Still Life 2
Front Yard: Garris
Go and talk to Garris, who is still sitting on the left side of the house, by
the fence that divides the Front and the Back Yards. Again, you can
conduct the conversation in any order you like. Note, however, that when
you address the topic on the Blue Door on the landing down the Cellar, a
cutscene will actually take you to that door. But Garris will leave
shortly thereafter, while you will remain by the Blue Door. So, you will
have to go back to him all the way out to the Front Yard, if you talked to him
about the Blue Door before the Charred Door. So, in order to avoid this
running in and out of the house after him, I prefer to conduct the conversation
in the following order.
1. Sheriff Halloway.
2. Electronics Expert:
(a) Safe. Check out the New
Document ("Documentation on Metalyr’s LK Model").
(b) Electronic Collar
(c) Jamming System
(d) Charred Door Electronic Lock
(e) Electronic Lock in the Stairwell
(i.e., by the Blue Door down on the Cellar landing).
Note: When you click on the topic
"Charred Door Electronic Lock," a cutscene will take Garris
and Victoria to that door. Garris will tell Victoria that it will take
him a while to open that door. But don’t wait for him to do so
because he won’t be "able" to until after you have finished
some more examination around the house. So, as soon as you regain control
of the game, click on him and talk to him about the "Electronic Lock in
the Stairwell." Another cutscene will then take both Garris and
Victoria to that Blue Door. A brief dialog will follow. Garris will
then go back to the Charred Door and, it seems, Victoria stays by the Blue
Door. But there seems to be a technical bug in the game here because the
camera remains on Garris, indicating Victoria is also with him; but then, you
won’t actually see Victoria there. Don’t worry about this bug
though. Just click on the Footprint icon on the stairs to see Victoria
down in the Main Hallway. Click on the Cellar Door to return to the
landing by the Blue Door.
Close up on the Blue Door. Click on the
Electronic Box right of that door, to hear Victoria’s comment. (Note:
You will also receive the "New Objective" notification. But
this is actually another technical bug in the game because no really
"new" objective will actually appear in our list of
objectives.) Use the ELECTRONIC KEY on the Electronic Box, to
learn that the door is now open. Click on the Target icon to enter what
we will call the Computer Room.
The Computer Room
The room is divided into two areas. The left portion, where Victoria is
standing, has nothing but some oil or gas cans against the wall in front of
you. Click in the lower-right corner of the screen to go to the main area
of the room. Victoria will comment.
Pick up the TRANSFORMER ELECTRIC CORD from the top of the Blue Filing
Cabinet left of the desk in front of you. Click on the DVDs on
the left of the shelf above the desk, to hear Victoria’s comment. Click
on the CDs on the right of that shelf, to hear another comment. Close
up on the Desk under that shelf.
Click on the gear icon on the Stereo
System, to turn on the music. You can turn the music OFF or
leave it ON and it will continue to play even after you step out of the close
up on the desk. Pick up the LOUDSPEAKER left of the Stereo
System. Click on the papers inside the Open Folder, to hear
Victoria’s comment. Click on the Shoes, to hear another
comment. Click on the Lipstick and Purse, to hear yet another
comment. Open the Top Central Drawer, and click on the papers
inside. Victoria tells us that we need to call Claire for
assistance. So, close the drawer, step out of the close up and call
Claire. Exhaust the conversation.
Close up on the Display of Skulls on the wall, to the right of the desk,
to hear Victoria’s comment. Step out of the close up and click on the
three Wall Shelves in the corner between the Display and the Computer
Table.
Close up on the Computer Table.
Click on the Telephone on your right, to learn that it is working.
Click on the Computer Screen or the Computer Keyboard, but the
computer is OFF. Turn the computer ON by clicking on the Processor
(the small gray box to the right of the computer screen). Note that a
blue hand icon now appears on the Processor. Collect the clue by using
the COMPUTER KEY from your Kit. Analyze the clue, to hear
Victoria’s comment.
Click on the Keyboard, to use the computer. Click on User:
Killer. The computer is password-protected, and we are given a choice
of two possible Passwords. Click on the first choice, but it is
incorrect. Victoria will step back from the computer. Go back in,
click on User: Killer and try the second password on the screen.
But that is also incorrect.
Since we don’t have any other choices, we cannot
do anything further with the computer. So step out of the close up on the
Computer Table. Open the Vault in the wall, to the right of the
Computer Table. Click on the Body inside, to hear Victoria’s
comment. Collect the clue by using the SAMPLING TONGS from your
Kit. Analyze the clue, to hear another comment by Victoria. Step
out of the close up on the Vault.
Close up on the Autopsy Table, in front of the Vault and now at the
bottom-right of the screen. Click on the table to hear Victoria’s
comment. Collect the clue by using the SAMPLING SWAB.
Analyze the clue by running the Chemical Analysis and then, the Database
Analysis. Victoria will comment. Step out of the close up on the
Autopsy Table.
Click on the Shelves, on the left in the
back of the room, to hear Victoria’s comment. Click on the big Blue
Cupboard on your right, to learn that it is locked. Use the PICK
GUN to unlock and open that cupboard. Click on the Dark Jacket hanging
in the bottom-center of the cupboard, to hear Victoria’s comment. Click
on the Brown Box in the top shelf, to hear another comment.
Collect the clue by using the REVEALER SPRAY and then, the SAMPLING
SWAB. Analyze the clue by running the Chemical Analysis and then, the
Database Analysis. Step out of the close up on the Blue Cupboard.
Click on the rusty green door left of the Blue
Cupboard, to learn that it is locked. Unlock the door by using the ELECTRONIC
KEY on the Electronic Box left of that door. Click on the
Target icon on the door to enter and find yourself back in what I called the
Locker Hallway. But we had already finished here earlier. So use
the secret door (now on your right) to return to the Computer Room. But
we are done here as well. So go out of the Computer Room, up the stairs
on your left, and click on the Blue Door to arrive at the landing down the
Cellar.
Go to Garris, who is still standing by the
Charred Door in the Second-Floor Hallway. Talk to him about the Blocked
Computer, but he can’t help you. So come down to the Main Hallway on
the First Floor, and enter the Living Room on your right.
Living Room: Safe
We must now try to figure out the code for opening the Safe in the
bookcase left of the fireplace. So close up on that Safe, and focus on
the buttons with the smudged fingerprints on them. Ignore the Red
Button with the arrow pointing right, because that is apparently only a RESET
button. The Green Button with "OK" on it is also not important
because, as you already know from having used a similar keypad down in the
Morgue, we have to press that button after punching in any code. So the
clue to the Safe’s code lies in the five buttons other than the Red and Green
buttons, i.e., 1-4-6-9-A. All we have to do now is figure
out the order in which these five buttons must be pressed to open the
Safe.
Step out of the close up, go to the right of
the fireplace, and click on the DVD on the sofa to learn that the movie
"The Blue Dahlia" had come out in 1946 or 1, 9, 4, 6
— the same numbers that had smudged fingerprints on them on the
Safe! Thus, we now have the order in which those numbers must be
pressed. But we still need to figure out where the letter "A"
goes. Consult the document that Garris had given you earlier ("Documentation
on Metalyr’s LK Model"), and note the "Default Factory Code"
given on the first page of that document: 00A00. Thus, it
is at least likely that the letter "A" might be the third
button that must be pressed to open the Safe as well. Give it a
try! Close up on the Safe. Click on 1-9-A-4-6 and then, press OK.
Victoria tells us that the Safe is open, and steps out of the close up.
Close up on the Safe again, and click on the Stack of Papers in the top
shelf, to hear Victoria’s comment. Collect the clue by using the FINGERPRINT
POWDER and then, the 3D SCANNER. Analyze the clue, to learn
that we will need Claire’s help again.
Note: Do not try to call Claire
while you are still in the Inventory Menu because, as I found, a technical bug
kicks in and you won’t be able to close up on the Safe again to check out the
other item inside: the pink-and-white box in the bottom shelf. So step out of both the
Inventory Menu and the close up on the Safe, before you call Claire.
Exhaust the conversation. Close up on the Safe again, and click on the Box
in the bottom shelf. Victoria will pick up the Box and put it on the
table in front of the Safe. Close up on the Box, and click on it to learn
that it is locked. Use the PICK GUN to open the box and hear
Victoria’s comment.
Step out of the close up on the Box. At this point, you should receive a
call from Claire. If you don’t, just wait a little while until it
comes. Victoria will automatically answer, of course, and a dialog will
follow.
* * * * * * * * * * * *
We are done in the Living Room now. So go back out into the Main Hallway,
and take the stairs up to the Second Floor. Note that the game
"takes over" as you get upstairs. You will hear Garris comment
and then, a rather long cutscene will follow that begins with a look inside the
Charred Room and ends with a flashback to something that had happened in 2005.
Chicago (Victoria: 2005)
Check out the New Objective. Go back down to the stairs and then, to the
wall left of those stairs. Click on the Orange Cans on your left,
to hear Victoria’s comment. Close up on the Sink on your right,
and click on it to hear another comment. Step out of that close up, and
pick up the FLEXIBLE MODELING TOOL from the Bench right of the
sink. Click on the Window up in the roof above the Bench, to hear
Victoria’s comment.
Go to the right of the stairs. Click on the Stove to hear
Victoria’s comment. Try to open the Gray Cupboard right of the
Stove, but it is locked. Close up on the Painting on the ground,
to the right of the Gray Cupboard. Click on the Painting to hear
Victoria’s comment. Step out of the close up on the Painting. Close
up on the Sculpture on the stool, to the right of the Painting.
Click on the Sculpture to hear another comment.
Step out of the close up on the
Sculpture. Close up on the Bench right of the Stool. Pick up
the SHARP MODELING TOOL from the left. Click on the Sketch on
your right, to hear Victoria’s comment. Click on the Phone icon to take a
picture of that Sketch. You can see the Sketch more clearly by checking
out the New Document = "Vladanna’s Sketch: The Killer’s Outfit."
Step out of the close up on the Bench, and close up on the Metal Shelves
right of that Bench. Click on the Photograph on your right, to
hear Victoria’s comment.
Step out of the close up on the Shelves.
Close up on the Blue Filing Cabinet right of those Shelves. Try to
open the Cabinet, but it is locked. Combine the "FLEXIBLE" +
"SHARP" Modeling Tools, and use the resulting IMPROVISED PICKING
TOOLS on the yellow keyhole (in the top-right corner of the front of the
Cabinet) to unlock the Cabinet.
Open the Top Drawer, and click on the papers inside to hear Victoria’s
comment. Click on the Phone icon to copy a document which will then be
presented to you automatically. Read the document. Click on the X
in the top-right corner of the screen to close the page. Then, click on
another Phone icon on the papers in the Cabinet, to copy the second document
which will also then be presented to you automatically. Read the document
and then, close this page as well. As you close the document, the Top
Drawer will close automatically and Victoria will comment.
Open the Middle Drawer, and click on the papers inside to hear
Victoria’s comment. Click on the Phone icon, and read the document that
will then be presented to you. As you close this document, the Middle
Drawer will also close automatically. Note that you cannot open either
drawer now. But that’s okay, because we have already copied the three
documents that we needed. If you would like to see them again, you will
find them in the New Documents folder of your cell phone.
Step out of the close up on the Filing Cabinet, and use your Picking Tools to
now open the Gray Cupboard on your left. There are several white
icons on the objects inside, but none of those items are of interest. But
note the gear icon on what look like pinkish-white pieces of cloth in
the lower-right portion of the Cupboard. Click on that icon.
Victoria will identify these pieces of cloth as A Bunch of Rags, which
will disappear as soon as you click on them because Victoria has moved them
aside. Note that a white icon has now appeared in place of the gear
icon you had just clicked on. Click on that white icon, to hear
Victoria’s comment. Pick up the KILLER’S CAPE, to hear another
comment.
Step out of the close up, and a cutscene and dialog will follow. Exhaust
the conversation. Another cutscene will then follow, bringing us back to
2008.
Killer’s House (Victoria: 2008)
Check out your New Objective. We are supposed to meet Hawker, but we are
also supposed to finish exploring the house. So let’s finish with this
area first.
The Charred Room
Go anti-clockwise (left) around the room to examine the following objects,
hearing Victoria’s comment as you click upon each object. Thus, click
upon the Sealed Dumbwaiter; then, the Charred Videotapes on the
floor; then, the charred part of the Wall (left of the sealed
Dumbwaiter) where the fire seems to have started; and then, the Burnt
Posters on the wall left of the bed.
Click in the lower-left corner of the screen to move to the Table below
the bed. Pick up the TRANSFORMER WITHOUT CORD lying on the floor,
by the outer-left leg of the Table. Click on the Electrical Outlet
down by the Table’s inner-left leg that is against the wall, to hear Victoria’s
comment.
Close up on the Surveillance Console on
the Table, to hear another comment from Victoria. Click on the gear
icon on the console, but the console is not working. Click on the
dismantled Keypad attached to the left of the Console’s Keyboard, to
hear Victoria’s comment and receive a New Objective. Click on the tool
icon in the top-right portion of the Console’s Keyboard, to learn that it is an
Outlet to Connect Headphones or a Speaker. So bring out the LOUDSPEAKER
from your inventory, and attach it to this Outlet.
Click on the tool icon in the top-left
portion of the Console’s Keyboard, to learn that it is an Outlet to Plug in
a Power Cord. So combine TRANSFORMER WITHOUT CORD + TRANSFORMER
ELECTRIC CORD, and attach the resulting TRANSFORMER WITH CORD to
that Outlet. Victoria tells us that the Console is on, but it is still
not working.
Step out of the close up on the Console. Click on the wall Painting
left of the Console Table, to hear Victoria’s comment. Click on either Glass
Door on your left, to learn that they are both locked. Use your PICK
GUN to unlock those doors. Before you go out, however, pick up the POKER
lying on the floor in front of the Fire Heater. Click on the Fire
Heater itself, to hear Victoria’s comment. Then, click on either
Glass Door to arrive in the Balcony.
The Balcony
Click on the brownish-gray spatter Trace in the top-left portion of the Railing
at the bottom of the screen. [Note: It’s okay even if you
can’t see the Trace. Just click on the white icon that appears in the
left portion of the Railing.] Victoria will comment. Collect the
clue by using the REVEALER SPRAY and then, the SAMPLING SWAB.
Analyze the clue by running the Chemical Analysis and then, the Database
Analysis. Victoria will comment.
* * * * * * * * * * * *
We are now ready to meet Hawker. So go down to the Main Hallway in the
First Floor. As Victoria comes downstairs, a cutscene will take us out
into the Front Yard.
Front Yard: Conversations
After the cutscene, a dialog with Garris will follow. Note that he will
leave as soon as you tell him about the Console. So save this topic for
last if you would like to address the other topics first. But, although I
don’t know if it affects the storyline in any way, I personally prefer not
to say much about the case in front of Hawker until those
"differences" (mentioned in one of the Objectives for this part of
the game) between him and Victoria have been resolved. So I prefer to go
directly to ELECTRONICS EXPERT and talk to Garris about the Broken
Console, leaving the other topics for a later time.
As Garris leaves, a dialog with Hawker will follow. Exhaust the
conversation. He will then also leave. Call Claire, and talk to her
about Hawker. Then, go in the house and up to the Charred Room on the
second floor, to continue your conversation with Garris.
Charred Room: Garris
You will find Garris standing left of the Console Table. Click on the
Talk icon to talk to him. Exhaust the conversation. Then, go out of
the room and downstairs into the Living Room, to continue your conversation
with Hawker.
Living Room: Hawker
You will find Hawker standing in front of the Fireplace. Note the choice
of tones that you get in conducting your conversation. Note also that you
will have to "Become Irritated" and then "Make
Peace," at some point during the conversation, before you can secure
Hawker’s co-operation. Once you have made peace, exhaust the
conversation. A cutscene will then take you into the Computer Room.
Computer Room: Information
Hawker will step aside after he has figured out the password for you. It
is time to see what we can learn from the computer. So close up on the
computer, click on the Keyboard, and start checking out the files. There
is a lot of information that is now available to us. But don’t worry.
Just try to keep track of what you check out. Thus, be sure to check out ALL
the:
·
Categories (Internet Search, Photos &
Videos, etc.).
·
Topics within each Category.
·
Pages within each Topic.
Note the following as you proceed:
- The very first topic in the Internet Search is the Technical
Manual that Garris had asked Victoria to find, in order to help him fix
the Surveillance Console in the Charred Room. As you click on that
topic, the Manual will be automatically printed out by the Printer, which
is to the right of the Computer Table. Victoria will step back from
the computer, apparently to allow you to step out of the close-up and pick
up the Manual from the Printer. But I suggest you wait until you
have finished looking up all the information in the computer, so you won’t
lose track of where you were in that investigation.
- Be sure to watch the Video of October 24, 2008
closely the first time, because it plays only once during the game.
- The Text File in the Codes category is "encrypted."
Again, I would suggest that you continue your examination of
everything else that you can examine on the computer, so you won’t
lose track of what you have and have not yet checked. After you have
finished doing so, click on the blue icon now on the Processor
(the small gray box right of the Monitor), to hear Victoria’s
comment. Then, bring out the COMPUTER KEY from your Kit, and
click on the Processor again. Victoria will indicate that the
encrypted file has now been decrypted. Check it out by clicking on
the Computer’s Keyboard; then, on Codes; and then, on what is now
the "Decrypted Text File" to see the contents of that
File. As you close the document, a dialog will follow. You
will then receive a New Document. You can check out that document in
your cell phone, where it has been stored as the "Decrypted Code
File."
- Every time that I played this game, the Group 6 Cameras
recording, in the Surveillance Cameras category, seemed to skip or
go too quickly past the first image of the recording the first time that I
would play it. So you might want to play this recording twice.
We are done with this room, at least for
now. So step out of the close up on the computer, pick up the PRINTED
TECHNICAL MANUAL from the Printer, and go upstairs to Garris in the Charred
Room on the Second Floor.
Charred Room: Surveillance Console
Talk to Garris about the Manual. A dialog will follow. Close up on
the Surveillance Console. Click three times, one by one, on the gear
icon on the Keyboard. Another dialog will follow. Click on the
Phone icon in the upper-right portion of the Keyboard, to get a notification of
a New Document waiting to be transferred to the Kit. Open the Inventory
Menu. Click on the Kit to bring it to the center of the screen.
Click on the clue in the cell phone on your left, to transfer it to the
inventory portion of the Kit. Click on the clue in that inventory, to
transfer it to the Blue Screen at the top of the Kit. Analyze the
clue. Victoria will comment.
Step out of the close up on the Console, and talk to Garris again. Then,
leave the room and go downstairs into the Kitchen.
Kitchen: Radio + Sheriff
Close up on the Dining Table in the lower-right corner of the screen.
Click on the Radio. A dialog will follow, bringing you out of the
close up automatically. Talk to the Sheriff on your right. Another
dialog will follow. Exhaust the conversation. Feel free to check
out your New Objectives. Talk to the Sheriff again. [Note: The
Talk icon is misplaced. You will now find it slightly to the right
of the Sheriff.] The Sheriff has given you the Keys to her car. Go
out into the Front Yard, and down the stairs. Use the KEY TO THE
SHERIFF’S CAR to open the trunk of her car. Pick up the METAL
DETECTOR.
The Metal Detector
Victoria will comment about using the Instructions Manual to see how the
Detector works. The Manual will be presented to you automatically.
Read it. If you need to consult it later, you will find it stored as the
"Metal Detector Settings" in the New Documents folder in your
cell phone.
Step out of the close up on the trunk of the Sheriff’s car. We must now
use the Metal Detector to find the hatch to that Fallout Shelter that the Sheriff
and Victoria discussed in the Kitchen, and that has been mentioned in our
Objectives. Refer to the Yellow Textbox below for some tips in using the
Metal Detector in our search for the Shelter hatch.
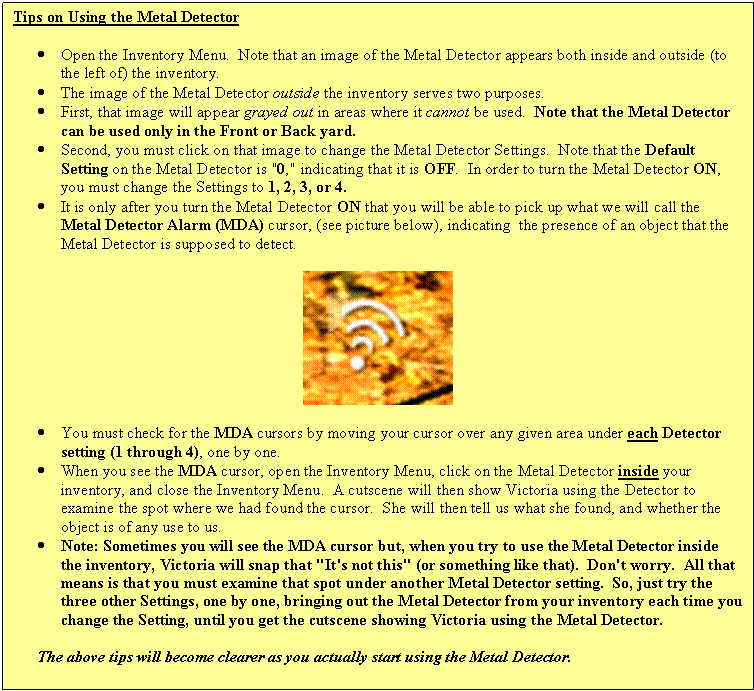
Examining the Front Yard
You will find the following objects in the Front Yard at the location, and by
using the Metal Detector settings, given parenthetically after each object.
BY THE
SHERIFF’S CAR
- Small Pieces of Copper (to the right of the Sheriff’s
car, Setting 1) - The Sheriff’s Car (Setting 3)
- A Handful of Rusty Nails
(lower-right corner of the screen, by the house, Setting 4) - An Old Can (slightly above and to the
left of the house stairs, Setting 4)
BY THE
LEFT FENCE WHERE PALOMA HAD FOUND THE TRUCK THE FIRST NIGHT
- A Large Plate Made of Solid Copper
(left of the Truck’s two tire tracks, Setting 2) - Gate & Railings (bottom of the Fence Gate
where the officer is standing, Setting 3) - A Copper Receptacle (in the grass, lower-right of
the screen, Setting 1)
BY THE
LOG SHED CLOSE TO THE FENCE DIVIDING THE FRONT & BACK YARDS
- Handle of Some Kind of Iron Tool
(left, between the 3 trees & the Log Shed, Setting 4) - A Few Pennies (just right of the Log Shed,
Setting 1) - Fence & Railings (on the grating at the bottom
of the Fence Gate, Setting 3)
Examining the Backyard
Step into the Back Yard, to find the following objects at the location, and by
using the Metal Detector settings, given parenthetically after each object.
BY THE
FENCE DIVIDING THE FRONT & BACK YARDS
- Piece of Grate (the square piece lying in the
lower-right corner of the screen, Setting 3) - Part of a Half-Buried Bicycle Wheel
(towards the lower-left side of screen, Setting 4)
BY THE
BACK-PORCH STAIRS
- Grenade Pin (below the white wooden
planks, left of the bottom of the stairs, Setting 1) - Small Silver Spoon (in the lower-left portion of
the screen, Setting 1)
BY THE
GRAY TRAILER ON THE LEFT
- "Truck" (or the Gray Trailer, which
had mud on its license plate; Setting 3) - Wire Fence (left of the Archery Target,
Setting 3) - "Iron Brazier"
(or the Orange Can in lower-left portion of the screen, Setting 3) - Aluminum Can (the Gray Can right of the
Orange Can, Setting 2)
And this is where we hit Jackpot! Change the Metal Detector Setting to
3, and use the Metal Detector on this Gray Aluminum Can again.
Victoria will comment, indicating that the Detector should not be reacting to
the Aluminum Can at that particular setting. The Can is rolled aside and
you will hear the leaves (that were previously under and around the Can)
brushed off. You will then see a set of wooden Planks where
the Can previously stood.
Opening the Hatch
Click on the tool icon on the Planks, to hear Victoria’s comment.
Use the POKER to remove the planks, and see the Hatch
underneath. Click on the gear icon on the Hatch, to learn that the
Hatch is locked. But note that a magnifying-glass icon has
replaced the gear icon on the Hatch, after Victoria’s comment.
Click on that icon to get a close up of the Hatch, as Victoria notes that the Reference
Number on the plate (left of the Hatch) = H103123.
We must now use this Reference Number to figure
out the password to unlock the Hatch with the help of the computer. So go
to the Computer Room inside the house, and close up on the computer.
Click on the Keyboard; then, on Codes; and then, on Decrypted Text
File.
Note that the Code for the East Hatch is
REFERENCE + D55, i.e.,
H103123 + D55 = H103123D55
So, go back to the Main Menu, and click
as follows: Access Control; East Hatch; and then, the above
code. Victoria will announce that the "Anti-Nuclear Shelter" is
opened! Step out of the close up on the computer. You can try to
talk to Hawker, but he is still "taking notes." In other words,
he won’t be going with us to check out the Fallout Shelter we just
opened. So try to go out to that Shelter yourself. But, just as you
go through the Blue Door outside the Computer Room, a cutscene will follow,
ending with another flashback to 2005.
Chicago (Victoria: 2005)
Check out the New Objective. Talk to Richard. Exhaust the
conversation, but note that the conversation will end abruptly as soon as you
address the topic "Neutralize Richard." So, if you would like
to hear Richard’s responses to the other topics, save the Neutralize topic for
last. When you get to that last topic, you will get a choice: whether to
convince Richard to surrender himself or to just hand him over to the
authorities. Choose as you please, because your choice will not affect
the storyline. Another cutscene will then follow, bringing us back to
2008, but switching the story now to Paloma’s point-of-view.
Killer’s House (Paloma: 2008)
THE FALLOUT SHELTER:
Paloma’s Cell
Exhaust the conversation. A short cutscene will follow. Check out
your New Objectives. Close up on the slot in the lower part of the door,
to get a short cutscene. Click on the Talk icon on the opposite
cell. A man will appear in that cell. Talk to him. Exhaust
the conversation, but it will be interrupted by another short cutscene.
Talk to that man again, to learn that his name is Anderson. You can try
to talk to him once more, but there is nothing further to discuss. So
step out of the close up on the slot; but then, go back in again, to get a
close up this time of the fork lying out in the corridor. Click on the
fork, but it is too far.
Step out of the close up on the door. Click at the bottom-center of your
screen to go to that side of the room. Click on the Big Wooden Crate,
to the right of the bed, to move it to the center of the room. Go back to
that wall where the Crate had stood. Pick up the METALLIC PIPE
lying on the floor in the middle of the two metallic shelves on your
right. Click on the gear icon on the right of the bed, to move the
bed to the right. Click on the Box of Cookies lying in the left
portion of the bed.
Pick up the STRING, one of the six rolls at the bottom of the metallic
shelves on your left. Try to open the Gray Cabinet left of those
shelves, but it is locked. Use the METALLIC PIPE on the Gray
Cabinet, to pry open its door. A MAGNET falls out as the door
opens. Pick up the Magnet from the floor, and the PLASTIC CAN from
inside the Cabinet.
Step out of the close up on the Cabinet. Go back to the Cell door.
Close up again on the slot in the lower portion of the door. Combine the STRING
+ MAGNET, and use the resulting combination to retrieve the FORK
from the corridor outside. [Note: you get only a split-second view
of the inventory as the fork disappears from the corridor floor.]
Step out of the close up on the door. Go
right, along the wall in front of you. Click on the Vent in the
upper-right portion of that wall, but it is too high to reach. Click on
the Pipes along the bottom of the wall, under the vent, to hear Paloma’s
comment. Put the PLASTIC CAN there. Click on the
magnifying-glass icon on the Vent, to climb up and get a close-up of that
Vent. Use the FORK to unscrew the two screws, one by one, on
either corner at the top. Click on the gear icon now on the Vent
to remove the grate. Step inside the shaft, and a cutscene will bring you
out into the Main Corridor.
View this guide raw, exactly as the archive holds it