Still Life 2

by ZSZUBAIRIE about 195 minutes to read

Still Life 2

(A Walkthrough by Zurreen Zubairie)


Copyright © 2010.  All rights reserved.


Please, note that this walkthrough is
copyrighted.

Any attempt to reproduce anything from this
walkthrough

will be severely punished to the maximum
extent of the law.


Kindly address all your comments
and questions to


The Walkthrough

GENERALLY:

           
Please, disregard anything that you might have heard or read to the
contrary.  This is in fact a very easy point-and-click game.  It is
also what I would call a "fair" game.  I am sure many of you
have played games where the solutions to puzzles were quite
"counter-intuitive."  The developers of these games do not seem
to realize that the use of such "techniques" makes the puzzles hard
only because their "solutions" would never work in real life. 
Thus, instead of being fascinated by the developers’ ingenuity, the gamers are
only aggravated by the trickery.  I am happy to tell you that Still Life 2
is not such a game.

THE
MANUAL:

           
As I mentioned, the game is actually quite easy, mainly because everything
flows so logically.  All you have to do is put yourself in the position of
the main character and you will realize what you need to do.  But while
the game is pretty easy in that sense, the game play can be somewhat
complex if you are unfamiliar with the basic "mechanics" of the
game.  It would be a good idea, therefore, to at least skim through the
manual to become familiar with those basics.  You will find that manual on
the DVD itself.  Here is how to get to it.  Click on START;
then, go to

ALL PROGRAMS > MICROIDS > STILL LIFE 2
> STILL LIFE 2 MANUAL

           
You need to skim through only 10 pages actually (pages 4-13, according to the
numbering in the toolbar at the top of the screen), starting with the section
called "The Story" and ending with the one called
"Dialogs."  Feel free to just print out pages 4-13, to make it
easier to refer to them, as needed, as you play the game.

BUILT-IN HELP:


To be perfectly honest, I did not turn this feature on.  I just love a
good challenge, you know!  So I cannot tell you just how helpful it really
is.  But you can read about this feature on page 11 of the Manual. 
You can find the feature in the game itself as follows.

Click on OPTIONS
in the Main Menu.

Click on GAME
in the top-right corner of the Options menu.

The "HELP
SYSTEM ACTIVATED
" is the second item on the Game Menu.

Please, be sure to check what the default
setting is on Help.  I believe that it is actually "yes." 
So, if you would rather not have any help, you need to click "no."

SAVES:

           
Game manuals and walkthrough-writers will often tell you that you must save
your game frequently.  That might not be a good idea in this
game.  I hate to tell you this but the developers were extremely unwise in
this respect.  For one thing, it is a long game.  It is also quite
complex, just full of rich graphics and sounds.  The downside is that each
saved game therefore takes up a lot of space on your hard drive, anywhere from
8-10 megabytes.  So, depending on how many games you save, you can easily
clutter up the available space on your hard drive.  In other words, depending
on how large your hard drive is, it can really slow down your game… If that
was not bad enough, the developers did not provide an option to simply delete
an old game from the ones showing on your Load Menu.  While you can "overwrite"
an earlier game by saving a new one on it, the computer still retains the IMAGE
of the overwritten save.  Frankly, I have no idea why the developers
considered it important to save the image of a game on your computer even after
you deleted the game itself.  But the bottom line is that, depending on
the number of times you overwrite, the images of the overwritten games still
linger on, taking up unnecessary space on your hard drive, and possibly slow
down your game.

           
Now I know how useful it is to save frequently, and how painful it can be to
have to go back a long way if something happens and you have to resort to your
last save.  And believe me, as easy as it is to play this game and even
though you do get more than enough time to beat the timed sequences, it is
still possible to fail.  In that case, it is Game Over, of course; and,
unlike some games which automatically start you off from the point where you
ran out of time, this game requires you to reload an earlier save
So, yes, that can be a pain, especially if that save was a long way
back.  It can also be rather confusing, trying to remember what you had or
had not already done before you had saved the game.

           
In short, the lack of foresight on the developers’ part has created quite a dilemma
for the gamers.  I would definitely not encourage anyone to fiddle
with the saved games in the Programs folder of your computer, especially if you
have little or no experience in that respect.  The best advice that I can
give you is: do save as frequently as you feel comfortable, but just make sure
you have plenty of space on your hard drive.

THE STORY:


If you have played Still Life, then you might recall how that story was divided
between two characters: Victoria Mcpherson (the heroine) and her grandfather,
Gus Mcpherson.  As you might also recall, the grandfather’s story was
already wrapped up in that game, but the heroine’s ended up in something of a
cliffhanger.  We never found out who the killer was!

           
Now I don’t want to spoil anyone’s fun.  So I will not give anything away
about the plot of the present game.  Rather, my intention is just to
introduce you to the structure of the story itself, so no one will get
confused in any way.  Basically, this game is also divided between two
characters: Victoria Mcpherson (our old heroine again) and Paloma
Hernandez
(a reporter).  Both their stories take place in the same
timeline: the present.  From time to time, however, the heroine Victoria
(or Vic) will have flashbacks from an earlier time: 2005.  In order
to avoid any confusion, therefore, I have divided up the following walkthrough
into sections according to the two characters as well as the different time
lines for Victoria.  You will get a better idea of what I mean as you read
the walkthrough.

           
Well, that’s all I can think of by way of any general instructions.  So
let’s get on with a more step-by-step walkthrough of the game.  Hope you
will enjoy it.

* * * * * * * * * * * * * * * * * * * * * * * *
* * * * * * * * * * *

Prologue/Los Angeles (Victoria: 2005)

           
The opening cutscene is actually the final cutscene from Still Life, which is a
great way to start the game, reminding us of how that first game had
ended.  That final cutscene from the first game is followed by another
cutscene, the beginning of the present game.  We are told that we are in
Los Angeles, and that the date is January 2, 2005.  This is actually a
flashback.  The real story, i.e., that of the present game, begins
in 2008.  The flashbacks actually serve as fillers, to help us understand
how we got from the end of the previous game to the present one.

           
The cutscenes are immediately followed by a phone call from Claire.  As
you will recall, she was the coroner in the previous story, and also a friend
and one-time teacher of our heroine, Vic.  Exhaust all topics of the
conversation with her.  At the end of the conversation, a box entitled
"Objectives" will pop up in the upper-left corner of the
screen.  If you listen closely, you will also notice a short pause in the
background music at this point.
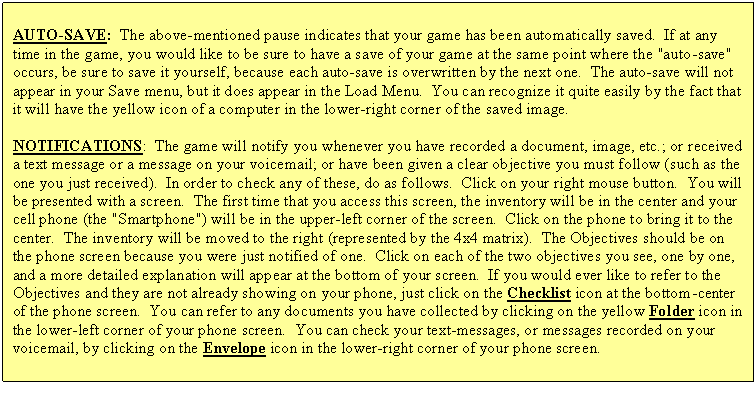
 

Text Box: AUTO-SAVE:  The above-mentioned pause indicates that your game has been automatically saved.  If at any time in the game, you would like to be sure to have a save of your game at the same point where the "auto-save" occurs, be sure to save it yourself, because each auto-save is overwritten by the next one.  The auto-save will not appear in your Save menu, but it does appear in the Load Menu.  You can recognize it quite easily by the fact that it will have the yellow icon of a computer in the lower-right corner of the saved image.

NOTIFICATIONS:  The game will notify you whenever you have recorded a document, image, etc.; or received a text message or a message on your voicemail; or have been given a clear objective you must follow (such as the one you just received).  In order to check any of these, do as follows.  Click on your right mouse button.  You will be presented with a screen.  The first time that you access this screen, the inventory will be in the center and your cell phone (the "Smartphone") will be in the upper-left corner of the screen.  Click on the phone to bring it to the center.  The inventory will be moved to the right (represented by the 4x4 matrix).  The Objectives should be on the phone screen because you were just notified of one.  Click on each of the two objectives you see, one by one, and a more detailed explanation will appear at the bottom of your screen.  If you would ever like to refer to the Objectives and they are not already showing on your phone, just click on the Checklist icon at the bottom-center of the phone screen.  You can refer to any documents you have collected by clicking on the yellow Folder icon in the lower-left corner of your phone screen.  You can check your text-messages, or messages recorded on your voicemail, by clicking on the Envelope icon in the lower-right corner of your phone screen.

           
Check your Objectives.  Then, check your messages: you have two, both from
Richard.  Just click on the Envelope icon in the lower-right-corner
of the phone screen, as explained above.  The next phone screen will show
two envelopes, on the left; and the name of the person who sent the message and
the date that the message had been sent, on the right of each envelope. 
Click on these envelopes, one by one, to hear each message.  When you are
done exploring everything you would like to explore on the phone (or in the
inventory), click on the right mouse button again to return to your game.

           
Click on the bed behind Vic, to get a close up.  There are a lot of papers
strewn about, but only 4 are of interest: The Los Angeles Murders File, A
Newspaper Clipping, A Brochure of the Ackerman Exhibit, and A Newspaper
Article.  Note the Phone icon that appears on each of these
documents the first time you click on them.  Each time you click on a
document, you will hear a tone sound and the image of a large "T"
in will appear in the upper-left corner of the screen.  The Phone icon
indicates that the information will be transferred to your Smartphone. 
The "T" image indicates that the information has been
transferred.  The first time you click on such documents, you will be
automatically presented with the information you are collecting.  If you
would like to refer to the information later in the game, just go to your
inventory, click on your Smartphone, and then click on the Documents folder, as
described in the yellow text box above.  Note:  Be sure to
click on the ">" in the top-right corner of the document
(right of the page number), if any, in order to read the rest of the pages in
that document!

           
After you have clicked on the Phone icon, and the information has been
transferred to your phone, the next time you look at the item in the game, it
will have a simple (what I will call a "White Eye") icon on
it.  Click on the four items on the bed again, and Vic will tell you only
what they are.  In order to read the documents themselves, you will have
to refer to them in your Smartphone, as described above.

           
Step out of the close-up on the bed, to hear another tone sound and receive
another notification in the upper-left corner of the screen.  You have
received a text message from Claire.  So click on your right mouse button
to open the inventory screen, click on your Smartphone, and then click on the
Envelope icon in the lower-right corner of the screen (unless you already have
that page showing on your phone).  Note that Claire’s message appears as a
closed envelope, while the other two messages that you have already checked
appear as open envelopes.  Click on Claire’s envelope.  She has
texted us the code to the FBI database: 96Ha)7Mn.

           
Without moving the heroine around just yet, move your cursor around on the set
of brown drawers in the upper-left corner of the screen.  A hand icon will
appear along with the words "Transformer With Cord" and the
words "2 case(s)" under it. Click on the hand icon to pick up
the Transformer.  Your inventory screen will automatically come up showing
the Transformer there. 
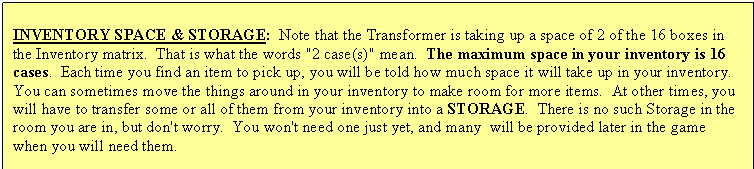
 

Text Box: INVENTORY SPACE & STORAGE:  Note that the Transformer is taking up a space of 2 of the 16 boxes in the Inventory matrix.  That is what the words "2 case(s)" mean.  The maximum space in your inventory is 16 cases.  Each time you find an item to pick up, you will be told how much space it will take up in your inventory.  You can sometimes move the things around in your inventory to make room for more items.  At other times, you will have to transfer some or all of them from your inventory into a STORAGE.  There is no such Storage in the room you are in, but don't worry.  You won't need one just yet, and many  will be provided later in the game when you will need them.

           
Close up on the papers on the floor on the left of the bed.  You will see
a White Eye icon on each of the two colored paintings, which are of Ackerman’s
Victims.  No information will be transferred to your Smartphone, however.

           
Click on the magnifying glass icon on the grayish picture in the lower-right
corner of the screen, to get a close up of a black-and-white picture of a
mask.  Click on the picture to hear Vic’s comment.  Step out of the
close up on the picture, and into the one on the computer.  Click on the
computer to learn that you need to learn that its power is dying.  Note
the Tool icon on the power outlet in the wall, which is down left of the
table.  Bring out the Transformer with Cord and attach it to that
power outlet.  It will be automatically attached to the computer as
well.  So just click on the Gear icon on the computer, to start your
research.

           
As you start the computer, you will be presented with two possible
searches.  Do the Internet Search first.  Exhaust the four
topics, one by one, but note that a fifth topic will be added after you have
checked out the first one.  Note that none of this information is
transferred to your Smartphone and, therefore, will not be available for
reference later in the game.  So read as carefully as you like, but try
not to miss anything.  The information is really not that critical, which
is why it is not recorded for you.  But it is still useful, to help follow
the story line.  As always, don’t forget to click on the ">"
to the right of the page number to read the information on the succeeding
page(s).

           
After exhausting the topics in the Internet search, do the FBI Database
Search
.  You need to provide a password, and three choices will be
automatically presented to you.  Pick the first one, which had been texted
to you by Claire: 96HA)7MN.

           
As the access is granted, you will be presented with 6 topics.  READ THE TOPICS FROM TOP TO BOTTOM,
because a cutscene will automatically follow as soon as you step out of the
close up on the information given for the topic at the bottom of the list of
topics, i.e., on Henry Allen.  So be sure to read everything
you would like to read (either in the Internet Search or the FBI Database
Search) before reading the information on Henry Allen in the FBI
Database Search.  Note the vertical scroll bar on the right of the only
two topics on which you will find any information.  Just click at the
arrowhead at the bottom of the scroll bar to scroll down the page.  After
you finish reading about Henry Allen, and step out of the close up, a series of
cutscenes will follow that will eventually bring you to the present time
(2008), and switch the story now from the point-of-view of the other character,
Paloma Hernandez.

Killer’s House (Paloma: 2008)

The Bedroom

           
Exhaust all topics of the conversation.  Another cutscene will
follow.  It is time now to explore the room.  Start by looking at the
camera in the upper-right corner of the ceiling.  Close up on the broken
mirror on the gray table on your right, to learn about the collar on Paloma’s
neck.  Step out of that close up, and close up next on the drawer under
the mirror.  Pick up the NAIL FILE.  Step out of this close up
and click on the lower-right corner of the screen to bring Paloma to the
fireplace, further down that side of the room.  Note the box icon on the
wardrobe on your right.  This icon indicates Storage Space.  [As
explained earlier in the yellow text-box entitled "Inventory Space
& Storage,"
you can use Storage Spaces to deposit some items from
your inventory to allow you to pick up more items from your surroundings.]

           
Click on the "entryway" (the gray panel with the red light on top),
which is to the right of the Storage, to hear Paloma’s comment.  Click on
the right of that entryway to learn the purpose of both the collar and the
entryway.  Don’t worry though.  Even though Paloma’s collar will give
her some kind of an electric shock, all that means is that she cannot go past
that entryway.  She will not get hurt badly enough to require any
first-aid.

           
Go to the left, to approach the television set and the bed.  Click on the
television, but it is not working.  Pick up the RUSTY TELESCOPIC
ANTENNA
.  Before doing anything further, click on the bottom-center of
the screen to bring Paloma in front of the door.  Use the RUSTY
TELESCOPIC ANTENNA
on the light switch left of the door, to turn on both
the television on your right and the lights in the left part of the room. 
Click on the television now to get a cutscene and hear another comment from
Paloma.

           
Click on the electrical outlet on the wall left of the television to unplug the
cable from the television.  Paloma will refuse to touch that cable (for
now), because the other end of the cable is still plugged into the electrical
outlet.  Click on the entryway left of that outlet, and then close up on
the plate at the bottom of that entryway.  Click on the plate to learn
about the screws.  Use the NAIL FILE to remove the four screws, one
by one, from the plate.  Right-click on the mouse to put away the nail
file; and then, click on the plate to remove it.  Click inside on the
circuit board.  Step out of the close up, and click on the cable coming
out of the electrical outlet.  Paloma will attach the live wire to the
entryway’s circuit board, thus short-circuiting all three entryways in the
room.  You can move freely around the room now.

           
Click on the lower-left part of the screen to bring Paloma to the door. 
Click on the door, but it is locked.  Note another electrical outlet under
the light switch, to the left of the door.  We will need this outlet
later.  For now, move further left along the wall.  Click on the
stove, and then close up on it.  Pick up the POKER.  Then,
click on the half-burnt flyer in the stove.  Step out of the close
up.  Click on the wedding dress and the camera on the ceiling above it.

           
Click on the boarded window on your left.  Use the POKER to remove
the boards.  Close up on the window.  A short cutscene will follow
and Paloma will comment.  We will need to use the mattress from the bed,
but that will take up our entire inventory space.  So put all of the items
currently in your inventory into the storage/wardrobe.  Go to the bed,
pick up the mattress, and return to the window.  Bring out the mattress
from the inventory and click on the tool icon on the window.  A longer
cutscene will follow.

Outside the House

           
Note another storage space (some kind of a dumpster) next to the house. 
Click on the footsteps icon to go up the stairs.  Try the front door, but
it is locked.  Click on the two windows left of the door, but you cannot
enter the house from there either.  Come back down the stairs and click on
the icon just left of Paloma, to learn about the tire tracks. (See picture
below)
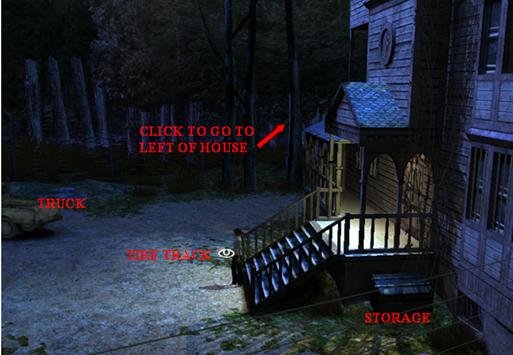
           
Click on the tree indicated in the above picture to go to the left side of the
house.  Note: it is okay if you accidentally click on the gear icon
that appears around that area.  Doing so will also bring you to the left
part of the house and, although Paloma will get an electrical shock from the
fence there, she will not be hurt enough to require first-aid.

           
As you arrive on the left side of the area, click on the fence gate in front of
you, to find that there is an electric current running through that gate as
well.  Paloma will get a shock but, as mentioned earlier, she will not get
hurt enough to require first-aid.  Click on the wooden plank lying
diagonally on the ground left of the fence gate.  Paloma will identify it
as a "Railway Tie" with the letters B-A-R on it.  Pick up the WOOD
BEAM
from the pile of logs stacked up on your left.  Then keep
clicking at the bottom-center of your screen until you bring Paloma down to the
area where you can see the truck parked on your left.  NOTE
You can double-click to make Paloma run.

           
Close up on the back of the truck.  Click on the box, but it is
locked.  Step out of the close up and click on the truck’s door on your
right.  Paloma will comment.  Try to open that door, but it too is
locked.  Use the WOOD BEAM to break the window in that door, and
close up on the window.  Pick up the DISCHARGED CELL PHONE from the
driver’s seat.  Paloma comments, and a "New Objective" will
appear in the upper-left corner of the screen (but we do not have the means to
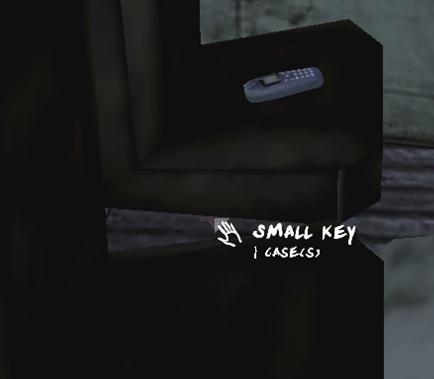
check out such objectives just yet).  Pick up the SMALL KEY from
the space between the two seats.  (See picture below)
           
Step out of this close up and into the one on the back of the truck
again.  Use the SMALL KEY to open the box there.  Click on the
red & white can (labeled "Motor Oil") on your right, to learn
about the receipts under that can.  Pick up the CHARGER &
DICTAPHONE
lying left of the can.  Finally, click on the black purse
on your left.

           
We need to go back up to the room on the second floor, but the window we had used
to come down is too high.  You must have notice a ladder by the stacked
logs in the left side of the house, but it will take up the maximum space in
our inventory.  So go to the dumpster/Storage on the right side of the
house (under the window we had used to come down from the second floor). 
Deposit all the items from your inventory into that Storage.  Now go to
the left side of the house, pick up the LADDER, and return to the right
side of the house.  Bring out the ladder from your inventory and click on
the tool icon that appears on the second-floor window.  Retrieve the items
you had deposited in the Storage and then, click on the gear icon that now
appears on the second-floor window, to return to the room on the second floor.

           
Feel free to retrieve the items you had deposited earlier in the wardrobe, but
note that having these items does not seem to affect the storyline in
anyway.  You will have to rearrange the items already in your inventory to
accommodate those recovered from the wardrobe.

Go to the door (by clicking a couple of times
in the lower-left part of the screen).  Separate the Charger from the
Dictaphone by clicking on CHARGER & DICTAPHONE in your inventory,
and then on the "Separate" icon on the right of the inventory. 
A New Objective will appear in the upper-left corner of the screen. 

Note: You can
now check your Objectives in the Dictaphone.  Click on the Matrix on the
right if you would like to bring up the inventory again.

Combine the Charger with the Cell Phone by
clicking on either one of these items, then on the "Combine" icon on
the right of the inventory, and then on the other item with which you are
combining the first item.  Attach the resulting CELL PHONE &
CHARGER
to the electrical outlet under the light switch left of the
door.  A cutscene and a dialog will follow. 

Note:  You will be able to cover
only three of the five topics before you are interrupted.  So be sure to
give Victoria the maximum possible information you have collected:  Flyer,
Gas Station Bill, and the Railroad Tie.

           
A cutscene will follow, and the story will switch to Victoria’s point-of-view.

Jackman (Victoria: 2008)

           
After the dialog between Victoria and Garris, three messages will flash in the
upper-left corner of the screen notifying you about a New Document, an unread
message on your phone, and a New Objective.  Be sure to check out
especially the document ("The Killer’s Case File") and the
text message (from Claire).

Click on Garris to talk to him again. 
Address the topic at the top first, and then the one below it.  At the end
of the second topic, the CSIA ("Crime Scene Investigation &
Analysis"
) Field Kit will automatically pop up in view.  See the
Game Manual (in the game DVD) for details about this Kit.  The following
text box gives a general description of the contents of the Kit and how to use
it.


Text Box: THE CSIA FIELD KIT

Contents:  As you can see, the lower half of the Kit consists of two sections.  The left section contains the instruments you will need to collect the clues.  The right section is an inventory of the clues you collect.  Although there are only 12 spaces in that inventory at the moment, more "pages" will be added as you gather more clues.  You will then be able to turn the pages to access those clues.

Manual:  The "Test Kit Manual" is in fact the first item (in the upper-left corner) of the inventory.  Click on it and an image will appear in the Blue Screen in the upper half of the Kit.  Click on that image to "open" the file and read the two-pages describing the instruments contained in and the analyses conducted with the help of the Kit.

General Instructions on Collecting the Clues:  When you close up on a clue, you will see a white icon on it.  Click on that icon, and Victoria will either tell you something about the clue or give you a hint as to how to collect it.  A blue hand icon will then appear on the object.  Bring out an instrument from the Kit and use it on the object.  If that is the correct and the only instrument you need to use, the Kit will spring back in view and you will find that a new clue has been added to the inventory on your right.  Put the instrument back in its original slot in the Kit, and then click on the clue in the inventory.  An image of the clue will then appear on the left of the Blue Screen in the top half of the Kit.  Usually, you will need to use only one of the three (analysis) buttons on the right of the Blue Screen to analyze the clue.  I suggest, however, that you click on all three buttons, one by one, because some clues need to be analyzed in different ways.

Sometimes you will need to use two instruments on the same object to collect a clue.  In that case, the instrument will remain out of the inventory and you will continue to see a blue hand icon on the object even after using that instrument.  In that case, right-click to get the Kit out, and then use another instrument on the same object.  Again, if you have used the correct instruments and the second instrument was the last one you needed to use, the Kit will pop back up in view and you will find a new clue added to the inventory on your right.  Proceed as instructed above to then analyze the clue.

The above instructions will become clearer as you start collecting and analyzing the clues in the walkthrough that follows.

Feel free
to talk to Garris again to see what he is doing as you go about your own
work.  Click on the papers on the bed to learn about them.  Close up
on the side table on the right of the bed, and click on the answering machine
to hear the first message.  Victoria will comment, and a phone icon will
appear on the answering machine.  Click on that phone icon, and the image
of the CSIA Kit along with the notification "New Document! Data is
ready for transfer to CSIA Kit"
will appear in the top-left corner of
the screen.  Right-click to bring up the inventory.  The CSIA Kit
will be in the center.  Note that two phones have appeared on the
screen.  The phone in the lower-right portion of the screen is your actual
phone.  You can click on that phone to call, or to check messages,
documents, objects, etc.  The phone in the upper-left portion of the
screen appears only for the purpose of transferring data to the Kit.  Note
the brown outline around it right now.  This outline appears only when
there is data to be transferred to the Kit, like the first message that we just
recorded from the answering machine.  Click on this phone now to transfer
that message.  The clue will appear in your Kit’s inventory area. 
Click on that clue, and an image will appear up in the Kit’s Blue Screen. 
You can click on the clue on the Blue Screen to hear the message again. 
More importantly, however, click on the top "Computer Analysis"
button on the right of the Blue Screen to analyze the clue.  The results
of the analysis will also appear on the Kit’s Blue Screen.  The figure
"100%" on the image on left shows that you have received all the
information you can get out of this clue.  As I mentioned earlier in the
text-box, however, it is a good idea to get in the habit of using, one by one, all
three buttons
on the right of the Blue Screen, just to make sure you have
completely analyzed each clue you collect.

           
The first message on the answering machine was the clue that we needed. 
After finishing the analysis on that clue, however, feel free to click on the
answering machine again to hear the second message there as well.  Then,
step out of this close up and into the one on the ground to the right of the
bed to hear Victoria’s comment about the BROWN FOOTPRINT (see picture
below) there.  Use the 3D SCANNER on the footprint to collect the
clue, and then analyze it.  (See the text-box labeled "The CSIA Field
Kit.")

           
Step out of this close up and into the one on the left side of the bed to hear
Victoria’s comment about the REMOTE CONTROL (see picture above) that
fell under the bed.  Use the FINGERPRINT POWDER, and then the 3D
SCANNER
, on the remote control to collect the clue; and then, analyze
it.  Click on the safe in the top-left, to find that it is empty.

           
Step out of this close up and click on the lower-left corner of the screen to
go towards the bathroom.  Instead of going inside the bathroom, however,
close up first on the closet outside on your left.  Click on the "SUITCASE"
at the bottom of the closet (see picture above) to learn that it is
locked.  Talk to Garris about it, to receive a PICK GUN WITH BATTERY
& TENSION WRENCH
.  Go back to the "suitcase," use the
pick gun to open it, and retrieve the MINI-DVD from inside.

           
Step out of the close up and enter the bathroom.  Click on the bullet hole
in the door on your right.  Click on the corresponding hole in the tile on
the wall on your left.  Click on the VENT in the wall in the
upper-left corner of the screen.  Open your inventory, and click on the
CSIA Kit on your right to bring it up in the center of the screen.  Use
the ELECTRONIC NOSE on the vent to collect the clue; and then, analyze
it.

           
Click on the close-up icon at the bottom-center of the screen to see the shower
area.  Click on the white icon on the gray spot in the corner of the
shower in the center of the screen (see the set of 5 pictures above) to learn
that there is a DETERGENT RESIDUE there.  Use the REVEALER SPRAY
from the Kit to learn that it is a blood stain.  Use the SAMPLING SWAB
to collect the clue, and then analyze it.  Note:  You will
have to run both the "Chemical Analysis" and also the "Database
Analysis" to get 100% information from this clue.

           
Step out of this close up and click on the white icon on the wall (see the set
of 5 pictures above), which appears actually on the right jamb of the door on
your right, to learn about the CLOTHING FIBERS.  Use the SAMPLING
TONGS
to collect the clue, and analyze it.

           
Step out of the close up and go back out to Garris.  Click on the broken LAPTOP
on the ground left of Garris’s left foot.  Use the COMPUTER KEY to
collect the clue, and then analyze it.  Click on the results then to open
and read the Repaired File.

           
Click on the CAMCORDER lying on the chest-of-drawers, just left of the
television set.  You will get a brief close up of it as Victoria comments,
and then will be automatically taken out of the close up as a tool icon will
now appear where you had gotten the white icon before.  Bring out the MINI-DVD
from your inventory and click on that tool icon.  A series of cutscenes
will follow, switching the story to Paloma once more.

Killer’s House (Paloma: 2008)

The Cell

           
Note the pulsating red aura around the screen.  This means that Paloma is
hurt, but we don’t know what is wrong just yet.  Go to the cell phone (the
blinking green dot on the ground a bit left of the door).  Try to pick it
up, but Paloma gets hurt by the broken glass around it.  Try again, and
you will be able to pick it up this time.  A dialog follows, and now we
know just what is wrong with Paloma: she has been poisoned, and we must find an
antidote for her — quickly, because the countdown clock has begun to run in
the upper-right corner of the screen.

NOTE:  SAVE YOUR GAME AT THIS
POINT!

           
Don’t worry about the clock too much though: there is more than enough time to
beat it.  Also, feel free to check out your objectives because the clock STOPS any time you open the Inventory Menu
(to check your objectives or something in the actual inventory or to go to the
Main Menu). 
Click at the lower-right corner of the screen and
go to the First-Aid cabinet on the wall there.  Try to open the cabinet,
but it is too high to reach.

NOTE:  To avoid any confusion, the HEADBOARD
refers to the end of the bed next to the gray board with the white writing,
while the FOOTBOARD refers to the end of the bed closest to the
First-Aid cabinet.  As you will see, you can move the bed only to the left
or to the right, and the gear icon to do this appears only on the Headboard.

So go to the Headboard in the lower-left corner
of the screen, and click on the gear icon on it to move the bed under the
First-Aid cabinet.  Click on the cabinet now to open it.  Pick up the
BOTTLE FILLED WITH TWO THIRDS (the bottle with the green liquid)
from the bottom shelf.  Paloma will tell us that, according to the label,
the bottle is a chemical reactant — "to separate the true from the
false."  Pick up the TUBES FILLED WITH LIQUID — WHICH ONE? (a
set of four vials) from the upper shelf.  Click on this set and then the
"Separate" icon (to the right of the inventory) to SEPARATE the four
vials in the set.  Note that each vial has a different colored cap on it.

THE
PROBLEM
:  Only one of the four vials
contains the antidote.  The other three vials are apparently filled with
poison because Paloma will die instantly (regardless of the time remaining on
the countdown clock) if she drinks from any one of these other vials. 
Therefore, the object of the puzzle is to determine which of these four
vials has the antidote
.  Unfortunately, I cannot tell you which vial
contains the antidote because that is determined randomly by the
computer.  So I can only help you figure out the solution yourself.

THE
SOLUTION

Combine the bottle
with the green liquid
with one of the four vials.  IF THE VIAL CONTAINS THE ANTIDOTE, THE LIQUID IN IT
WILL TURN BLACK; OTHERWISE, IT WILL TURN WHITE.
   If the
liquid turns black, right-click to open the Inventory Menu, pick up that vial
from the inventory and click on Paloma’s card (which is left of the inventory)
to have her drink from it.  Paloma will tell us that she is feeling
better, and you will hear the Killer’s comment in the background.  But if
the liquid in the vial does NOT turn black, combine the bottle with
the green liquid
(now called BOTTLE FILLED WITH ONE THIRD) with
another vial.  Again, if the liquid in the vial turns black, have Paloma
drink it; otherwise, DON’T or she will die and you will have to start
over.

Unfortunately, there is only enough green
liquid in the bottle to test two vials.  After that, the bottle with
the green liquid
will disappear from your inventory.  But don’t
worry.  Even if neither vial you tried turned black, you have at least
eliminated those vials from consideration.  Thus, you now have a 50/50
chance of getting the right vial from the two that are left.  In other
words, GUESS!  Just pick up one of the two untested vials and click
on Paloma’s card left of the inventory.  If it is the correct vial, you
will hear Paloma’s comment and then that of the Killer in the background. 
Otherwise, you will get a (morbid) cutscene showing her die, and will then be
told to RELOAD your last save to try again.  Just remember: the computer randomly
decides
which vial will contain the antidote each time you load the game to
retry.  So don’t think that if the vial with the red cap, for instance,
would have been the correct vial in the game where you failed, that it would
also be the correct vial the next time you try.

           
The countdown clock will disappear as soon as Paloma takes the antidote. 
Step out of the close up on the First-Aid cabinet and click on the wall poster
left of that cabinet.  Click on the gray wall cabinet (the Storage), which
is left of the poster.  Put away the unused vials and the bottle with
the green liquid
, if any, in that Storage.

           
Move the bed right to its original location.  A short cutscene will show a
couple of pipes lying on the ground left of the bed.  Go to that area and
pick up the METALLIC TUBE.  (See picture below.)

           
Move the bed left under the First-Aid cabinet again.  Go to and click on
the grating that was under the bed on your right.  Paloma will
exclaim.  Use the METALLIC TUBE to pry open the grating.  A
short cutscene will show a bunch of rats gnawing at a severed hand holding a
key.  (Ugh…)  You can try to pick up that key, but Paloma will
refuse to stick her hand in that "rat-infested hole" (of course!)

           
Click on the surveillance camera in the corner of the ceiling up on your
right.  Close up on the gray board on your right.  Paloma will
comment.  Note the number written on that board: 2324.  Step out of this close up
and close up next on the little mirror above the wash basin on your
right.  You will automatically get yet another close up.  Click on
the white icon.  Paloma will comment, and a tool icon will appear on the
four holes at the bottom of the screen.  But we don’t have the tool we
need to use here.  So step out of this close up and click on the tool icon
under the mirror to learn that the tap is working (should we need to get
some water later).

           
Click on the first locker on your right, but it is locked.  Close up on
the ground in the lower-right corner of the screen.  Paloma tells us about
the broken glass.  Put your cell phone in the storage, to make room in the
inventory for the mattress on the bed.  Then, go and pick up the MATTRESS
and put it on the broken glass.

           
Note the two boxes on the shelf on the wall in front of Paloma.  Click on
the box on the left to learn that it is a Fuse Box and that its cable runs
through the wall.  Close up on the box on the right.  Pick up the HEXAGONAL
KEY
.  Click on the Memory Card, to get a notification of a new
document in the upper-left portion of the screen.  Open the Inventory Menu,
and click on the Voice Recorder on your left to bring it to the center of the
screen.  Click on the orange button ("Documents") at the
center-left of the Recorder to see the three documents you now have. 
Click on the top round image on the left to listen to the first
recording.  You will be brought out of the Inventory Menu automatically as
Paloma comments.  Open the Inventory Menu again and listen to the other
two recordings.

           
Now go to the locker on your left, and use the HEXAGONAL KEY to open
it.  Pick up the DRY POWDER EXTINGUISHER.  Go to your left,
and use the Extinguisher on that "rat-infested hole" in the
ground.  Pick up the KEY.  Feel free to click on the hole
again to hear a new comment by Paloma.

Go to the door by the mattress.  Click on
the camera in the corner of the ceiling up on your right.  Then click on
the gear icon on the door to learn that it is locked.  But now
click on the tool icon on the latch (just above the door handle) to
learn that it is not very strong.  You can use either the KEY (to
unlock) or the Extinguisher (to just break open) on the latch to open the
door.  Enter the room on the other side.

The Electric-Chair Room


A dialog follows.  Exhaust all topics of
the conversation.  Check out your new objective.  Click on the gray
box with the High Voltage sign on your right to hear Paloma’s comment.  If
you click on it again, Paloma will receive a (harmless) electric shock. 
Go back to the Cell, and click on the tool icon on the fuse box left of the door. 
Use the Extinguisher on that fuse box to short-circuit it.  Return to the
Electric-Chair room and click on the "Electrical Cupboard" now to
open it.  Click inside the cupboard, but it is too dark to see anything in
there.

           
Step out of the close up.  Click on the gear icon on the door on
your left (the one you had used to enter this room) to close the door and get
an automatic close up of the two-button switch behind it.  If the door is
already closed, however, just close up on that switch (on the wall, left of the
door).  Click on that switch to press the green button with the vertical
line on it.  Go to and open the electrical cupboard to see a bulb now lit
inside.  Pick up the IRON THREAD lying at the bottom of the
cupboard.

           
Go back to the Cell, approach the wash basin, and close up on the mirror above
the tap.  Once again, you will get a further close-up automatically. 
Use the IRON THREAD to click in the numbers (2324) we had
noted earlier (from the gray board on your left), as follows: moving from left to right, click TWICE
on the first hole, THREE TIMES on the second hole, TWICE
again on the third hole, and FOUR TIMES on the last hole.  A
cutscene will follow showing Paloma throwing away the collar.

           
Return to the Electric-Chair room.  Note that there are six doors in the
room in addition to the one you had used to enter this room.  Feel free to
click on these doors to find that they are all locked.  Click on the
electric chair in the center of the room to get a new objective and also to get
a gear icon now on the chair.  Click on this icon once, to get Paloma to
slide the chair in place.  Click on it again, to get her to sit in the
chair.

           
Click on the LEVER on your right (see Picture
A
below) to turn the chair left to face one of the six locked
doors in the room.  The light above that door will go on, illuminating a
name and a number on the door.  Click on the white icon on that writing,
and Paloma will read that name and number.  Click on the lever again to
turn to the next door.  Feel free to click on the white icon on that door
to get Paloma to read the name and number there as well.  Repeat this
procedure until your reach the fifth door, which carries Paloma’s own
first name and the number 129.  Click on the white icon on
that door to hear Paloma’s comment.  [Note:  Feel free to turn
the chair to the last room, and read the name and number there as well. 
But you will need to go through all the other doors again to return to what we
might call Paloma’s door, if you would like to see the number on that door
again.]

           
Click on the GRAY PANEL between the lever and Paloma’s right hand (see Picture A above) to open that panel and hear
Paloma’s comment.  Click on the FOOTPRINT ICON (see Picture A above) to get Paloma out of the
chair.  Click on the lower-right corner of the screen to bring Paloma
close to the Electric Box.  Go and open that box, and click on the handle
bar in the lower-right corner of the box to turn it to the ON
position.  A short cutscene of the electric chair follows (indicating that
the power to its "Fuse Box" has now been turned on).

           
Click on the chair to return Paloma back in it.  Open the Gray Panel
("Fuse Box").  We must now set the voltage to 129,
i.e., the number indicated on Paloma’s door.  Picture B above illustrates how to do
it.  Simply click on the different dials inside as follows:

TWICE on the +50 dial ……………………….. (50 x 2 = +100)

 ONCE on the +20 dial
  ……………………….  (20 x 1 = +20)

TWICE on +5 dial
        ……………………….  
(5 x 2 = +10)

 ONCE on -1 dial
           ……………………….  
(-1 x 1 = -1)

Thus, (100+20+10) – 1 = 129.

           
After adjusting the dials, click on the RED round button at the bottom-left of
the screen.  (See Picture B
above.)  A cutscene, along with the killer’s voice in the background, will
follow as Paloma’s door opens.  Go to that door and enter the next room.

The Locker Hallway

           
Check out your new objective.  Click on the camera up on the ceiling,
right of Paloma.  Open the gray locker, right of Paloma.  Pick up the
EMPTY SPRAY.  [Note: you might have to rearrange the items
in your inventory to make room for it.]  Click on the lower-right corner
of the screen to get a view of the bottom of the stairs.  Click on the
camera up on the ceiling, right of Paloma.  Go upstairs and enter the next
room.

The Morgue

           
A dialog follows.  Exhaust all topics of the conversation.  Check out
your new objective.  Click on the white jacket hanging on the wall on your
right.  Click on the countdown clock (the black square with a red dot at
the top) up on the wall, right of Paloma.  Click on the tiles under the
clock.  Click on the camera on the ceiling, right of Paloma.  Try to
open the rusty green door in front of you, but it is locked.

           
Close up on the white table right of the green door.  Click on the large
splatter of blood in the center.  Pick up the POWDER REVEALER from
the left of the blood, and the SURGICAL INSTRUMENT below the sink on
your right.  [Note:  If you used the Extinguisher, and not the
key, to come out of the Cell downstairs, you will still have that key in your
inventory.  In that case, there won’t be enough room in your inventory to
pick up the two objects on the white table.  But that’s okay.  Just
pick up the Powder Revealer at this time.  You won’t need the surgical
instrument until much later anyway.]

Step out of the close up.  Click on the
camera (the red dot on the ceiling on your right).  Click on the red
drawing of a cow on the gray cabinet-like structure on your right.  Paloma
calls it a "Butcher’s Sign."

Go to the gray, large drawers now on your
right.  Feel free to click on the camera in the corner of the ceiling
above the drawers.  Note the gear icons on three of the six drawers below
that camera.  Click on these three drawers, but they are all locked. 
Close up on the electronic Keypad on the wall on your right.  Open your
Inventory Menu.  Click on the Voice Recorder to bring it to the center of
the screen.  Click on the Documents button, and note the three dates
of the interviews:  10/22, 02/29, and 01/13.  [Note:  Each date is
actually a code we must punch in the Keypad to open a drawer on your left, as
described below.]

           
Step out of the Inventory Menu to return to the close up on the Keypad. 
Click on the numbers for the first date on the Voice Recorder: 1,
0, 2, 2; then, click on OK.  A cutscene will follow, showing one of
the drawers open on your left.  Step out of the close up on the Keypad,
and click on that drawer.  A table will slide out and Paloma will
comment.  Click on the tag tied to the mannequin’s foot to learn that the
letter P has been underlined in that tag.

           
Close up on the Keypad again, and click on the numbers for the second date: 0,
2, 2, 9; then, click on
OK. 
Another drawer opens.  Click on that drawer, and then on the tag tied to
the foot of this mannequin to learn that the letter E has been underlined in this tag.

           
Finally, close up on the Keypad and click on the numbers for the third date: 0,
1, 1, 3; and then,
click on OK.  Another drawer opens.  Go and click on this drawer, and
then on the tag inside to learn that the letter H has been underlined this time.

Now go down to the Cell (where Paloma had woken
up at the start of this section of the game).  Go to the wash basin on
your left, bring out your EMPTY SPRAY and click on the tap to fill the
bottle with water, i.e., get the WATER SPRAY.  Combine the WATER
SPRAY
with the POWDER REVEALER to get LIQUID REVEALER.

           
Go back up to the Morgue, and use the LIQUID REVEALER on the tiles under
the countdown clock.  The words "PRESS HERE" will appear
on those tiles as a dialog follows and the Countdown Clock begins to
run!

           
But there is no need to worry or save the game, because we have more
than enough time to solve this puzzle.  Recall the letters that had been
underlined on the tags in the three drawers in the morgue:  P,
E, H
.  Close
up on the tiles on the wall and just press P, E, H, in the words "Press
Here
," as shown below.

PRESS HERE

           
A brief cutscene will show the countdown clock slow down and stop, and a shot
of the rusty green door.  Click on that door now.  Another cutscene
and dialog follow.  Feel free to check out your new objective OR
just wait.  If you wait long enough, you will first get a shot of the vent
under the "Butcher’s Sign"; and then, Paloma will appear right next
to it.

Click on the Butcher’s Sign, and Paloma will
tell us that it sounds hollow.  Use the Extinguisher on that sign. 
Step inside the new opening (the Shaft), and click on the panel in front
of you.  But it is too dark for Paloma to see anything in there.

Step out of the close up.  (Note:
This would be a good time to pick up the SURGICAL INSTRUMENT from the
table on your left, if you haven’t already done so.)  Go down to the Cell
and retrieve your CHARGED CELL PHONE from the Storage.  Step out
into the Electric-Chair room, open the Electric Box on your right and pick up
the SMALL BULB (right of the lit bulb in the upper-right portion of the
box).

Return to the Morgue, enter the Shaft, and put
the SMALL BULB in the dark hole just above the white panel.  Use
the SURGICAL INSTRUMENT to unscrew the panel and reveal the circuit
behind.

           
Note the three black fuses, one on top of the other, on your right.  Click
on the fuse at the bottom, to hear Paloma’s comment.  Attach the IRON
THREAD
to that fuse.  Click on the two fuses at the top, to hear
another comment from Paloma.  Attach the SURGICAL INSTRUMENT to
those fuses.  A cutscene will bring you down to the next room.

The Kitchen

           
Note the gear icon on the door on your left.  That is the back door, but DON’T
open it just yet.  Check out the Kitchen first.  Start by closing up
on the switch (to the right of the shaft from which Paloma had come down), but
we don’t have the key for it.  In fact, you won’t even find any icon on
that switch.  So step out of this close up and move Paloma to your right.

Click on the door to the right of the
shaft, but it is locked.  Click on the phone to the right of the door, but
it isn’t working.  Move to the table at the lower-right corner of the
screen, and click on the newspaper there to hear Paloma’s comment.  Click
on the two windows now in front of you, to find that they are both
barricaded.  You can check out the kitchen cabinet (Storage) on your
right), but we don’t need to use it.

           
Now that we have checked out everything in the Kitchen, go to that back door left
of the shaft, and click on it.  A cutscene will follow.  Note:
the bomb and the black screen that follows might make you think that it’s GAME
OVER, but it’s not.  Just wait a while and the cutscene will continue,
switching the story to Victoria’s point-of-view.

Killer’s House (Victoria: 2008)

           
A dialog follows.  Exhaust the conversation with the Sheriff.  She
will give you a New Document (the contents of the Memory Card), but you cannot
check it out yet as another dialog follows.  Exhaust the conversation with
Garris.  He also gives you a New Document (Hawker’s File), but you
cannot examine that document yet either.  At the end of that conversation,
you will get a New Objective.  You can now examine that objective as well
as the two new documents. [Note:  The contents of the Memory Card
will appear as the three separate interviews that we had seen earlier in
Paloma’s Voice Recorder in the previous section of the game.]

The Front Yard

           
Feel free to click on the trunk of the Sheriff’s car, but it is locked and
Victoria will refuse to even try to open it.  Note the dumpster (Storage)
before the stairs, on your right.  But we don’t need to use it.  Note
the two magnifying-glass icons shown in the picture below.

           
Click on the magnifying-glass icon labeled "TIRE TRACKS" in the above
picture.  You will actually find two clues in this close up, both in the
upper-middle portion of the screen.  Click first on the brown SHOE
PRINT
on left.  Use the 3D SCANNER to collect the clue, and
then analyze that clue.  Now click on the black TIRE TRACKS up on
right.  Use the 3D SCANNER to collect this clue also, and then
analyze this clue as well.  Victoria will suggest getting Claire’s help to
get more information on this clue.  Just step out of the close up, and she
will call Claire automatically for this purpose.

           
Now click on the magnifying-glass icon labeled "TRUCK MARKS" in the
above picture.  You will actually find three items in this close up.
 Click on the pair of TIRE TRACKS in the upper-middle portion of
the screen.  Use the 3D SCANNER to collect the clue, and then
analyze that clue.  Now click on the BARE FOOTPRINT in the
lower-middle portion of the screen.  Use the 3D SCANNER to collect
this clue as well, and then analyze this clue also.  Finally, click on the
BROKEN GLASS on your right.  Victoria will comment, but we won’t
collect or analyze any clues here.

           
Click, and keep clicking, in the lower-right portion of the screen until you
see the shed with the stack of logs in the area left of the house.  Note
the two beams holding up the top of the shed on the right.  Close up on
the first of these two beams (i.e., the one that Victoria approaches
first) to see an insignia engraved in the wood.  Victoria will
comment.  Click on the phone icon that now appears, to photograph that
insignia.  Open the Inventory Menu, and click on the phone in the
upper-left corner of the screen to transfer the photograph to the Kit. 
Analyze that clue, and Victoria will indicate we need to call Claire for
further help with this clue.  Just step out of the close up on the beam,
and Victoria will automatically make that call.

           
Close up on the "Crossbeam" (the wooden plank lying diagonally
between the shed and the fence).  Victoria will comment, but you won’t
find any clue to collect or analyze.  So step out of this close up, and
click on the mud just over the Metal Grate at the bottom of the opening
in the fence (the fence gate) in front of you.  You can try to talk to
Garris, on your right, but he has nothing new to report.  So go through
the fence gate to arrive in the Backyard.

The Backyard

           
Click on the square piece of Metal Grate in the lower-right portion of
the screen, but there is no clue to collect or analyze from that.  Note
the stairs leading down from the Back Porch of the house.  Recall that a
bomb had gone off just as Paloma took the last step down that stairway, in the
previous section of the game.  Close up by clicking on the
magnifying-glass-icon that appears on the ground in front of those stairs, to
find three pieces of evidence.  Click on the big, dark spot in the
upper-left portion of the screen.  Victoria will recognize that there has
been an Explosion there.  But there is nothing to collect or
analyze from this evidence.  So click next on the Brown Footprint,
a little to the right from the top-middle of the screen.  Collect the clue
with the 3D SCANNER, and then analyze it.  Finally, click on the
blue pieces in the center of the screen.  Victoria will tell you that
there is some blood on a Piece of Rubber.  Collect the clue with a SAMPLING
SWAB
, and then analyze it.  [Note: you will have to run both
the Chemical and the Database Analyses to get 100% information from this clue.]

           
Step out of this close up and note the GRAY TRAILER on your left, up against
the wall of the house.  Close up on that trailer, and click on it to find
that the hatch is locked, but that the lock is rusty.  But we don’t have
anything at the moment to break open that rusty lock.  So click next on
the yellow license plate with a brown line across its numbers, in the
lower-right portion of the trailer.  But we don’t have anything to clean
up that mud to be able to read the number on that plate.  In short, we
can’t do anything with this trailer just now.

           
Click on the Archery Target left of the house.  Click on the Electric
Fence
left of the target.  Click on the orange Iron Brazier,
and then the gray Aluminum Can, both of which are in the lower-left
portion of the screen.  But there are no clues to collect and analyze from
any of these objects.  So just pick up the OIL CAN from the ground
left of that orange Iron Brazier, and return to the front of the house. 
Go upstairs, and Victoria will comment.  This might be a good time to call
Claire.  So open the Inventory Menu, click on the cell phone to bring it
to the center of the screen, click on the MESSAGES & CONTACTS icon
in the cell phone, and then click on Call Claire Ashby.  Exhaust
the conversation.  Enter the House.  [Note:  We could
have also entered the house through the back door, of course, but I think going
through the front door gives a better idea of the layout of the house.]

INSIDE THE HOUSE

           
Click on the oval wall painting above the table on your right, to hear
Victoria’s comment.  Click on the broken floorboards down on your right,
to hear another comment from Victoria.  Go through the door now in front
of Victoria to enter the Kitchen.

The Kitchen

           
Move clockwise around the room to examine the following.  Click on the Telephone
to learn that it is broken.  Close up on the dining table, and click on
the Newspaper there to hear Victoria’s comment.  Close up on the Oven
to hear another comment from Victoria.  Check out the cupboard (the Storage)
above the same counter, but we don’t need to use it just now.

           
Close up on the Sink, and click on the pot on your right.  Collect
the clue by first using the FINGERPRINT POWDER, and then the 3D
SCANNER
.  Analyze the clue.  Click on the Tap to learn
that it is working.  Step out of this close up and close up on the Refrigerator
to hear Victoria’s comment.

           
Move slightly right towards that Dumbwaiter Paloma had used to come down
from the Morgue the previous night.  There is a bookcase now placed in
front of that dumbwaiter.  Click on that bookcase once to hear Victoria’s
comment.  Click on it again, to move it aside.  Go back to the
dumbwaiter and click on it to learn that it is locked.  Use the PICK
GUN
to unlock it, and click on it again to learn that we would need a rope
to go down the shaft.

           
Go through the backdoor on your left to arrive in the back porch and hear
Victoria’s comment.  But there is nothing of interest here.  So
return to the Kitchen.  But we are done with the Kitchen as well, for
now.  So, step back out into the main hallway.

* * * * * * * * * * * *

Click on the stairs right of the Kitchen door,
only to receive a notification that there is an "unread message"
and that there is data waiting to be transferred to the Kit.  Open the
Inventory Menu, click on the Kit to bring it to the center of the screen, and
then click on the description of the data in the cell phone on your left
to transfer the clue to the Kit.  Click on that clue then, as it appears
in the Kit’s inventory, to see the information on the Tire Track sent by
Claire.  You don’t need to analyze this clue any further, of course.

           
Go upstairs now, to arrive in the Second Floor hallway.  A cutscene and
dialog will follow.  Exhaust the conversation.  Then, enter the door
that Victoria is facing, to arrive in the bedroom where Paloma had waken up the
first time in the game.

The Bedroom

           
Victoria will comment.  Click on the Entryway (the gray panel with
the red bar on top) in the corner on your right, to hear Victoria’s
comment.  Go to the right of the bed, and click on the now-empty Camera
Base
up on the ceiling on your right.  Click on the round
black-and-white Picture above the table.  Then close up on the
round mirror on the table under the picture.  Click on the broken
Mirror
.  Collect the clue by first using the FINGERPRINT POWDER
and then, the 3D SCANNER.  Analyze the clue.  Then click on
the Broken Piece of Glass lying on the table below the mirror, to hear
Victoria read the message on it.

           
Step out of the close up on the table and click on the Blood-Stained
Bandages
lying on the ground between the foot of the bed and
Victoria.  Collect the clue by using the SAMPLING SWAB
Analyze the clue running the Chemical Analysis and then, the Database
Analysis.  Click on the Handcuffs tied to the top-right of the
bed’s headboard, to hear Victoria’s comment.  Then, click on the top-right
of the Mattress.  Collect the clue by using the DIGITAL
MICROSCOPE
and then, the SAMPLING TONGS.  Analyze the clue
running the Chemical analysis and then, the Database Analysis.  Click on
the white icon on the Wooden Frame along the lower-right side of the
bed, to hear Victoria’s comment.

           
Click in the lower-right portion of the screen to move towards the
fireplace.  Feel free to check out the wardrobe (the Storage), but
we don’t need to use it at least right now.  So, go right and click on the
Window to hear Victoria’s comment.  Click on the lower-middle
portion of the screen twice to face the wall right of the window.  Click
on the White Dress to hear Victoria’s comment.  Feel free to click
on another now-empty Camera Base up in the corner of the ceiling on your
left.  Close up on the Stove, to hear Victoria’s comment. 
Click inside the stove, to hear another comment from Victoria.

           
We are done in this room.  So, step back outside in the hallway.

* * * * * * * * * * * *

           
Close up on the wardrobe right of Victoria in the hallway.  Click on the Clothes
inside to hear Victoria’s comment.  Collect the clue by using the DIGITAL
MICROSCOPE
and then, the SAMPLING TONGS.  [Note that the
initial white icon and the first blue icon will seem to appear everywhere
inside the wardrobe.  But after you have used the Digital Microscope, the
second (i.e., the blue-hand) icon will appear only on the middle shelf
in the left side of the wardrobe.  So that is where you will have to use
your Sampling Tongs.]  Analyze the clue by first running the Chemical and
then, the Database analyses.  Then, go through the door right of the
wardrobe to arrive in the Bathroom.

The Bathroom

           
Victoria will comment.  Click on the magnifying-glass icon in the
lower-right portion of the screen, to close up on the Bathtub.  Note the
blue-hand icon on the black smudges (Blood Drops) on the ground, at the
bottom of the screen.  Collect the clue by using the SAMPLING SWAB
Run the Chemical Analysis and then, the Database Analysis, on this clue. 
Click on the brownish spots (Fibers) on the left edge of the
Bathtub, to hear Victoria’s comment.  Collect the clue by using the SAMPLING
TONGS
, and then analyze it.  Step out of the close up on the Bathtub,
to hear another comment from Victoria.

Click on the white icon that appears in the
middle of the extreme right of the screen, to learn about the Terrarium
Note the washbasin under a damaged mirror on the wall behind Victoria. 
Pick up the DRY OLD SPONGE from the washbasin, right of the tap. 
Click on the Tap itself to learn that it is not working.

           
Close up on the First-Aid Cabinet on the wall, to the right of the
washbasin.  Click on the gear icon to open it, but it is locked.  Use
your PICK GUN to unlock and open it.  [Note: Just wait a few
seconds.  You will first be brought out of the close up and then, taken
back in again as the cabinet opens.]  Click on the three orange Empty
Medicine Bottles
on the top shelf.  Click on the piece of paper on the
right of the bottom shelf.  Listen to Victoria’s comment; and then, pick
up that piece of paper = the RECEIPT FOR MEDICATIONS.  Pick up the ANTI-VENOM
SERUM BOX
from the left of the bottom shelf.

           
We are done in the Bathroom.  So, step back out into the hallway.

* * * * * * * * * * * *

           
Approach the green, rusty ("Charred") door on your
right, presently almost hidden by the blue electronic panel on the wall on your
right.  Click on it, to hear Victoria’s comment.  Try to open the
door, but it is "impossible to open."  Click on the blue
Electronic Panel
right of the door, to hear another comment from Victoria
and to receive a New Objective.  Feel free to check out that
objective.  Then, click on the brown door, now on your right.  It’s
locked but, as Victoria tells us, the door isn’t very solid.  But we don’t
have anything just yet to break open that door.  So go downstairs, back to
the main hallway on the First Floor.

           
Go through the rusty green door (what we will call the Cellar Door from
now on) right of the stairs.  It is quite dark on the landing.  Look
closely and you will see a lantern hanging just above and to the left of
Victoria’s head, on the wall in front of her.  [Note: Even if you
cannot see the lantern, you can find it by just moving your cursor around on
that wall until you find a white icon.]  Click on the white icon, to learn
that it is an empty Oil Lamp.  We can fill the lamp with oil, of
course, by using the Oil Can in our inventory.  But we don’t have any
matches yet to then light up the lamp.  So come back upstairs to the main
hall, for now, and go into the Living Room on your right.

The Living Room

           
Victoria will comment.  Close up on the China Cabinet on the wall
right of Victoria.  You will find two (blue and white) icons in this close
up.  Use the FINGERPRINT POWDER and then, the 3D SCANNER on
the Molding (the blue icon).  Analyze the clue.  Victoria will
comment, and you will also receive a New Objective.  You can check this
objective right away by clicking on the cell phone on your right.  Then,
step out of the Inventory Menu and click on the empty socket (the white icon),
to hear another comment from Victoria.

           
Click on the open book on the large table behind Victoria, to learn about the Lock
of Hair
there.  Collect the clue by using the SAMPLING TONGS
Analyze the clue by running the Chemical Analysis and then, the Database
Analysis.

           
Feel free to click on the four Books in the bookcase behind
Victoria.  You can find these four books you can click on as
follows.  There is one, the Black book, in the second shelf from the top,
of the left section of the bookcase.  The other three are all in
the middle section of the bookcase: the Red book on the right of the
second shelf from the top, the Blue book on the left of the third shelf from
the top, and the Green book on the right of the fourth shelf from the top.
 As you click, Victoria will tell you something about each of these
books.  But there are no clues to collect or analyze here.

           
Close up on the Safe in the third shelf from the top, of the right
section
of the bookcase.  Victoria will comment.  Click on the gear
icon on the wheel on your left to learn that the safe is locked.  Click on
the white icon on the keypad on your right to hear Victoria’s
comment.  Use the FINGERPRINT POWDER on the keypad to reveal some
fingerprints, but there is nothing good enough to collect and analyze. 
So, since we don’t know what the code is or how to figure it out just yet,
forget the safe for now.

           
Pick up the Match Box from the right of the mantel on your right. 
Click on what looks like a DVD Case lying on the couch further on your
right, to hear Victoria’s comment.  Click on the Food Tray on the
coffee table, to hear another comment.  Finally, click on the DVD Case
lying next to the food tray, to hear yet another comment.

           
We are done in the Living Room for now.  So, step back out in the main
hallway.

* * * * * * * * * * * *

           
Go down the Cellar door.  Light the Oil Lamp on the wall in front
of Victoria by first using the OIL CAN, and then the MATCH BOX,
on it.  Victoria will comment.  Now that the lamp is lit, you will
get a magnifying-glass icon on the Blue Door on your right.  Close
up on that door.  Click on the wooden plank just right of the door, to
move it aside and see the Blue Electronic Box behind it.  Click on that
box to hear Victoria’s comment and receive a New Objective.  Check
out that objective.  Step out of the close up and go down the stairs on
your left, to arrive in the Workshop.

The Workshop

           
As you enter, you will receive a notification about an Unread Message and Data
waiting to be transferred to the Kit.  Open the Inventory Menu, click on the
Kit to bring it to the center of the screen, and then click on the message in
the cell phone on your left to transfer the data to the Kit.  Click
on the clue ("Photograph Sign Engraved in Wood") in the
Inventory area of the Kit to transfer the clue to the blue screen at the top of
the Kit.  There is no need to analyze this clue any further, of course,
because the information received is already 100%.  Feel free to Open and
see the badge itself by clicking on the description of the clue in the blue
screen.

           
Note that the Workshop is actually divided into three areas.  We will call
the area where Victoria is standing the Dumpster Area because of the
dumpster (Storage) that is in the lower-left section of the screen.  The
actual Workshop Area is through the doorway on your right, and carries a
subdivision of its own which we will call the Store because it seems to
be used as such for a number of items, as you will soon see.

Note:  There is something other
than the dumpster in the Dumpster Area, but it will lead us out of the Workshop
altogether.  So let’s skip that item for now and first finish our
examination of this whole area before leaving it.

           
Go through the doorway on your right to arrive in the actual Workshop
Area.  Pick up the DEMOLITION MASS from the table right of the
doorway.  [Note: you might have to rearrange the items in your
Inventory to make room for it.]  Click on the Circular Saw, also on
the table, right of where you had found the Demolition Mass.  Close up on
the orange Gas Cylinder, on the ground right of that table.  Click
on the Address (the three fine-printed lines under the gray pipe hooked
to the gas cylinder), to hear Victoria’s comment.

           
Step out of the close up and click on the Furnace right of the
cylinder.  Close up on the shiny object on the ground in front of the
furnace, to hear Victoria’s comment about the Burnt Fragments
Click on those fragments to hear another comment.  Click on the blue icon
to learn that there is something tiny there.  Collect the clue by using
the DIGITAL MICROSCOPE and then, the SAMPLING TONGS
Analyze the clue.  Step out of the close up.

Note:  The Furnace is actually
placed in the left portion of the Store, the third subdivision of
the Workshop mentioned earlier.  You can click on the black tires (lying
to the right of the furnace) or at the edge of the wall on your right,
to bring Victoria close enough to get a look at this Store.  If you look
closely on the right wall, you will see a Black Lever in the center of
that wall, under the two windows.  Click on the gear icon on this
lever, to open the two windows above.  But there is no need to open those
windows just now.  So click on the lever again to close them, step out of
the Store to return to the main Workshop area, and go right along the partition
separating the Store from the main Workshop.

           
Click on the blue-grayish Shelves Filled with Bottles left of the big
tank in front of you, to hear Victoria’s comment.  Feel free to click on
the Camera Base just below the corner of the ceiling right of the
tank.  Note the two windows up on the wall right of that Camera
Base.  Click on the orange Still under the left window, to hear
Victoria’s comment.  Click on the Accounting Book on the table under
the right window, to hear another comment from Victoria.  Finally, note
the Black Lever in the wall between the Still and the table with the
Accounting Book.  Click on the gear icon on this Lever, to open the
two windows above.  But, once again, there is no need to open those
windows just now.  So click on the Lever again to close them.

           
We are done in the main Workshop for now.  So return to the Dumpster Area
on your right.  Feel free to check out the Dumpster (Storage), but
we don’t need to store anything yet.  So click on the Blackboard
behind the Dumpster, to hear Victoria’s comment.  Click on it again, to
move it aside.  Feel free to click on it once again, to hear another
comment from Victoria.  Then, click on the part of the wall that was
behind the Blackboard, to hear Victoria’s comment.  Use the DEMOLITION
MASS
to break that part of the wall and reveal the dumbwaiter behind
it.  Climb down the dumbwaiter, to arrive at the Morgue.

The Morgue

           
Victoria will comment.  Click on the ground in front of the Dumbwaiter, to
learn about the Bare Footprint there.  Collect the clue by using
the 3D SCANNER and then, analyze it.  Move the cursor on the gray
beam above the dumbwaiter to find a white icon there.  Click on that icon,
to hear Victoria’s comment about the empty Camera Base there.

Click on the Blood on the Autopsy Table
left of the Dumbwaiter, to hear Victoria’s comment.  Collect the clue by
using the SAMPLING SWAB.  Analyze it by doing the Chemical Analysis
and then, the Database Analysis.

Open the rusty, green door left of the Autopsy
Table, to learn about the Traces on the Wall.  Collect the clue by
first using the DIGITAL MICROSCOPE and then, the SAMPLING SWAB
Analyze that clue.

           
Move down along the wall on your left.  Click on the Countdown Clock
to hear Victoria’s comment.  Click on the White Tiles (with the
word "DEAD" now written on them) under the clock, to hear another
comment from Victoria.

Close up on the White Jacket hanging on
the wall, on your left.  Click on the red Traces of Blood halfway
down the gray pipe left of the Jacket, to hear Victoria’s comment. 
Collect the clue by using the SAMPLING SWAB.  Analyze it by first
running the Chemical Analysis and then, the Database Analysis.  Click on
the White Jacket now to hear Victoria’s comment about its sleeve. 
Collect the clue by first using the REVEALER SPRAY and then, the SAMPLING
SWAB
.  Analyze it by first running the Chemical Analysis and then, the
Database Analysis.  But these analyses do not give us 100% information
about the clue, and Victoria tells us that we need to call Claire for further
assistance.  So step out of the close up on the Jacket, open the Inventory
Menu, and use the cell phone on your right to call Claire.  Exhaust the
conversation.

           
 The rusty, green door in front leads us out of the Morgue.  But we
are not done here yet.  So go to the six Morgue Drawers on your
left.  Click on the empty Camera Base in the corner of the ceiling
above the drawers, to hear Victoria’s comment.  Click on the three gear
icons, one by one, on the Drawers below; but all of these drawers
are locked.  As you can probably guess, we need to use the same technique
that we used in Paloma’s section (using the interview dates from her Memory
Card as codes) to unlock those drawers.  So close up on the Electronic
Keypad
left of the door in front, and proceed as follows.

Click 1, 0, 2, 2; and then, on OK.  A cutscene will show a drawer
open.  Step out of the close up on the Keypad, go to that drawer and open
it.  Click on the tag ("Label") tied to a foot of the
mannequin inside, to hear Victoria’s comment.

           
Close up on the Keypad again.  Click 0, 2, 2, 9; and then, on OK.  Another drawer will
open.  Go that drawer now, open it and click on the Label inside.

           
Finally, go to the Keypad and click 0, 1, 1, 3; and then, on OK, to see the third and the last
drawer open.  Go to that drawer, open it and click on the Label
inside.

           
We are done with the Morgue now.  So click on the Target icon on the door
in front, to see a short cutscene that will bring you down into the Locker
Hallway.

The Locker Hallway

           
There is an empty Camera Base in the corner of the ceiling, left of the
stairs, but there is no icon on it.  Note the Outline of a Doorway
on your left.  But there seems to be no way of opening that door, at least
from this side.  Close up on the Marks on the Ground in front of
that door outline, to hear Victoria’s comment.

Move to the Locker on your left, but
there is no icon on that locker either.  Click on the empty Camera Base
on the ceiling, left of the locker.  Close up on the Ground in
front of the rusty, green door on your left.  Click on the Ground,
to hear Victoria’s comment.  Collect the clue by using the REVEALER
SPRAY
and then, the SAMPLING SWAB.  Analyze the clue by running
the Chemical Analysis and then, the Database Analysis.

           
We are done with this hallway.  So click on the Target icon on the rusty,
green door.  A short cutscene will bring you into the Electric-Chair room.

The Electric-Chair Room

           
Click on the Base (on which the electric chair had been mounted earlier)
in the middle of the room, to hear Victoria’s comment.  Click on the
magnifying-glass icon you will find by the mount, just left of Victoria’s
feet.  Click on the white icon, to hear Victoria’s comment.  Collect
the clue (Broken Pieces of Glass) by first using the DIGITAL MICROSCOPE
and then, the SAMPLING TONGS.  Analyze the clue.

Note that the names and numbers on the six Numbered
Doors
around the room are already visible.  All of these doors, except
the one marked "Paloma – 129," are locked.  But feel free
to click on the white icon on each of these five doors to learn
something about the victim whose name is marked on that door.  Then, click
on the white icon on the door marked "Paloma – 129," to
hear Victoria’s comment.

           
Close up on the Electric Box right of the unnumbered door. 
Click inside, but it is too dark to see anything.  Step out of this close
up, and click on the magnifying-glass on the wall left of the unnumbered
door.  Click on the Electric Switch.  Close up on the Electric
Box again.  Now that the bulb inside is lit, you can click on the Lever
under that bulb.  Click on that Lever, to hear Victoria’s comment. 
Collect the clue by using the FINGERPRINT POWDER and then, the 3D
SCANNER
.  Analyze the clue.

           
We are done with this room.  So click on the Target icon on the unnumbered
door, and a short cutscene will take you into the Cell.

The Cell

NOTE:  There is a white icon on the
handle of the door.  In playing this game, however, I noticed that there
is a technical bug that kicks in if you click on this icon at this point
in the game.  So I would advise you to wait until after you have already
finished examining the rest of this room before you click on this icon on the
door handle.

           
Click on the Fuse Box on the shelf left of the door.  Close up on
the floor left of the mattress, in the lower-left portion of the screen. 
Click on the Broken Glass, to hear Victoria’s comment.  Collect the
clue by using the SAMPLING SWAB.  Analyze the clue by running the
Chemical analysis and then, the Database Analysis.

           
Click on the Tool icon on the Washbasin on your left, to learn that the Tap
is working.  Bring out the DRY OLD SPONGE from your inventory, and
click on the Tap to get WET OLD SPONGE.  Close up on the Floor
in front of the washbasin.  Click on, and then pick up, the ELECTRONIC
COLLAR
.

           
Close up on the Gray Board with Inscriptions left of the washbasin, to
hear Victoria’s comment.  Click on the Phone icon to take a picture and
receive a notification that there is data waiting to be transferred to the
Kit.  So, open the Inventory Menu, click on the Kit to bring it to the
center of the screen, and click on the description of the data ("Photo
of the Carvings
") in the cell phone on your left to transfer it
to the inventory section of the Kit.  Click on that clue in the inventory
("Inscriptions on Basement Cell Wall") to transfer it to the
Blue Screen at the top of the Kit.  Analyze the clue, to hear Victoria’s
comment.

           
Step out of the Inventory Menu, and close up on the words "TOO LATE,"
written in red on the wall behind the bed, to hear Victoria’s comment. 
Click on the Grating under the bed, to hear another comment from
Victoria.  Go left of the bed and click on the First-Aid Cabinet up
on the wall, to find that it is too high for Victoria to reach it.  So go
back to the bed, and click on the gear icon on its headboard to move the
bed to your left.  [Note:  The game will be Auto-Saved at this
point because a timed sequence is about to follow.]  Click on the
First-Aid Cabinet again.  A cutscene will follow, and the countdown clock
will begin to run.  But don’t worry.  There is more than enough time
to beat that clock.  So you won’t need to save the game or even
have to use that Auto-Save from a few moments before.

Click on the First-Aid Cabinet again, to return
to the close up on it.  Click on the little Yellow Note stuck in
the top shelf of the cabinet, to learn about the clue that the Killer has left
for us to deal with the problem.  Open the Inventory menu, click on the ANTI-VENOM
SERUM BOX
and then, on Victoria’s ID card on your left, to have her take
that serum.  The countdown clock will stop, and Victoria will tell us that
she feels better.

Step out of the close up on the First-Aid
Cabinet.  Click on the Wall Poster left of the First-Aid Cabinet,
to hear Victoria’s comment.  Feel free to check out the Gray Wall
Cabinet
(Storage) left of the poster, but we don’t need to use it.  Note
Feel free to click on the Camera Base in the corner of the ceiling,
right of the rusty green door.  But the game developers seem to have made
a "boo-boo" here, because the comment you will hear is not the one
that Victoria is supposed to make.  In fact, you might recognize that it’s
not even her voice, but rather that of Paloma making the comment that she made
in the previous section of the game.

Note:  You will recall that I had
asked you, at the beginning of this subsection, to wait until after you had
already finished examining the rest of this room before you click on the white
icon on the handle of the door now in front of you.  So, it should be
"safe" for you to click on that icon at this point.  But,
although I personally did not have any problems doing so at this point, if that
bug still kicks in, you can always use that Auto-Save I mentioned a little
while ago, to replay the game from that point.

* * * * * * * * * * * *

           
We are done with this whole underground portion (the "Basement," as
the developers call it) of the house.  So go back all the way to the
Morgue, and use the Dumbwaiter to return to the Workshop above.  Take the
stairs in front of you, and then those from the landing, to come back to the
Main Hallway on the First Floor.  Take the stairs on your left to go up to
the Second-Floor Hallway, and approach the Brown Door right of the Charred
Door.  Use the DEMOLITION MASS on the Brown Door and then, click on
that door to arrive on the Roof.

The Roof

           
Close up on the Gray Box on the railing, in the lower-left section of
the screen, to hear Victoria’s comment.  Click on the Keypad on
your right, to hear another comment.  Collect the clue by using the COMPUTER
KEY
and then, analyze the clue.  Click on the bent Satellite Dish
on your left, to learn that an old Chewing Gum is stuck there.  Use
the SAMPLING TONGS to remove the Chewing Gum and then, analyze it. 
But you will get only 50% of information from this clue.  Step out of the
close up, and Victoria will tell us that we need Claire’s help for further
information.  But you don’t need to do anything because she will make that
call automatically.

           
That is all we need to do on the Roof.  So go back all the way down to the
First Floor, enter the Kitchen on your left, and use the back door to go out
into the Backyard.

Backyard: The Gray Trailer

Climb down the stairs, and approach the Gray
Trailer
left of the stairs.  Just as you reach it, however, you will
receive a notification about an Unread Message and that Data is ready to be
transferred to the Kit.  Open the Inventory menu.  The Kit should be
already in the center of the screen.  So all you have to do is click on
the description of the data in the cell phone on your left to transfer
the clue to the inventory section of the Kit; and then, click on that clue
("Chewing Gum Found On The Roof") to transfer it to the Blue
Screen at the top of the Kit.  There is no need to analyze the clue any
further, of course, since you already have 100% information.

           
Step out of the Inventory menu.  Close up on the Gray Trailer.  Use
the DEMOLITION MASS on the Lock to break it and open the
hatch.  Pick up the ROPE from inside.  Use the WET OLD
SPONGE
to wipe the mud from the yellow License Plate in the
lower-right section of the Trailer.  Victoria will read the number and
indicate that we need Claire’s help again.  So step out of the close up on
the trailer, and call Claire.  Exhaust the conversation.

* * * * * * * * * * * *

           
We are done with the Backyard, for now.  So go back into the Kitchen, and
approach the Dumbwaiter on your left.  Use the ROPE on it;
and then, climb down to arrive in the Morgue.  But we had already finished
here earlier.  So go back up to the Kitchen.  Go to the wall cabinet
(Storage) above the counter left of the sink.  Put your DEMOLITION MASS
in that Storage, to make some room in your inventory.

Note:  Depending on how long it
took you to get to this point since you called Claire about the license plate,
you should be receiving a call from her about it at this point.
  Victoria will answer that
call, and a dialog will follow.  At the end of that conversation, go out
into the Main Hall, and step out into the Front Yard.

Front Yard: Sheriff Halloway

           
Talk to the Sheriff, standing to the right of her car.  You can conduct
the conversation any way you like, but I prefer the following order.  Ask
the Sheriff first about the Receipt for Medications.  Victoria will
comment that we need to tell Claire about the Sheriff’s information, and the
dialog will be suspended apparently for that purpose.  So call Claire, and
Victoria will give her the information.

Talk to the Sheriff again, this time about the Missing
Clues
.  Call Claire again.  Now talk to the Sheriff again, this
time about the Obstruction of the Investigation.  Note that, during
this conversation, the Sheriff indicates giving Victoria two clues, as well as
an "Electronic Key," that she has found.  You will find the Key
in your inventory, and the two clues ("Fibers Collected by Halloway"
and "Product Collected by Halloway") in the Kit.  Analyze
both of these clues.  Note: you will have to run the Chemical
Analysis and then, the Database Analysis, on the Product.

Front Yard:  Garris

           
Go and talk to Garris, who is still sitting on the left side of the house, by
the fence that divides the Front and the Back Yards.  Again, you can
conduct the conversation in any order you like.  Note, however, that when
you address the topic on the Blue Door on the landing down the Cellar, a
cutscene will actually take you to that door.  But Garris will leave
shortly thereafter, while you will remain by the Blue Door.  So, you will
have to go back to him all the way out to the Front Yard, if you talked to him
about the Blue Door before the Charred Door.  So, in order to avoid this
running in and out of the house after him, I prefer to conduct the conversation
in the following order.

1.  Sheriff Halloway.

2.  Electronics Expert:

      
(a)  Safe.  Check out the New
Document ("Documentation on Metalyr’s LK Model").

      
(b)  Electronic Collar

      
(c)  Jamming System

      
(d)  Charred Door Electronic Lock

      
(e)  Electronic Lock in the Stairwell
(i.e., by the Blue Door down on the Cellar landing).

Note:  When you click on the topic
"Charred Door Electronic Lock," a cutscene will take Garris
and Victoria to that door.  Garris will tell Victoria that it will take
him a while to open that door.  But don’t wait for him to do so
because he won’t be "able" to until after you have finished
some more examination around the house.  So, as soon as you regain control
of the game, click on him and talk to him about the "Electronic Lock in
the Stairwell
."  Another cutscene will then take both Garris and
Victoria to that Blue Door.  A brief dialog will follow.  Garris will
then go back to the Charred Door and, it seems, Victoria stays by the Blue
Door.  But there seems to be a technical bug in the game here because the
camera remains on Garris, indicating Victoria is also with him; but then, you
won’t actually see Victoria there.  Don’t worry about this bug
though.  Just click on the Footprint icon on the stairs to see Victoria
down in the Main Hallway.  Click on the Cellar Door to return to the
landing by the Blue Door.

Close up on the Blue Door.  Click on the
Electronic Box right of that door, to hear Victoria’s comment.  (Note:
You will also receive the "New Objective" notification.  But
this is actually another technical bug in the game because no really
"new" objective will actually appear in our list of
objectives.)  Use the ELECTRONIC KEY on the Electronic Box, to
learn that the door is now open.  Click on the Target icon to enter what
we will call the Computer Room.

The Computer Room

           
The room is divided into two areas.  The left portion, where Victoria is
standing, has nothing but some oil or gas cans against the wall in front of
you.  Click in the lower-right corner of the screen to go to the main area
of the room.  Victoria will comment.

           
Pick up the TRANSFORMER ELECTRIC CORD from the top of the Blue Filing
Cabinet
left of the desk in front of you.  Click on the DVDs on
the left of the shelf above the desk, to hear Victoria’s comment.  Click
on the CDs on the right of that shelf, to hear another comment.  Close
up on the Desk under that shelf.

Click on the gear icon on the Stereo
System
, to turn on the music.  You can turn the music OFF or
leave it ON and it will continue to play even after you step out of the close
up on the desk.  Pick up the LOUDSPEAKER left of the Stereo
System.  Click on the papers inside the Open Folder, to hear
Victoria’s comment.  Click on the Shoes, to hear another
comment.  Click on the Lipstick and Purse, to hear yet another
comment.  Open the Top Central Drawer, and click on the papers
inside.  Victoria tells us that we need to call Claire for
assistance.  So, close the drawer, step out of the close up and call
Claire.  Exhaust the conversation.

           
Close up on the Display of Skulls on the wall, to the right of the desk,
to hear Victoria’s comment.  Step out of the close up and click on the
three Wall Shelves in the corner between the Display and the Computer
Table.

Close up on the Computer Table
Click on the Telephone on your right, to learn that it is working. 
Click on the Computer Screen or the Computer Keyboard, but the
computer is OFF.  Turn the computer ON by clicking on the Processor
(the small gray box to the right of the computer screen).  Note that a
blue hand icon now appears on the Processor.  Collect the clue by using
the COMPUTER KEY from your Kit.  Analyze the clue, to hear
Victoria’s comment.

           
Click on the Keyboard, to use the computer.  Click on User:
Killer
.  The computer is password-protected, and we are given a choice
of two possible Passwords.  Click on the first choice, but it is
incorrect.  Victoria will step back from the computer.  Go back in,
click on User: Killer and try the second password on the screen. 
But that is also incorrect.

Since we don’t have any other choices, we cannot
do anything further with the computer.  So step out of the close up on the
Computer Table.  Open the Vault in the wall, to the right of the
Computer Table.  Click on the Body inside, to hear Victoria’s
comment.  Collect the clue by using the SAMPLING TONGS from your
Kit.  Analyze the clue, to hear another comment by Victoria.  Step
out of the close up on the Vault.

           
Close up on the Autopsy Table, in front of the Vault and now at the
bottom-right of the screen.  Click on the table to hear Victoria’s
comment.  Collect the clue by using the SAMPLING SWAB
Analyze the clue by running the Chemical Analysis and then, the Database
Analysis.  Victoria will comment.  Step out of the close up on the
Autopsy Table.

Click on the Shelves, on the left in the
back of the room, to hear Victoria’s comment.  Click on the big Blue
Cupboard
on your right, to learn that it is locked.  Use the PICK
GUN
to unlock and open that cupboard.  Click on the Dark Jacket hanging
in the bottom-center of the cupboard, to hear Victoria’s comment.  Click
on the Brown Box in the top shelf, to hear another comment. 
Collect the clue by using the REVEALER SPRAY and then, the SAMPLING
SWAB
.  Analyze the clue by running the Chemical Analysis and then, the
Database Analysis.  Step out of the close up on the Blue Cupboard.

Click on the rusty green door left of the Blue
Cupboard, to learn that it is locked.  Unlock the door by using the ELECTRONIC
KEY
on the Electronic Box left of that door.  Click on the
Target icon on the door to enter and find yourself back in what I called the
Locker Hallway.  But we had already finished here earlier.  So use
the secret door (now on your right) to return to the Computer Room.  But
we are done here as well.  So go out of the Computer Room, up the stairs
on your left, and click on the Blue Door to arrive at the landing down the
Cellar.

Go to Garris, who is still standing by the
Charred Door in the Second-Floor Hallway.  Talk to him about the Blocked
Computer
, but he can’t help you.  So come down to the Main Hallway on
the First Floor, and enter the Living Room on your right.

Living Room:  Safe

           
We must now try to figure out the code for opening the Safe in the
bookcase left of the fireplace.  So close up on that Safe, and focus on
the buttons with the smudged fingerprints on them.  Ignore the Red
Button with the arrow pointing right, because that is apparently only a RESET
button.  The Green Button with "OK" on it is also not important
because, as you already know from having used a similar keypad down in the
Morgue, we have to press that button after punching in any code.  So the
clue to the Safe’s code lies in the five buttons other than the Red and Green
buttons, i.e., 1-4-6-9-A.  All we have to do now is figure
out the order in which these five buttons must be pressed to open the
Safe.

Step out of the close up, go to the right of
the fireplace, and click on the DVD on the sofa to learn that the movie
"The Blue Dahlia" had come out in 1946 or 1, 9, 4, 6
the same numbers that had smudged fingerprints on them on the
Safe!  Thus, we now have the order in which those numbers must be
pressed.  But we still need to figure out where the letter "A"
goes.  Consult the document that Garris had given you earlier ("Documentation
on Metalyr’s LK Model
"), and note the "Default Factory Code"
given on the first page of that document: 00A00.  Thus, it
is at least likely that the letter "A" might be the third
button that must be pressed to open the Safe as well.  Give it a
try!  Close up on the Safe.  Click on 1-9-A-4-6 and then, press OK.

           
Victoria tells us that the Safe is open, and steps out of the close up. 
Close up on the Safe again, and click on the Stack of Papers in the top
shelf, to hear Victoria’s comment.  Collect the clue by using the FINGERPRINT
POWDER
and then, the 3D SCANNER.  Analyze the clue, to learn
that we will need Claire’s help again.

Note:  Do not try to call Claire
while you are still in the Inventory Menu because, as I found, a technical bug
kicks in and you won’t be able to close up on the Safe again to check out the
other item inside: the pink-and-white box in the bottom shelf.
  So step out of both the
Inventory Menu and the close up on the Safe, before you call Claire. 
Exhaust the conversation.  Close up on the Safe again, and click on the Box
in the bottom shelf.  Victoria will pick up the Box and put it on the
table in front of the Safe.  Close up on the Box, and click on it to learn
that it is locked.  Use the PICK GUN to open the box and hear
Victoria’s comment.

           
Step out of the close up on the Box.  At this point, you should receive a
call from Claire.  If you don’t, just wait a little while until it
comes.  Victoria will automatically answer, of course, and a dialog will
follow.

* * * * * * * * * * * *

           
We are done in the Living Room now.  So go back out into the Main Hallway,
and take the stairs up to the Second Floor.  Note that the game
"takes over" as you get upstairs.  You will hear Garris comment
and then, a rather long cutscene will follow that begins with a look inside the
Charred Room and ends with a flashback to something that had happened in 2005.

Chicago (Victoria: 2005)

           
Check out the New Objective.  Go back down to the stairs and then, to the
wall left of those stairs.  Click on the Orange Cans on your left,
to hear Victoria’s comment.  Close up on the Sink on your right,
and click on it to hear another comment.  Step out of that close up, and
pick up the FLEXIBLE MODELING TOOL from the Bench right of the
sink.  Click on the Window up in the roof above the Bench, to hear
Victoria’s comment.

           
Go to the right of the stairs.  Click on the Stove to hear
Victoria’s comment.  Try to open the Gray Cupboard right of the
Stove, but it is locked.  Close up on the Painting on the ground,
to the right of the Gray Cupboard.  Click on the Painting to hear
Victoria’s comment.  Step out of the close up on the Painting.  Close
up on the Sculpture on the stool, to the right of the Painting. 
Click on the Sculpture to hear another comment.

Step out of the close up on the
Sculpture.  Close up on the Bench right of the Stool.  Pick up
the SHARP MODELING TOOL from the left.  Click on the Sketch on
your right, to hear Victoria’s comment.  Click on the Phone icon to take a
picture of that Sketch.  You can see the Sketch more clearly by checking
out the New Document = "Vladanna’s Sketch: The Killer’s Outfit." 
Step out of the close up on the Bench, and close up on the Metal Shelves
right of that Bench.  Click on the Photograph on your right, to
hear Victoria’s comment.

Step out of the close up on the Shelves. 
Close up on the Blue Filing Cabinet right of those Shelves.  Try to
open the Cabinet, but it is locked.  Combine the "FLEXIBLE" +
"SHARP" Modeling Tools, and use the resulting IMPROVISED PICKING
TOOLS
on the yellow keyhole (in the top-right corner of the front of the
Cabinet) to unlock the Cabinet.

           
Open the Top Drawer, and click on the papers inside to hear Victoria’s
comment.  Click on the Phone icon to copy a document which will then be
presented to you automatically.  Read the document.  Click on the X
in the top-right corner of the screen to close the page.  Then, click on
another Phone icon on the papers in the Cabinet, to copy the second document
which will also then be presented to you automatically.  Read the document
and then, close this page as well.  As you close the document, the Top
Drawer will close automatically and Victoria will comment.

           
Open the Middle Drawer, and click on the papers inside to hear
Victoria’s comment.  Click on the Phone icon, and read the document that
will then be presented to you.  As you close this document, the Middle
Drawer will also close automatically.  Note that you cannot open either
drawer now.  But that’s okay, because we have already copied the three
documents that we needed.  If you would like to see them again, you will
find them in the New Documents folder of your cell phone.

           
Step out of the close up on the Filing Cabinet, and use your Picking Tools to
now open the Gray Cupboard on your left.  There are several white
icons on the objects inside, but none of those items are of interest.  But
note the gear icon on what look like pinkish-white pieces of cloth in
the lower-right portion of the Cupboard.  Click on that icon. 
Victoria will identify these pieces of cloth as A Bunch of Rags, which
will disappear as soon as you click on them because Victoria has moved them
aside.  Note that a white icon has now appeared in place of the gear
icon you had just clicked on.  Click on that white icon, to hear
Victoria’s comment.  Pick up the KILLER’S CAPE, to hear another
comment.

           
Step out of the close up, and a cutscene and dialog will follow.  Exhaust
the conversation.  Another cutscene will then follow, bringing us back to
2008.

Killer’s House (Victoria: 2008)

           
Check out your New Objective.  We are supposed to meet Hawker, but we are
also supposed to finish exploring the house.  So let’s finish with this
area first.

The Charred Room

           
Go anti-clockwise (left) around the room to examine the following objects,
hearing Victoria’s comment as you click upon each object.  Thus, click
upon the Sealed Dumbwaiter; then, the Charred Videotapes on the
floor; then, the charred part of the Wall (left of the sealed
Dumbwaiter) where the fire seems to have started; and then, the Burnt
Posters
on the wall left of the bed.

           
Click in the lower-left corner of the screen to move to the Table below
the bed.  Pick up the TRANSFORMER WITHOUT CORD lying on the floor,
by the outer-left leg of the Table.  Click on the Electrical Outlet
down by the Table’s inner-left leg that is against the wall, to hear Victoria’s
comment.

Close up on the Surveillance Console on
the Table, to hear another comment from Victoria.  Click on the gear
icon on the console, but the console is not working.  Click on the
dismantled Keypad attached to the left of the Console’s Keyboard, to
hear Victoria’s comment and receive a New Objective.  Click on the tool
icon in the top-right portion of the Console’s Keyboard, to learn that it is an
Outlet to Connect Headphones or a Speaker.  So bring out the LOUDSPEAKER
from your inventory, and attach it to this Outlet.

Click on the tool icon in the top-left
portion of the Console’s Keyboard, to learn that it is an Outlet to Plug in
a Power Cord
.  So combine TRANSFORMER WITHOUT CORD + TRANSFORMER
ELECTRIC CORD
, and attach the resulting TRANSFORMER WITH CORD to
that Outlet.  Victoria tells us that the Console is on, but it is still
not working.

           
Step out of the close up on the Console.  Click on the wall Painting
left of the Console Table, to hear Victoria’s comment.  Click on either Glass
Door
on your left, to learn that they are both locked.  Use your PICK
GUN
to unlock those doors.  Before you go out, however, pick up the POKER
lying on the floor in front of the Fire Heater.  Click on the Fire
Heater
itself, to hear Victoria’s comment.  Then, click on either
Glass Door to arrive in the Balcony.

The Balcony

           
Click on the brownish-gray spatter Trace in the top-left portion of the Railing
at the bottom of the screen.  [Note:  It’s okay even if you
can’t see the Trace.  Just click on the white icon that appears in the
left portion of the Railing.]  Victoria will comment.  Collect the
clue by using the REVEALER SPRAY and then, the SAMPLING SWAB
Analyze the clue by running the Chemical Analysis and then, the Database
Analysis.  Victoria will comment.

* * * * * * * * * * * *

           
We are now ready to meet Hawker.  So go down to the Main Hallway in the
First Floor.  As Victoria comes downstairs, a cutscene will take us out
into the Front Yard.

Front Yard: Conversations

           
After the cutscene, a dialog with Garris will follow.  Note that he will
leave as soon as you tell him about the Console.  So save this topic for
last if you would like to address the other topics first.  But, although I
don’t know if it affects the storyline in any way, I personally prefer not
to say much about the case in front of Hawker until those
"differences" (mentioned in one of the Objectives for this part of
the game) between him and Victoria have been resolved.  So I prefer to go
directly to ELECTRONICS EXPERT and talk to Garris about the Broken
Console
, leaving the other topics for a later time.

           
As Garris leaves, a dialog with Hawker will follow.  Exhaust the
conversation.  He will then also leave.  Call Claire, and talk to her
about Hawker.  Then, go in the house and up to the Charred Room on the
second floor, to continue your conversation with Garris.

Charred Room: Garris

           
You will find Garris standing left of the Console Table.  Click on the
Talk icon to talk to him.  Exhaust the conversation.  Then, go out of
the room and downstairs into the Living Room, to continue your conversation
with Hawker.

Living Room: Hawker

           
You will find Hawker standing in front of the Fireplace.  Note the choice
of tones that you get in conducting your conversation.  Note also that you
will have to "Become Irritated" and then "Make
Peace
," at some point during the conversation, before you can secure
Hawker’s co-operation.  Once you have made peace, exhaust the
conversation.  A cutscene will then take you into the Computer Room.

Computer Room: Information

           
Hawker will step aside after he has figured out the password for you.  It
is time to see what we can learn from the computer.  So close up on the
computer, click on the Keyboard, and start checking out the files.  There
is a lot of information that is now available to us.  But don’t worry. 
Just try to keep track of what you check out.  Thus, be sure to check out ALL
the:

·       
Categories (Internet Search, Photos &
Videos, etc.).

·       
Topics within each Category.

·       
Pages within each Topic.

Note the following as you proceed:

  • The very first topic in the Internet Search is the Technical
    Manual that Garris had asked Victoria to find, in order to help him fix
    the Surveillance Console in the Charred Room.  As you click on that
    topic, the Manual will be automatically printed out by the Printer, which
    is to the right of the Computer Table.  Victoria will step back from
    the computer, apparently to allow you to step out of the close-up and pick
    up the Manual from the Printer.  But I suggest you wait until you
    have finished looking up all the information in the computer, so you won’t
    lose track of where you were in that investigation.


  • Be sure to watch the Video of October 24, 2008
    closely the first time, because it plays only once during the game.


  • The Text File in the Codes category is "encrypted."
     Again, I would suggest that you continue your examination of
    everything else that you can examine on the computer, so you won’t
    lose track of what you have and have not yet checked.  After you have
    finished doing so, click on the blue icon now on the Processor
    (the small gray box right of the Monitor), to hear Victoria’s
    comment.  Then, bring out the COMPUTER KEY from your Kit, and
    click on the Processor again.  Victoria will indicate that the
    encrypted file has now been decrypted.  Check it out by clicking on
    the Computer’s Keyboard; then, on Codes; and then, on what is now
    the "Decrypted Text File" to see the contents of that
    File.  As you close the document, a dialog will follow.  You
    will then receive a New Document.  You can check out that document in
    your cell phone, where it has been stored as the "Decrypted Code
    File
    ."


  • Every time that I played this game, the Group 6 Cameras
    recording, in the Surveillance Cameras category, seemed to skip or
    go too quickly past the first image of the recording the first time that I
    would play it.  So you might want to play this recording twice.

We are done with this room, at least for
now.  So step out of the close up on the computer, pick up the PRINTED
TECHNICAL MANUAL
from the Printer, and go upstairs to Garris in the Charred
Room on the Second Floor.

Charred Room: Surveillance Console

           
Talk to Garris about the Manual.  A dialog will follow.  Close up on
the Surveillance Console.  Click three times, one by one, on the gear
icon on the Keyboard.  Another dialog will follow.  Click on the
Phone icon in the upper-right portion of the Keyboard, to get a notification of
a New Document waiting to be transferred to the Kit.  Open the Inventory
Menu.  Click on the Kit to bring it to the center of the screen. 
Click on the clue in the cell phone on your left, to transfer it to the
inventory portion of the Kit.  Click on the clue in that inventory, to
transfer it to the Blue Screen at the top of the Kit.  Analyze the
clue.  Victoria will comment.

           
Step out of the close up on the Console, and talk to Garris again.  Then,
leave the room and go downstairs into the Kitchen.

Kitchen: Radio + Sheriff

           
Close up on the Dining Table in the lower-right corner of the screen. 
Click on the Radio.  A dialog will follow, bringing you out of the
close up automatically.  Talk to the Sheriff on your right.  Another
dialog will follow.  Exhaust the conversation.  Feel free to check
out your New Objectives.  Talk to the Sheriff again.  [Note: The
Talk icon is misplaced.  You will now find it slightly to the right
of the Sheriff.]  The Sheriff has given you the Keys to her car.  Go
out into the Front Yard, and down the stairs.  Use the KEY TO THE
SHERIFF’S CAR
to open the trunk of her car.  Pick up the METAL
DETECTOR
.

The Metal Detector

           
Victoria will comment about using the Instructions Manual to see how the
Detector works.  The Manual will be presented to you automatically. 
Read it.  If you need to consult it later, you will find it stored as the
"Metal Detector Settings" in the New Documents folder in your
cell phone.

           
Step out of the close up on the trunk of the Sheriff’s car.  We must now
use the Metal Detector to find the hatch to that Fallout Shelter that the Sheriff
and Victoria discussed in the Kitchen, and that has been mentioned in our
Objectives.  Refer to the Yellow Textbox below for some tips in using the
Metal Detector in our search for the Shelter hatch.


Text Box: Tips on Using the Metal Detector

•	Open the Inventory Menu.  Note that an image of the Metal Detector appears both inside and outside (to the left of) the inventory.
•	The image of the Metal Detector outside the inventory serves two purposes.
•	First, that image will appear grayed out in areas where it cannot be used.  Note that the Metal Detector can be used only in the Front or Back yard.
•	Second, you must click on that image to change the Metal Detector Settings.  Note that the Default Setting on the Metal Detector is "0," indicating that it is OFF.  In order to turn the Metal Detector ON, you must change the Settings to 1, 2, 3, or 4.
•	It is only after you turn the Metal Detector ON that you will be able to pick up what we will call the Metal Detector Alarm (MDA) cursor, (see picture below), indicating  the presence of an object that the Metal Detector is supposed to detect.


•	You must check for the MDA cursors by moving your cursor over any given area under each Detector setting (1 through 4), one by one.
•	When you see the MDA cursor, open the Inventory Menu, click on the Metal Detector inside your inventory, and close the Inventory Menu.  A cutscene will then show Victoria using the Detector to examine the spot where we had found the cursor.  She will then tell us what she found, and whether the object is of any use to us.
•	Note: Sometimes you will see the MDA cursor but, when you try to use the Metal Detector inside the inventory, Victoria will snap that "It's not this" (or something like that).  Don't worry.  All that means is that you must examine that spot under another Metal Detector setting.  So, just try the three other Settings, one by one, bringing out the Metal Detector from your inventory each time you change the Setting, until you get the cutscene showing Victoria using the Metal Detector.
 
The above tips will become clearer as you actually start using the Metal Detector.


Examining the Front Yard

           
You will find the following objects in the Front Yard at the location, and by
using the Metal Detector settings, given parenthetically after each object.

BY THE
SHERIFF’S CAR

  • Small Pieces of Copper (to the right of the Sheriff’s
    car, Setting 1)
  • The Sheriff’s Car (Setting 3)
  • A Handful of Rusty Nails
    (lower-right corner of the screen, by the house, Setting 4)
  • An Old Can (slightly above and to the
    left of the house stairs, Setting 4)

BY THE
LEFT FENCE WHERE PALOMA HAD FOUND THE TRUCK THE FIRST NIGHT

  • A Large Plate Made of Solid Copper
    (left of the Truck’s two tire tracks, Setting 2)
  • Gate & Railings (bottom of the Fence Gate
    where the officer is standing, Setting 3)
  • A Copper Receptacle (in the grass, lower-right of
    the screen, Setting 1)

BY THE
LOG SHED CLOSE TO THE FENCE DIVIDING THE FRONT & BACK YARDS


  • Handle of Some Kind of Iron Tool
    (left, between the 3 trees & the Log Shed, Setting 4)
  • A Few Pennies (just right of the Log Shed,
    Setting 1)
  • Fence & Railings (on the grating at the bottom
    of the Fence Gate, Setting 3)

Examining the Backyard

           
Step into the Back Yard, to find the following objects at the location, and by
using the Metal Detector settings, given parenthetically after each object.

BY THE
FENCE DIVIDING THE FRONT & BACK YARDS

  • Piece of Grate (the square piece lying in the
    lower-right corner of the screen, Setting 3)
  • Part of a Half-Buried Bicycle Wheel
    (towards the lower-left side of screen, Setting 4)

BY THE
BACK-PORCH STAIRS

  • Grenade Pin (below the white wooden
    planks, left of the bottom of the stairs, Setting 1)
  • Small Silver Spoon (in the lower-left portion of
    the screen, Setting 1)

BY THE
GRAY TRAILER ON THE LEFT


  • "Truck" (or the Gray Trailer, which
    had mud on its license plate; Setting 3)
  • Wire Fence (left of the Archery Target,
    Setting 3)
  • "Iron Brazier"
    (or the Orange Can in lower-left portion of the screen, Setting 3)
  • Aluminum Can (the Gray Can right of the
    Orange Can, Setting 2)

           
And this is where we hit Jackpot!  Change the Metal Detector Setting to
3
, and use the Metal Detector on this Gray Aluminum Can again. 
Victoria will comment, indicating that the Detector should not be reacting to
the Aluminum Can at that particular setting.  The Can is rolled aside and
you will hear the leaves (that were previously under and around the Can)
brushed off.   You will then see a set of wooden Planks where
the Can previously stood.

Opening the Hatch


Click on the tool icon on the Planks, to hear Victoria’s comment. 
Use the POKER to remove the planks, and see the Hatch
underneath.  Click on the gear icon on the Hatch, to learn that the
Hatch is locked.  But note that a magnifying-glass icon has
replaced the gear icon on the Hatch, after Victoria’s comment. 
Click on that icon to get a close up of the Hatch, as Victoria notes that the Reference
Number
on the plate (left of the Hatch) = H103123.

We must now use this Reference Number to figure
out the password to unlock the Hatch with the help of the computer.  So go
to the Computer Room inside the house, and close up on the computer. 
Click on the Keyboard; then, on Codes; and then, on Decrypted Text
File
.


Note that the Code for the East Hatch is
REFERENCE + D55, i.e.,

H103123 + D55 = H103123D55

So, go back to the Main Menu, and click
as follows: Access Control; East Hatch; and then, the above
code.  Victoria will announce that the "Anti-Nuclear Shelter" is
opened!  Step out of the close up on the computer.  You can try to
talk to Hawker, but he is still "taking notes."  In other words,
he won’t be going with us to check out the Fallout Shelter we just
opened.  So try to go out to that Shelter yourself.  But, just as you
go through the Blue Door outside the Computer Room, a cutscene will follow,
ending with another flashback to 2005.

Chicago (Victoria: 2005)

           
Check out the New Objective.  Talk to Richard.  Exhaust the
conversation, but note that the conversation will end abruptly as soon as you
address the topic "Neutralize Richard."  So, if you would like
to hear Richard’s responses to the other topics, save the Neutralize topic for
last.  When you get to that last topic, you will get a choice: whether to
convince Richard to surrender himself or to just hand him over to the
authorities.  Choose as you please, because your choice will not affect
the storyline.  Another cutscene will then follow, bringing us back to
2008, but switching the story now to Paloma’s point-of-view.

Killer’s House (Paloma: 2008)

THE FALLOUT SHELTER:

Paloma’s Cell

           
Exhaust the conversation.  A short cutscene will follow.  Check out
your New Objectives.  Close up on the slot in the lower part of the door,
to get a short cutscene.  Click on the Talk icon on the opposite
cell.  A man will appear in that cell.  Talk to him.  Exhaust
the conversation, but it will be interrupted by another short cutscene. 
Talk to that man again, to learn that his name is Anderson.  You can try
to talk to him once more, but there is nothing further to discuss.  So
step out of the close up on the slot; but then, go back in again, to get a
close up this time of the fork lying out in the corridor.  Click on the
fork, but it is too far.

           
Step out of the close up on the door.  Click at the bottom-center of your
screen to go to that side of the room.  Click on the Big Wooden Crate,
to the right of the bed, to move it to the center of the room.  Go back to
that wall where the Crate had stood.  Pick up the METALLIC PIPE
lying on the floor in the middle of the two metallic shelves on your
right.  Click on the gear icon on the right of the bed, to move the
bed to the right.  Click on the Box of Cookies lying in the left
portion of the bed.

           
Pick up the STRING, one of the six rolls at the bottom of the metallic
shelves on your left.  Try to open the Gray Cabinet left of those
shelves, but it is locked.  Use the METALLIC PIPE on the Gray
Cabinet, to pry open its door.  A MAGNET falls out as the door
opens.  Pick up the Magnet from the floor, and the PLASTIC CAN from
inside the Cabinet.

           
Step out of the close up on the Cabinet.  Go back to the Cell door. 
Close up again on the slot in the lower portion of the door.  Combine the STRING
+ MAGNET, and use the resulting combination to retrieve the FORK
from the corridor outside.  [Note: you get only a split-second view
of the inventory as the fork disappears from the corridor floor.]

Step out of the close up on the door.  Go
right, along the wall in front of you.  Click on the Vent in the
upper-right portion of that wall, but it is too high to reach.  Click on
the Pipes along the bottom of the wall, under the vent, to hear Paloma’s
comment.  Put the PLASTIC CAN there.  Click on the
magnifying-glass icon on the Vent, to climb up and get a close-up of that
Vent.  Use the FORK to unscrew the two screws, one by one, on
either corner at the top.  Click on the gear icon now on the Vent
to remove the grate.  Step inside the shaft, and a cutscene will bring you
out into the Main Corridor.

Corridors

           
Close up on Anderson’s cell on your right.  Try to talk to him, but he has
nothing new to say.  Step out of the close up.  Click on the Grate
on the floor between the two cells, to hear Paloma’s comment.  Go up the Ladder
at the end of the corridor in front of you, but the Hatch is locked. 
Close up on the Wall Switch, left of the Ladder.  Click on the gear
icon on the Switch.  Step out of the close up, and go up the Ladder
now.  A cutscene follows.

           
The red pulsating aura around the screen indicates that Paloma is hurt. 
But don’t worry.  She just needs some First Aid; and, since there is no
countdown-clock, we don’t have a time limit to get her that Aid.  Go into
the Side Corridor to the right of the Ladder.  Open the Wall Cabinet
on your right.  Pick up the FIRST-AID KIT (left of the Top
Shelf).  As the Kit appears in your inventory, click on it and then, on
Paloma’s I.D. Card on your left, to have Paloma use that Kit.  You will be
automatically brought out of your Inventory Menu.  The red aura around the
screen is gone, indicating that Paloma is okay now.  Pick up the COLORED
DISINFECTANT SPRAY
from the right of the Top Shelf.  Click on the
small Box in the Bottom Shelf, to learn that it is an empty box of
Amphetamines.

           
Step out of the close up on the Medicine Cabinet.  Click on the Camera
(with the orange light) in the top-left corner of the ceiling above the
door.  Use the COLORED DISINFECTANT SPRAY on this Camera.  A
cutscene will follow.  Feel free to check out the large Gray Wall
Cabinet (
Storage) on your left, but we don’t need to store anything.

           
Click on the Ladder at the bottom-left corner of the screen, but Paloma will
refuse to go up again.  Click on the Camera in the upper-left
corner of the ceiling above the Ladder.  Use the Spray to "neutralize"
this Camera as well.

Feel free to talk to Anderson in his cell on
your right; but he has nothing new to say.  So, click at the bottom-center
of the screen until you get to the other end of the Main Corridor, i.e.,
opposite the ladder.  Use the Spray to "neutralize" the Camera
in the upper-left corner of the screen.  Click on the Electronic Lock
left of the door in front of you, but Paloma does not have the Key to it. 
Click on that Door, to hear Paloma’s comment.  Put the METALLIC
PIPE
on that door, to barricade the door and hear another comment.

           
Click on the gear icon on the door on your right, to find that the door
is locked.  Click on the magnifying-glass icon at the lower part of that
door, to see Victoria inside.  Talk to her, to get a New Objective. 
Exhaust the conversation.

Step out of the close up on Victoria’s
Cell.  Go and talk to Anderson in his cell.  Exhaust the
conversation.  Step out of the close up on Anderson’s cell.  Try to
open Paloma’s cell door, but it is still locked, of course.  Close up on
the Digital Lock on the wall, right of the door.  But we don’t know
the code.  Step out of that close up, and talk to Anderson about this
lock.  He tells us that the code to Paloma’s cell door consists of 5 or 6
numbers; that he is sure the code begins with a 4, and thinks that the last
number is a 5.  But we still need more information.

           
Go and talk to Victoria again.  She tells us about that list of codes in
which her name is associated with STANTON, while Paloma’s is associated
with MARTIN.

The Digital Locks

           
The key to this puzzle is as follows.  As you know, there are 26 letters
of the alphabet.  To decode, you must transcribe each letter of the Name
associated with the Code into the number of the order in which that
letter appears in the alphabet.  (Thus, A = 1, B = 2, C = 3, etc.) 
If the number consists of two digits, you must add the two digits together to
get a single digit.  (Thus, for example, Z = 26 = 2 + 6 = 8.)  As
Victoria indicated, the Name associated with the Code for the Digital Lock to
Paloma’s cell door is MARTIN.  So we decode it as follows.

M = 13 = 4

 A = 01 = 1

 R = 18 = 9

 T = 20 = 2

  I = 09 = 9

 N = 14 = 5

           
Go to Paloma’s cell door, close up on the Digital Lock right of the door, and
click in the above code = 4 – 1- 9 – 2 – 9
– 5
; and
then, on OK.  You will hear the door unlock, and get a cutscene of the
door.  Step out of the close up on the Digital Lock, and enter Paloma’s
cell.

* * * * * * * * * * * *

           
Go to the Bed at the bottom of the screen.  Click on the gear icon
on the right of the Bed, to move the Bed to the left.  Click on the Crack
in the Wall
between the Metallic Shelves on your right, to get a close up
of the Crack.  Use your MAGNET + STRING (or you can separate the
combination, and just use the MAGNET) to retrieve the RING from
that Crack.  Paloma will comment.

Step out of the close up, leave the cell, and
go talk to Anderson in his cell across the corridor.  Exhaust the
conversation.  [Note: if you give him the ring first, the
conversation will be interrupted.  So you will have to click on him again,
to complete the conversation.]

* * * * * * * * * * * *

           
Go to Victoria’s cell, at the lower-left corner of the screen.  Close up
on the Digital Lock right of the cell door.  We use the same technique as
we did to open Paloma’s cell door to figure out the Code for the Digital Lock
to Victoria’s cell.  As Victoria indicated, the Name associated with that
Code is STANTON.  So we decode it as follows.

S = 19 = 1

T = 20 = 2

A = 01 = 1

N = 14 = 5

T = 20 = 2

O = 15 = 6

N = 14 = 5

           
So, click in the above code = 1 -2 -1 – 5 – 2 – 6 – 5; and then, on OK.  You will hear the door
unlock, and get a cutscene of the door.  Step out of the close up. 
Enter Victoria’s cell, and talk to her.  [Note: a New Objective
notification will appear but, if you stop the conversation there and check out
your objectives, you will find that there is really no new
objective.  So, it is a technical bug in the game, of course.]  Click
on the topic of the Amphetamines, to give the pills to Victoria.  A
cutscene and dialog will follow.  The story will then switch to Victoria’s
point-of-view.  [But note: there will be no Auto-Save or caption
(like the one I have given below) when the story switches the point-of-view
this time.]

Killer’s House (Victoria:
2008)


Fallout Shelter


Victoria’s point-of-view will begin as a New Objective notification appears in
the upper-left corner of the screen, and a Note in red appears at the bottom of
the screen informing that the objects from Paloma’s inventory have been
transferred to the Storage, i.e., the Gray Cabinet out in the Side
Corridor.


Talk to Paloma.  Exhaust the conversation.  Pick up the GINGER
BREAD
from the table on your left.  Click on the METAL DETECTOR
on the floor, left of that table, to hear Victoria’s comment.  Pick up the
Metal Detector.  There is nothing else of interest in this cell.  So,
step out of the cell.  A cutscene will follow.


The New Objective told us to explore the Shelter.  Start with the end of
the corridor at the bottom of the screen.  Click on the Gray Door
in front of you, to learn that it is locked.  Click on the Electronic
Lock
left of the door, to hear a comment from Victoria.


Go back down the corridor past
Victoria’s cell.  Click on the Grate on the floor between Paloma
and Anderson’s cells.  Enter Paloma’s Cell on your left. 
Click on the Grate on the floor on your right.  Come down to the
wall at the bottom of the screen.  Close up on the Crack on the Wall between
the Metal Shelves on your right; but there is nothing there now.  Step out
of the close up on the Crack.  Click on the gear icon on the Bed,
to move the bed to the right.  Click on the empty Package of Cookies
on the left of the bed.


Step out of Paloma’s Cell,
and close up on Anderson’s cell at the bottom of the screen.  Talk
to Anderson.  Click on the topic "Ginger Bread" to give
him that bread; then, exhaust the conversation.  You can try to talk to
him again, but he has nothing new to say.  So, step out of the close up on
his cell.  Try to talk to Paloma, now standing left of Anderson’s Cell.  But
she has nothing new to say either.


Go into the Side Corridor, right of the Ladder.  Open the Medicine
Cabinet
on the wall on your right.  Click on the small Box in
the bottom shelf, to hear Victoria’s comment.  Step out of the close up on
the Medicine Cabinet.  Feel free to check out the Gray Cabinet
(Storage) on the wall on your left.  But I would suggest not cluttering
our inventory with any of Paloma’s objects just yet.  So, leave the
Storage as it is, for now.


Now that we have explored the Shelter, it is time to see what we can find
outside.  So, click on the Ladder, now in the lower-left corner of
the screen.  A cutscene and dialog follow.  Click on the Ladder
again.  Another cutscene and then, a comment will follow.


The Backyard


Check out your New Objective. 
Click on the Man hanging down by a rope from a tree across the fence on
your left, to get a close up.  Victoria will comment.  Step out of
the close up, to hear another comment.  Go to your right, past the Gray
Trailer, but BE CAREFUL!  There are three Mines (in a row,
from Victoria’s point-of-view) on the ground in front of the Back Porch
stairs.  Thus, there is no way to go up the stairs, or go past them in the
Backyard, without setting off one of these mines, causing Victoria to get hurt.


Note:  Even if you do accidentally set off one
of these mines, don’t worry.  It’s not Game-Over, nor will you get a
Countdown clock.  You will see the red pulsating aura around the screen,
meaning you will just have to go back down into the Shelter and use Paloma’s
First-Aid Kit (in the Gray Storage Cabinet) to treat Victoria.  In order
to avoid all this hassle, however, proceed as follows.


Neutralizing the Mines


Look for the White Icon on the ground in front of the Back Porch
stairs.  (See Picture "A" in the Set of four pictures
below.)  Click on that white icon, to get a close up of that spot and hear
Victoria’s comment.  Click on the gear icon, to expose the mine;
and then, on another white icon to hear Victoria’s comment and also get a New
Objective.  Step out of the close up.  Click on the ARCHERY TARGET
on your left, to hear Victoria’s comment.  Pick up that Target (but you
might have to rearrange the Metal Detector in your inventory to make room for
the Target).  Put this Target on the Mine you just found in front of the
stairs.


We must now find the other two Mines in this area.  Open your Inventory
Menu.  Set your METAL DETECTOR to 1.  Close the
Inventory Menu, and look for the Metal Detector Alarm (MDA) cursor on the
ground between the stairs and the Archery Target.  (See Picture "B"
in the Set of four pictures above.)  Bring out the Metal Detector from
your inventory, and click on the tool icon now in that cursor spot below
the stairs, to see a cutscene of Victoria examining the spot with the Metal
Detector.  She will then confirm that it is a Mine.  Click on the gear
icon now on that spot, to expose the Mine.


Go down into the Shelter.  Talk to Paloma.  Enter her cell on your
left.  Click on the VENTILATION GRATE on the ground on your right,
to hear Victoria’s comment.  Pick up that Grate, and go back out to the
Mine you just found below the Back Porch stairs.  Put the Grate on that
Mine to neutralize it.


But we are not done yet!  Note another MDA cursor below and to the right
of the Archery Target on the ground.  (See Picture "C" in
the Set of four pictures above.)  Note:  Even though you
might see the MDA cursor, the Metal Detector setting went back to "0"
when you went down into the Shelter to get the Grate.  So, Reset the
Detector to 1
.
  Bring out the Detector from your inventory, and
click on the tool icon now on the spot where you just saw the MDA
cursor, to have Victoria check it out.  She will not comment this time,
but you will find a gear icon now on that spot.  Click on that gear
icon, to expose the Mine.


Go back down into the Shelter. 
Click on the VENTILATION GRATE on the ground between Paloma and
Anderson’s cells, to hear Victoria’s comment.  Pick up that Grate, return
to the Backyard, and place that Grate on the Mine you found below the Archery
Target.  (See Picture "D" in the Set of four pictures
above.)


* * * * * * * * * * * *


Now that we have neutralized all the mines in the Backyard, go back down into
the Shelter.  Retrieve all the objects from the Gray Storage Cabinet
in the Side Corridor.  Come back out into the Backyard.


Go right, past the neutralized
Mines, towards the Fence that divides the Front and the Back
Yards.  But BE CAREFUL!  There is an electric current running
through the Fence.  So if you try to go through, Victoria will get hurt.


Note:   Again, don’t worry if you missed
this trap and Victoria got hurt.  It is not Game-Over, nor is there a
Countdown clock.  You will see a red pulsating aura around the screen,
indicating that you just need to use the First-Aid Kit in your inventory.


There are actually two icons around
the Fence Entryway.  The footprint icon allows Victoria to go
through the Fence, causing her to get hurt.  But there is also a white
icon that is just before the footprint icon, on the dirt before the
Entryway.  Click on this White Icon, to hear Victoria’s comment and
receive a New Objective.


Neutralizing the Entryway


Note the Grate lying in the lower-right corner of the screen.  If
you click on it, Victoria will comment about using it to neutralize a
mine.  You will then be able to pick up that GRATE PIECE.  But
we have already neutralized all the mines!  So there is no need to click
on, or pick up, this Grate.  [Apparently, this was just another Grate
introduced in the game for you to use, in case you forgot the one in Paloma’s
cell.]


Click on the small Gray Box on the Fence, left of the Entryway. 
Victoria’s comment indicates that the box might control the electric current
running through the Fence.  But the box is locked, and we don’t have any
picking tools right now.


Note the MDA cursor on the ground in the lower-left portion of the
screen.  Set your Metal Detector to 4.  Bring out the Detector
from your inventory, and click on the tool icon now on the spot where
you had seen the MDA cursor.  Victoria will examine the spot, and tell us
that it is Part of a Half-Buried Bicycle Wheel.  [Recall that we
had found this object during the day as well, when we first used the Metal
Detector to explore these grounds.]  Click on the gear icon now on
the spot, to get a close up of the Wheel and to hear Victoria’s comment. 
Pick up the IMPROVISED PICKING TOOLS.


Step out of the close up on the Wheel.  Use the Picking Tools to unlock
the Gray Box on the Fence.  Close up on the Box.  Click on the empty Dark
Slot
("Base") on your left, but we don’t know yet what can
be plugged in here.  Click on the Pattern & Some Initials at
the bottom of the Box, but we don’t know yet the purpose of these carvings
either.  Click on the Metallic Plate on the Keypad on your right,
to hear Victoria’s comment.  Use the FORK to unscrew the
Plate.  Click on the Keypad, to hear another comment.  Pick up the KEYPAD
BOX
.


The Entryway trap has been
neutralized!  So step out of the close up on the Gray Box, and go through
the Fence.  A cutscene will bring you into the Front Yard.


The Front Yard


Try to move further down in the Front Yard, but you will be stopped
automatically as you receive the notification of an Unread Message in your cell
phone.  Check out the message ("Text Unknown," in
Messages & Contacts) in your cell phone.


Click at the bottom-center of your screen a couple of times, until you
see a Police Officer’s Body in the lower-right corner of the
screen.  Close up on this body, to hear Victoria’s comment.  Step out
of this close up; and then, close up on the other Police Officer’s Body
on your left, to hear another comment.


Go to the Fence on your left.  Click on the white icon on the
Fence, to learn that there is electricity running through it.  A gear
icon now appears on the Fence.  If you click on this icon, Victoria will
get an electric shock.  But don’t worry.  She will not be hurt
seriously enough to require even First Aid.  She will also refuse to touch
the Fence, if you click on it again.


Click on the end of the Fallen Tree Trunk touching the extreme
left-center of the screen.  This will allow you to see the third Police
Officer’s Body
, lying on the far side of the Yard away from the house and
below the first two bodies we have already checked.  Close up on this
body, to hear Victoria’s comment.  Pick up the POCKET-KNIFE, from
your left.


Step out of the close up on this
body.  Click on the magnifying-glass icon in the lower-right corner of the
screen, to close up on the fourth Police Officer’s Body (lying on the
ground in front of the front of the Sheriff’s car) and to hear another
comment.


Click on the Hood of the Sheriff’s Car, to hear Victoria’s
comment.  Close up on the fifth Police Officer’s Body, now
right of the Sheriff’s car, to hear Victoria’s comment.  Pick up the BROKEN
QUARTZ WATCH WITH BATTERY
, lying on the ground between the officer’s right
leg and arm.


Step out of this close up, and open
the Trunk of the Sheriff’s Car.  A cutscene and a comment will
follow.  Pick up the MULTISPECTRAL LAMP from your right.  If
you click on the white icon inside the trunk, Victoria will merely
repeat the comment she just made.


Step out of this close up, and go up the stairs leading to the front of the
house.  Click on the magnifying-glass icon on the reddish-brown dot on
the left post at the top of the stairs, to get a close up of a Bullet Hole
Click on this Hole, to hear Victoria’s comment.  Go through the Front Door
to enter the house.


The Hallway


Take a few steps into the Hallway.  Victoria will automatically
stop.  Close up on the Dead Rat down on your left, to hear
Victoria’s comment.  Step out of the close up, to receive a New Objective.


Neutralizing the Hallway Traps


There are actually two traps in the Hallway: one is at the Living Room doorway,
and the other is at the bottom of the stairs leading up to the Second
Floor.  Thus, Victoria will get hurt if she tries to enter the Living Room
or go upstairs.


Note:  Don’t worry though if you missed either
of these traps and Victoria got hurt.  It will not be Game-Over, nor will
you get a Countdown clock.  You will see a red pulsating aura around the
screen, meaning that you must treat Victoria with your First-Aid Kit.  In
fact, that is one way to neutralize these traps.  Enter the Living
Room and go upstairs, one by one, using the First-Aid Kit to treat Victoria
each time she gets hurt.  Keep in mind though that there are only two
"treatments" left in the First-Aid Kit.  So, even though you
will be able to neutralize both the Hallway traps this way, you will also use
up the First-Aid Kit.  Proceed as follows, if you would like to try
something more clever.


Use the COLORED DISINFECTANT SPRAY on the tool icon on the Living
Room doorway.  A cutscene will follow.  Use the POCKET-KNIFE
to cut the wires stretching across the Living Room doorway, to neutralize this
trap.  Feel free to close up on the Dead Rat again, to hear another
comment.


Click at the bottom-center of the screen twice, to move slowly
towards the stairs leading up to the Second Floor.  Don’t click on the footprint
icon on the stairs, of course, or Victoria will get hurt!  Rather,
click on the white icon on the Four Black Holes, vertically
aligned under the top painting which is to the right of the Kitchen door. 
Victoria will comment.  [Note that the footprint icon on the stairs
has become a tool icon.]  Click on a similar set of Four Black
Holes
, vertically aligned on the wall left of the Cellar door, to hear
another comment.  Use the SPRAY on the tool icon on the
stairs, to see a cutscene.  Use the POCKET-KNIFE to cut the wires
stretching between the two sets of Black Holes, to neutralize the last Hallway
trap!


* * * * * * * * * * * *


Recall that our main objective is to try our luck on the computer down in the
Computer Room.  But I prefer to explore the rest of the house first, to
see if we can find something new that might prove to be useful later. 
Start with the Kitchen on your left.


The Kitchen


Click on the Dumbwaiter on Victoria’s right, to learn that its door has
now been "blocked."  Close up on the Refrigerator on your
left.  Click on the Red Envelope inside, to hear Victoria’s
comment.  Pick up the Envelope, and its contents will be presented on your
screen.  [If you would like to refer to this information later, you will
find it stored as "Contents of Red Envelope in the Kitchen" in
the Documents folder of your cell phone.]


There is nothing else new in the Kitchen.  Before we leave, however, we
need to make some room in our Inventory.  So go to the Storage Cabinet
up on your left, and put away your First-Aid Kit and the Metal Detector. 
Step out into the Hallway, and go upstairs.


The Second Floor


·       
Start with the Bedroom on your left.  But there is nothing
new there.  So step back out into the Hallway.


·       
Go into the Bathroom on your right.  Close up on the Medicine
Cabinet
on your left.  Pick up the FIRST-AID KIT from the top
shelf.  Step out of the close up.  There is nothing else new in this
room.  So step back out into the Hallway.


·       
Go into the Charred Room on your right.  Pick up the Red
Envelope
lying on the floor, under the mannequin on your left, to hear
Victoria’s comment.  The contents of the Envelope will then be presented
on your screen.  [If you would like to refer to this information later,
you will find it stored as "Contents of Red Envelope in Charred Room"
in the Documents folder of your cell phone.]  There is nothing else new in
this room.


·       
Go out into the Balcony on your right.  But there is nothing
new here at all.  So go back into the Charred Room and step out into the
Hallway.


·       
Go to the Roof through the Brown Door on your right. 
Click on the white icon on the small object lying on the ground in front
of Victoria, in the corner of the Roof on your left, to hear her comment. 
Pick up the REMOTE CONTROL (NOT INITIALIZED).  Click on the white
icon in the center of the railing’s top (where Victoria had found a device with
the satellite dish during her daytime investigation of the house), to hear
another comment.


* * * * * * * * * * * *


We are done on the Second Floor.  So, go back down to the Main Hallway on
the First Floor.  Enter the Kitchen.  Go to the Back door, but you
will be stopped before you reach it as you receive the notification of an
Unread Message in your cell phone.  Check out the Message (the unopened
"Text Unknown," in Messages & Contacts) in your cell
phone.


Go out of the Back Door, and down the stairs.  [Note: if you hadn’t
opened the new gate at the bottom of these stairs when you were out in the
Backyard earlier, then a gear icon (instead of the usual footprint
icon) will appear on the stairs.  Moreover, when you click on this gear
icon at this point in the game, you will get a rather funny cutscene: Victoria
climbing down from the other side of the stairs!  But don’t
worry.  It is just a technical bug in the game, but nothing that will
affect your gameplay in any way.]


Go down into the Shelter.  Talk to Anderson in his cell.  Exhaust the
conversation.  Go back up to the Backyard, and use the Back Porch door to
return to the Kitchen.  We need to make some more room in the
Inventory.  So use the Storage Cabinet again to put away everything
but the Spray, the Pocket-Knife, and the Multispectral Lamp.  Step
out of the Kitchen, and enter the Living Room on your right.


The Living Room


Go to the window on your left, to get a closer shot of that area.  Note
the two new and rather tall objects on the floor, in front of that
window.  Pick up the REFLECTOR, right of the coffee table.
 Click on the white icon on a similar but brown object, left of the
television, to hear Victoria’s comment.  Pick up this object = LASER
TRANSMITTER
.  [Note: You will have to rearrange your inventory
to make room for it.]  Click on the gear icon on the television, to
see the video clip we had seen in Paloma’s section at the beginning of the
game.


There is nothing else new in this room.  So step out into the Main
Hallway, and go down the Cellar Door.  Go left to enter the Workshop.


The Workshop


Click on the gear icon on the Blackboard down on your left, to
see a short cutscene.  Click on the Dumbwaiter behind Victoria, to
hear a comment.  Click in the lower-left corner of the screen, once or
twice, to approach the entrance to the actual Workshop Area.  Go
right to enter this area.


Click on the orange Gas Cylinder on the floor, right of the saw table,
to hear Victoria’s comment.  Click on the Furnace, right of the Gas
Cylinder, to hear another comment.  Click on the tool icon on the Small
Wheel
on the Furnace, to hear yet another comment.  But we don’t have
the tool (either in our inventory or down in the Kitchen’s Storage
Cabinet) that can be used on this Wheel.  So leave the Wheel alone for
now.


Note:  There are actually a few other new
objects in the Workshop Area, but there are no icons on them to enable us to
examine or interact with these objects.  Thus, there is nothing more we
can do at the Workshop, at least right now.  So leave the Workshop, to
return to the landing in front of the Blue Door.


* * * * * * * * * * * *


We are ready to go into the Computer
Room now.  So go through the Blue Door.  Try to enter the Computer
Room, but you will be stopped by the notification of an Unread Message in your
cell phone.  Check this message (the unopened "Text Unknown,"
in Messages & Contacts) in your cell phone.  Enter the Computer Room.


Text Box: WARNING!!!
Save your game here!  Not because of the storyline but because of a technical bug that is sometimes triggered in the game sequence that shortly follows.  The bug is in fact serious enough to prevent you from finishing the game!  So, if the bug is triggered and you have saved the game here, you can just come back to this Save to try again.  Otherwise, you will have to go all the way back to wherever you had last saved your game.


The Computer Room


Recall that the Computer Room is divided into two parts: the Empty Section,
which has nothing but three oil or gas cans along the wall right of the door;
and the Main Section, which is filled with all kinds of things (autopsy
table, stereo, computer, etc.)  Click on the second Oil or Gas Can
on your right, to go to the end of the Empty Section.  But BE CAREFUL
There is a trap set up ahead.


Note:  Again, don’t worry even if you walk
into this trap.  It will not be Game-Over, nor will you get a Countdown
clock.  A cutscene will show Victoria back outside the Computer room, and
the red aura pulsating around the screen would mean that you would have to go
up to the Kitchen, use one of the First-Aid Kits in its Storage Cabinet to
treat her, and go back to the Computer Room to neutralize this trap.  In
order to avoid this hassle, however, proceed as follows.


Click on the Electrical ("Power") Outlet, just right of the
three Oil or Gas Cans, to hear Victoria’s comment.  Click on the white
icon on the Reflector (like the one you picked up earlier in the Living
Room), just right of the end of the wall, to hear Victoria’s comment and
receive a New Objective.  Click on the Green Cylinder (with a red
light flashing on its left) on the ceiling on your right, to hear another
comment and receive a New Objective again.  [But in fact, both of these
Objectives are one and the same.  Apparently, the idea was to inform you
of the trap when you clicked on either the Reflector or the Cylinder.]


Neutralizing the "Basement" Trap


Click on the White Base up on the second pipe on the wall on your left,
to hear Victoria’s comment.  Place the MULTISPECTRAL LAMP on that
Base.  A cutscene will reveal the trap on your right: a web of Yellow
Laser Beams
stretched beyond the entryway to the Main Section of the
room.  Victoria will move close to that web, and comment.  Click on
the magnifying-glass icon on the web on your right to get an aerial view of the
trap.


Text Box: WARNING:
DO NOT TRY TO DO ANYTHING
WHILE YOU ARE IN THIS CLOSE UP!
The close up is no doubt useful in getting the "aerial" view of the trap but, if you start doing things while you are in this close up, a TECHNICAL BUG will prevent you from accessing the area on your right unless you are in this close up: even if you step out of the close up, the magnifying-glass icon will cover the entire area on your right, thus becoming your only means of accessing that area.  The problem arises from the fact that the close up will also "freeze" Victoria at her starting position before the Web.  She will take the initial steps of solving this puzzle without leaving her position.  But the last steps of the solution require her to move.  So her inability to move will prevent you from finishing the puzzle and, thus, the game itself!


Step out of the close up on the Web on your right.  Click on
the Electrical Outlet on your left, to hear Victoria’s comment. 
Plug your LASER TRANSMITTER into this Outlet.  A web of Red
Laser Beams
will now appear along the Yellow Beams on your right. 
Note that the (dangerous) magnifying-glass icon on the Web has also now
disappeared.  Moreover, now that Victoria is aware of the trap and
can see how it is laid out, she will not (for the most part of the puzzle) go
through any beams that are not safe to cross.  Thus, you can now move
through the Web relatively safely.


Click on the white icon in
the area around the Laser Transmitter you just plugged in, to hear Victoria’s
comment.  Click inside the Web on your right, to move Victoria into the
Main Section of the room, and get an aerial view of the trap without being in a
close up.


Note:  Refer to the following picture as you
read the instructions below.  [But, please, do not be confused to see
Victoria appear in two places in this picture.  I have combined two
pictures, of course, to give you an overall layout of the trap, so you would be
able to see all the points of the room you must visit to neutralize this trap.]


  • Click on the Laser
    Transmitter
    ("A" in the above picture), to
    learn that it can turn 90 degrees.  Click on the Transmitter again,
    to turn it.


  • Click on the tool icon
    on what looks like a metal plate, below the above Transmitter, to learn
    that it is a "Support Base" for placing a
    Reflector.  So bring out the REFLECTOR from your Inventory and
    put it on this Base.  (See "B" in the above
    picture.)


  • Click on the Laser
    Transmitter
    ("C" in the above picture), to
    hear Victoria’s suggestion about changing its trajectory.  Click on
    the Transmitter again, to make this change.


  • Go to the lower-left corner of
    the room.  Click on the Device with the Red Blinking Light in
    that corner ("D" in the above picture), to hear
    Victoria’s comment and receive a New Objective.  [But, again, it is
    actually the same Objective we got at the beginning of this puzzle.] 
    Click on that Device again, to turn it off.


  • We must now go to the lower-right
    corner of the room.  But you cannot go through the Green Beams
    to do so.  Be careful because it is still possible to
    trigger the trap if you click on the wrong places a few times.
      Click
    just left of the Green Cylinder, to bring Victoria towards the entryway
    and to shift the aerial view to the right side of the room; and
    then, click in the lower-right portion of the screen to bring Victoria to
    the corner right of the Computer Table.


  • Click on the Device with the
    Red Blinking Light
    ("E" in the above picture),
    to hear Victoria’s comment.  Click on that Device again, to turn it
    off.


A cutscene will follow, ending with
the disappearance of the Web of Laser Beams around the room.  We have
neutralized the trap in the Computer Room!


* * * * * * * * * * * *


There is not much of the house left to explore in search of something new or
that might prove to be useful later.  So let’s finish that exploration
before attending to our Main Objective of trying our luck on the computer.


You won’t find anything else new in
the Computer Room.  So go to the door under the Red Bulb, left of the
large Blue Cupboard.  Enter what the developers call the
"Basement," but what I called the "Underground" in order to
distinguish this area from the non-secretive parts of the Basement: the
Workshop and the Computer Room.  In fact, you can think of the following
area as the secret part of the Basement.


The Secret Part of the Basement


  • The Locker Hallway:  The only thing new here is that Victoria can now open the Gray
    Locker
    , but there is nothing in this Locker.


  • The Electric-Chair
    Room:
      There is nothing new here except that
    there are two white icons (one above the other) now on the
    door marked "Paloma," and the one at the bottom prompts Victoria
    to make a new comment.


  • The Cell:  The only thing new here is a little Yellow
    "Sticky" Note
    on the small mirror above the washbasin. 
    Click on this Note to hear Victoria’s comment, but we will not get a close
    up or otherwise learn what the note said.


  • The Morgue:  There are only two new things here — (1) the Keypad
    on the wall left of the door is no longer working; and (2) the comment
    that Victoria makes when you click on the white icon on the Tiles
    under the Countdown Clock
    .


This concludes our exploration of
the house.  So go back down to the Locker Hallway, and return to the
Computer Room.


The Computer Room: Discovery


Close up on the Computer Table.  Click on the Telephone, to hear
Victoria’s comment.  Click on the computer’s Keyboard.  A
cutscene, a comment, and then a dialog will follow.  At the end of the
dialog, you will receive a New Objective as the Countdown clock begins to
run.  But don’t worry.  You will have more than enough time to beat
this clock.  In fact, you do not even have to save your game!


Step out of the close up on the
computer.  You will get an obscure screenshot.  If you listen
carefully, you will also hear the ominous sound of footsteps at a
distance.  Again, don’t panic.  Go to the right of the Computer
Table.  Open the Vault in the wall; and then, click inside
the Vault.  The Countdown clock will disappear, and you will get another
cutscene.  At the end of this cutscene, you will receive another New
Objective.


Note:  You can call the Killer right now, if
you like.  He will even answer, and a dialog will follow.  But you
will not get an answer if you call him again — at least not until after
you have set the trap for him…


Trapping the Killer


Go up to the Main Hallway on the First Floor.  You cannot go out into the
Front Yard because you will find the Killer is waiting there for
Victoria.  Feel free to try it!  Step out of the Front Door and go
down the stairs.  You will get a screen shot of the Killer.  You will
then see Victoria back upstairs, as the Countdown clock begins to run! 
Just step back inside the house, and the clock will stop.


Go into the Kitchen.  Retrieve all the objects from the Storage Cabinet
[Note: You will be able to fit everything in your inventory if you have
the String combined with the Magnet.]  Use the Back Door to go out into
the Backyard.  Go to your right, towards the Fence that divides the Front
and the Back Yards.  Close up on the Gray Box on the Fence, left of
the entryway.  You might have to wait for a few seconds before the tool
icons appear on the two slots in the middle of the box.
  After
they do, plug the REMOTE CONTROL (NOT INITIALIZED) into the slot on your
left, and the KEYPAD BOX into the slot on your right.


We must now figure out the code to
punch in the Keypad Box to initialize the Remote Control.  Note the Pattern
& Initials
at the bottom of the Gray box.  Check out the document
"Photo of Engraving taken with the Smartphone" in the
Documents folder of your cell phone.  Note that the pattern and initials
that appear in this document are the same as those at the bottom of the Gray
Box.  But the document also shows some numbers which did not appear on the
Gray Box: 8541.  Punch in these numbers on the Keypad; and then, click on "OK."  The Remote Control is
initialized!


Pick up the INITIALIZED REMOTE
CONTROL
, and step out of the close up on the Gray Box.  Call the
Killer now.  A cutscene will follow.  Victoria will comment. 
You will then get a New Objective.


* * * * * * * * * *


Click on the Gray Box on the Fence now, to hear Victoria’s comment.  Close
up on the Killer.  Pick up the KILLER’S ELECTRONIC KEY from the
ground on your right (just above his left shoe).  Click on the Killer’s
head, to hear Victoria’s comment.  Click on his right hand, to hear
another comment.  Finally, but most importantly, click on his right coat
pocket.  Note the word that Victoria reads: "NAMLEKCO."


Step out of the close up on the Killer.  Try to go down into the Shelter,
but the hatch is locked now.  Go into the house, and down into the
Computer Room.  Close up on the Computer Table, and click on the
Keyboard.  Click on USER: KILLER.  Then, click on the password
choice NAMLEKCO, to be
granted access by the computer.


You can immediately see the big shock here: Internet Search deactivated
But click on that option nevertheless
(to let the computer "know" that you have seen it), to hear
Victoria’s comment.  Check out the other Main Menu options, to find the
following.


  • Photos & Videos:  This option now contains only "Photos," and there
    is nothing new there.  So return to the Main Menu.


  • Access Control:  Click on East Hatch (locked), and use the old code H103123D55
    to unlock that hatch again.  Return to the Main Menu.


  • Surveillance Cameras:  Note that the Group 6 Cameras are now
    "broken."  It is unclear and perhaps irrelevant whether
    these are actually broken or just rendered useless by the spray that we
    used on them earlier.  The point is that you cannot use these cameras
    anymore to see inside the Shelter.  Return to the Main Menu.


  • Karson File:  Victoria will comment as you click on this option.  Be sure to
    check out the picture on the second page.  Close the document,
    to hear Victoria’s comment.  You will have to close the document
    again.


Close the Computer, and step out of
the close up on the Computer Table, to receive a New Objective.  We must
now go to the Shelter, to see what we find there.


The Shelter


Check out your New Objectives.  We need to make room in our
inventory.  So use the Storage Cabinet in the Side Corridor on your
right to put away everything except the KILLER’S ELECTRONIC KEY
and the BROKEN QUARTZ WATCH WITH BATTERY.


Click on the white icon on the ground on your left, between Victoria and
the door at the end of the corridor, to hear a comment.  Go to the Main
Corridor, and enter Anderson/Karson’s Cell on your right.  A
cutscene will follow, ending with a close up of the Pictures on the wall
facing the entrance.  Step out of this close up, and close up on the Vent
above the bed.  Click on the tool icon on this Vent, to hear
Victoria’s comment.


Step out of the close up, and click on the Books on the floor in front
of the bed, to hear Victoria’s comment.  Note that a blue icon now
appears on those Books, but we would need our Kit to check it out.


Click on the Wall left of the entrance, to hear a comment.  Click
on the Grate right of the entrance, to hear another comment.  Note
that a blue icon now appears on that Grate; but, again, we would need
the Kit to check it out.


Return to the Main Corridor, and go into Paloma’s Cell across the
corridor.  But there is nothing new here.  So return to the Main
Corridor, go to your left, and enter Victoria’s Cell.  But
there is nothing new here either.


Return to the Main Corridor once again.  Click on the Door in front
of you, to hear Victoria’s comment.  Click on the Metallic Pipe on
that door, to remove it.  Use the KILLER’S ELECTRONIC KEY on the Electronic
Lock
on your left, to unlock the door.  Click on the door again, to
enter what we will call the "Killer’s Room."


The Killer’s Room


Close up on the Pictures on the wall right of the door, to hear
Victoria’s comment.  Close up on the Flag above the bed on your
right, to hear another comment.  Click on the Magazines on the
floor by the bed, to hear yet another comment.  Note the blue icon
now on the Magazines; but, once again, we would need the Kit to check out that
icon.


Click on the Stereo on the
small table behind Victoria, to turn it ON.  Victoria will comment. 
Click on the Stereo again to turn it OFF.


Open the Chest in the
lower-left corner of the screen.  Pick up the PRESSURE-RELEASE MINE,
the FIRST-AID KIT and what looks like a Brown Stick, but is actually the
Ammunition for your Gun (as confirmed by Victoria’s comment and the fact
that the gun in your Inventory is now loaded).


Step out of the close up on the
Chest, and click on the blue Map on the wall on your left, to hear
Victoria’s comment.  Pick up the gray Metallic Case from the ground
right of Victoria, to learn that it is your CSIA Testing Kit!


Close up on the Table on your right.  Pick up the POCKET-KNIFE,
the NYLON THREAD, and the ADHESIVE TAPE.  Step out of the
close up, and click on the Small Table right of Victoria, to hear her
comment.  Click on the Crossbow on the wall on your right, to hear
another comment.  Pick up the ELECTRIC EXTENSION CORD plugged in
the electrical outlet below the Crossbow.


Close up on the Desk at the bottom of the screen.  Click on the Books
on your left, to hear Victoria’s comment.  Pick up the STEEL TENSION
WRENCH
, left of the large yellow padlock.  Click on the Notepad
to get an automatic close up of its contents.  [If you would like to refer
to this information later in the game, you will find it stored as the "Report
on the Killer’s Modus Operandi
" in the Documents folder of your cell
phone.]  Click on the two Photographs on your right, to hear Victoria’s
comment.


Check out the contents of the Desk
Drawer, beginning with the Packets of Chewing Gum Sticks on your
left.  Click on those Packets, to hear Victoria’s comment.  [Note
the "brand name," or rather the logo, that Victoria reads: "Brain Jack, since 1884."  This
information will come in handy later.]  Next, click on the Documents
right of the Chewing Gum, to get a close up of their contents.  Victoria
will comment.


BEWARE!  The New Document notification that
popped up when you got the close up of the above Documents does not
relate to what you see on the screen.  You will also not get an icon on
those Documents again, after you leave this close up.  So read the
information in the close up as carefully as you like, because you will not be
able to see it again.  Also, be sure to check out the second page of the
close up, to see the pictures of the Killer who was just electrocuted out in
the Backyard.


Step out of the close up on the
Documents, to hear Victoria’s comment.  Check the Documents folder in your
cell phone to find that only a recording of the Killer’s voice ("Message
Recorded by the Killer
") was just stored as the New Document.


Step out of the close up on the Desk.  Pick up the PICK GUN
WITHOUT BATTERY
from the floor left of the Desk, to learn that it is
missing both its tension wrench and battery.  So open your Inventory Menu
and proceed as follows to fix the problems.  Combine the POCKET-KNIFE
+ BROKEN QUARTZ WATCH WITH BATTERY to obtain the QUARTZ WATCH BATTERY
Combine this Battery with the Pick Gun to obtain PICK GUN WITH BATTERY
Finally, combine the Pick Gun with the STEEL TENSION WRENCH to obtain a
completely functional Pick Gun.


* * * * * * * * * * * *


Now that we have our Testing Kit back, let’s check out the blue icons we
found.


The Blue Icon clues


Inside the Shelter


  • Killer’s Room:   Go to the Magazines on
    the floor by the bed.  Use the FINGERPRINT POWDER and then,
    the 3D SCANNER to collect the clue on those Magazines.  Analyze
    the clue.


  • Anderson/Karson’s CellUse the FINGERPRINT POWDER
    and then, the 3D SCANNER to collect the clue on the Grate
    right of the entrance.  Analyze the clue.  Go to the Books
    on the floor by the bed.  Use the FINGERPRINT POWDER and then,
    the 3D SCANNER to collect the clue on those Books.  Analyze
    the clue.


  • Side Corridor:  Click on the blue hand icon on the
    floor in front of the door, to learn that there is some Blood
    there.  Use the SAMPLING SWAB to collect that clue. 
    Analyze the clue by first running the Chemical Analysis and then, the
    Database Analysis.


In the Front Yard


  • Climb up the stairs leading to
    the Front Door of the house.  Click on the magnifying-glass icon on
    the left Post at the top of the stairs, to get a close up of the Bullet
    Hole
    .  Use the SAMPLING TONGS to collect that clue. 
    Analyze the clue by first running the Chemical Analysis and then, the
    Database Analysis.


* * * * * * * * * * * *


Go back into the Shelter.  Enter Anderson/Karson’s Cell on
your right.  Close up on the Vent above the Bed.  Combine the PRESSURE-RELEASE
MINE
with the ADHESIVE TAPE, and attach the resulting combination to
the Vent.  You can click on the Vent again, to learn that we are not done
yet.  Attach the NYLON THREAD to the Mine already attached to the
Vent.  A cutscene will follow that will bring you out of the cell. 
Go back into the cell, and climb into the Vent opening to arrive on the other
side of the Shelter.


Note:  Recall that the computer back in the
house had indicated two hatches: the East Hatch and the West Hatch.  Since
we used the East Hatch to enter the Shelter, and did not find any other hatch
in the part of the Shelter we just left, that must have been the Eastern
section of the Shelter.  So I will call the following the Western section
of the Shelter.


The Western Section of the
Shelter


You will find Victoria standing in the middle of a Corridor.  Note that we
cannot use the vent we had used to come down into this area to return to the
Eastern section of the Shelter.  But don’t worry.  There is
another way to get back there, as you shall shortly see.


Click on the Blue Door in
front, to learn that it is locked.  Close up on the Electronic Lock
on the wall left of the door, to learn that it has a different color than the
ones we have seen before.  But then, there is no icon on this lock, so we
cannot even try a key on it.


Step out of the close up on the Electronic Lock, and click on the Gray Rusty
Door
on your left.  Victoria will comment.  Use the Pick Gun to
unlock the door, and enter what Victoria later calls the Control Room.


The Control Room


Click on the Computer on your left, to learn that its power is
OFF.  Close up on the Table on your left.  Click on the gray
box (Processor) on your right, to hear Victoria’s comment.  Click
on the DVD left of the Processor, to hear another comment.  Pick up
the COMPUTER KEYBOARD and the WRENCH.


Step out of the close up on what we will call the Processor Table.  Click
in the lower-left corner of the screen to approach the Ladder in that
corner of the room.  Try to go up the ladder, but the Hatch above
it is locked.  Close up on the Switch on the wall left of the
Ladder.  Click on the Switch to unlock the Hatch.  Step out of the
close up, click on the Ladder, and a cutscene will bring you in that part of
the Backyard where a man is hanging by a rope from a tree.


The Body in the Backyard


Close up on the gray Plate on the ground above the Hatch, to learn that
the Reference Number for this Hatch = H061914.  Step out of this
close up.  Close up on the Man Hanging down from the Tree, but we
can’t do anything because there is no icon on him.  [If you step out of
the close up and then close up again, Victoria will repeat the comment she had
made before, from the other side of the Backyard.]  Step out of the close
up, and use your POCKET-KNIFE to cut the Rope tied around the
tree on your left.  A cutscene will follow.


Close up on the Body again, to hear another comment.  Click on the white
icon on a tiny square object on the ground by the man’s left arm, to learn that
it is a Memory Card.  Pick up the Card to learn that you have
received: (1) New Data waiting to be transferred to your Kit, and (2) a New
Document.


Open your Inventory Menu.  You can check out the New Document ("Incomprehensible
Recording
") in your cell phone, but you will hear only some hissing sounds. 
Click on the Kit to bring it to the center of the screen.  Click on the
data in the cell phone on your left, to transfer it to the Kit’s inventory
section.  Click on that clue in the Kit’s inventory section to transfer it
to the blue screen at the top of the Kit.  Analyze this clue, but you will
get only 50% results along with a note that reconstruction is impossible. 
Click on the results to "open" the file, but you will just hear the
same hissing sounds you heard on the recording stored as a New Document.


There is nothing more we can do in this area.  So go back down into the
Control Room, and step out into the Corridor.


In the Corridor


Click on the Electrical Outlet
(with the two tiny red lights on top) down on the wall left of the Control Room
door, to hear Victoria’s comment.


Click in the lower-left corner of your screen to approach the second Blue Door
in this Corridor.  Click on the red smudge on the floor right of this Blue
Door, to learn that it is Fresh Blood.  Use the SAMPLING SWAB
from your Kit to collect this clue.  Analyze the clue by first running the
Chemical Analysis and then, the Database Analysis.


Go through the Gray Rusty Door on your left, to find yourself back in
the Eastern part of the Shelter.  But we don’t have anything to do here
just yet.  So use the same door to return to the Western part of the
Shelter.


Close up on the Plate on the wall left of the Blue Door.  Victoria
will read the reference number for that door = T082445
Step out of the close up, and go through the Blue Door.


Upstairs Corridor


Close up on the Plate on the wall left of the Blue Door, to find the
same number on it as the one we had found on the Plate on the other side of
this door.  [Apparently, the significance here is that we now know that we
can find the reference number for such doors on a plate on either side of these
doors.]


Step out of the close up.  Click on the red smudges on the floor left of
the stairs, to learn that it is Blood.  Use the SAMPLING SWAB
from your Kit to collect this clue.  Analyze the clue by first running the
Chemical Analysis and then, the Database Analysis.


Go up the Stairs.  Close
up on the Red-&-Black-Striped Box on the wall on your left. 
Click on the white icon on the Box, to learn that it is a Valve but
that its opening mechanism has been removed.


Step out of the close up on the Valve, and go up the Stairs at the
bottom of your screen.  Close up on the Plate on the wall left of
the Blue Door, but the reference number is illegible.  Step out of the
close up, and click on the Blue Door to hear Victoria’s comment.


Fixing the Control Room
Computer


Go down to the first Corridor you had entered in this section of the
Shelter.  Use the gray door on your left to return to the Eastern section
of the Shelter.  Use the Hatch there to return to the Backyard.  Go
to your right, towards the Fence dividing the Front and Back Yards.  Close
up on the Killer’s Body.  Click on the Killer’s Face, to
hear a new comment.  Click on the Killer’s Right Hand, to hear
another comment.  Use your POCKET-KNIFE on that hand, to retrieve THE
KILLER’S FINGER
.  [Don’t worry: you won’t actually see anything being
done.]


Note:  Recall Victoria’s comments when you had
clicked on the Blue Door upstairs in the Western part of the Shelter.  She
mentioned hearing a circular saw, and assumed that the sound was coming from
the Cellar.  So long as we are out here, feel free to go inside the house
(using the front or the back door) to investigate.  But you will
find that the Cellar door is locked.


Return to the Backyard, and go down
into the Shelter.  Go into the Western part of the Shelter (using either
the door in the Side Corridor or the Vent in Anderson/Karson’s Cell),
and enter the Control Room.


Go to your left and close up on the Processor Table.  Use THE
KILLER’S FINGER
on the Processor.  A cutscene will follow,
automatically bringing you out of the close up on the Processor Table.


Close up on the Computer Table
Click on the Keyboard.  Click on User: Brainjack.  The
computer will ask for a password.  Recall the "brand name" on
the chewing gum packets in the Killer’s Room in the Eastern Part of the
Shelter: "Brain Jack, since 1884."  Since the User is
"Brainjack," try the password choice "1884."  It works! 
Click on the options as follows.


  • Access Control
  • Upper Door (locked).
  • The computer asks for a
    password, and we are given a few choices.  But we need to input a
    Reference Number for that door, and the only such code in the choices is
    for the second Blue Door in the Downstairs corridor.  As you might
    recall, it was impossible to read the Reference Number for the door
    upstairs that we are now trying to unlock.  So just Return to the
    Main Menu.
  • Cameras System.
  • Group A Cameras.  You will get views of the Front and Back yards.
  • Group B Cameras.  You will get views of Anderson/Karson’s Cell.
  • Group C Cameras.  You will get views of the Kitchen.
  • Group D Cameras.  You will get views of the Computer Room.
  • Group 4 Cameras (ENCRYPTED).  Even though the option states that these cameras are
    "encrypted," click on it anyway, to let the computer
    "know" that you know.  Victoria will comment.  We need
    to decrypt this "camera feed" before we can proceed further in
    the game.  So just Return to the Main Menu and then, Quit.


Step out of the close up on the Computer Table, and close up on the Processor
Table
.  Click on the blue icon on the Processor, to hear
Victoria’s comment.  Use the Kit’s COMPUTER KEY on the Processor,
to hear another comment.


Step out of the close up on the Processor Table, and close up on the Computer
Table again.  Click on the Keyboard, Cameras System, and then on Group
4 Cameras
to see if they will work now.  A cutscene and dialog follow.


Conversation with Karson


The length of the conversation does not seem to actually affect the
storyline.  But you can certainly gain the maximum possible information
from Karson if you stretch the conversation the longest by addressing the
topics in the following order.


·       
Toughen the Tone

·       
Calm things down

·       
Karson’s Torture

·       
Gary Anderson

·       
Registrar’s File

·       
Make the Killer Talk


A cutscene will follow, providing Paloma with a New Objective as the story
switches to her point-of-view.


Paloma (A Few Minutes Earlier)


Note:  It’s funny because, even though we just
got a New Objective, we cannot check it during the sequence that follows, when
it really counts.  If you are curious to know, however, and as you can
later check for yourself, the objective was to "Remove the chains to
escape.
"


The Countdown clock is running, but don’t worry.  As usual, we have more
than enough time to beat the clock.  Here is the situation.  Paloma
is bound to the chair by a chain around her waist, and the chain apparently has
a lock on it.  The Key to that lock is on the small table (on your
left) that was shown in the cutscene we just saw.  If you try to go and
pick up that Key now, however, Paloma will approach it only to tell you that
she can’t reach the Key because her hands are tied.  You must therefore first
free her hands by using the Circular Saw on your right.  But Watch
Out
for the Wood Chips on the floor around the left part of the Saw
Table.  If Paloma moves into that rubble, she will not be able to go
directly towards the Saw.  You would have to bring her down and then try
to go to the Saw again, losing some time in this struggle.  Here is the
quickest way to get through this rather short sequence.


Move Paloma towards the right in a straight line, stopping just under
the Saw; and then, move her up towards the Saw in a straight line again. 
[See the path marked by the Red Line in the picture below.
Don’t click on the white icon that appears on the Saw because that means
you are still too far away from the Saw to use it.  Click on the gear
icon when it appears on the Saw.  A cutscene will follow.


Click on the white icon on the Box left of the Saw, to hear
Paloma’s comment.  Go back down on the screen in a straight line,
and then to your left, also in a straight line.  [See the path marked
by the Yellow Line in the above picture.
]  You don’t have to
actually reach the Table on your left to pick up the Key.  Click on
the hand icon on the Key as soon as you see it, and Paloma will do the
rest.  A cutscene will follow, switching the story back to Victoria’s
point-of-view.  [But note: you will not see any caption (like the one I
have used below) when the story changes the point-of-view this time.]


Killer’s House (Victoria:
2008)


The Countdown Clock is running but, again, don’t worry.  We have more than
enough time to beat the clock.  Check out your New Objective.  We
really need to open that Blue Door in the Upstairs Corridor now.  The
cutscene has already put you in a close up on the Computer Table.  So just
click on the Keyboard, and proceed as follows.


·       
Cameras System

·       
Group 4 Cameras.  A cutscene will
follow.  Victoria will read the Reference Number for the Upstairs Blue
Door (from the reflection of the wall plate on to the Tank below that
plate):  D090746.  The cutscene brought you out of the
computer system.  So click on the Keyboard, and continue as follows.

·       
Access Control.

·       
Upper Door (locked).  Note that the computer gives
you a choice of two passwords that begin with the above Reference Number
but end with two additional characters: one with "B2" and the other
with "C7."  If you try each choice, one by one, you will find
that the correct Reference Number = D090746B2.  So, click on this choice.


A cutscene will follow, switching
the story back to Paloma’s point-of-view.


Paloma (A Few Minutes Earlier)


The Countdown Clock is running but, once again, don’t worry.  We have more
than enough time to beat the clock.  Check out your New Objective.


Click on the Door to hear Paloma’s comment.  Click on the Pipes
against the wall, right of the Door, to hear another comment.  Click in
the lower-left corner of your screen to approach the large Blue Cupboard
by the door with the Red Bulb above it.  Open the Cupboard.  Click on
the Jacket hanging in the middle of the Cupboard, to hear Paloma’s
comment.  Pick up the METALLIC SHELF above that Jacket.


Step out of the close up on the Cupboard.  You don’t need to even go back
to the Door on your right that we are trying to barricade.  Bring
out the METALIC SHELF from your inventory, and just click on the tool
icon on that Door.


The clock will stop.  A dialog will follow.  You will then get a
short cutscene.  Check out your New Objective.  Feel free to go
around the room and click on anything that has an icon on it.  More
importantly, however, go to and close up on the Computer Table
You can try to use the Computer, if you like.  Just click on the Processor
to turn the Computer on; and then, click on the Keyboard.  But Paloma
doesn’t know the password, of course.


Click on the Telephone, to hear Paloma’s comment.  Pick up the
Telephone.  A dialog will follow.  You will then get a cutscene,
switching the story back to Victoria’s point-of-view.  [But note again:
you will not see a caption (like the one I have given below), when the story
switches the point-of-view this time.]


Killer’s House (Victoria:
2008)


Check out your New Objective.  We have to find Hawker and Paloma. 
You should be already in a close up on the Computer.  So click on the
Keyboard; go to Cameras System; and check out all the camera groups, one
by one, to see Karson’s body outside the Computer Room, the disarray by the
Blue Door at the Workshop, but no sign of Hawker or Paloma.


Close the Computer, and step out of the close up on it.  Go to the
Upstairs Corridor, and click on the white icon now on the stairs leading
to the Blue Door; but Victoria will decline to go through the flames coming out
of the pipes on either side of that Corridor.


Go back downstairs.  Use the Hatch in the Eastern part of the Shelter to
go out into the Backyard.  Go towards the Back Porch.  You will be
stopped by a call from Hawker, but the line is cut off.  Feel free to call
him back, but there is no answer.


Proceed towards the Back Porch.  Feel free to click on the white
icons on the three objects (the Archery Target and the two Grates) that you had
placed on the ground in front of the Back Porch Stairs, to learn that those
mines have been disarmed.


Go inside the house through the Back door, step out in the Main Hallway, and go
through the Cellar Door.  Go left on the landing to enter the Workshop.


The Workshop


Move further down in the room, to learn about the Strange Odor.  Go
to the other end of this Dumpster Area, to see the blue hand icon
on the floor under the Window.  Collect the clue by using the ELECTRONIC
NOSE
; and then, analyze it.


Enter the Workshop Area on your left.  Go to the Circular Saw
Table
, on your right.  Pick up the SOLDERING IRON from the left
of that Table.  Use the WRENCH on the tool icon on the
Furnace on your right, to loosen the wheel.  Pick up the FURNACE WHEEL.


Go to the Blue door on your right.  Click on the white icon on the Electronic
Lock
on the wall left of that door, to get a close up of the Lock and hear
Victoria’s comment.  [Note that the Keypad on the lock is
missing.]  Step out of the close up, and go through the Blue Door to
arrive in the Upstairs Corridor.


The Valve


Go down the stairs.  Close up on the Red-&-Black-Striped Valve Box
on the wall on your right.  Attach the FURNACE WHEEL to the
Box.  Click on the gear icon on that Wheel, to turn off the flames
coming from the pipes on either side of the Corridor.


Step out of the close up on the Valve, and return to the Workshop.  But we
are done here, for now.  So step out of the Workshop, go through the Blue
Door, to arrive at the landing where Karson’s Body still lies slumped on
the floor outside the Computer Room.


Karson’s Body: Discovery


Close up on Karson’s Body.  [You will have to click twice on the
magnifying-glass icon before you will get the close up.]  Victoria will
comment.  Pick up the Red ELECTRONIC KEY from the floor on your
left.  Click on the Gun at the bottom of the screen, to hear
another comment and receive a New Objective.


Click on the blue icon on the Bullet in the wall on your left, to
hear yet another comment.  Use the SAMPLING TONGS from your Kit to
collect the clue.  Analyze the clue by running the Chemical Analysis and
then, the Database Analysis.


As you finish the above analyses, note the Message in Green at the bottom
of the screen, to learn that two Ballistic Profiles of Bullets have been
saved, and that you can compare them by using a new Database Analysis.  So
run another Database Analysis on the clue you just analyzed, to hear Victoria’s
comment and receive another New Objective.


Call Hawker.


Note: If you have difficulty scrolling down to
Hawker’s number in the cell phone, step out of the close up on Karson.  As
I have noticed, if you step out of this close up at this point, sometimes
Victoria will get a call from Hawker automatically.  The conversation
proceeds, however, as if she had called him after all.


Exhaust the conversation, but Beware!  The conversation ends as
soon as you bring up the topic of the "Gun Bullet."  So
save that topic for last, if you would also like to discuss the other
topics.  [At the end of the conversation, you will get another New
Objective notification.  But, if you check your objectives, you will find
that there is really no "new" objective.]


Step out of the close up on Karson, if you haven’t done so already, and go into
the Computer Room.


The Computer Room


Go to the Computer Table, and close up on it.  Click on the Telephone,
to learn that the line is jammed again.  Click on the Keyboard and then,
on User: Truth.  But the password has been changed again,
and we don’t know the new one yet.


Step out of the close up on the Computer Table.  Click on the Piece of
Paper
in the Printer, in the lower-right corner of your screen, and
Victoria will read the message written on that paper: "The Truth is
behind the Mask
."


Go and open the large Blue Cupboard by the door with the red bulb above
it.  Click on the Mask, right of the Jacket, and Victoria will tell
us that the word "Betrayal" is written on the back of that
Mask.


Go back to the Computer Table, and close up on it.  Click on the
Keyboard.  Click on User: Truth.  When the Computer
asks for a password, click on BETRAYAL.  A cutscene and
then, a phone conversation will follow.  Exhaust the conversation.  A
cutscene and a comment will follow.  You will also get a New Objective.


Note:  If you check, you will find that the
Door with the Red Bulb above it is locked.  You can unlock it by using
Karson’s Red ELECTRONIC KEY on the Electronic Lock left of that
door.  Feel free to go through that door and check out all the rooms in
that part of the Basement.  But, if you have already explored that area
earlier when I suggested doing so in this walkthrough, you will not find
anything new there.  I suppose we got the Red Key at this time to give us
a chance to check out that area, if we had not already done so.  Then
again, maybe this was an opportunity to retrieve something that we might have
previously put in the Storage down in the Cell.


We need to go to the Shelter.  The Hatch in the Backyard is closed, and
cannot be opened from the Computer in the Computer Room.  We must
therefore go to the Workshop, and use the Blue Door there to get into the
Shelter.  So go to the Workshop.  A cutscene will be followed by a
dialog that will be followed by yet another cutscene that will take you back to
2005.


Chicago (Victoria: 2005)


Victoria comments.  Check out your New Objective.  The Countdown
Clock is running, but don’t worry.  We have a little less time than we
usually do, but it will be more than enough if you proceed as follows.


Click on the white icon on your right, to learn that you cannot go in
that direction.  Close up on the Wash Basin on your left. 
Click on the tool icon, to hear Victoria’s comment.  Use the KILLER’S
CAPE
on the tool icon, to get a WET CAPE.


Click at the bottom-center of the screen to approach the stairs.  Pick up
the HOOK from the floor at the bottom of the screen.  Pick up the CHAIN
from the floor on your left.


We need to get the gray Pole leaning against the left of the Orange
Drum
on your left.  Click on the hand icon on the Pole to try
to pick it up, but the flames are in the way.  So put the WET CAPE
on the Orange Drum, to subdue the flames.  Pick up the POLE.


Go to the right of the Wash Basin.  Try to get as far as you can in the
corner of the room left of the Bench.  If you go far enough,
you will get an aerial view of the Beam and the Window overlooking that
Bench.


Click on the white icon on the Beam on your left, to hear
Victoria’s comment.  Click on the Window on your right, to hear
another comment.  Use the POLE to open that Window, and hear
Victoria’s comment.


Combine the HOOK with the CHAIN, and use the resulting GRAPPLE
on the Beam on your left.  A cutscene will follow, taking you back to
2008.


Killer’s House (Victoria:
2008)


Check out your New Objectives.  The Countdown Clock is running, but don’t
worry.  We have plenty of time to beat that clock.


Click at the Bottom-Center of the screen to approach the Orange Still in
that corner of the room.  Click on the white icon on the Keypad
on that Still, to learn that it is the Fuse Box controlling the release
of the toxic fumes.  Pick up the KEYPAD BOX.


We have stopped the release of the fumes, but we still need to ventilate the
room to get rid of the fumes already released.  So click on the Lever
on the wall, right of the Still, to see the two Windows open above that
Lever.  [Note:  You will have to wait a little while for the gear
icon to appear on that Lever.]


Go to the Storage Area (right of the Furnace), on your left.  Click
on the Lever on the wall right of the Furnace, to see the two Windows
open above that Lever also.  The Countdown Clock will stop.


Step out of the Storage Area.  Close up on the orange Gas Cylinder
left of the Furnace.  Click on the gear icon on the Cylinder
Valve
, to turn off the flames in the entryway on your left.


Step out of the close up on the Cylinder.  Go to the Blue Door on your
right.  Click on that Door, to learn that it is locked again.  Click
on the top-center of the Tank right of the Blue Door.  Victoria
will read the Reference Number for the Blue Door:  ­D090746,
reminding us of the first time we had seen it.  [But recall that we had to
add B2 at the end of this Number when we unlocked the Blue Door
at that time.]


Click on the Electronic Lock left of the Blue Door, to get a close up of
that Lock and hear Victoria’s comment.  Put the KEYPAD BOX in the
Lock, to get a close up of the Keypad itself.  Click in the complete
Reference Number on that Keypad: DO90746B2; and then, click on OK, to hear the Door unlock. 
Step out of the close up on the Lock.  Go through the Blue Door, and down
to the Control Room.


The Control Room


Close up on the Computer Table.  Click on the Keyboard.  We have to
try to find Hawker and/or Paloma.  So click on Cameras System
Feel free to check all the Camera Groups, one by one; but you will get results
only when you click on Group C Cameras.  A cutscene and a comment
will follow.


We need to go to the Kitchen.  But we still cannot use the Hatch in the
Eastern part of the Shelter to get out into the Backyard and go into the house
that way.  Feel free to try it!  Click on Access Control, to
see that both the East and West Hatch openings are
"unavailable."  In other words, we cannot open those Hatches
from the computer.  Feel free to try to open those Hatches manually, of
course.  Just go to the Hatch in this room, close up on the Switch left of
the Ladder, and click on the gear icon.  But the Switch won’t
work.  Go to the Hatch in the Eastern part of the Shelter, and try the
Switch left of the Ladder under that Hatch, to learn that it doesn’t work
either.  In short, you need to use the Upstairs Corridor to go back into
the House.


We need to make some room in our inventory.  So use the Storage Cabinet
in the Side Corridor of the Eastern part of the Shelter to put away your FIRST-AID
KIT
.  Use the door right of the Storage Cabinet to return to the
Western Part of the Shelter.  Go to the Upstairs Corridor, through the
Workshop, and up to the Main Hallway on the First Floor.  Click on the
Target icon on the Kitchen door to enter that room.


The Kitchen


A cutscene and a comment will follow.  Approach the Kitchen Sink on
your left.  Click on the Counter right of the Sink, to hear
Victoria’s comment.  Pick up the DETONATOR, to get another pick-up
icon in the same spot.  Pick up the C-4 BARS.


We are done in the Kitchen.  Feel free to go out into the Backyard to see
if you can now use the Hatch there, since Hawker seems to have fled in that
direction.  But you will find that the Hatch is still closed.  So use
the Blue Door in the Workshop again to return to the Western part of the
Shelter.  Go down to the Corridor on the First Floor in that section of
the Shelter.


Downstairs Corridor


Click on the Blue Door, right of the Control Room door, to hear a new
comment.  Note that a tool icon has appeared on the door after the
comment.  Close up on the Electronic Lock left of the door, to hear
Victoria’s comment and see a tool icon now on that lock as well. 
Feel free to try the Red or the Green Electronic Key from your
inventory, but neither will work on that lock.  So step out of the close
up on the lock, and proceed as follows.


Combine the DETONATOR with the C-4 BARS, to make a BOMB WITH
C-4
.  Use this Bomb on the Blue Door.  Victoria will put it down
against the door.  Combine the SOLDERING IRON and the ELECTRIC
EXTENSION CORD
, and attach this combination to the Bomb you just put in
front of the door.


Go to the Electrical Outlet in the wall left of the Control Room
door.  Click on the end of the Electrical Cord lying under that
outlet, to plug it into the outlet.  A cutscene follows.  Go back to
where the Blue Door once stood, and enter what I will call the "Glass
Room."


The Glass Room


A cutscene and a dialog will follow.  Check out your New Objective. 
You can click on the Talk icon on the Glass Partition on your left, but
Paloma can’t hear you because the glass is sound-proof.  The only way to
talk to Paloma is by clicking on the Intercom on your right.  But
there is nothing further to discuss with her.


Don’t try to go through the Gray Rusty Door right of the
Intercom, just yet.  We need to assess the situation on the other side
before we go there.  So close up on the Computer Table right of
that Door.  Click on the Monitor ("Console"), to hear
Victoria’s comment.  Attach the COMPUTER KEYBOARD from your
inventory to that Console.  Click on the Keyboard to connect with
the cameras system.


Note that the names of, and the areas covered by, the Camera Groups on
this computer are identical to those you found on the Control Room computer,
except for an additional Camera Group on this computer: Group E Cameras
Click on this Camera Group, to get a cutscene and a comment.


Click on the white icon on the Red-&-Gray Object in the
lower-right corner of your screen, to hear Victoria’s comment.  Pick up
the ELECTRONIC TRACKING DEVICE.


Click on the Keyboard, and check out Group E Cameras again to get a more
detailed view of the room on the other side of the Gray Rusty Door on your
left.


Step out of the close up on the Computer Table.  Feel free to check out
the Cupboard (the Storage) on your right, but we don’t need to put away
anything just yet.


Click on the Target icon on the Gray Rusty Door left of the Computer Table, to
enter what I will call the Warehouse (because of all the Tanks that seem to be
stored there).


Warehouse: The Confrontation


The following sequence is actually quite easy.  It is also not
timed!  The only catch you have to watch out for is that every time you
approach the aisle in the middle of the room, the camera will automatically
turn you around to face the front of the room, where Hawker is lying in
wait.  You don’t want to go there, at least not through the middle
aisle.  So remember to turn right or left to get back on track.  The
following diagram gives an overview of what you need to do.  Step-by-step
instructions follow the diagram.


Note:  In the above diagram, the
Straight RED Arrows show the direction you must take.  The Curved YELLOW
Arrows show the direction in which the camera turns you around when you reach
the aisle in the middle of the room.  The Curved RED Arrows show
that you must turn LEFT or RIGHT to get back on track.

Step-by-Step
Instructions

  • Click on the Target icon to step towards the large Fan
    against the wall in front of you.
  • A cutscene follows, turning you around to face the front of the
    room.  So turn LEFT, to face the Fan again.
  • Click on the Target icon to reach the Fan.
  • A cutscene focuses you on the Fan itself.  Click on the Switch
    on the wall left of the Fan, to turn up the Fan speed and hear Victoria’s
    comment.
  • Click on the Target icon to go right, around that corner.
  • Apply the ELECTRONIC TRACKING DEVICE to the tool icon
    on the Tank in the lower- right corner of your screen.
  • Click on the Target icon to step forward, past the Fan.
  • Turn RIGHT.
  • Click on the Target icon to reach the aisle in the middle of the
    room.
  • A cutscene follows, turning you around to face the front of the
    room again.  So turn RIGHT to get back to your original
    direction.
  • Click on the Target icon to cross the aisle in the middle of the
    room.
  • Click on the Target icon to approach Hawker from the right side of
    the room.

* * * * * * * * * * * *

A cutscene follows.  Victoria will comment. 
Check out your New Objective.


Pick up the DAMAGED PDA from your left,
to hear Victoria’s comment.  Pick up Hawker’s Loaded Gun from his
right hand, to hear another comment.  Close up on Hawker’s Body, to
hear yet another comment.  Pick up the Blue HAWKER’S ELECTRONIC KEY
from the floor, just right of Hawker’s body.

           
Step out of the close up on Hawker.  We need to make some room in our
inventory.  So click on the footprint icon on the middle aisle, in
the center of the screen, to approach the Gray Rusty Door you had used to enter
this room.  Go through that door to return to the Glass Room.  Use
the Storage Cupboard on your right to put away the Green and Red Electronic
Keys
, the WRENCH, and the POCKET KNIFE.

           
Go back into the Warehouse.  Click on the footprint icon right of
Victoria to return to Hawker’s Body.  Click on the footprint icon
on your right, to enter what I call the Office.

The Office


Pick up the CONNECTING CABLE and HAWKER’S PICK GUN from the Desk
in front of you.


Close up on the Bulletin Board
on the wall above the Desk.  Click on the Gray Sheet of Paper on
your left, to get a New Document notification.  You will automatically get
a close up of the contents of this Document, and hear Victoria’s comment. 
[If you would like to refer to this Document later, it has been stored as the
"Check-list drawn up by Hawker" in the Documents folder of
your cell phone.]


Step out of the close up on the Document.  Click on the Photograph
in the lower-left portion of the Bulletin Board, to hear Victoria’s comment.


Step out of the close up on the Bulletin Board.  Click on the Center
Drawer
of the Desk, to learn that it is locked.  You can’t use
Hawker’s pick gun because, even though we are never actually told, it is not
functional just now.  So use your own Pick Gun to open the Drawer and get
a close up of its contents.  Pick up the METAL CUTTER from your
right.  Click on the Torn Photograph of Victoria on your left, to
hear Victoria’s comment.


Step out of the close up on the Drawer.  Click at the bottom of your
screen to approach the Bed on the other side of this room.  Open
the Black Tool Box under the Bed.  Pick up the ELECTRIC WIRE
COIL
, COPPER STRIP, SET OF ALLIGATOR CLIPS, and ISOLATED
CUTTING PLIERS
.  [Note:  You might have to rearrange the
items in your inventory to fit all of the above items.]  Step out of the
close up on the Tool Box.


* * * * * * * * * * * *


We are done in this room.  So
go back out in the Warehouse.  Click on the footprint icon at the
bottom of the screen, to find yourself in front of the Blue Door left of the
Fan.  As you might guess, Paloma is on the other side of this door. 
But we are not ready to go in just yet.  So use the Rusty Gray Door on
your left to return to the computer side of the Glass Room.  Step
out into the Corridor, and enter the Control Room on your left.


Control Room:  The
Damaged PDA


Close up on the Processor Table on your left.  Click on the Processor
on your right, to hear Victoria’s comment.  Combine the DAMAGED PDA
and the CONNECTING CABLE, and attach the resulting combination to the
Processor.  Victoria will comment.


Step out of the close up on the Processor Table.  Refer to the Document
"Check-list drawn up by Hawker" in the Documents folder of
your cell phone.  Note the Heading at the top of the page: "Checklist
Nemesis."  Close up on the Computer Table, click on the
Keyboard, and proceed as follows.


  • PDA Data.  The computer will ask for a password.


  • NEMESIS.  Access is granted!


  • Nemesis File.  [Note the alpha-numeric code under the word "Nemesis"
    at the top of the page:  A: A64571.  This code will come in handy later.]


Read the rest of the Document. 
Close the computer, and step out of the close up on the Computer Table.


* * * * * * * * * * * *


We are now ready to help
Paloma.  So step out of the Control Room, and go through the Glass Room
back into the Warehouse.


Approach the Blue Door on
your left.  Click on the white icon on the door, to learn that it
is locked (of course).  Unlock the door using the Blue HAWKER’S
ELECTRONIC KEY
on the Electronic Lock left of the door.


Note:  I would suggest that you SAVE your
game before going through this Blue door, for reasons explained in the
Yellow Textbox below.


Go through the Blue Door to arrive
at Paloma‘s side of the Glass Room.


Glass Room: Saving Paloma


A cutscene and a dialog will follow.  Paloma will comment, and the
Countdown clock begins to run.  But don’t worry.  You have more than
enough time to beat the clock if you have collected all the items from the
Office that I indicated in this walkthrough.


Text Box: Note:  When I first played this game, I was concerned by Hawker's remarks about "No Second Chances" and that, if this were a video game, he would program it so that we would not be able to try again.  It sounded as if I would not be able to save the game after the Countdown clock began this time, even though I had been able to do so in the previous timed sequences.  However, I did not have any problems saving my game this time either!  But then, a few days ago, as I was about to get to this sequence again, playing the game a second time to write this walkthrough, I happened to see a walkthrough in which the writer claimed that you couldn't save the game this time, referring to Hawker's above remarks as reasons for not being able to do so.  The person sounded so serious, I played this sequence several times to see if I had the same problem.  But I was able to save every single time!  In short, I have no idea what that writer was talking about.  But I thought it best to still ask you to save your game before entering this room, just in case you experience the same problem that that writer did.


Note:  There are actually two solutions to this puzzle, as
described below.  If you saved your game before entering this room, as I
suggested, you can use that Save to check out each of the following solutions.


Solution 1


  • Click in the lower-left corner
    of your screen to go to the black Countdown Clock behind
    Paloma.  Click on that Clock, to hear Victoria’s comment.


  • Click on the magnifying-glass
    icon on Paloma‘s right side, to get a close up of the four Shackles
    binding her wrists and ankles.


  • Click on the tool icon
    on one of these Shackles, to hear Victoria’s comment.


  • Open the Inventory Menu
    [Remember: The Timer STOPS when you are in this Menu.  So
    don’t worry about how long it takes to do the following work in the
    Inventory.]


  • Combine the ISOLATED CUTTING
    PLIERS
    with the ELECTRIC WIRE COIL, to make a PIECE OF
    ELECTRIC WIRE
    .


  • REPEAT this procedure 3 more
    times
    to make a total of 4 such Pieces of Electric
    Wire
    , thus using up the entire Coil.


Note: You will have sufficient room in your
inventory for these 4 pieces if you had stored the items I suggested, in the
Glass Room’s Storage cabinet.  But don’t worry even if you didn’t. 
Just "combine" each new Piece of Wire that you make with the one you
made before.  In fact, you will not be really "combining," but
only adding the new one to the one(s) before, thus collecting all
those Wires in a single Inventory space (as indicated by the changing numbers
in the upper-left corner of the Inventory space).


  • Combine a PIECE OF ELECTRIC
    WIRE
    with the SET OF ALLIGATOR CLIPS, to make an ELECTRIC
    WIRE WITH PLIERS
    .


  • REPEAT this procedure 3 more times to make a total of 4 such Electric Wires with
    Pliers
    , thus using up your entire Set of Alligator Clips.


  • Step out of the Inventory
    Menu
    .


  • Attach, one by one, each ELECTRIC
    WIRE WITH PLIERS
    to one of the four Shackles binding Paloma’s
    wrists and ankles.


  • Unlock these four Shackles, one
    by one, by using either your Pick Gun OR Hawker’s Pick Gun (after
    you have fixed it by combining it with the COPPER STRIP)
    .


* * * * * * * * * * * *


Solution 2


  • Click in the lower-left corner
    of your screen to go to the black Countdown Clock behind
    Paloma.  Click on that Clock, to hear Victoria’s comment.


  • Click at the bottom-center of
    your screen to approach the Metal Box on the floor, against the
    wall left of the wall with the black Countdown Clock.


  • Close up on that Metal Box,
    to hear Victoria’s comment.


  • Step out of the close up on the
    Box, and click on the Target icon now on that Box.  A cutscene
    will follow, taking you back into a close up on the Metal Box.


  • Click on the Electric Dimmer
    on your left, to hear Victoria’s comment.


  • Click on the Metal Cover
    on your right, to learn about the Foam Insulation in it.


  • Use the METAL CUTTER on
    the Cover, to cut out the Insulation inside.


  • Pick up the FOAM INSULATION.


  • Bring the FOAM INSULATION
    out of your Inventory, and attach it to the Electric Dimmer on your
    left.  Victoria will comment.


  • Step out of the close up on the
    Dimmer, and click on the magnifying-glass icon on Paloma‘s left
    side, to get a close up of the four Shackles binding her wrists and
    ankles.


  • Click on the tool icon
    on one of those Shackles, to hear Victoria’s comment.


  • Unlock the four Shackles,
    one by one, using either your Pick Gun OR Hawker’s Pick Gun (after
    you have fixed it by combining it with the COPPER STRIP)
    .


* * * * * * * * * * * *


A cutscene, a dialog, and then another cutscene will follow.  The
Countdown Clock has begun to run again.  At this point, you might be
inclined to agree with Paloma: "Oh, my God, will this never end?" 
Don’t worry.  This is the last puzzle; and, as usual, you have plenty of
time to beat that clock.  What’s more, you also get an Auto-save this
time!


Check out your New Objective.  We must find and defuse a bomb.  Click
at the bottom-center of the screen, to approach the Electric Box on the
wall left of the Blue Door.  Open this Box, to hear Victoria’s
comment.  Pick up HAWKER’S KEYPAD BOX.


Step out of the close up on the Electric Box.  Go to the Warehouse through
the Blue Door on your right.


Warehouse: Defusing the Bomb


You might be wondering about the
three Metal Cabinets you saw earlier, against the wall on your right in the
front part of the room where Hawker’s body lay on the floor.  Don’t waste
your time on them.  The bomb is in the Metal Cabinet right here, to
the right of the Blue Door that you just used to return to the Warehouse.


Click on the gear icon on this Metal Cabinet, to learn that the
Cabinet is locked.  Click on the tool icon on the Lock Outlet
on the right side of the Cabinet, to hear Victoria’s comment.  Put HAWKER’S
KEYPAD BOX
in that Outlet, to get a close up of the Keypad.


Recall the alpha-numeric code we noted earlier from the Nemesis File of
the PDA Data we read on the Computer in the Control Room: A64571.  Punch this code into the
Keypad; and then, click on OK.  A cutscene will follow, as you hear the
door unlock.


Step out of the close up on the
Keypad.  Open the Cabinet, to hear Victoria’s comment.  Click on the white
icon on each of the following objects, one by one, to hear Victoria’s comment
about that object.


  • The large Battery Unit,
    at the top of the Cabinet.


  • The two tanks filled with Red
    & Yellow Fluids
    , in the middle of the Cabinet.


  • The big Brown Tank, at
    the bottom of the Cabinet.


Next, click on the Gray Metal Box
between the two tanks filled with Red & Yellow Fluids.  Victoria will
comment, the cover will open, and you will get a close up of the panel inside.


  • Click on the three Green
    Lights
    in the top-center of the panel, to learn that we have to be careful
    not to let them go red.  [Actually, it is okay if one or two
    of them do go red.  You just have to be careful not to let all three
    of them go red.]


  • Click on the three Yellow
    Lights
    in the bottom-right of the panel, to learn that we need to turn
    all of them OFF.  Finally,


  • Click on the Meter in
    the bottom-left of the panel, to hear Victoria’s comment about the 24
    Milliamps
    .


Note:  Don’t worry if you are confused by this
comment.  The Developers could certainly have come up with something
better.  Just know that the object of this puzzle is to cut up the Blue
Wires so that their numbers, as marked on the panel, will add up to 24. 
So,


  • Use the ISOLATED CUTTING
    PLIERS
    to cut the Blue Wires numbered 7
    and 16 in the left column, and 01
    in the right column.  (See Picture below.)


As soon as you cut the last Blue Wire, Paloma will comment and the final
cutscene will follow.  So,

Just sit
back and enjoy the ending!


* * * * * * * * * * * *