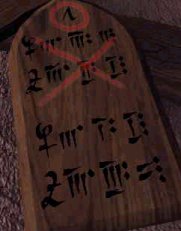
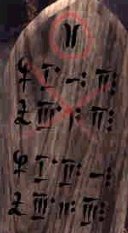
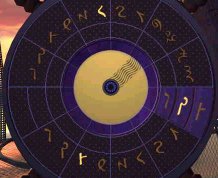
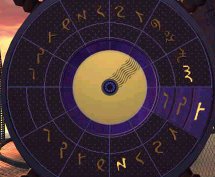
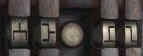
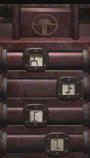
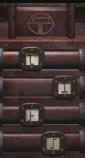
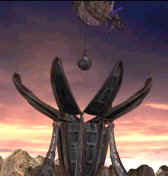
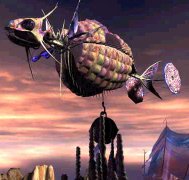
The new corrected coordinates is:
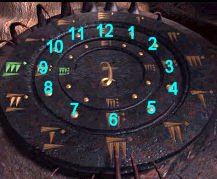
Left = 10, 12, 2 and Right = 3, 2, 2. There is no 12 on the console, so
0 is 12.
Now, let Sam explore the place
Hannah went to. Left, go out of Bosch tunnel, ride the chair lift to the
floating island. Go down the ramp, up the elevator to the main console.
Click on first lighted button at bottom left, place hand on scanner and
travel to the living ships area that Hannah has explored. (If you go
to the new coordinates, a puzzle at the Living Ship will not be triggered
and but can be retriggered (sic) by the appearance of 2 ghosts outside the
temple – I found out the hard way!).
Living Ships –
Temple – Living Ships – Sam
It is night here. Get off ship via
chair lift, cross the spines, down the ramp, forward to the console for
the gondola and ride the gondola across to the other island. Go forward,
turn right, forward, up the ramp and see a man come out of a door. He says
that Matia thinks the inhabitants are contaminated too, if it is not
done correctly now, the Good Servant will complete what it began and then
no more Wanderer, no chance. He offers precious oil, one unit of oil for
one pearl, use balance to measure what is required and take it to the
temple.
Turn right, forward to pear shaped
flask, look close, click on any number, automatically 9 units of oil is
pumped out and the 9 pearls disappears – remember the icon 9 on the wall
at the altar room at the temple. Look close to the right side and get the
blue flask of oil.
Move back, go back to the floating
island and up to the main console. Press second lit button, click hand and
travel to Bosch tunnel. Enter Bosch tunnel, forward, left, forward to
computer structure, right, forward until stairs and go back to the
temple.
Go right, forward 2x, right, forward
3x, left, forward 5x, left, forward and right to the altar room where
there is a picture of an Oriental Monk. A monk appears and it seems that
we need one more unit of oil but we don’t have anymore pearls and we got
the required 9 units – didn’t we?
Go back to Bosch Temple. Get on the
floating island. Click on Hannah and get her on to the floating ship also
– this will save a trip later. Go to the Living ships area again to talk
with that man. Get both Sam and Hannah off the ship at the Living ship
area, cross the spines, down the ramp and ride gondola to the next island.
As Hannah, move forward after getting off the gondola, right and forward –
near the elevator. As Sam, continue up the ramp to talk to the man. He
says go to the elevator, the pearl is there. Aha! so somebody stole
one pearl and got us only 8 units of oil! Turn around, down the ramp,
forward to where you left Hannah, by the elevator. Turn left to look at
elevator, look close and see pearl wedged underneath the elevator car. Get
Hannah to ride elevator one floor up. Get Sam to pick up the pearl. Bring
Hannah down and off the elevator. Sam goes back up the ramp, to the pear
shaped flask, click blue flask on stand, move back, look close on numbers
and click on it to get one more unit of oil. Look close on right side and
get blue flask of oil. Now we have 9 units of oil, time to go back to the
temple. On the way down, the man appears again, says to get to the
balloon, there’s still time and the Good Servant might still be convinced
to stay it’s hand.
Bring both Sam and Hannah back to
the floating island. Bring Hannah to the main console of the floating
island. Get Hannah to click on second lit button and click the hand
scanner to go to Bosch tunnel. Leave Hannah on the floating island while
Sam goes to Bosch tunnel and then temple.
Temple – Sam
Sam rides the chair, enter tunnel,
goes to the temple and to the altar room. The ghost in blue gives a CD in
exchange for the oil. Looks like the CD for getting coordinates for the
balloon ship. Go to the parked fish balloon then. It is also an advice by
the man on the Living ship area.
Go back to the temple landing
outside, down the stairs, bridge and before the next bridge meet Angela
Davis’ ghost. She says that you should go to Matia’s Zone, new
coordinates to get there, rituals abound, calculations might be key to
heaven and possibility to get off the world. Dr. Hovis comes out to
say his own warnings. Cross bridge, cross metal bridge, tunnel
gate, left, forward, right, forward to cross the metal ramp, up the
elevator by clicking the lever on the pole on the right, cross bridge, pan
right and forward up the stairs to the fish balloon. Go to the chair with
the steering mechanism that has icons – the one to the right. Click
leftmost lit button at bottom left of screen and then click the round
button at the center of the steering mechanism. Such a
view!
Balloon Field
– Sam
Get off fish balloon via stairs, go
to the opposite side of the floating structure and place the CD on the
stand with gold icons. Click on the highlighted symbols and note down the
new lit icons.
Go back to the fish balloon, climb
stairs and sit on the right chair. As before, pull the left lever
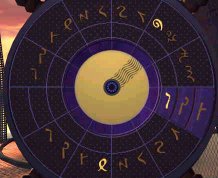
downwards to get the first icon, then move the selector on the arch for
the icon that is found on top of the blue disk, in this case the spiral
and then move the right lever to get the icon on the bottom of the blue
disk, in this case – like the letter l. Do the same for the other 2 sets
of icons. Press the middle blue button. There will now be 3 lit buttons on
the bottom left.
The fish balloon settles on a cliff
on a new island. Matia Island? Let us leave Sam for a while and see what
Hannah is doing at the floating island by Bosch tunnel. Click on Hannah’s
picture at bottom right of screen.
Matia Island –
Hannah and Sam
Hannah – Enter
the new coordinates calculated by Sam on the left and right circle of the
main console of the floating island. Left = 10, 12, 2 and Right = 3, 2, 2.
Click the hand scanner. Wonder where we’re going?
Now there’s a third lit button on
the hand circle. Move back and go to the chair lift. After getting off the
chair lift, the first scientist Hannah saw appears again, asks for help
and explains things – how Matia is just not only a defense mechanism but a
custodian and cultural heart of the Argilans, that the Wanderer is not a
treasure but maybe a doomsday device and that Matia thought that the
scientists were plundering and not realizing that they were
studying.
Pan left to the trolley, enter,
click on control mechanism, pull up or down the lever on the right
to change icons for different destinations and then click on the right
square button. The Y shaped icon works and moves the rail car to the first
stop. Turn the lever up to the icon that looks like a letter I above the Y
shaped one and press the button – didn’t go far – something is wrong with
the rail tracks. Automatically, go back on the Y-shaped icon stop, pan
right, get off the car and look at all the houses on the cliff, the
Argilans must live here. Turn right, forward 4x.
Sam – Move
back, get off ship and see a meshed
gate. Turn right, see a closed panel and a lock mechanism on the left side
of the screen. Click on lock mechanism, the panel opens to show 9 icons –
the fish balloon coordinates to get here. Click the lock mechanism again,
the panel closes and get a key. Go out through the meshed
gate to the elevator. The elevator has a central stand with button that
can be pulled up or down, push or pull to stop/floor wanted and release.
It has 4 stops, highest or 4th floor – meshed
gate where the fish balloon is, second from top or 3rd floor- the level to
the rail tracks, third from top or 2nd floor – off limits housing area and
the lowest or 1st floor – to some housing area, dam and tunnel. Click/hold
/release the button one stop, to go to the rail car area. Get off
elevator, forward pass a locked metal door and stop at the unlocked metal
door where Hannah is – together again.
Hannah or Sam
– Look close at the lock mechanism of the metal door, record it
down, press center button and enter the passage. See an oval structure
mounted on 4 legs – looks like a giant bud at the end of the rail track on
the other side of the cliff, turn right, forward and look close on a rail
track puzzle board.
First rail track
puzzle – The object of the puzzle is to build an unblocked
continuous railway track from the left side to the right side. The first
move is done by ?Matia and it will try to build a continuous wall
vertically and block your moves. It is a random puzzle and two wins in a
row is necessary. Saving a game in between the 2 wins is not possible. I
did not find a fixed strategy for this puzzle – The wins I got were
a staggered path from top to bottom diagonal or start 2 paths,
concentrated on one and slowly build the other #2 path while the other
is being blocked by Matia (to distract) – the other #2 path usually gets
a win. When 2 wins are accomplished, the bridge is raised but upon
riding the trolley will realize that it is only a part of the bridge and
that another part has to be done yet. This puzzle can be done later
– until after the metal door puzzle.
Move back, turn, forward, left and
go out to the other side of the cliff. Turn right, forward 2x, turn right
and see another door. This one is locked. There might be another of the
rail track puzzle here to raise the rest of the bridge to get through to
the Giant bud. Have to look for more clues. Move back, turn left and
forward until the elevator.
Tunnel
Both characters should go down the
elevator to the 1st floor or lowest level. Here, the elevator has 2 exits,
one to the dam and the other to the village and tunnel. Take either Sam or
Hannah to look around the tunnel and see a man imprisoned at the other
side of the water. To the left is a mechanism that has 4 squares –
something to do later. Get the other character still by the elevator to go
to the other exit by the dam. See and hear water flowing off the dam, turn
left and see a water wheel, click/hold turn up on the left side of the
wheel and note that the sound of the water falling off the dam is gone.
Now, click on picture of the character inside the tunnel. Walk across the
now dry reservoir and talk to the man – take note of what Dr. Charles
Santo says. Thinking that there’s a watch system – Matia, they tried to
make it mad by taking things. Angela Davis calls the Wanderer based from
old text – treasure beyond price – the old name is Good Servant and
might have a doomsday function. Richard Hovis came here and said that the
village of Matiani makes dimensional shifts and the key are the houses –
enter twice, exit once. The Wanderer is on the other side of the
dam. Hovis found the safety measures in unlocking the Wanderer but
cautions not to. As for him – unlock it. Come back for me –
Promise. Turn around and exit the tunnel.
Matiani
Sam and Hannah –
As Sam – go to the pathway away from the tunnel to the raised drawbridge.
Press the button on the stand and see that the bridge is uneven and barely
move. Hannah – Go to the front of the tunnel. Turn the wheel
to the right of the tunnel while facing the tunnel clockwise. Sam – push
the button and check the bridge. Do this back and forth the two
characters until the right bridge goes down even and back up again. Hannah
– go to the wheel to the left of the tunnel while facing the tunnel and
turn the wheel clockwise. Sam – push the button and check if the left side
of the bridge is even to the right. Turn wheel one increment at a time
when the bridge is close to being even. Do this cooperation between the
two until the bridge is even.
Sam – Cross the
bridge and see 4 houses on the left and one on the
right.
House puzzle –
Remember what Dr. Santo said – Hovis rambled about entering a house
twice and leaving it once. Check each house on the left and see that you
can go out of the same house, the house on the right or out of another
house. While exploring, a man appears at the right house and gives a
metal plate similar to the one Hannah has except with a different icon
-with a knob at the center. By trial and error the answer can be
obtained. A flash seen by opening the right house resets the
puzzle and that the right house doesn’t matter to the house entry and
exit count. Number the houses to the left
1-4.
Come out of the right house into the
night. Walk towards the bridge and see a woman looking up to the left. She
says the decision is yours the Wanderer or the Good Servant. Didn’t
Dr. Santo say that they’re one and the same? Wanderer, new name of Good
Servant or this a choice between old and new future? Look at what she’s
looking at. Look up to the left. It looks like the knobs on the top
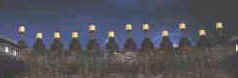
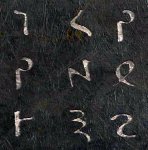
portion of the computer setup at Bosch Tunnel. Take note of sequence of
which ones are raised out of the 12 lights. From left to right – 1, 5, 7,
8, 10, 12.
Enter the right house and come out
to daylight. Walk over the bridge towards Hannah.
Sam and Hannah –
Enter the tunnel and go to the machine on the left.
Metal door code
puzzle – Find the code to unlock the metal door on the third
floor. Place Sam’s metal plate on the top slot. Icons now are seen on
the white squares. Move the squares until the icons from the unlocked
metal door is shown. Remember the position of the squares. From top to
bottom – left 1x, right 2x, left 1x and right 1x. Remove Sam’s plate and
replace it with Hannah’s plate. Then move the squares to the position
shown by Sam’s plate. Record the icons.
Sam – Go
up to the locked metal door while Hannah stays in the tunnel. Enter the
icons found doing the metal door code puzzle. Press the
button.
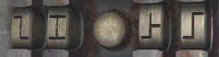
Enter and see the bridge and the
Wanderer across the cliff. If you have not done the other rail car
puzzle do so now and also see that 2 parts of the bridge is not raised.
If you have done the other puzzle, see that one part of the bridge is
still not raised. Turn left and do another railway puzzle. Same
procedure applies. After winning 2x in a row, the bridge is raised and
passable.
Go out to the trolley area, click on
stand to call the trolley, ride the trolley, change the icon to I shaped
one, click right button and finally get on the Wanderer area. Exit the
trolley, forward and turn right or left and forward. See houses on the
left and right that have a large pipe connected to it. The pipe has 8
buttons that can be moved up or down by clicking on it. Go back to center
path, forward under the Wanderer and enter the center raised platform. See
a panel similar to the one where the fish balloon is. Place key on the
lock mechanism on the left side of the arch and click. The panel opens and
new coordinates for the fish balloon is seen. Record it
down.
Turn around and see a button at the
center of the pipe. Press button and see the Wanderer try to open. It
needs something else. Go back to where you left Hannah. Call trolley by
pressing button on stand, change icon stop to the Y shaped one and press
right button.
Go to the wheel by the dam. Turn the
wheel and again the water flow is stopped.
Hannah – Walk
over to Dr. Santos and he says to do Ossa and Dissa at Bosch tunnel and
not to forget him. Go to the floating island via the trolley using the
slanted X icon and chair lift. Up on the main console, press the second
lit button and click the hand scanner.
Bosch Tunnel –
Hannah
Get off the floating island and go
to Bosch tunnel. Enter and go to the computer structure. Climb up and face
the keyboard.
Computer code
puzzle – The object of the puzzle is to get the sequence for the
8 pins for each of the houses by the Wanderer. From the lights up on the
cliff seen by Sam, words given by Dr. Santos and the icons from the big
blue compass at the balloon field Sam came down on, the solution can be
obtained.
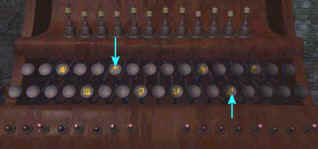
Pull the top knobs in the sequence
shown by the cliff lights – from left to right – 1, 5, 7, 8, 10, 12.
Press ossa (second from the left, top row icon) see the pins at the
bottom rise, then press dissa ( last icon at the bottom row) and a new
set of raised pins at the bottom is seen. Record the sequence of the
raised pins on the left and right side. Left – (L-R) 3, 5, 7, 8. Right –
(L-R) 1, 5, 8.
Go back to the floating island and
click the third lit button and then the hand scanner. Travel back to
Matia’s island.
Matia’s island –
Hannah and Sam
Hannah – Get off
the floating island, ride the trolley to the Wanderer. Go to the left
house and raise the buttons from left to right 3, 5, 7, 8. Then go to the
right house and raise the buttons from left to right 1, 5, 8. Go to the
raised platform area and press the button across from the coordinate
panel. See the Wanderer open and close. Turn to the right and see a ghost
that says – So
that is your decision. So be it. There is still time to save your friends.
Get to the balloon. Matia will do what it must do. Travel back to
the tunnel where Dr. Santo is.
Sam – Go to the fish balloon
on the top floor behind the meshed gate. Enter the new coordinates taken
from the panel under Wanderer. Press center button.
The
fish balloon
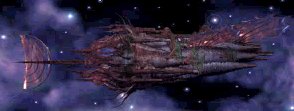
flies to the Wanderer, pulls something out, travels to the floating island
and drops the round object there. Green smoke rises from a ?chimney
on the floating island and the blue and pink material on the wings
disappears.
Go
to the wheel by the dam and stop the water flow
again.
Hannah – Walk towards Dr. Santo and he says – You came
back, kept your word, keeping faith is what matters, you and your friend
must stay together, we can go now. He
disappears.
Bring
Sam and Hannah to the floating island and up to the main console. When
both Sam and Hannah are up by the main console, a man appears and
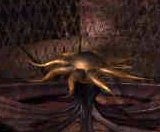
points to the tentacles directed to a bud. Look close and see a gold sun
like object on top of the bud.
Click
on it and explanations are given by Angela Davies.
Safe
Voyage to the …… 3 of you!!!

This document may not be distributed without express written
permission of the author and the content may not be altered in any
way.
For Questions
or Comments on this Walkthrough,
Please write to: MaGtRo
Copyright ©
11/2001 MaGtRo