Schizm: Mysterious Journey – Chapter 5

Written by Bert Jamin (www.gamesover.com)
August 2001
Click at one of the images to go directly to that part of the
walkthrough.


Or click at the image of Hannah and Sam at the bottom of this page to go to
the next part.
Bosh Tunnels, Part Three
Hannah:
Turn to the right and climb down the path. Enter the elevator
and push the up button. Exit the elevator and walk towards the big wheels. Zoom
in on the hand sign. Push the upper green highlighted button at the rim. Push
the hand sign.
The both of you are setting sail now to the other part. When
the island has docked, zoom out and turn to the right. Enter the elevator. Push
the down button. Exit the elevator and climb up the path.
Turn to the left and use the chair to cross the ocean. Walk
forward to cross the tentacles. Walk forward one time to climb down the path.
Walk forward one more time. Turn to the left and walk to the device. Push the
button to call the gondola. Now switch over to Sam.
Sam:
Turn to the right and enter the elevator. Push the down
button. Exit the elevator and climb up the path. Turn to the left and use the
chair to cross the ocean. Go forward across the tentacles. Go forward to climb
down the path. Go forward one time.
Turn to the left and push the button to call the gondola.
When you reached the opposite site, switch over to Hannah.
Hannah:
Look to the left a little and walk forward into the direction
of the green plant. Turn to the right and go forward one time. Turn to the right
and enter the elevator. Push the up button. Just let Hannah standing here.
Switch over to Sam.
Sam:
Look to the left and walk towards the green plant. Turn to
the right and walk forward two times. Climb up the path. The front door opens
again. There’s this man again. Of course you’d like to blow his head off, but…
you don’t. Just listen to his excuses. Now he tells you the pearl is in the
elevator.
Turn to the right and climb down the path. Look to the right
and go one time forward. Look to the left and zoom in on the elevator shaft.
This time the man has told the truth. So pick up the blue pearl.
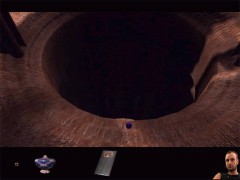
The blue pearl
Zoom out and turn to the left. Walk towards the path leading
up. Climb up the path. Turn to the right and walk to the pear shaped device.
Zoom in on the little shelf at the right and place the blue bottle.
Zoom out and zoom in on the pear shaped device. Click on one
of the signs inside the device. It doesn’t matter which one you choose. Your
pearl will disappear and the blue bottle will be filled with one unit of oil. So
zoom in on the little shelf and pick up the blue bottle. Zoom out. Turn to the left and go
forward one time. You’ll have another close encounter with the man.
The main thing is that he’s telling you that you’ll need the
balloon. Guess what… now the both of you have to go back all the way to the temple!
Turn to the left and climb down the path. Go forward
two times
and turn to the left. Walk towards the device and push the button to call the
gondola. When it stops, turn to the right and go forward one time. Climb up the
path. Go forward across the tentacles. Use the chair to cross the ocean. Turn to
the right and climb down the path. Enter the elevator and push the up button. Exit the elevator
and walk to the big wheels. Now switch over to Hannah.
Hannah:
Push the down button. Exit the elevator. Turn to the left and
go forward one time. Turn to the left and walk towards the device. Push the
button to call the gondola. When it stops, turn to the right and go forward one
time. Climb up the path. Go forward to cross the tentacles. Use the chair to
cross the ocean.
Turn to the right and climb down the path. Enter the elevator
and push the up button. Exit the elevator and walk towards the big wheels. Now
switch over to Sam.
Sam:
Zoom in on the hand sign. Push the second green highlighted
switch from top. Push the hand sign. When docked, zoom out, turn to the right and enter
the elevator. Push the down button. Exit the elevator and climb up the path. Use
the hanging chair to cross the ocean.
Cross the footbridge. When you enter the temple, go one step
forward. Turn to the left and keep on walking straight ahead until you can’t go
any further. Turn to the right. Keep on walking straight ahead until you go
through the tunnel. Turn to the right and go forward.
Go through the next tunnel. Turn to the right and cross the
footbridge leading over the water. When you’re facing the vases again, turn to
the left. Go forward five times. Turn to the left and climb up the stairs.
Turn to the right and enter the room with the painting.
You’ll have another brief encounter with the priest. This time he seems to be
satisfied, although he doesn’t say a single word. He’ll give you a cd-rom. Great… there’s only one place you can play
cd-roms.
And that is on the gas collectors island.
Turn around and exit the room. Turn to the right and climb
down the stairs. Turn to the left and go forward three times. Turn to the right
and go forward one time through the dark tunnel. Now you’re back in the main
entrance. Go forward to climb down the wooden stairs all the way.
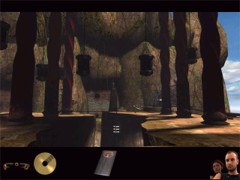
Walk forward here to climb down the wooden stairs
Go
across the stone bridge. Go forward to the next stone bridge. You’ll have
another close encounter with Dr. Bremmer and Dr. Hovis. Cross the stone bridge.
Go forward. Turn to the right and cross the footbridge. Turn
to the left and enter the opened door. Turn around and zoom in on the conduit at
the right of the door. Close the door by pushing the button.
Turn to the right and go forward. Turn to the right and keep
on walking across the footbridge until you are standing in the elevator. Pull
the handle. Exit the elevator. Cross the footbridge.
Walk forward two times and climb up the
stairs. Turn to the
left and enter the air ship. When facing the wooden steps, turn around and go
forward. Turn to the right and zoom in on the steering device.
At the very left you’ll see a row of five little blue
buttons. These buttons can be pushed to recall previous coordinates. Push the
most left button and then the big blue one between the steering handles to be
transported to the gas collectors island.
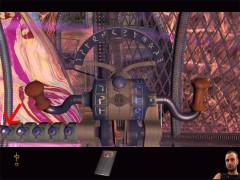
The correct blue button at the left
When docked, zoom out and
exit the ship. Go forward one time. Turn to the right and walk passed
the gas collectors. Standing outside again, turn around and zoom in on the blue
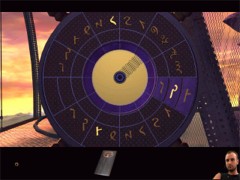
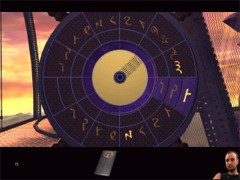
pedestal with the cd-rom reader. Place the cd-rom at the right spot. Push the
three blue symbols and note the signs for the graduation arc (the upper
highlighted signs) and for the right steering wheel (the lower highlighted
signs) again.
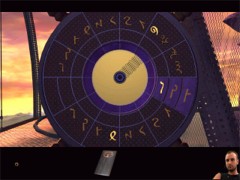
The first set of signs
The second set of signs
The third set of signs
Return to the air ship.
Enter the ship and enter the right cockpit again. Now you have to set up the
steering device again with your new coordinates.
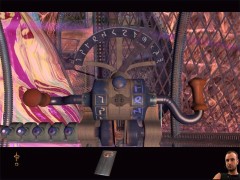
The pointer and steering wheels in correct position…
Now you have to make the
next combination of signs. So don’t touch anything else yet!!!
…and again…
Now you have to make the
next combination of signs. So don’t touch anything else yet!!!
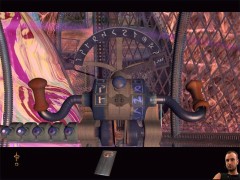
…and again. Now you may push the big blue button between the handles!!!
If you did everything
okay, you’ll go to the next part of the game…
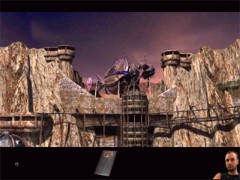
Good job!
If you’re vessel stops above
the ocean in the middle of nowhere, you did something wrong in the cockpit. In
that case you have to do the trick with the steering device again.
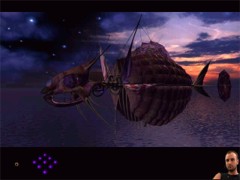
No good job!
To go to the next chapter
of this walkthrough, click on the image below…
…to go to

Matia Island, Part One
View this guide raw, exactly as the archive holds it
Parts of this guide
One guide by Bert Jamin, in 8 parts. They read in order, and the part you are on is marked.