Schizm: Mysterious Journey – Chapter 3

Written by Bert Jamin (www.gamesover.com)
August 2001
Click at one of the images to go directly to that part of the
walkthrough.


Or click at the image of Hannah and Sam at the bottom of this page to go to
the next part.
Bosh Tunnels, Part One
Sam:
When you arrive at your
new destination, zoom out and exit the vessel. You can hear Hannah now. The good
news is that she’s trapped somewhere.
Turn to the right and
climb down the stairs. Walk forward until you see a footbridge leading to the
left. Cross the footbridge to end up in an elevator. Push the handle in the
elevator. If you don’t do this, it will take quite some time to finish the game
🙂
Exit the elevator and
walk the footbridge all the way to the end. By the way, I hope you don’t have
fear of heights… In the next room just walk straight ahead to the strange
lumped door. You can’t open this one. But at the left of this one is the same
kind of door which you can open.
So turn to the left, go
one time forward and turn to the right. Zoom in on the door. Zoom in on the gold
colored conduit next to the door. Push the button
between the two gold colored conduit. The door now opens. Enter the door.
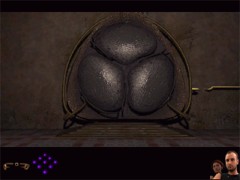
The correct door
Walk forward and cross
the footbridge. Turn to the left and cross the brickwork bridge. Walk into the
direction of the next brickwork bridge. Now you’ll have a close encounter with a
priest. I don’t know what he’s talking about (and neither will you) but he seems
to be upset.
Turn to the left and
cross the other brickwork bridge. Walk all the way up across the wooden planks.
When you reached the top, turn to the right and walk forward across the mono
rail.
You’ll see Base 1 in the
distance but it seems to be cut off. Turn to the left and walk passed the
obelisk shaped pillar. Turn around and zoom in on the pillar. Push the button to
call a funny way of transportation. Enter the vehicle and pull handle at the
right for another free ride.
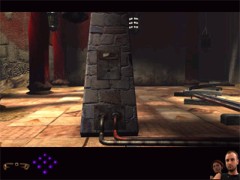
The obelisk shaped pillar
When the vehicle stops,
walk straight ahead into the darkness. Go forward one more time and you’ll be surrounded by eight
prayer vases. Notice that each and every vase looks different from one and
other.
Also notice that each and
every chest the vases are standing on, has different colored plates. When you
touch a vase, you’ll hear a strange kind of word. And if you touch a colored
plate you’ll hear another word. Because you don’t know what to do with this
information, write down each and every word you hear.
Let’s start with the
vases. I started with the green one, which is to the right of the tunnel you
came through. I pushed all other vases at the right of the green one. I made up
these words:
vase 1: doss
vase 2: leszz
vase 3: dihmah
vase 4: aahrih
vase 5: anahih
vase 6: drahih
vase 7: reijuh
vase 8: thuldih
Now let’s have the
colored plates…
green: tundrah
black: thanduh
white: hellhah
yellow: nakrih
purple: rueshsah
red: sahrm
blue: dihmah
orange: llezadjih
By the way, please don’t
e-mail me about typo’s on these ones also…
When you’re finished,
walk between the vase with the yellow plate and the green plate back into the
tunnel. Enter the vehicle and pull the right handle. This will bring you back to
the main entrance.
Exit the vehicle. Go
forward two times. Walk
along the mono rail into the dark tunnel. Now you’re standing on a square near
the water. Turn to the left and enter the temple.
Walk straight ahead two
times. Turn to the left and zoom in on another set of eight prayer vases. Zoom
out and turn to the right. Go forward one more time. On the crossing turn to the
right and climb up the stairs.
Turn to the left and
enter the small room. Walk towards the image of the Chinese priest. Zoom in on the
stone tablet at his feet. It’s the same kind of image of a bee Hannah has seen
before near that pear shaped device.
Zoom out and zoom in on
the stone tablet at the left of the priest. In the center of the image you’ll
see the same kind of sign Hannah has seen on the wooden tablets with the signs
for the new coordinates, but which was missing on the plank in the pear shape device.
This one look like a roman III. Make a note of this sign.
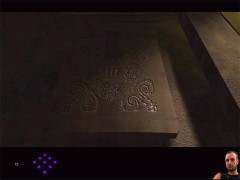
The roman III
Zoom out, turn around and
go forward two times. You’re standing on top of the stairs. Turn to the left and
climb down the stairs. Turn to the right and go forward once. Turn to the left
and you’ll see another set of eight prayer vases.
Turn to the right and go
forward twice to exit the room. Turn to the left and you’ll see spiral stairs. Climb up these
stairs until you can’t go any further. Turn to the right and step on the second
floor.
Turn to the right and
walk straight ahead. When you are standing in the corridor, go forward one time.
Turn to the right and enter the little dark room. Look around and on the left
wall you’ll see a mural of a scientist near some kind of spherical device.
You’ll also see a triangle. Zoom in on the triangle.
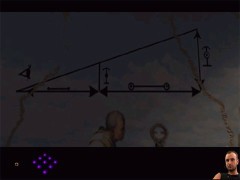
The beginning of one of the toughest puzzles…
Notice that the triangle
is divided by a line. Also notice the sign at the right of that line. Also
notice the same kind of sign at the right of the triangle. Also notice the sign
at the base line of the triangle. Zoom out and turn around. You’ll see some kind
of control panel with five meters and some sort of pipes behind those meters.
You still don’t know what
to do with this device, so ignore it for now. Note that the painting above the
device is the same as the one in and next to the triangle. This can’t be a
coincidence…
Exit the room and turn to
the right. Go forward one time. Turn to the right and you’ll see another room.
This one has a broken pillar and which is much more important, it also contains
another Mission Log. Zoom in on the Mission Log and listen to the three messages
of Angela Davies.
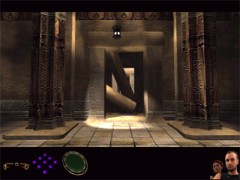
In front of the broken pillar you’ll find Angela Davies Mission Log on the floor
Zoom out and go back
all the way to the main entrance with the obelisk. In case you’ve forgotten the
way back, here it comes. Turn to the right, go forward one time, go down the stairs, go forward twice, turn to the left,
climb down the spiral stairs, go forward once, turn to the right, go forward three
times, turn to the left, climb up the stairs, turn to the left, go three times
forward, turn to the right and go into the dark tunnel. You should be there by
now…
In the main entrance,
turn to the left and go into the direction of the red pillars. Notice the
yellow sign on the wall. That looks familiar! Turn to the right and walk passed
the slope pillar. Cross the footbridge at the end of the floor.
Look at and zoom in on the spherical
device. Hey, if I’m right this is the same kind of device you just saw on the
mural in the small dark room. Zoom in one more time and then look around. Start
with looking at the yellow sign on the wall. Then look to your right to discover
some kind of pole. When you keep on turning to the right you’ll discover five of
these poles.
Look down and pull the
handle of the device. Take some time to study the different parts of the device.
On top you’ll see a kind of lens with a red line across the glass. You can pull
out this lens by moving your handy cursor over the lens. With this lens you can measure
the height of objects. The scale of this instrument has 7 marks.
Zoom in on the lower part
of the device. With this part of the device you can measure the length of
objects. The scale of this device has 50 marks. By pressing the 0 button you can
reset the instrument to… 0. By pressing the + button, the length of an object
will be shown.
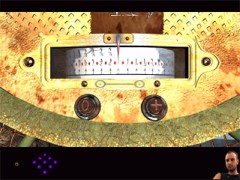
Notice the sign beneath the scale
Now zoom in on the brown
part above this scale. You’ll see the length scale. You’ll also see the same
kind of sign you’ve seen on the base line of the triangle. This scale has a
length of 10, which is also the length of the base line of the triangle.
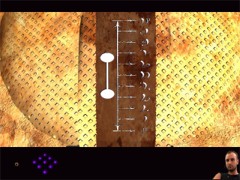
And the same kind of sign…
We will start with measuring
the height of the yellow sign. So aim the device on the yellow sign. Pull up the
lens until the red line is exactly above the yellow sign. You’ll see the scale
indicates 7. Now zoom in on the lower part of the device and push the 0 button
and the + button. And…. nothing happens! But you already know that the length
of this sign is 10
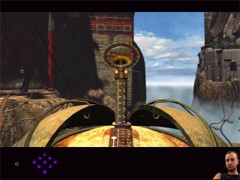
Measuring the yellow sign
Zoom out and aim the
instrument on the first pole at your right. Pull up the lens until the red line
is exact above the pole. You’ll see the scale indicates 4. Zoom in on the lower
part of the device. Push the 0 button and the + button. The meter indicates a
length of 45.
Zoom out and aim the
instrument on the next pole at your right. Pull up the lens until the red line
is exact above the pole. You’ll see the scale indicates 5. Zoom in on the lower
parts of the device. Push the 0 button and the + button. The meter indicates a
length of 16.
Zoom out and aim the
instrument on the next pole at your right. Pull up the lens until the red line
is exact above the pole. You’ll see the scale indicates 7. Zoom in on the lower
parts of the device. Push the 0 button and the + button. The meter indicates a
length of 20.
Zoom out and aim the
instrument on the next pole at your right. Pull up the lens until the red line
is exact above the pole. You’ll see the scale indicates 4. Zoom in on the lower
parts of the device. Push the 0 button and the + button. The meter indicates a
length of 25.
Zoom out and aim the
instrument on the next pole at your right. Pull up the lens until the red line
is exact above the pole. You’ll see the scale indicates 6. Zoom in on the lower
parts of the device. Push the 0 button and the + button. The meter indicates a
length of 35.
So the outcome of the
five poles is:
pole 1: 4 height and 45
length
pole 2: 5 height and 16 length
pole 3: 7 height and 20 length
pole 4: 4 height and 25 length
pole 5: 6 height and 35 length
Every length has to be
increased with the length of the yellow sign and has to be divided by 10. So the
true height of each pole is:
pole 1: (4*55)/10
= 22
pole 2: (5*26)/10 = 13
pole 3: (7*30)/10 = 21
pole 4: (4*35)/10 = 14
pole 5: (6*45)/10 = 27
Are you still with me 🙂
??? When you’re finished, zoom out. Turn around and go all the way back to the
dark room on the second floor with the mural.
In case you’ve forgotten
where this is: go through the dark tunnel at the end of the main entrance. When you are standing on the square
near the water, turn to the left and enter the corridor. In the corridor go
forward three times until the crossing. Turn to the right and climb the stairs. Go forward
and climb down the other stairs. Turn to the right and go forward three times. Turn to
the left, go forward one time and climb up the spiral stairs. When you can’t go
any further, turn to the right and step on the second floor. Turn to the right
and enter the corridor. Go forward two times. Look to the right and voila… the
dark room!
Enter the dark room. Zoom
in on the device. You’ll see that all the meters are pointing to the green mark.
Number all meters from the left to the right as number 1 up to and including 5. Look at the
image below for the correct numbers…
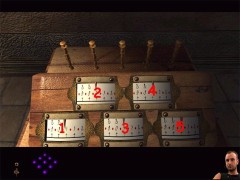
The correct order of the meters
Your goal is to get all
meters pointing to the correct position and by doing that, the poles behind the
meters will raise. The height of these poles must correspond with the height of
the poles in the main entrance.
You have to change the
meters by dragging them to the correct position. You must do this in the same
order as the poles in the main entrance. And you MUST do this by moving your
cursor from the right to the left with each and every meter!
And to make it even more
difficult, you have to count the lines on the meters in order to get them in the
correct position. Are you ready? Here we go…
By the way, save your
game before you start fussing around with these meters. A mistake is very easily
made!!!
At meter number one, move
the scale 22 marks from the right to the left.
At meter number two, move
the scale 13 marks from the right to the left.
At meter number three,
move the scale 21 marks from the right to the left.
At meter number four,
move the scale 14 marks from the right to the left.
At meter number five,
move the scale 27 marks from the right to the left.
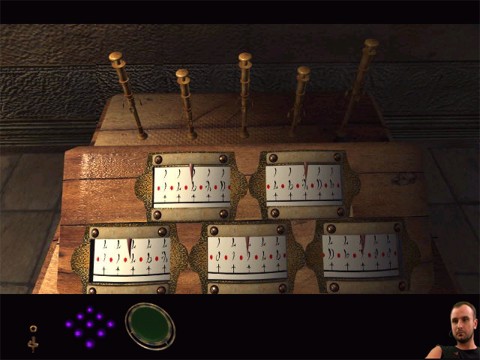
All meters in the correct position… and got the lens!
When you’ve done this
correct, a drawer beneath the device will open, revealing an optical lens. If
the drawer won’t open you did something wrong with these meters and you have to
start over this part. When you’ve got the lens, zoom out. Turn around and exit the dark
room.
Turn to the left and go
forward two times. Climb down the spiral stairs. Go one time forward and then turn to the left.
After one more step forward you’ll see another set of prayer vases and after the
next step forward another set. That makes 32 vases in total. That sounds
promising…
You can’t go any further
now. Turn to the right and you’ll see a golden statue and a wooden footbridge
leading over the water. Save your game and switch over to Hannah.
To go to the next chapter
of this walkthrough, click on the image below…
…to go to

Bosh Tunnels, Part Two
View this guide raw, exactly as the archive holds it
Parts of this guide
One guide by Bert Jamin, in 8 parts. They read in order, and the part you are on is marked.