Tomb Raider: Chronicles Walkthrough by Mark "Sinjin" Smith
LABYRINTH


Head toward the angled bench on your left to trigger the movie. Now go to the front of the church and locate the three stone buttons
and press the middle button, then the left, and finally the right. Watch another frightening movie then turn left to face
the urn in the wall. Note the ghostly skeleton to your left. Keep your distance so he won’t attack and carefully make your way to the door
that the wraith took in the first movie. The skeletons will disappear and reappear in new locations creating a sort of maze
you must follow. Here is an easy (and safe) route:
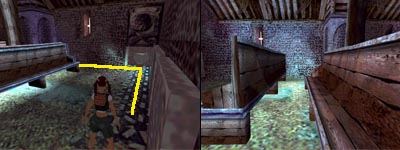
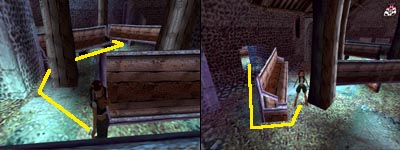
Stick to the wall with the buttons and move toward the corner. Walk between the pair of pews to reach the pillar then go
around the left side to avoid another skeleton. Continue forward past the next pew and make a tight turn around the end
where another skeleton is waiting. You should now be able to enter the next room and approach the first pew. Go to the
right corner and get the Bone Dust. Now make your way back to the front of the church using the
same route you took to get here.

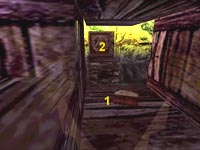
Cross the bridge and pull the switch to rotate the central platform and lower some bridges. Cross the new bridge and continue
up the wooden ramps and make a right to cross the higher bridge leading back to the central area. Ignore the switch and turn right
heading up more ramps to the very top where you can crawl to get a Medkit. Now return to the previous opening you just passed and follow the
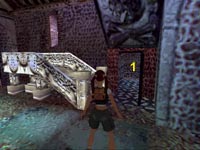
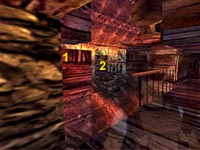
passage to the next bridge. Cross the bridge and get the Bestiary Book (1) then jump the gap to go
through the door (2) that just opened. Continue forward until you reach an area with broken walkways along the walls. You will have
to jump and climb to reach the top but you are aided by a ghostly white light. Get the Medkit on the lower floor then do a
standing jump to grab the edge of the first walkway and pull up.
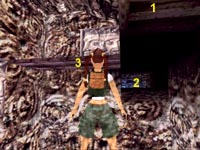
Make a standing jump from the top of the incline to grab the walkway above (3). Turn around and make a running leap to reach the next section
of walkway and continue to the top. Now is a good time to save if you haven’t been saving regularly all along. Go
through the exit and slide down the slope. At the bottom you will spot some ghostly lights and you must now follow them
quickly as they will guide you out of this area. If you ignore them or stray too far from their path you will encounter the
horrible monster that lives in the maze and ye shall surely die.
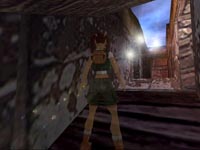
Follow the lights making standing jumps over the various pits when necessary. If you fall into a pit you can use the lower
tunnels to find your way back to the top where the lights will be waiting for you. Continue following the lights until you
reach the tunnel with the slope. Slide down to avoid the monster who quickly moves in as the white lights vanish. At the
bottom you can collect a Medkit then quickly go through the iron maiden and fall down the slope to encounter Father Patrick.
He leads you into the final level of this saga.

Head left through the tunnel until you reach the pit. Jump over the pit then head up the slope and turn right at the junction.
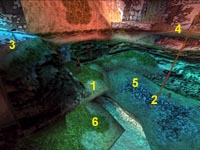
You get a nice view of the area as well as the two Imps who come out to toss rocks at you and finally an unlit torch on a ledge above
your current location (1). Make a running leap toward the rope (2) hanging above the pit then spin to face the ledge with the
torch (3) and start swinging until you can launch toward the platform. Make sure you are at the very bottom of the rope for maximum
arc. Use Sprint to increase your momentum and jump at the just the right time to land and get the Unlit Torch.
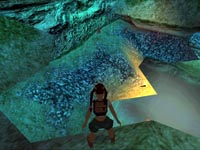
Jump back to the rope and make a decision on how to proceed. You can try to swing directly over to the crawlspace to
your left, but this jump is nearly impossible to make. I recommend going for the sloped pillars across the way and you can even
pick up a spare medkit along the way. Swing to the opposite platform and drop down to enter the tunnel and get the Medkit.
Climb back up to the flat ledge and survey the arrangement of pillars and the crawlspace you need to end up in behind you to your
left. You may want to save now. Climb the short lip (1) and as you slide down jump to the next pillar (2). As you slide
down again jump at the end to land on the next pillar (3). As you jump from this pillar press left and grab to angle toward the
middle of the pillar and grab on. Almost there. Pull up and as you slide down jump once more to the next pillar (not shown) and
make one final jump to the crawlspace. Angle this final jump to the left and grab as you hit.
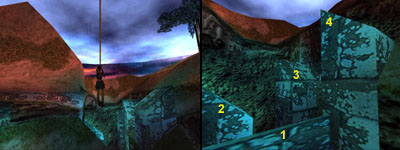
Pull up and crawl through the low gap and around the corner to the left. When the path gets too narrow you will have to back off
and shimmy to the left and pull up into the final crawlspace to continue. Drop down into the other area and get the Medkit on the
floor and some Chalk that can be pried from the far wall using your crowbar.
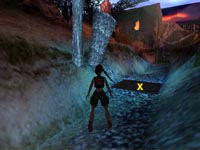
Now retrace your path back to the beginning of this entire level and locate the smooth section of ground (x) just outside the
tunnel and to the left. Use the Chalk to draw a symbol on the floor and trigger a very exciting movie. Enter the nearby opening and slide
down the slope to start another movie. After you get your orders from the demon head across the water and between the two buildings and follow
the water. Jump over the fast moving stream and continue toward the windmill.
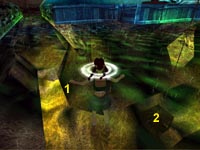
Dive into the water near the mill and head toward the left channel. Take a deep breath and dive down toward
the gold light and turn right going through the hole (1) in the bottom. Watch the red water demon swimming around and learn
his pattern. When he swims off to the right you can dash forward and get the Coin. If the demon
catches you there will be a struggle that uses much of your air. The current will force you out a small opening so you can
resurface and breath before trying again. Once you have the coin quickly swim to the cage (2) located at the front of
the mill with the demon in hot pursuit. Use the Coin on the cage to trigger the movie where the Imps get their revenge on this demon.
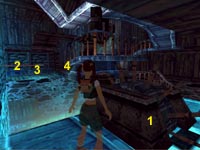
Return to where you found the coin and locate the underwater entrance to the mill. Once inside find and pull the crank (1)
five times to open the door then run to the end of the ledge and make a running leap and grab to catch hold of the bar (2).
Swing around and release at the right time to launch and land on the opposite ledge (3). Jump onto the next platform (4) off to
the right of your current position then crawl through the gap under the metal door before it shuts. Tumble and run around to
dodge more bats then face the steep slope but don’t slide down. Jump to grab the ledge above and pull up then turn to
face the switch on the wall. Jump over and pull the switch to shutdown the windmill.
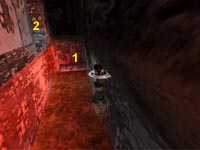
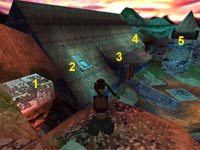
Locate the ledge above and pull up to face the buildings. Make a running jump to the stone ledge (1) then make a running
jump to the first window (2) on the roof of the horseman’s house. Next jump to the flat area (3) near the flat area above the door
followed by a running jump to land near the next window (4). If you miss any of these flat areas you will slide off the roof and
have to start the sequence over. Now comes a very tricky running leap to the high ledge (5) on the next building. This is
a very unpredictable leap. Sometimes you will make it and other times you will miss the exact same jump. Just keep trying until
you make it. Once you do make it to the roof you then need to crouch and tumble forward through the window. Note: You
cannot crawl forward through this window, but you can crawl backwards into the window and drop down. Flip the lever on the
wall to shutdown the waterwheel and start the final movie for this chapter.
This final chapter is one of the hardest and introduces some new stealth tactics that we have never seen before. Your
objective is to obtain a powerful object known as the Iris. Naturally this item is heavily guarded by all sorts of
soldiers and advanced security systems. You do have the assistance of a computer hacker named Zip who will help guide you
through this area. Good luck!
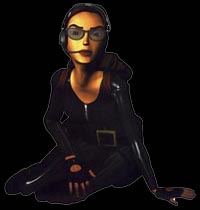
Talk to Zip as you proceed down the first hall then go left and shoot off the vent cover to the right. Start crawling through the vent
and watch the movie that plays. Note the gold rose on the floor. Continue to the end of the shaft and turn right staying crouched to
avoid the laser moving above you. Get the Medkit then turn and approach the hole in the bottom of the shaft. Lasers protect this
opening so watch the laser moving overhead and when it goes past quickly stand and jump over the hole then crouch again and continue
forward to the safe area.
You now have a choice. You can go right and explore the dark room to get some items that will make things much easier later on,
but doing this will activate additional lasers back where you began this level. You can choose just to go left to get the secret if
you wish. The next paragraph explains how to do both.
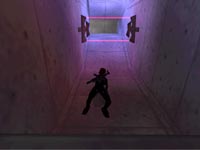
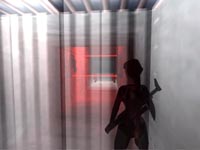
Security lasers are now protecting the hall where you first started this level. Watch their movement and learn the pattern.
When the top lasers start to move away from you run after it and quickly jump over the bottom lasers that are approaching.
Crouch and crawl to the end of the passage. Now wait for the top laser to come and go then stand and climb the ladder leading
up to the next vent. Move forward until a movie plays showing you the Iris.
Follow the passage and collect some more ammo for the HK to as you round the corner to the right then continue walking
down the next passage to keep quiet. After a brief movie showing the huge guard below you will need to approach the locked
door and use the Hammer on it. If you opted not to get the hammer earlier then you have a dangerous battle ahead of you,
so you may want to save now before reading the next section, otherwise skip over the next paragraph.
Since you don’t have the hammer you must target the lock on the door and shoot it off with your HK. The floor under you will
collapse and send you sliding into the room below with the armored guard. You now have 2-3 seconds to target and snipe this
guard in the head. If you miss or hit him anywhere else you are dead. His laser weapon kills you in a single blast. After you
have killed this guard you can climb into the ventilation shaft and locate a broken grate. Drop into this shaft and hang on
while several explosions rock this area. After the second explosion you can drop and run to the end of the passage where you
will find a ladder leading to the room above.
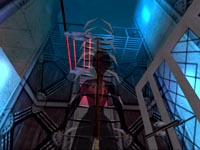
Regardless of how you got here, you are now in a tall room with a ladder leading up and another security laser moving back and
forth. Time your climb to avoid contact by sticking to one side of the ladder and starting your climb as the laser moves off in
the opposite direction. Look left at the top and shoot the shaft cover then climb into it. Continue to the left and get more
HK ammo then continue to the end of the vent making sure to walk to avoid making unnecessary noise. You should be able to
spot the guard without being seen. A quick headshot using your scope will silence him. If you miss you are pretty much dead as
he will activate a turret that will tear you to shreds. You may want to save before attempting the headshot.
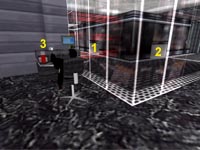
Drop into the hall below. Big red beams block your path so target the damaged vent cover (1). Crawl through until you can stand
then draw your weapons and target the second vent cover (2). Exit into the hall on the other side of the red beams and listen
to Zip who gives you a clue about the sleeping guard ahead. Keep quiet as you sneak around the glass wall and get the
High Level Access Card from the desk (3). Use this card to enter the nearby supply room behind the
guard. A quick search of the shelves will get you a Medkit and some HK ammo.
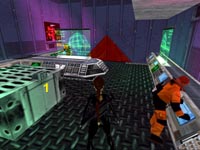
Return to the main passage and head for the elevator and press the button to use it. Enter and use the panel to reach the
16th floor where a pair of guards can be overheard talking to your right as you exit. Crouch down and crawl toward the
triangular door to the left and use your new access card to enter. There are two lab technicians inside who won’t bother
you if you don’t bother them (don’t draw your weapon). Locate the switch on the central table (1) and press it before quietly
leaving this room.
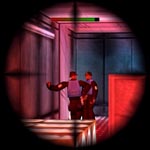
Those guards are still talking down by the crates. Use some sharp shooting skills to take them out from a distance. After you drop
the first one you will have a few moments before the other guard reacts. Aim and shoot quickly then head to that end and stop at
the corner leading to a right turn. Peek around the corner and wait for the guard to walk away then drop him with a headshot.
Continue toward the Iris which can be seen through the metal cage and head through the unlocked door on the opposite side of this room.
Keep your weapon holstered in this next room and ignore the man in the radiation suit – he just works here. Press the switch to
the right of this man to release a radiation suit from its compartment. You aren’t after the suit, but rather the
Access Code Disc that drops out with the suit. Take the disc and return to the elevator back where you
first entered this area.
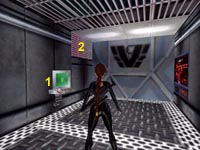
Crouch to continue through the low opening and you will reach a walkway overlooking a large room. Below is a door being guarded
by one of those armored troopers. Move quietly across the walkway until you reach the hall leading to a room with some shelves.
Search these shelves for a Medkit and a Cloth. Head to the next walkway and quietly make your way down
to the lower area.
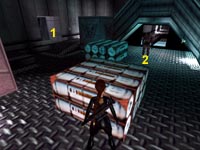
Return to the large room and cautiously sneak up to the trooper (2). When you are behind him use the Chloroform-soaked cloth to put
this guy to sleep. If he detects you he will spin around and you can still shoot him but the gunfire will attract another
trooper that you must also kill with a headshot and you won’t have the element of surprise. When the guard(s) have been
eliminated use the access card to open the door and enter.
Follow this passage and the door slams shut behind you just as another trooper charges from the door ahead. Quickly target and
take him out with a headshot before he fires his deadly laser. Grab the HK ammo behind you then search his body for an
Iris Lab Access Disc. Locate the computer terminal around the corner and use the new access disc to open
the door to the next guarded area.
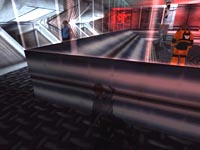
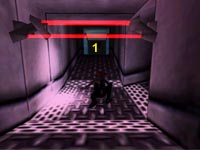
Shooting the scientist triggers a door to open back near the computer terminal and several guards come to investigate. Let them
come around the corner and you can easily kill them one at a time with a headshot. After you have killed the third guard sprint
past the turret and head for the door where the guards came from and kill the remaining two guards in this next passage. Crouch
and move into the junction and go left to get Rose 30. Now face the other way and wait for the lasers
to pass before running into the next stairwell (1).
If you had listened to Zip and spared the scientist’s life he would have helped you open the door to get to this area.
Oh well – roses aren’t cheap! Head up the stairs until you reach the door at the top leading to the Iris control room. Enter and
pull the switch on the wall to turn off the security force field. It only stays off for a few moments so quickly make your way
back down to the bottom and enter the Iris room to get the Iris before it comes back on. Head through the
opposite door and run down the long hall to exit this level.

Continue around the corner and enter the next room where you will stop to talk to Zip. He tells you to drop all your weapons
in the tray so you can pass through the X-ray scanner. You MUST do this. Go through the scanner and skip the first box with the
bomb in it and get the Medkit from the second box. Head into the next hall and turn left. Continue forward and go right then
enter the first door that leads to an office.
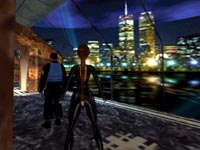
Return to the hall and head back to the previous hall where you can easily find the locked door with the keypad next to it.
Examine the new access card in your inventory to get the code 8526 then use the keypad to enter this number and press
Action once more to confirm the code. Enter the bathroom and kick open the stall door so you can move forward enough to jump up
and pull the ceiling hatch open. Climb into the air vent and proceed to the long vertical shaft. Back over the edge and hang
then drop and grab then drop once more to safely reach the bottom without taking any damage.
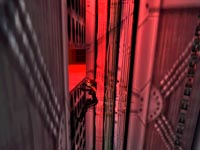
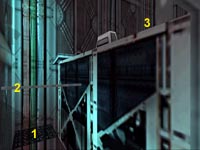
Back flip to the ledge (1) behind you then turn to face the alcove on the opposite wall. Now locate the horizontal bar (2) and take a running
start to jump and swing around it. Time your release so you land in the alcove on the other side. Now line up (see picture) and do a tricky
diagonal jump to the top of the elevator car (3). Steer to the right as you jump and grab then pull up to the top. Cross over to the far elevator car to get the HK ammo. Open the roof hatch and drop into the car then press the button to open the doors.
Quietly sneak out of the elevator and press the button between the two elevators to open the doors on the right. Enter and press
the button to ride to the next floor. Three guards are waiting for you on this floor so quickly press the button to try another
floor. Stray gunfire damages the elevator and you start to freefall to the ground far below. Quickly press the keypad to
activate the emergency brakes and avoid a horrible death.
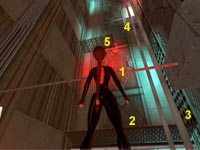
Exit the car through the ceiling hatch and line up with the horizontal bar (1). Make a standing jump to this bar and swing around
releasing it to grab the opposite ledge (2). Pull up to the ledge then climb the textured wall (3) to the right. When you reach the
area where there is a vent (4) to your left you need to back flip to land on the ledge (5) behind you. Now you can make a running leap
to reach the next bar and swing around to launch to the opposite corner ledge. Jump and grab the edge of the vent and pull into it.
You may want to save here.
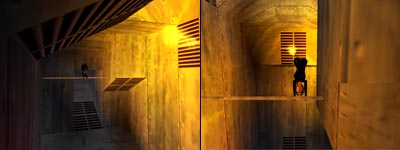
Drop down onto the sloped floor and as soon as you hit the second slope immediately Jump and Grab to reach the bar above rather
than slide into the fire below. Wait for the fire to go out then release the bar to launch toward the next bar and grab it. Watch
the fire on the far ledge and when it goes out release this bar to land on that ledge then move away from the vent before more flames
shoot out. You can reach the opening in the left wall with a standing jump and proceed across the elevator shaft by walking the pole
you swung across earlier. Once across this obstacle you can get the bottle of Chloroform then slide down
the next shaft where you can spy a guard patrolling the next passage.
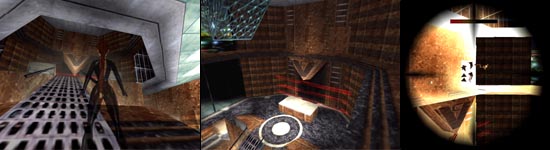
Continue around the balcony and locate the button on the wall just past the fire extinguisher. It opens the door and also
turns off the security lasers back at the main entrance. The sniper is still after you so quickly jump back off the ledge and
do a safety drop then run for the passage to avoid more sniper fire. Go down this passage until you reach the step near the end
and make a running leap to the raised floor in front of the aquarium. If you step into the lower part of this room you will die.
A guard will enter the hall and begin firing. Jump around to dodge his attacks and one of the bullets will shatter the tank and
short out the security system.
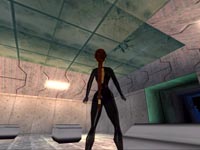
Press the button and a door will open. As you enter Zip will talk to you some more. Walk over to the pair of switches
and flip them both to disable the gun turrets then quickly run down the passage and turn right to go through another door. A
trooper is chasing you so don’t waste any time. Continue past the machine and into the storage room with a bunch of booby-trapped boxes. Jump up and grab the hatch to open it then climb into the vent shaft. Now you can crawl around to the other side
of the protective glass and press the button to activate the X-ray scanner. Locate the box with the object inside then crawl
back around to the storage room and locate that same box. Open it and take the Teleporter Disc.
Now go back into the next room and locate the green console where you can use this disc. Climb up to the central area with the
big “X” and use the Iris in the receptacle to transport Lara to another room. Quickly drop into the tunnel and continue until
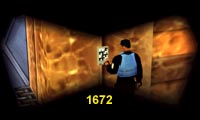
you hear from Zip. Using the zoom capabilities of your headset, watch the combination the guard uses to open the door to the
security room. If you missed it the code is 1672.
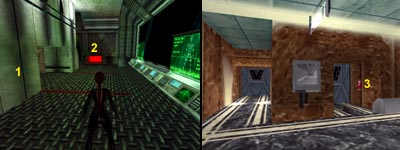
Now that the scanner is off you can take your HK and go back through the scanner. Cut through the
lounge to reach the hall and turn left. Go to the end and locate the locked door on the right. Shoot the fire extinguisher (3)
to blast open the door then go through to end this level.
View this guide raw, exactly as the archive holds it