|

INTRODUCTION


Welcome to Lara’s latest adventure. And you thought she was dead! Actually that is still up for debate as these
new adventures take place as a series of flashbacks as Lara’s friends gather for a memorial service in her honor.
You will explore 13 new dangerous and exciting levels spanning 4 new locations and several decades. You will even get
to play as the teenage Lara Croft.
As always, Sinjin will reveal everything you need to know to win this game and get a perfect score. All 36 secrets
are indexed at the end of this walkthrough and sorted by level making it very easy to find the one(s) you missed.

I’ve also included a golden rose icon next to each paragraph that describes the location of one of these secret roses.
If you are skilled enough to collect all of the golden roses you will unlock the items in the Special Features menu.
All weapons and level specific pick-ups are color-coded in the text, and you can find links in the Combat and Weapons
section to the text describing the location for each weapon pick-up for each chapter those weapons appear.
Special notes and advise (such as good times to save your game) will appear in italics.
NEW MOVES
Here are the default controls for moving Lara around during her adventures. You can customize many of these controls to your liking so find a combination that
you are comfortable with.
| Control |
PC Command |
PlayStation |
Dreamcast |
| Movement |
Cursor/Arrow Keys |
D-Pad |
Analog Stick |
| Action |
Ctrl |
 |
 |
| Draw Weapon |
Space Bar |
 |
 |
| Jump |
Alt |
 |
 |
| Roll |
End |
 |
 |
| Use Flare |
< |
Select + R1 |
L + R Triggers |
| Walk/Sidestep |
Shift + Arrows |
R1 + D-Pad |
D-Pad |
| Sprint |
? |
R2 |
R Trigger + Analog Stick |
| Crouch |
> |
L2 |
R Trigger |
| Crawl |
> + Arrows |
L2 + D-Pad |
R Trigger + Analog Stick |
| Look |
Ins (Hold) |
L1 (Hold) |
L Trigger (Hold) |
| Change Target |
Ins (Tap) |
L1 (Tap) |
L Trigger (Tap) |
| Zoom In |
> (binoculars or laser) |
L2 (binoculars or laser) |
R Trigger (binoculars or laser) |
| Zoom Out |
? (binoculars or laser) |
R2 (binoculars or laser) |
(binoculars or laser) |
| Normal View Mode |
Space Bar |
|
|
| Pause Game |
P |
Start |
Start |
| Inventory |
ESC |
Select |
Start |
Lara has a large collection of moves and actions she can perform. This list seems to grow with each new game. Below is a brief description for all of her moves
in this adventure. New moves are shown in in bold:

I will frequently use the term Safety Drop in this walkthrough. This is a term I have been
using since the original Tomb Raider walkthrough and it refers to the process of hanging from a ledge first then dropping
to minimize or eliminate any damage you might otherwise take from a fall. You can also minimize damage from long falls by hitting the
Roll button just as you hit the ground.
One past helpful tip. I noticed while playing this game that the camera will often get stuck in some weird angle making it difficult to
control Lara. If this ever happens just press the LOOK command to restore the camera to its regular position (behind Lara). You can also
use this command to interrupt lengthy camera pans if you have already seen them.
COMBAT and WEAPONS
Stealth vs. Combat
You may find it to your advantage to sneak around and avoid unnecessary conflicts. In the later levels ammo and medkits are few and far between so keeping quiet
and out of sight can get your further than killing everything that moves. Use the walk and crouch/crawl commmands to assist you in your stealth tactics. You
will also want to use your sniping abilities to eliminate enemies quickly and silently. Effective use of the scope with the revolver is even required in some
levels.
Targeting
Lara now has an optional manual targeting system where YOU get to choose who she fires at. A simple press of the Look button will select the nearest target
while repeated taps will cycle through any other targets in range of the currently selected weapon. Even if you pick the standard auto-aiming you can still
cycle through targets using this method.
Hardware List
Lara’s weapon’s list is a bit more limited in this game but there is still plenty of firepower at your disposal to eliminate your enemies.
Pistols – (Submarine pick-up)
These are Lara’s trusty sidearms she brought with her from her previous adventures. Use them “John Woo-style” to
take out your basic baddies. Their unlimited ammo supply makes them a good fall-back weapon when you run out of ammo for your bigger guns. You usually start off with these weapons unless the story dictates otherwise.
Shotgun – (Rome pick-up) – (Submarine pick-up)
This old favorite is back complete with two types of ammo; Normal and Wideshot. Using the right ammo at the right time will make things easier and
I’ll tell you when to load up each kind for the best results. The slow reload time on this gun makes it useful for single attackers only.
Revolver – (Rome pick-up)
More powerful than the pistols; this powerful handgun is the equivalent of the Magnums or Desert Eagle from the earlier games. It also has a slow reload
time and a tricky aiming system so you cannot fire while flipping, etc. It makes a good sniping weapon when combined with the Laser Scope.
Desert Eagle – (Naval Base pick-up) – (Submarine pick-up)
This powerful handgun packs the same punch as the Revolver and features the same limitations. Ammo is usually scarce, so
use this weapons only on the toughest opponents.
Uzi’s – (Rome pick-up) – (Naval Base pick-up) – (Sinking Submarine pick-up)
This powerful old favorite is back, but ammo is so limited you will hardly ever get to use it except for the most serious of encounters.
HK – (Escape with the Iris)
This is a new weapons and features three firing modes; single shot, burst, and full automatic. Ammo for this weapon is even more limited than the Uzi, so keep
it in single shot mode unless you are facing a unique enemy.
Chloroform – (13th Floor) – (Escape with the Iris)
This is a new stealth “weapon” with very limited opportunities for use. When combined with a cloth (use combine feature in your inventory) you can use the
combined item on an enemy to render them unconscious.
Laser Scope – (Rome pick-up) – (Naval Base pick-up)
Combine this handy little scope with the Revolver and you can zoom in for precise target shooting. Headshots are a basic part of the stealth tactics required in
later levels of the game.
Crowbar – (Rome pick-up) – (Submarine pick-up) – (Old Mill pick-up)
This is more of a tool than a weapon although you will get to smack at least one person with it later in the game.
Medkits
These come in both small and large sizes and heal half or all of Lara’s health accordingly. Try to save as many as possible for the later levels
where things get really dangerous and these medkits are in short supply. Lara will also heal after each level (without using a medkit) so avoid wasting medkits
if you are near the end of a level.
Flares
You can’t do any damage with these handy items, but they will be invaluable as they illuminate your surrounding making a great light source for finding your way
around dark areas such as the submarine. You will often find valuable items and passages you would have otherwise overlooked in the dark, so use a flare whenever
it gets too dark to see.
Torch – (Gallows Tree Pick-up) – (Old Mill Pick-up)
Another valuable light source. Lara can light this piece of wood by pressing Action near any existing flame. It can be dropped and reclaimed as needed since Lara
is unable to climb or shimmy while carrying the torch.
Binoculars
These allow you to survey the surrounding area to pinpoint items and enemies. Use the zoom commands to identify your targets.
Headset
Works just like the binoculars but with the added ability of an infrared mode that lets you see in the dark or invisible heat sources.
Grappling Gun – (Red Alert)
This item is found near the end of the game and comes complete with its own scope. Once equipped you can aim at the ceiling and when the target turns green
you can fire.
Timex-TMX
Lara’s watch certainly “takes a licking and keeps on ticking”. Use this device to get level statistics, game status, and your current completion times. Sinjin’s record time for the entire game is 6h:22m.
Gold Roses
There are three dozen of these roses scattered across the various levels in this game. They have no function, but if you collect all 36 there will be something
special waiting for you in Special Features menu. The Rose in your menu will display your current total and the number remaining.
Weapons and Ammunition
Ammo is scattered all over the various levels. It is always a good policy to save your bigger and better weapons for the bigger and badder enemies.
Sometimes I will give you a recommendation for which weapons to use, but feel free to use your weapon of choice. There will also be times when I might
say “you will find a certain weapon in a certain location” and all you find is ammo for that weapon. This is not a bug or error in the solve, but rather
part of the game design. Weapons appear in certain locations, but if you ALREADY have that weapon from an earlier “pick-up point” then you will find
ammo for the weapon that would otherwise be there.
SPECIAL NOTE: Your ammo and weapons are reset between each of they stories/chapters. As you
near the end of each story you may as well use all of the firepower at your disposal since you can’t take it with you.
Level Specific Items
There are additional items that you will find on each level that are used to solve puzzles or for other activities. These will be color coded red in the walkthrough text so you can easily pick them out.
ROGUES GALLERY
You will meet an interesting variety of people and creatures in this game. Avoid some and kill others. Here is a list of your potential enemies and tips for
getting rid of them.
Enemies in Rome
Bats
You are unable to target these creatures so just run away.
Dobermans
Kill with pistols while jumping and flipping to avoid their teeth.
Gate Guardians
Dodge their flame attacks and fire at them when their mouths are full of fire.
Gladiators
Best killed from a distance. They are very fast.
God Head
Avoid the green lasers while you shoot the eyes out with the revolver.
Hammer God
Dodge the hammer blast while firing pistols or Uzi’os at him.
Larson
Pistols work nicely to disable this enemy.
Lions
Pistols or revolver works well on these animals.
Rats
Another creature you cannot kill. Run away or swim to avoid them.
Sword God
Dodge his fire while using your shotgun on this enemy.
Enemies in Search for the Spear
Attack Subs
Use Chaff Flares to redirect their rockets.
Chef
Sneak up and whack him with the crowbar.
Huskies
Dodge their attacks while firing your pistols.
Mafia Goons
Keep it simple and use the pistols while avoiding their attacks.
Soldiers
Just like the goons, keep it simple and use pistols while dodging their attacks.
Enemies in Black Isle
Bats
You are unable to target these creatures so just run away.
Imps
Use the torch to scare them. Run away if you don’t have the torch.
Maze Monster
Follow the lights and he won’t bother you.
Rats
Another creature you cannot kill. Run away or swim to avoid them.
Skeletons
Avoid them and they won’t bother you.
Underwater Demon
Get the coin and put in the cage to get rid of this monster.
Enemies in VCI Headquarters
Armored Troopers
Can only be killed with a headshot. Dodge their deadly lasers.
Blue Guards
Sniper headshots work great on these guys.
Cockroaches
Run…run very fast away from them.
Cyborgs
The HK in full-auto mode is a good start, but these guys require some advanced strategy to defeat.
Soldiers
Headshots are quick and silent, otherwise use your weapon of preference.
STREETS OF ROME
Lara seeks the “Philospher’s Stone” and must acquire three keys to the Gate that leads to it. Watch out
for the villains; Pierre and Larson who will be pursuing you throughout the level.

As you begin this level you may want to duck into the Backstage Area to the left. This serves as the training
area for Lara to practice her new moves, plus there are some nice items you can get even if you don’t feel like
training.
Make your way to the walkway above using the roof of the forklift or the crate then jump the gap to enter the next room.
Do a running leap over the next gap and follow the passage to the next room. The next gap requires a running
leap with a grab to catch the opposite edge. Pull up and continue until you reach the next gap requiring a side
jump to the left. When you reach the area with the metal grid work on the ceiling jump up and grab then monkey
swing to the opposite side. Climb the ladder to the left then go around the corner and drop down to the ledge
below.
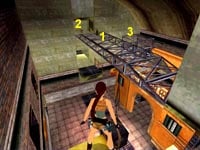
Look back into the room to locate an alcove then make a running jump to the top of the grid work and get the Flares (1) and Medkit (2).
Another Medkit (3) rests on a lower metal ledge to the right as you face the alcove. A standing jump takes you there and
another gets you back. Make another standing jump to reach the platform at the top of the ladder. Crawl
through the passage next to the ladder and turn left where a drop requires you to use the new tumble move.
Drop down to the floor and flip the switch to open the door leading to the next room.
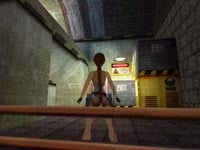
Head across this room and climb the boxes and jump across to the pool. Dive into the water and swim through the tunnel. Take a breath
at the other end then dive to the bottom and locate the tunnel in the corner. Swim through until you reach
a small room with Revolver and Shotgun ammo plus a medkit. Return back through the tunnel to the previous pool.
Exit the pool and continue until you reach the tightrope. Ignore it and drop into the lower section to get some items before heading into the room with the shelves. Get the Flares from the one shelf then locate the two sets of empty shelves that can be moved. Move both of
these to find secret areas; one with Revolver ammo and the other with Uzi ammo and your first secret, Rose 1 hidden
on the shelf.
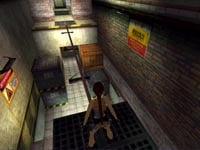
Head back to the area below the tightrope and climb the crate to leave through the door on the upper level. A search of the
shelves in this area will reveal another Medkit. At the end of the passage is a lever you can pull to open the
door. Drop down into the next room and head back outside to the street where you started.
Follow the street until you spot an alley to the right. Follow the alley and kill the dog that attacks as
you near the fountain. Turn right and continue down the narrow alley to the right of the cafe until you come to a hole
(looks like a mouth) in the wall. Flip the switch inside this hole to open a gate at the end of the first street.
Now make your way back down the alley and enter the new area to the left past the opened gate.
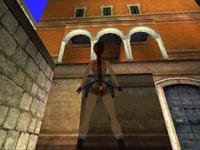
Locate the hole in the wall and flip the second switch at the end of this passage. Quickly, do a reverse roll
and sprint out of this area to avoid the bats that will attack you immediately. As you exit this short
passage you will spot a new block that has slid out allowing you to climb to a ledge with the pillars above. Proceed across
the balconies and go through the opening just past the red and white lounge chair. Drop down to find yourself in a hall with
three windows.
Shoot out the windows and take the Revolver ammo and medkit from the first two and climb out the third to get
on a ledge. Jump across to the other side and take the first left. Climb up to the walkway above and get the
Golden Key. Climb back down and follow the passage around to the left to the next balcony where a movie
will show you where to use that new key. A barking dog warns of an upcoming encounter.
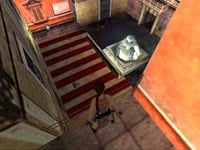
Leap over the railing to land on the red and white striped awning above the cafe and search behind the sign for some
Flares. From here you can easily target and kill the dog with no danger to yourself. Drop down and cross the courtyard
to unlock the gate and enter the passage beyond. As you enter the next area have your pistols ready as Larson shows up
about now and wants to have a shootout. He’s up on the balcony to the left so start firing as soon as you go around the
corner and keep firing and dodging his bullets until he runs away.
Search the dark areas behind the pillars to locate a Medkit in the corner. Locate the entrance opposite this
item and go through and head left. Follow the ramp leading down to the area with the boxes and get the
Garden Key. Go back up the ramp and head to the ramp leading up to the right. You
can see Larson so open fire until he runs away. Now use the tightrope to reach the other side and drop into
the alley.
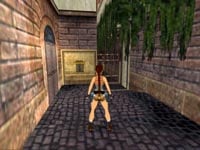
Locate and pull the lever so you can return to the fountain. Now make your way back to the hallway with the
three windows you shot out earlier. Climb through and drop into the room below quickly killing the dog that
attacks. Put your guns away so you can activate the door to open it. As soon as it opens a dog leaps at you.
Back flip while drawing your pistols and let him have it. Enter the new room and get Shotgun ammo from the crate and the Medkit.
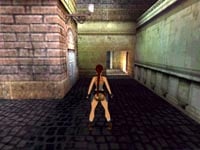
Head through the door opposite this room and follow the passage until you come to a lever. Pull it to open
a gate leading back to the fountain. Head back to that area and go back through the gate you opened after finishing
the tightrope. Continue to the intersection and turn left to face the entrance shown in the picture.
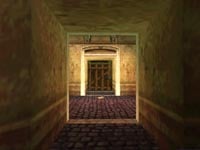
Go through the entrance and turn right and head down the long passage. An alcove on the left has some Revolver ammo
and a locked wooden door that you can’t open right now. Remember this door for later as it has the final secret.
Continue down the passage and climb the stairs at the end. Get the Revolver then head up
the ramp to the blue door.
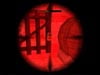
Get the Laser Scope to the left as you enter this new room. Combine this item with
your new Revolver then head over to the gate on the opposite side of this room. Use the Revolver and scope to
shoot the lock off the gate then go inside and get another Garden Key. Rats swarm into
the room so you need to get out of here fast.
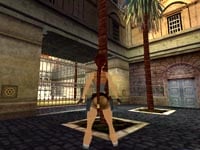
Return to the previous street and go past the closed gates and head left at the end to locate the two slots where you can insert your
pair of Garden Keys. The gates you just passed are now open and you can enter this new area. Watch the movie
that triggers when you near the building. Make a note of the room off to the side with the pool then take the narrow
alley to the right of the main building then turn right and follow the passage up to the bell tower. You may have to
kill another dog along the way. The camera pans around giving you a nice view of this new area.
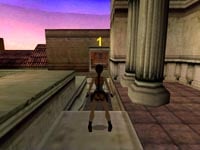
Use your Revolver and scope to shoot the bell to open another pair of gates. Now head to the left of the bell
tower and locate the small passage (1) which is now open. Climb up and make a standing jump with a grab to the
passage on the other side. Quickly run down this passage and flip the switch then run back as bats swarm in and
attack. Now the door to the bell tower is open. Quickly run back and make sure to stop and make that standing
jump back across the gap. Go to the newly opened door under the bell and get the Revolver ammo to the right
before going inside.
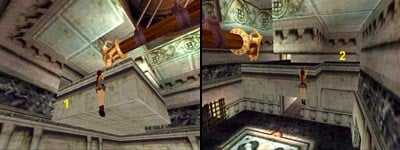
Head to the back of this room and go left. Pull the lever on the back wall to crack one of the bird statues
in the previous room revealing a dove. Return to that statue and press Action. Now go down the next passage
past the other bird statue and follow the ramps leading up to a deadly trap. Walk up to the edge and turn
around and back off clinging to the edge (1). Shimmy past the battering ram and climb into the alcove (2). Pull the
lever you find here to crack the remaining statue. Drop down (2) to the floor and return to the other bird statue and press
Action again.
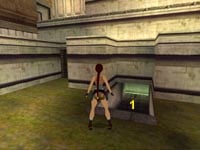
This opens the entrance to a new chamber (1) near the front of this building where you will find the first of the
three Gateway Keys. Don’t go get it just yet unless you want to continue without the last two roses for this
level. Instead, head back to the passage you were just in where you were attacked by the swarm of bats. Now
you will find a pair of secret alcoves are now open and you can get a Medkit and Rose 2.
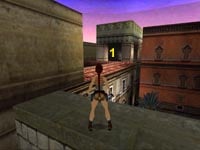
Now go back to the stone wall that borders the stairs leading up to the bell and make a running leap to the outer wall.
Follow the wall around to the left until you are close enough to jump to the red roof. Follow the roof until you can jump
into the opposite tower (1) where you will find the Medkit and Revolver ammo.
The final rose is located in that locked room near the Revolver ammo you got earlier. You can take a shortcut
by dropping down the ledge near where the bats attacked you. Once you reach the wooden door it will
now be open and you have to quickly kill the dog that attacks as you enter. Search the shelves for a Medkit and
Rose 3.
Return to the building with the bell and enter the new chamber at the front of the building to get the
Gateway Key and trigger the movie that ends this level.
TRAJAN’S MARKET
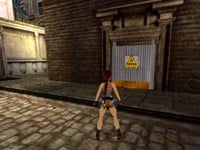
From your starting position you have two possible doors to explore on either side of you. The entrance
to the right leads to a building with a box containing a Laser Scope in case you managed to lose the one from
the previous level. Head into the left building and shoot the box inside. Get the Crowbar
then head back outside and go down two more doors on the right and use the crowbar to open the door. The street
branches off just past this door but you will be exploring that section later in this level.
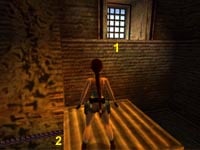
Shoot the box and get the Medkit before climbing up the ledges to reach the second floor where you should find a
tightrope. Before crossing the rope you will want to make a jump over to the window ledge (1). Grab on and pull up to
get another Medkit then jump back and walk across the tightrope (2) to the opposite ledge. Jump the sections of broken
floor to reach the opening above on the right then walk out along the walkway toward the gate and turn right to face the
sloped wall.
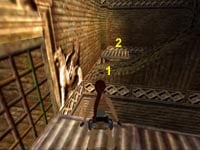
Jump to the sloped section of wall (1) then to the small ledge (2) beyond that. Now make a running long jump to get the
shotgun ammo from the window ledge overlooking the previous tightrope. Repeat the running leap to reach the previous small
ledge and enter the building. Make your way to the floor by dropping down to the first ledge then to the floor and get the
Revolver ammo and Flares. Jump and pull up to the next ledge and go into the next area until you trigger a movie. You can
now drop down to the ground.
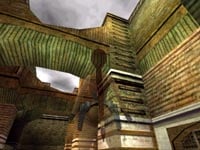
Head over to the second arch and climb the textured wall located on the backside of the column. When you reach the
top move left around the corner then slide down the short slope to land on the flat ledge (S) and turn to your right.
Make a running jump to the next small ledge (1) followed by another as you curve around the wall to land on it the
next ledge before entering the room.
Locate the rope and give it a pull. After you pull it three times a movie will play. Head back outside and jump
back to the small ledge and then back to the first ledge (S). Position Lara on the highest section of this ledge and aim
her next jump to the lowest part of the next ledge (2). From this ledge you can make a short jump to the ledge (3) leading
to another room with another rope. Pull this rope once to start another movie revealing a new location.
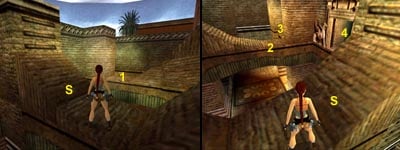
There are some Uzi clips on another ledge (4) nearby. Return to the previous ledge (3) then aim for the entrance
flanked with the statues and make a running jump and grab just in case you come up short. Do a safety drop down
to the floor below and enter the new room you just opened with the rope. Get the Medkit and Revolver ammo from
either side of the statue then turn and start to exit this room. When you reach the door light a flare and look
for the ledge concealed in the darkness on the right. This ledge is located in the back of the slot where the
giant round door rolled out of.
Climb up then drop into the small room where you can pry the Coin from the wall with the
crowbar. Rats pour into the room when you take the coin, so quickly turn and run back to the room with the statue.
Insert the coin into the slot at the base of the statue to open the gate to the next area.
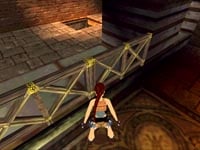
Make a quick detour back out into the area where you dropped down after getting those Uzi clips. You should now spot
a trapdoor that was also opened when you used the coin. Drop down into the lower area and stock up on Shotgun ammo
and Rose 4. Now you can climb out and head back to the main street from the beginning of this
level and go through the new gate you just opened.
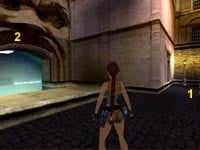
Locate the new passage and follow the alley until you reach a cavern with a waterfall. Locate the short alley (1) and
head down it to get some Revolver ammo then return to the water (2) and dive in. Swim under the waterfall then climb out
onto the ledge and enter the large stone door. A movie plays as you enter. Collect the Revolver ammo nearby – from
the looks of that movie you are going to need it.
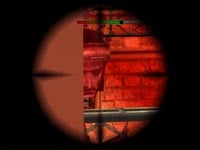
This is the first of three boss encounters on this level. You may want to save your game. This boss, which I
will refer to as “the Head”, fires green lasers out of its eyes. Lara needs to dodge these blasts and shoot out the
eyes between shots. You can see when the Head is powering up for another blast so be prepared to sidestep or flip
out of the way. Use the revolver and laser scope to snipe the eyes to defeat this enemy. I hid behind the first corner
leading into this area then leaned around the corner and shot both his green eyes before he ever fired at me.
Collect the Mars Symbol after you defeat the Head then continue to the back of the room and
climb onto the raised platform on either side of the entrance. Jump up and grab the grid work above and pull up.
Make another jump to land on top of the red machinery where you can collect Rose 5.
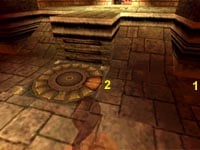
Drop back down and head to the opposite side of the area and locate the circular hatch. Get the Revolver ammo (1) in
the corner then stand near the brown part of the hatch (2) and press Action to open the door. Drop down to the canal below.
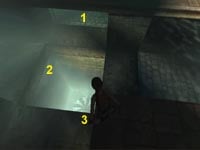
There are three underwater passages to explore. You will also want to watch out for rats which will swarm into the
passage if you get to close to those metal grates along the outer wall. If rats do appear just dive into the water
and stay under until they go back into the walls. Dive in and swim through the closest passage (1) to get a Medkit. Now
locate the tunnel in the corner (2) and swim through until you reach the machine room. Get the Shotgun ammo and use the
crowbar to pry off the Valve Wheel.
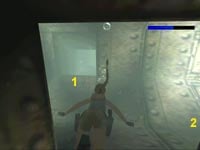
Now you need to retrace your steps back to the room where you found the last secret rose and use this wheel on the
large red machine. This stops the deadly propeller blade that was blocking your path to the remaining underwater tunnel (3).
Go back down the hatch and dive into the water. This time you can swim through the bottom passage. Continue forward
then head left toward the small opening (1). Swim through and enter a small room with a Medkit. Swim back out and follow
the hex-shaped metal passage (2) until you come to another spinning propeller. Follow the current to the right and it will
lead you to a gap in the ceiling. Swim up into the next room.
Climb out of the water and turn the valve wheel in this room to stop the propeller in the water below. Dive back in
and swim back toward the propeller and through the small passage next to it on the right. Swim up the sloped passage and exit the
water in the next room. Move ahead into the next area until the gate slams shut blocking your exit. Get the
Shotgun and the Shotgun ammo. Arm yourself with your new weapon and enter the next large
room.
This is the second of three boss encounters on this level. You may want to save your game. Defeating the
Gladiator requires constant evasive tactics such as back flips and jumps to dodge his attacks. The Gladiator attacks
by firing energy bolts or by charging at Lara while swinging his deadly sword. Wait for his charge then sprint in the
opposite direction then turn and fire. The shotgun is your best weapon, but you need to be pretty close to use it
effectively. Fire away at the Gladiator and parts of him will break away. Dodge his attacks and keep up your assault
until he is totally destroyed. Upon his destruction two gates will open and a window will break.
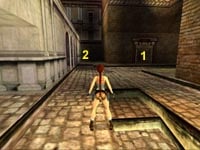
Exit this arena by using the platform, but make sure to grab the Medkit and Shotgun ammo on the ledge on your way
out. Before dropping to the street grab the medkit off to the left then return to the main street intersection.
You should now be near the location where you started this level. The metal door you opened with the crowbar (1)
should be to your right and the newly opened gate (2) leading to Rose 6. is ahead and to the left.
Now make your way back to the cavern with the waterfall and swim through the new underwater passage on the left. Get the Medkit
and the Venus Symbol on your way to the next room. Things are about to get dangerous so you
will want to save your game. After a brief movie you need to whip out your pistols and fire at Larson until he is
injured. This leads to the third boss encounter for this level.
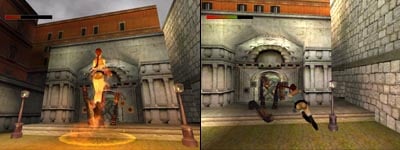
The Gateway Guardians have two attack modes. They shoot guided bolts of fire that actually seek you out. If you take
a direct hit you will burst into flames. If you aren’t instantly killed you can quickly run to the pool to extinguish
the flames and heal yourself. Even if you dodge the fire you can still take considerable damage from the explosion when
it hits any nearby surface. They Guardians will also bite but only if you get too close, so your best position for combat
is somewhere between the trees and the streetlights. You can now fire at each of the heads but only just prior to
when they launch a fire attack at you. Wait for their mouths to fill with fire and their heads to go back then fire
rapidly with your pistols. Target only one at a time and the danger will lessen with each dead Guardian.
When the battle is over you can collect four boxes of Shotgun ammo (two of each kind) and a Medkit. Insert your two
keys into the slots to open the Gateway and go inside. Make a series of running jumps to each of the platforms and
when you jump onto the last one it will send you falling into the pit and the next level…
|