Tomb Raider: Chronicles Walkthrough by Mark "Sinjin" Smith
COLLOSEUM


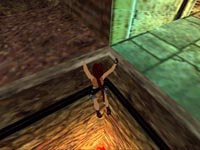
Return to the broken passage and back off and hang over the edge. Now shimmy around to the narrow gap to the left and pull up
and crawl through. Vault into the next lower area and press the button inside to open a door back in the previous room. Climb
back up and crawl through. This time you have to rotate around and back off and hang then shimmy to the right to get back to the
large room.
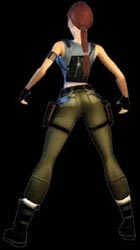
A door is now open above allowing you to slide into a lower part of this level. Get ready for action as soon as you
reach the bottom as a lion attacks. The Shotgun with the Wideshot ammo proves a useful weapon in this close-range
encounter. Locate and press the button on the wall to open the exit and another lion attacks. Kill him with a few
blasts from your shotgun then enter the next area.
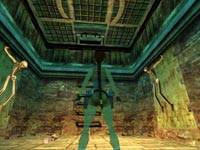
Climb the wall until you reach the top where you will find a pedestal with a Gemstone Piece #1.
Enter the next room and fight the Gladiator who charges from a newly opened door. Dodge his attacks while firing at him
with your favorite high-powered weapon. Search the room where he entered from and get the Medkit.
Head back down one previous level and locate the large room and enter. Your goal here is to collect the second piece
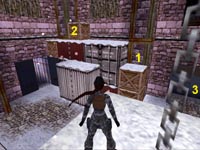
of the Gemstone by navigating a tricky puzzle that is on a timer. The following four pictures show the area from
various views. Ledges are numbered the same in each picture. Go to the center dais then jump toward the left wall
and stand by the rope. Face the center of the room and pull the rope three times to raise the pedestal on the central platform
above. Now jump back and angle yourself toward the platform to the right and make a running leap from the corner
of this area (1).
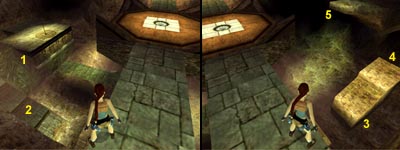
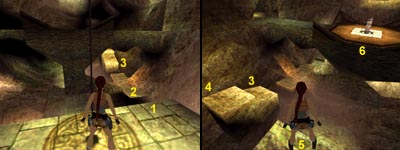
Start running as soon as you recover from the landing on the next ledge (2) and make a running leap to the following
ledge (3) and then do another running leap and a grab to clear the next gap (4) and cling to the edge of the next platform.
Pull up quickly and turn left following the ledge as it turns back toward the center of the room. Make one last death-defying
running leap (5) to reach the pedestal (6) with Gemstone Piece #2. You can now casually exit this
area through the door opposite of where you entered, but a trapdoor opens sending you down toward the rocks where you manage
to grab on and dangle above a huge pit. This triggers an encounter with Pierre who is after your Gemstone.
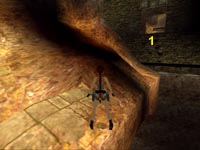
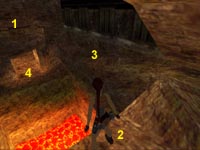
The door opens as you head back up the ramp. Combine the two pieces of the Gemstone in your inventory then insert it in
the obvious slot. As the floor starts to break away quickly do a reverse roll followed by a running leap to the
stable ledge (1) on the opposite side of this room. Now make another running jump to the opening (2) across the gap then drop
over the edge and shimmy around the ledge (3) to the other side and drop down to go through the door (4) below.
Use the block to reach the room above then whip out your shotgun to take care of another Gladiator/Lion combo. A quick
search of the room gets you the Colloseum Key which you can use to open the large doors that
lead to the boss. Saving your game now would be a good idea.
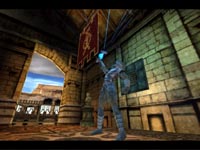
The Thor Gladiator is much like the gladiators you fought in the market but much more powerful. Since this is the final
encounter before you lose all your weapons feel free to use Uzi’s and any other powerful weapons you have collected up
to this point. Make sure to take plenty of evasive action and dodge the blasts from his mighty hammer when it strikes
the ground. When he is destroyed the exit will be revealed on the wall opposite of where you entered.
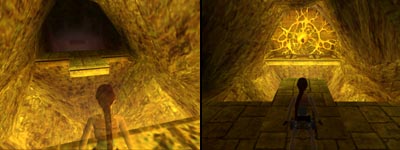
Make a running leap across the first ledge and a running leap with a grab over the second to reach the crawlspace.
Crawl through into the next area to find the final secret for this location; Rose 9. Now
retrace your path back across the ledges to the Philospher’s Stone and pry it from the wall
with your crowbar to end your adventures in Rome.
Lara is after the Spear of Destiny, an ancient artifact rumored to be lying at the bottom of the ocean inside a
wrecked U-boat. Naturally others are also after this treasure. A Mafioso boss has recruited a Russian submarine admiral
to take him to the treasure, and you are going to go along for the ride.
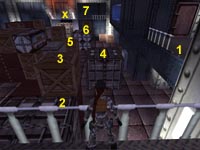
Head up the steps to the next level where you must make several tricky jumps while dodging the giant mechanical claw.
As you enter the upper area make a running leap from the broken railing (1) and land on the lower container (2) across the way.
Pull up onto the box (3) then line yourself up to make another running jump back to the crates (4) just to the left of your starting
ledge. When you land on this box angle yourself to the right and prepare to make a tricky running leap to the
closest section of crates (5). This is a very tricky jump so you may want to save.
As you land the claw is about to come crashing down. Quickly back up to the edge so you have room to make the running
leap required to clear the gap and reach the next section of crates (6). Climb up to the top crate and immediate run and
leap to the gap in the railing (7). Grab the edge and pull up and get inside before the claw catches up to you. Now
you can press the button to open the doors and trigger a movie.
After the next exit has been revealed you can make a quick search of the lockers in this control room to find a Medkit
and some Uzi clips. Press the button to open the other door and return to the ledge where you started all that crate hopping.
Now that you are out of danger from the claw you could take the time to explore the tops of the crates for some additional items.
A Medkit (x) is on the far silver crate to the right and Uzi clips are on the silver crate along this side of the warehouse.
Each item requires more jumping out to the center stack. The Uzi Clips are probably worth the trip. You decide if you want either
or both of these items. Head to the newly revealed exit when you are ready.
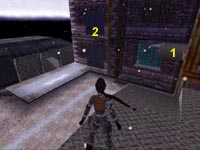
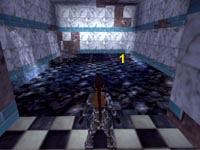
Push the button to open the door to the left as you exit the showers and you are now back in the main passage. Go across to the
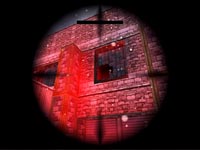
opposite hall and go back outside near the crane. You will want to arm your Desert Eagle after attaching the Laser Scope
and get ready to pick off the two snipers who are staked out in the windows above. One is ahead and to your left and the other
is in the window above and to the right as you exit the building.
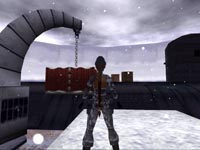
Snipe them then enter the room with the machine and insert
the Fuse into the slot to turn the machine on. A door unlocks and you quickly need to kill an attacking dog. Finally press
the button in the new room to position the crane/box giving Lara access to the sub. A running jump from the red crate will get
you close enough to grab the hanging crate. Make a running jump toward the submarine to trigger the final movie for this level.
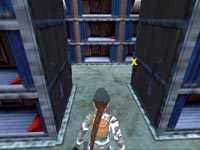
Go toward the fan and climb the next ladder toward the power cables. Drop into another hole and hang down then shimmy over to the
next ledge and climb back up. Open the vent and drop into the room below where you can search some shelves to find a Medkit and a Battery. Climb back up and proceed to the ladder. When you reach the top of the ladder you will overhear a conversation
between the Admiral and Sergei. Continue to the end of this tunnel and climb down the next ladder.

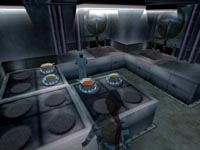
Have your guns ready as you enter the mess hall. Two men attack but they are easily eliminated. The door to the left
leads to a bathroom with a guard inside. Take care of him and get the Shotgun ammo then return to the mess hall and
head to the door opposite the bathroom. Follow the passage left then right and kill the guard in the hall. Continue
to the end of this passage and go right and open the airlock.
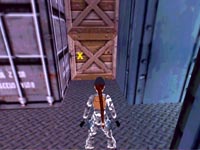
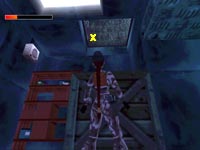
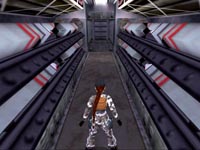
Quickly kill the guard who enters then search the drawers to get another Battery. Follow the
next passage until you come to a hole in the floor just past the hall leadin left Climb down to the walkway below and shoot the guard.
Proceed past the airlock on the left and continue toward the bunk area at the end of this passage. Collect the Medkit and the Shotgun
ammo. Head back to that airlock and open it then enter and shoot the guard. Climb up the ladder to reach the diving area.
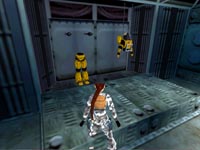
There are now four possible doors. Head to the right door and enter. Shoot the sailor and get the
Suit Console then return to the main hall. Continue to the doors at the end of the hall and
enter the door that’s already open. Shoot another guard then return to closed door across the hall and enter. Inside is the
Diving Suit (the only one that is on the floor), which you cannot really take but you can activate
it by playing around with your inventory.
Combine the Suit Console and Aqualung then combine the two Batteries. Now approach the torso part of the EDS suit and use these
combined items on it to trigger the movie that takes you to the next level.
Save your game as danger lurks ahead in this short but exciting level. You will be attacked by mini-subs armed with rockets. You have some defensive countermeasures as well as the ability to dodge the rocket attacks provided you stay
near the ocean floor. Also watch your breathing. Dangerous situations make Lara breath faster using more air. This
won’t really become a problem until later in the level.
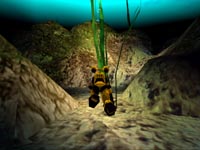
When you exit the sub head straight down then move forward until you come to two possible directions you can take. Head
to the right and continue until you reach the wreckage and an attacking mini-sub. Move side to side as you approach the
sunken U-boat and the rockets will be unable to lock on. If you are in danger of getting hit you can always use a Chaff
Flare to temporarily disrupt the rocket’s homing device. Make sure to stay off the walls which also slows you down
making you an easy target.
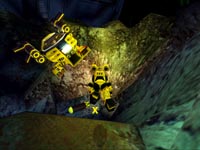
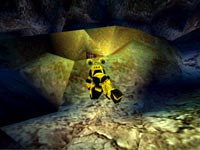
When you enter this new area head to the right to find more wreckage. Swim toward the wreckage but keep an eye on a new
mini-sub entering the area. Locate the small opening in the back left corner as you swim over the wreckage. Swim through this tiny
gap and use Chaff to protect yourself from any incoming rockets. When you reach the next area things are starting to
get darker. Locate the small tunnel in the round rock formation area ahead of you and swim through. Swim down and
forward then turn left and continue forward until you spot the opening up along the ceiling. Swim through then turn right
enter the next chamber then head through the next opening slightly over to your left.
Swim through to trigger a movie where Lara claims the Spear of Destiny and a cave-in damages
her diving suit. Now with a limited oxygen supply you must get Lara back to the sub quickly and safely. Saving
would be a very good idea about now.
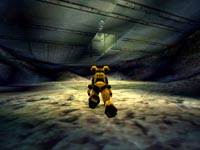
Retrace your previous path back through the underwater cavern. Swim fast through the larger areas and slow down going
through the narrow passages. Too many bounces off the wall will deplete your O2 supply and you will die before you ever
make it back to the sub. As you leave the cavern use a Chaff and start taking evasive action immediately to dodge the
incoming fire from the mini-sub parked outside. Retrace your path through the narrow passage and then through the open
are patrolled by the other sub and finally back to your own submarine. Try to maintain control and not hit the walls.
You should be able to spot the submarine about now so head through the final underwater opening in the rocks and get
under the sub to reach the airlock. Swim up through the hole to end the level. You may be out of air but your health bar will
give you a few extra seconds. You can breath now.
Just when you thought it was safe to get out of the water you get back onboard the sub only to find it is sinking.
Flickering lights and dangerous power cables are making flooded passages dangerous if not downright deadly. You may be
tempted to use your flares in the dark passages. Make sure to keep at least two or three back until the end of the
level. Remember your pistols can be used to light-up your immediate surroundings.

You are greeted by Sergei and his goons as you remove your diving suit. After a brief movie your human threat is
eliminated and a new threat presents itself. The sub is damaged and going down quickly. Climb down the ladder behind
you and get out your guns. Kill the guards next to the missiles and get the Uzi ammo and Desert Eagle ammo they leave
behind. Remember, you can’t take anything with you after this level so use it now.
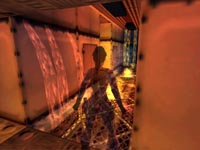
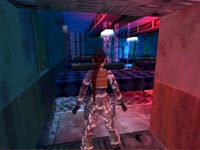
The movie shows the next part of the passage being electrified. Jump onto the closest table then make a series of
standing jump to cross the room and avoid the deadly water. When it comes time to jump across to the other side make
sure to press grab to lower your arc, otherwise you will hit your head and fall in the water. Jump through the sheet
of falling water and enter the passage.
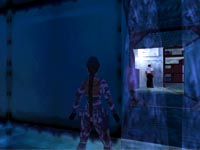
Go right and enter the supply room at the end of the next passage. The sailor has his back turned so you have the
element of surprise if you walk into the room and shoot first. Get his Access Card and
search the shelf for a Medkit. Now retrace your path through the mess hall and back over the fires in the first hall.
Past the fire, turn right then left and continue to the end where you can shoot the man in the room on the right and
get some Uzi clips.
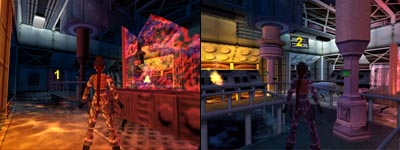
Use your Access Card on the airlock. You cannot go to the right as another flooded passage with power cables makes this
path quite deadly. Continue forward and climb the ladder. Go past the flooded room on the left and follow the passage around
until you reach the control room. Open the airlock on the far wall (1) and enter the dark room. Talk with the Admiral who gives
you a Silver Key that unlocks his stateroom. Return to the control room and shoot out the damaged
cover (2) on the airshaft.
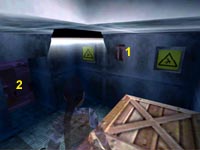
Get on the table and jump to pull up into the ventilation system. Follow the duct until you reach the trapdoor in the
floor and open it to drop down into the room below. Locate the switch high on the wall (1) of this room and jump and
grab to pull it and turn off the electrical power. The door in this room (2) is locked, but remember it for later as this
is where the final secret is located. Make your way through the air duct and exit to the control room. Use your pistols
to light the way if necessary.
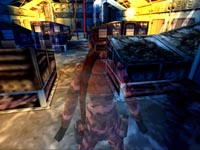
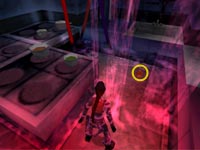
Return through the duct back to the control room and enter the room with the Admiral. Climb the ladder and use the
Nitrogen Canister in the left slot and the Oxygen Canister in the right to end your underwater adventures.
This chapter takes us back to the teenage adventures of Lara Croft. Lara stows away on a boat headed for a mysterious
island. Her adventures will require the use of your brain rather than combat, as Lara is unarmed for these next few
levels. Your immediate goal is to locate the stolen heart from an undead creature.
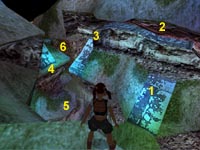
Move away from the hole and head to your left to approach the deep canyon. Line yourself up and make a running leap over
canyon and land on the lower sloped ledge (1). Jump and grab the crack (2) in the wall and shimmy left and around the
corner (3). Drop down and slide to a stop. Jump over to the sloped ledge (4) and press grab as you land so you can catch
the edge as you slide off. Drop down to the ledge below (5) then locate the cave opening in the cliff wall to your right
(or left if you are facing back toward the canyon).
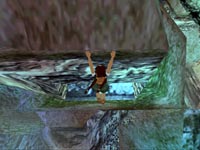
Retrace your path back to the sloped pillar (using steps 1-4 above), but this time when you slide off and hang, shimmy
around the corner (6) to the right. Continue to shimmy along the ledge until you are hanging above an opening below.
Release the grab and quickly press it again to drop and grab the edge of the opening then pull up into the cave.
Crawl through to the other side and drop to the floor. Turn right and climb onto the short stone ledge and face the opening
in the wall across the way.
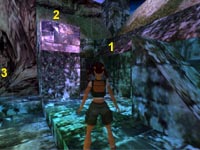

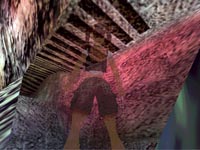
You should spot another textured ceiling that you can use to continue forward and up into the next passage. More startled bats
attack Lara and you must run around dodging these creatures until they eventually fly away. At the end of this passage is
a ledge you can climb up to then turn to face your next jump. Do a standing jump to land in the well with the broken roof.
It is quite easy to get lost or drowned in this next part so you may want to save.
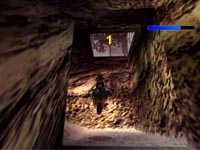
Take a deep breath and dive down. Continue to the first junction and go right. Follow this passage until you reach the
next junction and go right again, this time through a very narrow gap. Continue into the larger area where you will notice
an inviting hole in the ceiling (1). Ignore it – there is no air up there. Instead, turn left and follow a new tunnel until
you reach a vertical shaft leading to some much needed air. Exit the pool by swimming past the dock to the right and climb out
onto the sloped wall and doing a back flip as you climb out to land on the flat ledge behind you.
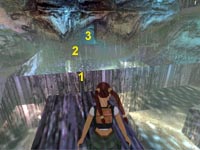
Enter the house by crawling through the opening behind you. Once inside you can get the Medkit from the floor and search the
drawers for a Rubber Tube. Head back to the pool and climb onto the dock. Run fast to avoid the attacking
rats and jump over the wall to the opposite side. More rats are waiting as you land so quickly climb into the opening then crouch
and crawl through the gap to reach the previous area with the campfire.
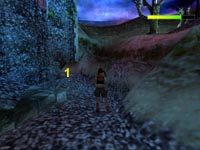
If you spot a fat little creature running around make sure to keep your distance – sprint if necessary. Head past the fire
to the low opening (1) in the far left corner of the wall on the other side of this area. Quickly crawl through as the Imp and
possibly some rats from your previous swim may still be chasing you. Follow the path on the other side once you can stand up and
continue to the next area with the ledge.
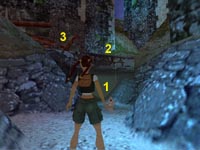
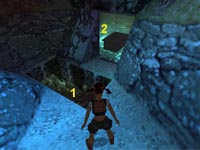
You can now pick-up the Iron Clapper from this room then locate the hole over in the corner and drop down.
As you exit the passage you should come to a room to your left with a piece of wood hidden on the floor behind the table. This is your
Unlit Torch and you either carry it in your hands or you drop it (draw weapon button). You cannot climb
or shimmy with this item in your hands. Exit this room and head up the winding dirt path past other empty rooms with tables until
you reach the large intersection.
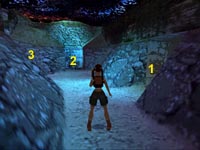
The room to the right (1) had a burning torch you can use to light your own piece of wood. Just stand next to the torch and press Action.
Directly a head is a pit (2) with a ladder leading down to your ultimate goal. Make a note of the dirt path (3) leading up to the left.
This is the final exit to this level when you are finished with your quest. Throw your torch into the hole (2) then climb the ladder
and pick it up at the bottom, or you can just jump in and roll as you hit the bottom for some minor damage.
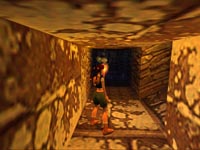
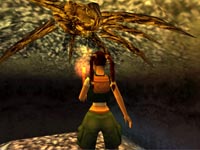
Return to the passage on the other side of the spikes and take your torch. Now head to the T-junction opposite the wall
torch and turn right. Run/sprint up this sloped passage past the attacking bats. When you reach the top use your torch
to light the brownish roots on the ceiling. After the fire has burned itself out you can retrieve the
Heart. This triggers a movie where Lara talks with Father Patrick about her “mistake” and what
she must now do. Head toward the exit that Father Patrick used and get the Medkit stashed around the corner. Slide down
the slope to return to the campfire.
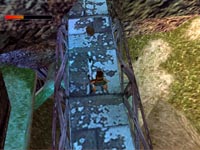
Retrace your previous path to get to the area where you first picked up your unlit torch. Continue
forward but don’t go down the hole this time. Go up the slope to the red door and insert the Heart in the hole next to it.
This triggers a movie where several Imps come out of the various buildings. Enter the opened door to your left to trigger
another movie where you defeat a small horde of those fat little Imps with the Iron Clapper. When you have control again,
drop into the hole to escape the two remaining Imps. Follow the passage to a bridge. Dodge the swarming bats as you find
another Medkit on the bridge and follow the path to the next level.
View this guide raw, exactly as the archive holds it