The Secrets of Da Vinci: The Forbidden Manuscript

by Zurreen Zubairie about 108 minutes to read

The Secrets
of Da Vinci

The Forbidden Manuscript


(A Walkthrough by
Zurreen Zubairie)

Copyright © 2007.All rights reserved.

(Please,
note that this walkthrough is copyrighted.Hence, any attempt to
reproduce anything from this
walkthrough will be severely punished
to the maximum extent of the law.)

The Walkthrough

GENERALLY:

For those of you who might be concerned, this game has
nothing to do with "The Da Vinci Code" book or movie.Rather, it is just
a very intriguing, quite non-controversial, and (apparently) fictitious story
about a youngman who has been hired anonymously to retrieve an invaluable
manuscript left behind by the great Leonardo Da Vinci.The story line is wonderful, the graphics are
superb, and the quest as well as the puzzles are quite clever and
engaging.In short, this is a game that
I would highly recommend to anyone looking for some good, clean fun with the
touch of a nice intellectual challenge.

As for the dynamics of the game itself: This is a
point-and-click game.In addition,
please note the following about the Inventory Page that you can access at any
time during the game by right-clicking, i.e., clicking on the right button of
your mouse.


The "Conscience" Gauge:This
is undoubtedly the most important dynamic in the game.As explained in the game booklet, some of the
actions you carry out would have a "good" or "bad" impact
on this gauge, depending on how you choose to accomplish a given objective.You need to strive for a balance: if you are
too "Angelic," you would not be able to carry out at least some bad
things that you might have to do; similarly, you can’t afford to be too
"Diabolic" either.For my
part, I have taken the "Angelic" approach, for the most part, using
bonus points to keep the Conscience gauge balanced.But don’t worry – you will have more bonus
points than you will ever need in this game, in no time at all.In the following walkthrough, I have pointed
out at least some of the "Diabolic" actions that you can take.If you decide to try them, however, please
keep in mind that doing so does have at least some unpleasant consequences,
although none of these consequences will prevent you from doing well and
finishing the game.

The Diary:You will find this particular notebook under
the hero’s portrait, in the right-hand portion of the Inventory Page.It contains virtually all the information you
need about the story: the description of the place, characters, and
events.It even gives you a checklist of
things to do; and once you have accomplished a given task, that task even gets
crossed out in the list.Be sure to
check out the diary at the very beginning of the game.The sooner you can get a hang of using it,
the more useful it will prove to be later.Here is how to use the Diary.

Click on the Diary in the Inventory Page to access it.Note the four arrows (or rather the
arrowheads) at the bottom of the screen.You can click on the two arrows in the middle to flip through the pages,
two pages at a time; or you can click on the arrows in the extreme left or
right (the ones with a vertical dash each on their point, i.e., I< or >I) to immediately
get to the first or the last two
pages, skipping everything in the middle.The box with all the arrows would be grayed out at the beginning of the
game, of course, because there are only two pages in the diary at that
time.Right-click (click on the right
button on the mouse) OR click on the Exit icon (the circular
combined image of the Sun and the Moon) at the lower right-hand corner of the
screen, to return to the Inventory Page.

The Portfolio:This is the large
notebook you see in the top center of the screen.It will contain all the documents you collect
in the game.In addition, any document
that you produce or reproduce in any way will at first appear among the various
objects in your inventory as a "sheet to be added to the
portfolio."You would therefore
have to click on this "sheet" and then on the Portfolio, in order for
the sheet to be attached to the Portfolio as a document.Here is how to use the Portfolio.


Click on the Portfolio to access it.A close up of the notebook would be presented
to you.Note that there are two sets of four arrows each on this
page – one to the right of the
Portfolio, and the other to the right of the black box (the "Text
Field") under the
Portfolio.Use the four arrows to the
right of the Portfolio (above the Exit image), to flip through the documents collected in the game.The two arrows in the first row (I< or >I) take you to the
first and the last document, respectively, while the two plain arrows (< or >) in the
second row allow you to flip through the documents, two pages at a time.


Once you have the document you would like to check out,
click on it in the Portfolio and a close up of that document will be presented
to you.Click on this close up and the text of this document will appear in the
Text Field under the document’s close up.Use the four arrows arranged vertically to the right of the Text Field
box, to read through the text.Once
again, the plain arrows in the middle move you through the text, a few lines at
a time.Use the outer arrows (I< or >I) to zoom to the
beginning or the end of the document.

Finally, it would be a good idea to organize your Inventory
from time to time, because that really makes it much easier to locate the items
you need.

Well, that is all I can think of in terms of a general
guide to the game.Following is a more
detailed step-by-step walkthrough.Please, feel free to address any comments or questions about this
walkthrough to .

* * * * * * * * * * * * * * * * * * * * * * * * * * * * * *
* * * * * * * * * *

Day 1 (The Night of 22
September 1522)

You arrive at the Cloux Manor at Amboise, property of François I, King of
France.This is where Leonardo Da Vinci
died three years ago.The manor is
currently inhabited by Madam Marie Babou de la Bourdaisière, your hostess.You are ushered to your room by Saturnin, the
guardian of the manor.

As the controls of the game are returned to you, read the
two pages of the Diary first.Exit the
Diary and then read the two documents already collected in your portfolio.While the first document gives you some information
not already given in the opening cutscene, the second document gives you even
more new information.

Exit the Portfolio and the Inventory pages.Turn slightly to your left and examine both
the drawers in the chest-of-drawers.Retrieve the Doublet from the top drawer and the Brandy
from the drawer under it.Feel free to
don this doublet now or later when your meeting with the hostess is
imminent.As explained in the booklet,
you would put on the doublet by opening your Inventory and clicking first on
the doublet and then on the hero’s portrait in the upper right-hand corner of
the screen.

Step towards the table under the window, to your
right.Open its drawer and retrieve the Knife
and the Charcoal Crayon.We are
done in this room.So turn left and step
out of the room.Turn around and look
at the large rug hanging on the wall behind you.There is no icon on it, so we can ignore it
(for now).

Turn around again and go down the stairs, arriving in
what we will call the Pantry.If you pan
the camera around, you will see sacks of food and other goodies in this
room.But there is no icon right now to
allow you to take anything.Look down
and note the stairs leading to another room below with an open door indicating
a route out of the house.But there is
no reason either to go down or out of the house yet.So just turn around and enter the Kitchen,
through the door facing the stairs you had used to come down.

As you enter the Kitchen, pick up the Bottle of Milk
and Oil from the table in front of you.Step forward, turn left, and pick up an Egg from the other end of
the same table.Note the food dish down
on the floor to the left of the table.Pan the camera further to your left and you will see a black cat sitting
on the floor, to the right of the door you see there.Click on the cat, and listen to the hero’s
comment.Turn back around to the table
and feel free to put some milk in the food dish on the floor (i.e., click on
the Bottle of Milk in your inventory, exit the inventory, and then click on the
food dish).Now step in the cat’s
direction and turn around to see the cat drinking the milk out of the
dish.A "Use" (or gear) icon
appears on the cat; but nothing happens if you click on this icon.[Apparently, the only purpose for feeding the
cat is to befriend it; and this is the only time in the game that you would be
able to do so.This act of kindness on
your part also raises your Angelic level.]

Turn to the table on your left.You can try to pick up the knife lying on the
table, but the hero will not pick it up because he has "got one
already."(The extra knife is no
doubt provided just in case a gamer missed the one in the hero’s room.)Step towards the door on the left of this
table and step through it to enter the Great Hall.(It is actually the dining room, but we will
call it the Great Hall because it will be referred to as such much later in the
game).

Pan the camera slightly to your left and pick up the Bottle
of Water
sitting on the dining table in front of you.Now step towards the door to the left of the
table.If you go through this door,
however, you will enter a corridor where the door to the right is closed at
this time.But that is the area we want to explore next – what we will call the
Workshop.So let’s ignore the door
leading to that corridor for now and use the other entrance from the Dining
Room to the Workshop: the door to the right
of this one.

As we thus enter the Workshop, we find that the left half
of the room is shrouded in darkness.Even
if you click on the arrows pointing to the dark side of the room, the hero will
refuse to go there, because of the darkness, reminding us instead of our
immediate objective: to find Leonardo’s Study.[Note: the hero says that the Study must be on the "First
Floor."This is actually European
terminology, whereby the floor we are on would be called the ground floor and the "First
Floor" actually refers to the one upstairs.]But let us do a little exploring around the
Workshop, so long as we are here. So pan
the camera to your right and pick up the Stick leaning against the table
to your right.Pick up the Link
from the floor, to the left of where the Stick was standing.Step towards the area lit by the candle in
front of you.Note the sawing table on
your right and the drilling equipment on your left.Note also that both the crank and the drill
bit, in the drilling area, can be
removed.But leave them alone for now,
because you will just have to put them back again when you use the equipment
later.

Turn to the sawing table.Bring out the Stick from your Inventory and click on the gear icon on
the top of the table, to place the Stick in front of the sawing blade.Next, look under the table and click on the
machine’s foot pedal on the floor.The
sawing begins, but nothing is happening to your Stick!Don’t worry.Look at the top of the table again and click on the Stick now, to move
it against the blade and saw the Stick in half.Pick up both pieces of the
Stick (which will now be labeled as "Small Stick" in your Inventory).

We are done in this room – for now, so step back out in
the Dining Room.Step forward and use
the door on your right now, to step into the corridor that we had ignored
earlier.Turn left and step forward to
arrive in a small hallway with a set of stairs leading up to the First
Floor.Take a step up the stairs, turn
around and look down to find a "Collar" (necklace) on the
landing area between the two flights of stairs.Pick up the collar, wait for the hero to finish his comment, and then
take another step up the stairs to reach the First Floor.

As you arrive on this floor, you can turn left and step
forward to enter a rather dimly lit area.But there is nothing of interest here.So go back out and enter the corridor to the right of the stairs you had used to reach this floor.Look to the right of the corridor, but there
is no arrow allowing you to go further in this direction at this time.So enter the room to your left.This is what the hero calls Leonardo’s room.For the sake of clarification, however, we
will refer to it as Leonardo’s Bedroom.But it is Leonardo’s Study
that we still need to locate and, according to the hero, it must be near.

Look at the bed to your left.Note the symbol of a triangle at the top of
the left bed-post.Even if you can’t
actually see it, just move your cursor slowly around over the square block
forming the top of the bed-post until a magnifying-glass icon appears.Click on the glass icon and listen to the
hero’s comment about the triangular symbol ("sign"); but we don’t
have enough information just yet to figure out what that symbol means.Note a similar triangular symbol at the top
of the right bed-post as well.
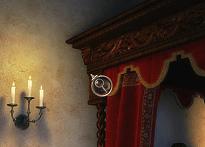
Feel free to click on the two paintings, on the walls on either
side of the door you had used to enter the room.Turn around then and step forward to the tall
bookcase across the room.Again, feel
free to click on the two paintings on either side of this bookcase.Note the markings in the center, just above the bookcase.Click on the magnifying-glass icon appearing
on these markings, and the hero will read, "The path of
pleasures."Hmmm…

Turn left and step forward, to find yourself facing another
door.Click on it and listen to the
hero’s comment.Click on the painting of
St. John the Baptist, hanging on the wall to
the right of the door.Turn left of the
door, step forward, to face yet another door.But this one is of no interest.So look at the bed on your left and check out the triangular symbols on the
top of the bedposts on this side of
the bed.Next, turn to the small table,
to the right of the bed, and pick up the Sheet of Paper.If you try to pick up the Charcoal Crayon
lying next to that sheet, however, the hero will refuse to take it, because you
already have one – the one you got from the drawer in your room.So just turn to the large table, to the right
of the door, and pick up the Mirror.Feel free again to click on the painting above the table.

Open your Inventory, click on the Sheet of Paper and then
click on the Portfolio, to attach the sheet to the Portfolio.You will be presented with a close up of the
sheet you just attached (it is the one that appears as the right page in the
close up).Note the strange markings on
this sheet.Click on the black Charcoal
Crayon
, in the middle circular slot to the right of the Portfolio.Now click first in the top half, and then in
the bottom half, of the sheet with the mysterious markings.A shading will be drawn across the page,
revealing an inscription in white, but it will be illegible.Click on the page, but the Text Field below
will also call it "Illegible Text."Release the crayon by right-clicking, and pick up the Mirror,
from the top slot to the right of the Portfolio, and then click on the shaded
sheet again.You will now be able to
read the text of the sheet, but only in the Text Field under the
Portfolio.Feel free to put away the
mirror (just right-click your mouse) as you scroll through this text.It is a message from Leonardo to Francesco,
presenting him with two riddles
the solution to which would enable one to find or make the necessary keys.

After you finish reading the message, use the arrows on
the right of the Portfolio to turn
the page.Note the four triangles on the
left page.These are the same signs we
saw on the top of the bedposts!There is
some kind of writing under each triangle, but you can’t read it off the page;
and if you click on the magnifying-glass icon appearing on this writing, the
Text Field would also call it Illegible Text.So use the Mirror on the right of the Portfolio again, and the Text
Field will tell you the meaning of these triangles.Thus, click on the writing under each
triangle, one by one, and find the Symbol
of the element Fire
, the Symbol
of the element Air
, the Symbol
of the element Water
, and the Symbol
of the element Earth
.

Go to the other side of the bed now (the one next to the
door you had used to enter this room).Click on the magnifying-glass icon on the left bed-post first, and the hero says, "The sign for
air."Now click on the
magnifying-glass icon on the right
bed-post, and the hero says, "The sign for fire."The hero then automatically quotes a line from Leonardo’s message, indicating we
have solved his second riddle. The camera will automatically pan down to the floor, and focus on the corner of a
carpet at the foot of the bed.Click on
the gear icon appearing on that corner of the carpet, to flip it back and
reveal a white rectangular panel in the floor underneath. Use your knife on this panel (i.e., open your
Inventory, click on the Knife, close the Inventory, and then click on the white
panel) to remove it from the floor and reveal something hidden inside.Click on the hand icon to retrieve another Sheet
of Paper
and a Key Mould.

Open your Inventory and attach the new sheet to the
Portfolio.A close up of this sheet will
now be presented to you.Click on the
writing that appears at the bottom of the page, but it is "Illegible
Text" again.So use the Mirror again
on the writing, reading the Text Field to learn about "Bronze, a metal used for casting statues
as well as for ordinary objects such as keys
" and how it is "an alloy of copper and tin."Turn the page now, and decipher the writing
in the middle of the left page, using the Mirror and the Text Field again, to
learn a little about the properties
of gold and how gold coins are molded
.

Feel free to go around to the other side of the bed and
click on the magnifying-glass icons on the top of the bedposts on that
side.The hero will call out the meaning
of those symbols also, but nothing will happen after that, of course, because
the symbols on the first side of the bed were the only ones relevant to the
riddle leading to the secret panel in the floor.

We are done in this room, for now.All that remains is to somehow enter
Leonardo’s Study which we still
haven’t found.There are two ways to accomplish this
objective.Let us try the Diabolic
approach tonight.[Note:The Angelic approach will be discussed a
little later, because we would have no choice but to use it then anyway.Using the Diabolic approach tonight would be
advisable for two reasons.First, it
will give you a chance to use some of the Inventory items that you would not be
able to use otherwise.Second, you will
get more bonus points for having tried both the methods of entering the Study
than if you had used the same Angelic approach twice.The "downside" of using the
Diabolic approach, of course, is that you would then have to use some of these bonus points to
increase your Angelic level, thus restoring the balance in your
Conscience gauge once again.]

The Diabolic Approach:Step out of the bedroom, turn right and enter the small hallway
above the stairs.Go all the way
down the stairs and enter the Kitchen, through the door on your right.Take two steps forward and enter the
Pantry.Look down on the floor to
your left and go downstairs to arrive in an area that we will call the
Store Room.There is nothing of
interest here at the moment, so just step through what we will call the
Store Room Exit/Entrance, to come outside the house.Turn right, step forward, and then pick
up the Ladder lying against the wall (with the large closed gates)
to your right.


Wait for the hero to finish his comment and then turn
to your right.We need to reach the
corner of the house to your extreme right.The first arrow on your right will take you back to the Store Room Entrance,
from where you can turn right and step forward to arrive at the spot we are
seeking.But the direct route (from the spot where
you found the ladder) would be to just click on the second arrow to your right, and you will be instantly
transferred to the corner of the house we want.Turn around to your left now and look up at
the side of the house, to find a "Specific Use" icon (two gears
with a line drawn across them) between the windows on the ground floor and
the First Floor.Bring out the
Ladder from your inventory and click on the gear icon that now appears
between the windows, to place the ladder under the First Floor window.

Step on the ladder but the cut
scene shows the rungs breaking under the hero’s weight.Don’t worry.Just bring out the two Small Sticks
from your Inventory, one by one, placing each on the Ladder to serve as
rungs now.Click on the arrow now
appearing on the ladder, to arrive in what appears to be another empty
bedroom.[In fact, this is Madam
Babou’s bedroom, as we will learn later, but she is not here, at the
moment.]Feel free to explore the
room, but there is nothing of interest.So step to the door on the left
of the fireplace.Click on the
keyhole, and then on the door handle above it, to open the door; and then,
enter Leonardo’s Study!

Text Box: The Diabolic Approach:  Step out of the bedroom, turn right and enter the small hallway above the stairs.  Go all the way down the stairs and enter the Kitchen, through the door on your right.  Take two steps forward and enter the Pantry.  Look down on the floor to your left and go downstairs to arrive in an area that we will call the Store Room.  There is nothing of interest here at the moment, so just step through what we will call the Store Room Exit/Entrance, to come outside the house.  Turn right, step forward, and then pick up the Ladder lying against the wall (with the large closed gates) to your right.

Wait for the hero to finish his comment and then turn to your right.  We need to reach the corner of the house to your extreme right.  The first arrow on your right will take you back to the Store Room Entrance, from where you can turn right and step forward to arrive at the spot we are seeking.  But the direct route (from the spot where you found the ladder) would be to just click on the second arrow to your right, and you will be instantly transferred to the corner of the house we want.  Turn around to your left now and look up at the side of the house, to find a "Specific Use" icon (two gears with a line drawn across them) between the windows on the ground floor and the First Floor.  Bring out the Ladder from your inventory and click on the gear icon that now appears between the windows, to place the ladder under the First Floor window.


	Step on the ladder but the cut scene shows the rungs breaking under the hero's weight.  Don't worry.  Just bring out the two Small Sticks from your Inventory, one by one, placing each on the Ladder to serve as rungs now.  Click on the arrow now appearing on the ladder, to arrive in what appears to be another empty bedroom.  [In fact, this is Madam Babou's bedroom, as we will learn later, but she is not here, at the moment.]    Feel free to explore the room, but there is nothing of interest.  So step to the door on the left of the fireplace.  Click on the keyhole, and then on the door handle above it, to open the door; and then, enter Leonardo's Study!

This would be a good time to check your "Conscience"
gauge.The bad news is that your Angelic
"level" has gone down; but the good news is that you have 14 bonus
points![Note:It would have been only 12 points, if you had
sawed the Stick in half only after
the ladder rungs had broken.Thus, your
foresight was actually rewarded by 2 points!]So just click once on the
button under the Angelic gauge, and your Conscience will be balanced
again!Your bonus points are down to 4,
of course, but don’t worry – they will be up again soon.

Turn right now and approach what we will call the Lab
area, with the "Still" apparatus on your left and the desk (with all
the phials, etc.) on your right.Feel
free to examine the Still, the boiler under it, etc.; but you don’t need to
start tinkering with any of that just yet.Instead, turn to the desk itself, to the right of the Still.Pick up the Empty Phial of Ink and the
Phial of Sulphur from the bottom shelf, on the left side of the
desk.Pick up the Sheet of Paper
sticking to the wall behind, and hidden by, the two phials you just
removed.Next, pick up the Phial of
Sleeping Potion
, from the top shelf.

Open the Inventory Page, attach this new Sheet of Paper
to the Portfolio, and use the Mirror to read the text in the upper left- and
lower right-hand corners.[You will only
be clicking on these positions with
the Mirror, of course; the text itself would appear only in the Text Field
under the Portfolio.]The first portion
of the text tells you how to make Black
Ink
and the second tells you a little bit about the So-Called Invisible Ink.Turn
the page then and use the Mirror to decipher the text at the top of this page
as well, to read a little bit about how to use Distillation to produce Brandy, Perfumes and Oils in the
Text Field again.

Feel free to explore the room, but there is nothing else of
interest, at this time.So when you are
done, return to the door you had used to enter the room.Now click on what appears to be a portrait of
Leonardo himself, hanging on the wall to the right of this door.The
portrait will flip around, revealing yet another Sheet of Paper sticking to its
back.Retrieve this Sheet, and listen to
the hero’s comment.Open the Inventory
Page, attach this new Sheet of Paper to the Portfolio, and examine the "Clockwork Mechanism" –
which is actually a puzzle you need to solve to proceed further in the
game.Here is how to do it.

The Clockwork Puzzle

Note that there are three gears in the "clock" at
the top of the page, and a lone gear at the lower left-hand corner of the page.Note also the seven gears of varying sizes at the very bottom of the page.Click on the lone gear, and it will start running.Now pick up a small gear from the bottom and
click around the lone running gear.[Note:
You can place a gear anywhere that
the Specific Use icon does not appear.]The objective is to attach the new gear to the lone running gear, so that the new gear
would start running as well.You must
thus attach all seven gears from the bottom of the page, one by one, arranging
them all the way up to the third gear sticking out of the
"clock."When the last gear is
successfully attached, the clock will start running.

Sit back now and watch the cutscene that marks the end of
the day as well.

Day 2 (23 September
1522)


As the day
begins, you are taken out of your room and brought out of the house, through
the Store Room Exit, where you find yourself engaged in a conversation with
Saturnin.While you gain some important
information, you also find out that Saturnin has discovered your little
"indiscretion" the night before.You must now pay him to keep his mouth shut.So open the Inventory, click once on the coins (appearing under the
Diary), close the Inventory, and click on Saturnin to pay him that one
coin.A short dialog follows.Feel free to click on Saturnin again, to have
him repeat the last part of the second dialog.

If you haven’t done so already, put on the Doublet you
had found in your room.Turn around and step
forward, to reach the corner of the house where you had put your ladder the
night before.There will be no icon to
allow you to put a ladder there today, of course, but there is an icon on the rose bush at that
corner of the house.Use your Knife to
pick up some Roses from this rose bush, and then step back to the Store
Room.Enter the Store Room.

Pick up three
handfuls of Charcoal from the sack on the floor to the left of the
stairs.Next, pick up some Split Logs
piled up on the floor to the right of the stairs.[Note: The hero will refuse to take
more than once.]Turn further to your
right and grab the pair of Pliers from the back of the closed half of
the door.Go upstairs now to the
Pantry.Look down slightly to your left
and pick up three handful of Grains
of Wheat
from the sack on the floor.Turn to the (Kitchen) door on your right and pick up the Broom,
leaning against the wall, to the right of this door.Enter the Kitchen now.Turn right and pick up the Thyme from
the top of the floor-cabinet against the wall.Step forward then, turn around, and pick up the Lemon from the
top of the other end of the same cabinet.

Turn right and step forward, going past the
fireplace.Turn left and step through
the door, to arrive in the small hallway with the set of stairs leading up to
the First Floor.Go all the way up the
stairs, turn right and step through the door to arrive in the corridor in front
of Leonardo’s Bedroom.Turn right and
note that the door on the other end of the corridor is now open.You can even see a balcony outside.But there is no need to go there yet.So just turn around and enter Leonardo’s
bedroom, to the left of the door you had used to enter the corridor.

Step forward to your left, to
reach the door next to the painting of St. John the Baptist.Recall the first riddle in Leonardo’s
message from the night before, telling us to "follow Saint John the
Baptist."Note how St. John’s finger is
pointing up.Move your cursor on the
upper right-hand corner of the picture frame until a hand icon appears.Click on the hand icon, to retrieve a Key.Use this key now on the keyhole to open
the door to your left.Enter
Leonardo’s Study once more.[Note:Your Conscience gauge will not be
affected by entering the Study this way.I merely call this the Angelic way, to contrast it with the Diabolic
method we had used the night before.At any rate, you do gain 4 points for using a different method this
time.]

Text Box: 	Step forward to your left, to reach the door next to the painting of St. John the Baptist.  Recall the first riddle in Leonardo's message from the night before, telling us to "follow Saint John the Baptist."   Note how St. John's finger is pointing up.  Move your cursor on the upper right-hand corner of the picture frame until a hand icon appears.  Click on the hand icon, to retrieve a Key.  Use this key now on the keyhole to open the door to your left.  Enter Leonardo's Study once more.  [Note:  Your Conscience gauge will not be affected by entering the Study this way.  I merely call this the Angelic way, to contrast it with the Diabolic method we had used the night before.  At any rate, you do gain 4 points for using a different method this time.]

As you enter the Study, a cutscene follows.You finally get to meet Madam Babou.In addition to some helpful information, she
gives you a couple of tasks to perform for her.She even gives you an Engraved Plate, just before retrieving the Letter
of Introduction
from you.As the
cutscene ends, feel free to click on her again, but she is not in the mood of
chatting anymore, at least at the moment.Recall Saturnin’s last words about trying to soften the lady’s heart
with words and gifts.So give her the Collar
(necklace) that you had found on the stairs the night before.Another short dialogue follows; but if you
click on her again, you realize that it would not be so easy to persuade this
lady to let you visit her apartments where you hope to find some critical clues
to your actual quest.Try to give her
the Roses you had just clipped outside, but she is not pleased by the
fact that you cut her roses.[No harm in
having tried though.]

Turn right, and pick up the Lyre leaning against
the wall, under the window.Turn further
right and pick up the Empty Bowl (actually a tea-cup) and the Empty
Perfume Bottle
, from the small round table in front of the couch.Step towards the lab area then.Click on the small cupboard to your right,
above the table, and listen to the hero’s comment about making a key from the
mold you found the night before.Turn
around and return to Madam Babou, now seated on the couch.As you approach her, she compliments you on
the Doublet you are wearing.You are
given a choice of two possible responses.Feel free to pick either one, because neither will affect your
Conscience gauge or award you with bonus points; and the lady will give you the
same information in return, no matter how you respond to her compliment.As she finishes, feel free to click on her
again, to have her repeat the information she just gave you, but it will now be
delivered as separate responses to the four choices presented to you.

Turn right then and step into Leonardo’s bedroom.Step forward and turn left, to face the tall
bookcase against the wall.Click on the
markings above the bookcase.The hero
will first repeat the phrase from the night before ("The path of
pleasures"), and then notes that the room he slept in the night before
must be right behind this bookcase.Note
that you also get a gear icon on each of the books today.In fact, this is another puzzle; and the
hero’s remark is actually a clue to the solution, which is as follows.

The Bookcase Puzzle1

You must click on the books so as to spell out the name of
the person Babou mentioned in her last statement:SALAI.Here are the
books you need to press.

S (the fourth
book from the left, in the middle shelf)

A (the fourth
book from the right, in the top shelf)

L (the third
book from the right, in the bottom shelf)

A (the fifth book
from the right, in the bottom shelf)

I(the fourth book from the left, in the top shelf)

Note: It really doesn’t matter which "A"
you pick first.All that matters is to
get the spelling of the name right.In
this connection, note that "I" = i.Note also that you must click a little to the right of the book you would like to press in order for the right
one to go in.

As you click on the last book, a short cutscene shows the
opening of a passage.You find yourself on
the other side, back in front of your room.Note:When you go back to
Leonardo’s bedroom, you will find that the bookcase still appears as before,
but there is an arrow on it now, allowing you to go through.Thus, from now on, you can use this route as
a shortcut to your own room, without having to tinker with the books
again.Unfortunately, however, there is
no such shortcut to get back in Leonardo’s bedroom.If you turn around and look at the wall rug,
you will see a gear icon on it.However,
when you click on it, the hero notes that the "passage must also open on
this side," but that he will "take care of that later."[See The Bookcase Puzzle – 2, much
later on Day 4.]

Go down to the Pantry and enter the Kitchen.We need to go to the Workshop now, but let’s
try a different route than the one we used the night before.So as you enter the Kitchen, take two steps
forward, to enter the small hallway with the stairs leading up to the First
Floor.Turn right and step forward, to
find yourself in a corridor.The Dining
Room is on your right; and another door leading out of the house is now open on
your left.[For the sake of
clarification, we will call this the Main Entrance/Exit, because it is the only
one we will find in this game that can properly be called as such.]We are not leaving the house just yet, so
keep going forward in the corridor.The
next step brings you into another small hallway.Feel free to click on the wall painting to
your right.Click on the double doors to
your left, only to find them locked.Step forward now to enter the Workshop.

As you enter, you find yourself facing a Press.The hero will automatically indicate the
machine’s purpose, but there is no need to start tinkering with it just
yet.Instead, look down on the floor and
pick up the Gear (which looks like a ship’s helm or a rimless wheel with
spokes sticking out; so, for the sake of clarification, we will call this the
"wheel-like Gear.")Turn left
and approach the fireplace.Moving left
to right on the mantel, pick up the Iron Box, the Lighter, and a
thick Drill Bit.There is also a Sheet
of Paper
stuck on the wall above the mantel, but you must use your pair of Pliers
on the sheet to pick it up.You thus get
both the sheet and the Nail that had pinned it to the wall.Open your Inventory then and attach this
Sheet of Paper to the Portfolio, to find a diagram on some kind of
waterworks.In fact, this is a puzzle
that you must solve in order to provide Madam Babou with her fountain.Here is how to do it.

The Waterworks
Puzzle


Note:Please, don’t be overwhelmed by the following
instructions.It is actually much easier
to solve this puzzle than to describe the solution itself!Moreover, be sure to look at the Diagram
following these instructions, and you will see just how simple it all really
is.With that in mind, begin by moving
your cursor (which is in the form of a gear icon right now) on the various
parts of the diagram and noting the name of each part in the Text Field.Thus, we find:

1.Water Pump

2.Jack linked to a system of communicating
pools

3.Archimedes Screw, a device for pumping water

4.Hydraulic Press

Click on the Water
Pump
and the water will come out of the pump and "flood" the
whole page.Click on the Jack, and it will be connected to the Water Pump.Click on the Water Pump now, and this time the water will go all the way to the Archimedes Screw.Click on this Screw, and the water will go to the Hydraulic Press.Click on
the Hydraulic Press, and the water
will move up and "flood" your whole page again.But note how this happened.There is a horizontal line, with two vertical
lines on either end, in the upper portion of the diagram.There are two breaks (or gaps) in the
horizontal line.Thus, when the water
came out of the Hydraulic Press, it went through these gaps in the horizontal
line and flooded the page.Hence, we
must find a way to plug up these gaps, and reroute the water so that it would
sprout like a fountain at the top, instead of leaking from the bottom and
flooding the whole page.

Note the five geometric lines in the "box"
above the Water Pump.Three of these are
straight, double (or pairs of) lines, which you can think of as
"pipes."There are two curved
lines also (with two openings each), which you can think of as
"bowls."You must use these
five geometric forms to plug the two
gaps in the broken horizontal line.In
fact, it will take you only ten simple clicks to do it.Moreover, you don’t need to be precise in
your placements.Just click close to the
areas indicated below, and each line will automatically go where it is supposed
to go.With all this in mind, here is
how you place those lines.

1.Click
on the tallest "pipe" (or double line), and then click on the second (counting left to right) gap in
the horizontal line, to place the pipe under
that gap.

2.Click
on the medium-sized pipe and then click on the first gap in the horizontal line, and the pipe will automatically
connect, going halfway up through the gap.


3.Click
on the shortest pipe and then click in the middle of the two pipes we just attached, to put the shortest pipe
between the other two.

4.Click
on the bowl (curved line) that has both its two openings at the top, and then
click between the tallest and the
shortest pipes, close to the bottom
of both those pipes, so that the end of the tallest pipe would appear to go
through, while that of the shortest pipe would only touch, the bowl opening
next to it.This bowl will thus direct
the water flow from the tallest pipe to the shortest pipe.

5.Now
click on the bowl that has one opening at the top and the other at the bottom,
and then click in the area between the bottom
of the middle-sized pipe and the top of
the shortest pipe, so that the shortest pipe will appear to go through, while
the end of the middle-sized pipe will appear to only touch, the bowl opening
closest to it.This bowl will thus
direct the water flow from the shortest pipe to the medium-sized pipe.

Once done, your "construction" should look
something like the following.

Now let’s see if it works!So click on the Jack first, to connect it again to the Water Pump.Then click on
the Water Pump, and watch the water
flow up to the Archimedes Screw.Click on this Screw, and the water will now go up to the Hydraulic Press.Click on
this Press, and the water will come
out of the top of the Hydraulic Press, pour into the horizontal line, enter the
system of pipes and bowls you arranged, and finally sprout out of the top of
the medium-sized pipe in the form of a fountain that the lady had desired!

A cut scene follows, after which the hero indicates that
we must find the prototype of Leonardo’s fountain in the barn.Before we get to that, however, let’s take
care of a few things right here in the Workshop.If you are still facing the mantel, turn
around to your left and step towards the "crooked" door.If you click on the door knob, the hero will
explain that the door has come off its hinges.Turn down slightly to your right, to see a pair of Pliers on a
small floor cabinet.The hero will
refuse to take these pliers, however, because you already have a pair in your
inventory.Turn further right and pick
up the Gear from the floor.[We will
call this the "small gear," to distinguish it from the wheel-like
gear we had picked up earlier.]Turn
right yet further and click on the Jack sitting on a wooden box.The hero notes that it doesn’t work at the
moment.Pick up the Engraved Plate,
to the right of the Jack.

Turn right and take two steps forward, to approach the
drilling machine.The bit currently in
place will prove to be too thin for our present purposes [although you are
welcome to try using it, of course!].So
remove (pick up) this thin Drill Bit, and replace it with the thicker Drill
Bit
you had retrieved from the mantel earlier.Now put the wheel-like Gear on the
table, under the drill bit, and click on the Crank (sticking out from
the left of the drill-bit holder).The
machine will drill a hole in your wheel-like gear.Pick up the wheel-like (now Perforated)
Gear, and then put your other (the small) Gear on the table and
drill a hole in that gear as well.Pick
up that (also now Perforated) Gear.Having drilled a large enough hole in both of
your gears, pick up the Crank from the machine.

Return to the crooked door and turn to the Jack on the
box (no pun intended, all ye American fellow gamers!)Put the small Perforated Gear on the
Jack, and then pick up the Jack.We are done in the Workshop for now, so let’s step outside the house
through the Store Room Exit.(Note:There are three different ways you can go
down to or come around to this
Exit, but the simplest to explain would be to use the other door to go directly into the Dining Room; then go into the
Kitchen, and then into the Pantry, down to the Store Room and out).As you step out of the Store Room Exit, look
around to your right to find an open door now to the left of the Exit you just
used.This is the Barn. Step inside, and a cut scene follows.

As the cut scene ends, look at the table on your
right.There are several things on it
that you can purchase from Saturnin.Click on the table, after Saturnin stops speaking, and he will repeat
his offer.After that, you will be able
to click on individual objects, and Saturnin will just tell you the price he is
asking for that object.Bring out the
number of coins he wants, from your Inventory, and click on him, to pay him that
price.Then, just click on the object
and (if you have paid the right amount) you would be able to pick it up.However, there is nothing here that we might
need shortly that we cannot find or make ourselves.So just turn to Saturnin’s left, and pick up
the Fountain System from the floor.

Step out of the Barn.Turn right, step forward, and pick up the Ladder from the ground
on your right.Turn left then and step
towards the Pool.Turn right to face the
Pool and place the Fountain System in its center.A cutscene will follow, taking you back up to
Madam Babou in Leonardo’s Study.Feel
free to pick either one of the two choices presented in response to her
compliment, because neither will affect either your Conscience gauge or your
bonus points.Feel free also to click on
the lady then, and ask her to let you visit her apartments; but she is
"not at all in the mood" to allow you to do so.So turn to your right and approach the lab
area.Click on the small boiler door
below, to open it, and put some Charcoal inside.Use the Lighter then, to light up a
fire; and then, close the boiler door again.

Next, remove the Gooseneck connecting the Still to
the Funnel at the top of what we might call the Distillation area of the
mechanism.Put the Roses into the
Still (it looks like a pot or a tiny cauldron, and you must click in the center of the pot, not at the top).Next, bring out your Bottle of Water
and click on the Still, to add some water to the roses you had just put in the
Still.Put the Gooseneck back in
its place, and the hero will say that something is still missing.Put the rest of the water from the (now Opened)
Bottle of Water into the Funnel at the top of the distillation
area.The hero will indicate that the
product is ready, as a pink liquid trickles down into the phial at the bottom
of the distillation area.Bring out the Empty
Perfume Bottle
and click on the phial with the distilled product, to fill
your bottle with the newly made perfume.Return to the lady and present this Perfume Bottle full of Rose Oil
to her.She will accept it graciously
enough; but if you click on her and ask her again to let you in her apartments,
she will firmly decline to do so.Offer
her the Brandy, but she will not appreciate that.[There is no harm in having tried though; and
it does add an entry to your Diary about her.]

It is time now to head for that bridge that the lady had
indirectly asked you to repair.Take the
shortcut through the bookcase in Leonardo’s bedroom.Go down to the Store Room and step outside
the house.Look to your right and find
that Saturnin is back there again.You
can click on him and still ask him about purchasing something from him, and he
will take you to the Barn.But as
mentioned earlier, there is nothing that we need from him right now. Feel free to ask him about how to soften the
lady’s heart.He will tell you to give
her gifts like perfumes and flower oils, but we have already done that.Other than that, he will tell you to just
continue with gifts and compliments.Turn left now and take two steps forward, to reach the other end of the
garden.Turn right and take a step
towards the coach that had brought you to the Manor the night before.You will not be allowed to reach the coach
itself though.Instead, turn left and
grab the clump of Gall Nuts hanging down from the big tree.

Turn left then and take three steps forward, to reach the
unusable Bridge.Note how it is anchored
by two mechanical units on your left and right.Pick up the Iron Bar sitting on the wheel-like gear, on top of
the unit anchoring the bridge on your left.Look to your right and note that a similar wheel-like gear is missing
from the anchoring unit on that side.Bring out the wheel-like Perforated Gear from your inventory, and
place it on this unit.The bridge is now
fixed!Note that it can be moved to three different positions:(1) the present position, pointing into the
canal; (2) towards the first parcel of land on your left, where the Dovecot is
located; and (3) across the canal, to the second parcel of land on your right,
where the Mill is located.

If you look at your Diary, one of your assignments is to
locate the Dovecot where we are expecting a message for the hero.So let’s head there first.Click once on the right anchoring device, and
then step forward on the bridge.Look to
your left and note the pile of logs on the ground.You can pick up one of these, but you cannot
put it in your Inventory.You can only
place it on the tree stump to the right of the pile of logs.But then, you don’t have an axe to chop up
the log, before you can pick up the split logs.Besides, you already have some split logs, and you don’t need anymore
just yet.So ignore the pile for now,
turn right and take another step forward on the path in front of you.


Look to your left again, and note the beehive buzzing with
bees.Obviously, it would not be a good
idea to disturb these bees, because you don’t have any protection; and if you
click on the hive, the hero will say so.So turn right and cross another bridge which is fixed, unlike the one we
just repaired.Pick up the Small Logs
and Twigs
from the ground on your right and a handful of Dead Leaves
from the ground on your left.Step
forward then, towards the red-brick building in front of you, to enter the
Dovecot.

As you enter, the camera automatically pans to a
half-open window on your right, and then up towards what we will call the
Loft.As the hero finishes his comment,
look down to your right and pick up a handful of Pebbles from the
ground.Continuing to move to your right
then, pick up the Copper Object sitting on the window sill, the Long
Rope
hanging down from the wooden beam, and the pile of Old clothes
lying on the ground.

Go up to the Loft now.Note the barrel towards the edge of the Loft to your left, and the patch
of hay or straw on the ground to your right.But there is no need to tinker with either of these, because they don’t
become significant until much later in the game.So just pick up the Pewter Dish from
the floor on your left.Then, look at
the six pigeonholes vertically aligned to the left of the window.Pick up the Call from the second from the top of these
pigeonholes, and then bring out this Call from your Inventory.As you close the Inventory, you will see the Call
suspended in the air in front of you, inviting you to yet another puzzle.

The
"Call" Puzzle


This is actually a very simple puzzle in which you must
play the right notes to summon all the birds out of their holes, so that we can
see if any of them has a message for us.Imagine as if the holes that you see on the Call were numbered
1-5 as follows:

1 – 2 – 3 – 4 – 5


Play the notes in the following order:

(1)Click on the 4th hole.

(2)Click on the 3rd hole.

(3)Click on the 5th hole.

(4)Click on the 1st hole.

(5)Click on the 2nd hole.

As you play each correct note, a bird will come out of
its pigeonhole.Miss a note and all of them will withdraw, and you will
have to start all over again.After you
have played all five notes correctly, all of the birds will be out and the Call
will disappear from your view, indicating that you have solved the puzzle.You must now click on the magnifying-glass
icon appearing on each bird, to check to see if it is carrying a message.As you click on the fifth bird (the one in
the top pigeonhole, in the extreme right), a cut scene will follow that will
show the hero reading the message sent to him and then his own response to
it.[Note: you might want to save
your game just before clicking on this bird, if you would like to hear these
messages again, because they are not reproduced in your Diary or Portfolio.]

We are done in the Dovecot for now, so step outside and
head back across the movable bridge that we had repaired.Click once on the right anchoring device
again, to move the bridge towards the Mill on your right this time.Step forward on the bridge.You will find a path in front of you, while
the Mill is on your right.Before going
in the Mill, however, take a step forward on the path.Look to your right, and use your Knife
to cut and pick up a Reed.There
are some Pebbles lying on the ground to the right of the crop of reeds,
but the hero will refuse to take them, because you already have some.

Return to the bridge now and step towards the right of the Mill.Pick up the Axe, leaning against the
door frame, to the right of the Mill’s entrance.You will find another batch of Dead Leaves
on the ground to your left; but if you try to pick some, the hero will refuse
to do so, because you already have some in your Inventory.Turn further left, towards the canal.Bring out your Empty Bottle of Water
and click on the canal, to fill up your bottle with water again.Turn further left then, and click on the
arrow pointing into the canal itself.The
hero will note that you need to find something to help you breathe in
there.So open your Inventory, click on
the Reed and then on the hero’s portrait, to put the Reed on his
face.Jump into the water now and look
up, to your left, to find a tangle of twigs blocking the water-wheel.Use your Knife on this tangle, to free
the wheel, allowing it to run again.Turn further left and click on the arrow to come out of the water.Open your Inventory now and remove the Reed,
by clicking on it in the hero’s portrait (unless you want to hear Saturnin’s
"crack" about your appearance, when you later approach him and start
to move away!).Turn right and enter the
Mill.

As you step inside, note how the Mill is divided into two
separate areas: the actual Mill area, to your right, and what we might call the
Forge area, to your left.We will need
both these facilities to achieve some of our objectives.Before we get to that, pick up the Beekeeper’s
Veil
(hanging under the shelf on the wall, to the right of the window) and
the Gloves (hanging down from a hook, on the front edge of the
worktable).

Turn now to the Furnace on your left.Place the Small Logs and Twigs
inside.Next, put in the Split Logs.Use your Lighter then to start a
fire.Now turn to the worktable on your
right.Our first task is to make a key
for Leonardo’s cupboards.Feel free to
refer to Leonardo’s notes in your Portfolio, about making a key.We will need Bronze (which is said to be an
alloy of copper and tin), for this purpose.So put the Copper Object and the Pewter Dish in the
Crucible.Click on the crank (which is
attached to the side of the metal pole that is on the left of the Crucible), to
raise the Crucible.Click on the
metallic "arm" above the Crucible, to move the Crucible into the
Furnace.Click on the crank again, to
lower the Crucible on the Furnace floor, and the hero will say, "Perfect,
but it is not hot enough."Click on
the metallic "arm" again, to move it out of the Furnace, leaving the
Crucible inside.


Click on the huge metallic cover, sitting on the floor
under the Furnace, to pick it up.You
can’t deposit it in your Inventory, of course.Just move it up to the Furnace and click, to place the cover on the
Furnace.Open your Inventory and put on
your Gloves (by clicking on the gloves and then on the hero’s portrait,
in the upper-right portion of the Inventory).Click on the Furnace cover again, but the hero might ask you to wait for
just a few more seconds.In fact, it will be only a few seconds before you
can click on the cover again, to remove it and place it back on the floor.Click on the metallic arm now, to bring it
back above the Crucible.Click on the crank,
to raise the Crucible.Click on the arm
again, to bring the Crucible back to the table; and then click on the crank
again, to lower the Crucible on to the table.Click on the arm, one more time, to move that device out of the way for
now.

Place the Key Mould on the table, in front of the
Crucible.Click on the Crucible, to pour
the contents into the mould.Click on
the gear icon on the mould, to open
its cover.Pick up the Bronze Key,
and then the Key Mould.We are
done with the Forging area for now, so let’s take care of a few things in the
Mill area.[Note:You can go back to Saturnin and he will tell
you generally how to use the Mill to make paper and flour; or just proceed as follows.]

Put the Old
Clothes
in what looks like a trough, on the left side of the Mill
area.Next, put in some water from your Bottle
of Water
.Close the cover.Click on the handle, which appears under and
to the right of the anvil.The machine
will start grinding.You don’t need to
wait at all.Just click on the same
handle again, to stop the grinding; open the cover; and then, pick up the Paper
Maché
.

Bring out a handful of Grains of Wheat and put it in
the large metallic Funnel that you see up on the loft, against the left side of
the ceiling.Look down on the floor to
your right, and pull the handle on the left of the bucket by the door.Pick up the Flour from the
bucket.Feel free to pull the same
handle again, to stop the machine.We
are done in the Mill area as well, so let’s return to the other side of the
movable bridge again.

We still have two more things to take care of, before we
can return to the Manor.So click on the
left anchoring device this time, to move the bridge back towards the Dovecot
parcel of ground again.Step across the
bridge, and then turn left.Pick up a
log and place it on the tree stump.Use
your Axe to chop this log.Pick
up the Split Logs from the ground.[Note: one click will pick up both pieces that have fallen on
either side of the tree stump.]

Turn right now, step forward, and then look at the beehive
on your left.Put on your Beekeeper’s
Veil
.Click on the smoking apparatus
("Bee Smoker"), sitting on the ground to the right of the beehive, to
open it.Put some Dead Leaves in
it; use your Lighter to light a fire in those leaves; and then, pick up
the Bee Smoker.Bring out the Bee
Smoker
and click on the beehive, to chase the bees away.Put away the Bee Smoker (just
right-click), and then click on the top of the beehive to pick up its
cover.You cannot put this cover in your
Inventory though.Instead, put it on the
small stool, to the left of the beehive.Click on the beehive now, to remove two Honeybee Combs.Feel free to replace the beehive cover.Now take off your Beekeeper’s Veil
(again, unless you want to hear Saturnin’s "crack," when you approach
him and start to move away).You can
take off your gloves as well.

Return to the Manor now and approach Saturnin, standing
to the left of the Store Room Exit.Feel
free to tell him that you have repaired the bridge, even though doing so will
not affect either your Bonus Score or your Conscience gauge.The only new thing you will learn is that you
need to use the press to make sheets of paper out of the paper maché you made
in the mill.More importantly, however,
talk to him about the two Honeybee Comb frames you removed from the beehive.At the end of the dialog, he will take both
of them from you, to keep one for himself in exchange for making honey for you
out of the other one.[Note: Once
again, you may ask him about purchasing something from him, even though you
really don’t need to do so.But if you
do ask him about it, be sure to do that at the end of the conversation, because
he will not talk to you about anything except the purchases when he is inside
the Barn.He talks about other matters
only when he is standing outside next to the Store Room Entrance, and you would
have to go elsewhere and then come back before he returns to that location
again.]

Go upstairs now to Leonardo’s bedroom.Approach the locked cupboard, under the
painting, on the other side of the bed.[Remember,
it was in front of this cupboard that you had found your mirror the night
before.]Use your newly made Bronze
Key
on the keyhole in the top center of this cupboard.The "Exit" image (of the combined
Sun and Moon) appears in the lower right-hand portion of the screen, indicating
the beginning of this puzzle.

The Cupboard Puzzle No. 1

This is really a very easy puzzle which is actually more
complicated to explain than it is to solve.Take a moment to study the set-up and get comfortable with it.Note how the cupboard is divided into five
vertical columns and four horizontal rows.The keyhole appears at the top of the central section, i.e., in Row
1, Column 3
.There is a rectangular
compartment under this keyhole, and a large diamond-shaped socket under that
compartment (in Row 4, Column 3).Note the location of the pink Knob
at the top of this diamond-shaped socket, above three gray (actually empty)
slots.This is our Reference or the Fixed cell.

There are eight
other cells on either side of Column 3 (i.e., 16 cells in all), and each pink
knob appears in different locations (within its diamond-shaped socket) in all
of these sixteen cells.The objective is
to bring all those pink knobs at the
top of the three empty gray slots, just as it appears in our Reference/Fixed
cell.

Note the eight
Control Knobs – four at the top of Columns 1, 2, 4, and 5; and then, two on the
left, and two on the right, side of the cupboard.As you can probably guess, the Control Knob
at the top of a column (1, 2, 4, or 5) controls the adjustment of all four
Knobs under it, in that column.Similarly, each Control Knob on the Left side of the cupboard controls
the adjustment of the four Knobs appearing to its right, in that row; and each
Control Knob on the Right side of the cupboard controls the adjustment of the
four Knobs appearing to its left, in that row.Thus, we must click on these Control
Knobs
to set every pink knob at the top of its socket, in the sixteen cells
on both sides of the Reference/Fixed cell.

Now
I am not sure if the computer sets those pink knobs randomly in each game, but
this is how it worked out for me.I
clicked on the Control Knob at the top in

(1) Column 1, three times, until the pink knob in
Row 1, Column 1 was set at the top;

(2) Column 2, twice, until the pink knob in Row
1, Column 2
was set at the top;

(3) Column 4, none, because the pink knob
in Row 1, Column 4 was already set at the top; and (4) Column 5, once,
to bring the pink knob in Row 1, Column 5 at the top.

I then clicked
on the Control Knobs at the sides of the cupboard as follows:

(5) Right Side (Top) à none,
because all the pink knobs in Row 1 were already set at the top;

(6) Right Side (Bottom) à three
times
, to bring the four pink knobs in Row 3 at the top;

(7) Left Side (Top) à once,
to bring the four pink knobs in Row 2 at the top; and

(8) Left Side (Bottom) à none,
because all the pink knobs in Row 4 were already set at the top.

Thus, the rectangular compartment
opened as soon as I took Step 7 above.

Pick
up the Mould for Gold Blanks, the Coining Die, the Hammer,
Leonardo’s Jewel, and the Roll of Parchment from this
compartment.Be sure to retrieve your Bronze
Key
from the cupboard keyhole as well.Open your Inventory then and attach the Roll of Parchment to the
Portfolio.The close up you get shows
that it is a "Plan of Cloux Manor – First Floor."If you move the cursor around, the Text Field
will indicate the various areas in and outside the Manor.Note the gear icon you get, when you move
your cursor around the circular drawings in the four corners of the
document.But we don’t have any
information about what they represent or how to use them.So let’s just ignore them for now, and head
for Leonardo’s Study.

As you enter the
Study, turn left and step towards the table to the right of the fireplace.Turn right and look down at the table.Click on the drawer, to open it.Pick up the Monocle and the Blood
Stone
you find inside.Close the
drawer and step towards the lab area.

Use
your Bronze Key to open the cupboard on the right, above the table.Pick up the Nuggets of Gold from the
top shelf, and the four small glass jars (one filled with Varnish and
the other three with the Red, Blue, and Yellow paints)
from the bottom shelf.Close the
cupboard, and retrieve your Bronze Key.

We
need to make some Blank Ink now.Feel
free to refer to Leonardo’s notes about making this ink, in your Portfolio, to
note that we can use either Charcoal or Gall Nut as the powdered
black pigment necessary in making the blank ink.So put either Charcoal or Gall Nut
(whichever you prefer) into the Mortar, and use the Pestle (on the right of the
Mortar) to grind it.Pick up the powder
from the Mortar; and then, bring it out of your Inventory and put it in the
empty dish on your right.Add an Egg,
and then some water from your Opened Bottle of Water, into this
dish.The solution is ready, so bring
out your Empty Phial of Ink and click on the dish, to fill this phial
with the newly made Blank Ink.

Go
down to the Workshop and approach the Press.Note the thin drawer right under the Pressing block.Click on the handle in the center of this
drawer, to pull out the drawer.Click on
the top of the drawer, to open its cover.Note that there are four (little balls of) Paper Maché in your
Inventory.Take out one of them and put
it in the drawer; and then, close the drawer and push it back in.Click now on the hammer-like handle above the
Pressing block.The handle will move to
the left, pushing the Pressing block go down.Click on the handle again, to move it to the right, bringing the
Pressing block back up.Pull the drawer
out, open its cover, and remove your first Blank Sheet of Paper.Repeat this procedure to make three more
Blank Sheets of Paper out of the other three (balls of) Paper Maché in
your Inventory.

Now
that we have some paper, let’s print the two Engraved Plates that we have in
our Inventory.So open the cover of the
drawer (unless it is already open, of course, after you made your last Blank
Sheet of Paper), and put one of the two Engraved Plates in it.Bring out your newly filled Phial of Ink
and click on the Engraved Plate inside the drawer, to spread some ink on
this plate.Put a Blank Sheet of
Paper
on the now-inked plate, close the drawer and push it back in.Now click on the handle above the Pressing
block, to push the Pressing block down; and then, click on the handle again, to
bring the Pressing block back up.Open
the drawer and remove both the
just-printed Sheet of Paper and the inked Engraved Plate.Now print another Sheet of Paper from
your second Engraved Plate in
the same way.Again, remember to remove
both the newly printed Sheet of Paper and the inked Engraved Plate.We are done printing, for now.So close the drawer and push it back in.

Well,
now that we have printed both our Engraved Plates, let’s see what we got.So attach each of these new Sheets of Paper
to the Portfolio, one by one, and examine their contents.It’s all right if you lost track of which of
the two Engraved Plates you had received from the lady, and which one you found
right here in the Workshop, because it really doesn’t matter.If you have
kept track though, you will find that the Sheet of Paper printed from
the lady’s plate tells us a little bit about the bridge we fixed earlier.[Note:Use the mirror to decipher the writing in the top and central portions
of this Sheet.]As for the Sheet of
Paper
printed from the second plate, use the Mirror at the top of the page
to learn something about the "fumagents" and how to make them.Now click on the drawing of the two cannons
in the lower-right hand portion of the page, and those cannons will "go
off," spilling some writing of their own.Use the Mirror again on this writing to learn how to make gun powder.

Go
down to the Store Room.Step outside the
house, and Saturnin will call you from behind and give you a jar of Honey.Go to the Mill now.[Note:You will have to click on the right anchoring device to move the bridge
in the Mill’s direction first.]Put the Split
Logs
into the Furnace, to revive the fire.Put the Nuggets of Gold into the Crucible.Click on the Metallic Arm, to bring it back
to the table.Click on the crank at the
side of the metal pole, to lift the Crucible off the table.Click on the Metallic Arm again, to move the
Crucible into the Furnace.Click on the
crank again, to lower the Crucible into the Furnace.The hero will note that it is not hot enough
(meaning, we must cover the furnace, of course).Click on the Mechanical Arm, to move it out
of the way.Pick up the large cover from
the ground and put it on the Furnace.Put on your gloves then, and try to remove the Furnace Cover.[Note: You might have to wait a few
seconds and try again though, as you did when you had made the bronze.]After removing the cover, click on the
Metallic Arm again, to bring it back to the Furnace.Click on the crank, to raise the
Crucible.Click on the Metallic Arm once
more, to bring the Crucible back to the table.Click on the crank again, to lower the Crucible down on the table.Finally, click on the Metallic Arm, to move
it out of the way.

Place the Mould
for Gold Blanks
on the table, in front of the Crucible.Click on the Crucible, to pour the Molten
Gold into the Mould.Click on the Mould
twice, to recover first the four Gold Blanks; and then, the Mould itself.Bring out the Coining Die from your
Inventory, and place it in the circular slot on top of the Anvil (to the right
of the table).Bring out one of the
four Gold Blanks then, and place it on top of the Coining Die.Use the Hammer on the Gold Blank;
and then, pick up the Gold Coin.Place the other three Gold Blanks, one by one, on top of the Coining Die
still in the anvil slot.Use the Hammer
on each of these Gold Blanks, to produce three more Gold Coins, one by
one.Keep picking up each Gold Coin, as
you make it.After you make your last
(fourth) Gold Coin, pick up your Coining Die.[Note:The coins you just made are added to the coin collection that appears
under the Diary, in your Inventory.]

We are done in
both the Mill and the Forging areas of the Mill.So take off your gloves and return to the
Manor.Go back up to Leonardo’s Study
and approach the lady, still seated on the couch.Give her Leonardo’s Jewel (that you
had found in the cupboard in his bedroom).She will thank you, and you will be given a choice of two
responses.Pick the first response, telling her that you had found the jewel in
Leonardo’s cabinet.This response will
not affect either your Bonus Score or your Conscience gauge, but the other one
would have cost you Angelic points, without gaining anything in return.

Click
on the lady and the hero will tell her about having fixed the bridge.She will be pleased, of course, but would
like yet another favor from you.Again,
you are presented with a choice of two responses.Although neither choice will affect either
your Bonus Score or your Conscience gauge, pick the first choice anyway, because
the other one is rather rude and the lady’s reaction will be understandably
unpleasant as well.So tell her that you
are listening, and she will now ask you to play your lyre.Bring out the Lyre.As you do, the instrument will appear fixed
in the top left portion of the screen, while the lower portion of the screen
will be subdivided into three portions, featuring the strings of the lyre on
the left, a musical sheet in the middle, and the Sun/Moon "Exit" sign
on your right.You will also hear the
first three sample notes, inviting you to solve this puzzle.

The Lyre
Puzzle


The objective is to pick the
right strings to match the notes you just heard.Move your cursor
across the strings in the lower left portion of the screen, and note the five positions
(each appearing after each string) in
which the gear icon appears.Imagine as
if these clickable points were numbered 1-5 as follows:

1 – 2 – 3 – 4 – 5


Play the following notes:

(1)Click on the 1st position.

(2)Click on the 2nd position.

(3)Click on the 3rd position.

As you play each note, a symbol will appear in the
musical score sheet in the middle of the lower part of the screen.The color of this symbol will be dark
brown
, if you have played the correct note; but red, if you have
not.[Note:You can click on the lady at any time, to
hear the sample notes again.Apparently,
she is the one who is – perhaps whistling – these notes for you to play!]If you have played the first three notes
correctly, you will hear another sample of notes that you must match.This time, play the following notes:

(4)Click on the 4th position.

(5)Click on the 2nd position.

(6)Click on the 2nd position again.

(7)Click on the 1st position.

As you play the last note correctly, a cut scene will follow showing the hero and the lady, sitting
together on the couch, apparently singing and laughing, as the tune you started
plays on sweetly in the background.Bad
news follows this cut scene, however, as the lady declares that her throat is
sore from all the singing.You must now
arrange for a cure.The hero thinks that
Saturnin might be able to help.So go
down to the Store Room, step outside and talk to Saturnin.He will tell you about a remedy consisting of
honey, thyme, lemon and water.Turn
around and click on the second arrow
to your left, to arrive directly at the pool.Fill up your now-Empty Bottle of Water with water again, and
return to Leonardo’s Study.

Go
directly to the lab area.Remove the Gooseneck
from the top of the Still.Put the Honey,
Thyme, Lemon and some water (from your Bottle of Water),
one by one, into the Still.[Remember to
click in the center of the Still, to
put in the ingredients.]The hero
indicates that the remedy is ready.[Note:
At this point, you can put in the
Sleeping Potion in the Still, but you will just lose 20 + 10 = 30 Angelic
points, altogether, and gain nothing at all.Moreover, you would not be able to go into the lady’s apartments by
yourself either, because the door is locked.So you would have to wait, i.e., go out of the room and then come back,
for her to wake up and take you there herself.In short, there is no use in resorting to the Diabolic approach at all.]So just bring out the Empty Bowl (the
tea cup) and click on the Still, to get a Bowl full of Syrup.Go to the lady then, and offer her this
syrup.The lady will be pleased and will
take you to her apartments without any further ado.


After the dialog, step to your
left.Click on the drawing set in the
corner on an easel, on your left.As the
hero finishes his comment, the gear icon on the drawing will turn into a hand
icon.But if you click on this icon, the
hero will decline to pick up this drawing, saying that he will do so
later.So turn now to the large drawing
on the wall, on your right.Click on it,
and listen to another comment by the hero.Note the sketch of a hand, in the upper left portion of the drawing.Feel free to refer to Leonardo’s notes about
the invisible ink, in your Portfolio, and see that the same sketch appears in
those notes as well.Thus, this is a
clue that there might be something written in invisible ink on the sketch on
the wall also.So bring out your Lighter
and click anywhere at all on the wall
drawing.Sure enough, a line sketch of a
telescope will appear, right between the sketch of the hand on the left and
that of the woman on the right.Wait for
the hero to finish his comment, and then return to the lady on the couch.


Click on the lady and listen to the
dialog about the sketch of the Battle of Anghiari.You will then be presented with a choice of
two responses.Feel free to pick either,
because neither choice will affect your Bonus Score or your Conscience
gauge.Turn around then and look at the
telescope.Click on it and another
dialog will follow.Click on the
magnifying-glass icon now, appearing at the eye-piece, to try to look through
the telescope.As the hero finishes
speaking, click on the gear icon on
the telescope, to open a small cover at the top, a little further up from the
eye-piece.Click on this new opening,
and the hero will tell you that the lens is stuck.Use your Knife, on the opening, to
remove the Broken Lens.Then,
bring out the Monocle from your Inventory, and insert it in the opening,
to serve as the telescope’s new lens.[Note:If you click on the handle, sticking out from
the right of the telescope, to change the telescope’s position, the hero will
tell you that it is jammed.If you try
to oil it then, the hero will decline to do so, at this time.]Click on the magnifying-glass icon on the
eye-piece, to look through the telescope again.A cut scene will follow, taking you on to the next day.


Day 3 (24 September
1522)


As the
hero wakes up, he wants to look at Leonardo’s telescope again.So go down to the Kitchen, and step forward,
to the door that leads to the small hallway with the stairs going up to the
First Floor.Instead of stepping out
into the hallway, however, take a step to your right.Turn right again, and pick up the Full Bottle
of White Wine
from the table in front of the fireplace.Turn around and note that several sacks that
had been there on the ground since your arrival, have now been removed,
revealing a trap door.Click on the
door, to hear the hero’s comment.But
let’s ignore the door for now, because we need to find out more about that
telescope upstairs.So step out of the
Kitchen, and go upstairs to Babou’s apartments.Go past her bedroom and enter her Sitting Room.


Approach
and click on Babou.After the dialog,
turn around to the telescope and click on its handle, to find that it is still
jammed.So bring out the Oil from
your Inventory, and click on the handle, to oil it.Right-click, to put away the Oil; and then,
click on the telescope’s handle again, to see the telescope swing to the
right.Another dialog follows.Click on the magnifying-glass icon appearing
at the left end of the telescope, to look through the telescope.Turn around now and click on Babou.Two topics will be presented to you.Click on any one of them; and then, click on
Babou again, to address the other topic as well, thus gaining some information
about both Leonardo and his telescope.


Go down to
the Store Room, step outside and click on Saturnin, sitting down on a bench
today.As the dialog ends, we must now
calm Saturnin’s suspicions, to get those "two circular lenses" that
the hero suspects he is hiding.Bring
out the Brandy from your Inventory, and give it to him.But he seems even more suspicious now, or
perhaps just greedy for some more Brandy.You are presented with a choice of two responses, each representing a
different (Diabolical or Angelical) way of dealing with this situation.


The Diabolic Approach:Pick the first choice, urging Saturnin to remember harder.You lose 10 Angelic points.Go up to Leonardo’s Study, and towards
the lab area.Open the Boiler cover,
put in some Charcoal, and use your Lighter to light up a
fire.Close the Boiler Cover, bring
out your Full Bottle of White Wine, and click in the center of the
Still.Bring out the Gooseneck
from the Inventory, and place it on top of the Still.The hero indicates that the product is
ready, as it trickles into the phial to your right.Bring out your Empty phial of Brandy
and click on the distilled product, to fill your phial with more
Brandy.You gain 5 bonus
points.Go down to the Store Room,
step outside the house, and give this Brandy to Saturnin.He will graciously accept, and doze off
after drinking it.Open your
Inventory and click on the Angelic gauge, to restore the balance in your
Conscience gauge.Thus, your net
loss is 10-5 (points you had gained for making Brandy) = 5 Bonus Points, if
you take this approach.

Text Box: The Diabolic Approach:  Pick the first choice, urging Saturnin to remember harder.  You lose 10 Angelic points.  Go up to Leonardo's Study, and towards the lab area.  Open the Boiler cover, put in some Charcoal, and use your Lighter to light up a fire.  Close the Boiler Cover, bring out your Full Bottle of White Wine, and click in the center of the Still.  Bring out the Gooseneck from the Inventory, and place it on top of the Still.  The hero indicates that the product is ready, as it trickles into the phial to your right.  Bring out your Empty phial of Brandy and click on the distilled product, to fill your phial with more Brandy.  You gain 5 bonus points.  Go down to the Store Room, step outside the house, and give this Brandy to Saturnin.  He will graciously accept, and doze off after drinking it.  Open your Inventory and click on the Angelic gauge, to restore the balance in your Conscience gauge.  Thus, your net loss is 10-5 (points you had gained for making Brandy) = 5 Bonus Points, if you take this approach.

The Angelic Approach:Pick the second choice, telling Saturnin that you were just trying
to be pleasant.Saturnin won’t seem
too pleased with this answer, but he will allow you to go fetch the colored
lenses from his cabinet in the Barn, warning you not to touch anything
else.Check your Conscience gauge to
find your Angelic Score has risen by 10 points.Thus, you must click on the Diabolic
gauge to restore balance in your Conscience gauge, losing 10 Bonus
Points.But after you are finished
in the Barn, you can still go make Brandy and gain the 5 points for doing
so, just as you would have if you had followed the Diabolic approach
above.Thus, your net loss is still
5 points, by using this approach as well.

Text Box: The Angelic Approach:   Pick the second choice, telling Saturnin that you were just trying to be pleasant.  Saturnin won't seem too pleased with this answer, but he will allow you to go fetch the colored lenses from his cabinet in the Barn, warning you not to touch anything else.  Check your Conscience gauge to find your Angelic Score has risen by 10 points.  Thus, you must click on the Diabolic gauge to restore balance in your Conscience gauge, losing 10 Bonus Points.  But after you are finished in the Barn, you can still go make Brandy and gain the 5 points for doing so, just as you would have if you had followed the Diabolic approach above.  Thus, your net loss is still 5 points, by using this approach as well.   

         In short, there is really no
difference whether you choose the Angelic or the Diabolic approach, at least as
far as the Bonus points are concerned.But the Angelic approach is quicker. Moreover, you won’t really need
either the 5 points from making Brandy, or any more Brandy itself.So there is no need to make the Brandy at
all, making the Angelic approach that much quicker than the Diabolic approach,
in getting on with the real story.


As you
step into the Barn, look at the cabinet on your left.Click on the left door, to open it and see
the two Colored Lenses on the middle shelf.Pick up the two lenses, one by one.Turn right and click on the white piece of paper, on the stool in front
of the table with all the items that Saturnin had offered for sale.Listen to the message read by the hero.Then, click on the gear icon appearing on the little red-and-white cloth napkin on the
table, to remove the cloth and reveal the coin that you had used to bribe
Saturnin the day before.After the hero
finishes his comment, a hand icon will appear on the coin.In fact, a hand icon appears on all the items
for sale as well, allowing you to pick up anything and everything from the
table.The first time that you try to
pick up anything, however, the hero will suggest not doing so.In fact, I would suggest the same, because
you will only lose Angelic points, and gain nothing in return.


As you
step outside the Barn, you will find Saturnin asleep, even if you had followed
the Angelic approach.Go back up to
Babou, in her Sitting Room.Click on
her, and tell her about the message you found in the Barn.A dialog will follow; and then, you will be
presented with a choice of two responses.Picking the first one will cost you Angelic points, without gaining
anything in return.So pick the second
choice and "confess."You will
lose Diabolic points and would therefore still have to use bonus points to
restore the balance in your Conscience gauge.But you will also gain some information and, probably, a new ally.


Now turn
around and note the two slots at the front end of the telescope.Bring out the two Colored Lenses from your Inventory, one by one, and click on
the front end of the telescope, to put the lenses in those two slots.Note:The telescope will reveal three parts of a message.The order in which these parts come up seems
to be randomly generated by the computer.Thus, no matter which of these two colored lenses you click on the first
two times, you will get only Parts 2 and 3 of the message; Part 1 is revealed
only after you have already discovered the first two parts.So, proceed as follows.


1.Click ONCE on the
outer colored lens, and then look
through the telescope, to hear the hero read Part 2: "then
find the Philosopher’s stone,
".

2.Click ONCE again
on the same lens, and then look
through the telescope, to hear the hero now read Part 3: "and the
path to power will open up before you.
"

3.Finally, click
TWICE on the inner colored lens, and
the hero will read Part 1: "First, look for the stars".


After this, the hero will automatically read all
three parts of the message in the correct order, and then restate the message
(or rather, the riddle): "First seek the stars, then find the Philosopher’s
Stone and the path of power will open up before you.
"He
will then turn to Babou, and a dialog will follow.


We must
now find the constellation corresponding to the one we saw through the
telescope.As the hero described it, it
is a lozenge topped by a fifth star.Babou identifies it as the constellation of Lyre, and suggests using
Leonardo’s celestial globe.So go out to
Leonardo’s Study and step towards the Celestial Globe, to the right of the
fireplace.


Note that the globe seems to be "lit
up" now, with five bright points on it.These points correspond to the five points of the Lyre constellation we
saw through the telescope.Note also the three metallic gold strips
across the globe.One of these strips
crosses the globe horizontally at the
top, while the other two cross it diagonally.We must ALIGN these three strips, and the
globe itself, so that the five "lit" points on the globe will come to
the front and shine through the
overlapping holes in all three metal strips.(See Picture below.)


As soon as
you achieve the correct alignment, the globe will split open, holding out at
its top a medallion that looks like the combined image of the Sun and the Moon,
just like the "Exit" icon in the Inventory.Pick up the medallion and a cut scene will
follow.


After the
cut scene, go down to the Store Room, step outside and speak to Saturnin.He will introduce you to the black cat,
curled up on the bench beside him.Feel
free to click on the cat itself, to have Saturnin repeat the introduction.Now go back upstairs to Babou, still in her
Sitting Room.Click on her, and you will
be presented with a choice of four topics.The new topics will be highlighted in white, while the old one is grayed
out.Feel free to address the old topic,
if you like; but you must cover the
three new topics (clicking on Babou repeatedly to do so), in order to proceed
forward in the story.Thus, you learn
that "Alkahest" (the name of the manor cat) also means the
Philosopher’s Stone, and that the cat wears a medallion.


Go down to
Saturnin, but neither he nor the cat is at the bench anymore.So go to the Dovecot.[Note: You will have to move the bridge
in that direction first by clicking once on the left anchoring mechanism.]As you approach the Dovecot, you will see the
cat sitting up in the loft’s window.Click on the magnifying-glass icon that appears on the cat, to hear an
amusing comment by the hero.Then, step
inside the Dovecot, and go up to the loft.The camera will automatically pan down to the cat, as the hero makes
another comment.As he finishes, click
on the cat to retrieve the second medallion, which looks like a silver crescent
moon.


Return to
the manor and go to the Trap Door now, in the Kitchen.Note the two sacks lying on the left portion
of this door.Pick up the one on the
right.You can’t put this sack in your
Inventory, of course.Rather click on
the floor, to the left of the door, to put the sack there.Put the other sack there as well.Then, click on the little circular hook that
had been hidden by the two sacks, to try to lift the door.The hero will tell you that it’s too
heavy.Look up at the ceiling, and note
the brown pulley.Bring out the Long
Rope
from your Inventory, and click on the pulley.The rope will be automatically slid through
the pulley, and one of its ends will be tied to the hook in the door and the
other to a wheel on the wall.Bring out
the "multi-purpose" Crank from your Inventory, and click on
the wheel, to attach the crank to it.Now click on the wheel, to
lift the door.Then click on the hand icon on the Crank, to
retrieve it.


Bring out
the Lighter from your Inventory, and click on the lantern hanging down
from the lifted door.Pick up the lit
lantern ("Lamp"); then, bring it out of your Inventory and step down
the stairs of what we will call the Cellar.As you come down, turn left and pick up two handfuls of Saltpetre from the wall.Turn right and pick up the Cannon Ball from the floor.Turn further right and note the three barrels
(one on top of two others) on the ground, to the left of the staircase.Pick up the Engraved Plate, leaning against
the left side of the top barrel.Turn
back around then, and step further in the Cellar.Turn left and click on the bricked-up
doorway.Turn right, and click down on
the cannon.Now turn further right, and
click on the prototype of Leonardo’s flying machine.Note that even though the hero says that he
would take care of that (machine) later, he also complains about its being
"pitch black inside."So look
up, to your right, and use your Lighter to light up the chandelier.


Turn left
and click on the flying machine again, to hear the hero describe what is wrong
with it.But we don’t have any reason or
equipment to try to fix it just yet.So
ignore it for now, turn right and step forward, to return to the first part of
the Cellar.Turn slightly left and click
on the magnifying-glass icon now appearing on what looks like another Engraved
Plate (on the ground, leaning against a table or a bench).The hero indicates that we need some kind of
a powder to make the marks on the plate more visible.So bring out the Flour from your
Inventory, and click on the plate, to spread the flour over the plate.A short cut scene will follow, showing the
hero making a note of those marks on a Blank Sheet of Paper.But you can’t attach this Sheet to your
Portfolio just yet, because it is "still incomplete."Thus, you can’t even see the marks the hero
just noted.We need more information to
proceed further anyway.So let’s ignore
the marks and the sheet, for now, and proceed with the story.


We are done
in the Cellar for now, so return to the Kitchen and head for the Workshop.Go to the Sawing machine, and place the Broom
in front of the sawing blade.Click on
the foot pedal to start the sawing.Then, click on the Broom, to move it against the blade and saw the Broom
in half.Pick up both the Short Broom
and the Wooden Shaft.


Turn left
and step over to the Press.Click on the
drawer, under the Pressing block, to pull out the drawer.Open the cover of the drawer, and place the Engraved
Plate
you just found in the drawer.Now bring out the Phial of Ink from your Inventory, and click on
the Engraved Plate, to ink it.Then,
bring out your last Blank Sheet of Paper and place it on the now-inked
Engraved Plate.Close the cover of the
drawer then, and click on the drawer, to push it back under the Pressing
block.Click once on the handle above
the Pressing block, to push the block down; and then, click on the handle
again, to bring the block back up.Pull
out the drawer, open the cover, and retrieve both the Sheet of Paper and
the now-inked Engraved Plate.Close the drawer and push it back under the Pressing block again.


Open your
Inventory and attach the printed Sheet of Paper to the Portfolio.Use the Mirror to read about "Alberti’s
Grid" at the bottom of the newly printed Sheet of Paper (the page on the
right, in the Portfolio).As you exit
the Portfolio, feel free to click on the Diary and flip back to the "To be
done as quickly as possible" list for the date of 23 September 1522.You will find that the second item, about
printing Leonardo’s plates, is now crossed out, indicating that we have
recovered and printed the last of the Engraved Plates we were supposed to
print.


Turn
around and approach the crooked door.If
you click on the handle, the hero will tell you (once more) that the door has
come off its hinges.So open your
Inventory, bring out the Jack, and place it under the door.Now bring out the Crank from your
Inventory, and place it on this Jack.Click on the gear icon on the
Crank, to straighten the door.Click on
the hand icon appearing on the Jack then, to pick up both the Jack as
well as the Crank in one swoop.Click on the doorknob then, to move the door aside and reveal a large
gray cabinet behind.Click on this cabinet,
to open it.Click inside, to start yet
another puzzle.


The Cups & Balls Puzzle


Again, it
is much more complicated to explain the solution than to solve the puzzle
itself.Take a moment to familiarize
yourself with the set up.There are two
cups, at the bottom of the cabinet, under the round mechanical plate.There is a red dot on the left cup,
indicating that we must put only red balls in this cup.So we will call it the RED CUP.Similarly, there is a yellow dot on the right
cup, indicating that we must put only yellow balls in that cup.So we will call this the YELLOW CUP.


Now look
at the round mechanical plate above the two cups.If we pull the chained handle on the right,
the plate will start rotating clockwise, and several red and yellow balls will
slide down from the upper left side of the mechanism and fill the holes in the
outer edge (or rim) of the metallic plate.Note the two interlocking rings, with holes of their own, in the top
half of the plate.Let’s call the
smaller ring on the left "RING 1" and the larger ring on the right
"RING 2."(See Picture
below).Note that you can drop the balls
into the Red and Yellow cups only by moving them through RING 2.Moving the balls through RING 1 only returns
the balls into the outer edge of the round metallic plate.


Examine the two arc-like, gold-colored buttons,
in each of these two rings.Clicking on
the button at the TOP of RING 1 will move the ring (and the balls in its holes)
clockwise, while clicking on the
button at the BOTTOM of this ring will move the ring (and the balls in its
holes) anti-clockwise.The set up in RING 2 is the direct opposite
of this, in that clicking on the button at the TOP of RING 2 moves that ring
(and the balls in its holes) anti-clockwise, while clicking on the button at
the BOTTOM of that ring moves that ring (and the balls in its holes)
clockwise.Finally, note that the puzzle
is set up so that the balls will alternate between the cups as they drop, i.e.,
the first ball to go down will automatically drop in the RED CUP, the second
will drop in the YELLOW CUP, the third will drop in the RED CUP again,
etc.So it is very important that you
line up the balls in alternating colors as well, so that only the red balls
will go into the RED CUP and only the yellow balls will go into the YELLOW CUP.

Now that we have figured out the set up, let’s solve the
puzzle!Please, keep in mind, however,
that the order of the balls filling in the metallic plate might be randomly
generated by the computer.So they might
turn up in a different order for you than they did for me.Just be sure to drop the red balls in the RED
CUP and the yellow balls in the YELLOW CUP.In fact, you must drop a total of 7 red balls in the RED CUP and 6
yellow balls in the YELLOW CUP.If you
miss, and a ball goes in the wrong cup, don’t worry.Just click on the "Exit" icon, step
away, and then come right back and start the puzzle, to find that the puzzle
has been reset for you.Here is how it
worked out for me.

As I started the puzzle, I found a red ball was already
in RING 1, before I even pulled the chain.So I clicked ONCE on the top button in RING 1, to move the red ball into
RING 2.I then clicked THREE times on
the top button in RING 2, to move the red ball down and into the RED CUP.I then pulled the chain.As the metallic plate started rotating, a
yellow ball immediately slipped into RING 1.I then waited for a red ball to appear in the metallic plate’s outer
edge, just above the yellow ball in RING 1.As the red ball appeared, I clicked ONCE on the top button in RING
1.Thus, the yellow ball moved into RING
2, while the red ball slipped into RING 1 right behind it.I then clicked THREE times on the top button
in RING 2, to deposit the yellow ball in the YELLOW CUP.


I then waited again, this time for a yellow ball to
appear in the metallic plate’s outer edge, above the red ball already in RING
1.As the yellow ball appeared, I
clicked ONCE on the top button in RING 1, thus moving the second red ball into
RING 2 as the second yellow ball slipped into RING 1 behind it.I then clicked THREE times on the top button
in RING 2, to deposit my second red ball into the RED CUP.[Note:Don’t worry if, let’s say, a red ball slips into RING 1 instead of the
yellow one you were trying to get in there.Use the button at the bottom
of RING 1, to move the ring anticlockwise,
just as a yellow ball appears in the metallic plate’s outer edge.The yellow ball will slip in the empty hole
in front of the red ball you just moved away.Thus, you don’t have to start all over.By clicking repeatedly on the button at the bottom of RING 1, you can
even return the wrong ball to the outer edge of the metallic plate.Be careful in using the button at the bottom
of RING 2, however, because if pushed repeatedly at a time, it will just move
the ball clockwise only to still drop it into one of the cups, when you might
have been trying to just move that ball back to RING 1.]

Note also that the metallic plate tends to stop rotating
after a while, so you will have to pull the chain on your right, from time to
time.After dropping 6 balls into each
cup (first in red, then in yellow, then in red again, etc.), when you drop the 7th
red ball
in the RED CUP, both the
cups will go down and then come back up again
, as the "Exit" sign
in the lower right-hand corner of the screen disappears.This means that you have solved the
puzzle!At that point, click on the
wooden lever sticking out from the bottom right portion of the cabinet.The camera will automatically pan to your
right, and you will see a wooden platform come up.

Step onto the platform, turn around and pull the lever in
the floor, on your right.A short cut
scene will follow, as the platform serves as an elevator to take the hero down into
what we will call the Workshop Cellar.The cut scene will end, focusing our view on the lever on the floor,
showing that it is now on our left.Turn
right and take a step forward in this Cellar.Look to your right, and click on the gray wall cabinet, to open it and
find the same kind of mechanism inside that you had just used upstairs to
summon the platform elevator.But you
don’t have to solve a puzzle here.If
you click on the lever at the bottom right of this cabinet, the camera will
automatically pan to your right and show that the elevator has gone up.Click on the lever again, and the camera will
pan to the right to show that the elevator has returned.But there is no need to fiddle with this
mechanism at all.Apparently, it was put
here only to show us how someone approaching from the other side of the Cellar
would be able to summon the elevator to take him up into the Manor.

Step forward to your left, and the camera will
automatically pan down further to your left, as the hero will comment,
"Ah, what’s this?"Click on
the ground, to clear away some of the dirt and reveal a set of marks.Bring out the Short Broom from your
Inventory and click on the marks, to reveal a similar set of marks above the
one already exposed.Take out the incomplete Sheet of Paper, from
your Inventory, and place it on these marks.Now bring out the Charcoal Crayon, and click on the Sheet of
Paper you just placed on the ground, to trace the marks onto the Sheet of
Paper.Pick up the Sheet of Paper,
and the hero will inform you that we don’t have a key yet to decode these
marks.Open the Inventory and attach
this Sheet of Paper to the Portfolio.Thus, we will finally be able to see the marks but, as the hero warned
us, we don’t have enough information yet to decipher them.


Step forward into the Cellar, turn right and click on the
door.Listen to the hero’s comment, and
note the round gray plate in the upper part of the door.Bring out the Sun/Moon Medallion from
your Inventory, and place it in the gold-colored round slot, on the right side
of the gray plate.Bring out the
Crescent-Moon Medallion from your Inventory, and place it in the
gold-colored crescent-shaped slot, in the top left portion of the plate.The door will swing open, but it is dark
inside.So bring out the lantern
("Lamp") from your Inventory and step forward, to come down a set of
stairs.

Turn slightly to your right and step forward.Then turn slightly to your left, and step
through the Iron Gate.Turn slightly to your left again and step
forward, to reach an arched doorway leading to a lighted area.Step through this doorway, look down on the
ground and pick up the Precious Stone.As the hero finishes his comment, look up at the door leading to a
well-lit stairwell, in front of you.But
if you click in this direction, the hero will decline to go there.So turn left and click on a door that is
slightly ajar, to open it completely.Step through this door, and the camera will automatically pan to your
left.As the hero finishes his comment,
click on the metal plate in the door, but it will squeak and the hero will
advise us to be more discreet.So bring
out the Oil from your Inventory, and click on the plate to oil it.Now click on the plate again, to open
it.A cutscene will follow.

By the end of the cutscene, the hero will be out of that
room and decline to go back in there.The stairs to the King’s castle are on your left, and the way back up to
the Workshop Cellar is on your right.So
turn right and take two steps forward. There is no icon to allow you to go down the
passage in front of you.So turn
slightly to your right again, and step forward.Turn slightly right again, to see the foot of the stairs leading back to
the Workshop Cellar.Note: It
would be a good idea to SAVE your game here.Click in the direction of the stairs then,
and a cut scene will follow, taking you to yet another new day at the Manor.

Day 4 (25 September
1522)


Francois I had given his Signet Ring and a Sheet of
Paper.As the cut scene ends, open your
Inventory and attach that Sheet of Paper to the Portfolio.In the close up that follows, the right page
shows the marks you had traced in the two Cellars.The left page is the King’s sheet, which is
in fact the key to the marks on the right page.But we need to take care of something else before deciphering these
marks.So go down to the Kitchen and
find Saturnin sitting on the table in front of the fireplace.Approach the fireplace and a cut scene will
follow.

As the cut scene ends, go back up to Babou’s
apartments.As you approach the door to
her Sitting Room, turn left and pick up the Key from the mannequin.Enter the Sitting Room, and the camera will
automatically pan to your left, focusing your view on the Venetian
cabinet.Bring out the key (that you
just retrieved from the mannequin) from your Inventory, and click on the
keyhole in the top center of the cabinet, to start yet another puzzle.

The Cupboard Puzzle No. 2

As you can see, this puzzle is similar to the one we
solved in Leonardo’s Bedroom on the second day [i.e., "The Cupboard
Puzzle No. 1
"].Once again,
take a moment to study the set up and get comfortable with it.Thus, note how the cabinet is divided into
five vertical columns and four
horizontal rows.The keyhole (indicated by the green cell
marked "K" in the picture
below) appears at the top of the central section, i.e., in Row 1, Column 3.Again, there is a rectangular compartment
under this keyhole, just as there was in Leonardo’s cabinet. But instead of the large diamond-shaped socket
we had in that puzzle, there is a colored
circular pattern
(in Row 4, Column 3) under the compartment, in this
puzzle.Thus, this pattern is our
Reference (indicated by the green cell marked "R" in the picture below), in this particular puzzle.

Again, there are
eight other cells on either side of Column 3 (i.e., the 16 unmarked white cells
in the above picture), and we find a variety of patterns in these cells.The objective, once again, is to make the same
pattern appear in each of these sixteen cells as the one that appears in our
Reference/Fixed cell.

Note that we
have sixteen Control Knobs in this puzzle.I have labeled the four control knobs at the TOP as T1, T2, T3 and T4; the
four at the BOTTOM as B1, B2, B3 and B4; the four on the LEFT
side of the cabinet as L1, L2, L3
and L4; and, finally, the four on
the RIGHT side of the cabinet
as R1, R2, R3 and R4.Thus, we must click on these Control Knobs to set the pattern in each
of the sixteen cells in columns 1, 2, 4 and 5, to match the pattern that
appears in the Reference/Fixed cell.Once again, the Control Knob at the Top of a column adjusts the four
Knobs under it; the Control Knob at the Bottom of a column adjusts the four
Knobs above it; the Control Knob on the Left side of the cabinet adjusts the
four Knobs to its right; and the Control Knob on the Right side of the cabinet
adjusts the four Knobs to its left.

Again,
I am not sure if the computer sets the patterns for the sixteen cells randomly
in each game, but this is how it worked out for me (and, hopefully, it will for
you too).I clicked

(1)Once on R1.

(2)Twice on R2, and once on L2.

(3)Twice on R3.

These first three steps
set the correct pattern in all four cells in the T3 column.I then
clicked

(4)Twice on T1, and once on B1,
to set the correct pattern in all 4 cells in the T1 column.

(5)Twice on T2, to set
the correct pattern in all 4 cells in the T2
column
.

(6)Once on T4, and once on B4,
to set the correct pattern in all 4 cells in the T4 column.


Thus, as soon as I finished Step 6 above,
the left desk drawer opened.

Click
on the document inside the drawer, to find that it is the Letter of
Introduction that you had given to Babou on the 2nd day.Pick up the gray sheet (on the left of the
letter), place it above the letter and click, to find that the letter contains
a secret message.A cut scene will
follow, bringing the hero back out in Leonardo’s Study.He will refuse to go back into Babou’s
apartments.So go down to Saturnin who
is still in the Kitchen.Click on him
and you will be presented with two topics.You don’t need to buy anything from him, but click on that choice
anyway, to find that no bargaining is possible anymore because of the guards
outside.Click on Saturnin again, and
the dialog will automatically follow.

The Four Signs Puzzle

It’s
time to use the King’s key to decode the marks we found in the two
cellars.So go to those two pages in the
Portfolio.Examine the key on the LEFT
page.Note the numbers 1-4 around the
symbol in the upper left-hand corner of the page.Note also that this one symbol is in fact a
combination of four symbols, each adjacent to a number from 1 to 4.Thus, each symbol represents the number that
is closest to it.We find the symbols
representing the numbers 5-8 and 9-0, in the same way.

Look
at the marks on the RIGHT page now.There are four rows, each of which begins with a circular drawing on the
left, followed by two or three symbols.Note the image of a heavenly body inside each circular drawing.So let’s refer to each drawing by the object
in it.Thus, going from the top to the
bottom of the page, we have the SUN, the STAR, the MOON and Saturn, i.e., the
PLANETS.

Pick up the Blood
Stone
, from the right of the Portfolio, and it will appear as your cursor.
Click on the first symbol after the Sun drawing, on the right page; and
then, click on number 1, on the left page.Since this is a correct match, a white space will appear at the end of
the row.Click in this white space, to
see number 1 appear in it.Click on the second symbol now; then on
number 2; and then, on the white space.Since this is also a correct match, number 2 will
appear in the white space.Finally,
click on the third symbol; then on number 0;
and then, on the white space, to see number 0 appear in it.Thus, you will now have 120 in the
white space at the end of the first row.Proceed in the same way for the other rows, to obtain the following
results:

Row 1: SUN —————– 120

Row 2: STAR————— 240

Row 3: MOON ————–60

Row 4: PLANETS
———- 310


Turn
to the next page in the Portfolio: "Plan
of Cloux Manor – First Floor
."The
circular drawings we just saw in the previous page now appear in the four
corners of this Plan.It is much easier
to identify the heavenly bodies in these drawings, however, because of the
sketch of those bodies (the Sun, Star, Moon or Planets) next to the
drawings.Note how each circular drawing
is divided up in 360 degrees.The four
main degrees (0, 90, 180, and 270) have been marked for our convenience.Note the two arrows around each circular
drawing.If you move your cursor over
them, a gear icon will appear on each arrow.Clicking once on either arrow will move the dial (along the inner edge
of the circle) by 10 degrees.Based on
this information, set the dials in the drawings as follows:

SUN (in the upper-left portion)
———— 120

STAR (in the upper-right portion) ——— 240

MOON (in the lower-left portion)
———60

PLANETS (in the lower-right portion) — 310

As
you adjust the degrees, a gray beam from each drawing will move across the
Plan.If you have set the correct values,
the four beams will overlap and a red "X" will mark the
juncture.Move your cursor over this X,
and the Text Field will show that "The
Manuscript is hidden somewhere in front of the entrance to the manor.
"Close the Portfolio and the Inventory, to
hear the hero’s comment.Click on
Saturnin, to be presented with two topics, the first of which we have already
addressed.So click on the second topic,
to learn the secret: you must subtract 10 from the Stars and 10 from
the Planets, and add 10 to the Moon
.So go back to the "Plan of the Cloux Manor," in your Portfolio, and make the
following changes:

STAR (in the upper-right portion) ———240 to 230

PLANETS (in the lower-right portion) —310 to 300

MOON (in the lower-left portion)
———60
to70

The
gray beams will now overlap at a slightly different point.Move your cursor over the new X, and the Text
Field will show that "The
Manuscript is hidden in the chapel.
"

Close
the Portfolio and the Inventory, and click on Saturnin, to be presented with
two topics again.Click on the first
topic (the key to the chapel).Click on
him again to address the second topic (why Leonardo entrusted him, rather than
Melzi, with this secret).Then go
upstairs to Babou’s Sitting Room.She
will start speaking as soon as you approach her, and you will get a choice of
two responses.Although neither will
affect your Conscience gauge or Bonus points, pick the SECOND response ("I
shouldn’t have lost my temper…
") because it will give you a choice at
the very end of the game that you won’t get otherwise.Click on Babou again, for another exchange of
dialog.

Go
down to the small hallway, and step into the corridor.Turn left, to see a guard in front of the
Main Entrance.We don’t want to be
caught, so turn right and step forward in the corridor.Use Babou’s Key to unlock and open the
Chapel door on your left.Enter the
Chapel, to hear the hero’s comment.Turn
slightly to the left and pick up the Sceptre.Now click on the golden Lily (under the Cross),
to hear another comment by the hero.Bring out the King’s Signet Ring from your Inventory and put it
in the hole under the Lily.Now bring
out the Sceptreand put it
through the ring, to open a door below.Pick up the Manuscript by Leonardo Da Vinci from this
opening.Click under the Lily, to
retrieve both the Signet Ring and the Sceptre, in one
swoop.Then turn to the wall on your
right, and click in the empty picture frame (to the left of the door), to hear
the hero’s comment.

We
are done in the Chapel and must contact the King’s messenger now.So go back upstairs and enter the Balcony
(across the corridor from Leonardo’s bedroom).The camera will pan to your right to show the guards below, as the hero
makes a comment.Step forward in the balcony.Try to pick up some pebbles from the floor to
your left, but the hero will decline to do so, because you already have
some.So bring out the Pebbles
from your Inventory, turn right and study the movements of the two guards
below.Note that the guard stationed in
front of the Main Entrance doesn’t move at all.There is another guard to his left, however, that goes back and forth
along the side of the house.Wait until
he starts moving towards the house, and then throw the Pebble between the stationary
guard and the Main Entrance.Thus, with
both guards now moving towards the house, turn quickly and step into the
Stairwell.Then turn quickly to your
extreme left, and take two steps; and then, turn left again and step forward,
to arrive in front of the moveable bridge.

We cannot cross
the bridge, however, because a guard is stationed there as well.So step to the right of the bridge.Turn left, pick up the brush off the boat and
place it on the ground, to your right.Click twice on the boat (first to hear a comment by the hero, and then
to get in it).You can reach the Dovecot
now in one of two ways: (1) go to the Mill across the canal, get out of the
boat, and walk over to the canal across the Dovecot; or (2) take the boat to
the Bridge, then down the canal to your right to reach the Dovecot.A guard is stationed before the Dovecot also,
so you will still have to get out of the boat on the ground to the right of the
canal.Thus, either way, you will arrive
at the same spot.As you do, bring out
the Ladder from your Inventory and place it across the canal.Then bring out the Pebbles, and throw
one on the fixed bridge to your left.As
the guard moves in that direction, cross the canal and enter the Dovecot.

Turn
right to note an object barely hidden by the three sacks against the wall.Pick up the Sheet, to find the Mona
Lisa painting behind it.Pick up the
Mona Lisa
, and the hero will make a comment.Pick up some more Pebbles from the
ground, behind you.Go up to the loft,
and a black bird will arrive at the window.Bring out the King’s Signet Ring and click on the bird, to hear
another comment by the hero.Meanwhile,
the guard should have returned to his post before the Dovecot.Wait for him to turn his back to you, and
then bring out the Pebbles from your Inventory and throw one at the
ground floor window behind you.The
guard will come into the Dovecot, and you will get a choice of two approaches
to return to the Manor.

The Angelic Approach:Pick
up the straw from the ground on your left and throw it out of the loft
window.Then jump out of the
window.Turn left, cross the canal,
and then turn around and pick up the Ladder.Return to the boat, take it back to where
you had first found it, and step back out on the ground.The moveable bridge would be to your
right, but you must wait for the guard to look away before going
there.Thus, you must sneak behind
the guards’ backs to return to the Manor.[Note:This approach
does not affect your Conscience gauge.I call it the Angelic approach only to contrast it with the Diabolic
approach described below.]

Text Box: The Angelic Approach:   Pick up the straw from the ground on your left and throw it out of the loft window.  Then jump out of the window.  Turn left, cross the canal, and then turn around and pick up the Ladder.  Return to the boat, take it back to where you had first found it, and step back out on the ground.  The moveable bridge would be to your right, but you must wait for the guard to look away before going there.  Thus, you must sneak behind the guards' backs to return to the Manor.  [Note:  This approach does not affect your Conscience gauge.  I call it the Angelic approach only to contrast it with the Diabolic approach described below.]

The Diabolic Approach:As
the guard stands below, click on the barrel resting at the edge of the loft
floor, to find that you need a lever to move it.So take the Iron Bar or the Short
Broom
from your Inventory, and click on the barrel again, to roll it
down on the guard.Go down and click
on the unconscious guard, to take the Guard’s Uniform.Open your Inventory, and put on this
uniform.Click on the Angelic gauge,
to restore balance to your Conscience gauge.Step out of the Dovecot, and pick up the Ladder
from your left.Go past the guard at
the bridge, without any problems.But the guard patrolling the side of the house will object, when you
arrive there.You get a choice of
two responses.You will get caught
if you pick the first response.So
pick the second response ("Leave me alone…"), and you will not be
bothered after that.

Text Box: The Diabolic Approach:   As the guard stands below, click on the barrel resting at the edge of the loft floor, to find that you need a lever to move it.  So take the Iron Bar or the Short Broom from your Inventory, and click on the barrel again, to roll it down on the guard.  Go down and click on the unconscious guard, to take the Guard's Uniform.  Open your Inventory, and put on this uniform.  Click on the Angelic gauge, to restore balance to your Conscience gauge.  Step out of the Dovecot, and pick up the Ladder from your left.  Go past the guard at the bridge, without any problems.  But the guard patrolling the side of the house will object, when you arrive there.  You get a choice of two responses.  You will get caught if you pick the first response.  So pick the second response ("Leave me alone…"), and you will not be bothered after that.

What Happens if You Get
Caught


It isn’t "Game Over," as you might
expect.Rather, you end up back in
the hero’s room.Step towards the
fireplace, to hear a comment by the hero.Turn left towards the door and click on its keyhole, to hear another
comment by the hero.Pick up the Blank
Sheet of Paper
from the floor, to the right of the door.As the hero finishes his comment, bring
out this Blank Sheet of Paper from your Inventory and place it under
the door.Now bring out your Knife
and click on the keyhole, to push the key down on to that paper.Wait for the hero to finish his comment,
and then pick up the Blank Sheet of Paper, retrieving the Key
in the same swoop.Use the Key
to unlock the door; and then, open the door and step outside.But we can’t go down to the Store Room
because the hero expects a guard to be stationed there.So click on the large wall rug, on your
right, to hear the hero’s comment.Bring out the Pliers from your Inventory and pick up a Nail
from each of the two corners at the bottom of the rug.Click on the rug again, to move it aside
and reveal the bookcase behind it.

The Bookcase Puzzle2


The code for this passage from Leonardo’s bedroom was SALAI.Since we are on the other side now, the code must be read backwards:
IALAS.So press the following books.

I(the fourth book from the left, in the top shelf)

A (the
fourth book from the right, in the top shelf)

L (the
third book from the right, in the bottom shelf)

A (the
fifth book from the right, in the bottom shelf)

S (the
fourth book from the left, in the middle shelf)

A short cut scene follows, and
you will find yourself back in Leonardo’s bedroom.

Text Box: What Happens if You Get Caught

It isn't "Game Over," as you might expect.  Rather, you end up back in the hero's room.  Step towards the fireplace, to hear a comment by the hero.  Turn left towards the door and click on its keyhole, to hear another comment by the hero.  Pick up the Blank Sheet of Paper from the floor, to the right of the door.  As the hero finishes his comment, bring out this Blank Sheet of Paper from your Inventory and place it under the door.  Now bring out your Knife and click on the keyhole, to push the key down on to that paper.  Wait for the hero to finish his comment, and then pick up the Blank Sheet of Paper, retrieving the Key in the same swoop.  Use the Key to unlock the door; and then, open the door and step outside.  But we can't go down to the Store Room because the hero expects a guard to be stationed there.  So click on the large wall rug, on your right, to hear the hero's comment.  Bring out the Pliers from your Inventory and pick up a Nail from each of the two corners at the bottom of the rug.  Click on the rug again, to move it aside and reveal the bookcase behind it.

The Bookcase Puzzle – 2

The code for this passage from Leonardo's bedroom was SALAI.  Since we are on the other side now, the code must be read backwards: IALAS.   So press the following books.

 I – (the fourth book from the left, in the top shelf)
A – (the fourth book from the right, in the top shelf)
L – (the third book from the right, in the bottom shelf)
A – (the fifth book from the right, in the bottom shelf)
S – (the fourth book from the left, in the middle shelf)

	A short cut scene follows, and you will find yourself back in Leonardo's bedroom.
     

       As soon as you step into the Manor, the
hero will indicate that Hector must have come via the Underground Passage, and
suggest that we go down and meet him.[If you were caught, this comment will come after you enter Leonardo’s
bedroom through the Bookcase and can thus move about freely again.]Go down to the Workshop, and approach the
gray wall cabinet.Open the cabinet and
use the lever at the bottom right, to summon the platform elevator.Step on the platform and go down to the
Cellar.Step out of the platform and a
cut scene will follow.Click on Hector
again, to cover another topic.Then,
return to the Workshop.

We must now make a
copy of the Mona Lisa.So go to the
fireplace and turn left to face the easel.Click on the sheet, to remove it from the easel.Then bring out the four cans of (Red, Blue,
and Yellow) Paints and Varnish, one by one, and place them in the slots under
the canvas.Now click on the Reference
frame on your left, to hear the hero’s comment.Bring out a Nail from your Inventory and click on the frame, to put
it on its left edge.Now bring out The
Mona Lisa
and put it on the Reference frame.We are now ready to make its copy.

The Mona Lisa
Puzzle


This puzzle actually consists of three parts.In the first part, we have to make a charcoal
sketch of the painting.Don’t worry
though, because no artistic talent is required.So pick up the Charcoal Crayon, lying to the right of the cans of paint
and varnish; and click on the boxes in the easel, to turn the blank canvas into
the sketch.It is not as easy as it
sounds, however, because while a click on one box might turn it into a piece of
the sketch, a click on another box might return the first box to blank
canvas!So click on the shaded boxes
below, in the order in which they have been numbered, i.e., click first on box
number 1; then on 2; then on 3; etc.

The
sketch will be completed as you click on box number 15, concluding the first
part of the Mona Lisa puzzle.Right-click, to put away the Charcoal Crayon, and note the 16 large black
dots in the completed sketch.In the
second part of the puzzle, we are supposed to be roughly painting the
portrait.Again, no artistic talent is
required.Begin by clicking on each
box.It will look as if you were
flipping each piece, turning the sketch into a dull-colored portrait, but all
the pieces of this portrait will appear to be jumbled up.Now click on any one of the 16 black dots and
see how that rotates the four boxes around it.Thus, we must click on these dots to rearrange the pieces of the
portrait until they form a coherent whole.

Note:I have often run into puzzles of this kind
and found that while some people relish them, others absolutely dread or detest
them.There is good news for the second
group though.As I was working on this
puzzle, one of my automatic programs kicked in, minimizing the game to the task
bar.I closed that program and restored
the game (by clicking on its name, at the bottom of the screen), to find the
puzzle solved!As they say, Serendipity brings Good Fortune.But you don’t need serendipity to solve this
puzzle for you.All you need is
something to minimize the game to the task bar, and Windows offers several ways
of doing that.For instance, you can
press CTRL+ALT+DELETE.The game would be minimized, as the Windows
Task Manager window will pop up.Close
that window, and click on the name of the game at the bottom of the screen, to
return to the game and find the puzzle solved.OR:You can click on either one of the WINDOWS LOGO keys (that appear next
to the ALT button, on either side of the Spacebar).The game would be minimized, as the Start
Menu will pop up.You don’t even have to
close this menu, because it will disappear as soon as you click on the name of
the game at the bottom of the screen.Once again, you will return to the game to find the puzzle solved.

Note:I don’t know if the above is just a
technical bug in the game or a technique that the developers deliberately
introduced to help out the gamers that dislike such puzzles.But I did go back and try it with some
other puzzles in this game, to find that it works only with this particular
puzzle.

Text Box: Note:  I don't know if the above is just a technical bug in the game or a technique that the developers deliberately introduced to help out the gamers that dislike such puzzles.  But I did go back and try it with some other puzzles in this game, to find that it works only with this particular puzzle.

          We will actually use some paint in the third part of the
puzzle.But again, no artistic talent is
required.Just pick up the Paint Brush
(from the right of the Charcoal Crayon), dip it in Red Paint, then in Varnish,
and then click THREE times on
your painting.Wipe off the red paint,
by clicking on the piece of cloth hanging down from the bottom right of the
easel.Now dip your brush in Yellow
Paint
, then in Varnish, and then click THREE
times on the painting again.Wipe off
the brush on the cloth once more.Finally, dip your brush in Blue Paint, then in Varnish,
and then click TWICE on the
painting.And voila!The painting is finished.Right-click, to put away the paint
brush.Pick up your copy of The Mona
Lisa
, and then the original, to receive the Sewing Spool along with
the original.

There is no use going back to the Dovecot, because the hero
will decline to put the copy of The Mona Lisa where he had found the
original.So go to the Kitchen instead
and click on Saturnin.A dialog and a
cut scene will follow.[Note:The phrase "a little over three hundred
years ago" in the cut scene is a typographical error, of course, because
Saturnin also mentions the date 1519, i.e., just three years before the events of the game.Besides, Saturnin himself was part of that
cut scene event, and he certainly can’t be 300 years old!]

In addition to information, Saturnin gives the hero a Wooden
Bow
and permission to take whatever the hero may like from the Barn.So go out of the Store Room exit and into the
Barn.Pick up the bowl of Sugar.Return to the Store Room, and pick up two
handfuls of Charcoal, from the sack on the ground to the left of the
staircase.[Note:Once again, you will not have any problems
getting in and out of the Manor, if you took the Diabolic approach in returning
from the Dovecot with the Mona Lisa, and are still dressed in the Guard’s
Uniform
.This is true even if you
had been caught coming back.You would
have to check to make sure the guard is moving away from you, however, if you
had taken the Angelic approach.]

Go up to Leonardo’s Study.[If you were caught, you can use the passage
through the bookcase to return to Leonardo’s bedroom, of course, and then go
directly to his Study from there.]Approach the lab area.Feel free
to refer to Leonardo’s notes (in the Portfolio) about making Powder and
Fumigants.Then open the boiler door, put
in some Charcoal, and use your Lighter to light up a fire.Close the boiler door, and remove the Gooseneck
from the top of the Still.Put in the
rest of the Water from your Opened Bottle of Water + Sugar + Saltpetre,
one by one, into the Still.The hero
will tell you that the product appears to be ready.Bring out the Iron Box from your
Inventory and click on the Still, to retrieve the Fumigant.

Now put a handful of Charcoal in the Mortar to
your right.Use the Pestle to grind it,
and then pick up the Charcoal Powder.Bring out the Charcoal Powder from your Inventory and put it in
the bowl to your right.Bring out the Phial
of Sulphur
and add the Sulphur
to the same bowl.Finally, add Saltpetreto the bowl as well.Pick up the (explosive) Powder.

Go to the Workshop.There is no use going down to its cellar, because you will find that
Hector is not there anymore.So approach
the sawing table instead.Remove the
thick Drill Bit and replace it with the thinner Drill Bit from
your Inventory.Bring out the Crank
from your Inventory, and attach it to the side of the Drill Bit holder.Now bring out the Wooden Bow and put
it under the Drill Bit.Click on the gear icon on the Crank, to drill a hole
in the Wooden Bow.Pick up both the Crank
and the Bow made of Perforated Wood.

Go to the
Kitchen now and down the Trap Door Cellar.[Note: You won’t need the Lamp anymore, because there is plenty
of light now from the chandelier.]Go
forward and turn right to face the Flying Machine.Feel free to click on it, to hear just what
is wrong with it.Bring the Wooden
Shaft
from your Inventory, and click anywhere on the Flying Machine, to see
the shaft attach to the machine’s top front.Now bring the Bow made of Perforated Wood from your Inventory and
click anywhere on the Flying Machine again, to see it attach along the side of
the machine.Finally, bring out the Fumigant
from your Inventory and put it on the ground (next to a chest, to the right of
the Flying Machine).

Return
to the Kitchen, to find that Saturnin is not at the table anymore.Step in one of the following directions: (1)
forward (to the corner of the Kitchen, to the right of the table with the bowl
of eggs on it); or (2) to your left, to the door leading to the Dining Room; or
(3) through the door on your right, to step out into the small hallway, and
then come right back into the
Kitchen.As you follow any of these
directions, you will hear a rumbling noise in the distance, as well as a
comment from the hero indicating that we have no choice but to use force.

Go to the
Workshop and try to approach the platform elevator, but the hero will decline
to take that route.So go back to the
Kitchen and down into the Trap Door Cellar.Step forward and the camera will automatically pan to your left, towards
the bricked-up door, as the hero will make another comment.Bring out the Jack from your
Inventory, and click on the cannon below, to place the Jack under it.Now attach the Crank to the Jack, and
then click on the gear icon on the
Crank, to straighten the cannon.Load
the Cannon Ball from the front end of the cannon.Click on the small cover at the back of the
cannon, to open it.Put your (explosive)
Powder in this opening and the cover will close automatically.Finally, use your Lighter, to light
the fuse just behind the cover.A short
cut scene will show the cannon firing through the bricked-up door. Go through
that door, to find Hector sprawled on the floor.

Check your
Conscience gauge, and you will find that there is no loss in your Angelic
gauge!Pick up the Manuscript by
Leonardo Da Vinci
, lying just above Hector’s left thigh.A cut scene follows.[Hints of a sequel?]Now there are two ways to get out of this
place: you can either go back to the cellar through the bricked-up doorway you
blew up, or use the platform elevator (summoning it by using the lever in the
large gray cabinet to your left) to go up to the Workshop.Neither method will affect either your Conscience
Gauge or your Bonus Score.As you start
to leave, however, the hero will indicate that we must leave the Mona Lisa
painting here [to the left of the bricked-up doorway].If you leave the copy, your Angelic gauge
will go down.But if you leave the
original, your Diabolic score goes down.Thus, either way you will have to spend 20 bonus points, to restore
balance in your Conscience gauge.I
suggest that you SAVE your game first and then, try it both ways, to see
how it affects the ending!

Go to Babou’s Sitting Room now and click on
her, to say your Farewells.A cut scene
follows.If you had picked that second
choice (when you came to get the Chapel key from her) and apologized to Babou
for having lost your temper, she will now ask the hero to take her with
him.You get a choice of two responses,
of course.Feel free to use the SAVE
I just suggested to try each response and then,

Sit back and enjoy the ending(s)!

* * * * * * * * * * * * * * * * * * * * * * * * * * * * * *
* * * * * * * * * *

Other guides for The Secrets of Da Vinci: The Forbidden Manuscript