The St Christopher’s School Lockdown Walkthrough
PART 1: ST CHRIS TRIVIA
You get roped into competing with Harold. To win you just need to answer more questions than the other person. For a chance to win the grand prize you’ll have to score at least seven points out of ten.
Kevin presents the quiz.
Q: What is the name of the band featuring me, Taylor and Roger?
A: Indecent Exposure (On Kev’s hat)
Q: What did the police use to stop our march?
A: Tear gas (The roleplayers tell you when you first talk to them if you ask about yesterday)
Q: What type of liquor does Brody enjoy the most?
A: Vodka (Drake tells you to follow the vodka trail when you need to find Brody to get the recording device)
Q: What television show does Shilling draw his inspiration from?
A: A Pound a Day (Mentioned by Kevin & Shilling while completing the manifesto)
Q: What is the name of the school’s headmaster?
A: Mortimer Jenkins (Mentioned by Taylor & Cressida while completing the manifesto)
Q: What is the TV show that Martin Carrington’s little sister is currently on?
A: It Girlz (Mentioned by Clive & Martin while completing the manifesto)
Q: What does Martin’s father do?
A: Shadow Minister of Education (Mentioned by the potheads while completing the manifesto)
Q: What is the name of Harold’s role-playing character?
A: Ragnarok, Merchant of Death (Mentioned by Harold when you talk to the roleplayers while looking for I.D.)
Q: How long will the protest last?
A: Until we are forced out (Mentioned by Anemone)
Q: What does Shilling currently not sell?
A: Aspirin (Stated on a note on Shilling’s shop sign)
If you win, your prize is the voodoo doll *JOHN LEMMON (3).
ACHIEVEMENT: One Little Victory (Won the extracurricular evening extravaganza trivia contest)
*Losing will contribute towards a different achievement. [5]
(You have a chance to win the John Lemmon doll later.)
PART 2: E.E.E.E. SCAVENGER HUNT
Taylor presents the next part of the evening’s entertainment.
You’re given a list of riddles & a polaroid camera.
The aim is work out what items each of the 7 riddles refer to, walk around the school & use the camera on them to take a photo.
Backstage
See Drake. Take a photo of the palm tree.
RINGS WITHOUT ANY FINGERS. LEAVES BUT STAYS NEARBY. HIDING DOWN BELOW OUR FEET, BUT I CAN BE SEEN BY LOOKING HIGH.
Changing Room
Take a photo of the discarded paper towels.
THE MORE I DRY, THE WETTER I BECOME. HUNG FOR MY DEEDS, THOUGH THEY RE NOT CRIMES.
Foyer
Hear the phone ringing. Click on the desk & the phone. The police want to talk to Roger. You can choose the polite reply or say *”Fuck off, we don’t negotiate with state terrorists.” [6]
Take a photo of the envelope.
I START WITH AN “E”, I END WITH AN “E”, BUT I USUALLY CONTAIN ONLY ONE LETTER.
Hallway
Take a photo of the bear sculpture.
I AM A VICIOUS BEAST, REDUCED AND DECLAWED. CHILDREN SHOULD FEAR ME, BUT FIND COMFORT IN MY ARMS.
Art Room
Take a photo of the rope. (You can talk to the potheads to play Voodoo Wars if you want to win the John Lemmon doll. Click on the arrows to choose either GUYBRUSH or OSCAR MILDE for the game.)
I AM TWISTED YET VERSATILE. I CAN BE A FRIEND AND HOLD YOUR THINGS TOGETHER, YET IF NEED BE, I CAN ALSO TAKE YOUR LIFE.
Student Lounge
Look at the computer to see the close-up. Take a photo of the keyboard.
I HAVE KEYS BUT DON’T UNLOCK. I HAVE SPACE, BUT NOT ROOM. YOU MAY ENTER, BUT NOT LEAVE.
Cafeteria
Taylor may or may not be here to give you a hint depending on what order you visited the locations.
Car Park
Hear Roger & Martin having a discussion about the protest.
Enter the van & take a photo of the book (dictionary). See a note addressed to Kev from Roger.
THE ONLY PLACE IN THE WORLD WHERE SATURDAY COMES BEFORE THURSDAY AND YESTERDAY FOLLOWS TOMORROW.
Hear an alarm going off in the school.
Gym/Stage
Shilling’s shop is on fire. Roger & Kevin are trying to put out the flames. Drake is standing by.
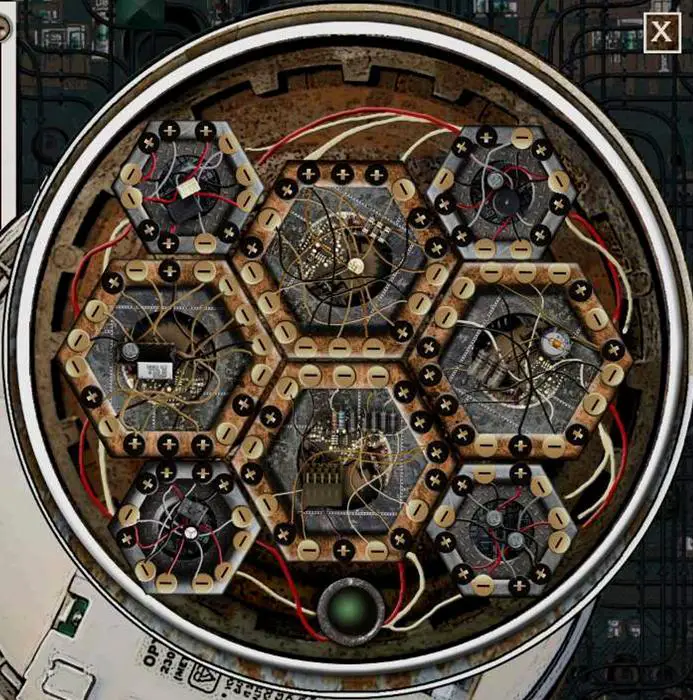
Interact with the alarm to see a puzzle. Click on the hexagons to turn them. The aim is to match the symbols along each edge with those on the adjacent hexagons.
SAVE GAME
Try to interact with the fire extinguisher to the right of the backstage door when Roger asks you to. You burn your hand.
THE DRINKING GAME
Backstage
You chat with Roger. You think the wiring behind the extinguisher may have been tampered with.
You answer the phone when your friend Kevin rings from Ohio.
You continue to chat with Roger & get to choose, for fun, what you think the prize might have been for the scavenger hunt.
Roger suggests a drinking game to help you learn more about his circle of friends. He asks you some questions. For each one you get right, he drinks & for each one you get wrong, you drink.
Q: What did Drake get me for my birthday earlier this year?
A: A set of monogrammed vellum index cards
Q: Helen was voted “Most likely to”…….
A: Become secretary-general of the United Nations
Q: What did Kevin deliver as his final project for art class last year?
A: A model of St. Chris made out of lego bricks and plasticine
Q: Who did Shilling dress up as for Halloween this year?
A: A zombified John D. Rockerfeller
If you win you get a *CROWN (6)
ACHIEVEMENT: God Save the Queen (Beat Roger in the trivia drinking game)
*Losing will contribute towards a different achievement. [7]
DAY 2
“My thoughts were full of other things when I wandered off the path.”
Dante Alighieri, Inferno
Backstage
See Kayleigh wake up. Decide how much of a mistake you made.
See Clive. He talks to you. He’s seen the news & recognises you from the K.L.A.T.U charity party 2 nights ago.
Student Lounge
FIX YOUR MOOD.
Look at the TV to see the news report on ‘Crime Stoppers’.
You call Uncle Vincenzo & tell him about the charity do & your predicament with Clive.
FLASHBACK 2: THE PICCADILLY MANOR
Ballroom
Talk to the waiter (Clive) to get appetisers.
SAVE HERE
Talk to Salvador Potestry.
Tell him that you’ve read all of his books. He asks you for your opinions.
SCENARIO 1: (If you give the right answers)
Q: So, which one did you like best?
A: The Caravan of Failures
Q: And what did you think about Heribert?……
A: His silence spoke volumes!
Q: I tried to do the same thing with Frederick in “Waiting to Order………” What did you think of it?
A: The omelette scene was a revelation!
ACHIEVEMENT: I Write the Book (*Answered all of Salvador Potestry’s questions successfully) [8]
SCENARIO 2: (If you give a wrong answer).
Salvador is not impressed & concentrates on watching the magic act.
Talk to Father Jeremy to learn that his dog Genesis is part of the act.
Give the appetisers to Genesis.
ACHIEVEMENT: I Wanna Be Your Dog (Disrupted Father Jeremy’s show by giving Genesis canapés)
Talk to Salvador. He’ll either mention that he’s feeling a little chilly or that it’s getting a little cold in here.
Interact with the thermostat left of the door, behind the stage area, to turn the temperature down.
The waiter gets annoyed & turns it back up.
Talk to the respectable society matron/wealthy lady. She’s having hot flashes.
Talk to the waiter & he agrees to turn the temperature down.
Talk to Salvador. He’ll now go to the bar.
Bar
Talk to Salvador. You need to convince him that you’re someone worth talking to.
Talk to the bartender. Salvador had a glass or two of white wine but seemed terrified that his wife would catch him in the act.
Talk to the guest. He foists a martini on you. Look at it in inventory to separate the partially dissolved pill from the spiked martini.
Take the scissors from the cocktail decorations.
Orangerie
Talk to the fashionable guest to listen to the conversation she’s having with the avant-garde eccentric.
He introduces himself as Holden Burke.
Mirabelle tells him she will be interviewing Salvador later on behalf of the Nobel Prize Committee. When he asks her for her card, she also gives you her business card when you mention that you would like one too. Look at the card in inventory.
Listen to the conversation between the subservient twit/older man & the commanding man/stern man to glean that they are Mortimer Jenkins & Martin’s father Archie respectively.
Bar
Use the business card on Salvador to make him believe you’re Ms.Mirabelle Okadigbo. He’s expecting you to be wearing a corsage as promised.
Ballroom
Use the scissors on either of the vases to get a flower. Then use the scissors on the ribbons flowing from the woman in couture.
In inventory combine the flower & the ribbons to create a corsage.
Bar
Use the corsage on Salvador. Talk to the bartender & order a grapefruit juice.
In inventory combine the grapefruit juice with the partially dissolved pill to get roofied juice. Give this to Salvador. He wants a nap. You offer to take him up to your room.
See what happens in the elevator.
BACK IN THE PRESENT
Student Lounge
Uncle Vincenzo will see what he can do to help. Meanwhile he recommends trying to blackmail Clive. “Everybody has a skeleton or two in their closet”.
BLACKMAIL CLIVE
Gym/Stage
Talk to Helen. Clive’s excellent at football & is at the school on some kind of athletic scholarship.
Changing Room
Talk & listen to the girly collective (Rachel, Anenome & Emily). There’s nothing on Clive, but you discover that Emily has just managed to get into the school unnoticed by the police.
Cafeteria
Look at the complaints list.
Talk to the denim-wearing group to ask Sandra about Clive’s locker. It’s the one next to hers locker A3.
Hallway (library)
Look at & try to interact with the lockers.
Backstage
Click on the tools behind Clive to pick up a hammer.
Hallway (library)
Look at the lockers & then use the hammer on them.
In the close-up of the locker, interact with the trainers to get Clive’s car key.
Your phone rings. Kevin is going to be in London in a month or so & needs the use of his motorbike stored in your garage.
Side of School
Use Clive’s car key on the blue flame car to open the boot. Pick up the video tapes to get porn videos. Pick up the pill bottle. Interact with the gym bag to get a disciplinary letter. In inventory, look at the letter addressed to his parents Mr & Mrs Corby from academic adviser Frances Molten. Learn that Clive’s scholarship will be terminated if his grades don’t improve.
Sports Corridor
Remember that you heard that Stephen is able to hack into the school database.
Listen to the nerdy bunch & talk to them to ask Stephen about passwords. He hands you a disc with a grade hacking code
Student Lounge
Use the ‘porn videos’ on the TV. (Are you reminded you of kebabs?)
Look at the computer & in the close-up use the grade hacking code on it.
See the screen & click on HELP to read the instructions.
The aim is work out the number or sequence of numbers that correspond to each of the letters in the word ‘MODIFY GRADES’.
Do this by clicking on each of the boxes in the left column, & typing in (using your keyboard) up to 10 different four letter words. Click on the arrow next to each word to see a series of numbers corresponding to the letters in each word appear in the right column. The idea is to choose words which will help to pinpoint the code for each letter. Enter the codes for each letter in the right section. Type in the full code for MODIFY GRADES where it says INPUT COMMAND & press ENTER.
This is an example only! The codes are random & change each time you try.
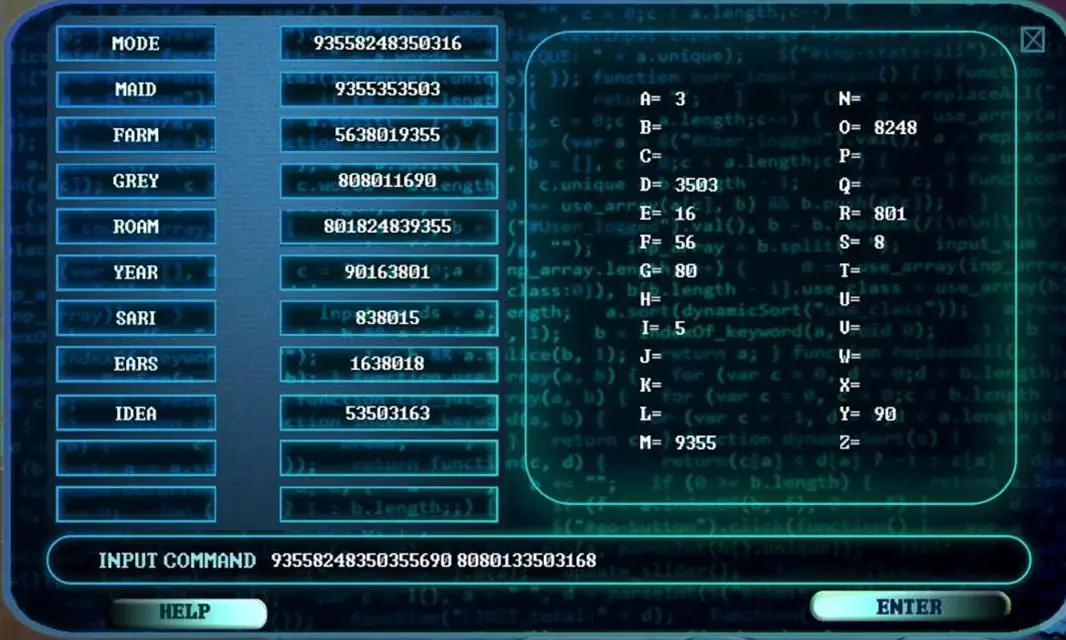
You change Clive’s grades & get a print out of the doctored grades.
Backstage
Try giving Clive the pill bottle & then the video tapes. Give him the doctored grades.
You get a text from Jono. You have 24 hours to pay him back.
LOOK FOR THE PAINTINGS
Changing Room
Talk to Helen & Emily about the priceless paintings.
Stalls/Gym
Talk to Taylor & Brody.
Taylor tells you that that an ex student Damon has some pieces around here.
Sports Corridor
Give the grade hacking code back to Stephen if you want.
Hallway
Talk to Martin. He’ll tell you about the paintings if you help him get into the nurse’s office. Drake has most of the master keys to rooms in the building.
Gym/Stage
Try to take Drake’s briefcase.
Backstage
Use the wooden stick to get the golden briefcase. Look at it in inventory. “Camp is the new black”.
Hallway (library).
Look at the xenophobic graffiti to see it’s crudely sprayed in black paint.
Art Room
Look at the pot brigade (Gerald, Anthony & Scott) & see that Anthony‘s hands & trousers are smudged in black splotches.
Talk to the pot brigade. Anthony denies having black paint.
Hallway (library).
Use the polaroid camera on the xenophobic graffiti to get a graffiti photo.
Art Room
Use the photo on the pot brigade. Talk to Anthony to set him off on his racist rant.
Use the recording device on him to get a voice recording. Use this on the pot brigade to get spray paint.
In inventory combine this with the golden briefcase to get spray-painted briefcase.
Gym/Stage
Talk to Shilling.
While Drake is distracted, use the spray-painted briefcase on his briefcase to switch them.
Automatically be outside the nurse’s office.
Nurse’s Office
You talk to Martin. He knows you’re lying about the paintings.
He helps himself to the mind-altering meds & tells you he’ll text you later about the paintings.
Take the always there magnet. Pick up the book.
In inventory, look at the book. It’s the first one in the Bakerloo Line Quartet by Holden Burke.
Hallway
See Drake. He wants you to take a key up to Roger & hands you a key ring with the pantry key.
Drake needs to phone his nan. He has a personal situation.
Foyer (upper)
Go upstairs. Look at the magazines. (See the same partridge portrait as the one hanging in the bar at The Piccadilly Manor).
Look at the varnish, paint & paint thinner.
TEACHERS’ LOUNGE
Entrance
See Roger trying to access the computer. He asks you to look through Leslie’s pigeon-hole to see if you can find the password.
Leslie is the school secretary. Talk to Roger.
Look at both the photo of the old headmaster & the one of the new headmaster. Look at the metal plate below them to see that Mortimer is re-enacting the pose of the 1st headmaster.
Look at & interact with the *STRAW HAT (7) to try it on. Take the hat & look at it in inventory to see that it belongs to Leslie D.
Exiting right from the entrance leads to a sitting area. Exiting to the left leads to a kitchen area.
Sitting Area
Take the plant & pick up the planter. Take the lacrosse Sticks. Look at & try to interact with the trunk. Roger urges you to find the password.
Kitchen Area
Take the knit bag. Look at it in inventory to get a knitting needle & a copy of crochet special.
Look at the magazine in inventory to see that it’s the property of Leslie M. & find a love letter. It mentions a CD-Rom the author found in one of the computers. “If I am right about who’s behind it, it would be so painful, so sad. Such a lovely child, albeit troubled”….. ”So why carry on with that reprehensible poisonous web site?”
Interact with the crochet special to imagine yourself wearing the *CROCHET HAT (8)
Look at & then take the fridge Photo. Look at it in inventory to see one of the men wearing the straw hat. See what’s written on the back. Now that you have the surname of the secretary, interact with the cubby holes to get a close-up.
Look at the cubby holes.
(Before you type in the secretary’s name you can try some of the other names to see if they’re hiding anything!)
Type in DUMAS & click ‘READY?’ to find a password.
The lights go out suddenly & you find yourself by the entrance. You can’t go anywhere without a light.
FIND A BETTER SOURCE OF LIGHT
Entrance
Look at the key ring to see that a faint green light emanates from Captain Centollo. Interact with the key ring to use the light. It’s just enough to move around with.
Try to exit through the door. The door is firmly locked. Talk to Roger twice to find out where he left the key. He left it in the lock. Interact with the locked door to bang on it & call out.
Try using the love letter on the locked door & then the knitting needle.
Sitting Area
Interact with the confiscated items in the trunk. In the close-up look at the items & take the pocket knife, wine, buzzing bunny & mighty puffer. (Click on the arrow top-left of the trunk to exit the close-up.)
Kitchen Area
Take the wooden crate from the shelf. Look at it then take the candles.
Entrance
Give the candles to Roger. While he’s searching for a lighter, Shilling emerges from the closet protesting. Someone’s pouring paint thinner under the door.
Roger climbs up to try & open the vent………
You get a mood alert. You’re jittery & on edge but you need to do something about the paint thinner quickly.
Kitchen Area
Interact with the wine in inventory to get a chilean cork & a corkless bottle. Interact with the sink to turn the tap on & use the corkless bottle on it to fill it with water. You need something much bigger.
In inventory use the pocket knife on the chilean cork to get sliced cork. Use the sliced cork on the planter to plug the holes & get a sealed planter. Use the sealed planter on the sink to get water.
Entrance
Use the water on the paint thinner. FIX YOUR MOOD.
Search (hand icon) Roger to get Roger’s phone. Interact with it in inventory to find it’s password protected.
Search Roger again to find a wallet. Look at it to extract a family photo, postcard, condom, credit card & pet photo. Look at & interact with these items to see if any of them hold a clue for the password.
Try using the family photo, postcard & pet photo on Roger. He’s not very coherent but his mutterings offer some clues.
Interact with the drawer & then look at it to get a stolen CD & a pencil.
Look at the CD-Rom in inventory to see the title, & that it belongs to Roger.
Interact with Roger’s phone, type in BOWIE & then press enter on your keyboard.
Interact with the phone again. There’s no signal but it emits a brighter light than the Captain Centollo key ring.
Talk to Shilling to find out what he’s doing here. Play Voodoo Wars if you want.
In inventory, look at the mighty puffer. It doesn’t have any batteries. Look at the buzzing bunny & use the pocket knife on it to get batteries. Use the batteries on the mighty puffer to get a mightier puffer! You can give it to Shilling to play with if you want.
To capture the flying toy, look at & then use the lacrosse sticks on it.
Kitchen Area
Interact with the cabinet door next to the oven.
Try to interact with the valve & see a ‘man-eating’ spider. Use the straw hat on it, then the crochet weekly to trap the spider. You can give the spider to Shilling.
ACHIEVEMENT: Boris the Spider (Successfully captured the spider.)
ESCAPE THE TEACHERS’ LOUNGE
SAVE GAME
METHOD 1:
Entrance
Look at the photos of the old & new headmasters to see the photos side-by-side. See what the difference in the background is.
The cabinet has moved.
Sitting Area
Look at the chair in the corner & the sofa. Interact with the cabinet 3 times to reveal a boarded-up fireplace.
Pick up the bronze bust & use it on the fireplace. Look at the open fireplace.
Talk to Shilling to show him what you’ve found.
Interact with the cabinet again to push it further out of the way with Shilling’s help.
Shilling disappears into the chimney to go & get help.
ACHIEVEMENT: Chim Chim Che-ree (Escaped the teachers’ lounge using the fireplace)
METHOD 2:
Kitchen Area
Look at the oven & the stove. Look at the H & S device on the wall right of the fridge. Use the pocket knife on it to remove it from the wall to get the gas detector.
Interact with it in inventory to see that it has no batteries. Use the pocket knife on the mightier puffer (or the buzzing bunny) to get the batteries. Use them on the gas detector to get charged detector.
Interact with the valve in the cabinet again so that the gas is hissing. Interact with the stove to turn the gas on. You should see fumes rising. Use the charged detector on the stove to set the alarm off.
ACHIEVEMENT: Fire Escape (Escaped the teachers’ lounge using the gas detector.)
(N.B I found that this achievement didn’t register)
METHOD 3:
Kitchen Area.
Look at the vent. You need some sort of hook .Take the umbrella from the stand by the entrance to get the brolly in inventory.
Use the brolly on the vent to remove the cover.
In inventory, use the pencil with the password to write an S.O.S. to get loaded Note. Use this with the mightier puffer to get loaded puffer.
Use the loaded puffer with the vent. It gets stuck.
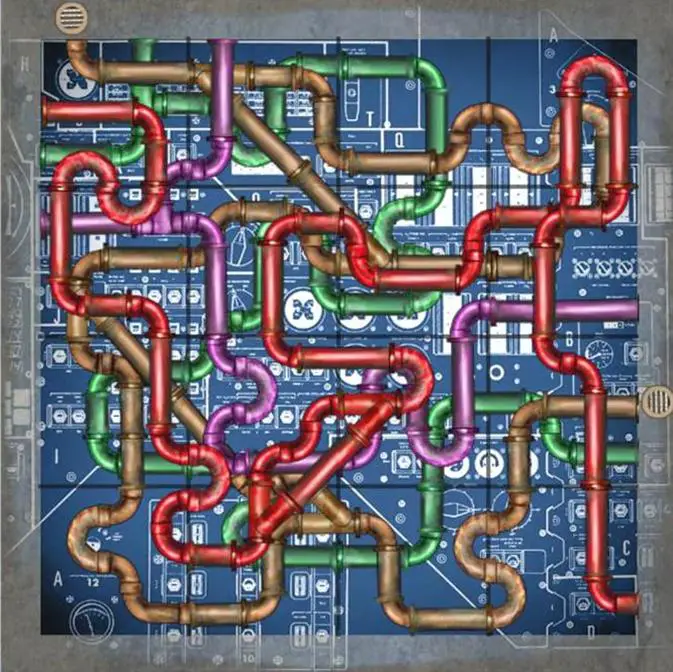
You see a pipe puzzle. You can swap the squares by clicking & dragging them to a different position. Click on a square to rotate it.
Complete the pipe puzzle to clear the vent.
ACHIEVEMENT: Pipes of Peace (Escaped the teachers’ lounge using the mighty puffer.)
Entrance
After successfully summoning help, Drake arrives in the teachers’ lounge.
He tells Roger that he has to leave for the evening. “My Mum – it’s not good” & says he’ll be back tomorrow. He states that you weren’t locked in. The door was unlocked.
DAY 3
“All the pieces were there from the beginning, but no one knew how to put them together.”
Paul Auster, Moon Palace
Backstage
Drake turns up & shows you the headlines of today’s paper. You have another look at the newspaper to see pipes & valves in the background of the picture. Cressida could still be in the school.
Look at the vodka bottles. It seems you’ve spent the night drinking with Roger but nothing more!
Look at the tools. See the drill & notice the wires that lead to the fire extinguisher.
SEARCH THE SCHOOL FOR CRESSIDA
Stalls/Gym
Talk to the gaggle of girls (Emily, Anemone & Brody)
Last time they saw Cressida she was hanging out with Martin by one of the vending machines.
Cafeteria
‘Take’ the number list to enter the phone numbers into your phone.
Enter the boiler room.
Boiler Room
Picked up the pieces of rope from the floor to get rope fragments.
Pick up the cufflink, lighter, masking tape & newspaper. Pick up the toolbox to get wire & pliers.
Look at the lighter in inventory to see the letter ‘H’ written on the bottom in ink.
Interact with your phone to call Drake. Try to call Cressida. Her phone goes straight to voicemail.
Look at the service tunnel hatch.
Stalls/Gym
Show the cufflink to the gaggle of girls. It’s Martin’s.
Try to call Martin. His phone just keeps ringing.
Backstage
Talk to Taylor & Kevin. They suggest looking upstairs as no one has searched there yet.
Teachers’ Lounge
There’s no one here. Click on the fridge decor in the kitchen to take Pedro.
Foyer (upper)
Take paint thinner.
Try to call Martin again. You hear a phone ringing in the distance. It seems to be coming from beyond the door to the rooftop.
Go upstairs & try the door. Something is keeping it shut.
Art Room
Listen to the stoners (Scott, Gerald & Gaz) while you’re there.
Take the long rope.
Hall
Use the pliers on Moose Ahoy’s hook to get a pirate hook.
Boiler Room
Interact with the table. Pick up wood from the broken table.
You can make a shoddy grappling hook by using the pliers on the wire to get a wire hook & combining it with the rope fragments.
To get a super grappling hook combine the long rope with the pirate hook. Use this on the service tunnel hatch. Enter the service tunnel.
Rooftop
Look at the brush. See strands of blue hair tangled in it.
Try calling Martin’s phone again. Hear the ringing come from somewhere inside the water tank. You automatically call Roger.
Interact with the water tank to bang on it & call out to the occupants. Hear a distinct cough followed by a loud “Shhhh”.
Interact with the water tank pipes to get a close-up. See an open space underneath the water tank. Look at the broken valve. Exit the close-up.
Interact with the pallet at the end to unblock the door.
Boiler Room
Use the pliers on the valve. Use the masking tape on the steam geyser.
Rooftop
Interact with the water tank pipes again to get the close-up.
SAVE HERE
There’s 2 ways to force out whoever’s hiding in there.
METHOD 1:
Use the valve from the boiler room on the broken valve.
METHOD 2:
Use the wood on the open space. Use either the newspaper or the paint thinner on the wood. Then use the lighter.
See a small crowd gathered on the rooftop: Cressida, her ‘kidnappers’, Roger & yourself.
Roger berates Martin. You agree by saying *“It was disrespectful and dangerous.” [9]
Drake emerges from the rooftop door to inform Roger that the headmaster called. He’s furious & demands to speak to Roger immediately.
Students Lounge
Hear Roger talk to Morty. They have 24 hours to end the protest or Roger loses his entire scholarship. Drake offers to take the blame to avoid Roger being implicated.
You suggest trying to dig up something incriminating to blackmail Morty with.
Either Roger will have the key & search Morty’s office with you or,
Drake will tell you it’s unlocked & you will get a phone call from Martin when you’re in the hall. Martin will tell you that he’s already in Morty’s office.
FIND ‘DIRT’ ON MORTY
Headmaster’s Office
Talk to Roger or Martin depending on which of them is there.
Interact with the closet door.
Interact with the lockbox on the shelf to find a strange coin.
Interact with the BOWLER HAT (9) to try it on.
ACHIEVEMENT: You Can Wear My Hat (Found and worn all 9 hats in the game.)
(N.B The achievement registered but I found the illustration of the Huaso hat missing from the WORLD OF HATS in the BONUS section. )
Look at the armillary sphere. Try to pick the globe up to get a closer look.
See 3 holes around the perimeter.
Interact with the lamp to get a close-up. Take the ‘switch’ from the base to acquire a screw.
Interact with the left-most chair to find another screw.
Look at the left painting to get a close-up. Try to take the screw from the lower part of the frame. Use the Pedro magnet on it. It’s not strong enough. Maybe a second magnet would help.
Nurse’s Office
Even if you already have the always there magnet, visiting the nurse’s office now will give you the opportunity you to win another voodoo doll.
Talk to Alex Valero. He only arrived that morning. Challenge him to a game of Voodoo Wars. Win *Lizzy 1 (4)
Gym/Stage
Talk to Helen. She mentions how stressed Drake is.
Listen to Shill n’ Hash.