The Lost Crown
The
Lost Crown
by
Jonathan Boakes and Darkling Room
Walkthrough by
MaGtRo March 2008
Gameplay:
This is a third person point and click game. Before the game starts; see a
display and sound selection frame. The display frame has device, colors and
antialiasing choices. The sound has a choice of the sound device.
The main page shows a
Tarot card and a coin. Click on the Tarot card to show the main menu: Begin Your
Quest starts a new game, Relive Your Past brings saved games up and The Options.
The coin has Go Back or Quit depending on when it is clicked. The Options has a
selection for subtitles.
In game screen, move the
cursor to the top to see a Tarot card. Make Your Choice brings the Game Menu.
The Game Menu has Continue, Relive your Past, Save your Future and The Options.
To exit the game menu, click on Go Back coin and it changes to Quit.
Bring the cursor to the
bottom of screen to show the inventory. Right click of an item shows a close up of
the item or hear a description of the item by Nigel.
Double click the
destination cursor speeds up the transition to the next screen.
An updater can be found here:
I would like to thank Jonathan for the guidance he
has given. Another masterpiece, Jonathan! Bravo!
Mr. Hare. Mr. Crow.
Report! Danvers heard and seen too much.
Where, sir? Where is
he going? He’s going nowhere.
Friday, April 28
Day
One: On the run…
SedgeMarsh Train
Depot:
Nigel Danvers
approaches the stationmaster. Remember Nigel in Dark Fall 1?
Talk to the stationmaster completely. Learn about the Sleepwalker, the train.
There’s a young lady that might have gone to the Fens. Spring tides
flood the marsh. No return passenger for this train.Go to the other end of
the train at top of screen. Look around. Check the 2 posters in the waiting
area: The Broads and Saxton. Check the beer barrels destined for The Bear.
Click on the depot signs.Go back to the front
of train and take the left path away from the train. Try to go left but he
does not know where to go. Go back to the depot and talk to the stationmaster
at back of train. Learn about the path that leads to Saxton through the Fens.
Treasures are mentioned. The stationmaster gives the young lady’s wallet found in the train.Inventory: Right click to look
close or hear a description of the inventory items at bottom of screen. Read
the report by Mr. Hare that talks about the rip in a chasm. Printout
1 is the attempt by Nigel to hack the Paranormal Division computer.
Printout 2 shows Nigel getting 2 images before access denied. See 2
Hadden images of the chasm reported. One shows the chasm and the other, the
entities reported in the chasm rip. Check Danvers ID Hadden Industries.
The back has a work phone number: 0207 555 5714.Read Day one of Danver’s
diary. It has a list of things to do.
Fens – SedgeMarsh
Nature Reserve:
Go to front part of train and left to the path going to the Fens. Hear the train
leave.
Check the
wallet of Lucy Reubans, student at UCEA (United College East Anglia) in
inventory. Take
note of the 2 part return ticket on the train.Fens: Look close at the
poster of the SedgeMarsh Nature Reserve. Take note of the Flora and Fauna
described. Study the map.Go left on the
walkway. See Lucy walk the marsh partly hidden by the reeds. Look at the
water. Go to top and around to the next junction. Note the predominance
of the Azurian Fritillary that cause lethargy, dizziness and promote cancerous
growths. Click-look at the carving on the stone. Go forward to the next split
in the path. Try to talk to the man using the binoculars behind the blind.
Look through the blind at what he is looking at – a heron.Go to top right and be
at the edge of the North Sea. Pick up the piece of a sign right of the
walkway on the sand.Martello Tower: Go back and take the
top path again. Take the left path at the junction. Continue left to Martello
Tower. Pick up a second piece of a sign on the ground. Go right and see
the sign with a piece still attached in front of a cave. Pull back and go
right. Take the 4th piece of the sign from the ground. Nigel refuses to
go right. Go back to the broken sign by the cave.Broken Warning Sign:
The object of the puzzle is to put together the sign with the found pieces.Arrange the attached
piece to fit the indentation. Right click turns it counterclockwise and left
click turns it clockwise. Click-hold moves it faster.Place the next piece
to match the indentation and the break.Do this for all the
pieces. When done correctly, the pieces hold together and a ding is heard.
Nigel reads the warning.

Fenland Eye:
Enter the cave to the next side.
Read the newspaper
seen on the sand floor. Learn about the treasure hunters that would be in
Saxton. Professor Hardacre is Saxton’s expert. Look close at the monster
depicted on the wall.Gate: Go left of the sea
monster on the wall and read the
newspaper about the Spring tide’s effect on the cemetery and the corpses. They
are floating into the sea. Look through the gate by clicking on the top of the
bars to get a close up. Hear sounds and shadows walking inside. Exit the cave.
Saxton Shores:
Look at the abandoned,
desolate
building above the cliffs.See a young boy trying
to get a teddy bear in the water. His tricycle is nearby. You cannot go to the
boy.Go left to Saxton Shores
edge. See and talk to a lady with her dog George completely. It sounds that
Nigel is expected in Saxton. See something in the water.Go back and see that the
boy is gone. Maybe the one floating in the water?
The Beach:
Go diagonal right at side of cliff and be at the Beach.
Saxton Caverns:
Go right and see a cave. Enter and forward. Nigel does not want to go any
farther. It’s too dark to see. Exit back to the Beach.Go right pass the steps and another right to see the lobsters and bottles on
the fishing boats by the harbour wall.Go back and climb the steps
to town.
Harbour wall:
Go left and walk the top of the harbor wall until the end.
Read the plaque on the
wall about the contribution of Frederick Ager of Northfield. Look at the abandoned
building (Old Net Store) we saw earlier. Pan right to see the pine trees above the cliffs.Go back to the right. Look at the no swimming sign. Look at the
Missing Cat Watch poster. Nigel notes the phone number.
The Bear:
Go right and check the swinging sign.
Look close at
the menu left of the door. Read the history, menu and lodging detailed on the
poster. That made me hungry. The Harbour Cottage is closed indefinitely. Enter
the Inn.Talk to Morgan Mankle, the
landlady completely. Get a bottle of water. Nigel rents the Harbour
Cottage and gets a key to the Cottage. She also gives a map of
the town. Study the map.Check the fireplace
left of the room and see a cat warming in front of a roaring fire.Check all the
pictures: Church, The Bear and Harbor wall. Check The Ballad of Tom Oliver
reminiscent of Dark Fall 1.Go through the open
doorway and check the painting and the bathroom doors.Go right to the dining
room area. Check the clock that stopped at 9 o’clock. Go right and check the
live lobster selection. Look and get a Rhys Branwen Saxton Snappers
leaflet. Read both sides of the leaflet in inventory. See pictures of post
office box, Celtic cross, wild garlic and pine trees. The Picture contest will
be shown at the Bear and the winners announce on May Day night.Exit the Inn.
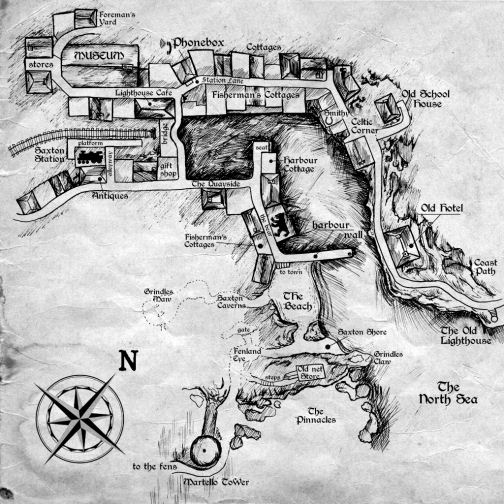
Quayside:
Go to the top of the screen to Quayside.
On the way to the
Cottage, talk to the man in white shirt. He is a reporter. He’s holding a PDA.Seat:
Go left. Professor Hardacre calls and talks to Nigel. Well…
Harbor Cottage:
Go to the white house at right and look close at the sign. Use the cottage key
on the door.
Living Room:
Oh My! Check the telephone and see that it is disconnected. The drawers are
empty. Check the switch left of the hutch and see that no electricity.Hallway:
Go to the hallway.Check the lintel
decoration of the doorways. There’s a windmill carved into the wood. Check the 3 desolate
pictures on the wall.At the end of the hallway, check the wall. There’s
something not quite right about the wall.Kitchen: See blue plates
and a book on the hutch.Check the drawer of
the table. Read the Auction information about Harbour Cottage. Read the
history of the cottage on the other page. Edward Molina, a Spanish immigrant
originally owned the cottage.The door at top left
is inaccessible. Exit the kitchen.Bathroom:
Enter next door and check the tub. Check the things on
the cabinet and the mirror. Exit the bathroom.Go towards the living
room and
hear something break. Go to the kitchen and check.Kitchen:
See that a plate fell off the hutch to reveal a Guest Book. Look at the book and
read not a Guest Book but a journal.It is Eduardo de
Molina’s diary on March 14-28, 1952. Christina is his wife. She arrived and
got sick within 2 weeks. The other pages before
and after appears to be blank.Go back to the living
room.Stairwell:
Check the newel post of the staircase. It also has the windmill design.
Balcony:
Climb the stairs. Check the pictures and the window. Hear a thumping sound.Bedroom:
Chest:
Look at the chest at the foot of the bed. A cat is in there. It might be the
missing cat in the poster!We need a key. Look around. Look
close at the stag’s head on the wall. There’s something in its eye. Click
and get a key.Use the key on the
chest at the foot of the bed. Uh oh! It’s empty but the noise stopped.Table:
Check the table and see some money, The Bear paid bill and empty photo
album.Wardrobe: Open
the wardrobe.
Nigel tacks the Hadden documents inside the wardrobe. Check the empty
drawers at the bottom of the wardrobe.Check the window and
the light switch. Look close again at the deer head and see that it was
donated by Frederick Ager.Bed:
Check the bed and Nigel’s sleeps.
Night One: First Impressions
Nigel wakes up and
hears the Saxton Bell. See a list of things to do in Nigel’s journal. There’s a lit candle on the
table! Click the wick of the candle on the table. Has someone
been here?Go down the stairs.
Hear a knocking sound.Living Room:
Someone has been here. The place is a bit clean. Automatically read Morgan
Mankle’s letter.The knocking on the
door continues. Exit the house.
Harbour wall:
See flashing light
coming from the kitchen window. It is flashing a Morse code: 3 short, 3 long,
3 short – SOS.See a man walking
away. Follow the man. The man is Prof. Hardacre. Listen to what he says. He warns Nigel about the
Fens. He says to walk tomorrow through the Fen Land Eye.Go back to Quayside.
The Bear:
PDA:
Nigel sees Alex Spitmoor’s PDA on top of the barrel. Pick it up and check the
one new message. It mentions about the culprit and charade. Go back to Main Menu.
Click on any icon and see a log. It talks about Nigel.Inn:
Enter the Bear. Talk to Morgan Mankle completely and learn about May Day Fayre.
Check the cat by the fireplace.Go through the open
doorway. Hear laughter and festivities. Go to the other room. The room is
empty. Check the clock. Exit the pub.
Quayside:
Go towards the cottage. Talk to the man up the ladder
putting up bunting. Go right from the man. Go forward to the
bridge ahead and go right across the bridge.
Coast Path:
Take the Coast Path to the right.
Talk to Lucy Reubans
completely. Automatically give her the wallet.Look inside the window
right of the phone booth when the light comes on. See a typewriter and wine.Phone Booth:
Enter the phone booth.Automatically take the press pass of Alex
Spitmoor. His phone number is on the back of the card. Use Alex Spitmoor’s
card on the phone. He’s out right now.Use Nigel’s Hadden ID
on the phone and automatically use the phone. Talk to Hadden completely. Nigel
ended up agreeing to do paranormal research. Hadden advises to scry and follow
the old ghosthunters way. He will
send a gift to Nigel tomorrow.
Night One: A pawn in Hadden’s game
There’s a new list of
to dos in the journal.Go back to the left
and then to the Harbour. Go down back towards the cottage.
Harbour Cottage:
Enter the cottage using the key.
Bathroom:
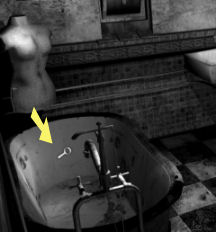
Go to the bathroom. See a shadowy figure at the corner. Turn on the lights and check the dress form at the corner.Look close at the
bathtub.Scry –
Look close at the mirror. Use the water bottle on the mirror. Watch and see a woman
with long hair appears.Kitchen:
Enter and check the flashing of the lamp. No, it doesn’t form a Morse code.Hallway:
Go to the end of the hallway and see a picture frame shape on the wall. The
air smells like rotten flesh. Hear weird sounds.Living Room:
Go back to the living room.Séance: Click on the
cup. The cup moves in place for yes and farther away for no.Nigel is not alone
here. The
spirit definitely wants help but is not trapped here.Check the phone. Hear
static and tapping. Hear also someone reciting (The Traveler) Is there anybody
there… ?Bathroom:
Check the bathroom and tub again. You might or might not see hair in the tub.
Bedroom: Go to bed.
Saturday, April 29
Day 2: A new face in an old town
Room of Nightmare:
Nigel has a nightmare of being in a room with a bloody sickle. On the wall is a
picture of 4 men in black with blood red evil eyes and are wearing hats.Living Room:
Go downstairs.See the Saxton Times
newspaper and poison pen letter 1 dropped through the mail slot. Read the
newspaper about the missing cats and the letter.Let’s check the town.
Exit the Cottage.
Station Lane:
Go right behind the crates and the seagull. Go towards and cross the bridge to
go right. Take the path at top.
Lighthouse Cafe:
Look close at the Lighthouse sign. This is the place that will give the free
meals mentioned in Morgan’s letter.Go forward, look on
the window and see yummies. Enter the cafe and come out with food in
inventory.The Ark:
Continue to the right. Check the place across the window that has a circle and
cross.See the lady met at
the shore doing her gardening. Talk to Nanny Noah with her dog, George completely.The wall across the
house is the museum wall. Learn that she avoids the antique store and that Bob has a workshop.Nanny Noah invites
Nigel for tea this afternoon. Show her any item to get some comments. Click on her again to
change dialogues.Museum:
Go forward to the end of the road.Check the Museum. Click on the Saxton Bell at top of the building and was
built in 1890. Enter the walls and see that the building is closed. Check
and click on the carving on the stone of a
winged stag with a crown above and on the neck.Saxton Food Stores:
Note that the sign of the Food Store has 3 Crowns.Go back to the
intersection.
Coast Path:
Go forward to Coast Path.
Alex Spitmoor the
journalist: Talk to the journalist standing by the phone
booth. He has his handy PDA and is watchful.Bob Tawny, the smith:
Go forward the path.Cairan the pig:
Enter the first entryway at left and meet Cairan the pig. Give her the food in inventory by placing it on the shelf.Bob the smith:
Enter the next entryway and meet Bob Tawny. Talk to Bob completely.He will meet Nigel at
the pub. He fixes things.He sounds like he’s
enamoured with Nanny Noah. Nanny Noah lost her son a long time ago in the sea.
Ah… Maybe the boy had a tricycle.Look at the picture on
the wall of Rose and Cole. Read the poem tucked left of the frame of Cole’s
picture.
Quayside:
Go back to the cottage. Go left and take the Harbour road at intersection and
be at the quayside.
Seat:
Go to the door of Harbour Cottage and see a letter tucked behind the pipe.
Take and read the letter from Lucy.Go left and talk to
Lucy Reubans. She mentions the caverns and Hardacre. Learn about other
townspeople.
Saxton Caverns:
Go pass the Bear Pub and down to the beach. Go left by the steps and enter the
cave.
See a lantern.
Continue forward and talk to Professor Hardacre completely. He says he did not
meet with Nigel last night. He repeated what he said last night. Hmmm…Go right and forward deeper in the caverns. It gets too dark to go on.
Exit the area and
Hardacre mentions that the Stationmaster has a package for Nigel.Exit the caverns. Go
back to the Quayside.
Quayside:
Go right towards the bridge. Go forward to the road.
Saxton Train Depot:
Go to the alley pass Gruel’s Antiques. We’ll check that shop
later.Look at the poster on
the wall. Enter the depot and talk to the Stationmaster completely.He warns about the
rail tracks at night. Learn about his father, the falling pictures and the
story of the disaster of the Great Crash of the Apple Train owned by Gurney.Pickup the Hadden
package on the chairs at left.
Harbour Cottage:
Go back to the cottage.
Hadden’s gift:
Open the box. Read Hadden’s letter. Take the equipments inside the box.
Day 2: We have technology
New set of things to
do is seen in Nigel’s notes.Paranormal equipments: Read the Gadgets
leaflet to know more about the equipments.The EMF meter is used to
detect and measure the electromagnetic field.The Night vision Camcorder
detects and reads infrared light.The Digicam or camera takes pictures and also
develops it.The voice recorder is an EVP (electronic voice phenomena)
recorder of unexplainable sounds heard during playback.Let’s play with the new toys.
Bathroom:
Hear a voice that says ‘here’. You will hear that on locations of interest.Use the digicam
on the tub and see a streak of light. Use the digicam on the mirror and get a
picture of a beautiful face.Hallway:
Use the camcorder and the digicam on the wall at the end of hallway. See a
frame of a doorway.Living Room:
Use the digicam on the cushioned chair. See a picture of a sad man.
Balcony:
Climb the stairs and while at the balcony, click on the ceiling. Use the digicam on the rafters/beams. Is that a face on the wall?Bedroom:
Go to the table and Nigel places the pictures in the album and the cassettes
on the box. Click on the album and box to review what you have collected.Exit the house.
Saxton Caverns:
Go pass the Bear Pub and down to the beach. Go left by the steps and enter the
cave.
Enter the cavern and
see Hardacre still at work. Go right and forward until the dark area.Cave passage: Use the Night vision
camcorder and go forward. At each step forward, look right and left to see
ancient carvings on the wall. There is a crown on one of the left walls 3
clicks from the start of the night vision passage.In a wider area of the
cavern 4 clicks from start of night vision passage, see planks on the left
side. Take a plank.Go forward once and
see a sea monster etched on the wall. To the left is an opening and another one at
right. Enter the right one behind some lobster traps.Chasm:
See a chasm (abyss). Click on the left and see an etched hand pointing to the
right on the wall. Click back to the right and see a narrow passage left of
the chasm. Go forward once and see a crown carving on the left wall.Boulders: Look right and
see a pile of boulders across the chasm. Look down and place the plank on the
abyss.Cross the chasm. Take
the plank laid down the chasm and use it on the boulders. The boulders are
removed but the plank disintegrated. Stranded. Enter into a smugglers
hideout.Smugglers hideout (Grindle’s
Maw): See a cavern with loot, fire pit and a locked
chest.Fire pit: Hear a ‘here’. Use the dictaphone on
the fire pit and get a reading. Listen to the Smuggler’s recording in inventory and hear
the smugglers sing around the camp fire.Use the EMF reader on the fire pit. Note the numbers read on the dial below the meter.
Locked chest – Go and look close at the
locked chest.The locked chest has Roman numbered buttons. Enter the numbers read on the EMF
reading of the fire pit – 2513.Take and read the
journal of what happened to Captain Walter Spivey, the treachery of Gruel and
subsequent escape. There are old wines in the chest.Hear a sound. An oar
dropped down from nowhere. Take the oar. Exit the hideout.Chasm:
At the chasm, look up and see a hook at the ceiling of the cave. Use the oar
on the hook. Swing across to the other side.Turn left and forward
to exit the chasm area and be back at the main passage of the cavern.Tidal cavern:
Go forward, right and see light coming down from a hole on the ceiling.Siren: Go forward to the
light. Automatically, Nigel talks to the light. Talk completely to the spirit
woman.Take a picture and recording of the spirit woman.
Listen to the
recording of the Tidal Chamber – Bring me a Pasque flower.Turn around and
forward. Turn right when you see the lobster trap. Go forward to exit the
cavern.
Beach:
Go left from the cave. See a painter.
Go to Dr. Black
painting a scene. Try to talk to him.Look close at the
painting and see that he painted someone left of the desolate building and top
of cliff.
Fenland Eye:
Go to top of screen on the narrow path. Enter the cave on the right.
Grilled gate at
Saxton Caverns: Go left of the sea monster wall.Here! While (not in a
close look) one step away from gate, use the camcorder, recorder and then take
a picture in between the bars. Use the camcorder.Listen to the Saxton cavern gate cassette (help us)
and check the Saxton cavern gate picture (2 figures).Exit and go back to
town.
Day 2: A link to the legend
Go back to town and to
Quayside.
Quayside:
Go right towards the bridge. Go forward to the road at diagonal left.
Gruel’s Antiques:
See 3 crowns, a link to the legend on the store window. Enter the store.Look around. At the
far aisle, go the back of the store and meet Mr. Gruel and Jemima. Weird
man!Try to get a
coherent conversation. See a book in front of Jemima that has 3 crowns on the
cover. We need to get that.While Mr. Gruel covers
his face with Jemima and Jemima sings, take the locked journal.Exit the store. Check
the locked journal in inventory (right click) and see that it cannot be
opened.
Bob Tawny, the smith:
Go to end of Coast path. Enter the first
opening and give Cairan whatever food you have. Enter the workshop
next door. Ask Bob to open the book. Exit the store.
Celtic Corner:
Follow the cat that crosses Nigel’s path outside the workshop.
Talk to Rhys Branwen
completely. Meet Mr. Tibbs, the cat.Check the bookcase on
the right.Read the 3 volumes of about Unknown Anglia. Learn about 3 local
ghost stories: Mysterious Maiden at Ulcombe Lane, Gyb farm incident and Spivey
and the Failed Invasion.The middle books show one page of Anglo Saxon
symbols. Take note that something can be clicked on the page to identify it.The right 2 books are about the Festivals; take note
of Beltane since it is this Monday.Check the unique snake
candle holder on the counter and the entry box for the photo contest at end of
the counter. If you have taken any pictures that you want to enter, insert
them in the slot.Check the crystal ball
on your way out. See a future event, like Nigel with Hardacre by a cliff or
some other future scene.Exit the store and check the
grab boxes at front of store. Read about yews, its meanings and usages.
Read the King Time magazine and the games that will scare you silly. Ahem!Check the notice board
on the left of the path.
Meadow:
Go left and be outside of town.
At the bridge, look at the town from here and
identify the buildings.Go left and check the
lighthouse. The Saxton bell rings
1 PM.Go back up and left to
see the meadow. Go back over the bridge.
Bob Tawny, the
handyman/smith: Enter and ask Bob for the
William Ager journal. Exit and automatically be at the cottage.
Harbour Cottage:
William Ager’s
Journal: Read William Ager’s journal. The Agers lived in Raven Lane,
Northfield. Click on all the pictures and cover title before opening the next
page to read the entries.It mentions the
tracks, fens and death of Emily in a cave at Saxton Shores. She wanted a
Pasque flower. Emily is the ghost lady in the tidal chamber and William killed
her.It is time to go to the rail
tracks and SedgeMarsh station to investigate the Agers’ House.
Fens – SedgeMarsh
Nature Reserve: Exit the town.
Go to the beach,
Saxton Shores and enter the cave. Go right and left out to Martello tower. Go
right to the fens.Pictures: On the way, you might
want to stop at the blind where the man is located. Take a picture of the frog
on the edge of the walkway behind the blind. Also click to look at where the
man is looking at. Try to take a picture of the heron. If it is blurred, try again
when the heron moves closer to the left. You can submit them for the contest
later by placing them in Rhys’
entry box at the Celtic Corner.
SedgeMarsh Train
Depot/rail tracks: Go to the Station and forward to the
other end of the building.
Now that we have a
clue for this place mentioned in William’s journal, we can go further on the
tracks.On the way, see that
the signal light for the train tracks is covered by the wood. Remember the
stationmaster’s story about what happened to the apple train crash.Take a photo of the
signal post. Look at the photo in inventory.
Raven Lane:
Go forward and see apples and boxes by the rail tracks. Ah yes, the
stationmaster’s story…
Take the bridge beside
the tracks and go left.See that the main path
has a side road at right. The side road leads to an unknown place and the one through
the woods is the entry to Carrion Woods. Take the main path at
left.At the end, see a
letter on top of a post at right. Read the letter. The farmer BG
wants the wife to leave her husband Robert and come to Brock Farm. The path to
the left goes to Carrion wood.
Ager (Karswell)
House: Continue on the main path. See a house with a woman
gardening in front. Beautiful garden.
Gardens:
Go left and up to enter the path to the house. Talk to Katherine Karswell.Robert is upset and is
in his workshop. Join them for lunch of 7 pigeon and nut broth.Look at Jasper the
parrot hanging by the door. Look at the disk with symbol by the door – spring.Workshop:
Go right and enter the workshop. Try to talk to Robert. He’s still upset.Kitchen:
Enter the house through the door by the parrot.Cookbook: Go to the table left
of the fireplace. Read the cookbook and see the recipe for the 7 Bird and Nut
Broth.Check the paper wedged in the pages of the cookbook.
It states that winter is not the end of the year; it is the beginning of the
year.Katherine has taken
care of the pigeons, bacon and she is now picking bay leaves.Collect ingredients:
Nigel needs to get garlic root, chives, wood mushrooms and cobnuts. Study the
picture on the right to see what they look like.Exit the house and go
left to get to fence by the horse.Go left and see a
horse in the pasture. Take purple flowered chives left of the pasture gate.Go right pass the
Raven Lane sign.On the side road by
the tracks and the bridge, take cobnuts from the small tree at side of the
road.Go to the rail tracks
and pick the white flowered garlic plant from the side of the bridge.Go back to Raven Lane
and enter the Carrion Woods’ path uphill. Take wood mushroom around a
broken millstone. There’s an intact millstone at left.Exit the woods by
going left. See 2 more millstones. We’ll come back here later.Go back to the kitchen
of the house.At the kitchen, go to
the chop board on the table at center. You can ask Katherine for help in
identifying the plants or where they can be found.Cut the chives,
mushroom and garlic by placing them on the board one at a time. Place the
cobnuts on the mortar and pestle.Place all the prepared
ingredients in the boiling cauldron.Take note of the round
symbol right of the stove – winter.Katherine wants some
Hedgerow balm to add to the broth. She said there’s a picture in the bedroom.Bedroom:
Climb the stairs and look inside the bedroom.Look close at the
picture frame left of the window. The hedgerow balm is in the hedge.Look at summer
symbol plate below the picture. Look at the other items on the window sill and
the Karswell pictures on the wall.Go down and exit the
house. Go to the front of the hedge where the flowers are located. Pick the
hedgerow balm left of the white daisies at center of the hedge. You can pick flowers
from the garden if you want.Kitchen:
Go back to the kitchen and place the herb in the cauldron. Rest while the
broth is stewing. They have eaten.Workshop:
Exit the kitchen. Go to top right and enter the workshop.Talk to Robert
completely. What church? At the woods… The disks with symbols might be
giving directions…Check the table and
look at through the microscope. The piece of the broken millstone has
autumnal berry stains. Check the broken stone in the box left of the
microscope – autumn.Check all the scrolls.
See a drawing of the autumn stone and get a map of the Carrion Woods.
Read the flower drawing and the millstones. Take the sturdy oak sticks
behind Nigel.Exit the room, house
and go to the Carrion Woods.
Carrion Woods:
Go down Raven Lane and enter the path at left in front of the post with the
letter.
Study the map of Carrion Woods. See where the
millstones are placed.Based on volume 1 of the Countryside Festivals of
Antiquity book at Celtic Corner and paper inside Katherine’s cookbook, winter is considered the start of the year.Millstone 1:
Go close to the first millstone as stated in the map and the dots on top of
the symbol.Use the oak sticks on the millstone. Turn the
millstone with the winter symbol in front. Look at the hole on top and see the
next millstone.Millstone 2:
Go to the next millstone. Turn the millstone with the spring symbol in front.
Look through the hole on top and see tree trunks.Millstone 3:
Go right to the next millstone which is beside the broken 4th one. Turn
the millstone with summer symbol in front. Look through the hole on top
and see dense woods.Go back to the first
millstone and look through the hole. See the tower of Northfield Church. It is
added to the Carrion Woods map.
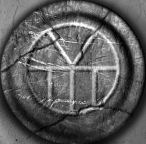
![]() |
![]() |
![]() |
![]() |
![]() |
||||
| Winter | Spring | Summer | Autumn (broken) |
Northfield Church |
Day Two: The last of Northfield
Northfield Church: Go down
to Raven Lane. By the sign, take the path going up and side of the Woods.
Go forward until the
cemetery. See a new set of things to do.Cemetery:
Look around and remember some key places in the cemetery and outside the
church. You will need to remember it later at night. Look around.North Yard:
Go around and to the right side of the church. See crows all around. Go right
by the sign.See a man down a grave
hole. Talk to Mr. Russet. Give Mr. Russet some help so that he can talk to
you.The birds took Tom’s
name and the name needs to be placed on his stone. Then Mr. Russet might be able to talk to
Nigel.Search for Tom’s
name: Exit the North Yard.M – Go left and see a
crow by the corner. Look at the ground and pick up M, a rusty metal
letter.T – Continue to the left by the gate
and then up to the side (right) of the church. Go right and forward to the closed door.Take T, a
rusty metal letter under the drain pipe and beside a tombstone.O – Go back to the back of
the church. Around the church (left side), see a pile of rubble at the corner of the
church.Continue to the
left and at the extended side door of the church.Look at the base of the door and get
Thomas Ager’s Journal and letter O, a rusty metal letter.N – Go right at
foreground path until the yew tree at start of cemetery. Take N on the
cross of a grave.E – Go left, left of
the closed door and see the church entrance. Pick up E right of the
door.H – Go left to the
path beside the church and go back to Mr. Russet at North Yard. Look at the
bucket beside him. Take H from under the jawbone.Tom’s stone – Exit
North Yard and go left until right of the gate.See a tombstone
missing letters. Place the letters back in place to make Tom Henry Oliver.
Thomas Ager’s journal: Read Thomas Ager’s
Journal. Thomas Ager killed Gurney. He took his hands and buried them under
stone.Go back to Mr. Russet.
Talk to Mr. Russet completely. Learn about Thomas Ager being a rector of the
church and about poor old Nick Gurney. William Ager is the last of the Ager’s.
The Black Plague emptied Northfield. Nick walks the churchyard at night
looking for something. Mr. Russet will light candles when Nigel comes back
tonight.Church:
Go to the entrance to the church. Enter the ornate grilled door.Poster board:
Look at the poster board. See that Evelyn will have a memorial service on
Thursday, May 4th. Check the history of the church. The tomb of Nicholas
Gurney is at the back of the church.Enter the church and
look around.
Check for paranormal
phenomena:Leave the camera on
the table by the door. Go left twice.Aisles – After
the lectern, use the camcorder and see the ghost of Thomas Ager walk the
aisles.Use the recorder on the pews and
hear chopping sounds on the pews cassette.Gurney’s tomb – Go right and see a
coat of arms on the end of a pew in front of Nicholas Gurney’s tomb.See that the 3 decorative panels below the statue
are gone.Look at Gurney’s
effigy and see that it is missing hands.Use camcorder and
recorder above Gurney’s statue and see orbs. Listen to the Gurney cassette –
he took
my hands.Hear the camera left at the table by the entrance take a
picture.Stone slab on the
wall – Check the stone slab hanging by the window. See 2 women and a
coat of arms.Rector-Rood screen: Exit the sanctuary
on the left.Use the camcorder and the recorder on the Rector-Rood board and see
a list of rectors.Thomas Ager’s name is highlighted. Use the recorder
on the rood screen.Look up and see a coat of arms.
Camera on table
– Go back to the entrance. Pick up camera and the picture taken. Look at church
ghost picture.Vicar:
Go left again and then go left to enter the Vestry/office.Check the painting in
the back and the tapestry with 3 crowns.Use the camcorder on
Thomas Ager’s portrait. Click to look close of the eyes of pure hatred.Talk to the Vicar. He
lost something important. He lost it between Wednesday and Friday.Exit the Vestry and go
back to the entrance of the church. Exit through the door.Look at the notice
board. Take the Thursday, May 4th Memorial of Evelyn Ackland. It’s the
Thursday that was lost by the Vicar.Go back to the Vestry.
Talk to the Vicar again. Automatically give the Memorial paper. He asks to
give the Memorial paper to Nanny Noah.Talk to the Vicar
completely again. Thomas Ager got large sum of money in his later years.
(Gurney was a very rich man.) The painting at the back is an ancestor of the
Vicar. Hmm…Exit the church and go
forward. Take a close look at William Ager’s tombstone at foreground of the
path. Click on the name and 3 crowns.Exit the cemetery and walk to the end of Ravens
Lane.
Day Two: Research is the key
Go back to town and
the museum.
Saxton Museum:
Enter the Museum.
Booth area:
Take a map of the museum from the leaflets in front of the window. No
cameras allowed.Talk to Prof. Oogle
completely. Almost everyone states that something that has been hidden should
be kept secret. Security cameras are everywhere. Nigel can not come back
tonight.
Let’s follow the map of the museum:
A: Check and read
about the rotating statue of 3 Anglo Saxon Kings holding crowns (Aldwulf and
his 2 sons, Ganwulf and Pendraed)2. Check the Northfield skeleton
in a case. Use the recorder on the skeleton. Listen to the skeleton recording.
Read about the Northfield skeleton found in 1924 and get the phone number of the Crime Line.
Look at the hat, the sickle and then read the book.C. Go left and then
click on the map of Saxton beside Nigel. See that there’s a hole in the map. Since Nigel is
hidden here from the camera, take a picture of the Saxton map. Read about the lost
treasure in lands around Saxton.3. Go around the
corner. Read about Saxton Caverns.Read about Emily
Travers below the cavern poster. In 1940, she disappeared and is thought to be
the Siren in the caverns. Remember the Emily in William Ager’s journal. Look
at Emily’s glasses on display.Read about the Saxton
buildings on the right. Read about Eduardo Molina and the Harbour Cottage.
Look at the plan of Harbour cottage and the drawing. There’s an archway at
river level where the boats enter.5. Look close at the
lady on the painting and see haunting eyes that follow you around.4. Library:
Look close at the books.Read about the Olden
Families of Anglia: Mr. Russet’s family is quite old.The Agers family seems
to be long-lived ones. Hmm… Nathaniel built the organ In Ulcombe church.
William died in the 1940’s but brother Thomas was the rector in Northfield
church in 1799.Nicholas Gurney is a
collector of art.The green book on the
bookcase shows the Celtic symbols like the one in Celtic Corner.Check the trilobite left of the library.
6. Spivey’s telescope:
Go left and see a telescope right of a locked door. See that it is supposed to
bring good luck to one who uses it.D. Saxton Warrior:
Check the helmet left of the telescope. It is supposed to be Ganwulf’s.Left of the helmet,
click on the hand and watch the video of Northfield church. Go left.Video room: Enter the video room
and watch the movie about Saxton town.Exit and look at the camera on the wall spying on
the room.7. Suicide Noose of
Edward Molina: Press the button to identify the noose.
Use the recorder on the noose. Listen to the noose recording. Look around
at other
displays.Go to the back of the
room and enter the elevator. Go to the second level.8. Go right and look
at the coat of arms on top of the entryway at the corner.Go to the end of the
hallway and look close at the Tree of Crows. Use the recorder of the painting.
Listen to the Tree of Crows recording and hear crows.Go to the elevator and
press 0 to get to the basement. Uh, get back to the elevator and go the #1
level.You might hear that
the museum is closing. Leave the museum.
The Ark:
Go down the road and knock on Nanny Noah’s door across the window of the
museum. Hear George bark.
Say hello to George.
Look around at the painting and the picture of the little boy above the
fireplace.Talk to Nanny Noah.
Pass the time while having tea. Talk to Nanny Noah
again.She gives a charm when she learns that Nigel is going by the tracks.
Show her interesting items in inventory and she can give some info.Give Nanny Noah the
Thursday Memorial for Evelyn Ackland from Northfield Church.Nanny Noah reads
Nigel’s palm.
Moon rises over
Saxton. Beautiful!
Harbour cottage:
Nigel climbs upstairs to the bedroom.
Bedroom:
Leave the evidences on the table. Review the pictures and recording if you
want.Click on the bed and
see a scissor under the covers.
Night Two: A return to the Carrion Woods
Wake up at 3 AM. New
things to do are added. Go downstairs and hear
a rattling sound.Bathroom:
The rattling sound comes from the bathroom door. Someone is shaking the door.Look close at the
door’s handle. Look through the keyhole. A shadow passes through.Open the door and
enter. See a shadow at the corner. Turn on the lights and see it is the shadow
of the dress form.Something is on the
sink. It looks like hairs. Hear grunting sound and the hair on the sink is
gone.Use the camera on the
mirror.Living room:
Use the camera on the armchair and see a woman. Use the recorder on the
armchair. Listen to the armchair cassette.
Exit the cottage. See
a letter left by the drainpipe of the cottage. Read the invite letter of the
stationmaster about poltergeist activity in the Saxton’s station.
Saxton train
station: Go right to the path after the crates on
Quayside. Go forward and right to the alley.
Enter the station. Use
the camcorder on the pictures ahead right of door. Click twice and look close
at the picture of the train by the Saxton station. See men waiting to climb
aboard.Pull back and now use
the camera on the pictures. See 3 additional men in the Station Staff picture
posing at the station.Use the recorder on
the pictures. Listen to the tape of the train coming.Exit the station.
The Bear:
Talk to Bob Tawny tending the bar. Bob gives a book about The Legend of Grindle and Ganwulf. Open the book and see that it is dedicated to darling by
Rose (Nanny Noah).
Railroad tracks:
Go to Northfield Church. Exit the town; pass through the Fens and to the
railway tracks.
Hear all the warnings
about the tracks during the night.Phantoms:
Walk the tracks pass the station depot.Watch what occurs on
the signal post. A black mist appears.See phantoms come out
of the black mist. Use the charm given by
Nanny Noah on the phantoms before they reach you.
Northfield Church:
Go forward and cross the bridge to get to Raven Lane. Use the
camcorder when it becomes too dark just before entering the cemetery.
Get to the
church: The starting place is the tombstone with the
flowers in front.Go right and see the
church ahead. Go forward. Turn left and go
forward. Go around the side of the church. Enter the church.Church:
Look at the items on the table. Read the letter left by Mr. Russet.
Read the book Hedge Witch book.Go down the aisle and
see the black mist blocking the way. Go back and review the book on the table.
Collect the plants
necessary to trap the black mist.Exit the church and
look for plants.The starting point is
the side path from the entrance to the closed door of the church.Turn right and take
the #3 – Creeping Ivy climbing on the tombstone.Turn back to the left. Go around the church
walls to the other side.At the right corner,
beside the closed door pick up the #1 Binding Nightshade plant.Forward and dogleg to the back
side of the church. Be just off the church wall.Turn right and take
the #2 Preachers Fear plant.Turn back to the left.
Go forward once, left and pick up the #5 Ash Thorn plant.Turn back to the right
and go forward. Turn right and go forward once.Turn left and pick up
the #4 Witch’s Bane.
Bind the Black Mist (Thomas Ager).Go back to the church. Turn left and forward to go
back to the church.
Go forward See a pile
of rubble
Turn left Go forward
Turn right Go forward
and see this cross
Turn right
and see the entrance to the church.Turn right
and see the door with the black mist.Go and face the closed
door at outside side of the church.Remember the position
of the plants as shown in the book. They do not need to be placed in order.Go close to the locked
door of the church. The black mist appears.At top point of the
arch of the door, place the Binding Nightmare.At right at northeast
position, place the Preachers Fear.At the east position,
place the Creeping Ivy.At west position,
place the Witch’s Bane.At northwest position,
place the Ash Thorn.
Go back around the
church wall at left and enter the church. Now, the church is black mist free.Nicholas Gurney’s
tomb: Go to the sanctuary and the tomb.Use the camcorder
above the tomb. He took my hands… They took my arms…Hands:
Review Thomas Ager’s journal and he mentions that ‘burrowing hands of his
and bury them deep under tombs of stones’.Go outside and go to
the church wall at other side of the closed door.Go to the corner. Look
close at the pile of rubble. Take a pair of stony hands. If you try to
check this rubble earlier, black mist comes out of it.Go back to the tomb
inside the church.Look close at the
effigy’s chest. Place the hands on the stony stumps.Arms:
Now let’s look for arms.Turn around and take a
picture of the coat of arms at the end of the pew.Go to the rood screen
just outside the sanctuary. Look up and take a picture of the coat of arms.Look close at the
stone slab above the effigy and right of the window. Take a picture of the
coat of arms above the 2 women.Go back to the tomb of
Nicholas Gurney.Look close at the base
of the tomb. Place the picture of the rood screen coat of arms on the left, the one from the 2
women at the middle and the pew coat of arms on the right.
Use the camcorder on
the effigy. See the spirit of Gurney rise and say:
With oil and hair, I captured the crows. Seek the tree.Automatically be on
the beach in town.
Night Two: Seek the tree
Museum:
Go to Museum road.
The door to the museum
is closed and no entry is found at front of the building.Go to the front of The
Ark, Nanny Noah’s house. Take the spade by the door.Look close at the
window of the Museum building across The Ark. Use the spade on the window.Automatically, enter
the basement through the window.Basement:
Maintenance room:
Look at the shelves on the right. Take a 40A fuse. Exit the last
entryway.Bathroom:
Enter the entryway to the bathroom.Trash can –
Check the trash can and read the newspaper. Another time warp is noted. Katherine and
Robert died in their house fire 20 years ago. The Ager house goes on auction.Mirror – Go to the
mirror at bottom of the room.Use the EMF meter on
the mirror.Use the camera on the
mirror and see a little girl beside Nigel in the ghost girl picture.Use the camcorder on
the mirror. Nigel talks to the spirit. The spirit answers yes or no.Use the recorder on
the mirror or bathroom door. Listen to the basement bathroom cassette.Exit the bathroom.
Elevator:
Go to the top corridor and to the elevator. See the ghost girl inside the
elevator. Use the elevator button and see that it doesn’t work.Surveillance room:
Go back and to bottom screen and then left.Copier:
See the copier print out paper.Enter the room on the
right.Monitors:
Look at the different monitors on the wall and check if there’s any paranormal activity
seen.Look at the monitor on
the desk. Push the buttons to check the different areas of the museum.At the 4th down left
side row of buttons, it focuses on the ticket window of the museum.Click on the clipboard
and see the numbers 4581.Power box:
Look at the power box on the right wall by the pipes. It has a number lock.Look close and press 4581. See a burnt fuse.
Replace the burnt fuse with the one taken from the maintenance room.See that the elevator
works now. Go back to the elevator.Elevator:
Press the button by the elevator. Enter and go to first floor.First level:
Now we can take pictures.Noose display:
Use the camera on the noose of Molina.Helmet:
Use the camera on the helmet in the butterfly room.Trilobite:
Use the camera on the trilobite.Northfield Skeleton:
Use the camcorder and camera on the skeleton in the display case. See it
wearing a costume and the picture showed a face.3 Kings:
Take a picture of the rotating 3 Kings.Lucy:
Go to the grilled window on the wall right of the 3 Kings. Click twice to look
close inside the room behind the fan. Talk to Lucy.Meet Lucy at the
butterfly display. She came out of the locked door beside the telescope. Talk
to Lucy completely. Nigel gives the EMF meter to Lucy to use.Storage room:
Enter the room left of the telescope. Look around.Net Store Plan:
Look at the painting on the floor. See the back picture is the plan for the
Net Hut that is the desolate building above the Saxton Shores. It was made by
Frederick Ager.Service passage:
Move the file drawer left of the paintings on the floor and see the service
passage for the museum.Enter and hear the
crying of a child. Go left and see holes in the wall. Look through the holes
and see that they are spy holes to the museum. One is behind Emily’s glasses
and another through the Saxton map.Look inside the box on
the floor. Look at the picture of a policeman and newspaper clipping of the
finding of Verity Church’s body. So the child in the basement bathroom is
Verity. She’s crying! Eek!Go to right side and
look at the holes here. The holes on the right are the eyes of the painting
of the woman. Look up and the pipes may lead somewhere.Nigel hears an alarm
or phone. Look through the double holes of the woman’s painting at right room and see Lucy
talk to someone on the phone.Exit the storage room
and talk to Lucy at the butterfly room.Elevator:
Go to the elevator by going left from the butterfly room and forward to the
end of the hallway by the armors.Use the elevator and
press the 2 button. Argh! Verity is still being playful. Verity needs some
talking to.Bathroom:
Enter the elevator and go to 0, the basement. Go to the bathroom.Use the camcorder on
the mirror. Talk to Verity. Find out about the ugly man, William.Someone is knocking on
the door. Exit the bathroom.Elevator:
Go to elevator and go up to second floor now that Nigel talked to Verity.The Tree of Crows:
Go to the end of the hallway.Use the camcorder on
Nicholas Gurney’s painting of the Tree of Crows. Lucy joins Nigel.Take a picture of the
painting symbol.
Harbour cottage:
Automatically be at the Cottage.
Hear a sound.
Kitchen:
Go to the kitchen and read Molina’s journal. It has changed.There’s a picture of
crows. The entry is April 3, 11 and 18th. Dr. Black checked Christina in 1952.Exit the kitchen. Hear a knocking on the
door. Open the door and talk to Lucy.Living room:
Talk to Lucy.Click on the
Environmeter on the table and Nigel talks Lucy in helping.Click on the monitor
of the Environmeter to enter Nigel’s password.Adjust the
transmitter – Click on each monitor and direct Lucy in adjusting the
transmitter.Look at the squares at top left and tell Lucy the
direction to move by clicking on the sentence at bottom left of the screen.Watch for the numbers
to pop up at bottom left and work from there. Nigel will say when it is done.Do all the monitors.
Use the
Environmeter – There are 4 monitors for the transmitters set up in the
bathroom, kitchen – hallway and balcony.Watch the left yellow
bars on the left of each monitor. It measures and shows the activity on that
room.Once the yellow bar
fluctuates to the top and sounds, activity is seen. Click on that monitor to
get a close up of that room. Watch what happens.Click on the X at top
right to get out of close view.Bathroom – Activity that might be seen are floating orbs.
Kitchen –
hallway:Activities
that might be seen are: Wheelchair
that gets overturned. Orbs
shooting from wall to kitchen. Dress form
in the hallway.Orb
activity: Nigel says there is activity here but how can
one determine between dust and orb.Wait for
large circles that float left to right and then click on it to frame it.I found 5
orbs floating. See a sad Eduardo Molina facing the wall.Bedroom:
There is a difference in the room.
Differences seen:A small
before picture is seen at top right inset. Click on the inset to see closer.Click on the
differences to enclose it in a frame: The stag
antler’s shadow, the plaque on the stag’s head, the frame on the wall, the
bald head of Christina, open drawer and the coin on the table.See
Christina crying.
Balcony:
After doing the differences in the bedroom and the orb activity in the
hallway, Lucy sees activity in the beams of the balcony.See Lucy
checking it with the EMF meter. When it gets stronger, Nigel asks questions.
Repeat the questions until another activity happens or the ghost leaves.Lucy leaves
and Nigel climbs to the bedroom.Bedroom:
Place the collected evidences on the table. Place the equipments on the window
sill.Go to bed.
Nigel experiences the same nightmare room with the sickle and picture of the Agers.
April 30, Sunday
Day Three: DeceptionCollect the
equipment from the window sill. Some are missing.See a
picture taken during the night. One of the Agers came out of the cabinet.Go downstairs and automatically get the newspaper
and the second poison pen letter. Read the newspaper and the letter. Someone
was at the museum last night. I wonder who the culprit is.Go to the
bathroom and pick up the EMF meter from the bathtub. Go to the kitchen and
take the recorder from the left drawer.
Quayside:
Exit the cottage. Talk to Nanny Noah at the seat beside the cottage. She
mentions that she saw Lucy going to the coastal path.
Martello
Towers: Go to the beach and Fenland Eye to get to Martello
Tower. See Lucy at top of the tower. Go to the other side of the tower. Click on tower to eavesdrop.
Harbour
Wall: Go back to Harbour wall. See Nanny Noah feeding
the ducks. Talk to her completely.
If hungry,
have breakfast at Lighthouse tower.
Celtic
Corner: Time to check what that symbol seen in the Tree of
Crows painting mean. Go to Celtic Corner.
Mr. Tibbs is
gone.Enter any
picture that can be inserted on the contest box at end of counter.Go to the
bookcase at right. Look at a book of symbols from the center of the shelf.Click the
picture of the symbol from the Tree of Crows on the book. Nigel identifies the
Tree of Crows symbol
as Town or Village.Exit the
store.
Coast
Path: Go to top path until the end and see beautiful
flowers. Take a flower picture.
Harbour
Wall: Go back to Harbour wall. See Nanny Noah feeding
the ducks. Talk to her completely.
Show her the
picture of the flower taken at the meadows.She wants
Nigel to test the Treasure Hunt for tomorrow’s May Day celebration.She
identifies the bloom as Pasque flower. She gives clue 1.
Treasure
Hunt:
Read Clue
1: Sounds like a train and the picture of the
Station Staff.Go to Train
Station and take the Saxton Local Map from the chair. Talk to
stationmaster. I wonder who stole Mr. Gruel’s book.Go to the
picture of the Staff right of the door. Take clue 2.Clue 2:
Sounds like the butterfly collection in the old town hall which is now the
museum.Go to the
museum. Talk to Prof. Oogle. Mines under the Carrion Woods?Go to the
butterfly display. Click on the left side of the butterfly display and get
clue 3 and wire.Telescope
– Hear EMF reading. Nigel gets a strong reading close at the telescope and
Nigel wants to do another pilfering.Look at the
camera on left wall. Hmm… Take a picture of the telescope stand while
standing under the camera so that Nigel is not under surveillance.Use the wire
on the camera. Use the room photo on the wire. Hehehehe!Take the
telescope. Look at telescope in inventory. It is jammed.Bob
Tawny: Go to Bob at Coast path.Talk to Bob
about fixing the telescope and other topics. If you have any food, give it to
Cairan. Fattening the pig, eh.Clue 3:
Read clue 3. It describes the old Saxon lighthouse.Go to the
Coast path and lighthouse.Now, we see
Lucy as mentioned by Nanny Noah. Talk to Lucy. She gives a walkie talkie.Take clue
4 on top of the barrel.Clue 4:
Sounds like a snake.Go to Celtic
Corner and look at the snake candle holder on the counter. Take clue 5.Clue 5:
Ah, it sounds like the siren at the tidal chamber of Saxton
Caverns.Go to the
Saxton caverns left of the steps of Harbour wall. Enter cave and see clue 6
flying by.Use the
camcorder at dark area, go forward for a while, left at sea monster, right and forward
until the Tidal Chamber.Talk to
Emily, the siren. Show me you are here. At can I help you in some way, see an
active spot at bottom left. Place the picture of the Pasque flower on rock.
Emily is released.Take a
picture of Emily’s symbol seen.Now Emily
and Gurney are released. They are the ones mentioned on the poisoned letter.Exit the
cavern. Take clue 6 from the rock. Nanny Noah wants Nigel to visit this afternoon.
The
Pinnacles: See Prof. Hardacre going left.
Follow him
by going to Saxton Shores, the cave and through Fenland Eye. At the rocky
area, go to bottom screen.Talk to
Hardacre completely. Hardacre is looking through a theodolite. There’s a life
bell here and it needs a crank handle.Look around
the Pinnacles:Go right and
then go to bottom right by lamps. Look in crab box and see rotten fish. Find a
picture of Nigel at right corner of the box.Go right,
forward and see an anchor at top right. Check the corner there and expose the
crank handle. Click on the rod midway down the item. Click again between the
middle and the handle twice. You cannot exit the puzzle until you get
the crank and have clicked on all the active spots on it. Get a crank handle.


Go back and
then take the top path. Continue the path and see the life bell. Look close at
the metal close to the base. Insert the crank handle and automatically turn
it. Listen to the bell. Hear echoes that reverberate on the boulders.Go top left
and then top right. The sound affected Nigel and he gets a vision of an
Anglo Saxon, maybe Ganwulf. You might need to repeat the ringing of the bell and
going to this area to get this scene.Go left and
talk to Hardacre.Go left
twice and down to Hardacre’s equipments.Theodolite: Look through
the theodolite.Click on a
number at the bottom to move the theodolite.See a memorial at -135 and the
entrance to Saxton Caverns is at -180.+135 shows a figure at the Old Net
Store. Lucy is looking for something on the ground at the door of the Net
Store. Hahahahahahah! Go right from Hardacre.Nigel gets a
call from Lucy on the walkie talkie. Right click the walkie talkie in
inventory
to talk to Lucy.
Old Net Store: Automatically be at the Old Net Store.
Talk to Lucy
by the door.Go back to
the path and look at the rock by the cliff side across the steps going down.Lower
floor of the building: Look around. Check the junk and the window.Go back and
talk to Lucy completely. She borrows the camcorder.Go back to
the lower level of the building.Black Mist: Lucy enters
the building with the help of a rock.The window
closes and Nigel is in the dark. Lucy guides
Nigel through the junk.Go L F R F.
Hear a noise. Black mist comes out of the floor.Go L L F
to get to door. Black mist comes out by the door and escape is not possible.Go R R F R
F. Don’t move.Lucy says
Something’s coming. Tell Lucy to run to other side of balcony.Nigel turns
around. Go R R F L F L F F. Click on chain at left. Then click on handle to open
window to get light in.
Ramp:
Look at the barrel with oil cans at right. Pick up Mr. Tibbs collar.Go down the
ramp. See the door rattle and hear a cat crying.Slide the
lever of the door. Enter the room. The door closes shut.Nightmare
room: See the tortured cats.Look at the
pictures on the wall. They are pictures of Lucy and Nigel in different places
and time.Take the
key from behind the top left photo.Go left and
look at the books in the bookcase.Look close
at the Ager Brothers painting on the wall. The one on the right, William is
breaking up.Look close
at desk drawers. Use the key from the photo on the keyhole.The door’s
lever is slid to close the door. Trapped. Swarm of flies attacks Nigel.Go to the
door and try to get out. Use the walkie talkie. Lucy comes.Lucy takes
pictures of the photos for evidence.Check the 2
journals in the drawer. A secret to hide.Take
Frederick Ager’s journal from the bookcase. Read the journal. It talks
about a place in Grindle’s embrace that hides the crown.Look at the
painting again and see that Thomas is breaking up. Two more to go.Talk to
Lucy. Lucy comes
clean about Alex Spitmoor.
The Ark:
Automatically be at Nanny Noah’s. Talk to Nanny Noah and have a rest and tea.
Nanny Noah
gives a May Day raffle 142 ticket.Nanny reads
the tea leaves of Nigel’s.
Harbour
Cottage:
On the way
to the cottage, talk to Bob Tawny up the ladder. Molina was a smuggler.Enter the
cottage. At the bedroom, leave evidences and the Saxton map on the table.Go to bed
and again see the scissors.Wake up at
3 AM by the phone ringing.
Night Three: Nocturnal SurveillanceGo down and
answer the phone. The environmeter detects activity. Click the monitor to
enter the password.Bedroom:
See Molina come out of the cabinet.
Balcony: See bats or hear words said on the beams.Words at
the beams:See a cross
hair on the screen.Move the
cursor-square and click in places to pick up words.The places
are: top center, top right, middle right, center, middle left and bottom
center.Once they
are located. Click on each word to form a sentence.If correct, Nigel
repeats the sentence. Evil which lives within the walls.
Hallway:
See Molina go through the ghost door at end of the hallway or a wheelchair.Bathroom:
Click on the orbs seen floating. There are 5 of them. Then see Christina with
no hair by the sink.Exit the
environmeter by clicking on ‘quit’ on any monitor.Go towards
the hallway to check where Molina went. Get a walkie talkie call from Lucy.
Talk to Lucy.Lucy mans
the environmeter.Bathroom:
See and hear a crying of Christina.Kitchen:
Read Molina’s journal. He mentions what Christina believes and stated. He
repeated those words on the beam’s paranormal phenomena: Evil which lives within the walls.Hallway:
Hear a growling sounds. See the black mist in the kitchen and the Agers at the
hallway.Bedroom:
See the cabinet open and orb activity. The cabinet rattles.Balcony:
Lucy calls Nigel to go down and look at the balcony monitor.A shadow of
a man hanging on the beams is seen. Nigel climbs up to the balcony.Use the
camcorder on the balcony and see the rope. Take a picture and see the rope
shadow on the beam.Use the
recorder on the balcony. Nigel listens to the cassette of the balcony. Molina
says 3418.Bedroom:
Leave the equipment on the window sill and the evidences on the table.Go to bed.
See the
nightmare room again and the door at the end of the hallway. Nigel is now
added to the Ager brothers painting.Nigel
experiences an out of body. Go down to the hallway. Click on the wall and see
Nigel gets overwhelmed by the black mist and sound.
May 1, Monday
Day 4: May DayWake up.
Pick up the equipments from the window sill. Take a look at the photo taken
that night. The Agers were there. Some of the equipments are missing.Go
downstairs and automatically pick up the newspaper and poisoned letter 3. Read
the letter and the newspaper.Bathroom:
Take the recorder from the top shelf.Hallway:
See that the wall is destroyed. Enter through the opening.Look at the
water.Power box:
Go to the power box and click to get light.Safe:
Go to the safe at right.Enter the
numbers said by Molina – 3418. Press the center square with a windmill.Take a
picture of Christina. Use the videocam on the picture and then take a picture.
See a symbol on Christina’s picture.Take the EMF
meter. Read Molina’s journal. It was Molina’s last entry before he committed
suicide. The stagnant water caused Christina’s illness.Look under
the stairs and click on the sealed archway.Exit the
cottage.
Beach:
Go to the beach below the Harbour wall. See the May Day Fayre.
Bob
Tawny’s Hog Roast: Oh No! Cairan! Talk to Bob
completely.Punch and
Judy Show: Go left from the Hog Roast. Check the show.Ghost
Train: Talk to Lucy. Have a ride on the ghost train.
Talk to her after the ride again.Lucky
Dip: Go left and see a barrel behind the caravan. Click on the
barrel until you get a silver spoon.Mystic
Morgan: Enter the caravan. Give the
silver spoon to the Mystic. Learn Nigel’s fortune. Watch the crystal ball.Exit the
caravan. Hear that
the winning ticket is 142.Raffle:
Go left to Prof. Oogle. Nigel won the raffle.Talk to
Oogle after getting the prize. As long as the telescope makes its way back to
the museum…Check the
lighthouse painting won on the raffle. The lighthouse sees from
Northfield to Ulcombe Town.Nanny
Noah: Talk to Nanny Noah.Go back to
Bob Tawny and ask about the telescope.
Celtic
Corner: Go to Coast Path and enter Celtic Corner.
Talk to
Rhys. Go to the bookcase and check the symbol books in the middle of the
shelf.Use the
picture of the Siren symbol on the page. It is a symbol of an eye.Use the
picture of Christina symbol on the page. It is the great Fen. Exit the
store.
Lighthouse: Go behind the store and forward to the
lighthouse.
Use the
telescope at bottom right of the water and see the town.Use the
telescope at bottom left of the water and see Ulcombe church.
Ulcombe:
Exit the lighthouse area and go left across the meadows.
Memorial:
Check the memorial with a eulogy.Tower:
Go left to get to the church.Click on the
clock of the tower. Go to the tower and see that it is locked.Go left and
forward between the tower and building. Go through
the archway.Church:
See birds on top of the archway of the church entrance.Enter the
church and go down the first aisle.Nancy and
Timmy:Nancy
Brewer: Talk to the girl listening to a gramophone.Timmy, the
brother found a key to the tower and hid it. She and
Timmy are waiting for Dad to come home from the war.Timmy:
Exit the church and then go right until the shed. Find and
talk to Timmy in the shed.Mr.
Russet: Go left and talk to Mr. Russet.Riddle:
Go forward, pass the church door and be at the archway and drainpipe.Look at the
Celtic symbol on the retaining wall. See that it
is old language. Read the first line.Go back and ask Mr.
Russet’s help about the stone riddle. He wants to be read the riddle.Go back to
the riddle. Look close and then use the notepad to copy the riddle.Go back to
Mr. Russet. Read him the lines and listen to the translation.He will not
give the answer. The riddle translation is in inventory.Timmy:
Go back to Timmy. Timmy and Nigel try to solve the riddle together.When it is
Nigel’s turn, take the translation paper in inventory and give it to Timmy.Select
Swallow. Timmy gives the tower key.Nancy:
Go back to Nancy inside the church.Talk to her
completely. She asks help to go home and be with Dad. Learn that happened to
them was caused by a man in black when the cliffs gave away.Tower:
Go to tower. Use the tower key on the door.Climb the
ladder to be at top of tower. Use the
telescope on the sky and see a man at the Memorial.Memorial:
Exit the tower. Go to the Memorial and look at the eulogy.The ghost
man was Nancy and Timmy’s father. Use the notebook on the eulogy to copy what
the father wrote.Nancy and
Timmy: Go back to the shed at the back of the church.Click the
eulogy copy on Nancy. Nancy reads the eulogy to Timmy. Rest now.Tower:
Go back to the tower.Read the
books on the floor. Check the machine on the table.Go down the
stairs and see a door with a button lock. Take the
wheel by the barrel.Go back to
Mr. Russet at the side of the church and ask for help about the machine. It is
a steam machine that he made for the organ. The organ has a curse. Ask about
the metal door. It is the crypt.Go to the
shed. Enter the shed.Take
Nathaniel Ager’s journal. Read the journal and learn about the organ.
Nathaniel’s organ playing
shakes the earth. Take the
oil can.Go back to
the tower.Steam
machine: Look close at the steam machine on the table.Look close
at the tank on the left. Use oil can on the tank.Press the
button on the machine. See fire, steam and the pump start up.Cellar:
Go down the stairs. See that the
crypt door is now powered by the steam machine upstairs.Crypt door:
Look at the door. It has a 5-button lock.Press
buttons and listen to the sound.If the
button is pressed at the correct order, it makes a higher click sound.If the
button is pressed when in the wrong order, it makes a lower thud like sound.The top
right has a click sound. Now find the next button that produces the second
click sound.Then start
from top right, the second and look for the third. Always start the sequence
from the first correct ones to find the next one.Click on top
right, bottom left, middle, bottom right and top left.
Ulcombe
crypts: Enter the crypt.See that the
passage close to the entrance has candelabras. Use that as marker in the dark. There are no matches to use. Use the
camcorder to see the passageway.Go forward
and eek! Look at the walls on each side on every step. Occasionally get hit by
stone.Check the
cells on the left. Turn the corner and look inside the next cell. Take the
piece of broken candle stand from the floor.Go forward
to the other corner. Open the coffin ahead using the broken candle stand.Read the
book. The Dance of Death tells about the waning crescent moon, the moon like
sharpened scythe and the darkling moon.Continue
forward on the passageway on the right.Triptych
– See an ornate door on the right and a triptych across the door.The panels
of the triptych depict pictures with moon on top.Each panel
can be rotated. Turn the
panels to show the moons described in the book Dance of Death.Left is the
waning crescent moon, the middle is like a scythe and the right is the
darkling moon.
Ager
Tomb: The ornate door opens.Enter and
see the way to the skeleton on the slab is blocked by the black mist.We can not
pass through. We contained Thomas at the Northfield church. We can do this to
Nathaniel. Go back out.Exit the
crypt. Go right and forward.Check the
paintings on the wall. Turn the corner, forward and left. Forward until the
door.Church:
Go back inside the church. See that steam now flows through the pipes.Play
Nathaniel’s music in the organ:Power the
organ:Go to side
passage of the organ. Go forward to the end.Look close
and then place the wheel found at the tower cellar on the knob of the pipe.Turn the
wheel to steam power the organ. The organ now works. Go back out
to the organ.Gramophone: Go down the
first aisle to the gramophone.Turn the handle. Look close
at the gramophone and read the record.Use the recorder on the gramophone. It was conducted
by Nathaniel. Listen to the music recorded and hear a different music.Turn the
handle and take a picture of the gramophone.Nathaniel’s music: Go
further down the aisle.Read the book on the table. Learn that Nathaniel’s
best known work starts with F#. Also note the organ keys guide.Look at
Nathaniel’s journal. See that the snake has notes. There are notations from top to bottom. F# A ? B A# ? D.Listen to
the recording of the music and hear 7 notes. The journal shows 5 notes plus 2
erased. Play the cassette and determine the 2 missing notes.
Go to the
organ and play the notes.Play F# – A
– G – B – A# – C – D.The music
reverberates through the church, outside and the crypt. The place is free. Free of its dead.
Nathaniel is exorcised.
Crypt:
Go back to the tower and the crypt.Use the camcorder in the dark part of the crypt.
Go right at first intersection. Go left and enter
the Agers tomb at left.Go forward and see Nathaniel’s skeleton.
Take a picture of the crypt symbol on the
wall.Exit the tomb, crypt and tower.
Mr. Tibbs: Go forward and see
Mr. Tibbs. We need him to follow Nigel.Go back inside the church. Go to the middle aisle
and look close on the floor between the pews.See a rat trap. Use the broken candle stand on the
trap. Take the Stilton cheese. Rats with very sophisticated taste.Go back to Mr. Tibbs. Click the cheese on Mr. Tibbs.
Go towards the town at right.When Mr. Tibbs stops, click the cheese on him again
to get him going.
Celtic Corner:
Automatically enter the store and talk to Rhys.
Book of symbols: Look at
the middle book at top shelf of the bookcase.Use the
picture of the tomb symbol on the page. It is a symbol of mountains.Read the description at bottom right of page. It
states that the symbols when turned can have different meanings. Also they can
form a sentence when the symbols are combined and can give directions.
Harbour
Cottage: Go back to Harbour cottage.
Bedroom: Place evidences
collected on the table.Symbols: After getting 4
symbols and have identified them using the Book of Symbols, it is time to see if it
can direct to the next destination.Open the Saxton local map found on the table. Use the
4 pictures with symbols on the local map.Place: The town or village symbol at top left. The eye at
top right. The great fen at bottom right. The hill at bottom left.Turn each symbol and note the directions stated.
With all the evidences and clues gathered through conversations and books, use
the symbol to describe the direction to the place where the crown is located.Turn the symbols: Beneath the
town, through the Eye, through the Fens, beneath the hill.The treasure is beneath the Carrion Woods. Prof.
Oogle mentioned that there are mines there and that the mystery skeleton was
found there too.
Day Four: The treasure
revealed
Carrion Woods: Exit the cottage and the town proper.
Go through the beach, the Saxton caverns, Fenland Eye and the fens. Pass through the station and go to Raven Lane. Enter the Carrion Woods.
Go left until the middle crossroad (2 clicks upon entering the wood). See and
take a pinecone at the base of a tree. Check the Carrion Woods map for
directions.Go left and see millstone #2. Take the path going to the bottom of the screen.
Mine: Enter the mine.
Look close at the barrel at left. Take the plunger from between the
barrels.Go right and see a box connected to a cable. Take sweaty gelignite
from the box below the makeshift table.Read the scroll written by T.G. concerning knockers right of the table.
Go back and enter the mine. Go to the end and see that it is blocked by boulders. A cable is already laid
out between the boulders.Place the sweaty gelignite on the boulder. Go back to the box on the makeshift
table outside the main mine passage.Look close at box and use the plunger on the box. Automatically the plunger
goes down and explodes the gelignite.Go back to the mine. Go forward and read the book on top of a boulder. It was
the last words written by Alistair Farleigh after hiding in the mine from a
man wearing a hat and black cape on April 1924. Now we know the identity of the
Northfield skeleton. Click on his name.
Outside the Secret Kingdom:
Decorative stone at hanging bridge: Go forward until the
decorative stone on the wall. Look at the decorative stone. Use the recorder
on the stone tablet. Listen to cassette and hear 3 tones. Take note of the
fiery brazier with a dragon.
Open the stone wall: Go forward until another hanging
bridge.
Go right after the arch and see a wall blocking passage. There’s a tile on the
wall.Turn back and go left after the arch. Look close and
see the wood pipe broken in one part allowing water to fall and not reach the
waterwheel at right. Use the pinecone on the broken part. See the waterwheel
turn.Go back to the right after the arched entryway.
Press the tile on the wall now that it is activated by the waterwheel. The
stone wall goes down.
Secret Kingdom:
4 Seasons room: Go
forward through the hallway. See another tile on the wall. Oops, the wall goes
up. Press it again to lower the stone wall.Go forward and be at the bottom of the waterwheel
activated earlier.Waterwheel – Go forward to the waterwheel.
Look close at the waterwheel. In between the spokes, see a picture of a fish
and spring.Seasons door – Go back to the right on the walkway; look at
the closed door in front of the wheel. It has the old symbol of All Seasons.Go back outside at right again and press that tile on the wall that
raises the stone wall. Go back to the seasons door and see that it is lowered
and opened.Seasons wheel – Enter and go forward.
See a 4 seasons wheel with season disks on each
side and 2
rings. The disks are winter on top, spring at right, summer at left and fall
at the bottom.The outer ring has the dragon, fish, hare and bird.
The inner ring has the elements:
fire, water, earth and wind.Turn the rings to show the clue seen behind the
waterwheel: Spring, fish and water.Turn the inner ring first to position water with
spring at right.Then turn the outer ring to position fish with
spring and water as shown by the waterwheel or dragon above the fire as noted
on the brazier by the decorative stone at the hanging bridge.Take disk #1 from the center that opened.
Exit the room and back to the walkway.
Clockwork passage: Continue
through the arch left of the waterwheel.Look at the skeleton under the fallen column. Take
disk #2.Waterwheel Passage:
Go left at the hallway on top.Look close at the white area between broken column
base. Take disk #3.Wind stone wheel: Go
forward through the archway. See that this is the feasting room.Look around. See a 3 crowns tapestry at the end.
Wind sound puzzle: Look
close at the 3 stacked round cylinders with holes on the left.Hear the wind pass through the holes to make sounds.
Listen to the recording of the decorative stone
taken by the first hanging bridge.Turn the wheels to reproduce the sounds from the
recording.Turn to get 2 on top, 4 in a square in the middle
and 3 at the bottom. Take disk #4.
Exit the room to the end.
Seer Pools room: Go right
at the hallway.See a room with 9 stands. Each stands shows an event
in Nigel’s adventure in Saxton.Black mist emanates from the center of the floor.
Stand 1 below the entrance and stand 9 at the other
side of the entrance are unchangeable.Stand 1 shows Nigel’s arrival at the SedgeMarsh
depot. Stand 9 shows Nigel entering the Secret Kingdom.The object of the puzzle is to show the next event
in Nigel’s life at Saxton.Going clockwise from bottom of entrance:
Stand 1 (unchangeable) – SedgeMarsh depot.
Stand 2 – Nigel talking to Nanny Noah at Saxton
Shores.Stand 3 – The opened chest at Smugglers cave.
Stand 4 – Ager’s (Karswell’s) house at Raven Lane.
Stand 5 – Northfield church.
Stand 6 – Saxton museum surveillance room at night.
Stand 7 – With Prof. Hardacre at the Pinnacle.
Stand 8 – The Gypsy caravan at the May Day Fayre.
Stand 9 (unchangeable) – Nigel at start of Secret
Kingdom.Disk pattern: The mist at center
of room disappears. Go to the center
of the floor.Use the 4 disks located from all around the secret
kingdom on the round indentations. They will
be inserted automatically at the correct place.The object of the puzzle is to arrange the pattern
of the 4 outside disks to match the adjacent pattern seen on the center disk.
Click the center disk to reset the puzzle.Click on all 4 outside disk once and then click the
bottom left disk again (5th click). The floor opens and a pedestal comes up.
Tomb hall: Go to the center of
the floor and the pedestal lowers to the columned tomb hall.Go forward and see the tomb with swirling light
above it.Click on the tomb. Open the tomb. Look close inside.
When the light shines to see Ganwulf’s skull, take
the crown. Ganwulf speaks.Automatically be at the entrance to the secret
kingdom. Exit the mine.
Night Four: To share a
secret.
Carrion Woods:
Exit the woods by avoiding the black mists emanating
from the stone cairns.Go left from millstone 2, above millstone 1, right
at lower path, bottom right at intersection (pinecones) and right to exit the
woods.
Go back to Saxton town and then to Harbour cottage.
Harbour Cottage:
Bedroom: Go to the bedroom.
Place new evidences on the table.Use the rusty key on the chest at the foot of the
bed. Place the crown inside.Exit the bedroom and see the cabinet door
open. Exit the cottage.
The Bear: Enter the Bear
and go to the back room.
Hear who won the Saxton Snappers Competition. Talk
to Rhys.Talk to Lucy completely. Lucy shows that she got the
crystal ball.
Harbour Cottage: Automatically be in
the cottage.
Bedroom: See that the room
has been ransacked, the chest opened and the crown gone. Someone has stolen
it.Living room: Watch the
crystal ball and ask questions.See the culprit running, being chased at the
Pinnacle and getting attacked with a sickle.The next morning, Nigel is alone, disoriented in the cottage.
Take the newspaper and letter.
Day Five: A shadow
across the landA new set of things to do is seen on the notepad.
Read the newspaper and the poisoned letter. EG, who
is EG? Ah, yes… Read about the newspaper to learn about bad things that has
happened overnight in
Saxton. The animals and birds are gone.
The Pinnacle: Exit the
cottage. Go right and hear barking.
Go to the Pinnacle. Go to beach, Saxton cave and
right to the Pinnacle.Go to the right and see police tapes. Go right and
talk to Nanny Noah. She refuses to know Nigel.Talk to the policeman. Talk to Alex, the detective.
Hat, glasses and plaid coat… See what happened to
Prof. Hardacre.
Saxton Town:
Talk to
stationmaster at the depot, Prof. Oogle at the museum and Bob Tawny at the
smithy. See a replacement for Cairan is here. Nigel is ignored by the
townspeople.Northfield Skeleton: Use the
phone booth and use Crime Line phone number on the phone.Report that the Northfield skeleton is Alistair
Farleigh. Alistair’s soul is free.
Seat by Harbour cottage: Go
left of Harbour cottage and talk to Lucy. Leave Lucy.
The Bear: Go right and see what
happened to EG – Gruel. Jemima…
The Pinnacle: Automatically be
at the Pinnacle.
Boots and footprints: Go
right until the crime scene. Look close at evidence A – the boots. Use the
camera on the close up of the sole of the boots.Go left and then bottom right. Go to life bell and
look on the sand. See footprints. Use the picture of the boot sole on the
footprint.Go left by the lobster trap and look close on the
prints in the sand. Use the picture of the boot sole on the prints on the
sand. A match, a perfect match.See Hardacre’s ghost pointing to something. Look
close at the small cave left of where the ghost was standing. Take the
crown.
Seat by Harbour cottage:
Automatically be facing Lucy. Talk to Lucy again completely. She agrees to
help tonight.
Harbour Cottage: Automatically enter
the cottage.
Cellar: Go down the hallway
and enter the stagnant water area at the cellar.Safe: Go to the safe.
Open the safe by pressing 3418 and then the
windmill. Look close inside and place the crown inside.Help Christina: The light bulb goes
out and see a light by the stairs. Take the paper on the water under the stairs. Read
Christina’s letter to her mother. She believes that Edward is trying to
kill her. She has a hidden diary. Take note of the places where Edward’s mechanism is
heard.Secret hiding place: Go upstairs
and see that the place has changed.Find Christina’s hiding place by clicking on windmills (Molina)
seen around the house in the order stated in Christina’s letter.1. Look close and click the windmill on the newel at
top of stairs at the balcony.2. Look close and click the windmill at top left of
the door frame of the living room to hallway entryway.3. Look close and click the windmill on the newel at
bottom of stairs at the living room.4. Look close and click the windmill at top left of
the door frame of the bathroom entryway.Hear a swinging door.
Go to the kitchen and see that the closet at top
left is opened. Look inside and read 4 pages of Christina’s diary.Nigel talks to Christina. Christina and Edward are now
free.
Living Room: Hear a knocking.
Let Lucy inside the house.
Phone: The phone rings.
Answer the phone. Hadden wants to talk to Lucy.Lucy talks to Hadden. He said – to pull you back
when the time is ready.Séance: Go to the place where Hardacre came through the cottage.
Go to bedroom. The cabinet is active. See Hardacre
all over the room.See Hardacre go to the safe at the cellar. Nigel
follows.Light comes out of the safe. The crown floats. It
is me that you want. Nigel is pulled in the light.Ganwulf talks again. Nigel is in the Tomb hall.
See all the Saxton population here. Click on each of
them.Go to tomb. Place the crown back on Ganwulf’s head.
It felt… eternal. Forever.
This
document may not be distributed without express written permission of the
author and the content may not be altered in any way.For
Questions or Comments on this Walkthrough,
Please write to:
MaGtRo
Copyright © 3/2008
MaGtRo