Myst IV: Revelation

All images in this walkthrough are property of Ubi Soft
Entertainment™
Walkthrough by Bert Jamin
© October 2004
Bert Jamin (www.gamesover.com)
This walkthrough may not be sold and may not be used for any commercial
purposes. Neither is it permitted to publish this walkthrough in any way without
the written permission of the author Bert Jamin () and his E-mail address are mentioned unchanged. For the most up to date walkthroughs always visit www.gamesover.com.
If you have any suggestions
to improve this walkthrough, let me know by sending me an email: .
Click on one of the books
to go to that chapter,
 Tomahna |
 Spire |
 Serenia I |
 Haven |
Serenia II |
or click on the image at
the bottom of this page to go to the next chapter.
Attention: I’m writing this walkthrough while playing the game
for the very first time. Maybe I’ll have to update this walkthrough during the
game! So check often if there are any improvements… For the last time updated
on: 10.31.2004
.
Chapter 1, Tomahna by Day
– Part 1
You start your adventure in
a gondola with Yeesha, the daughter of Atrus and Catherine. Hang-on and join the
ride! When you arrive in front of the landing platform, Yeesha will stop the
gondola to enjoy the view. She tells you to make a picture of the nice view.
She warns you not to place your finger in front of the lens because her
father does that and always ruins his pictures. To take a picture, click on your right mouse
button. Then move the cursor to the photo camera at the bottom left side of your
screen. Make sure you have the landing platform in your viewer and then press
the left mouse button for your first picture.
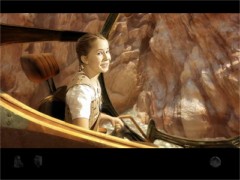
Nice view…
When you reach the
landing platform, wait until Yeesha enters the building to tell her father
that you have arrived. While you are standing in front of the door, look to
the right and pull the lever attached to the railing. Enter the opened door.
Climb up the stairs to your right.
Look to the right and you’ll
see a small type of planetarium standing on the desk. Move the lever at the
bottom of the device to turn the planets. Open the drawer of the desk. Examine
the drawer. Hmmm… nothing! Zoom out and close the drawer. Turn to left and move one step
forward.
Turn to the right and open
middle drawer of the desk. Also examine this drawer to find… nothing again!
Open the small cupboard with the small squares at the left side on top of the desk.
Zoom in. Hmmm…
nothing except little empty flasks! Zoom out. Turn to the left and go one step
forward. The father of Yeesha, good old Atrus, now welcomes you.
Listen to his story. It
seems that he has build a new device called a Crystal Viewer to get linked to the different
Ages. Atrus is absolutely sure that the Crystal Viewer will work
properly. The only thing is… it must be calibrated first. It would be good if
you would help him with that. He points to the control panel behind your back.
If you zoom in on the panel,
you’ll see that the control panel has a slider and three dials. With those three
dials from the left to the right you can adjust the amplitude, the frequency and
the phase by turning the dials. First of all save your game, just in case of
something goes wrong!
Follow Atrus’ instructions. For a large part I can help you with that. The last part however is a little
tricky. To accomplish the last part you must listen very carefully to the instructions
of Atrus. Each time he tells that you must choose another signal, you must
move the slider. The first set of coordinates is for Achenar’s Prison Age called
Haven. Here we go:
move the slider to the right
turn the left dial all the way to the right
turn the right dial all the way to the right
move the slider to left
turn the left dial all the way to the right
turn center dial all the way to the right
That’s it! The first set of
coordinates for Haven has been set. Now the second set for the Prison World of
Sirrus, called Spire…
move the slider to the right
turn the left dial to 45 degrees to the right
turn the center dial to 45 degrees to the right
turn the right dial to 45 degrees to the right
move the slider to the left
turn the left dial to 45 degrees to the right
turn the right dial up to 45 degrees to the right
turn the center dial a little to the right
For the last part you make very
small adjustments. So follow Atrus’instructions very
carefully until you have set the second coordinates! I can only wish you good
luck with that!
When the calibration has been
done, the happiness is however of very short duration. Something seems to be very
wrong with the Crystal Viewer, and as a result the Crystal Viewer breaks
down… Atrus leaves for Rime to find some materials to fix the Crystal Viewer. In the meantime you
only have to restore the power supply and you have to get the Crystal Viewer to
work properly again to get in touch with him. He also tells you not to forget to slide out the antenna on
the roof!?!?!?!? The last thing he kindly asks you is to keep an eye on Yeesha. And off he goes, leaving you a little helpless and bewildered
behind…
The first thing what we’ll
do is to restore the power supply. Turn around and take one step into the
direction of the broken Crystal Viewer. Turn to the left and you’ll see an elevator
door beneath a little stair. Pull the lever at your right to open the elevator
door.
Enter the elevator and wait
until the door is closed. Look around and move the handle with the red lights to
the center position. When the elevator has arrived at it’s destination, pull the
beige lever at the right side of the elevator door and exit the elevator.
Remember that you can find the elevator here. Turn to the right and follow the
wooden planks until you are standing in the first greenhouse. Turn to the left
and go further along the wall of the greenhouse. When you stop, turn to the right
and go through the opening in the wall.
A little further Yeesha is
standing in the entrance of the next greenhouse and calls that you must come
quickly. So quickly walk to her. When in that greenhouse go to the right and Yeesha
will show you a green colored gecko. When Yeesha leaves, turn around and walk
further into the greenhouse. When you stop, turn to the right and go through the
next opening in the wall of the greenhouse.
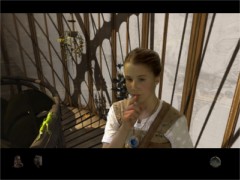
The green gecko…
Walk straight on to the
wooden planks that are leading into a rock formation in the distance. Walk
further until you enter the rock formation. Examine the room and you’ll see a
huge water wheel that has stopped due to the little accident with the Crystal Viewer
resulting in no power for the moment. In front of you you’ll
see a pole with a button on top, two orange blinking symbols and below them a
large lever.
First, take a picture of
the orange blinking symbols. After that, pull the large lever to reset the device.
Notice that the two orange symbols will no longer be lit. Turn around and exit
the rock formation. Walk straight ahead into the greenhouse. Exit the
greenhouse through the next opening in the wall. Look to the left and see that
Yeesha is standing in her mother, Catherine’s garden chamber.
Enter that garden chamber.
Yeesha will tell you that there is something wrong with the power box.
Catherine made that power box because Atrus has caused accidents with the
power supply in the past. Walk into the direction of the power box. Yeesha is
showing you some captured fireflies. When she disappears, zoom in on the
power box and pull up the shutter.
At the back of the power box
you’ll see six panels, of which, only two are lit and have the same kind of
symbol at the bottom you saw earlier in the rock formation with the water wheel.
You will also see two rows of buttons that look very much like the buttons of an
old-fashioned typing machine. To the left you’ll see a lever and to the right a
large push button.
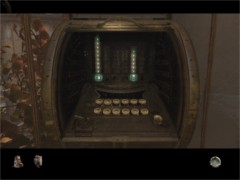
The power box before…
With the lever to the left
you can reset the device and the push button. To the right is some kind of enter
button with which you have to confirm your entries. With the back row of buttons
you can send power and with the front row of buttons you can receive power. To
send power to the rock with the water wheel you have to push the next buttons
from the left to the right:
back row 1
front row 4
enter
back row 4
front row 5
enter
back row 5
front row 3
enter
back row 1
front row 6
enter
back row 3
front row 6
enter
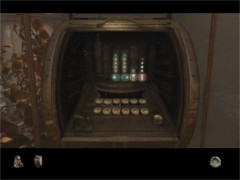
…and afterwards
When you have done this
correctly, the symbols of the water wheel will blink and the power box will close.
If this doesn’t happen, you have done something wrong. In that case you have to
pull the left lever to reset the device and try again.
Turn to the left and leave
the garden chamber. Enter the greenhouse at your right and walk further to the
left side. Go through the opening in the wall. Walk straight on the
wooden planks that lead to the rock formation. Enter through the opening in the
rock to end up once more in the room with the water wheel. Notice that the two
symbols are lit white now, which means that there is power. Push the button
above the symbols and the water wheel will start to move. Congratulations… you
have just restored the power!
Turn around and go to
outside. Walk forward on the wooden planks. In the distance you’ll see Yeesha
walking to the right. Unfortunately something else has gone very wrong now. With a thundering noise the walking planks collapse, leaving you behind in
the water. For the moment you have no idea what caused the explosion but you
find out soon enough. Notice the green glow caused by the explosion…
Tomahna by Night – Part 2
Climb out of the water via the blue-lit planks.
Walk all the way back to the elevator via the two greenhouses. Pull the lever and step into the elevator. Move the handle with the red
lights into the upper position to return to Atrus’ study. Now it’s time to
accomplish the next task: to get in touch with Atrus. Open the elevator.
Walk to the panel that you used at the beginning to establish the amplitude, frequency and phase with
Atrus. No… you don’t have to do that again. Open the upper drawer at the right
of the round
desk. Look through Atrus’ diary that is lying in the drawer.
Approximately in the middle of the diary you’ll see an image of five colored
crystals. Make a picture of these crystals!!! It’s the crystal combination for
Rime, the place Atrus has left for.
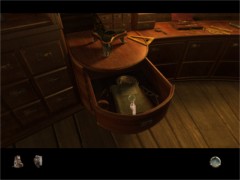
Atrus’ Journal
Turn to the left and walk
toward the Crystal Viewer. Climb up the little stairs at the left side and walk to the three circular guarding monitors.
Zoom in on the monitors. Look to the right and you’ll see a
large drawing. Flip over the first drawing and you’ll see a sketch of a
telescope. Turn to the right a little and you’ll find a switch that is difficult
to see. It is in the direction of the elevator.
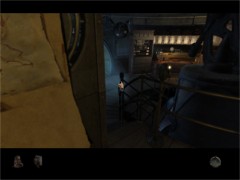
The very hard to see switch
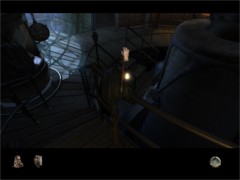
That’s it!
Walk
to that switch and press the switch all the way down. That will
open a part of the roof. Seems like a good idea to me to use the telescope! Turn
around and walk back to the guarding monitors. At the left of it climb up the
little stairs. Turn to the left and below you’ll see a little chair. Take a seat
and push the red blinking button to go up in the direction of the telescope.
Zoom in
on the telescope and press the upper-right button that has on it an image of a lighthouse.
The button
is now lit orange and more importantly, now the antenna on the
roof will slide out. Turn the wheel to the right to get a complete picture
of the moon.
Zoom out
and press the red button on your chair to go down. Turn around and step on the
platform. Turn to the right and walk toward the Crystal Viewer. Notice that all
the crystals are burning now on
top of the device. It should work properly now.
Zoom in on the Crystal Viewer. Your goal now is to get in touch with Atrus. First of all
save your game. You never know when something will go wrong.
Now have
a look at your Journal. That is the device at the bottom leftof your screen
next to the photo camera. Take a look at the picture of the crystals you just
took in Atrus’ diary. Zoom in on that picture and make a sketch of those crystals
and note the colors of each and every crystal. You can also refer to the photo
before setting each crystal eliminating the need to sketch them.
Now have
a closer look the Crystal Viewer.
At the top you see a display that now only shows snow. Beneath the display you’ll
notice five sliding lids with buttons underneath them. At the right side you see a
circular panel with colored dots, a little lever above the dots and a slider
above the colored dots. Note that the little lever is situated over the red dot. That’s
fine because that
is the color you have to start with.
Move the
slider on the circular panel to the right and see that another form of a crystal
will be projected on the circular panel while sliding the slider. Be sure that
you move the slider all the way back to the left. Now move the slider slowly to
the right and be sure that you see the sixth image of a crystal. Then press the
left button underneath the display. This opens the lid and you’ll see that the
same shaped red-colored crystal is now in that box.
Now move
the little lever over the pale blue dot. Be sure that you move the slider all the
way back to the left. Now move the slider slowly to the right and be sure that
you see the third image of a crystal. Then press the second button underneath the display.
This opens the lid and you’ll see that the same shaped pale blue-colored crystal
is now in that box.
Now move
the little lever over the yellow dot. Move the slider all the way to the right
this time. Then press the third button underneath the display. This opens
the lid and you’ll see that the same shaped yellow-colored crystal is now in that box.
Now move
the little lever over the green dot. Don’t move the slider this time! Then press
the fourth button underneath the display. This opens the lid and you’ll see that
the same shaped green-colored crystal is now in that box.
Now move
the little lever over the dark blue dot. Be sure that you move the slider all the
way back to the left. Now move the slider slowly to the right and be sure that
you see the second image of a crystal. Then press the fifth button underneath the display.
This opens the lid and you’ll see that the same shaped dark blue-colored crystal
is now in that box, which makes the series complete. Now press the large button
beneath the five small buttons. If you
did this correctly, you’ll be in touch with Atrus. If not, you have done something
wrong. In that case give it another try until you succeed.
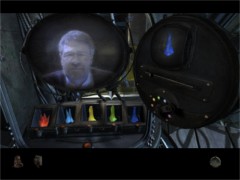
Well done!
Atrus
seems to be stuck in an electromagnetic storm. You can barely here him tell
you to go to his bedroom and to press the button on his desk to discover his
studies about the Ages Haven and Spire. He also asks you to tell Yeesha that she
must not forget to do her homework!? If you want to hear the message again, just push the large
button again.
Turn to
the right and take one
step forward. Pull the lever of the elevator and get in. Move the handle with the
red lights into the bottom position. When the elevator stops, use the beige lever
to get out of the
elevator. Climb up the blue-lit stairs. Look around and read the sign on the floor.
Zoom out.
Turn
around and enter Atrius’ bedroom. Turn to the right and walk toward
the nightstand at the right side of the bed. Read Catherine’s note that is lying on the nightstand.
Notice how her name is written in D’Ni writing. Turn around and walk
toward Atrus’
desk. Open the small cupboard on top of the desk. Zoom in on the opened cupboard
and read the note. You’ll see a sketch of the fireplace. Notice that the two lamps in the
bedroom are connected with the fireplace by laser beams.
Click on
the square button beneath the opened cupboard (thanks Johan Kruk). This opens two compartments. The
left one contains a red/brown book and the right one a blue book. Zoom in on the
red/brown book and click on the amulet. Page through the book to learn more
about the Age called Spire, the Prison Age of Atrus’ son Sirrus. Take a picture of the colored crystals. You never
know if they come in handy later on in the game. Besides that you can take 999
pictures in total. I’ll bet you’ll never taken that many. On the other hand, you
can always delete pictures if you want. That’s one of the benefits of digital
cameras… Zoom in on the blue book and click on the amulet again. Page through
the book to learn more about the Age called Haven, the Prison Age of Atrus’ son
Achenar. Also take a picture of these
colored crystals. So these must be the studies Atrus was talking about! When you
finished reading, zoom out.
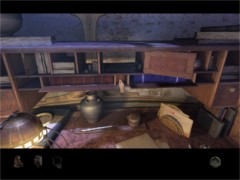
The red/brown book at the left and the blue one at the right
Look a
little to the left and switch on the lamp on the desk by using the switch on top of
it. Turn around and walk toward the left nightstand. Switch on this lamp
too. Walk toward the fireplace and notice that the bottom part is now lit. Step into that part of the fireplace. Look around and see that
Yeesha’s amulet is laying on the floor. Pick it up and click on it to see what has taken place. Remember that Yeesha
told you earlier that she can see things by using this amulet!
Step out
of the fireplace. Zoom in on the painting above the fireplace and
click on the amulet. Zoom out. Exit the bedroom and zoom in on the sign on the floor once
more. Click on
the amulet. Zoom out. Turn to the right and walk past the left side of Atrus’ bedroom. This
brings you to a
platform with an elevator. Walk past the left side of the elevator. Look
around and notice a lever attached to the balustrade. Pull that lever to the right.
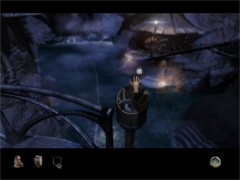
The lever to Yeesha’s bedroom and the living room
Out of
nowhere appears a wooden bridge. Cross that bridge and
you end up in front of the family’s living room. Turn to the right and zoom in on the
table. You’ll see an opened book with D’Ni-signs and the corresponding characters. Click on
the amulet. Take a picture of
the opened book. Zoom out. Turn to the left and enter the living room.
Take a look
at the pictures of the two sons of Atrus and Catherine, Sirrus and Achenar, on top of the
mantel. If you wish, you can light the fire in the fireplace by
using the bellows… Go to the right and study the picture of Atrus and
Catherine. Turn to the left to see the kitchen. Enter the kitchen and walk
toward the sink. You can start some water running by using the tap.
Hit the large pan at the right side above the sink.
Turn to
the left and study the pans on the left side above the sink. Click on the amulet.
Zoom out. Turn around and study the stove. Click on the amulet. Go to the right and walk
toward
the lounge suite. Zoom in on the picture of Yeesha. Zoom in on the chessboard and
click on the amulet. Exit the living room and step on the platform on the right
side. Pull the lever on the
railing at the right. The wooden bridge changes position and now leads to
Yeesha’s bedroom.
Descend the
wooden bridge and enter Yeesha’s bedroom.
Study the table with the fish tank. Walk to Yeesha’s bed and move the pillow.
Pick up Yeesha’s diary and click on the amulet. Look through the diary. Take a
picture of the image with the colored crystals!!! It’s the crystal combination
for the Age called Serenia. Notice that on the next page
she has written that on the second Friday her dad and she had modified the lock
of her bookcase. And because she reads D’Ni-signs now, she has been able to change the backs of the books. Also
notice that she has written that she uses everybody’s name now and that she doesn’t forget
anybody’s age!?!?
Turn to
the left and zoom in on the fancy dress. Click on the amulet. Zoom out. Go further
to the left and study the desk. Zoom in on the crystal and click on the amulet.
Zoom out. Walk further to the left and stand in front of the bookcase. Zoom in on the
glass doors beneath the books. In the left cupboard you’ll see some kind of book
and in the right cupboard you’ll see some kind of cloth. There is no way to open
these cupboards. Now have a look at the books. Notice a lot of books
with D’Ni language on the backs as mentioned in Yeesha’s diary. Remember that she wrote that she doesn’t
forget anybody’s age.
Now there
are two different ways to discover the way in which the names Yeesha, Sirrus,
Archenar, Catherine and Atrus are written in D’Ni-language. One way is by
returning to the garden where you can find the family tree in one of the greenhouses. The
other way is by using the picture you just made of the
opened book with D’Ni-signs and the corresponding characters. This last way
doesn’t need any further explanation I guess. If you happen to choose the first
way, here is how you can find
that family tree. And not only that but I’ll also point out the various spots where you can
use the amulet to see what happened in the past…
If you
wish can play with the wooden ball game at your left. Exit the
bedroom and go up the staircase on the left side. Pull the lever on the railing to
the left. Cross the bridge and walk in the direction of the staircase. Pull the lever of
the elevator. Step into the elevator and move the handle to the center position.
When the elevator stops, open the elevator and get out. Turn around and cross the wooden planks
on the left side. Enter the first greenhouse. Look around and notice the bucket
filled with water. Look down and notice a ladder leading down. Climb down that
ladder.
In that
part of the greenhouse you’ll see a device with a large ball. Push the orange
button beneath the ball to make some light. You can move the ball by using the handles.
Point the beam of light to the right onto the stone shield. Zoom in on the stone
shield that appears to be the family tree. Click on the amulet. Take a picture of the family tree.
Zoom out. Climb
back up
the ladder.
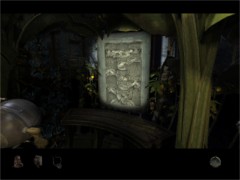
The family tree
Don’t return
to the elevator yet. Turn to the left and walk further through the greenhouse.
Leave the greenhouse through the opening in the wall. Turn to the right and
enter Catherine’s garden chamber. Walk to the left and zoom in on the power box. Click on
the amulet. Zoom out and walk further to the right. Try to open the door of the
garden chamber.
Zoom in on the lower part of that door and click on the amulet. Zoom out.
Zoom in
on the glass tank with the fireflies. Click on the amulet. Zoom out. Turn to the right
and walk toward the wall with the lit bulbs. Open the center bulb and zoom in on the plant. Click on
the amulet. Turn a little to the right and exit the room. Enter the greenhouse
at your left side and continue until you reach to the bucket filled with water.
Exit the greenhouse and walk to the elevator. Pull the lever of the elevator and
get in.
Move the
handle into the
upper position. You’ll end up Atrus’ study. Open the elevator and turn to the
right. Walk toward the door leading outside. Pull the lever at the right side of
the door. Go outside and zoom in on the pole with the orange sign. Click on the
amulet. Turn around and pull the lever to open the door. Go inside and walk to
the Crystal Viewer. Zoom in on the Crystal Viewer and click on the amulet.
Now once
you are here, let’s make a virtual trip to the three Ages of which you found the
crystal combinations. The first two you found in Atrus’ hidden books for the
Ages called Spire and Haven. The last one you found in Yeesha’s Journal for the
Age called Serenia.
Your
first virtual trip is to Serenia. Move the slider on the right circular panel slowly to
the right and be sure that you see the seventh image of a crystal. Then press the
left button underneath the display. This opens the lid and you’ll see that the
same shaped red-colored crystal is now in that box.
Now move
the little lever over the yellow dot. Be sure that you move the slider all the
way back to the left. Now move the slider slowly to the right and be sure that
you see the sixth image of a crystal. Then press the second button underneath the display.
This opens the lid and you’ll see that the same shaped pale yellow-colored crystal
is now in that box.
Now move
the little lever over the pink dot. Be sure that you move the slider all the
way back to the left. Now move the slider slowly to the right and be sure that
you see the fourth image of a crystal. Then press the third button underneath the display. This opens
the lid and you’ll see that the same shaped pink-colored crystal is now in that box.
Now move
the little lever over the dark blue dot. Be sure that you move the slider all the
way back to the left. Now move the slider slowly to the right and be sure that
you see the third image of a crystal. Then press
the fourth button underneath the display. This opens the lid and you’ll see that
the same shaped dark blue-colored crystal is now in that box.
Now move
the little lever over the green dot. Be sure that you move the slider all the
way back to the left. Now move the slider slowly to the right and be sure that
you see the first image of a crystal. Then press the fifth button underneath the display.
This opens the lid and you’ll see that the same shaped green-colored crystal
is now in that box, which makes the series complete. Now press the large button
beneath the five small buttons. If you
did this correctly, you’ll see an image of Serenia. If not, you have done something
wrong. In that case give it another try until you succeed.
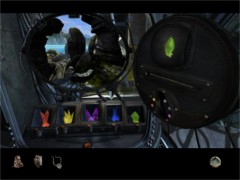
Your first impression of Serenia…
Your
second virtual trip is to Spire. Now move the little lever over the green dot. Be sure that you move the slider all the
way back to the left. Now move the slider slowly to
the right and be sure that you see the first image of a crystal. Then press the
left button underneath the display. This opens the lid and you’ll see that the
same shaped green-colored crystal is now in that box.
Now move
the little lever over the dark blue dot. Now move the slider all the way back to
the left. Now move the slider slowly to the right and be sure that you see the
seventh image of a crystal. Then press the second button underneath the display.
This opens the lid and you’ll see that the same shaped dark blue-colored crystal
is now in that box.
Now move
the little lever over the red dot. Now move the slider all the way to the right
to see the eight image of a crystal. Then press the third button underneath the display. This opens
the lid and you’ll see that the same shaped red-colored crystal is now in that box.
Now move
the little lever over the yellow dot. Be sure that you move the slider all the
way back to the left. Now move the slider slowly to the right and be sure that
you see the fourth image of a crystal. Then press
the fourth button underneath the display. This opens the lid and you’ll see that
the same shaped dark yellow-colored crystal is now in that box.
Now move
the little lever over the light blue dot. Be sure that you move the slider all the
way back to the left. Now move the slider slowly to the right and be sure that
you see the fifth image of a crystal. Then press the fifth button underneath the display.
This opens the lid and you’ll see that the same shaped light blue-colored crystal
is now in that box, which makes the series complete. Now press the large button
beneath the five small buttons. If you
did this correctly, you’ll see an image of Spire. If not, you have done something
wrong. In that case give it another try until you succeed.
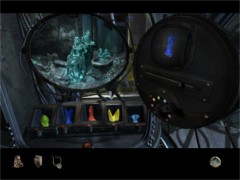
Your first impression of Spire…
Your
third virtual trip is to Haven. Now move the little lever over the dark blue
dot. Be sure that you move the slider all the
way back to the left. Now move the slider slowly to
the right and be sure that you see the second image of a crystal. Then press the
left button underneath the display. This opens the lid and you’ll see that the
same shaped dark blue-colored crystal is now in that box.
Now move
the little lever over the red dot. Now move the slider all the way to the right
so that
you see the eighth image of a crystal. Then press the second button underneath the display.
This opens the lid and you’ll see that the same shaped red-colored crystal
is now in that box.
Now move
the little lever over the pink dot. Be sure that you move the slider all the
way back to the left. Now move the slider slowly to the right and be sure that
you see the first image of a crystal. Then press the third button underneath the display. This opens
the lid and you’ll see that the same shaped pink-colored crystal is now in that box.
Now move
the little lever over the green dot. Be sure that you move the slider all the
way back to the left. Now move the slider slowly to the right and be sure that
you see the fifth image of a crystal. Then press
the fourth button underneath the display. This opens the lid and you’ll see that
the same shaped green-colored crystal is now in that box.
Now move
the little lever over the yellow dot. Be sure that you move the slider all the
way back to the left. Now move the slider slowly to the right and be sure that
you see the sixth image of a crystal. Then press the fifth button underneath the display.
This opens the lid and you’ll see that the same shaped yellow-colored crystal
is now in that box, which makes the series complete. Now press the large button
beneath the five small buttons. If you
did this correctly, you’ll see an image of Haven. If not, you have done something
wrong. In that case give it another try until you succeed.
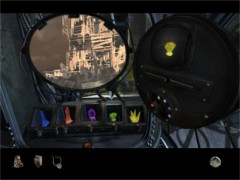
Your first impression of Haven…
When
finished, zoom out. Walk
further to the left and take a seat in the little chair near the telescope.
Press the red button
and zoom in on the telescope. Click on the amulet. Go down by pressing the red
button of the chair. Step on the platform and walk to the circular monitors.
Zoom in on the monitors and click on the amulet. Return to the elevator near the
Crystal Viewer.
Pull the lever
and
step into the elevator. Move the handle to the bottom position. Open the elevator and
go to the right. Cross the bridge. Pull the lever on the railing at the right. Go down and enter Yeesha’s bedroom. Now stand in front of the bookcase. Open your Journal and look at the picture you made of the family tree.
Zoom in on the family tree. Compare the names on the
backs of the books with the names on the family tree. Keep in mind that you have
to start with the youngest one (Yeesha) and have to end with the oldest one (Atrus).
Now you can easily find out the correct order to press the different books to
unlock the bookcase.
Just in
case that you might have problems with that here is the correct order: press the books from
the left to the right in this order: 12, 6, 8, 3 and 14. Whit this the whole bookcase goes down.
Enter the revealed opening. Go to the left. On your way you’ll see some swimming
stuff and at the end of the scaffold you’ll see an easel with a painting. Well…
great!!! Was all that effort only for this!?!? Well… no! You have to come back
here later.
When you are finished looking around, head back to the ladder leading up. Pull the
lever at the right side of the ladder. Exit the bedroom and cross the bridge.
Turn around and pull the lever on the railing to the left. Cross the footbridge
and climb up the stairs at the right side of the elevator. Enter the bedroom of
Atrus.
Enter the lower part of the fireplace. Turn around and push the button. Because of this
a large panel falls down. Look up and you’ll see a panel with a lot of square push buttons and red laser
dots. Notice that the red laser dots are shining on some of the square push
buttons. Your goal is to press the correct buttons in the correct order so that
all buttons with a laser dot will be lit. Lable the buttons
from top to bottom A up to and including F and the buttons from the left to the
right 1 up to and including
8. Push the buttons in this order: B2, E1, D3, D4, C6, E8 and F6. When you have done
this correctly… enjoy the ride! If nothing happens you simply didn’t use the
correct code. In that case push the button beneath the square buttons to reset
the board and try again…
After your free ride down
walk to the big broken circular door at the left. Zoom in on the door and click
on the amulet. Turn to the right and climb up the little stairs. Pull the big
lever at your right backwards. Enter the circular room. Turn to the right and
pull the little lever to the right. The whole chamber turns around revealing two
linking books. Click on the left
linking book to go to Spire.
View this guide raw, exactly as the archive holds it
Parts of this guide
One guide by Bert Jamin, in 5 parts. They read in order, and the part you are on is marked.