Myst IV: Revelation Walkthrough, part 2 of 5

All images in this walkthrough are property of Ubi Soft
Entertainment™
Walkthrough by Bert Jamin
© October 2004
Bert Jamin (www.gamesover.com)
This walkthrough may not be sold and may not be used for any commercial
purposes. Neither is it permitted to publish this walkthrough in any way without
the written permission of the author Bert Jamin (www.gamesover.com) and his E-mail address are mentioned unchanged. For the most up to date walkthroughs always visit www.gamesover.com.
If you have any suggestions
to improve this walkthrough, let me know by sending me an email: .
Click on one of the books
to go to that chapter,
 Tomahna |
 Spire |
 Serenia I |
 Haven |
Serenia II |
or click on the image at
the bottom of this page to go to the next chapter.
Attention: I’m writing this walkthrough while playing the game
for the very first time. Maybe I’ll have to update this walkthrough during the
game! So check often if there are any improvements… For the last time updated
on: 10.30.2004
.
Chapter 2, Spire
Turn around, go forward and pull up the
lever if you wish to listen to the horn. Turn around and walk past the bent bars.
Look to the right and zoom in on the diary. Click on the amulet. Zoom out and
turn to the left. Climb down four staircases. Turn to the left and go forward.
Push the button on the left side of the elevator shaft. For some reason the
elevator doesn’t come…
Zoom in on the elevator
shaft to see it has gone down a long long way. Zoom out and turn around. Go
forward and climb down another two staircases. Turn to the right and walk to the
crystal statues of the whole family with the little water basin. Zoom in and click on the amulet.
Zoom out and look a little further to the right. Zoom in on the extinguished
fireplace. Click on the amulet. Zoom out. Turn around and walk to the passage on
the left side of the crystal statues.
Walk to the huge white
crystal at the end of the gangway. Zoom in on the crystal and click on the
amulet. Notice that this is a pentagon shaped crystal. Also notice that there is
a white mark on the fourth position from top on the scale. Zoom out and take a picture of the crystal. Turn to the right and zoom
in on the huge tube. Click on the amulet. Jump into the tube. At the end of the
ride, look to the left to see seven lit crystals in the distance. Good… you
might think. Well… no, the point is that these crystals shouldn’t be lit!
Turn to the right and go
forward twice. Now you’re standing in front of some sort of a device. Pull
up the green-lit handle. When it opens, it appears to be some kind of circuit
board. Notice that it is dead for now. Click on the amulet. Zoom out. Turn to
the left and walk toward the crystals that are floating in the air in the distance. Zoom in on those crystals
and click on the amulet. Zoom out.
Turn to the left and walk to
the device with the green hose attached to it. Zoom in on the device and
click on the amulet. Zoom out and press the blue-lit button on the left side of
the device. When the lid opens you’ll see a small lever on the left side, seven little green crystals,
a bottom slider and a power gauge on the right side.
Flip down the small lever to
get power to the panel. Move the bottom slider to the right, back to the center
position, to the right, back to the center position and to the right once more.
Notice that all seven little green crystals are lit now. Wait a moment and
you’ll see a device is come down and pull to the electromagnet on the left bottom
side of the panel.
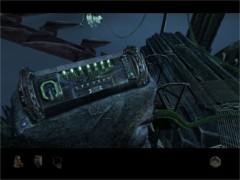
All seven crystals lit…
Turn to the right and walk
toward the circuit board. Pull up the green-lit handle one more time. Notice
that the lower section of the left panel is lit. Zoom out. Turn to the right and
climb up the steel ladder. On top of the ladder move the green-lit handle of the
hatch to the left.
Turn to the left and go
forward three times. Look to the right and zoom in on the huge tube leading
down. Go down the tube. Now you enter a room with a strange kind of chair. Have
a seat. Push the blue button on the right side of the chair. The lid of the
chair closes. Now have a very good look at the closed lid. On top of the lid
you’ll notice 36 little green crystals. Only 7 of them are lit now. Remember
that you just lit the device at the bottom of the ladder to have 7 lit crystals! That can’t be a coincidence!!!
Take a close look at the bottom
left sign of the lid. Notice that it corresponds with the square button beneath
the little bars with the green dots. These actually are sliders, as you will
discover later on in the game. Also notice that there is the number 36 written
on the left side of that sign. This really is a very important clue, as you will
discover soon enough. Finally notice that the square button isn’t lit now which
means that the chair isn’t working properly yet. Now you realize that the chair
will only work properly when all 36 little green crystals are lit. This means
that you have to look around for some more panels and crystal to switch them on
or off to get exactly 36 green-lit crystals at this chair!
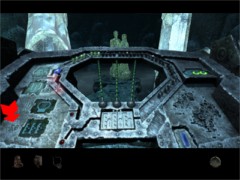
Notice the number 36 next to the left bottom image and 7 little green-lit
crystals
Because the chair isn’t
working properly now, push the blue button on the right side once more to open
the lid. Walk straight ahead to the door with the bars. Pull down the green-lit
lever on the left side of the door. Go through the opened door and turn to the
left. Climb up the stairs. Look to the left and step into the elevator. Pull up
the green-lit lever. When the elevator stops, turn around and go forward four
times. Turn to the right and walk toward the steel ladder. Climb up the
ladder.
Turn around and notice the
same kind of device as you saw downstairs. Zoom in on the device and click on the amulet. Zoom out and
press the blue-lit button at the left side of the device. Flip down the little
lever at the left side of the panel. Move the bottom slider to the left, back to
the center position and to the right. This lights two of the little green crystals are lit.
This means that there should be lit 9 crystals of the strange chair. Although nothing
else seems to happen, it
really does!
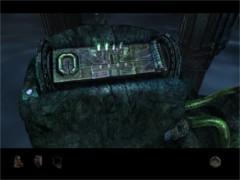
Two crystals lit…
Turn around and climb down
the ladder. Turn to the right and go one step forward. Zoom in on the floating
chained rock. Click on the amulet. Zoom out. Walk toward the desk. Turn to the
left and go forward twice. Turn to the right. Go forward one step and zoom
in on the crystal figure of Catherine with the plant. Click on the amulet. Zoom out and study
the desk at your right side. Turn to the right and walk forward. Turn to the
left and walk forward one more step.
Turn to the left and zoom in
on Sirrus’ Journal. Click on the amulet and look through the Journal. When
finished reading zoom out. Pan a little to the right and zoom in on the
instruments on the desk. Click on the amulet. You can play with electrical
device if you wish. Zoom out. Pan a little further to the right and look through
the telescope. Click on the amulet. Zoom out.
Turn to the right and go
forward. Walk to the ladder and open the hatch to go down. Walk straight forward
in the direction of the crystals. Turn to the left and walk to the floating
ship. Climb down to enter the ship. Pull the green-lit lever all the way forward for
a free ride to the distant island.
The floating ship
When you arrive at the
island, look up and climb out of the ship. Go forward and look around. Notice a
platform with the same kind of device you just set in the Docking area and in
the Garden area to get the airship to work properly. The only thing is that you can’t
reach it because of the gap in the floor. Cross the bridge at your right. Look
to the right to see another tube leading down. Zoom in on that tube and click on
the amulet. Climb down the tube. Turn to the left and go forward in the
direction of the window with the chains. Zoom in on the circular monitor and
click on the amulet.
Notice the blue button on
the right side of the monitor. Also notice the four pushbuttons surrounding the
blue button. Push the bottom button four times and the blue button will light.
Press the blue button to zoom in on that spot. Press the blue button once more
to zoom out. Press the upper button seventeen times. Press the blue button once
more to zoom in. When have seen enough push the blue button to zoom out. Press the
left button five times. Zoom in. You’ll see another huge white crystal. Notice that
this is a circular shaped crystal and that the slider is at the third position from the top. Press the blue button to zoom
out. Press your left mouse button to zoom out of the monitor.
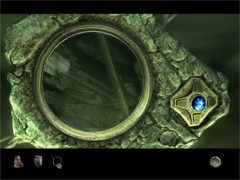
Note the slider on the third position from top
Turn around. Go forward once
and go to the right. Turn to the left. You’ll see a huge wheel with an enormous
chain. Pull the handle in front of the wheel. Hmmm… nothing! Have a closer
look at the right side of the wheel. Notice that a piece of rock with little
green crystals is blocking the wheel. Push that piece of rock to set the wheel
free.
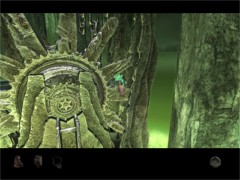
The piece of rock stuck in the wheel
Pull the handle once more. This time the wheel releases the chain and
a huge rock will float up in the air. Turn to the left and walk to the
hanging rope.
Climb up the rope. Cross the
bridge leading the right. Turn to the right and notice that the machine with the
chain released a huge rock that is floating in the gap in the floor. Step on the
floating rock and walk to the device on the platform. Zoom in on the lid and
click on the amulet. Zoom out. Press the blue-lit button to open the lid. Holy Jesus!
Remember that the first device you just set in the Docking area had seven little green crystals, the second one
in the Garden area had four and this one has no less then thirty-four of them!!!
Flip down the left lever.
Move the bottom slider as follows: one position to the right, one position to the right,
one position to the left, one position to
the left and one position to the right. Now count the little green crystals that are lit. It
should be 29. This means that now there should be 38 little green crystals lit on the strange chair. But… wait a minute… there are only 36 crystals on that
chair. Correct!!! This means that at this moment there are two too many crystals lit. Turn around and step back on the floating rock. Turn to
the left and walk forward. Pull up the green-lit handle on the circuit board.
Click on the amulet. Zoom out and step back on the floating rock. Go straight
ahead and board your vessel. Push the lever all the way forwards to go back to
the main place.
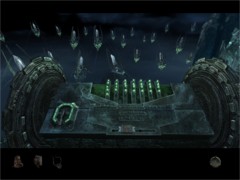
Twenty-nine crystals lit
Look up and exit the vessel.
Turn to the right and go forward. Turn to the right and climb up the steel
ladder. Open the hatch once more and climb up the next ladder. Turn to the left.
Walk to the the device and push the blue-lit button on the left. Remember that you set this device so that two
crystals are lit but because you don’t need the air ship anymore you can now switch
off this panel. The result of this is that the two green crystals are no longer lit
and that brings
the total of lit crystals to exactly 36! So…flip up the little lever to shut down the power supply.
Climb down the ladder.
Turn to the left and go
forward two times. Look down to the floor at your right side to find a note
lying on the floor. Zoom in and take a picture. Zoom out and go forward one
time. Now you enter Sirrus’ bedroom annex working area. Look
around and from the left to the right you’ll see his bed, a little table with a
chessboard, another huge crystal, his working bench and another huge tube
leading down. Walk toward the bed. Turn to the left past the bucket filled with
water. Notice another piece of paper lying on the floor. Zoom in and take a
picture. Zoom out. Turn around and zoom in on the chessboard. Click on the
amulet. Zoom out.
Turn to the right and walk
toward the huge white crystal. Turn around and zoom in on the bed pole on the right
side of the chessboard. Notice the scale of the white crystal. Also notice that
the white mark is on the seventh position from the top. Turn around and zoom in
on the white crystal. Click on the amulet. Notice that this is a hexagon shaped
crystal. Take a picture of the crystal. Turn
around and walk toward the working bench.
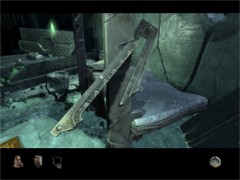
The slider on the seventh position from top
Zoom in on the note on the
left side of the desk. Take a picture and zoom out. Turn to the right and zoom
in on the other note. Take a picture and zoom out. Open the square compartment
at the right side of the desk. Move the gear to the right. Take a picture of the
note about the blue crystal. Flip that note up to the right side and take a
picture of that note too.
Zoom out, turn to the right
and go forward one step. Turn to the left and zoom in on the tube leading down.
Climb down the tube. Turn to the left and walk toward the crystal statue of
Atrus and Catherine. Zoom in on the note they are holding and take a picture of
the note. Zoom out and turn around. Go forward one step. Turn to the right and go through the opened gate.
Turn to the left and climb up the stairs. Look down to the floor and zoom in on
the note. Take a picture of the note and zoom out. Return to the room with the
strange chair and have a seat. Press the blue button on the right side. The huge
lid will cover you once more.
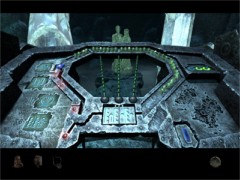
The chair all set up!!!
Pull the blue handle on
the left side down one position. Zoom in on the statue that comes down. Click
on the amulet. Zoom out. Pull the blue handle all the way down. Save your game
just in case. Look down a little to notice four circular displays. Zoom in on
each and every display and see that the top-left display contains a white
crystal, the bottom-left display a piece of stone, the top-right display a piece
of nara and the bottom-right display a blue crystal. Actually these displays are
locks to keep you in the chair. Your goal is to open all the locks at the same
time by using the correct frequency. You can determine the correct frequencies
from the notes you gathered. But… before you can do that, you first have to
calibrate the chair cables.
Push the square light
green-lit panel in front of you. This reveals another blue button. Press that
blue button to go further down. Now you are facing three gears with different
geometric symbols. They are from the left to the right, a pentagon, a circle and a hexagon.
Each of them corresponds with the huge crystals you saw earlier. Look to
the right and zoom in on the pliers. Click on the amulet and zoom out.
Take a look at the gears and
notice that there is a little lever attached to each gear. By pulling that lever
you can reset each gear back into the first position. So this means that you
have to count this starting position as number one and that there is no zero
position!!! Now have a look at the three pictures you took of the three crystals
in your Journal. Notice that the mark on the scale of the pentagon crystal is on
the fourth position from top. Notice that the mark on the scale of the circle
crystal is on the third position and remember that the mark on the scale of the
hexagon crystal you saw on the bed pole was on the seventh position. This means that you have to move each gear into
those positions. So, from the left to
the right, into positions 4, 3 and 7. Now remember I just told you that you
have to count the starting position!!! This means that you have to move down the
left gear only 3 positions, the center gear two positions and the right gear 6
positions.
You can only move the gears
down. So if you make a mistake by setting one of the gears, reset it by pulling
the little lever attached to the gears. When you have set the gears this way,
look up to the left and press the big black button to go up again. Now you have
to open the four locks at the same time by conduction the correct frequencies
for each and every lock at the same time by using the sliders on the chair.
First of all, move one of the sliders up and down to hear that the cable beneath
you makes a different tone. Notice that each slider has twelve positions.
Now you first have to determine the correct frequencies for each and every lock.
You can do this by studying the pictures of the notes about the crystals.
Have a look at the pictures
of the note about the quartz crystal. The first one shows that the first slider
should be set to the sixth position. The second note shows that the optimum
setting is near 8-12-4. Let’s give it a try. Push the left slider to the sixth
position, the center slider to the top position (12) and the right slider to the
fourth position. Notice that the quartz crystal starts to vibrate meaning that
this is the correct combination. When you zoom in on that lock you’ll notice
that a ring around the lock slowly turns clockwise. This means that the
vibration will only last for a short time.
Now have a look at the
pictures of the notes about the rock. The notes indicate that the total power
is 20 and that the last slider must be set to the fifth position. This means
that the other 15 have to be divided between the other two sliders. Notice that
this note also shows that the lab strongly vibrated with one of the
melodies from the music chart. Have a look at the picture of the music chart to
determine that the correct combination must be 10-5. So the correct frequency for
the rock lock must be 10-5-5. Let’s give it a try. Push the left slider to the
tenth position, the center slider to the fifth position and the right slider to
the fifth position also. Notice that the rock crystal starts to vibrate meaning
that this is the correct combination.
Now have a look at the
picture of the notes about the blue crystal. The notes show you that the
setting for the left slider is 3 and that the others must be set to the output
from the garden station (4) and the docking station (7). That means 11 together
and that one of them must have the full power of the docking station. This means
that two combinations are possible: 3-7-1 and 3-1-7. By trying out both
combinations you’ll see that the last one is the correct one.
Now have a look at the
picture of the note about the nara. The only note you found about nara shows that it has to be
powered so the board can generate and that it has to be divided
equally by all three sliders. Because the board can generate a power of 36, the
only correct combination can be 12-12-12. So simply move all sliders to the top
position to see the nara rock vibrate.
Good… now you have the
correct combinations for all the locks. Now the last problem is that you have to
set these combinations in a very short time to unlock the four locks all
together. Save your game just in case!!! Here we go:
Push the left slider to
position 6
push the center slider to the top position
push the right slider to position 4
push the left slider to position 3
push the center slider to position 1
push the right slider to position 7
push the left slider to position 10
push the center slider to position 5
push the right slider to position 5
push all three sliders to the top position
When you’ve done this
correctly and quickly enough, all four locks will open and a bridge to the next part
will appear in front of the chair. Press the blue button at the right side of
the chair and exit the chair. Cross the four boulders. Look around to see a huge
piece of stone lying in the elevator. When you study it, it turns out to be a
part of nara-stone from the wall of the linking cabin.
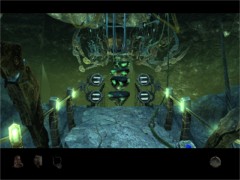
All four locks opened…
Go forward one step. Look at
the right and move the slider to the right. Turn to the left and go one step
forward. Turn to the right and zoom in on the crystal figure of Yeesha. Click on
the amulet and zoom out. Look to the left and zoom in on the Journal. Click on
the amulet and look through the Journal. When finished reading, turn to the left and walk toward the
two dispensers.
Zoom in on the left
dispenser. Notice the shield with the combination 10-5-5 which corresponds with
the frequency of rock. Click on the amulet. Zoom out and zoom in on the right
dispenser. Notice the shield with the combination 12-12-12 that stands for the
frequency of nara. Zoom out and look down. Notice the containers beneath the
dispensers. Move them to the left.
Return to the chair. Have a
seat and press the blue button to close the lid of the chair. Move the three
slides all the way up (12-12-12) and see what happens. One of the crystal figures
will fall from the ring above and will go to the dispenser. But because you moved
the containers to the left, the figure will not end up in the containers but on
the floor. The result is that the figure unloads its electricity and sets free
its nara detonating frequency! Also the piece of nara wall on the elevator in
the bomb factory explodes setting the elevator free. Now you know what caused the explosion back in Tomahna!!!
Press the blue button once
more to pull up the lid of the chair. Cross the four boulders once more. Look
around to see that the piece of nara stone has been blown away. Go forward one
step and turn to the left. Step into the elevator. Look around and you’ll see
the lever of the elevator attached to one of the poles. Before pulling the
lever, look down at the right side of the lever to notice a medallion hanging on
a collar. Zoom in on the medallion. Pull down the little bent lever at the
center of the medallion. Take a picture of the colored panel!!!
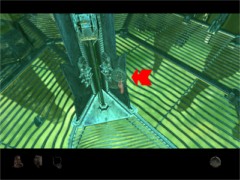
Where to find the medallion…
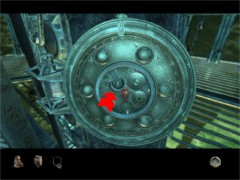
…and where to find the little lever
Now pull up
the green-lit handle. When the elevator stops all the way up, zoom in on the
medallion one more time. Pull down the little bent lever. If you didn’t do this
before, take a picture of the colored panel!!! You are going to need this image later in Serenia. So you really MUST
take a picture of these colors because they are different with each and every
game!!! If you don’t, you’ll be stuck in Serenia for ever!!!
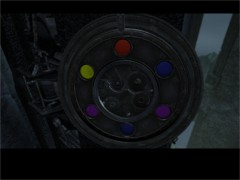
This is how the medallion looked with me… I’ll bet they look different with
you!
Zoom out. Exit the elevator and climb the stairs all the way up. Your
next Age will be Serenia but before going there you make a short trip to Tomahna.
So enter
the linking cabin and link back to Tomahna.
Tomahna – Part 3
When you arrive at Tomahna
you’ll be witness of someone coming out of Yeesha’s bedroom. Standing outside
the bedroom this person uses some kind of linking book and links himself away.
You just see the linking book falling down to the place below Yeesha’s bedroom.
Turn to the right and pull the little lever to the right. Climb down the stairs
and go to the left. Press the button on the right side of the elevator and get
in. Turn around and push the button.
You’ll end up in the
fireplace of Aturs’ bedroom of course. Exit the bedroom. Go to the right. Walk
past the elevator on the platform. Pull the handle on the railing to the right.
Look down to see the linking book laying on the platform beneath Yeesha’s
bedroom. Cross the bridge. Pull the lever on your left to the right. Walk down
the bridge. Enter Yeesha’s bedroom.
What a mess this place is.
The person you just saw coming out of the bedroom must have been looking very
hard for something. Turn to the left and walk toward the bookcase. The person
also has broken the glass doors of the lower compartment of the bookcase. Zoom
in on the left compartment. Click on the amulet. At the tone of his voice you
know that this person is no one else but Achenar!
Zoom out and zoom in on the
right compartment. Look at Yeesha’s handprint. It not only tells you that she is
a "Child of Water", it also shows some of her hand lines. Take a
picture and zoom out. Now let’s find out what kind of linking book Achenar has
dropped down to the place beneath Yeesha’s bedroom. Remember the correct order
of pushing the books: 12, 6, 8, 3 and 14. Go down and walk all the way to the
left until you reach the easel with the painting. Turn to the right and look
down to discover the linking book. Open the linking book and click on the image
to get linked to Serenia.
View this guide raw, exactly as the archive holds it
Parts of this guide
One guide by Bert Jamin, in 5 parts. They read in order, and the part you are on is marked.