Myst IV: Revelation Walkthrough, part 4 of 5

All images in this walkthrough are property of Ubi Soft
Entertainment™
Walkthrough by Bert Jamin
© October 2004
Bert Jamin (www.gamesover.com)
This walkthrough may not be sold and may not be used for any commercial
purposes. Neither is it permitted to publish this walkthrough in any way without
the written permission of the author Bert Jamin (www.gamesover.com) and his E-mail address are mentioned unchanged. For the most up to date walkthroughs always visit www.gamesover.com.
If you have any suggestions
to improve this walkthrough, let me know by sending me an email: .
Click on one of the books
to go to that chapter,
 Tomahna |
 Spire |
 Serenia I |
 Haven |
Serenia II |
or click on the image at
the bottom of this page to go to the next chapter.
Attention: I’m writing this walkthrough while playing the game
for the very first time. Maybe I’ll have to update this walkthrough during the
game! So check often if there are any improvements… For the last time updated
on: 10.30.2004
.
Chapter 4, Haven
Look at the floor in front
of you. Zoom in on the crystals. Click on the amulet. Zoom out and look to the
right. Zoom in on the purse that is lying on the tray. Click on the amulet. Zoom
out and look a little further to the right. Pull up the handle to blow the horn.
Turn around and face the exit.
Go forward one step. Turn to
the right and pull the tray. Exit the building. Look at your right and see a red
crab walking around a little further away. Walk into that direction and look
down. Notice a glimpse of a crystal underneath a stone. If the crab is on the
stone, tap on it so that it takes off. Move the stone to the left. Zoom in on the
crystal and click on the amulet.
Zoom out and look to the
right. Notice that there is a passage leading to the left. However you can’t reach that
passage from here. Go one step forward. Look to the left and notice a passage
next to the cabinet. No need to go there. Pan a little further to the left and
notice the passage with the little stairs at the bottom. Enter that passage.
The correct passage
At the end of the passage
look to the left and climb down the rope ladder. Go forward and walk to the
right. Look around to enjoy the beautiful view. Look to the left and notice some kind of totem standing in the water.
Walk toward the totem and zoom in on the little square at the center of the
totem. Click on the amulet. Take a picture of that square. Call this one the
Cerpatee totem.
Zoom out and look at the
huge skeleton at your right. Click on the amulet. Zoom out and turn around. Go
one step forward. Turn to the right and walk toward the shipwreck. After one
step look down to see three crabs eating a dead fish. Have a look around to
enjoy the view! Now walk all the way to
the shipwreck.
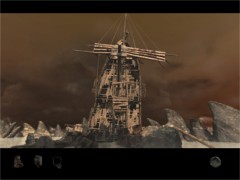
A very nice view
You are facing some kind of
elevator now. Inside the elevator there is an empty crate. Look to the right and
see four cannon balls lying on the floor. Move the empty crate into the direction
of the cannon balls. Move two cannon balls into the empty crate. Turn to the left
and go forward one step. Look down and notice another four cannon balls lying
around and another crate on a rope. Move another three cannon balls into that crate. Turn
to the right and go forward one step so that you are facing the elevator once more.
Move the crate into the elevator. Now step into the elevator. Turn to the left
and turn the little wheel clockwise. Pull the big lever attached to the floor
all the way to the right. This will take you to the upper level of the shipwreck.
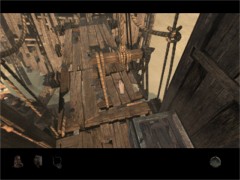
Move the crate forward
Look in front of you and
notice that the last part of the gangway is missing. Move the crate with the cannon balls onto the gangway. Now cross the gangway. When you reach the ship’s
deck look around to see a hole in the ship at the right side leading down and a
ladder leading up on the left side. Go to the right and climb down by using the
fishing net.
Turn around and walk
forward. Zoom in on the piece of paper that is lying on the table. Take a
picture of the drawings on that paper. Zoom out and zoom in on the creature on
the shelf. Click on the amulet. Zoom out and turn to the right. Enter the next
part of the ship. Turn to the right and zoom in on the left side of the shelf.
Click on the amulet. Zoom out and look at the trap that’s lying on the shelf. If
you want you can play with it.
Look at the right side of
the shelf and notice a little pipe attached to a bellows. Push the bellows and
some green stuff will come out of the pipe making you dizzy. Look up to have a
closer look at the wind-bell that is hanging on the ceiling. I sure know what
kind of bones those are.
Walk back to the room with
the table. Go to the left and climb up the fishing net. Turn around and
walk toward the ladder. Climb up the ladder. Look to the right and see a Karnak
eating fish. Study his paws so you see how his footprints look. Compare
them with the picture you just have taken. The beast will be blocking your way
forever so kindly tap on it.
Walk to the end of the
gangway. Look at the right and turn the upper left little wheel clockwise all the
way. This will raise the sail of the ship. Zoom in on the sail and click the
amulet. Take a picture of the sail. Zoom out and notice the small button at the
right side of the wheel. Move it to the right to lower the sail.
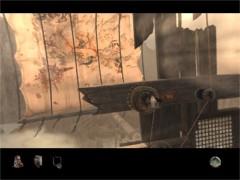
The raised sail
Turn to the right and go
forward one step. Look to the right and enter the next room. Look down to the
right and zoom in on the treasure chest. Click on the amulet. Zoom out. Turn to
the left and walk to the other side of the room. Zoom in on the Journal that is
lying on the bed. Click on the amulet and page through the Journal. Learn more
about the different animals as the Camoudile (a predator), the Zeftyr (a
herbivore) and the Mangree (an omnivore). By reading the Journal you also learn a
lot about the Archenar’ state of mind.
When finished reading turn
around and exit this room. Go to the right and climb down the ladder. Turn to
the right and step on the wooden planks leading back to the elevator. Walk all
the way to the end. Turn to the right and press the little wooden button to
lower the elevator.
Go ashore and walk to the
right. Climb up the rope ladder. Go forward until you’re facing the wooden
crates. Turn to the left and walk in the direction of the tent. Surprise… a Zeftyr pops
out! And not only that… this causes you to fall from the cliff using the tent
as a parachute! When you come to your senses a Mangree is watching you very closely
and starts alarming the other beasts with a loud scream.
Look at the ground to see a
large footprint of an animal. Zoom in and click on the amulet. Zoom out. Look around and
see what is left of your tent. Now carefully pan to the right and look up.
Zoom in on the remains of your tent hanging from the tree. Click on the amulet.
Zoom out and turn a little to the right. Walk forward into the dark jungle. So
don’t walk on the path leading to the left with the remains of your tent and don’t
walk on the bright path leading to the right but walk the path in between.
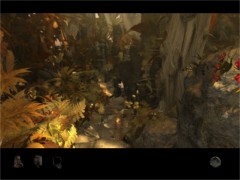
The path in between
Walk all the way straight
ahead until you reach the end of the path. On your way there listen carefully to
the warning yells that the Mangree is making from the tree. You’ll hear three yells,
one long high yell, a short lower yell and the same long high yell. Look to the
right and see a watchtower past the red plants. Move the red plants at the
left to the left and the plants at the right to… the right. Now walk to
the watchtower. Climb up. Turn around and pull down the curtain that’s hanging
above the entrance. It seems to be another drawing of footprints of the various
creatures. Take a picture of it. Turn around and zoom in on the bones in the
left corner. Click on the amulet.
Turn around and zoom in on
the little wheels. Than zoom in on the Mangrees covering the totem in the
distance. Notice that this is the same kind of totem you saw earlier on the
beach. Also notice that these Mangrees are changing places all the time. But no
matter how long you wait, one of them covers the square sign at the
center of the totem. But you do have to take a picture of that
square!
Now you are facing a little
difficult puzzle. You have to scare away these creatures from the totem. Remember
the warning yells the Mangree made from the tree earlier. Your goal is to
imitate this warning yell by using the little wheels in front of you. Remember
that the warning yell exists of three yells shortly after each other, one longer
high yell, one lower short yell and the same longer high yell. You have to turn the right wheel
a 3/4 turn; the
left wheel a 1/4 turn and finally the right wheel for 3/4 turn again. You
also have to turn them quickly enough after each other. I wish
you good luck on this one! I’ll bet you wished you could use one of the bows to
shoot these creatures away. Well… you can’t!
Tip: don’t
pay attention to the sound the wheels are making! With my first attempts I payed
to much attention to the sounds of the wheels so that they were corresponding
with the warning yells of the Mangree. Because of that it took me a very long
time before I scared away the Mangrees. You only have to be sure to turn the
correct wheels for a 1/4 or 3/4 turn. Even when a wheel doesn’t make any sound
at all while turning it or if it makes a sound that doesn’t correspond with the
warning yell, this doesn’t matter!!!
When you have frightened the Mangrees away
save your game of course! Zoom in on the totem and take a picture of the center
square. Call this one the Mangree totem. Turn around and roll up the
curtain. Exit the watchtower. Turn around and go past the red plants. Turn to
the left and go forward five times. Look around and you should be back at the
intersection with the remains of your tent at the right. Walk past the tent.
Wait a moment and you’ll see a Camoudile passing by. Go forward one more step.
Turn to the left and go forward five times. Look at the right and you’ll see a
gate.
Zoom in on the stone shield
on the left pole of the gate. Click on the amulet. Push up the shield. Now you
are facing a rather difficult lock puzzle. First of all save your game here just in case something goes wrong! Notice that the lock
contains three slides
with holes in them. Also notice that on the center slider there is a light brown
latch that is in the fifth hole of the upper slider. And that there is a dark
brown latch on the bottom slider that is in the first hole of the bottom
slider.
Here is the solution for
this lock:
place the upper latch into the center slider
move the center slider all the way to the left
place the upper latch into the upper slider
move the upper slider 1 hole to the right
place the lower latch into the center slider
move the center slider all the way to the right
place the lower latch into the lower slider
move the lower slider 1 hole to the left
place the upper latch into the center slider
move the center slider 2 holes to the left
place the upper latch into the upper slider
move the upper slider all the way to the right
place the upper latch into the center slider
move the center slider all the way to the left
place the upper latch into the upper hole
place the lower latch into the center slider
move the center slider 2 holes to the right
place the lower latch into the lower slider
move the lower slider all the way to the left
place the lower latch into the center slider
move the center slider all the way to the right
place the lower latch into the lower hole
When the lock opens save
your game so you won’t have to start all over again. If the lock doesn’t open
you must have done something wrong. In that case load your earlier saved game
and start all over! Walk past the opened gate. You’ll now enter the lake area.
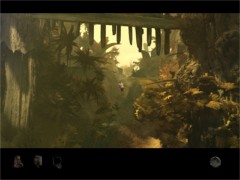
The opened gate
Zoom in on the water and click on the amulet. Zoom out and turn around. Zoom in
on the totem. Nice… no Mangrees this time! Click on the amulet and take a
picture of the square at the center of the totem. Call this one the Karnak
totem. Turn to the left a little
and walk up the path. Turn to the left and go forward seven times. Look at the
left side of the path. Zoom in on the trap and click on the amulet. Zoom out.
Turn around and go forward two times. At the intersection turn to the left. Go
forward three times. Turn around and zoom in on the trap. Click on the amulet
and zoom out. Turn around and go forward one time.
You’ll see two eating
Camoudiles. Go forward one time and see how a Zeftyr kills one of the Camoudiles. Walk
past the eating Zeftyr and the tree stump. Turn around and zoom
in on the tree stump. Notice the big axe sticking out of the tree stump. Click on
the amulet and zoom out. Turn around and walk toward the water. Turn around and
see that a Camoudile gets stunned by one of the plants. Zoom in on that plant
and click on the amulet. Zoom
out and pan a little to the left. Go forward one time and go to the right. Walk
past the right side of the huge boulder. Turn to the left and zoom in on the
totem. Click on the amulet. Take a picture of the square sign of the totem and
zoom out. Call this one the Camoudile totem.
Walk past the left side of
the boulder. Pan a little to the left. Go forward one time. Turn to the right
and go forward three times. Turn to the left and go forward one time. You’ll
see two Mangrees being chased by a Camoudile. Go forward one step. Look to the
left and see a path with a wooden plank and a barrel. Go on that path forward three times. Zoom in on the footprint
on the rock and click on the amulet. Zoom out. If you
want you can tap the brown frog.
Go forward one more step
and look to the left. A little further you’ll see the fifth and final totem.
Walk toward that totem. Zoom in and click on the amulet. Take a picture of the
square sign on the totem. Call this one the Zeftyr totem. Zoom out and turn around. Go forward two times. Turn
to the left and go forward two times. Now you are standing in front of a wooden
stair. Zoom in on the ground and click on the amulet. Zoom out and climb up the
stairs.
Turn to the right and step
on the platform. Look up and pull down the handle that is hanging down. Look to your left to see some buttons
that control the bridge at your left side. At the
left side of the device is a big lever. Pull up one of the golden knobs above
the buttons. Now the buttons actually turn out to be looking glasses. With every
position you pull up the tube another image will be visible in the looking
glass. The correct order of setting these controls is the descending pecking
order you saw earlier on the sail of the shipwreck, the drawing on Archenar’s
table and the curtain in the watchtower. The correct order is: Cerpatee,
Camoudile, Mangree, Karnak and Zeftyr. Notice that the symbols on the tube
correspond with the square signs on the totems. Your goal is to lower bridge
by setting these controls in the correct order. One problem is that the looking
glass of the fourth tube is broken. Because of that you have to use the third
tube to set that tube. Save your game here just in case of…
Pull up the left tube until
you see the third image in the looking glass (notice that you can see three
little dots on the tube)
pull up the second tube until you see the second image in the looking glass
pull up the third tube until you see the fifth image in the looking glass to set
the fourth broken tube
pull down the third tube all the way so you see the first image in the looking glass
pull up the fourth tube until you see five little dots on the tube
pull up the fifth tube until you see the fourth image in the looking glass
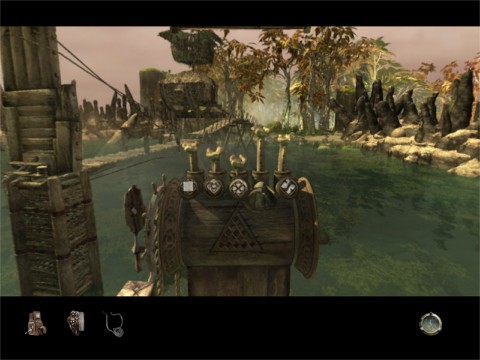
All tubes set correctly
Pull the lever at the left
side of the device all the way back and the bridge will lower. Turn to the
left and go forward one time. Turn to the right and go forward on the bridge
three times. Turn to the left and enter the hut. Open the big chest next to the
door. Zoom in on the opened chest. Hmmm… nothing but diving stuff. Zoom out and
walk to the little desk at the right. Roll down the piece of paper attached to
the little plank. Zoom in on the drawing. It seems to be a drawing of a big bearded Mangree. Notice the
little table drawn beneath the face of the Mangree with a short and a longer
line in it. Also notice the three cups drawn above the table. Does this ring a
bell??? Take a picture of the drawing. Zoom out.
Turn to the left and walk to
the table with the Journal and the shirt. Zoom in on the Journal and click on
the amulet. Look through the Journal. One of the important things you read is
that the Mangrees seem to have names!!! When finished reading zoom in on the
shirt and click on the amulet. Zoom out. Look to the left and open the big red chest. Zoom
in on the lid and find a second drawing of a Mangree. Notice that the lines in
the table are different from the other drawing. That makes sense because every
Mangree has a different name… Also take a picture of this one.
Zoom out and walk to the big
pole at the center of the hut. Climb up. Turn to the left and notice the
telescope. Walk to the telescope. Open the book that is lying at the left side
of the telescope. Zoom in on the opened book and click on the amulet. Zoom out. Look
through the telescope. With the left mouse button you can zoom in and zoom out.
When finished looking around click on the right mouse button.
Turn around and walk to the
easel with the drawing. Zoom in to see that it is a drawing of the opened
bridge. Zoom out and flip over the drawing to find the third drawing of a
Mangree. Click on the amulet and take a picture. Zoom out and zoom in on the
table to the right. Now you’ll see the fourth drawing of a Mangree. Take a
picture. Zoom out and zoom in on the box with the cups on the table. Click on
the amulet. Pan a little to the right and go forward. Turn to the left and walk
in the direction of the crate. Turn around and go down.
Exit the hut and walk to the
left. Keep on walking straight ahead until you reach the end of the wooden
pathway. Look around and notice one path leading to the right, which is blocked
by a Camoudile, and a path leading to the left. Walk the path to the left. Walk
toward the watchtower and climb up. When you have climbed up, the first thing you’ll
notice are the three wheels in front of you. Now you know what I meant with
"Does this ring a bell" earlier.
When looking down you’ll see
the Camoudile chasing some Mangrees. Turn to the right and notice a small dark
drawing hanging down. Zoom in and click on the amulet. Zoom out and turn a
little further to the right. Look at the drawing of a Mangree throwing fruit and
the corresponding table beneath the drawing. Notice that there are three lines
in this table. Take a picture of this drawing.
Now turn around and face the
three wheels. You are now facing an even more difficult puzzle than earlier in
the watchtower. Your goal is to let the Mangrees change places, to get the
Camoudile into the pit at the center and to have the big bearded Mangree throw
fruit at him to get him to stun him with a poisoning plant. First of all save your
game!!!
As you have seen on the
drawings of the different Mangrees every name exists of two yells. Some short
yells and some longer yells. For every short yell you have to turn one of the
wheels for about 1/4 and for every long yell about 3/4. Each wheel has it’s own
tone. Every time you make the
correct combination, you’ll see a Mangree change place down there. If nothing
happens, the combination wasn’t correct so do the same yell again until
a Mangree does change place. As you have seen on the fruit throwing drawing,
that yell exists of three yells.
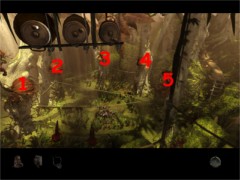
Notice how the Mangrees change places…
Tip: don’t
pay attention to the sound the wheel are making again! Again, you only have to
be sure to turn the correct wheels for a 1/4 or 3/4 turn.
Number the nests from the
left to the right 1, 2 , 3, 4 and 5. Your goal is to make the Mangrees
change places in the correct order and finally get the bearded Mangree in nest
number 1 and give him the command to throw fruit at the Camoudile so it drops
into the pit and gets stunned by the green stuff of the poisoning plant. With all that in mind off you
go.
Turn the left wheel 1/4 and
the right wheel 3/4, see a Mangree goes from nest 1 to nest 5
turn the right wheel 3/4 and the center wheel 1/4, see a Mangree goes from nest
2 to nest 1
turn the left wheel 1/4 and the right wheel 3/4, see a Mangree goes from nest 5
to nest 2
turn the left wheel 3/4 and the center wheel 3/4, see a Mangree goes from nest 4
to nest 5
This will put the Camoudile
into the pit. But because the big bearded Mangree isn’t in place yet to throw
fruit it will climb out again. Save your game once more!
Turn the center wheel 1/4
and the left wheel 1/4, see a Mangree goes from nest 3 to nest 4
turn the left wheel 1/4 and the right wheel 3/4, see a Mangree goes from nest 2
to nest 3
turn the right wheel 3/4 and the center wheel 1/4, see a Mangree goes from nest
1 to nest 2
turn the left wheel 3/4 and the center wheel 3/4, see a Mangree goes from nest 5
to nest 1
turn the right wheel 3/4 and the center wheel 1/4, see a Mangree goes from nest
2 to nest 5
In the next part the big
bearded Mangree is in the correct position to throw fruit to the Camoudile but the
problem is that you have very little time. You only have to do two more
combinations. The first is to get the big bearded Mangree to the correct spot and the second one is to
have him throw the fruit. As soon as you finish the
first combination immediately start the final combination that consists of
three tones. First of all save your game!!! Here we go for the last time:
Turn the left wheel 1/4 and
the right wheel 3/4
turn the right wheel 3/4, the left wheel 1/4 and the center wheel 1/4
If you have done this
quickly enough, the big bearded Mangree throws fruit at the Camoudile while he
still is in the pit. He falls down causing the poisonous plant to spit the green
stuff just in time to get the Camoudile. Save your game!!! If not… try again until he does!
Climb down and walk the path until you reach the wooden pathway. Turn to the
left and follow the no longer blocked path to the right. You will be welcomed by
one of the Mangrees. At your left you’ll see the temporarily passed-out Camoudile.
Follow the path until you
reach a pole leading up. Climb up to end up in the Mangrees’ nest. Look around
and notice a compass, two orange leaves and a shirt. Zoom in on the compass and
play with it if you like. Zoom in on the shirt and click on the amulet. Zoom out
and look to the left. Zoom in on the orange leaves. It doesn’t make sense to you now,
but it actually is a brief instruction to get rid of a snake a little further
on. Take a picture of those leaves. Pan a little to the right to see a path of leaves leading out of the nest.
Walk all the way to the end of that path to end up at some kind of chair.
Well… have a seat! Look down and notice the same grey twisted thing down there
as you saw on the waterwheel back in Serenia.
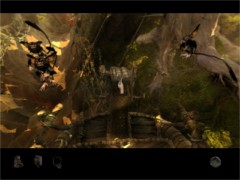
The grey uhhh… thing down there
Zoom in and click on the
amulet. Now carefully watch what Archenar is doing with that thing. As written
on the orange leaves, he strikes the bottom line of the right-most twist four
times. As the thing comes alive it turns out to be a huge snake. Than he taps it
on the head and off it goes. So let’s do the same trick. Strike the bottom line
of the right-most twist four times from the right to the left and tap it on the head as soon as it comes
alive. When it leaves, it sets free a wooden handle. Tap on the handle to have a
free ride back all the way to the cabin with the linking book.
Go forward and turn around.
Enter the cabin. Walk to the pedestal with the linking book. Open the lid, zoom
in on the linking book and click on the image to get linked back to Tomahna…
Tomahna – Part 5
Turn to the right and pull
the little lever to the right. Exit the linking chamber. Turn to the left and go
forward. Push the button to call the elevator. Step into the elevator. Turn
around and push the button to go up. Exit the fireplace and exit the bedroom.
Turn to the right and go forward. Turn to the left, pull the lever of the
elevator and get in. Turn to the left and pull the handle to the center
position. At the end of the ride, open the elevator.
Turn to the right and walk
into the first greenhouse. Turn to the left and walk further through the
greenhouse. Exit the greenhouse. Turn to the right and enter Catherine’s garden
chamber. Turn to the right and walk past the wall with the lit bulbs. Go forward
and turn to the right. Go through the closed door. Exit the corridor. Turn to
the right and walk to the closed doors. Go through the closed doors. Turn to the
right and walk to the pedestal with the linking book to Serenia. Open the book
and click on the image to link to Serenia.
View this guide raw, exactly as the archive holds it
Parts of this guide
One guide by Bert Jamin, in 5 parts. They read in order, and the part you are on is marked.