Myst III: Exile Walkthrough by Bert Jamin, part 4 of 6

Written by Bert Jamin
June 2001
This walkthrough is dedicated to my dearest
friend Witchen =O
Click on one of the books to go to that chapter,


or click on the book at the bottom of this page to go to the next chapter.
Chapter 4, Amateria – The Age of Dynamic Forces
Cross the suspensionbridge with the horizontal boards in front of you. When
you reach the first covered pagoda, turn to your right and you’ll see another
linking book to J’nanin. Leave the book alone for now. Follow your path across
the bridge. In the next building keep on walking until you see a chain at your
left. Passed the chain, walk down the small stairs at your left.
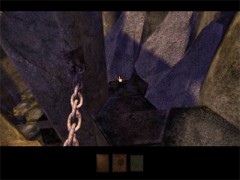
The very small stairs
Walk down until
you reach the end and you arrived the floor below. Walk straight ahead until you
see a passage to your left with a wooden footboard above the water. Ignore this
passage for now and head straight forward. Look around and you see something
that looks like a door further on. Walk towards that door and you’ll find out
that this door is an entrance of an elevator. Get in and pull the handle.
When you arrive upstairs, step on the little platform in front of you. You’ll
see a huge metal chute. Look at your left and you’ll see an orange ball. Zoom
in on that ball. It turns out that the ball is for 3/4 part made out of wood and
for 1/4 part out of crystal. This of course reminds you of the balls and the
scales in the green house… There’s nothing more to do here.
So get back into the elevator. When you are standing in the elevator, look
around and you’ll find some other missing pages for Saavedro’s journal. Pull the
handle to go down. Downstairs you go to the right. Keep on walking and enter the
wooden footboard above the water at your right.
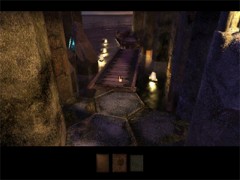
The footboard
Keep on walking until you reach a green illuminated
water. Above the water
you see something that looks like a bridge. Standing on this bridge you find out
that this is some kind of control panel. Look around and pull the large handle
beside the control panel. When you reached higher grounds, pull the small handle
on the control panel. See what happens if you use the three small black handles
on the panel. You’ll see how the big cogwheel beneath the chute is moved. When
you’re finished, pull the big handle to go down again.
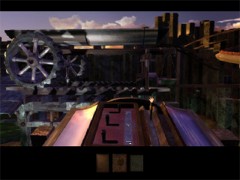
Just play with those handles to see what happens
Walk along the pond to the building with the blue roof. Enter the room.
When you enter the room, you’ll see a half finished ball and on the bench
against the wall you’ll see wooden, crystal and metal parts to finish the ball.
In the green house you have seen how the weights of different materials are
in proportion of each other. You just have seen that the orange ball upstairs is
made out of 7 wooden parts and one crystal part. In the green house you’ve seen
that 1 crystal ball is as heavy as 4 wooden balls. This means that the weight of
the orange ball is equal to the weight of 11 wooden parts. In the green house
you’ve also learned that 1 metal ball is as heavy as 4 crystal balls. This also
means that 1 metal ball is as heavy as 16 wooden balls… Are you still with
me??? Good, then you should know how to finish this ball!
The ball you are going to finish must have the weight of twice of the orange
ball. So that should be a ball with the weight of 22 wooden parts. The half
finished ball exists out of 4 wooden parts. So the weight has to be supplied
should be equal to the weight of 18 wooden parts.
Add 2 wooden parts to the half finished ball by dragging them
one by one from the bench and dropping them on the half finished ball . After that add 1 metal part, which is equal to the
weight of 16 wooden parts. The ball might look if it’s not finished yet, but
that doesn’t matter. The weight is the only thing that counts here…
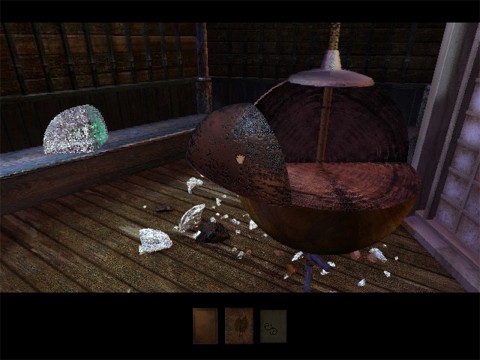
Added two more wooden parts and now adding one metal part
Exit the room and climb up the control panel near the green water again. Pull
the big handle to go up once more. Make sure you move the big wheel beneath the
chute all the way to the left by using the small black levers. When you’ve done
that, pull the little handle at the right on the console. You’ll see that my
arithmetical solution was correct…
When everything went right, you’ll see a part of a bridge going up and down.
When the console closes you’ll see an image of a solved hexagon puzzle on the
lid. Make a note of this solution because you gonna need it later. Also note the
color of the border around the puzzle, which turns out to be yellow on this one.
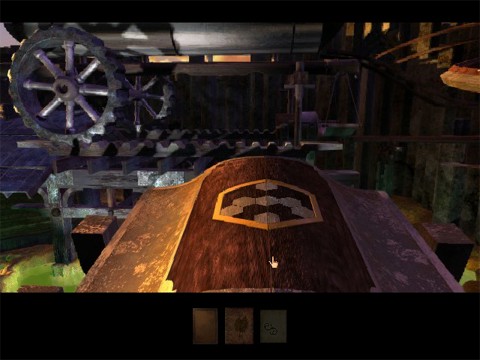
The first out of three hexagonal puzzles
When finished, pull the big handle again to go down. Turn
around and walk back across the wooden footboard above the water into the stone
building.
When you enter the building go to the left and passed the elevator. Walk
straight ahead and you’ll enter a blue crystalclear passage. Walk to the end of
the passage and hold when you are facing the opening with the red beam. Turn to
the right and you’ll see a hidden ladder in the wall.
The hidden ladder
Climb up the ladder. Turn around and you’ll see a little building in the
distance. Walk towards that building. When you can’t get any further, head to
the left. Walk straight ahead until you reach the blue control panel. When you
are facing the panel, turn to the right and pick up some more missing pages of Saavedro’s journal.
Turn around again and pull the big handle at the left of the control panel.
The panel raises and you have a great view over the island and over the ocean.
And not only that, you have the great opportunity to study the next puzzle you
have to solve. In the ocean there are five pagodas. Each and every pagoda has a
sonic force field. Your goal is to visit each and every pagoda in the right order
to change the force field. And not only that, you also have to temporary shut
down the power shield when a ball passes. I think this is one of the toughest
puzzles in Exile!
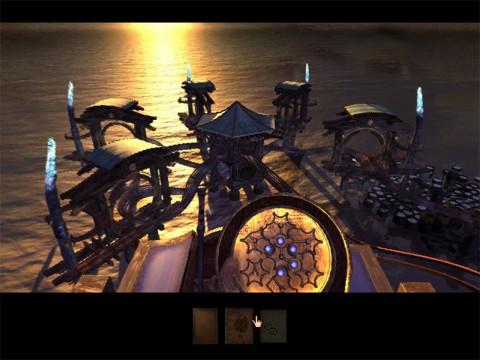
Pull the handle until you understand the meaning of this tough one.
Pull the handle at the left of the control panel to see the track of the
ball. Also watch very closely the metal images on the copper-colored dial of
the control panel. When you’re finished, pull the handle at the left of the
platform to go down again.
Turn around and walk towards the footbridge. Climb up and go to the right.
Climb down the hidden ladder and go through the opening with the red beam. Keep
on walking until you enter a room with a mural painting on the left wall made by Saavedro. I must
say he’s quite an artist! Walk the planks at the right of the room. Keep on
walking straight ahead across the wooden parts sticking out from the water. You are now
walking in the remains of an old ship. When you can’t go any further climb up
the rails above you.
Walk via the rails to the left into the central pagoda. Safe your game here
because you can get lost easy! Follow the rails straight ahead until it makes a
sharp turn to the right. You are standing just in front of the first sonic force field.
Look to your left and you’ll see a footboard that leads to the poles at the end
of the runway. Step on that footboard and turn to the right. Zoom in on the
pole and you’ll see some kind of dial. Put the pointer at 10 o’clock.
The first dial set up
Walk back onto the rails and go to the left. Walk straight ahead until you
are facing a small tunnel. Standing in front of that tunnel, click on the
right passage. Go straight ahead passed the turn and through the second force field.
Step on the footboard at the right. Turn around and zoom in on the blue dial.
Put the pointer at 12 o’clock.
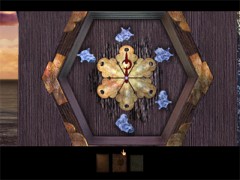
The second dial set up
Step on the rails and go to the right. When you reach the central pagoda go
straight ahead and when you’re standing in the curve, step on the footboard and
zoom in on the brown pole. Put the pointer at 2 o’clock.
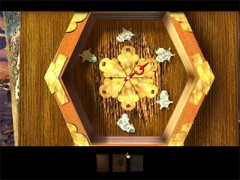
The third dial set up
Step on the rails again and go to the left. You are going down now. When you
are standing in front of the little tunnel, click on the right passage. Standing
in the tunnel, click on the second passage from the left. In the curve, passed
the force field step on the footbridge. Zoom in on the blue pole. Put the
pointer at 4 o’clock.
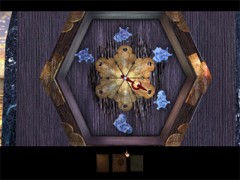
The fourth dial set up
Step on the rails again and go to the right, towards the central pagoda. Keep
on going straight ahead passed the central pagoda. In the curve before the force field step on the
footboard. Zoom in on the brown pole and put the pointer at 6 o’clock.
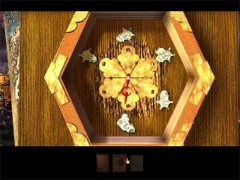
The fifth dial set up
Step on the rails again and go back into the central pagoda. Standing in the
central pagoda, turn around to the building with the red spot on the roof.
Follow the rail to that building until you can’t go any further. Turn to the
right and jump down. You are back in the remains of the ship again. Walk
straight ahead until you reach the room with the mural painting.
Walk across the planks against the wall and climb up the hidden ladder
in the wall once more. Upstairs walk towards the little building and head to the
left towards the control panel. Pull the big handle at the left of the platform
to rise again.
Pull the handle at the left of the control panel. If
you did everything alright, the ball will follow the track through all pagodas. Because the
force fields
are shut down when the ball passes, the ball arrives home in one piece.
The control panel closes and you’ll see another part of the bridge going up
and down. And when the lid closes, you’ll get another solution of a hexagon
puzzle. Note this solution and the color of the border, which is blue
this time.
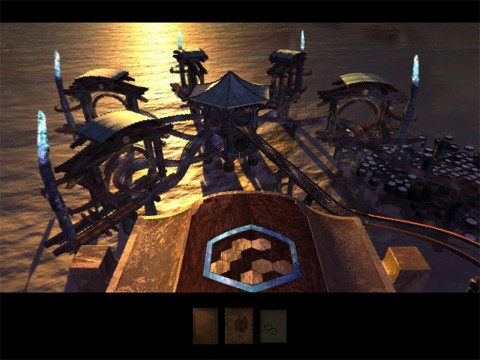
The second out of three hexagonal puzzles
Head all the way back to the central pagoda. Standing in that pagoda, turn
around and go through the passage left from the passage to the building with the
red image on the roof. You can recognize the correct passage by the big wheel shape
object that’s lying in the water in the distance.
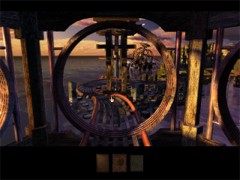
The correct passage
Follow the rails until you can’t go further. Step on the moss covered stones
next to the rails. Follow that path until you pass the first lantern on the wall.
Turn to the left and open the door. Enter the room and stand in front of the
control panel. Pull the handle at the left to raise the control panel. You are
now facing a huge device with two turning tables, equipped with big cups to
catch ice balls. That is, if you solve the puzzle correctly. If not, the ice
ball won’t be caught…
Move the coppercolored handle beneath the two dials to see what’s happening
if you do something wrong. Yep, the ice ball will be flinged into the ocean!
Take one of the red pins and put it in the upper hole of the left dial. Put
another red pin into the hole to the right of that pin. Put the last red pin
into the left one but upper hole of the right dial.
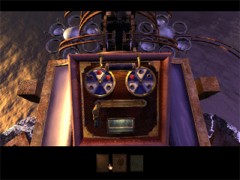
It should look like this now
Move the coppercolored handle to the right and see what happens now.
If you have done alright, the ice ball will be shot from one side tot the
other and back again without being flinged into the ocean. When the ball arrives
at its starting point, you’ll see the third part of a bridge go up and down.
When the lid closes, you’ll get the last solution of a hexagon puzzle. Note this
solution and the color of the border, which is green.
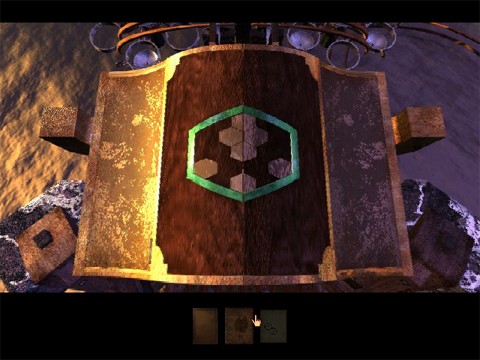
The third out of three hexagonal puzzles
Pull the big handle next to the panel to go down again. Turn around and grab
some missing pages for Saavedro’s journal out of the niche in the wall. Exit through
the door and turn to the left. Keep on walking until your way is blocked by a
ropeladder. Climb up. Step on the footboard and turn to the right.
Now you’ll find out what these up and down going parts of a bridge meant. Next
to every gap in the bridge you’ll find a hexagon puzzle. If you did what I told
you to do, you noticed every solution to these three puzzles. It makes no
difference in which order you solve the puzzles or in which order you push the
cubes. Solve all three of them and walk to the building.
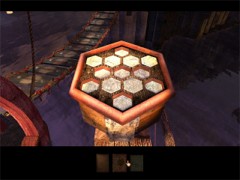
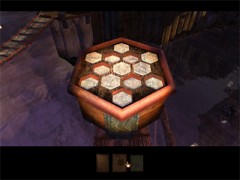
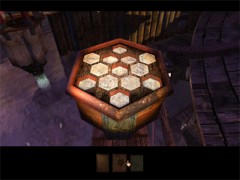
Three pieces of cake
Click on the red door to open and enter the building. Cross the foldable
stairs. Click on the orange back of the chair and finally click on the chair to
have a seat. Push the red button to hear another message from Saavedro. Look up
and pull the handle that’s hanging from the ceiling.
Enjoy the beautiful view… When you’ve seen enough, zoom in on the control
panel in front of you. Look at the different colored lines at the sides of the
panel. These mark the way an ice ball starts and follows it’s patch through the
whole panel. Your goal is to turn the inner disks so the ice ball can follow the
whole track starting at the yellow line, via the blue line, the green line and
finally make it through the red line. The order of the colors is the same as the
order of the borders around the solved hexagonal puzzles. You have two options:
1. keep on moving the inner disks to try to find it out yourself or
2. use the next solution:
Number the disks from left to right and from up to down as follows:
1 2 3
4 5 6
7 8 9
Click once on number 2
Click once on number 9
Click once on number 7
Click twice on number 5
Click once on number 3
Click once on number 8
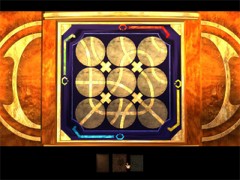
It should look like this now
Zoom out and safe your game. I’m sure you want to see the next part more than
once also. If you saved your game, look up and push the blue button. You will be
wrapped up into an ice ball and will head down all the track!!!
At the end of your ride you’ll get the Symbol of Dynamic Forces. Look down
and click on the book. Click on the image in the book to go back to… J’nanin.
Place the Symbol of Dynamic Forces on the blue dish. When the message is over
go through the elevator doors to step outside. Cross the footbridge and climb
down the ladder to the beach.
Go to the left and walk across the stones
in the water straight ahead. Walk passed the
pole with the purple bulb and head for the stairs. Climb down the stairs at the
left and cross the first footbridge. Look at your right and climb down the
ladder. Click on the white/yellow flower. Zoom in and turn the flower into
different directions to hear several sounds.
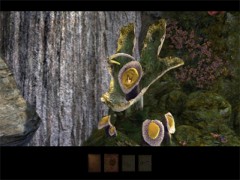
It surely looks like an egg-plant
Turn around and walk to the rock with the lamp. Turn to your right and climb
down the ladder. Look around and you’ll see the green house. Walk across the
rocks and passed the footbridge.
Walk straight ahead until you are standing in a cave with an object that
looks like a little tent. On top of that object, you’ll see a kind of flowerbud. Pinch the
flowerbud and a cute little squee is showing his or her face. So
this isn’t a tent but the squee’s lair. Look at your right and you’ll see a
green plant. Pinch that plant and it’s spreading its leaves.
Pinch the bud on top of the squee’s lair once more. It shows its face again,
sees that the leaves of the green plant are spread out and hurries out of its
lair. It crosses the spread leaves of the green plant to get some moss to eat.
Walk back to the cliff and climb up the ladder. Zoom in on the white/yellow
plant again and aim it on the little squee, to hear the sound it makes (Squee
chirps).
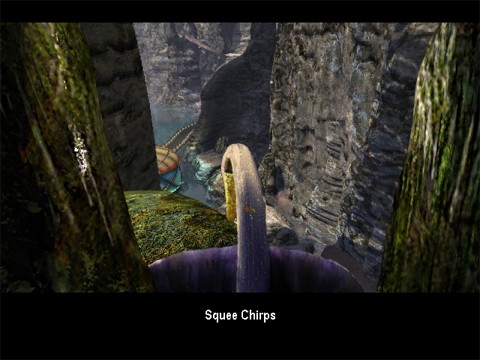
Be sure to get this sound
Zoom out and look what’s happening behind your back… The moss is
swelling and changes into huge red balls. Climb up the ladder.
When you are on top of the rock, walk via the swollen moss to the door of the
tower. This tower has the Edanna Code above the door. Enter the tower and zoom
in on the brown column. So now you have to place the dots according the Edanna
Code. To help you with this one:
The Edanna Code:
The dots on the outside ring: between half passed 10 and 12 o’clock
The dots on the second ring: between half passed 7 and 9 o’clock
The dots on the third ring: at 6 o’clock
The dots on the inner ring: at 7 o’clock
It should look like this:
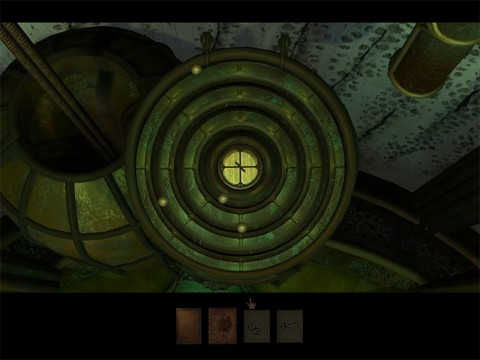
Click on the center part and the linking book to Edanna comes down. Open the
book and click on the image inside the book to go to…
…chapter 5
Edanna – The Age of Nature
View this guide raw, exactly as the archive holds it
Parts of this guide
One guide by Bert Jamin, in 6 parts. They read in order, and the part you are on is marked.