Myst III: Exile Walkthrough by Bert Jamin, part 3 of 6

Written by Bert Jamin
June 2001
This walkthrough is dedicated to my dearest
friend Witchen =O
Click on one of the books to go to that chapter,


or click on the book at the bottom of this page to go to the next chapter.
Chapter 3, The Voltaic Age – Age of Energy
When you arrive on the island you see a round stone building. Walk around
that building and try to open the huge door that looks like the door of Fort
Knox. Darn… also closed! Turn around and walk toward the sphere at your right.
Open it and you’ll discover a linking book to J’nanin. Don’t do anything with
it. Turn around and step on the small scaffolding to your right. Walk
to the end of it and look up. It’s clear that some kind of wire leads from the
water into the brick house. I wonder what that’s for…
Walk back to the building and go down the scaffolding to the right. Keep
walking straight ahead until you are walking into the big rock.
It’s a long way to go
Take the first
exit to the right. After three steps you’ll find some other missing pages for Saavedro’s journal. No need to tell you to pick them up, I guess. Walk straight ahead
until the next splitting. Go to the right into the blue illuminated passage.
Keep on walking straight ahead until you reach a blue
illuminated room. Turn
to your right and you will see a power display. It takes no genius to see that
all systems are down.
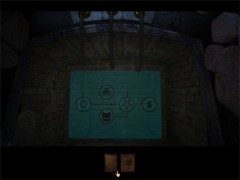
As dead as…
Turn around and climb up the ladder against the wall.
Upstairs you step on the wooden platform. Turn the big red wheel. Climb down the
ladder against the wall.
Head to the left into the tunnel until you arrive at another Fort Knox like
door. Turn to the right and you discover a kind of manhole with a ladder leading
downstairs. Climb down that ladder and push the red button. Walk towards the
device and turn the crank at the left of the device. Climb up the ladder.
Turn to the left and enter the tunnel again. Walk until you are standing on
the illuminated blue platform just before the room with the power display. Turn
to the right and you’ll see a broken porthole. Look through the porthole and you
see the outer rim of a huge waterwheel. Touch the rim and the wheel will start
turning,
giving you some more power.
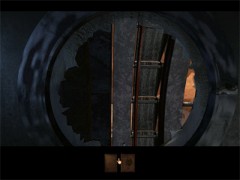
Touch it ones and see what happens
Turn to the left and enter the room with the power display. Looking at the
panel you see that two parts are having power now. One of them is the Fort Knox
door at the end of the tunnel.
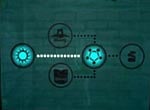
A little bit of power
So turn to the left and enter the tunnel towards
the closed door. Open the door and climb down the ladder.
At the right you’ll see another projector. Push the button and listen to the
message. Turn to the right and follow the narrow passage all the way to the end.
After this long walk you arrive in a room with a huge electromagnet. Walk down
the ladder and study the panel right in front of you. You’ll see a group of
three movable power strips. You have to move these strips so that all strips
are connected to each other. These strips can be moved by pressing the big black
buttons at the left and at the right of them. One good advice: don’t press the
buttons at the left side.
Solution:
press the upper right button twice
press the middle right button once
press the lower right button five times.
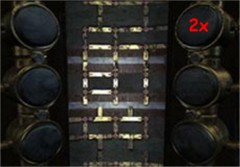
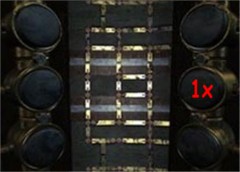
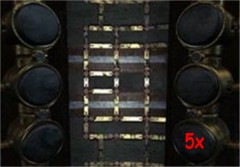
So… don’t press any left button
If you pressed the correct buttons in a correct order, the panel closes and
you’ll have some more power. Walk around the huge electromagnet and you’ll find
some other missing pages to Saavedro’s journal. Climb up the ladder and walk all the
way back until you are back into the room with the projector. Climb up the
ladder.
Enter the tunnel once again and keep on walking until you are standing in the
room with the power panel again. Look at the panel and you’ll see that all but
one parts are powered up.
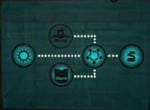
Lots of power
Turn around and enter the tunnel to your left. Keep on
walking until you reach the end. Go to the left into the red illuminated passage. Keep on walking until the end and then turn to the right. Keep on
walking to the end again. When you reach the end, look down and climb down the
ladder.
Step on the footboard and walk this one till
the end also. At the end you
enter an elevator which is operated by hot air. Whatever you do at this moment,
nothing happens. The reason is that you don’t have hot air yet… And believe
me, to get some hot air around here will be a hell of a job!
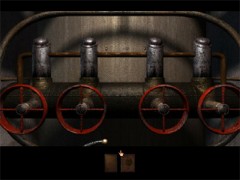
Turn the wheels now and… nothing happens!
Standing in front of the red wheels turn around. Make one step forward and
you’ll see another ladder. Climb up the ladder. When you reach the top you’ll
see a bulging door. Step on the nearby platform and pick up some other missing
pages to Saavedro’s journal. Open the door and enter the next room.
Look around and you’ll see a long tube hanging from the ceiling. Step on the
tube and walk all the way to the end. Look at the right and you’ll discover a
ventilating shaft. Open the grid and climb into the shaft. After one step forward
the grid closes behind you and it gets as dark as night. When you look
around, you’ll see a faint glimmer in the distance. Go into that direction two
steps. Look down and you see another grid. Open it and enter that room.
First of all, unlock the door by moving the bolt at the right of the door.
Turn around and walk to the control with the big red knob. The control has been
sabotaged by your good old friend Saavedro. In the middle of the control mister
Weird has forced a metal wedge into the center of the control.
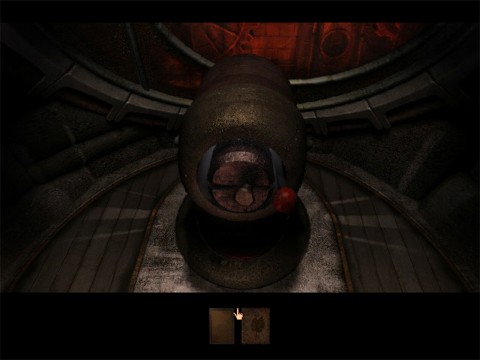
Mr. Sabotage has been around again
By lucky chance
you can still use the control a little bit. Through the window you can look into
the next room. You can also see that that room is filled with hot lava.
Exactly, that room has to provide the hot air you need for operating the
elevator and more… The only problem is that the fan doesn’t work. Your goal is
to get that fan working.
Click with your left mouse button on the red knob. Move the knob
counterclockwise until you heard a click twice. Then let go the knob. It
will spin around all by itself and you’ll see the lava leaving the other room.
Now you can safely enter that room.
Turn around and climb down the ladder. Look around and you’ll see a closed
door. Click on the round handle to open the door and enter the next room. Look
around and you’ll see a huge cogwheel against the wall. Walk towards that wheel
and you’ll see another control with the same kind of red knob. This one has not
been sabotaged.
Your only goal is to get the fan working. As you might understand by now, you
can’t do this by simply flipping over a switch…
This is what you have to do:
1. Click on the red knob. Turn it
clockwise until you
hear a click twice. Then let go the knob. The platform you’re standing on will rise.
2. Move the knob through the central
slot to the left. It’s hard to see and
the knob will only go a little bit. Let go the knob if you can’t move it any
further. The big cylinder at your right will be moved to your left, revealing another mural
painting of Saavedro.
3. Turn the red knob counterclockwise until you hear another two
clicks. Let go the knob. The room will be filled with hot
lava and the platform is rising again. Walk forward and push
the button to start the fan. You’ll hear the fan starting to move! Turn around
and head back for the red button.
4. Turn the red knob
clockwise until you
hear another two clicks. Then let go the knob and the platform goes
down.
5. Move the knob through the middle
slot to the right until it won’t move
any further and let go the knob. The big cylinder will be replaced to it’s
right side.
6. Turn the knob counterclockwise until you hear those familiar
two ticks again and let go the knob. The hot lava will be drained out of the
room and the
platform sinks all the way down.
7. Move the knob through the middle
slot to the left until it won’t move
any further and let go the knob. The big cylinder will be replaced to it’s left
side again.
Turn around and exit through the oval door. Climb up the ladder. Turn around
and looking through the window you’ll see the empty lava room with the working
fan. To put it in other words you do have air now, but it’s still cold air…
Time to use the sabotaged knob once more! Turn the knob counterclockwise until
you hear those two ticks again and then let go the knob. The room will be filled
with hot lava now and you do have hot air at last! Time to return to the
hot-air-driven-elevator.
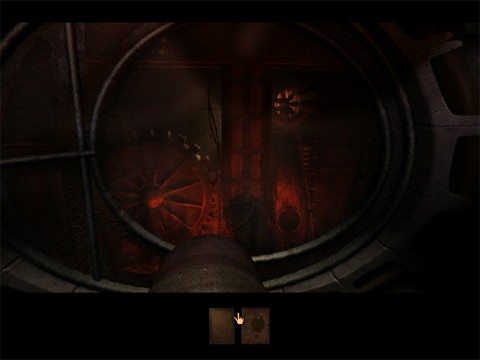
Cool… HOT AIR!!!
You can go there in two ways. Via the ventilating shaft (the opposite way you
got here) or via the door you just opened. I give you both ways.
Via the ventilating shaft:
Look up and climb into the shaft. Look around until you see the faint light
in the distance again. Go to the light and open the grid. Climb on the tube nearby and
walk all the way to the end. Go through the round opening. Step on the round
platform. Look around to find the ladder leading downstairs. Climb down that
ladder and climb down the next stairs. Turn around and you’ll see another ladder
going down. So use that ladder to go down until you are standing on the round
platform. Step on the round wooden platform to the opposite and you’re back into
the elevator.
Through the door:
Open the door using the big red handle. Exit through that door and turn to
the right into the red illuminated passage. Walk to the very end. At the first
splitting turn right and walk straight ahead until the end. Climb down the
ladder, cross the footbridge and you’re back into the elevator.
When you are standing in the elevator you’ll see nice hot steam coming out of
three pipes. The fourth one has been sabotaged by guess who… The meter
indicates a pressure of 10 units. This is caused by the closed pipe. To make
things easy, there are no numbers on the meter. So you have to count the lines
or believe me on my word.
Your goal is changing the pressure to exactly 19 units of pressure by moving to
three different levels and by opening and closing the pipes in the elevator.
The dotted red line on the meter indicates this 19 units. You need this pressure
to get an air vessel up and going. At this first level you are standing now, the
pressure increases with 10 units by every pipe you’re closing. At the next
level every pipe adds 4 units and at the third level 1 unit for every pipe.
At this first level close all three pipes by turning the red
wheels. The
pressure will be increased up to 40 units. Look at your left and pull the big
handle to the right once. You’ll now rise to the second level. Close all four pipes. The pressure will increase up to
56 units and points to the sixth line
into the red field! I hope this will go alright…
Pull the handle once more to the right. You will be raised to the third and
upper level. Close only one pipe. The pressure increases with 1 unit and now
points to 57!!! Now pull the handle to the left and you’ll go down to the second
level. Open two pipes. The pressure now decrease to 49 units.
Pull the handle to the left once more to go down to the first level. Open all
three left pipes. The pressure now decrease to exactly 19 units and the
pointer is standing exact on the red dotted line.
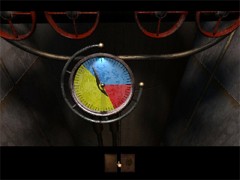
Exactly on the red dotted line
Get out the elevator and turn to the right
where you can see the big hose on
the floor. Make one step forward. Look to the right and open the big red wheel.
You’ll see the airship being filled with hot air and how it drifts away.
Turn around and step on the round wooden platform of the elevator. Go through
the elevators opening, step on the footbridge and walk till the end.
Climb up the ladder and step on the scaffolding. Walk straight ahead until you
reach the first exit to the left. Go to the left. You are now standing on a
scaffolding which is bending to the right. Walk to the end and step into the
elevator at the right. Pull the handle of the elevator. When you arrive
downstairs, pick up some other missing pages to Saavedro’s journal. Step
on the scaffolding and go to the end, nearby the big spherical door.
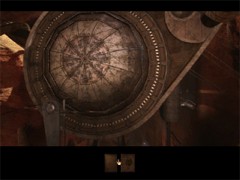
The huge hangar door
Pull the handle near the door. The door opens and the air vessel glides stately
to its proper position. Go on board and pull the switch in front of you. Now you
are transported to the island with the rocky building where you started. When
the vessel stops, get out and step on the scaffolding. Walk to the end. Look
around and you’ll see another handle. Before you pull the handle save your game
because you really want to see this more than once… So did you save your
game??? Pull the handle…Look what’s happening now. I’m sure you hardly can’t
believe your own eyes!!!
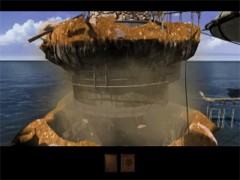
Hhhhuuuu….
When the building is hanging in the air like some kind of excessive kite, go
on board of your vessel again and pull the switch. You will now be taken to the
building. Step on the scaffolding and walk to the closed door of the building.
Open the door, which has power now, and enter the building. Descend into the
manhole. When you arrive at the bottom of the building, open the hatch by
turning the wheel. When the hatch opens, you’ll see some debris floating in the
force field below the building. And… this is not just some debris floating
around but it is the Symbol of Energy.
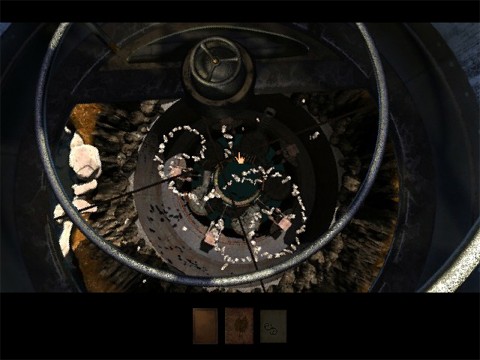
Not just some ordinary debris
Look up and you’ll see to tiny doors. Open them to bring out the linking book
to J’nanin. Open the book and click on the image inside the book and you’ll be
transported to… J’nanin.
Standing in the observatory, put your fresh obtained Symbol of Energy
on the blue dish. When the message is over, walk to the elevator. Open
the elevator and the second door to go outside. Walk till the end of the
footbridge and climb down the ladder.
Walk across the bend footbridge. Walk to the pole with the red bulb. Cross
the footbridges at the right of the pole and you’re standing on the island. Walk
into the direction of the ocean until you can’t go any further. Look down at
your right.
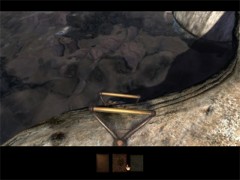
A little bit hidden ladder
Climb down the ladder. You are facing a column with two handles.
Across the room you see a footbridge that’s blocked by a huge wheel.
Your goal is to move the wheel and set the passage free by using the two
handles. First pull the left handle, then the right one, the left one once more
and finally the right one once more. Climb up the ladder. Look around and you’ll see some kind of shallow part in the rocky cliffs.
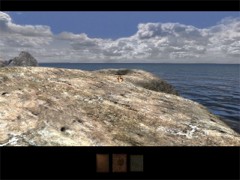
A little bit hidden too
Walk over there and climb down the manhole. Turn around and walk to the door.
Open the door and step inside. You won’t get much further because your good pall
Saavedro has destroyed the entire floor of this room… Thank God we know a way to fix
this minor problem.
Climb up the ladder and walk till the end of the rocks and climb down the
ladder again. When you are standing in front of the column, pull the left handle
twice and pull the right handle twice. You’ll see the big wheel disappear
through the opened door and the ladder taking his correct position again…
Climb up the ladder en head for the manhole again. Climb down and enter the
room. The wheel fixed the broken floor provisional so now you can enter the
room.
Zoom in on the brown column. Hey, another four ring with dots. This time you
have to use the Amateria Code. To help you with this one:
The Amateria Code:
The dots on the outside ring: between half passed 10 and 12 o’clock
The dots on the second ring: between 3 o’clock and half passed 4
The dots on the third ring: at 6 o’clock
The dots on the inner ring: at 9 o’clock
It should look like this:
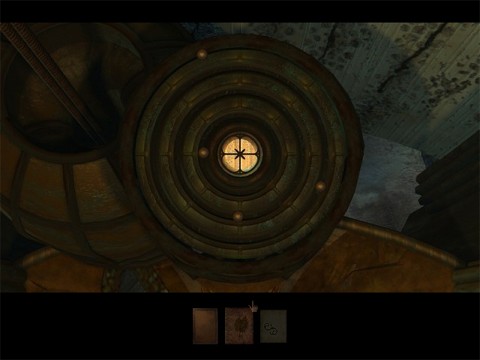
The dots and their correct spots
Click on the center part and the linking book to Amateria appears. Zoom in on
the book and click on the image inside the book. You will be transported to…
…chapter 4
Amateria – The Age of Dynamic Forces
View this guide raw, exactly as the archive holds it
Parts of this guide
One guide by Bert Jamin, in 6 parts. They read in order, and the part you are on is marked.