Jack Keane
Chapter XII: The decision
Jack wakes up and goes to the plane wreck. He sees
Amanda’s boots under the plane wreckage.
There are still no wind turbines seen. Amanda works on
the plane wreckage.
Track down the doctor:
Go left and look at the
stone road sign base. Cross the bridge on the left and get stopped by 3 killer
plant guards.There are monkey
skeletons around. Take skeleton. Go back to the left.Go to top of screen. Go right to arch (small altar) and
see Vincent standing by the ornate bridge.Talk to Vincent. The
wedding party is still down below because the plane wreckage changed the flow of
the river and blocked the path. He asked that Jack help them.Deserter monkey: Continue to cross the
bridge. Go forward and see a familiar deserter monkey holding a coconut up a tree.Talk to the monkey and
recognize him as the bicyclist giving power to the airfield fence. He throws the coconut.
He emphatically does not want to be friends. Take
coconut.Continue forward and see
the wreckage of the balloon.Look at the wobbly rocks on the cliff side. Take the
bamboo rod holding the wobbly rocks. The rocks slide down.
Bring agent a cold
beer:
Montgomery follows the rockslide. Talk to Montgomery.
He wants a cold beer before he will help.Take beer crate to get beer bottle (warm).
Continue to the left at the balloon wreckage. See the 2 thugs are in the balloon
gondola.Continue to the left and see a
raised bridge and dense vegetation right of it. Something is hidden there. Use
knife of dense vegetation and see a sign post. Take sign post stone.Go back one screen to
the right and see another signpost. This one has 2 on top of each other and
showing entrance to consecrated bridge. Enter consecrated bridge then.See that you are back by the front part of the plane’s
wreckage. Use
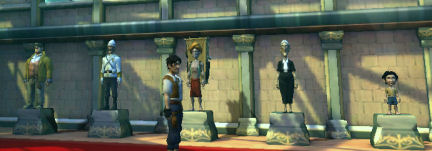
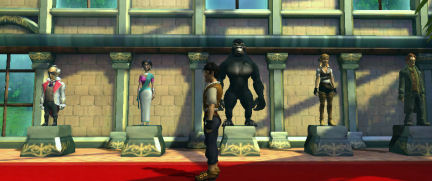
the sign post from inventory on the stone road sign before the bridge. Bonus feature
unlocked.
Optional
Bonus Wax Works completed
Continue forward passing
the way to Vincent and the bridge. See the wreckage of the rear part of the
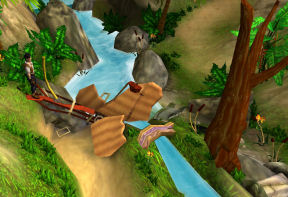
plane that is blocking the plane flow.Go down to the former path of the river’s flow. Cross
the bridge and look down the stairs. See the rest of the party down there.
Go back up to the other
side by the giant ferns. Use the bamboo rod on the metal at center of the red
part. It will then control the rudder blocking the present river flow.Use bamboo rod and see that the river flows to the
other side of the tree and steps.Use the skeleton on the
now dried-up riverbed. Use beer bottle (warm) with skeleton.Use the bamboo rod again and see
the river chills the beer. Take beer bottle (chilled) from the altered
river flow.Go across the bridge and
go forward to Montgomery. Use chilled beer on Montgomery.Get mad at Montgomery. He gives
comb (miniature saw) and elastic belt.
Let the wedding party into the crater:
Go back to the blocked
river flow. Use comb with the tree beside the steps.Watch as the river flow is
diverted to allow the wedding party to pass.High Priest starts talking about the Sacred place. The
wind turbines rise and the raised bridge drops down.Take hollow branch beside the small bridge.
Expose the doctor:
Go to the bridge where
Vincent is located. Talk to the High Priest.He will help you if you
show the villagers that Dr. T is responsible for the desecration of their Sacred
Island.Cross the bridge and go
forward pass the balloon crash site. See the raised bridge is now down.Enter statues. Climb up to the boardwalk.
See the doctor up inside the glass covered room. Go other
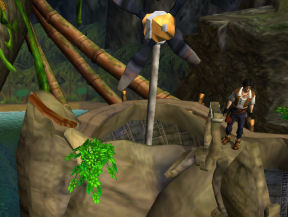
side of the left wind turbine.See that the first crown chevron has the central stone
fall down. Use the belt on the crown chevron to get a catapult-slingshot.Go to the other side of
the back wind turbine. Use the hollow branch with rocks.Go back to the belt. Use
coconut on the makeshift slingshot. It breaks the window of surrounding Dr. T’s
control center.
Infiltrate the
doctor’s headquarters:
Go back down to the maintenance ramp. Enter the
consecrated bridge right of the lowered ramp.Take crank from the foreground beside the plane
debris.Killer plants: Go back and
talk to the High Priest by the bridge.He gives the ancient artifact – Shape of Bone;
ritual bone shaped
mold.Go to the rubber tree left of the High Priest. Use
knife on tree trunk and see rubber ooze.Use ritual bone mold with rubber and get 3 ritual
rubber bones.Go left and forward.
Cross the bridge to sacred island. Use ritual bone on each of the 3 killer plant
guards.Headquarters’ entrance: Go
forward.See 2 keyholes and locked hatched. Use crank on the
right padlock and Jack will say he does not have
technical savvy on this one.Go back to Amanda at the plane wreckage. Talk to her
about needing her expertise.While Amanda thinks why the mechanism is still not
opened, climb on the ledge at left. Enter the small hatch.
Disarm the bomb:
Dr. T throws a bomb. Look around and see loose wires
at the control panel at right (center of screen).Take the teapot by the chair. Use teapot on
loose wires to short circuit it.
Stop the doctor before his transmitter is reloaded:
Platforms: Take cane
hanging right of locked door. Use cane on the hatch of the locked door.Follow Dr. T outside to the bridge and enter upper
platform through the next building on the left.At the platform, take door handle left of door. See a
closed hatch. Use knife on hatch. Take blown fuse.Enter the door at right to platform close to barracks.
Talk to Amanda. Take the brake pad right of platform.Go back down to the upper platform using the door on
the left. Use the brake pad on the fuse socket.Go back through right door. Go to the ramp at right to
enter the barracks.Barracks: Take the spindle
with twine at bottom bunk left of Jerry, the sleeping chimp.Check the lockers at back wall. Take the clothes
peg-coat hanger from the last locker at right.
Open the door in the
monkey’s dormitory:
The exit hatch to the hangar is closed and needs a
code. The chimp should know it.Go back to left side of room and see the alarm console
that alerts the chimp pilots.Use the large green button and this wakes up the
chimp. He opens the hatch and takes off in his round plane.Amanda follows the chimp. Amanda tries to fix the
metal door.In inventory, use the clothes hanger with spindle with
twine to get improvised coil.Use improvised coil on fuse box or Amanda.
Use broken rifle.
Amanda and Jack confront Dr. T.
Montgomery arrives to a sort of rescue and gets
thrown off the gondola of the fixed balloon.Dr. T escapes in the balloon.
Chapter XIII: The last stand
Change the course of
the balloons:
Dr. T needs to be higher to signal his army.
Grappling hook: Go left and enter
the cabin-furnace room.See and take horseshoe on wooden board on the
wall. Use the horseshoe on oven.Take corkscrew by oven. Use corkscrew on
minibar. Open minibar. Take bucket of ice.Go outside and left. Take emergency paddle and
hawser. Go back to the cabin-oven.Use paddle with oven to get red hot horseshoe.
Use horseshoe on paddle with bucket of ice. Use horseshoe with hawser to get
grappling hook.Go outside and right by Amanda. Use grappling hook on
ship’s helm-steering wheel in front of Dr. T.This turns the ship sideways.
Stop the doctor
before his transmitter is reloaded:
Amanda is hanging below.
Climb up to be on the first sofa. Turn the steering
wheel to get Amanda a foothold on the rudder to climb up.Use knife on blue box left of steering wheel. Take
signal flares.Give signal flares to Amanda. She uses it to distract
Dr. T.
Prevent the doctor
from grabbing the transmitter:
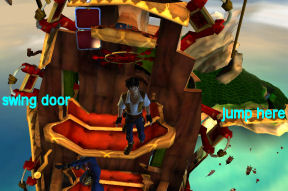
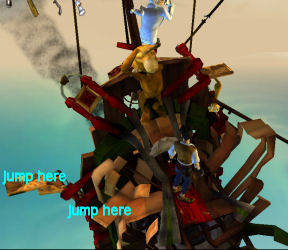
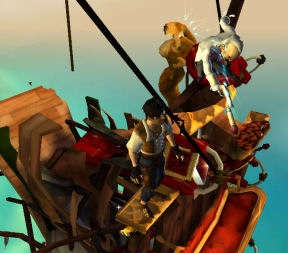
Jump to right ledge of the gondola. Jump again to be left of the chimp figurehead.
Stand on the red door. Climb to the figurehead and
then use
the chimp’s left arm to get to Dr. T. The left arm breaks off. Take wooden
arm.Go down to the red door. Go back to the left. Jump
back to the ledge and back to the sofa.Go left of sofa and see a swing gate on the railing
that does not hold open. Use wooden arm on wrecked swing door.Jump back to the right until the chimp figurehead.
Now, go right instead of up (chimp figurehead) to the right small platform.Then go up to stand on swing door propped up by the
arm. Use knife on frayed rope.Watch.
But we did it!
Watch the credits for some outtakes.
This document may not be
distributed without express written permission of the author and the content
may not be altered in any way.
For Questions or Comments
on this Walkthrough,
Please write to:
MaGtRo
Copyright © 11/2007MaGtRo