Dracula: Origin
The window is barricaded.
Take the linen cloth that is over a basket
right of the door.Take St Michael’s spear from the statue on
the left bookcase. Use the spear on the head front of desk. Open.Safe puzzle:
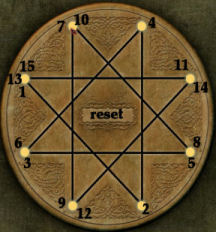
The object of the puzzle is to light the balls
at the tip of each triangle.Click on a ball and it will show the paths it
can go to.The next position to be lit has to be connected
by a line to the recently lit positioned ball.The ball is held in place if 2 actions are
done: light the ball in a slot ahead of where you want it to be and then
click on the slot-place you want it to go. So think ahead where you want a ball
to go.
One possible solution:
Click on the numbered holes in sequence
1-15.
Open!
Take the key and chalice, the Cup of
Targovise.Go to bottom screen. Take an old broomstick (handle) on the floor right of
the shelf.Check the Schnapps barrel on the bottom shelf. Use
the paper cutter to open the schnapps’ keg and see the alcohol pour on the
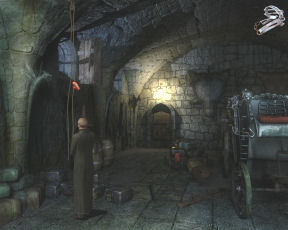
floor. Watch out!Food cellar: Go to the
right.Look at the tortured body of the hanging man at
right.See rats below the man. They are on top of a student’s
pack. Check the student’s pack. The man must be Baker mentioned in Duke’s letter.In inventory, combine the broomstick and the linen
cloth to make a torch. Light the torch using the matches.Use the lit torch on the rats. Open the student’s
pack and take holy water.Hallway: Go to the top
hallway.Check the locked door. The key doesn’t work on it.
Take and automatically wear a dirty monk’s robe
hanging on the wall.Wine cellar: Go back to the
wine cellar.A creature from hell monk comes in and goes to the
wine cellar. He blocks the way and he must be taken care of.Use the lit torch on the spilled liquor on the
floor.Take the key from the ashes of the devil
monk.Hallway: Go to the hallway. Use the key taken from the monk on the locked door.
Altar room: See monks
worshiping a devil. One of them drank from a chalice at right side of room.See Brother Alberto chained and imprisoned at bottom
right corner. Go and talk to Brother Alberto.Get rid of the monks:
Look around at the ghastly room. Go inside
the pentagram.See a stand with a goat’s head right of the
pentagram on the floor stand. On top of the goat’s head is a chalice.In inventory, combine the chalice and holy water to
get chalice of holy water.Exchange-click the chalice of holy water on the
chalice on top of the goat’s head.Move away from the stand and see what happens. The
other monks cannibalize the dead monk.Talk to Brother Alberto. Find out that his leg is
broken. The text cannot be read by Brother Alberto because they blinded him.Learn that Dracula must be conquered and forced to leave
this earth in his own soil. The link Dracula has with those he controls will vanish
also.Use the dark key taken from the safe in the wine
cellar on the door at right of Brother Alberto.
Orlowski Manor:
Automatically be at the manor. Mina was taken by Dracula.
Transylvania
Van Helsing and Seward travels to Castle Dracula.
Seward got sick during the trip. Van Helsing makes an arrow for a crossbow
from the blade from Cairo
during the trip.
Tavern: The inn close to
Castle Dracula is far from any village.
Talk to Seward and automatically enter the tavern.
Talk to the innkeeper, Abraham du Varmin.
What a name. Lion, tin man, scarecrow. Oh my!Try to take the menu-paper from the counter. Ah.
Look around the inn and take note of garlic strands
and devils on the posts.Go to the bottom screen. Look around.
Take circle and rod looking pretzels from the
bowl on the table. Take silver paper from the table just in front of
Seward. Take a spoon by the wine bottle from the table.Use the spoon on the sticky slimy substance
from the bench under the window on the right.Try to take the key left of the door. Take note that
the key is silver.Try to open the door on the left. It is the door to
the stable.Seward is getting very sick. Van Helsing says to ask
for medicine.Talk to the innkeeper again about remedy. Abraham
looks for a potion at the stable.Now that Abraham left, check the menu-paper on the
counter. They are from the Castle and one of them is in Harker’s writing. Read
Extract from Harker’s Journal. Harker has been made a vampire.Abraham comes back with potion in a flask.
When he closed the door, the boar’s head falls off from the wall. Pick up the molar that detached from the boar’s head.
Make a stable door key:
In inventory, combine the silver paper and sticky
substance to make silver paper glued together.Use the silver paper glued together on one of the 2
pretzels shaped like a rod and circle. This wrap around the pretzel made a glossy pretzel.Use the silver paper glued together on the other of
the 2 pretzels. This wrap around the pretzel made another glossy pretzel.Combine the 2 glossy pretzels to make an assembled pretzel.
Use the silver paper glued together on the wild
boar’s molar to get a shiny molar.Combine the assembled pretzel with the shiny molar to get a false key.
Use the false key on the key hanging left of door.
Talk to innkeeper again to distract him.
While Abraham looks for bootleg behind the bar, use the stable key on the
locked door (footprint cursor).
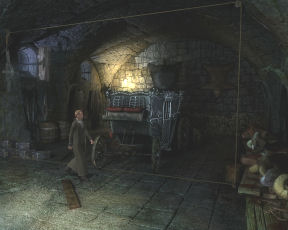
Stable: Look around.
Check the coach. Van Helsing needs to hide in the coach to get to Castle
Dracula.Look at the cask above the coach. He needs to hide in the cask.
Look at the hole in the ground beside the table behind the coach.
Check the horses and see that they are agitated.
Calm the horses:
Go to the right and be at the workbench.
Take the empty bucket on the floor behind the bottles left of the
workbench.There ‘s a bucket of oats in front of the bottles on the ground.
Use the empty bucket on the oats to get bucket of oats.
Go back close to the door.
See blood dripping from the hanging carcasses.
Use the bucket of oats on the carcass to get bucket of oats and
blood.Give the bucket of oats and blood to the horses. That calmed the horses.
Collect items for wine cask:
Now that horses are busy eating, go to the front of the horses.
Take the funnel in front of the cask and the chest-box on the
table.Take the old trough (half a metal pipe) from under the table.
Take the tube-pipe in front of the left horse.
Take the beaver’s cadaver-carcass beside the bloody chopping block
at right and by the gate of the stable.
Empty the cask of wine:
Go back to the coach.
Place the box-chest on the ground in front of the back wheel.
Place the trough-half a pipe on top of the chest.
Place the beaver carcass on top of the trough.
Place funnel on top of the beaver.
Place the tube at the bottom of the trough to lean on the chest and to the
hole on the ground.Open the tap of the cask. Now will this work? Wine goes down the hole in the
ground.Click the setup and it will all be removed automatically.
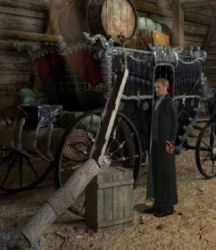
Castle Dracula: Automatically, Van Helsing is in the
cask and is watching the ride to the castle.
Stables: Van Helsing says to lure the coachman under
a trap. Look around the stables.Make a trap: Take the leghold trap on the worktable left of the coach. See a bucket
of blood on the floor at the end of the worktable. It cannot be used yet.Go to the bottom of the screen and see the door where the coachman went
through. There is an impressive collection of hides on the wall.Take the 2 ropes on top of the barrels on the left wall.
Look up at the ceiling and see a pulley. Use a rope on the pulley and see it
hang from it.
Use the leghold trap on the rope and see it attached and on the floor.Use the other rope on the leghold trap on the floor.
.
Go to the right and be behind the coach.
Click on the pulley on the ceiling above the worktable and see the rope strung
across.Bait the trap: Take 2 meat hooks from the worktable in the foreground.
Move the cursor to the middle part of the worktable just above the tree stump
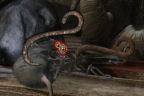
on the floor and see a close up of a dead rat caught in a trap. We need that
rat. The meat hooks are at bottom of screen.Use a meat hook on the right of the trap and one on the left side of the trap.
Take the rat.
Bait the trap. Go back to the leghold trap left of the coach.
Place the rat on the leghold trap and the trap is baited.
Watch the trap sprung.
Talk to the coachman. Learn about Mina. Dracula is
singing to the sleeping girl to bring back his first one. The beauty (beast) with black hair is
waiting to prevent entry to where Dracula and Mina are located.Talk to Igor again. Take the axe in front of Igor.
Use the arrow for crossbow on the red wrapped object left of the coach. Take
the jam pot with preserved hearts.Take the gold bowl-vase above the red cloth left of the coach.
Give the jam pot to Igor. Igor says that he owes you.
Go to right screen and front of the coach. Use the bowl-vase on the bucket of
blood left of the coach to get blood.Go right and go through the door to the
castle.Storeroom: Take the cord
on the red curtain at right. Take the fur coat on top of the barrel at
bottom center.Crypt: Enter the door top of the room and be in front of locked gate to the crypt.
Look at the gate. Look close at the panel at right.
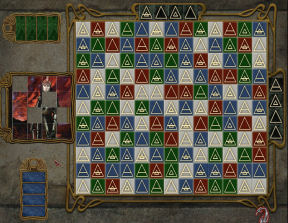
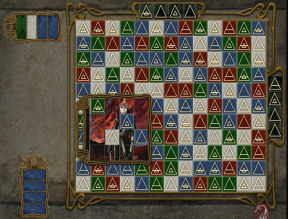
Dracula’s picture puzzle: This
puzzles consists of several steps. (Thanks, tyke!)Take note that Dracula’s picture on the left is made
up of squares.The top and right side of the big square have 4 symbols
each. Pass the cursor over the symbol tile and see part of Dracula’s picture.Let’s do the top horizontal symbols first:
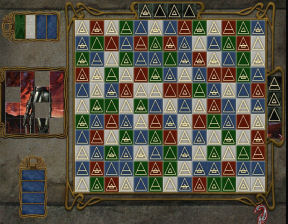
1. Study the 4 parts of the picture that are under
the symbols on the top or above of the big square.2. Click the squares on Dracula’s picture that
corresponds to the picture under the horizontal symbols above the big squares.
The squares on the picture are now blank.
3. Move-click the picture to the big square and look
for a place where all 4 symbols seen above the big square could be seen inside
the blank squares. Drop the picture on that selected area.4. Note the colors of the squares and enter those
colors at top left horizontal frame of colors: (l-r) green, white, blue, blue
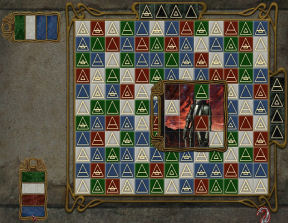
Right vertical symbols: Click back Dracula’s picture
to remove blank squares.1. Study the 4 parts of the picture that are under
the symbols on the right of the big square.2. Click the squares on Dracula’s picture that
corresponds to the picture under the vertical symbols on right side the big
squares. The squares on the picture are now blank.
3. Move-click/hold the picture to the big square and
look for a place where all 4 symbols seen right of the big square could be
seen inside the blank squares. Drop the picture on that selected area.4. Note the colors of the squares and enter those
colors at bottom left vertical frame of colors: (t-b) green, white, red, white .Open! The gate rises.
Enter the crypt.
Coffin 1: Look at the cover
of the coffin by the stairs.Click on Moana and also on 12176 that are written on it.
Open the coffin and see that the vampire woman has
red hair.Coffin 2: Open the next coffin on
the left. Nothing of interest.Coffin 3: Look at the cover
of the coffin on the left.Click on Illona and also on 8954 that are written on it.
Open the coffin and see that the vampire woman has
blonde (white) hair.Dracula’s coffin: Look at
Dracula’s coffin with the dragon symbol on the cover.
Use the axe on Dracula’s coffin.
Coffin 5: Check the bird
drained of blood beside the right coffin.Open the coffin and see Harker’s body.
Take Harker’s glasses from his hand.
Take the book Myths and Legends from the First
Order of Knights from the side of the coffin. Learn about the Pelor
shield.Take Harker’s journal from his feet. Learn
how he was turned into a vampire by a black-haired initiator and about Pelor,
the shield of the Sun.Liberate Harker by combining the stake and hammer
in inventory. Use the combined stake and hammer on Harker.Exit the crypt and forward to the door at right.
Great hall: Enter the door
at right of the storeroom.Fiat lux: Go to the left
side of the hall.Look at the white painting on the floor depicting
Genesis and text of celestial beams – Fiat lux – Let there be light.Large Tapestry of Knights:
Look close at the end tapestry on the wall.It shows Dracula as a knight with several knights in
the background. Check his shield.Look close at the hand of the left knight and see a
pink ribbon. Remember the past of Dracula as mentioned in his diary. This must
be the knight that is betrothed to Dracula’s love. Check his charred shield.Irina portrait: Pull the
cord of the curtain on the left. Take the cord that fell on the floor.Look at the portrait of a beautiful woman. Look close at her hand and then use the
Harker’s glasses. Something pink has been scratched from her hands. It must be the
knight’s pink ribbon token.This must be Irina, Dracula’s love. The one that is
mentioned in Dracula’s book and the one he wants to bring back to life through
Mina.Go left twice and see the 3 portraits on the other
side.Illona: Read the name plate
at the base of the portrait on the left. Illona has blond hair.Dracula: Look at the
painting of Dracula.Moana: Read the nameplate
at the base of the portrait on the right. Moana has red hair.Jada: Open the door beside
the portrait of Moana.Meet Jada. Learn about Mina and Dracula. She spent
5777 nights with Dracula.She must be the woman that is mentioned by Igor that
is black haired beast that will prevent from getting to Mina and Dracula. She
is also the one mentioned by Harker that is the black haired initiator to his being a vampire.Locked door: Check the main door
at end of hall.Armory: Go to the right. Go
close to the cage on the right of center locked door.Look close at the sword lock. It has squares for
numbered code.Armory code: Go back to the
stables past the storeroom.After giving the jam to Igor – he owes you. Talk to
Igor.Igor: Learn that the numbers on
the coffin are the number of nights the women stayed with Dracula.The code to the coffin is: 3 times the night with a
white moon plus 2 times the night with a red moon plus 5 times the night with
a black moon.Illona is blonde and has 8954 on her coffin. 8954 x
3 = 26862Moana had red hair and has 12176 on her coffin.
12176 x 2 = 24352Jada has black haired and spent 5777 nights with
Dracula. 5777 x 5 = 2888526862 + 24352 + 28885 = 80099
Go back to the armory and enter 80099 on the sword
lock. The cage
opens. There, perfect!Pick up the coat of mail and the crossbow
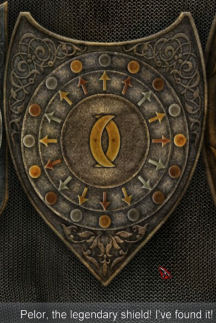
without bow string at left part of the cage.Pelor shield: Remember the
mentions of the Pelor shield in Harker’s journal and the description of it in
Myths and Legend book.Crossing the 2 moons and aiming the arrows so
that the golden darts target the neighbouring silver and that silver, in his
turn, points towards a nearby bronze.Identify Pelor shield: Click on the shields. See the 3 shields in close up.
Based on the description from the Myths and Legend
book and the shape of the favored knight’s shield on the tapestry, work on the middle one.Crossing the 2 moons – Click the 2 moons to
face each other and the 2 ends overlap.aiming the arrows so that the golden darts target
the neighbouring silver and that silver, in his turn, points towards a nearby
bronze. – Click the outside ring that goes clockwise 12 times. Click the
middle ring that turns counterclockwise with the darts 3 times. I found it!
The Pelor shield is in inventory.
Jada: Click on Jada’s door.
He says he needs something to attract the beast.Click the bowl of blood on the floor in front of the
door of Jada’s room.Watch as Jada picks up the blood and what Van
Helsing did to her. That is quite a curse.Jada’s bedroom: Enter the
room.Look around. Use spacebar to see all the hotspots.
Take the pot of grease on the floor on the
left. Look at the hanged tortured man.Use the axe on Dracula’s coffin at the foreground.
Take the key inside the coffin.Take the book, The Vermis Mysteris (Mysteries
of the Worm). Read it in documents and learn that elemental forces… that
comes from the centre of earth or from the skies can cause harm to this black
ones.Use the axe on the other coffin. Look at the picture
of Jada Dahmer before she became a vampire.Use the arrow for crossbow on the mandolin leaning
on the bed and get mandolin string. In inventory combine mandolin
string and crossbow to get a complete crossbow.Exit the room.
Ritual room: Use the key
from Dracula’s coffin on the locked door and enter.See Dracula and a floating Mina. Dracula is reciting
the ritual. The green clouds of spirits are blocking the way.Short circuit the clouds:
Check everything in the room.Look at the bookcase with a metal top.
Click on the railing on the floor right of the
bookcase. It shows that the bookcase is movable but the mechanism is jammed. Use
the pot of grease on the railing. There. Perfect!Push the bookcase to the right and close to a puddle
of water.Go close to the left statue of a knight. Look at
statue, it is made of metal.Place coat of mail on the puddle close to the right foot of the statue.
Watch as the ligntning passe from above to the cord.In inventory, combine the 2 curtain cords. Use the
combined cords on the left foot of the statue. Van Helsing spread the
cord to the open space.Go right and use the fur coat close to the laid out cord.
This caused the green clouds to part.In inventory, combine the complete crossbow and arrow for a crossbow
to get crossbow ready to fire.With the crossbow ready to fire highlighted, go
forward behind the green clouds.Watch the final confrontation.
Duchess Orlowski has a visitor.
This document may not be
distributed without express written permission of the author and the content
may not be altered in any way.
For Questions or Comments
on this Walkthrough,
Please write to:
MaGtRo
Copyright © 5/2008MaGtRo