Just Adventure original
Dead Synchronicity: Tomorrow Comes Today Walkthrough
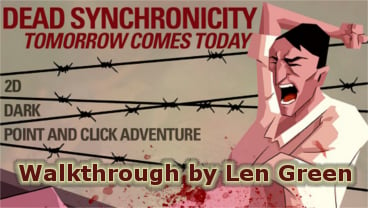
Comprehensive walkthrough for Dead Synchronicity – Tomorrow Comes Today.
WALKTHROUGH
· Len Green { lengreen@netvision.net.il } 13th May 2015
FOREWORD
{A} This walkthrough describes ONLY ALL the actions which you MUST take in order to complete the game, together with just a very few which are helpful although not absolutely essential.
However, please don’t use this walkthrough unless you absolutely have to. Nearly all aspects which are not absolutely imperative have been omitted. Very many of these are extremely interesting and provide most of the background story to the game, and particularly to the fascinating (and artistic) characters, and scenery etc.
{B} “Warning”:- The main purpose of this game is to examine items, interview people, view the interesting sights and sounds and backgrounds, etc.
If you simply take this walkthrough in your hand (or consult all the built in hints) and follow exactly what to do and not to do, you can probably finish the game quite quickly. However that would completely defeat its whole purpose!{
{C} The walkthrough does not do justice to the horror of the situation depicted in the game or the harrowing fate of the participants! It can help you to overcome possible stucknesses &/or help you to know where to go next if you cannot progress but it CANNOT depict the misery and terror of the ‘new world’!!
{D} Upon entering EVERY new location, it is highly advisable to browse around as much as possible in order to explore the general layout and in so doing examine fully EVERY one of the many hotspots. However, the walkthrough NEVER tells you explicitly to do this! To (GREATLY) help in this procedure, pressing the space-bar reveals ALL of the hotspots on your game screen overlaying your screen location view! The hotspots themselves are exhibited with labeled captions (names).
{E} You should most certainly NOT HAVE TO follow the identical order of accessing locations or hotspots etc. as outlined in this walkthrough since the game is not linear. There are several permutations of routes, and it is highly unlikely that 2 players will follow exactly the same itinerary etc. from beginning to end. In addition it is most likely that this walkthrough does not necessarily describe the best or even the most efficient route to play the game (and finish it completely)!
Some locations of course will not be ‘created’ until you have completed certain previous tasks. The same applies to certain gameplay actions. And so a particular order is sometimes obligatory.
{F} The game is third person and mouse driven point & click. There are full (and excellent) subtitles.
{ G} As in most Quest-Adventure games, it is easy to make a ‘wrong’ or redundant move! So it is HIGHLY advisable to save FREQUENTLY. There are an unlimited number of save-slots.
{H} EVERY TIME you obtain a new item, it will appear in your inventory. You should observe and if necessary examine each new inventory item immediately it appears in your game-inventory..
N.B. It is imperative to view, and sometimes to ‘manipulate’, some of the inventory. In addition, some inventory items will combine with others there to create new objects.
{I } In the text, all objects which are acquired and entered into the inventory are written in bold, underlined, and yellow.
All objects which are used from the inventory are written in… bold italicized, underlined, and blue.
{J } Throughout the game there is a periodic interruption – a sort of disintegration of the scene and its recombination. It is presumably included in the game to stress the horror and despair of the “New World”. Each such interruption only lasts for about 20 seconds, but they occur VERY FREQUENTLY and hence can be VERY annoying in that they tend to spoil the unfolding narrative and gameplay
However, if desired, they can very easily be skipped by pressing the escape button whenever they start!!
The actual WALKTHROUGH starts here!
Act 1 – A Camp Full of Rats
Room in Trailer1st visit
***** It’s pitch dark! Light the oil lamp.
***** Talk to Rod Atkinson and exhaust ALL dialogues.
***** Open the oven and examine its contents.
***** Pick up the Pot Lid.
***** Pick up the Notebook.
***** In inventory read the Notebook .
Trailer Yard1st visit
***** Look through the window of the trailer and view Rod, his wife, and son Colin, and a cookie box.
***** Access the shopping cart – and get VERY forcibly warned not to even touch it.
***** Whilst wandering around without shoes on you get a nasty cut on your foot from a rusty nail. You need to treat that ASAP!
***** Talk to the homeless man and exhaust ALL dialogues (He is the owner of the shopping cart and its contents!).
***** Look at the open bin full of burning garbage – a thick pall of smoke rises vertically from it.
***** From inventory, place the pot lid on top of the bin… it fits almost completely and causes the smoke to blow sideways out of a bullet hole towards the homeless man – it temporarily more of less chokes and incapacitates him.
***** QUUICKLY seize the opportunity and examine the contents of his shopping cart and steal a Credit Card.
Room in Trailer2nd visit
***** Open the cupboard. You can’t – it’s locked.
***** From inventory, use the Credit Card to open the cupboard.
***** Take the Bottle of Whiskey.
***** Take the Pillowcase.
***** From inventory, use the Pillowcase on the very sharp broken spring protruding from the bottom of the bed – this makes some Bandages.
***** Pour some Whiskey (from inventory) onto the bandages in the hope that the alcohol will disinfect the foot wound.
***** Take the soaked Bandagers from inventory and wrap them around the wound and put on (the wearable but dirty) shoes.
***** The homeless man screams blue murder from outside about the smoke and pot lid and angrily throws the lid away.
***** The connecting door opens as Rod and his wife anxiously want to know what’s going on outside!
Rod’s Room in Trailer1st visit
***** Enter the (now opened) connecting door.
***** In panic, Rod screams at Michael to get out.
***** Michael is shocked and bewildered and does not understand but gets out of Rod’s room nevertheless.
Room in Trailer3rd visit
***** Rod follows Michael into ‘his’ room.
***** He apologizes for losing his outburst.
***** Rod explains at length what the problem is and why he lost his cool.
***** Talk with Rod and exhaust ALL dialogues.
***** Rod strikes a bargain with Michael:-
He requests Michael to undertake the very difficult and perilous task of getting out of the “Refugee Camp” and obtaining a specific drug which may hopefully cure his son Colin (who has become one of the “dissolved” ill people).
Amnesiac Michael is a Blank-Head. In return for his help, Don will use his contacts in the city to fill Michael in on his past and thereby return him to some sort of normality!
“A man without a past is just a shadow – GIVE US OUR FUTURE (i.e. Colin) MICHAEL AND I WILL GIVE
YOU BACK YOUR PAST”!
***** Michael, hesitantly, agrees.
***** Go to the door to exit ……………….
***** Michael writes down his present status in his Notebook .
***** He leaves the trailer.
Outside the Trailer1st visit
***** Walk forward (i.e. bottom of screen).
***** Suss out the area.
***** Go to the Camp Centre which is on the main path from the Refugee Camp to the City.
***** Continue forwards (i.e. middle of screen).
***** Suss out this area – it is the barbed wire perimeter of the refugee camp. It has an exit with heavily armed trigger-happy guards covering a barrier.
***** Talk to the guards and exhaust ALL dialogues. They are highly aggressive and abusive,
***** Examine the motorbike and its saddlebag.
***** Turn round – you are still at the Camp Centre to the city but now facing back towards the ‘refugee camp’.
***** Walk east (i.e. towards the right edge of the screen).
Rose1st visit
***** Meet a young lady in a white dress. Her name is Rose and she speaks with a childish voice and behaves rather strangely.
*****Talk to Rose and exhaust all dialogues.
***** She calls Michael “Sleepy Head” and says she has secrets concerning him.
***** Two thugs order Rose into the van.
***** Michael wants to follow her and talk to her and learn a secret about himself.
***** The thugs will only let him into the van if he pays them, They are pimps and don’t care what he does in there so long as they get paid!
***** Michael has got no money.
***** Talk to the two goons – NO USE!!
***** After looking around the area, he leaves unhappily!
Solitary Inhabitant1st visit
***** Return to the Camp Centre to the …………….city.
***** From there, walk west (i.e. towards the left edge of the screen).
*****Talk to the solitary inhabitant and exhaust all dialogues.
“Hunter”1st visit
***** Enter the Brick Building.
***** Talk to the bartender and exhaust all dialogues.
***** From the bar (‘table’) take the Empty Beer Cans.
***** It’s a black-market headquarters run and completely controlled by “The Hunter” (His previous name was Hank – but you must not use it!!).
***** You can buy ANYTHING there , or barter items.
*****Talk to Hunter and exhaust all dialogues.
***** Exit the building and the location and return to the Camp Centre.
Woman Smoker1st visit
***** Approach the barbed wire fence, turn left, and walk left SLOWLY (to the west).
***** Talk to Misha, the Smoking Woman, and exhaust ALL dialogues.
***** She is the wife of the ‘Mole’ who was shot (and is mortally wounded). She is highly antagonistic towards Michael who she repeatedly calls a “Rat”.
***** Michael promises to bring her morphine from the City when he gets the drug if she gives him her husband’s pass… He needs the pass which grants the bearer many privileges including permission to leave the Camp and visit the City!
***** The woman does not trust Michael.
***** She needs food for her children so Michael says he will get her food in exchange for her husband’s pass.(Which he has since he is/was a ‘Mole’).
***** Examine the overturned drawer on the floor in the middle of the room.
***** Notice that sticking out from under it is a pack of cigarettes.
***** Take the cigarettes. You can’t – Misha is angry and won’t let you touch them!
***** If you need those cigarettes you’ll have to get Mish out of the way for a short time!
***** Exit through the door on the left .
Misha’s children1st visit
***** Watch the very badly wounded Mole’s 2 children throwing rocks at a primitive target which is a painted pallet.
***** Talk to the children and exhaust all dialogues.
***** They would like a better target for their target practice.
***** From inventory use the empty beer canson the painted pallet and thus create a new target.
***** Talk to the children again and exhaust all dialogues.
***** Persuade them to get their mother (Misha) out of their house for a few minutes so that Michael can do something there.
***** Michal returns to Misha + Mole’s house.
Woman Smoker2nd visit
***** Grab the Pack of Cigarettes.
***** Leave the house and return to Hunter’s Headquarters.
“Hunter”2nd visit
***** Barter with the bartender… Exchange your whiskeyand the cigarettesfor a Food Package.
***** Leave Hunter’s HQ and return to Misha’s house.
Woman Smoker3rd visit
***** Give Misha the Food Package and she reluctantly gives Michael the Pass which is in the form of a special Bracelet.
***** Leave Misha’s house and go to the guards at the barrier.
Barrier1st visit
***** At the barrier show the Bracelet to the guards who very reluctantly let Michael leave the Refugee Camp and approach the City!
***** You pass the barrier and enter the main road to the City.