Secrets of the Ark: A Broken Sword Game Walkthrough by Bert Jamin
Phoenix
Examine the jeep to get a jack
handle. Try to open the gate. Use the jack handle to open the gate. Walk past
the opened gate. Walk to about halfway the path. Look at the fire escape at the
wall on the left side of the path. Try to activate the fire escape. Darn… it
is out of reach!
Walk to the opposite side. Try to
move the big container. It won’t budge. Pull the wooden crate next to the
container backwards. Examine the chain that’s hanging at the right side of the
container. Pull the chain once to relieve the brake. Move the container to the
left. Stand at the left side of the upper wooden crate. Pull it backwards once.
Go and stand behind the wooden crate and push it against the wall.
Climb up the wooden crate. Climb
up the green part of the roof. Climb up the platform at your right side. Jump
onto the ledge above you. Go all the way to the left until the next platform.
Jump to the next platform. Walk to the left and climb up on the next platform.
Go around the corner and climb up the roof.
Step on the roof. Walk forwards
and pick up a piece of rubble. Notice the fire escape at the opposite building.
It’s the one which was out of reach a little earlier! Look at the old satellite
dish holder on the roof. Move the arm of the dish holder four times to the left.
Be sure it is aimed to the fire escape at the opposite building. Use the piece
of rubble on the arm to shoot down the fire escape!
Go all the way down and walk
towards the fire escape. Climb it up. Move the wooden crate on the roof. Move
the large pipe once. Crawl through the pipe to end up at the other side of the
crack in the roof. Walk to the right a little further. Kick a piece of rubble
into the crack in the roof. Climb down into the crack.
Look through the window. Try to
open the door. Walk to the table at the center of the room. Look at the picture
on the table. Walk to the left side of the room. Look at the gold plated name
tag on the desk. Look at the photo on the wall. Look at the poster on the wall.
Look at the gun display case against the right wall.
Walk to the opposite side of the
room. Use the code lock next to the door. Punch in the wedding date you saw
earlier on the photo. Hhhmmm… for some reason the code doesn’t work. Time to
do another hacking! So use your PDA to get the correct code. Click on Connect.
Click on c.jenkins_office1. Here is another image to assist you once more.
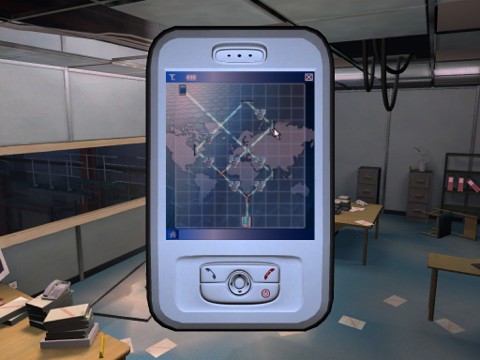
Hacked into Jenkins office
When the hacking is over, click on
OK. Scroll down the text and click on Files downloaded from Secretary’s PC.
Close the PDA. Use the code lock next to the door and punch in the wedding date
reversed. Open the unlocked door and enter the room.
Walk to the left. Jump over the
first gap. Walk further to the left. Jump on the platform. Hang on the ledge of
the platform. Go all the way to the left, around the corner and all the way to
the end. Let go to jump on the wooden crate. Step on the floor.
Look at the huge hopper in the
floor. Walk past the first hopper. Look at the key card that is laying on the
right side of the hopper. Try to pick it up. Oooeeepppsss… Look at the barrels
behind your back. Open the door at the right side of the room. Go through the
door. Go through the opposite door.
Walk to the right side of the
kitchen. Take the hook from above the sink. Walk towards the table against the
left wall of the kitchen. Move it to the left. Climb up the table. Take the
stick of gum from the top of the cabinet. Step down the table. Exit the kitchen.
Turn to the left. Enter the first door at the right side to enter the man’s
locker room.
Open the center locker with the
jack handle. Take the can of engine oil from the locker. Walk towards the door.
Try to open it. Use the electronic lock at the left side of the door. Time to do
another hacking. So use your PDA. Click on Connect. Click on admin.pc_office7. Here is another image to assist you once more.
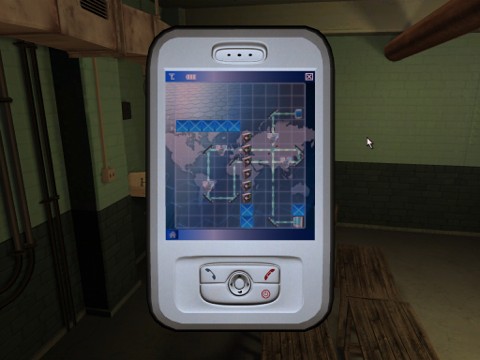
Hacked into the admin office
When the hacking is over, click on
OK. Close the PDA. Open the door. Exit the locker room. Open the door at the end
of the corridor. Go down the stairs. Enter the door to the left. Try to open
the door. Climb up the safe. Climb up through the hole in the ceiling. Operate
the control panel. Put some engine oil on the rusty chain. Operate the control
panel once more. Move the chain to the right and move it down.
Enter the hole in the floor.
Attach the hook to the chain. Climb back up through the hole in the ceiling.
Operate the control panel. Move the safe up and move it to the left. Walk to the
right side of the room. Try to operate the control panel at the right side of
the door. Examine the wires in front of the control panel. Attach the stick of
gum to the wires.
Try to operate the control panel
once more. Walk to the left. Talk to Maynard. Ask him about everything you can.
When he fixed the control panel, operate it. Your goal is to move the safe to
above the centrifuge room. Here we go! Move the safe to the left, left, down,
right, right, up, up, left, down, down, left, up, up, up, and up. If you have
done this correctly the safe should be standing just besides you.
Try to push the safe into the
centrifuge room. Talk to Maynard about the safe so he gives you a hand. Flip the
safe down into the centrifuge room. When Maynard tells you to do so… press the
button! When the process is over, enter the centrifuge. Pick up the plastic
folder and Maynard’s keys. Examine the plastic folder to find a bank statement
and some technical drawings. Exit the centrifuge.
Walk to the left. Open the door
with Maynard’s keys. Close the door on the other side and lock it with Maynard’s
keys. Go up the stairs. On the next floor, put some engine oil on the doorstop.
Press the power switch to switch off the light. Open the door…
Walk through the corridor. Quickly
enter the last door at the left side. Lock the door from the inside with
Maynard’s keys. Walk to the elevator at the right side of the room. Press the
button to call the elevator. Walk all the way to the left and
exit.
Back at the Vatican
Try to pick up the bottle from the ground next to good old Archie. Talk to
him and ask him about everything you bin. Walk all the way to the left. Search
the garbage can. Take the half empty bottle of champagne from the garbage bin.
Walk back to Archie. Talk to him once more. Tell him about the half empty bottle
of meths. Offer him the half empty bottle of champagne. Pick up the half empty
bottle of meths. Head back to the garbage bin.
Pour the meths into the garbage
bin. Use your lighter to set the garbage bin on fire. Enter the door of the
wafer factory. Walk straight forward. Open the door in the wall at the right
side of the storage room. Look at the wafers on the conveyor. Walk to the right.
Examine the controls of the machine. Look at the white mixing vats. Look at the
gold dust between the two vats. Walk back towards the door.
When Nico and sister Angelica
return, ask the sister about the special wafer making machine twice. Ask her
about the holy powder twice too. At the end of the conversation you see cardinal
Gianelli sneaking through the factory. You have to follow him to the garden.
Exit the room. Walk to the left. Walk through the corridor between the storage
room and the little office.
Open the door at the end of the
corridor. Climb up the stairs at the right side. You have to cross the garden
once more to the opposite building once more without being spotted by the
patrolling monks. Enter the building. Walk to the left side of the main room.
Notice that the trapdoor in the floor is still firmly locked. Climb up the
stairs. Walk through the corridor and peek through the half opened door of
Devlin’s office about halfway the corridor. When you’ve seen enough, enter the
room. Examine the new manuscript.
Read the three Latin lines of
text. Look at Jesus with the cross. Look at the symbols of the Templar, the
Turk, the Assassin, Mamluk and the Hospitaller. Zoom out. Talk to Mark. Ask him
about everything you can. Go back downstairs. Walk to the main room. Notice that
the lock of the trapdoor has been removed. Try to open it. Click the icon of
brother Mark on the trapdoor. Stick the golf club into the trapdoor. Go down the
trapdoor.
Walk to the end of the room. Look
at the base of the two huge statues of an angel. Notice the two turnable
hourglasses Remember that you’ve seen a painting upstairs with two angels on the
golden frame. The only thing is you don’t remember the position of the
hourglasses on that painting. So go back upstairs and enter the last door at the
left side of the corridor. Examine both angels on the frame of the painting.
Make a note of the position of the hourglasses of the left angel and do the same
with the hourglasses of the right angel.
Head back down the trapdoor. Walk
to the left statue. Turn the left hourglass to the standing position with the
sand in the bottom part. Turn the right hourglass in the laying position with
the sand pointing to the right. Climb up the statue and move the head. Climb
down the statue.
Walk to the right statue. Turn the
left hourglass to the standing position with the sand in the bottom part. Turn
the right hourglass to the laying position with the sand pointing to the right.
Climb up the statue and move the head. Click with brother Mark’s icon on the
angel’s head. Go down the opened trapdoor.
Catacombs
Walk to the corner of the
corridor. Open the junction box against the wall with your knife. Use the rubber
gloves on the opened box to pry the wires loose. Walk to the door at the end of
the corridor. Try to open the door. Look at the light bulb in the socket next to
the door. Try to remove the light bulb. Ouch! Remove the light bulb with the
fire proof blanket. Put the C-4 explosives into the socket. Walk back to the
junction box. Use the rubber gloves on the opened box to connect the wires.
BANG!
Go through the opened door. When
the shooting is over, read all the signs attached to the pillars. There are
fourteen of them! Walk to the left and enter the opened room to the right. Just
before you get shot good old Archie stumbles into the room and knocks down the
attacker with his last bottle ’85. It’s good he has his secret stash down here!
Look at the controls on the right
side on the wall. Move the first 1x. Move the second 5x. Move the third 1x. By
this the first cross is pointing up to the right, the second is pointing down to
the left and the third is pointing down to the right. And not only that, a
hidden door will open.
Go through the opened door.
Carefully walk around the corner. As soon as you enter this next room hold it
right there! Look at the floor to see all kind of tiles. You have to cross this
room by walking the correct path. Step on the tile with the cross in front of
you. Step on the tile with the cross in front of you. Step on the tile with the
sword at the right. Step on the tile with the lion at the right. Step on the
tile with the cross in front of you. Step on the tile with the cross in front of
you. Step on the tile with the cross at the left. Step on the tile with the
cross in front of you. Step on the tile with the moon at the left. Step on the
tile with the lion at the left. Step on the tile with the cross in front of you.
Step on the tile with the cross in front of you. Step on the tile with the moon
at the right. Step on the tile with the lion at the right. Step on the tile with
the cross in front of you.
Keep on walking until you enter the room with
the two gaps in the floor. Walk further between the two gaps. Oooeeepppsss… at
the end of the path you fall down a trap. Tell Anna Maria to pull the levers in the
correct order Assassin, Turk, Manluk and Templar. Walk into the next room.
Put the green map on the hand of
the statue of Jaques de Molay. Set it on fire with your lighter. Enter the next
room. Keep walking straight ahead. Put the rosary into the slot of the base
where the Ark has been standing on. Enter the opened door. Keep walking straight
ahead. As soon as you can smash one of the cherubs with your golf club. As soon
as you can also smash the other cherub with your golf club too.
The end…
View this guide raw, exactly as the archive holds it