Black Mirror
The Black Mirror
What
evil hides in the reflection of your soul…
by
Future Games
Walkthrough by MaGtRo October, 2003
Gameplay:
After installation, enter the key or ID code and then press enter. This is a
point and click game. The Main Menu has new game, save game, load game, options,
credits and quit. The Options Menu has the volume for spoken word and sound,
subtitles and gamma correction. In saved game, enter the name saved game and
then press enter. There are 24 saved game slots.
The main menu is accessed by
clicking on gear icon at top right of the screen. Double click the exits to move
between locations faster. Pressing Tab will show all the exits during gameplay.
Inventory is at the bottom of the game screen. Right click an item and it will
be identified or check what else is contained in that item. Press ESC to skip
intro.
See William write a letter to
Samuel. The ancient ring of your heritage should always be you. I am
afraid…
William is seen falling off the
tower window.
It is best to click a hotspot
until the cursor is not red-active anymore and to right click the hotspot if it
is still red. Right click to check the items in inventory closer. Exhaust all
dialogues.
Chapter 1
return of the
future…
Castle Black
Mirror:
Meet the main characters in
the Common Room: See Victoria, the widow of
William. Heinz Hermann, the pathologist is invited to stay and he went to the
library. Robert, son of William and Victoria went to his study. Victoria wants
you to stay for good. You are a Gordon. Bates the butler has your room ready and
gives you the key.
Why Samuel left for 12
years:
Lobby – In inventory, you
have William’s mourning card. Check all hotspots. Press tab and see all
the exits. Take the SE exit and climb the stairs. Go to the room.
To the room – Check the
newspaper rack by Robert’s study. Inside is a letter from HH about a parcel
brought by Mark. Check all hotspots. Go forward to the room passing Victoria’s
room on the left. Use key on the room and enter your bedroom.
Samuel’s bedroom – Check
the broken mirror and Cathrin is mentioned. Click on drawer under broken mirror.
Check the album and the picture of Cathrin. The bottom drawer is locked. Turn to
the doorframe and click on it – it is too high. Right click the doorframe and
find the key to the drawer. Use the key on bottom drawer and see camera,
films and bible. Look at the portrait of above the chair and find out that
Cathrin died in a fire and Samuel feels it his fault. Check portrait above
fireplace and the fireplace (get Bates to start a fire). In the suitcase, take
the headache pills and wallet. Right click the wallet to get a
coin.
Robert’s study – Knock on
Robert’s study and talk to Robert. Exhaust all dialogues.
Old Wing – Go to the
balcony and click at old tower. You must get inside
somehow. Go back in and continue to the old tower. Listen to his
guilt about Cathrin. Check everything. Look in the fireplace and then
right click to get remnants of old photograph. Look at close at torn-up
photograph and put it together.
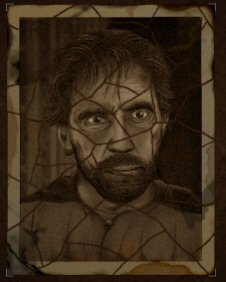
When complete, it will be placed
in inventory. Check the door to the attic and find it locked.
Find the key to open the
attic:
Bates – Talk to Bates
dusting the fireplace just outside the library about all topics especially about
the key and fireplace.
Dining room – Look close
at the fruit bowl and get sweets. Check
everything.
Kitchen – Take key
by cellar door. Check
everything.
Attic – Use key on attic
door. Check a locked chest, other hotspots and the entrance to tower. The door
to the tower is boarded up.
Find a way to get in the
tower:
Bates – Talk to Bates by
library door about tools and entrance to tower. Morris and stables are
mentioned. Go out through the front
door.
Stables – Go to stables
and on the way look at broken fence where William fell. Talk to Morris,
the groom about everything.
Enter the stables. Open the
drawer and take the hammer. Check the tool box also. Play with the light
switch by the horse.
Tower entrance – Use the
hammer on boards and find out that the door is locked. Click on door again until
you should ask Victoria is said. Go to your room and meet Bates coming
out of your room.
Look around the
area:
Castle ground – Look
around castle ground. Check everything at right wing area and rear garden
(fountain) and main gate. Go by the stairs and meet Henry, the gardener. Talk to
Henry about everything.
Greenhouse – Go to
greenhouse and find it locked. Look close at grinder and see blood. Talk to
Henry about the grinder and closed greenhouse.
Recording Strange Tower
symbol:
After seeing the broken fence by
tower, talk to Bates by library door about where William
fell.
Tower base – Look close
and click at stain. You should put this down somehow. Look close and
right click at bush to the right to get a strange
object.
Bates – Talk to
Bates at kitchen about the strange object. Place attic key
back.
Bedroom – Take the
camera from the drawer.
Robert’s study – Ask
Robert about everything. He will not recognize the photo. Ask about film and
then the chest in the attic. He will give you the
key.
Attic chest – Use the key
on chest and take film. In inventory, combine film and
camera.
Tower base – Take picture
of the stain in close up. Where do you have it
developed?
Stables – Ask Morris about
Henry and the strange object.
Trail of the strange
object:
Greenhouse – Check the
painting on the easel. Talk to Henry about the strange object and the painting.
He pawned a part of the strange object. Ask about the Bill of
exchange.
Library – Talk to Hermann
about William and the photo. William had burns on his body and he will talk to
you more tomorrow. Go to central part and take the map from the
table with an hourglass. Look around the whole library and read the history of
Warmhill Manor, the large book on the desk.
Victoria at the Common
room – Talk to Victoria about everything. William was looking for truth.
There’s a secret chapel under the church. Morgan’s body is in a secret crypt.
Victoria got upset about the tower discussion. Go talk to Bates in the kitchen.
He advises that you apologize as soon as possible. Apologize to Victoria.
Victoria says to Go ask the doctor about William’s personal effect. The
photo is recognized as a quiet boy that became mad and was sent to Ashburry.
Robert accepted him as a patient. Hmmm. Robert lied.
Library – Talk to Hermann
again and ask about personal belongings. The Doctor’s man will bring the
personal belonging at the Main Gate at 7
o’clock.
Robert – Ask him about
everything. Murray at Willow Creek has dark room at his pawn shop. The photo
resembles a patient of Robert.
Right click the map and the click
on Willow Creek.
Willow
Creek:
Find the pawn
shop:
Creek area – Check
everything.
To Pub – Talk to boy. Give
sweets and show photo to Vick. Enter the Three Kegs
Inn.
Pub – Talk to Harry. Mark
is mentioned. Talk to Tom. You say you will pay his debt. Talk to Harry about
Tom’s debt and pay the debt. Talk to Tom again. William goes to the vicarage
after midnight. You can ask the vicar and the grave digger for verification. Ask
about Mark who works part time for Murray or
Hermann.
Cross the bridge – The
pawn shop at the corner is locked.
To Pub – Go back to Pub
and talk to Vick. After a while, find out that Murray went to town and won’t be
back until tomorrow. Oops – Vick broke the window. Enter the pub and talk to
Harry about Murray.
Warmhill
Vicarage:
Verify William’s midnight
foray:
By church – Check the 2
entrances and find out the church is locked. Talk to gravedigger about
everything. 6 months ago after midnight, William was here looking for something
and Father Frederick was expecting
William.
Rear of Cemetery – Go to
rear of cemetery left of church. Go to William’s grave. Look close at William’s
headstone and click again. Hear your promise to find out the
truth.
By church – Talk to
gravedigger again. The church bells ring seven – It’s seven o’clock and
automatically go to the castle’s main gate.
Castle:
William’s clue:
Main Gate – Talk to Mark
and take the box. Right click on box in inventory to see watch and
some trinkets. Right click on watch and see paper. Right click on paper
in inventory. To my forgetful head: The path to the key
begins in the library on my work table, hidden away under the blue curtain of
unwritten words. The paper also shows books, map, globe compass
and inkwell.
Library – Look at the
globe and ‘it seems something is missing here’. Read the Warmhill Chronicles
again if you want to. Look at inkwell and see a button. When the button is
pressed – the secret cabinet opens.
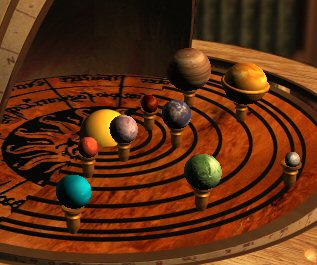
Globe puzzle – Take the
box that has the miniature planets of the solar system from the secret
cabinet. Go to the globe. Click the box of planets on the indentations. Arrange
the planets on the rings around the sun. When done correctly, it opens to show
William’s key.
Finally, the
tower:
Tower – Use William’s key
on door. The door with the key on the other side closes and locks you in the
tower. Check the massive chest and chessboard (black rook missing). Open the
roll top desk.
Roll top desk – Check
parchments (important notes somewhere). Take black rook and right click
it in inventory to make it a small knife. Check the small cabinet
(jewel box) and it has melody heard before.
Drawer – Check the drawer
of the roll top desk. Take untitled book and right click it in inventory
to get a key. Pull back from close up and right click the drawer and get
Williams’s diary.
William’s diary – Read it
and learn that the men that have the madness that plague the Gordons have in
common was they were born in the same week repeating for 5 centuries. There are
5 symbolic keys given to men in the family. William is in search of all 5 keys.
William has one, James, Marcus, Dergham Gordon of the branch in Wales and the
fifth key’s location is not known. He concentrated on where Marcus was supposed
to be buried – under Warmhill parish. He found a pedestal that has a complex
mechanical lock. He opened the lock but didn’t find Marcus’ body. A sign Shall wisdom be your
way. The first answer of the puzzle was MAP. He also found a
stand with a black ball.
Massive chest – Use key on
massive chest on right of the screen. Take strange black sphere (cold to
the touch).
Use the small knife on door and
the door is opened. Exit the tower and Samuel collapses. He was brought to his
bed by Robert and Bates.
Chapter 2
back to the
light…
Samuel dreams of a man
under water and a key dropping to the bottom of the water.
There’s a knock on the
door. Bates informs you that Henry was found dead in the pond. Detective wants
to speak to you in the Common Room. After the interrogation and before he left,
the detective said that he will close the case after Dr. Hermann’s report.
Find out what
happened to Henry:
Stables – Talk
to Morris.
Fireplace before
library – Talk to Victoria and she will mention where Dr. Hermann
lives.
Kitchen – Talk
to Bates and find out more about the death – around midnight but the body was
found around 6 AM.
Robert’s study
– Talk to Robert about his research.
Old Wing – See
that it is unsafe to go to the attic because the roof caved in. There is also a
broken window.
Rear Garden –
Go to the fountain and see a footprint by just above the puddle on the ground.
Click twice and then right click the fountain. There is something glittering
at bottom.
Greenhouse –
Look at right drawer and see a metal box that is locked. We need the key.
Get Morris’
key:
After
remembering the dream and the seeing something glittering under the water in the
fountain, we have to see how to get it.
Cellar by
kitchen – See that the cellar door is open. Enter and talk to Bates at far
right. Learn that there’s a pump that controls the water flow in the castle. Go
to rear of cellar.
Rear of cellar
– Look at the pump and then the pump control. Since you don’t know what to do
yet, go talk to Bates. Bates will explain that the fountain column is the second
from the right and that you can adjust the amount of water in those columns by
using the other 3 wheels. Go back to pump control.
Pump Control
puzzle – Save game here. The object of the puzzle is to lower (L-R)
#3 column to no water seen.
This can be done is
several ways. Note the height of the columns when one of the wheels is turned.
Note that (L-R) columns 1 and 3 can be raised to the highest point before all
the wheels can not be turned anymore. Note that the last column #4 can be
raised only midway before locking all the wheels.
The best strategy is
to lower #4 column enough to allow #1 and 3 columns to be moved.
This is one way to
do this puzzle if the wheels are not yet turned. So if you have touched the
wheels – go back to a saved game and then turn from L-R wheels: Wheel #2
– left click once. Wheel #1 – right click 7 times. Wheel #4 – left click once.
If correctly done, you will hear a glurb glurb and Samuel will say READY!
Leave the cellar
through the front area and out.
Fountain – See
that the fountain is drained. See a symbol on the side. Click the camera
to record the symbol and then pick up the key beside it.
Greenhouse –
Use the key on the metal box (cabinet) in the drawer. There is no bill for
the pawn shop to be found. Take and read the letter to Victoria and find out
that Henry intends to blackmail Morris.
Cellar – Ask
Bates about the letter. Stable
– Talk to Morris about the letter.
Now you can leave and
check on Dr. Hermann and his promised report on William as well as Henry’s
death.
Dr.
Hermann’s house and morgue:
Trail
of the bill of exchange:
See Dr. Hermann throw
something in the garbage. Samuel follows him down to the morgue.
Morgue – Talk
to Dr. Hermann and find out that he changed his mind in explaining William’s
death except for the presence of chest burns. He refuses to let you check
Henry’s belongings. Henry’s death report that should be kept secret shows that
Henry does not have a single drop of blood in his body.
Outside the
morgue – Check the garbage container and find out that it is padlocked.
Check the trash bin and find torn papers recently placed there.
Torn paper
puzzle – Put together the pieces of paper. Right click torn paper in
inventory. In close up; left click to pick paper, right click to turn and then
left click to drop in place.
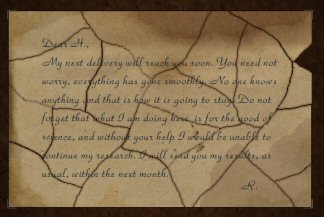
Who does research
that we know of that has an initial R? Hmm…
Ring the doorbell by
the door, talk to the doctor on the intercom and enter. Go down to the
morgue.
Morgue – Check
everything. Note the key on the left above the sink basin. Note the photographic
canister under the right sink-basin. Samuel would note that doctor develops
his films here. Talk to the doctor. You’re standing at a
morgue… Oh yes, that’s quite apparent! He will develop the
films if you get toner from Murray in the village.
Village – Talk
to fisherman on dock and to Vick by the
pub. Pub – Talk to
everybody about Henry and find out that he was sober last night.
Pawn shop –
Cross the bridge and enter the pawn shop. Talk to Murray and he wants 35 pounds
to get back the rune-strange object. He will not give it to you unless you have
the bill of exchange. Samuel says find a way to get the bill of exchange.
Get the toner.
Distract the
Doctor to get the bill of exchange:
Pub – Talk to
Harry about Mark. Talk to Mark and pay him 20 pounds (positive answer) or 30
pounds (negative answer) to distract the doctor.
Morgue – Ring
doorbell and talk to the doctor at the morgue. When he leaves to talk to Mark,
click on box found in the room in the background. Get the bill of
exchange. Click on table drawer in the background and get the imprint
plastic. Click on key above the sink-basin. The large one is the one for the
garbage container. Click plastic on key to get a key imprint. You leave
the morgue.
Ring the doorbell
again and talk to Doctor to give him the toner.
Pub – Talk to
Harry about the imprint and he will refer you to Mark. Talk to Mark and he will
try to make a key from the imprint. Be back in an hour to check if done.
Castle – Talk
to Robert about Henry’s loss of blood.
Pawn shop –
Talk to Murray and for 40 pound, then 35 pounds he gives the strange
object. In inventory, combine the strange object and the rune to make one
strange object.
Morgue – Ring
doorbell and talk to Doctor about the film. The developed pictures are on the
tray by the sink Samuel places the pictures in William’s diary. The difference
between the 2 pictures is the symbol at the center.
Pub – Go back
around 2-3 times to the pub and ask Harry about Mark. Finally, Harry will give
you the key Mark left for you.
Morgue – Use
the key on garbage container. Take Henry’s clothes and it exposes human
remains underneath. Right click Henry’s clothes and feel something hard
inside. Right click the black rook to make a small knife and use it
on Henry’s clothes. A diamond is seen. Click diamond over the strange
object to complete it. Now you can enter the church.
Warmhill Vicarage:
Look for the
findings in William’s diary:
Enter the church
through the side entrance. Look at the stone tablet by the door and see the
church was built by Marcus in 1230.
Check the locked
grate, the rear part and then go to the Altar. Talk to Father Frederick at the
altar. Eventually, he will let you in the belfry behind the locked gate.
Belfry – Look
at everything, the gate to the rear part of the cemetery and the opening. Place
the strange object on the opening found below the candle on the pillar. An altar
rises at the center of the floor.
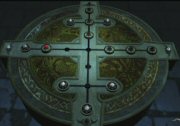
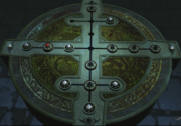
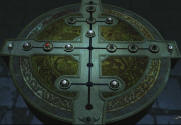
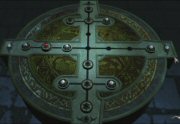
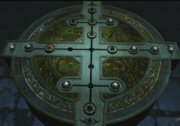
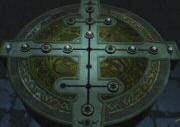
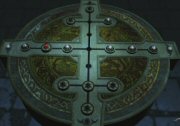
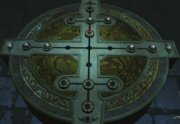
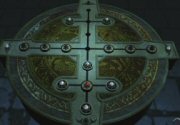
Mechanical lock
puzzle – The object of the puzzle is to reverse the positions of the black
stones and the white stones. The red stone should be at the center.
Click on a stone,
then click on adjacent empty space to move that stone to that space. The way
that works for me is to move white stones to one end to have space to work in
and then move the black stones to the opposite nearly empty side.
When correctly done,
a grating sound is heard.
1. Move bottom white to
sides.
Move red and top white to
bottom.
Move top white to
sides.
2. Move all black on left
arm to top.
Move bottom white and red
to left arm.
3. Move top 2 blacks to
bottom.
Move top left side white
to left arm.
4. Move 2 bottom blacks
to top.
Move bottom-most white to
top.
5. Move all 3 right side
blacks to bottom.
Move top white to right
arm.
6. Move left arm white to
right arm.
Move 2 bottom blacks top
and right arm.
7. Move bottom right side
white to left arm.
Move top black to bottom
right side.
Move bottom left side
white to top.
8. Move right arm black
to bottom side.
Move top white to right
arm.
Move center top black to
bottom.
9. Move left arm white
and then red to top.
Move right arm white to
left.
10. Move one bottom black
to right side.
Move top red and one
white to bottom.
Move top white to left
arm.
11. Move right arm black
to top. Arrange top blacks in a row.
Move bottom white to
right arm.
Move red to center.
Arrange bottom black in a
row.
Take the strange object
from the opening. Move the carpet at left side of the floor. Go down.
Catacomb – Place the
strange object on the opening. The trapdoor closes. Read the engraved lettering
– Shall wisdom be your
way.
Riddle puzzles – There
are 4 old books on stands. They contain riddles. Beside them are 4 stone
blocks where the answers to the riddle are placed by rotating the letters.
When correctly done the stone blocks lowers to the ground.
Front left book: It can’t be seen but it can be heard. It will not speak unless it’s
spoken to. A picture of a monk talking to 2 men is depicted on
the opposite page. Answer is ECHO.
Back left puzzle: The more you take away the larger it grows. A picture of
an entryway is seen. Answer is HOLE.
Back right puzzle – Cities without house. Rivers without water. Forests without
trees. A picture of a globe is on the opposite page. Answer is
MAP.
Front right puzzle –
Black when bought. Red when used. Gray when thrown out.
A picture of a woman using a bellow is seen. Answer is
COAL.
When correctly done, the stone
tomb of Marcus Gordon rises.
Open the tomb and take the
book. The book states that Black Mirror is the gate between 2 worlds –
good and evil. The book describes the fight between Marcus and Mordred Gordon.
The curse stated by Mordred before he was slain by Marcus – Of your blood, others will rise with your name bearing my curse! One of
your heirs will convert give should of five mortals. This will be the catalyst
to bring my anger back to life! And I will return! When your days have ended
there will be no one to stop me.
The
secret chapel must be under the castle. I must finish what William has
started. Take Marcus’ diamond sacred key – first key of
the five.
Look at candlestick at bottom of
screen. Right click on candlestick and see a rat go to a suspicious hole. Click
on suspicious hole to fall down a hole.
Mine:
Get out of this
place:
Mine power control
place:
To get light – It is dark
here and you lost a lot of your inventory.
Power lever puzzle – Go
to far wall and see a rusty valve. Turn it until it won’t go anymore. Go to
the mechanism. In zoom mode, you have to know which lever to turn to get the
power on.
Move left lever to the middle,
the middle lever to the bottom and the right lever to the top. Press the
button.
Live cable problem – Pick
up all your other inventories but the camera is smashed. See a live cable
hanging by the grilled door on the left. DO NOT TOUCH or you die! Click on metal
box on the left middle shelf in the other room. You take the wire
cutters. Press the red button at the mechanism to cut power. Use the wire
cutters on the now dead cable to cut it. Press the red button again to turn on
the light.
Open the grilled door –
Try to leave but the grilled door is locked. Right click on door and Samuel will
note that the key is on the other side. Use the wire cutter on the grill and
then click to get the key from the other side. Use key on lock.
Mine shaft – Take the
iron rod on the pile at left of the puddle. Take the rag from the
skeleton. Check the switchboard. It is stuck. Use the small knife (rook) on the
switchboard to open it. It has fuses.
Go to the tunnel and see an
elevator lift, full barrel and mining cart. The lift has broken lock.
Go to the engine room and see a
large engine. Samuel doesn’t know how to work the control panel. There’s a pool
with oil on the green area to the right of the engine.
Way out of this level – Go
back to the lift room. Click on lid bottom of full barrel by the lift. Right
click and Samuel says there’s something under the lid. Click on barrel to
try to move it. Too heavy! Use the iron bar on barrel to drain some oil. Now
Samuel tilts it off to reveal a trap door.
Trap door – Click on trap
door and it’s too heavy. Click the rope on trap door and the other end to the
mining cart. Click-push the cart and it is too heavy. Right click the cart and
Samuel says get rid of the break stop. Push the cart again and it moves to pull
the trap door open. Climb down.
Lift room – Go down once
more into another room. There’s a locked locker. Go to the hotspot on the left
wall. Click on it to find it to be a stuck switchboard. Use the small
knife on the panel to open it.
Circuit board – Click
the wires on the clamp. Right click to unclamp. Arrange the wires from left to
right: wire clamped already, green, red and then blue wire. The light comes
on.
Check the skeleton and then right
click to get a small key. Read the old book -diary of the trapped
miner about the ghost problem and how he died. Click the small key on locker and
get revolver, click again for bullets and click again for the
plans to machinery. In inventory combine 2 bullets to revolver.
Engine room – Climb up to
mine cart level 2. Go to engine room and click the plans to machinery on control
panel. The main engine is working now.
Lift room – Go back down
to the lift room and see that there’s a hole in the pipes. Try the rag on it but
will get burned. Go back to engine room and use the rag on the green pool beside
the big engine. Go back to lift room and use wet rag on hole. The generator can
not take full power. Look at fuse box and see that a fuse has blown. Go back to
the switchboard at the mine shaft off the lift at level 2. Take a fuse
from the switchboard. Go back down to lift room. Use the fuse on the fuse box.
Click the generator control to turn it on again. It now takes full power.
Functional lift – Go up to
the level above the lift room and see that the control panel is lit. Press the
control panel and the lift comes down. Click on control panel again to get the
gate open. Samuel in the lift goes up to the highest floor.
Highest floor – Look at
the grilled door and see that it is padlocked. Click (right click) on padlock
and Samuel sees a rusty part of the firm padlock. Save Game here! Use the
revolver on the firm padlock. You should do this with one shot only. Exit
and meet the wolf.
Wolf – The wolf is
blocking your way. Use the revolver with one bullet to shoot the wolf.
Leave and find Samuel in the
common room with Robert and Victoria. Robert left for work in the sanatorium.
Samuel tells Victoria he is leaving tomorrow to go to Wales.
Chapter 3
hidden
legacy…
Samuel had nightmares
of birds, wind chimes and a body on a slab. He leaves for Wales and arrive at
the gate of the manor.
Get pass the
gate:
Welsh manor
gate: Press the doorbell but it would not work. Right
click to note that the wires barely connect. Use the small knife-rook on
doorbell. Look at the broken statue on the left. See the leg is broken. Click
again and see a nail Take nail. Use the nail on doorbell and someone
comes.
Louis wants proof that
you are a Gordon. Show him William’s mourning card. He lets you in.
Inside the
Manor – Talk to Eleonor about everything. Learn that William was there with
Robert 2 years ago and acted strange after being in the tomb. Dergham’s grave is
older than the tomb and has a monument in the grounds. Richard, Eleonor’s
husband works on his Chemistry experiments in an old house in the garden. After
the talk, look at everything and see a mahogany box with a 9 field chessboard
top.
Find
Richard:
Go outside and look
around. Go to the path fork and talk to Louis about the doorbell. Go to the Old
garden.
Abandoned House
– Look at the house and note a tower attached to it. Look at faucet by
Richard’s feet to take firm wire holding the hose from faucet. Take the
path to abandoned house. The door is locked and no other possible way to enter.
Enter abandoned
house – (Right) click the door and note that the key is on the other side.
Insert William’s mourning card on door and then use the firm wire on door. Get
the key, use on door and enter.
Table – Check
the table by right wall. Open the small drawer and take the fountain pen.
Right click the pen in inventory to see it has blue ink. Look at everything.
Cabinet – Pet
the sleeping cat on the mantel of the fireplace and it runs away. The cat went
inside the cabinet. Open the cabinet and see it is dark there. Check the
newspaper clipping on the door and realize that Richard Gordon is a promising
biochemist doing research on mammalian blood.
Fireplace – Go
back to the fireplace and see a small door on the right. It is locked, right
click to note that it has a hexagonal lock. Pick up the key off the floor
just close to the logs by your feet. Use the key on small door and take the
candle and lighter with no wick.
Lighter with no
wick – Right click on candle in inventory and it says candle with a firm
wick. Right click on lighter and note it is an alcohol lighter with no wick.
Use the small knife-rook on candle to get wick. Click wick on lighter
to get a lit lighter.
Cabinet – Use
the lit lighter on cabinet to see a latch to a secret passage. Enter the secret
passage.
Richard at last
– Samuel surprised Richard and he dropped a flask containing the last sample of
EX-52 oxidant. Be positive on your answer to him. He wants you to go to
Leechdale and to the drugstore in the square to get Boron Oxidant EX-52. It
should be vigorously saturated blue in color.
Get the Boron
Oxidant:
Tower
laboratory – Look around at everything. Take a small bottle from
table by door and take the shards from the floor by Richard. Right click
on shards to note the label of the broken bottle. Exit to the abandoned
building.
Inside building
– Take the log, old newspapers from floor and tea
kettle from table. Exit to go outside.
Faucet by wall
– Click the empty bottle on faucet to get bottle with water. Right click
on fountain pen to see it has blue ink. Click fountain pen on bottle with water
to get bottle with dissolved ink. Click tea kettle with water from faucet
to get tea kettle with water.
Inside building
– Go to stove at bottom left of screen. Place old newspaper in stove, then logs
and then use lit lighter on the logs. Place kettle with water on stove. Wait –
the water will boil in a minute. Remember – a watched pot never boils.
<whistle> <tap fingers> Go out and look around. Go back and look at
the kettle to see steam coming out. Click the shard on the steam to get
label. Now to glue it on. Ah, where’s the glue?
Toolbox trial
– Go to gate. There’s a tool box beside Louis, who is fixing the doorbell.
Talk to Louis. Go to Eleonor inside the house and she wants Louis to mow the
yard. Back to Louis at the doorbell. Talk to Louis about mowing. Back to
Eleonor and ask her about everything. Back to Louis. Back to Eleonor. Then see
Louis mowing outside the manor patio.
Go to the toolbox at
the main gate. Take the glue and firm wire from the tool
box.
Use the glue on
label and then the label on the bottle with dissolved ink. Voila!
Oxidant.
Richard in the
tower lab – Give Richard the ‘oxidant’ and then talk to him about
everything.
Get in the
tomb:
Tomb – Go to
the Chapel left of the abandoned house. Check the stone flower pot (the soil is
different color) and the monolith of Dergham. Check the tomb to find out the
grate is locked. The path to the ruined old church is swamp.
Richard – Talk
to Richard and he says to ask Eleonor or Louis about the tomb key. Samuel says
to better ask Louis.
Garden – Go to
where Louis is mowing the grass. See his jacket hanging on the tree. Drop the
wire on the lawn. Watch. When Louis leaves, Click on jacket to get tomb
key.
Decipher the Tomb Puzzle:
Inside the tomb
– Use the tomb key on tomb grill door. Enter and look around. There are 3
statues, 3 inscriptions and 3 empty stone bowls. Read the 3 inscriptions –
Veine, Odire and Malite. Duh!
Richard – Talk
to Richard about the signs. Go out, visit the tomb, look at the soil, wait for a
while and then go back to Richard. Patience! When you go back to him and ask Can
I bother you for a moment? That’s the right time to get an answer from Richard.
Veine is the Irish God of Strife. Odire is the Druid Goddess of Harvest and
Malite is Old God of Water.
If you already saw the
newspaper clipping on the cabinet about Richard during his younger days worked
on mammalian blood experiments, you will be able to ask him for blood. He will
give you an ounce. Click on freezer to get blood.
Go back to the tomb
and on the way pick up the kettle with water from the stove. When in
front of the tomb, pick up some soil from the stone flower pot. Now we
have all of them.
Tomb – Place
the blood on left stone bowl under Veine. Place soil on middle stone bowl under
Odire. Place water from kettle on right stone bowl under Malite. When done
correctly for each statue, the light comes on. I can hear something.
Altar Puzzle
– The altar rise from the floor. See a Zodiac slider puzzle. There are 4 signs
under the tiles that show that the Zodiac tiles are to be arranged in
chronological order around the 4 blank ones at the center. Good
luck!

Take the key.
Automatically see Louis come, takes the keys and closes the tomb. You’re not
done yet but Samuel says to come back at night. What now?
Richard – Talk
to Richard and ask for his help. He wants something in exchange and is as
secretive as you. Come back when it’s dark and to tell no one.
Get back in the
tomb at night:
Watch Samuel climb out
of his bedroom when all is quiet. Look at the gardens under moonlight. Fireflies
and bats fly around. The tower lab is lit up and Richard must be waiting.
Abandoned house at
night – The door is locked. You must get Richard’s attention somehow. Go
back to the tower but pick up grit-stone on the walkway beside the pond. Click
the stones on the lit tower window. Enter and help Richard with his experiment.
Oxidant? What oxidant! Bang! As part of the agreement Richard tells you about
the acid in the flask to use on the tomb door. Pick up acid on table left
of door.
Tomb – Use the
acid on the lock of the tomb. Look at the stone lock on the tomb on the right.
Use the key taken from zodiac puzzle on stone lock. A secret passage opens.
Secret passage
– Enter and see a grilled door that is locked. Look at the lock and note that
the symbol looks familiar.
Richard – Ask
Richard about the symbol of the gate. He tells you about the key in Eleonor’s
jewelry box (remember the one on the table left of the piano). Take key
to the mansion from the table left of door.
Mansion – Use
the key on door and go to the table with mirror left of the piano. Look close at
jewelry box.
Knights
puzzle – The object of the puzzle is to get the white knights and the
black knights to exchange their position – white on top corners and black at
the bottom corners. Knights move in an L-shaped path.
white 7 to 6
white 9 to 2
black 1 to 8
black 3 to 4
white 6 to 1
black 4 to 9
black 8 to 3
black 3 to 4
white 2 to 7
white 7 to 6
black 9 to 2
black 2 to 7
black 4 to 9
white 1 to 8
white 8 to 3
white 6 to
1
Automatically take the
amulet. Go to the secret passage.
Crypt – Use the
amulet on the gate and enter the crypt. Save Game here!
Read the engraving on
the central altar – Use a stranger’s head or you’re own will
shed! Do NOT open the tomb or you will lose your head for
sure!
Look at the skulls
hanging at the middle wall. One of the skulls is labeled skull – third from
right. Click on it and Samuel will note that it is cracked. Click stones on the
cracked skull. The skull falls and breaks into pieces and a key falls behind a
grill. It is unreachable. Go to abandoned building and get the poker. Use
the poker on the key behind the grill. It is a key with a skull.
Use key with skull on
the monolith and a sound is heard. Now, you can safely move the tomb. Take
Dergham’s red sacred key.
Chapter 4
forgotten
bound…
Victoria is upset.
Bates explains that Robert has not returned from the Ashburry since you last saw
him. The nurse reported that he left the gates at midnight. Detective Collier
reported that a boy was found killed in the woods possibly by wolves.
Find out what
happened to Vick:
Village – Go
the Pub and talk to Harry and the gravedigger. The grave digger says that Vick
was torn in pieces and found by the Druid altar in Stonering where Samuel used
to play when he was a child.
Stonering –
Talk to Detective Collier. Note that the blood is only on the altar. Henry’s
cause of death is still unknown. There are 3 of the menhirs around the altar.
Look at the middle menhir and see the third symbol. Click William’s diary on the
symbol to record it. The vines clinging to the tree beside the symbol is burned.
Talk to the detective about the symbol.
Distract the
detective – Look at the plant on the ground by the menhir to the left, right
click and Samuel will note a piece of cloth. For you to get the cloth, the
detective needs to be distracted. Go to the rock on the ground at right of where
the detective is standing. Click the bottle of blood on it. Talk to the
detective about the blood. Right click the fern plant and get a
handkerchief that has the Gordon symbol on it.
Dr. Hermann’s
morgue – Talk to Dr. Hermann. Find out that Vick was not killed by any
animal.
Castle – Talk
to Morris about Vick.
Find out what
happened to Robert:
Castle:
Mail box – Go
to the mail box at the main gate and pick up a letter from James to
Father. He cannot stand being confined anymore and decided to do something about
it. He will wait at their meeting place.
Kitchen – Talk
to Bates and ask about Victoria. She is in her room and doesn’t want to be
disturbed.
Victoria’s room
– (Letter is trigger to talk to Victoria). Talk to Victoria about Robert and
find out that James is William’s illegitimate son. Victoria wants you to go to
Ashburry and check about Robert.
Ashburry:
Front desk –
Press the doorbell and later talk to the nurse. Learn about Robert’s time there
and James’ escape.
Outside the
building – Check the sewer. Go left and around the building. Take the
hammer from the roof of the shed. Check twice the dustbin by shed to get
syringe. Knock on metal door and talk to boiler man about everything.
Learn that to escape, one must go through foyer or sewer to the outside. Samuel
wants to see James’ cell.
Graveyard – Go
left and check the graveyard and the rear part of the graveyard.
Get into James’
cell:
– Drug the
boiler man:
Front desk –
Talk to the nurse and she will make a phone call for Samuel.
Sedative –
Enter the counter door. Take the vase and find out the cabinet is
locked. Check the vase in inventory and hear it clink. Right click the vase to
note that it has a slot of some kind at the bottom. Right click the
wallet to get coin. Combine coin with vase to get key. Use key
on cabinet. Check the medicines and pick up the bottle of white powdered
sedative at middle shelf close to left door.
Talk to nurse about
the graveyard.
Boiler man – Go
back to metal door of boiler room. Combine syringe and sedative. Use syringe
with sedative on beer by metal door. Now, how do we get him to drink it?
Turn the heat
up – Look close at boiler room window left of beer case. See the machinery
of the boiler.
Go back inside the
sanatorium. Use the handkerchief in fountain to get wet
handkerchief.
Go back to boiler
room window. See a loose rod. Hit the brick holding the loose rod with hammer.
OOPS – he heard us. Let’s try again, this time wait for the noise of the
machinery to increase and thump. Hit the brick with hammer in time with the
thump of the machinery.
Use the wet
handkerchief on machinery to trick the sensor of the thermostat to increase
the temperature.
Watch the boiler man
get a bottle of beer.
– Go through
Boiler room:
Boiler room –
Wait for a while for the sedative to work. Visit the graveyard again. Then enter
the metal door and see the man asleep. Sssh!
Go to the rear part of
the room and notice the intercom and the notice board.
Door – The
door has a numerical pad beside it and a key slot.
Go to the notice
board and take pin, small key and note all the poster especially
the Follies 1918 and the schedule.
Go back to the door.
Insert the small key and then press 1918. Door opens.
– Distract the
Doctor on duty:
Go through door and
see a doctor at the table. Samuel goes back to the boiler room.
Foyer – Talk to
nurse and get the duty schedule.
Boiler room rear
part – To call the Doctor away from the desk, click the duty schedule on the
intercom.
Go through the door
and down the foyer.
– Find Mr.
Bubby:
Talk to Ralph, the
patient. Samuel agrees to find Mr. Bubby to get his approval for the patient to
talk to you. Look in the dustbin on the right side of the foyer. Right click the
dustbin to get a doll’s head.
Go to the boiler
room’s stack of coal beside the furnace. Right click the coal to get the body
of a doll. Combine head and body of doll. The doll is still separated.
Right click the
separated doll parts to find a thread. Combine the thread and the pin
from the notice board together. Click the pin and thread on the separated doll
parts to make Mr. Bubby.
Give Mr. Bubby to
Ralph and he tells you that James cell is next door. Dr. Smith has all the keys
to the cells.
– Get the keys
from Dr. Smith:
Flip the light switch
found on the wall above the dustbin off. Click the wire connected to it to pull
it off. Click the other end of the wire to the fencing over the window. Samuel
says now to attract the attention of the doctor. Place the music box on the
fencing of the window. Samuel flips the switch on the make a live connection to
the fencing. Samuel hides and Dr. Smith touches the fencing. Samuel takes the
music box. Take the cell keys from Dr. Smith.
James’ cell –
Check everything.
The eye picture on
left wall is crumpled. Click on eye picture twice until it falls off and an eye
appear. Talk to Ralph and find out about James and Robert. Robert does his
experiment at night giving medicines to patients.
Take the dark
picture that James painted on the easel. Check and right click the hole in
the mattress to read James’ diary.
The doctor has locked
you in. You must get out before he comes back. Talk to Ralph about James’ escape
and he will talk about the hole under James’ bed.
Exit through the hole
under James’ bed.
Look for James
at Lighthouse at Sharp Edge:
Castle – Ask
Bates in the kitchen about the lighthouse depicted in James’ drawing. It
is at Sharp Edge.
Sharp Edge –
Saved Game here! Go to entrance and Samuel will say to look around first.
This will open a ‘look around’ exit to left of building. Go around and
scream.
Caught –
Everything has to be done fast. See that James will bury Samuel alive. Click
on Samuel to find out he is tied up feet and legs. Use the small knife-rook on
Samuel. James needs to be distracted. Now that the hands are free, click the
music box on James. James will look at the music box. If you’re not fast
enough, James will hit Samuel on the head and RIP.
Samuel and James have
a heart to heart talk. Find out about Robert’s experiments on the patients and
where James’ sacred key is. It is in the sewers under the cellar accessed from
one of the cellar drains.
In search of
Castle sewer:
Castle cellar –
Take cellar key in kitchen and use on door. Enter cellar and see that
there are 3 sewer grates that have unpleasant smell – by the door, right of well
and by the pump control in the rear. Look at the well and take a rope with 2
hooks. It might come handy.
Which sewer
grate? – Go to each sewer grate and drop a coin (right click
wallet). Find out which one doesn’t have water at the bottom – the grate to
the right of the well.
Sewer – Check
the fountain and pick up the cogwheel on the floor beside it. Go to the
right and see a mechanism that has a stuck red wheel. Look above the wheel and
see a cogwheel and it is missing 2 others.
Get to the
sewers:
Underground –
Go to underground and see a stairs that is flooded. We have to find a way to get
all this murky water drained.
See an opening on the
pillar and a wheel that is chained. Look in the murky water and also see 2
openings on the sides. One of the openings is for letting out water and one for
letting in water. The one for letting in the water is closed. See a cogwheel
floating at right edge of the murky water. Combine hook and rope together
and use it on cogwheel – the rope is bending too much.
– To get
cogwheel in murky water:
Open the closed
water outlet – Go to the railing on the left of the platform and take a
loose rod. Use rod on the opening on the pillar but it is too wide.
Remember what Bates was doing at the cellar. Go to the cellar above and use
the rod on the grinder. Go back and use sharpened rod on the opening
underground. That opened the flap of the drain. Aack – no water.
To get water to
flow – Use acid on the chains holding the wheel. Then turn the wheel.
Water flows.
Cogwheel –
The cogwheel reached the level of the drain but is still unreachable. Used the
combined rope and hook taken from the well on the cogwheel. The rope is still
bending too much. Combine rod on rope and hook to make a fishing pole. Use it
to fish the cogwheel.
– Drain the
murky water: Go back to the mechanism with red wheel.
Place the 2 cogwheels on the cogwheel above the red wheel. Turn the wheel and
the mechanism is running. Go back to the underground and see that the murky
water is drained.
James’ sacred
key – Go downstairs and pick up James’ chest. Open the chest to
get James green sacred key. A headache came on and you will come back
later to check this place.
Chapter 5
confession of
the truth…
Another nightmare –
the morgue, the saw, the body and the head of Dr. Hermann. Samuel is awakened
again by Bates. Ashburry’s head nurse called and wants you to go there. The
weather is foul.
Murder pouring
like rain:
Ashburry – Ring
the doorbell. Talk to the nurse. Robert is dead. He and James were found at the
lighthouse.
When the nurse leaves,
enter James’ cell. See James hanging from the ceiling. Look at Samuel’s name on
the wall in blood. Click on James to get Robert’s key.
Go to the plastered
hole and use the small knife on it. The knife breaks. Talk to Ralph and find out
that James didn’t kill Robert and knows who killed Robert.
Lighthouse at Sharp
Edge – Look at dark hole. Use lit lighter on the dark hole and see another
symbol. Click William’s diary on symbol to record it.
Morgue – Ring
the doorbell and nobody answers. Click on door and find it open.
Go down to the morgue.
Click on the sheet of the body on the table. It is Dr. Hermann. His head is in
the bucket. After Samuel’s bout at the sink, look at the symbol on the sink.
Click William’s diary on symbol to record it. See the rise of an altar on a
tower in front of a throne. The tower came up from a green abyss. It seems that
the 5 mortals’ statement on the book found with Marcus is coming true. Mordred
is coming!
Look at the body again
and see his clamped hand holds something but you can’t open the fingers.
Go to the lamp at the
table at far wall. Click on drawer for a close up look at the table. Take the
medical forceps. Click on the book at the drawer to get small plastic
bags.
Go back to the body
and use the forceps on Hermann’s hand to see hairs. Use plastic bag on
hair. Black hair – James has black hair. You need to get a sample.
The doorbell rings.
Meet Detective Collier at the foyer. He blames James for all the killings.
Get some of
James’ hair:
Ashburry – Ring
the doorbell and talk to nurse. Find out that James’ body is at the chapel in
the old graveyard behind the sanatorium.
Chapel at
Graveyard – Go left and back of the sanatorium. Talk to the boiler man and
he won’t talk to you. Go to the graveyard at left and see that the chapel is
locked.
Boiler man –
Talk to him and find out that he has the keys but he will not give it to you
even for a bribe.
– Get the chapel
keys:
James’ cell –
Go to the front of the sanatorium and climb down the sewer to James’ cell. Go
out of cell and to the boiler room.
Boiler room –
Look at the locker close to the exit of the boiler room. See and take the man’s
rubber boots. Hmm…
Get the rag
from the rail by coal. Use rag on boiler door. Too hot. Go back to James’ cell
and wet the rag either from the fountain in the foyer of the sanatorium or the
tap by the toilet in James’ cell.
Back at the boiler
room, open the boiler using the wet rag. Try to throw the rubber boots in
boiler. It is best to turn the valve above the boiler door to shut the vent to
the chimney. Place the rubber boots in boiler. Automatically leave the room.
Go back to James’
cell, under bed and to the boiler room in the back. Take the keys from
the boiler room door.
Chapel – Use
the keys on chapel door at graveyard. See James’ body. Take glass shard
from floor and use it on James to get hair.
Morgue – Click
on microscope and automatically focus the microscope. Click James’ hair and the
murderer’s hair on microscope. They differ. Morris?
Get Morris’
hair:
Stable – Read
the letter on the vise. Morris ran away. Click on the switch by one of the
stall. The light comes on. Take Morris’ cap. Right click on Morris’ cap
in inventory and see a hair in it. Click one of the plastic bags on cap to get
Morris’ hair.
Morgue – Click
Morris’ hair on microscope. It’s not Morris! Then who? Who else has black
hair?
Check on
Robert:
Castle – Talk
to Bates in kitchen and tell him about Robert and convince him not to tell
Victoria.
Robert’s study
– Use Robert’s key on door of Robert’s study.
Picture – Enter and look close at the picture above the table on the
left. The man has one of the sacred keys. We have to find out who this man from
the past.
Table – Look close at table and see a cocoa box. Click to open the lid of
the cocoa tin and click inside the tin to get a small key. Use the key on
top drawer of the table. Take a paper. Right click on the paper in
inventory and see it a code of some kind. It’s blank. Open the lower drawer and
see a picture of Robert’s wife that left him – Sophie. Go to one of the lights
by the bookcase and click the paper on the lamp. See 6 3 0 8 1.
Bookcase – Click on the MCXX (1120) above the middle bookcase and Samuel
says it is the year prior to building the foundation of the castle.
Clock – Note the clock chimes and is exactly 12 o’clock. Hmm. Click on
the red button at the middle of the hands and change the time to 11:20. Press
the needle on top. If done correctly, the needle will do a full turn and the
clock will chime.
Safe – The middle bookcase opens to reveal a safe.
Safe puzzle –
From the paper we need to enter 6 3 0 8 1.
Click on first frame
at bottom. Click on dial to change it to 6. Click on first frame to close
it.
Click on next frame
and change it to 3. Do all until you have entered 6 3 0 8 1.
If correctly done, a
click will be heard and the safe opens.
Look in the safe and read Robert’s diary about his experiments and his plans for
James. Read William’s last will that states that Victoria gets all of William’s
personal possession while Samuel gets the family’s estate – Black Mirror and the
lands. James was to stay in the Castle for as long as he wants. Robert was
disowned. Take the ring. Read undelivered William’s letter to
Samuel right before he died. Right click on the ring and see that it has
runes and Latin words.
In search of
Lothar’s key:
Victoria –
Knock on Victoria’s room. Talk to her about the picture. Learn that the man is
Lothar Gordon, who started Ashburry. He died mad and buried at the graveyard
behind the sanatorium.
Ashburry –
Press the doorbell and then go to the graveyard. Look at the graves and at the
rear part of the graveyard find an unmarked grave surrounded by dried, thorny
bush. Right click on the unmarked grave and see that it has the Gordon coat of
arms. You have to remove the thorny bush first.
Chapel – Enter the chapel and check the box by the door to get broken
gardening scissors.
Boiler room door – Look close at boiler room window left of the door. Take
the screw holding the clamp of the gutter pipe. In inventory, combine the
screw and the broken garden scissor to make gardening scissors.
Gordon grave – Use the gardening scissors on dried shrub. When done
clearing it, try to push the lid off but it is too heavy.
Boiler room shed – Go to the dark corner of the shed. Click and
right click the dark corner to get a metal rod. Use the metal rod on the
grave. Oh no! The grave is empty!
Foyer – Talk to the nurse about ancestor’s grave and find out that the
Warmhill parish administered the graveyard before Ashburry.
Warmhill
vicarage – Enter the church. Go to the altar and talk to Father Frederick
about the ancestor. He wants you to come back. Go out and look around. I went to
the castle, morgue, pub and cemetery twice before I got an answer from Father
Frederick. He said that Lothar was cremated and is now kept at the Gordon family
vaults.
Rear Cemetery – Go to the rear cemetery. Find that one of the crypts is
open. Talk to the gravedigger and ask him to look for Lothar’s urn. He comes
back and gives you the urn. Right click the urn to get ancestor’s sacred
key. Now only William’s key needs to be obtained. Click on tool box to get
flashlight.
Get William’s
key:
William’s grave
– Look at William’s grave and Samuel says that the ground has still not
hardened.
Cemetery by
church – Go to the cemetery right of the side entrance to the church. Look
at the grave and barrow. It’s too dark. Use the flashlight and take the
shovel lying on the barrow heap at extreme right of screen.
William’s grave
–
Get rid of
gravedigger – Click the shovel on William’s grave but Samuel says to get
rid of the gravedigger first. Take the peg (bottom of door) holding the
door open. Click on the wire tied to the door and fence and Samuel will untie
it. Samuel then places the peg on the closed door.
Dig
William’s grave with the shovel. Watch. Take the William’s blue sacred
key.
Church – Go in
front of the church and see the Gordon carriage. Samuel enters the church and
sees Bates go in to the confessional. Samuel stops Father Frederick from going
any further. Samuel enters the confessional and hears Bates’ confession.
Samuel!!!!
Chapter 6
Look through
the mirror…
Catacombs – Go
to the underground that you drained. Go down the stairs and look at the symbols
in circle on the wall.
Pentagram –
The symbols surround a pentagram at the center. Use the ring on the pentagram
and the symbols similar and those seen beside the bodies of the 5 mortals
killed light up. Click the red jewel beside the symbols in the order seen
throughout the game. The door will slide open when done correctly.
Maze – Enter
the catacomb. Look at the writing on the archway. Samuel doesn’t understand it nor do I.
Save Game here. Enter a maze. Look around as you
please. Don’t look at all the openings or you might get killed.
Ornate Door:
1. Go left from start (sign on archway). Go to room at top
of screen. Take the helmet from left at ground. Press the brick. You
will hear a sound.
2. Go at top of screen and see an ornate door that has an
opening where the lock should be.
3. Go 2 screens down and left. Look in opening and take
the talisman.
4. Go back to ornate door and place the talisman on
the opening where the lock should be.
5. See a stand and 2 alcoves behind it. Place the black
sphere from inventory on the stand. Hear sounds and the button under the lamp
lit up. Look in left alcove and get map of the
maze-catacomb.
Lights:
1. From the globe
stand , go right 2 screens down past the beast wall.
2. Light the candle
with your lighter. Hold the map on candle to see areas that are lit.
3. Go down one
screen from candle and pick up the sword from left at ground
4. Go to 2 screens
down from the globe stand and press button on the right wall to light the
lamp.
5. Go back to globe
stand, go left, go one screen down and see an abyss. You cannot get to the
button on the right.
6. Throw the helmet
and sword down the abyss and the floor slides to cover it.
7. Press the button
to light the lamp.
8. Go in front of
the beast wall and press the left and right buttons to light the 2 lamps.
An eerie gate is
seen. Enter
Black Mirror
Gate:
Look at the altar.
Pick up the dagger. Right click dagger in inventory to note that it is
Volpar, the ritual dagger. Click dagger on Samuel. He will shed his blood on the
container in front of the book on the altar. Blood flows to open the holes
around the book. Place the 5 sacred keys on the holes based on the color of
their jewels.

Read the verses.
Samuel has sealed the gate – Black Mirror between evil and this world.
Here there is
no judge to pass judgment. There is only me.
This document
may not be distributed without express written permission of the author and the
content may not be altered in any way.
For Questions
or Comments on this Walkthrough,
Please write to: MaGtRo
Copyright ©
10/2003 MaGtRo