Black Dahlia – Cheats
The Black
Dahlia by Interplay and Take2

The Black
Dahlia, is a truly interesting story of Murder, intrigue, mystery,
the occult, and being able to solve the puzzles. The game is
linear in the respect that certain things must be accomplished
before you can move on. You must be good at clicking and sliding
your cursor because a lot of the puzzles require this.
The story
line revolves around a murder mystery in the early 1940’s of
Cleveland, Ohio. You, playing the role of the newly hired COS
agent are given a case file–and the investigation starts…….
YOUR OFFICE
After the
initial video sequence (of which there are a lot-so I will just
state video when they come up)–you wind up in your office. Click
forward once and head behind your desk. Tilt your view down and
to the left and click open your center desk drawer–read the
newspaper article and then click on the little green book and
read the Preliminary Report. Then move over and open the right
hand desk drawer, read the “to do” list that is inside,
and take note of the items not yet checked. Put the list back in
the drawer and click and slide it back until the revolver is seen,
click on the gun and put it into your inventory. Now turn to your
right and face the file cabinet. Tilt your view up slightly, and
click on the little black book on the top of the stack, Read the
Fifth Column Lessons for America. Then click on the top drawer of
the file cabinet and read the information inside, Jim (your
character) will automatically note the gibberish inside. Now lets
examine what we have in our inventory–click on badge-note on the
left hand side is a piece of metal sticking out, click on it–it’s
your St. Christopher Medal. Now click on your case file and click
on and take a note of the different parts of it, remember that
you can slide the pages up & down and click for next pages.
Now click on the Revolver–putting your cursor on the butt of the
gun you notice it changes, you can click here. Click-hold and
drag it towards the barrel of the gun. This reveals a key, take
the key. Exit your inventory. Click forward -turn to face the
bookshelves on your right and notice at the end there is a locked
cabinet. Get a close up of this and then access your inventory
and use the key on the cabinet. Click on the message left by Dr.
Strauss, then click on the notes at the bottom–Study this
carefully, as it a major clue–the numbers and letters refer to a
phone dial. Notice the scribbles that say 0 +1 – 1 and then the +
or – and the ?, next Click on your office door and go to Sullivan’s
office.
Sullivan’s
Office
Talk to
Sullivan. When asking him about the case file, click on the
document that says-Initial Crime Report. Move your cursor down to
the bottom and notice the signature–it will say “ask about
Detective” click on this. Then move up to the top, it will
say “ask about Finster” click on this also. When
Sullivan asks you to look at the Invitation wants to know what
you make of it Choose: It looks like fascist propaganda. Next
access your World Map and go to Finster’s Office.
Finster’s
Office
Talk to Finster.
When done access your World Map and go to the Police Station.
Police Station
Talk to
Detective Merylo. Now remember the Det. Said you could look at
the mug book if you wanted. Tilt your view down and to the left
and click on the mug book. When the book opens click on the paper
on top and take it to your inventory. Page through the book and
take note of Louis Fisher, the man with the bushy beard. So now
you have Finster’s stationary in your inventory. Access your
World Map and go to McGinty’s Bar.
McGinty’s Bar
Turn to your
right and go over to the man sitting alone, talk to him. Winslow
mentions the Black List to you. Now access your World Map and go
to Sullivan’s Office.
Sullivan’s
Office
Talk to
Sullivan. When you get the Black List, go back to your Office-go
behind the desk and now you will need to use the Special Code for
getting Dr. Strauss’ phone number—-
Bring up the
Black List in your inventory and slide it up and
at the bottom
see Dr. Karl Strauss, note his number says:
CLV 51 22 40,
the first part refers to phone dial numbers,
C=2, L=5, V=8
so, 258. Then the other scribbles and
marks referring
to 0 + 1 – 1 —-2 + 0 = 2, 5 + 1 = 6 and
8 – 1 = 7 so
now we have 267. These are first 3 digits.
Then you need
to figure out the rest of the numbers from
51 22 40, Use
the -. So we have 5 – 1 =4 , 2 – 2 = 0, &
4 – 0 = 4 so we
now have 404. Combine with first 3, so now you have 267404.
Now click on
the telephone on your desk and dial the six digit number. The
person on the other end tells you that Strauss is not there right
now.
If you haven’t
done it already go towards the door and turn on the light switch
by clicking on it. Then turn and face the desk from that position
at the doorway, and tilt your view up to look at the light
fixture. You notice some shadows in the fixture — click on them.
You now have some parchment papers and a bag of Runes in your
inventory. You can look at them but DO NOT attempt to put the
shapes together–this will be done much later in the game. ( If
you attempt this now, there is a known bug here, when played on
some systems-you could possibly get those symbols stuck on the
stone shape and not be able to use them when you need to) Now
access your World Map and go to Detective Merylo’s Office.
Detective
Merylo’s Office
Talk to Merylo.
Ask about Special Agent Winslow. Then access your World Map and
go back to your office.
Your Office
There should be
a message waiting for you, Helen Strauss has called, click on the
note
CD CHANGE
Museum
At the Museum
talk to Ms. Strauss, Then in your inventory, use the bag of Runes
on Helen, then use the Case File on Helen. Next study the book
that she shows you carefully–if your memory is good you can do
this easily, if you need some help, draw some rough sketches of
the following crests—Top right hand corner, Notorious Tyrant
and Sorcerer, click three pages, then on your left, bottom right
hand corner–Sergeant at Arms-Knights of the Trinity, click two
more pages, you should be at the back of the book now, and on the
left, top left hand corner, Scribe, Knights of the Trinity and
just below that in the bottom left corner, Herald, Knights of the
Trinity.

These are
Knights in the Brotherhood of Thule–A Germanic Knighthood
After Helen
puts the book away, talk to her and ask her about the Stained
Glass Window. Click on the stain glass pieces to bring up the
puzzle. One crest is almost completed for you, all you need to do
is put the other three together. It does not matter in which
order you do this. Clicking and dragging the piece, you will bump
into other pieces, click and release the piece becomes the cursor.
One way to check your progress is to look for the embedded words
in the stained glass by using the red filtering light that is
above you and on the left of the table. Don’t worry about backing
out of the puzzle-as it does not reset. What you are looking for
is four names that are seen in the red filter of the four stained
glass shields–make a note of these, and to which shield they
belong when you have completed the puzzle.
The complete
puzzle looks like this:
Access your
World Map and go to McGinty’s Bar.
McGinty’s Bar.
Click forward
and go to the man at the far end of the room, the one who is bald
with a mustache and talk to him. Then turn to your right and go
over the phone on the wall, in the close up look at the top right
side and note the name Lou Fielding with the number CMR 259. Get
the close up of the dial and dial this number. When the person on
the other end asks who you are calling for–Type in the name
Louis Fischterwald. The man on the phone will then tell you about
The Raven Room. Access your World Map and go to the Raven Room.
The Raven Room
Go over to the
door and click on the intercom. Tell the man that Finster sent
you and you will find out about the Mission. Then go to the table
on the other side of the room, look at the book on top, and then
click under the table and click on the little card there. Look at
the little Holy Card in your inventory, be sure to flip to the
backside by clicking on the card. Access your World Map and go to
St. Bartholomew’s Mission.
ST. Bart’s
Mission
Click on Ernie
behind the counter and talk to him. Then click on Ernie again and
trick him into leaving to get a package for you. Once behind the
counter, lower your view and click on the suit case. When it
opens, first move all the items to the right, then slide them all
the way to the left, this will expose the picture Ernie showed
you. Take the picture and examine it in your inventory. Access
your World Map and go to the Museum.
Museum
Ask Helen if
she has figured out how the pieces of the Runes are assembled.
Then go back towards where the stained glass is, and turn to your
left and click on the desk. Click on the book on the left and
read it, then click on the book on the right and read it too.
Access your World Map and go to Detective Merylo’s Office.
Police Station
Show Detective
Merylo the picture you got from Ernie’s suitcase. Then access
your World Map and go to the Raven Room.
The Raven Room
Louie should be
there now. Ask him about the invitation, Then use Ernie’s picture
on him.
VIDEO Sequence
When you are in
control again, ***************SAVE YOUR GAME************
Turn to your
right, and click forward, then click on the bottles ( Jim will
use this as a distraction) When the bad guy comes out to your
upper right–SHOOT HIM. Short video sequence (COVER YOUR EYES *grin*
)
CD CHANGE
Talk to Merylo,
Ask him about the warehouse gunman, keep asking about the gunman,
He doesn’t need to know everything you know. Then tilt you view
down and click on the newspaper article on the desk–read both
left and right sides. Then in your inventory, examine the
matchbook, click on it to open it and see the name Mulhaven.
Click it closed and flip it around to see the other side, not the
number GB5 637. Then access your World Map and go to Louie’s Loft.
Louie’s Loft
At the loft,
click forward once, you hear a board squeak. Turn 180 degrees
around and tilt your view down and click on the area of the floor
near the cord of the broken lamp. Jim will remove the floorboard,
click on the item inside and take it to your inventory. Then turn
to your left and click on the area near the potbellied stove.
Then click on the broom brush, this will trigger a Video Sequence,
Jim will make a note of the Rune symbols on the floor which you
can examine in your Notebook. Access your World Map and go to the
Hotel Cleveland.
Hotel Cleveland
Talk to the man
at the desk. Then try to bribe him. Then turn to your right and
click over to the telephone on the wall. Dial the number from the
matchbook–GB5 637. This will trigger a video sequence.
Turn around and
click on the maid’s cart, click on the cart again and get a view
of the middle shelf, click on the knife that is under the napkin
and take it to your inventory. Now click on the transom above the
door. Jim will use the knife to get into the room. Inside, turn
to your right and click over towards the bed, then click on the
vase beside the bed, in close up view, click on the key inside
the vase, then click on the piece of paper and this triggers a
video sequence–After this, go back to the vase and get the
photograph that is now been placed there. Examine it in inventory
be sure to click on it and view the backside of it. Now access
your World Map and go to Sullivan’s Office.
Sullivan’s
Office
You will walk
in on Winslow and Sullivan, Then talk to Sullivan. Then access
your World Map and go to the FBI Office.
FBI Office
Talk to Winslow.
Then access your World Map and go to your office.
YOUR Office
For now,
examine some items in your inventory. Look at Helen’s notes. Then
get the item you retrieved from Louie’s loft. (Looks like a
little log cabin) It is a LOCKBOX. To open the Lockbox use the
following directions:
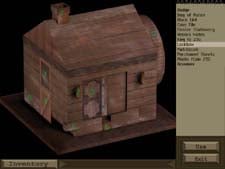
Turn the Wheel
on the right, all the way down
Turn the left
small light on front to a horizontal position.
On the left
side, push the top half of the door inwards.
Then lower the
chimney on the roof.
Then on the
left side of house again, raise the lower part of
the door up.
(A section of
the left hand wall should retract)
Turn the wheel
all the way up.
Then slide the
lower segment of the lower left wall at the
bottom front of
the house to the back.
Lower the top
half of the door, on the left side.
Raise the
chimney back up.
Rotate the
wheel on the right, all the way down.
(On the left
side of house, the top half of door pops back out)
Turn the small
light back to the vertical position.
Then click on
the front door, hold, and pull it all the way to
the left.
Just below the
door, slide the long board all the way left.
Now raise the
small block that has the symbol on it.
The box/house
should now open. Inside, click on the key and the signet ring.
Access your
World Map and go back to Louie’s Loft.
Louie’s Loft
Click forward
once, then turn left. Click on the dresser, then on the lock, In
your inventory, use the lockbox key on the dresser. Then using
the phases of the moon posted above on the wall as a reference to
work the lock. Like so–Turn the key this way–push in, turn left,
back out, turn right, again, push in, turn left, then back out,
it should open now. Retrieve the tooth/fang that is inside the
drawer. Access your World Map and go to the Hotel Cleveland.
Hotel Cleveland
Click forward
once, then turn around, click on the wardrobe cabinet. Click on
the cabinet door handles to get a close up. In inventory use the
signet ring on the door handles, This will trigger a video
sequence. When done, in the open cabinet, examine the Raven Room
Invitation, the hand written note, the bar-bill tab, maybe even
the magazines, the letter to Joseph, the Scrumpy’s Prophylactic,
the belt/collar, and the telegram. Access your World Map and go
to the FBI Office.
FBI Office
While Dick
Winslow is “busy”, you need to get your hands on that
Pensky file that is in the safe. Go over to the small bookcase
that has the globe on it, notice the sports picture of Dick
Winslow–
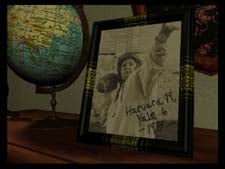
make note of
the numbers 19, 6, 33. Make your way over to the painting on the
wall with the fruits, and pitcher on it.
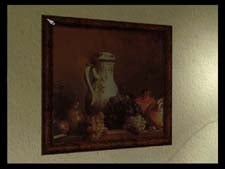
Click on the
top left hand side of this painting. Then click on the safe to
get a close up. Spin the dial al the way around once and then
stop at 19. Go left past the six, and then stop on 6 second time
around. Then go right to 33. Click on the handle the safe will
open. Click on the manilla envelope on the top, read its contents.
By doing this you find out Pensky has been sent to the Sunnyvale
Rest Home. Then click down towards the bottom of the safe and get
the security pass. When you exit the safe there is a video
sequence–which you will automatically wind up in your office
when this is done. Examine more things in your inventory, like
the Raven Room Invitation and Winslow’s pass. Access your World
Map and go to Flannigan’s.
Flannigan’s
Question
Mulhaven. Use the invitation on him and get it signed. Access
your World Map and go to Sunnyvale Rest Home.
Sunnyvale Rest
Home
Talk to Pensky.(take
special note when he talks about the Black Dahlia) After talking
to Pensky, you realize you already have one of the talismans (tooth/fang)
Access the World Map and go to your office.
Your Office
Click on the
middle bookshelf, towards the center/right hand side–clicking on
the book entitled “The Crusades, A Pictorial History”
Retrieve the Raven’s feather. Access the World Map and go to the
Museum.
Museum
You need to get
a stamper so you can make the seal on the invitation. Turn to
your right, and click on the Parchment left of the stamper–You
will have a “Vision” when done examine the five seals,
you will want to make one like the purple or the blue one. Back
out of this close up and click on the stamper–click on it again
to open it–Note there are five dials with no. 1 being closet to
you and 5 being farthest away. Dial 1 controls the left lower
quadrant of the stamp, Dial 2 controls the right lower quadrant
of the stamp, Dial 3 controls the right upper quadrant of the
stamp, Dial 4 controls the left upper quadrant of the stamp. The
5th dial rotates the retracted pieces inside the
handle. Turning the dials 1 -4 to the right retracts the pieces,
and turning them to the left pops them back out again. When using
the 5th dial you have to listen for the pieces to
click as they go around.
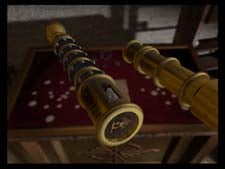
Follow this
order for the solution: 1 right— 5 left—- 1 left—-2 right—
5 left — 2 left— 4 right — 5 right —- 4 left —-5 left
—-5 left —- 3 right —-5 right— 3 left—- 5 left —- 3
right —-5 right —3 left —- 5 left —-3 right —- 5 right
—– 3 left —- 1 right —-2 right —– 5 right —–1 left
—- 5 left—– 2 left Then a video sequence, then a CD CHANGE
The Raven Room
At the party,
talk to Winslow, Then talk to the man standing guard at the door.
Then turn left and tilt your view down and click on the upside
down plate on the table, from here go forward behind the blue
screens and you will see a table. Turn right and notice the tray
of glasses. In your inventory use the plate on the black table,
then click on the tray of glasses. This will create a diversion
so Jim can slip into the back room. After another video sequence,
you can explore the room with your flash light. Note the
astrology painting on the right side of the fireplace and the
Rune symbol chart on the left side. (Esp-what each Rune stands
for) Turn left until you are facing a big round table and then
tilt your view up and see that there is a cord for the light
switch, click on it and turn the lights on. You will notice the
panel directly in front of you on the table cannot be opened, but
you can go around and open all the others. Read the inscriptions
underneath these panels. Then referring to your inventory and
Helen’s notes,, and the parchment papers –All this information
put together gives you the order in which the panels are to be
opened. Start with all the panels closed. And assign numbers to
them starting with the locked one in front of you as number 1 and
continue in a clockwise manner and open in this order—- 6—8—11—12—9—4—5—7—2—3—&
10, the bottom one opens to reveal a Book and triggers another
video sequence.
It
is now December 2nd, 1941
Read the note
from Cassandra Rollins, you will automatically go to her. Talk to
Cassie, and then answer “yes” that you want to be put
into a trance. When in the trance–click forward into the area
between the two torches. While in this trance world, click around
to the different areas and listen to the phrases–these voices
are giving you hints that you need to open the door that is
guarded by the two skeletons. These phrases are :
The bird
and the fish are the base of all
When the bird
is away from the sun she’s with the moon
The key
are creatures of the sun
The fish
are creatures of the moon though she’s avoid her
company
The crown
and bird sit on his right and left
The sun
loves a bird but only when she’s alone
No twin can
stand if separated
The star
follows the key
If west
is right and east is the left, you know on which site
the sun will rise and which the moon
will set
The key
follows the shield when the moon is far away
By night
it refers to the moon and fish, by day that
shield surrounded itself with the sun and key
The comet
has seen up after the moon has present
A lonely
fish loves a crown though lonely crown prefers
the key
The serpent
will chase the comet tail if not chased itself by the
star
So the answer
should be :
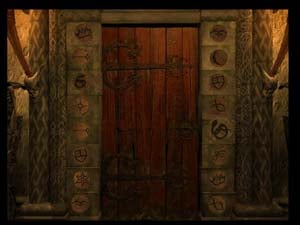 Left–Crown
Key Serpent Star Key Shield Sun & Bird
Right–Bird
Moon Shield Fish Serpent Comet Crown & Fish
You will need
to traverse these planets with the rune symbols on them, but you
need the order they go in, so leave the trance state by using the
“ESC” key of your keyboard. Talk to Cassie again and
tell her about the crystal spheres. Read the astrology tome that
Cassie hands you, make notes and the different planets’ names and
their symbols. Then for now access your World Map and go to
Sullivan’s Office
Sullivan’s
Office
Talk to
Sullivan, Access your World Map and go to Detective Merylo’s
Office.
Merylo’s Office
Ask for the
evidence on the Torso Case, review this evidence, item by item,
starting with number 1. As you are reviewing the evidence make
note of the dates on the newspaper clippings and what is being
covered by blood and what isn’t being covered. Notice that item
no. 19 is impounded by the FBI, then ask Merylo about Von Hess,
and about Von Hess’ medallion. Access your World Map and go back
to Cassie’s , the psychic.
Psychic Cassie’s
Have Cassie put
you into another trance, you will arrive at the crystal spheres(planets).
Keeping in mind the newspaper articles you saw,
Notice how in
each paper (The total of 8 from first victim to the last one),
there is a number revealed. These numbers are the order for the
sun-planet puzzle. The answer is : 15-65-260-175-111-369-34-4 or
Saturn, Mars, Mercury, Venus, The Sun, Moon, Jupiter, and finally
Earth.
go through the
planets in this order–Saturn, Mars, Mercury, Venus, Sun, Moon,
Jupiter, Earth, and then the gray sphere. Then click forward and
make your way to the reflection pool. Click on the water to get a
close up view, then click on the stones that you see, one at a
time,
they each will
trigger a “Vision” pay close attention as the clues
will be used later on. Then hit your “ESC” button again
and talk to Cassie about the stones and the pool of water. And be
sure and tell Cassie you saw yourself in the “pool”.
Access your World Map and go to the FBI Office.
FBI Office
Talk to Winslow.
Then access your World Map and go to Detective Merylo’s office.
Detective
Merylo’s Office
Ask if Winslow
has returned the evidence, no. 19, that was missing before. You
can now examine it. Also go back to item no. 1 and click through
to the back page and click on the address Jim will make a
statement about checking this out. Access your World Map and go
to Santini’s house.
Santini’s House
Talk to Mrs.
Santini. Then notice all the window shades can be pulled down,
but they go right back up again. Go over to the doorway and turn
the light switch off. Then go to the window shade on the right
side of the bed, pull it down and Jim will retrieve a photo from
the back of it. Turn the light back on again, and then go to the
corner of room between the bed and the dresser and click on the
baseboard (remember your “vision”) Get the items inside,
including the letter on top and the envelope underneath it with
the rune symbols on it. Short video sequence, Access your World
Map and go to the Kingsbury Run Sewers, CD CHANGE.
Kingsbury Run
Sewers
At the entrance
to the tunnel, after the video stops, take this path. You now
have a compass on your screen. North 1 click, East 4 clicks,
North 5 clicks, & turn right to face the gauges. Click on
this to get a close up view of the puzzle.
There is many
ways to solve it. The main goal is to keep all the pressure on
the same level (it is 30). Use the valve to control the pressure
level.
To solve it
look at this clues : wheel 6 will control meter 2, wheel 5 will
control meter 3 and 4 in opposites direction, wheel 8 will
control 1 and 4 in opposite direction, and wheel 9 will control
meter 2,3 and 4. Here is one of the solution (in 9 moves) : Turn
wheel 9 to the right until meter 4 reads 30
Turn wheel 8 to
the right until meter 1 reads 30
Turn wheel 5 to
the left until meter 3 reads 30
Turn wheel 9 to
the right again until meter 4 reads 30
Turn wheel 5 to
the left until meter 3 reads 30 Turn wheel 6 to the left until
meter 2 reads 30 Turn wheel 9 to the right again until 4 reads 30
Turn wheel 6 to the left until meter 2 reads 30 Turn wheel 5 to
the left until meter 3 reads 30
Look at this
picture to help you:
When completed,
a passageway opens up. Enter it, and inside click on and take
notice of the symbols on the door, and the cross-shaped hole in
the middle of the door. Access your World Map and go to the FBI
Office.
FBI Office
Ask Winslow for
the cross, which is Von Hess’ medallion, When you return to the
sewer click on the center where the cross shaped hole is, Winslow
will give you the medallion, after he leaves click on the door in
front of you. This will be the sewer bars puzzle. The point is
that all the bars must come down at the same time. Number them
like so…….
1 2
8 3
7 4
6 5
Then click on
them like so….5—4—2—3—7—5—2 the door will now open.
Now click on the next door in front of you.
Jim will
comment and say something like it’s obvious you can’t get through
that door, there must be another way. So now, look up and to your
left and notice the grate/grille cover–click on it, this will
trigger a video sequence. Access your World Map and go to the
Raven Room.
The Raven Room
When you get
there Jim will break in. Then go to the back door
( the room you
were in before )Access your inventory and look at the Raven Room
Invitation, manipulate it and pay attention to the folds, its
like origami, If you fail to get it, then do the following:

click on a
close up of the door, then click the Red Diamond (this is the
bottom of two rows you will use, center position) then click top
row center, bottom row left, top row right, top row left, bottom
row left, and bottom row right, then enter.
When you are
inside click forward to the wardrobe closet and click on the lock
itself for a close up view, note the indentations in the center
part of the lock. Click back out of this view and click down to
the candle sticks and then click on the left one. There are
actually five pieces to click on this to manipulate it, and the
base does nothing. Section 1 is the closest to the closet and 4
is just above the base. Here is the solution to make the pieces
pop out to be used on the lock. Turn section 3two times to the
right, Section 4 two times to the left, section 2 two times to
the right, the closet opens,
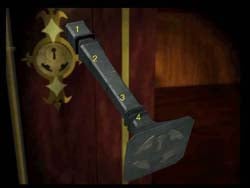
Click on the
green medallion hanging there. This is the killers talisman.
Access your World Map and return to Psychic Cassie.
Psychic Cassie
Ask Cassie to
put you into a trance. Once there, click forward and go to the
pool, Tilt your view down and notice another stone has been place
there.(second from the left) Place it into the water, Watch the
video carefully (esp. The Bookcase)
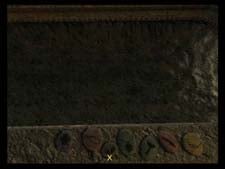
When you end up
at the Raven Room, turn to your right and click forward to the
bookcase, and face the bookcase and click on the middle shelf–far
right and a passage will open behind the closet. Watch the video
sequence.
It
is now 1945, and Jim Pearson is an Officer in the OSS.
You are in a
mineshaft. Look above the door you are facing and notice the
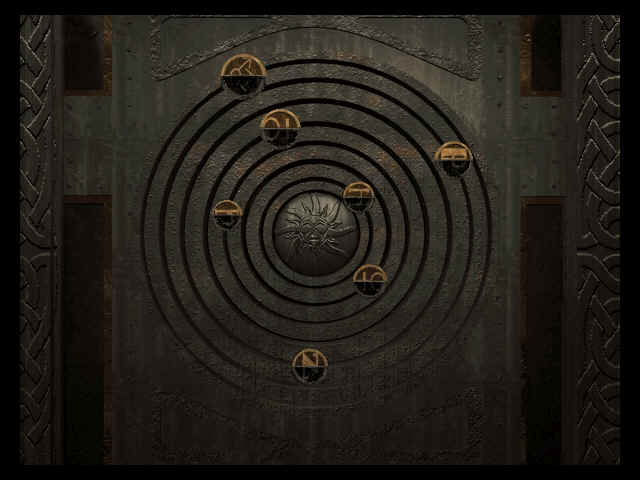
painting. Click on the door itself to get a close up. The object
here is to manipulate the planets around the Sun so that they are
all reflecting up to the painting. When all the planets are
reflecting up towards the painting you may click on the Sun in
the center and the door will open.
The clue on how
to do it :
Let’s say we
name the circle from A to G (from outside to inside)
Control A and C
simultaneously until they’re in position
Control G until
B in position
Control D, F,
and G until all of them in position
Last move,
control E and D until D, E, and G in position
After a short
video sequence, you will be faced with 3 archways and puzzles.
Turn left, this is the Lever Puzzle.
Look at this
picture to solve it. The order is :
E – F – C – B –
A – D – G – H – I – F – E (Step 1) E – D – E E – B – C – F – I –
H – G – D – A – B – E E – B – A – D – G – H – E Repeat step 1 E –
B – A – D – E E – B – E
Next turn to
your right and go to the Keys Puzzle. This is a simple puzzle.
Just match up the keys with the keyholes. The only problem is :
one key can fit into several keyholes.
Look at this
picture to help you. The answer is : A-3, B-6, C-4, D-1, E-8, F-5,
G-7, H-2.
Remember to
push each key in.
Now make
another right and go to the Switches Puzzle. There are 7 switches
from left to right. Flip switches 1—4—6—& 7, then keep
pushing the red button below and then click on
The Black
Dahlia.
It
is now 1946.
You are in a
Nazi cellar. Turn around and find the staircase. Click forward to
it, when you get to the door—STOP. Click the little black
square in the center of the door, it is a peephole. Then turn 180
degrees around and shine the flashlight around till Jim says
” Hmm, what’s that over there?” Then as you make your
way over you will notice a well in the ground with a hook hanging
above it, that you cannot reach. Turn left and make your way over
to that Winch Control Lever, click on it for a close up view
there will be two levers and a crank handle. The left lever is up
and the right lever is down, Switch these so that the left lever
is down, and the right lever is up, this will automatically lower
the rope. Then when that is done, make sure that both levers are
in the down position to lock the winch in place. Make your way
back to the well and click on the hook laying on the floor. CD
CHANGE
It’s a good
idea from here on out to ******SAVE YOUR GAME****** often.
Sometimes directions are not always what they seem, but you don’t
want to get lost either.
Compass
Directions—-
To get to the
Main Hall follow this direction (assuming you know how to use the
compass on the lower right corner of the screen): N, NE,
NE, N, NE, NE, NW, W, SW, W, W.
There are 4
pillars around the altar. Each pillars resemble the Highest Order
in the Brotherhood of Thule : Herald, Scribe, Sergeant of Arm,
and Landulph. You need special sequence for each pillar to open
the secret door.
The sequence is
in Herald’s sarcophagus. To open it, you need to find a special
artifact first. It is the key. Enter the archway where you came
from. Follow this direction : E, NE, E, N (you’ll
arrive in front of an altar). Check out the wooden box on the
right. Get the artifact. Now go on with this direction : S,
W, NW, NW, W (you’ll arrived at the Herald Tomb). Click
on the sarcophagus lock. Use the artifact. Then click on the word
to copy it to your notebook.
It’s
inside the Scribe’s sarcophagus in Scribe’s crypt. Go back again
to Main Hall (SE, SE, SW, W, W). Take the second archway
from the left side of the main altar. Follow this direction : SW,
S, SE, SE, S, SE, S, S, SW (or you could just memorize
this : take left path at the first intersection, then right at
all the rest)
It’s inside his
sarcophagus in Sergeant of Arm’s crypt. Follow this direction : NE,
N, NW, NW, NW, NW, NW, NW, SW, SW, W, NW, W, SW (or you
could just memorize this : take left path at every intersection).
Again, it’s
inside his sarcophagus in Landulph’s crypt. Follow this direction
: NE, NE, NE, NW, NW, N, NW, NW, W (or just
simply : take all the left path at every intersections).
Go back again
into the Main Cave (follow this direction : SE, SE, E, NE,
NE, SE, S, SE, SE, SE, E (or simply just take the left
path at every intersections. I guess left is the key word in this
maze !!!). Let’s name the pillars surrounding the altar with
Scribe, Landulph, Sergeant of Arm, and Herald (starting from top
left corner and following the clock direction). Arrange all the
rings from top to bottom in each pillars according of the
writings you’ve found earlier. Look at this pictures to help you,
Or just
follow along here EXACTLY—
When
you reach the shaft way, click forward once, then make a right
and keep going right until you reach the alcove, make a right
into the alcove. You will see some skulls and vases on an altar,
turn slightly to the right and click down low, click on the big
box and get the artifact from inside. You can examine it in
inventory to see the markings on the back of it. Exit the alcove–you
will automatically go to the left, but turn around 180 degrees,
and click forward and keep going right. You will end up at a
Sarcophagus, notice the hasp on the front and it’s markings, use
the artifact you just acquired on the sarcophagus, When the lids
opens notice the Rune Symbols reflected in the top of the lid,
click on then and Jim will make note of them. Exit this room.
Then click forward but keep on branching to the right. You will
end up in the main Pillar Room. Turn yourself so that you are
facing the altar, then turning to your right, go through the 6th
(sixth) door. Go forward and keep making rights again. Then you
come to the open area where there is a Bridge and Steps. Click
Forward Twice. An arrow will hit Jim’s torch. Then click on the
steps in the following order, left step, right step, left step,
center step, right step, left step, & then right step. At the
top. Click on the sarcophagus, then click on the broken lid. Then
click on the Rune Symbols, and Jim will make a note. Then inside
the sarcophagus, notice the skull is missing. Then click forward
and go down the steps in the opposite order of when you came up.
Like so….Left, right, left, center, right, left and then right.
Then go back down the passageway and keep going right, You will
end up at another sarcophagus. Click on the sarcophagus once to
bring into a close up view, and then click on the lid to bring up
the Puzzle. The object is to move the blocks around to free up
the four corner stones that are tucked into the outside edges.
There’s no exact way to solve it.

Just remember this—you have
to put every block inside the frame. To simplify your quest, use
the corner hole to put the small square block for a while. Put
all the vertical blocks in the middle. Arrange the rest and
finally take out those small square blocks again. Look at this
final picture to help you (it’s only one of the many possible
solutions).
When
the sarcophagus opens up and you get a view of the skeleton
inside and the sword on his chest, click on the symbols and Jim
will make a note. Exit this chamber. Click forward and keep
branching to your right again. When you enter this next chamber,
turn to your left and click on the sarcophagus to get a close up,
click on the opening to get a view inside. Then click on the
little square stone pieces you see scattered about in front of
the skeleton. Now turn to your right and you will see a basin of
water, hanging from the figure on the wall. Click on it to get a
close up. In you inventory, use the stone pieces on the basin of
water. Then arrange the stone pieces inside the basin to form
Rune Symbols that look like.. A vertical line, a slanted letter X,
what looks like a small letter N ( n ), and a letter F with the
tines slanting down. Note each Rune Symbol will have 3 pieces of
stone, and then the stones will be put together to form one large
square. Click and drag the pieces around to arrange them.
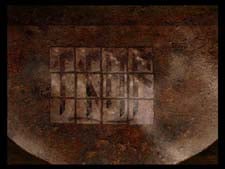
When
complete Jim will automatically note them. Exit this room and
make your way back to the Main Pillar Room. Do this by going
forward, then two lefts, then one right.
Go
forward to the Main Altar where the four Pillars are, the
starting with the Pillar on your near left and working clockwise,
enter the correct combination for each pillar, First is the
Scribe, then in the far left is the Landulph Pillar, then in the
far right is the Sgt at Arms Pillar and then last is the Herald’s
Pillar on the near right. But this is a special one, remember
that the symbols where reflected-so turn them around.
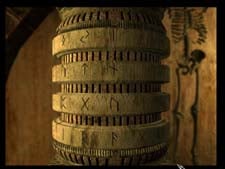
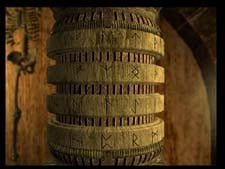
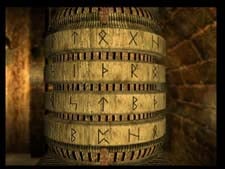
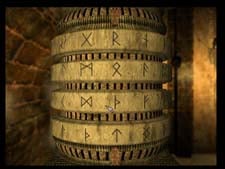
When
all four are correct a door will open in the back of the room,
revealing another passageway, CD CHANGE.
When
you enter this new room, click forward once and then click on the
figure lying on top of the sarcophagus, noticing that it’s hands
are cupped. Now you finally get to use that bag of Runes you been
carrying around with you all game~!! In inventory click on the
bag of Runes, click on it to open it up. Assemble the Runes onto
the figure of the gem stone in the center in this order—-
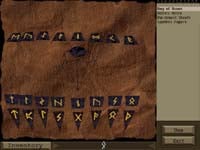
Top Row—-Looks
like and N ( n ) then a slanted Z then an F pointing up then a
vertical line then what looks like a bowtie then the one that
looks like a boomerang then the letter R then the letter M.
Second
Row—-a backwards 7 then a left & right greater than signs
then and actual letter N then a slanted letter X then what looks
like an N ( n ) then an angled letter S then a diamond shape with
a crossed bottom then the arrowhead pointing up.
Bottom
Row—-what looks like a letter C then a backwards 7 then an
angled letter S then an X then an F then a diamond shape crossed
at the bottom then a vertical line with an arrowhead in the
middle of it the a T or line with an arrow at the top.
Then
use the assembled Rune Stone Shape on the figures cupped hands.
Watch the video sequence. Afterwards click on the figure again
and notice its eyes are glowing red. Back out of this view and
tilt your view down and to the left. Now you can go down into the
trench around the sarcophagus. Go down inside towards the head
and turn to see some binoculars, look into them. You will see a
red fog. Notice the panel to the left of the binoculars–click on
it until you get a great stone face and then click once more past
this. Then go around to the foot of the sarcophagus and you will
see 2 more panels, Do the same to them. Then go back to the head
and look into the binoculars again, now you see a panel with a
“Red Dot” in the center. Back out of this view and turn
left and move the cursor along the inner wall of the trench until
the cursor turn into a pointing arrow, click on this and Jim will
remove a dagger from the wall and another secret passage opens.
Talk to
Von Hess. Then watch the video sequence.
It
is now 1946.
Talk to
the Pilot. Then turn to your left and open Captain Collin’s foot
locker and you can examine the items on the right, but slide the
tray on top to the right and then click on the letters.
It
is now 1947.
On the
train, examine the ashtray on the table. Notice the black
cigarettes. After the Porter leaves, click forward to the end of
the car then turn right and click on the seating chart on the
podium. Click to get close up. Notice that on Shift 2 in the 4th
table the name of Matt Collins (Winslow must be impersonating him)
Then turn left and go through the door, Then just keep going to
the back of the train–don’t click on any doors as this will get
you thrown off the train. Just keep going until you reach the
baggage car. As soon as you enter the baggage car turn all the
way around and click on the blue thing inside the metal jacket on
the door. Take it to your inventory. This is the blueprint for
the train, from now on when you go to a train car , you open the
blueprint and click on the car you want. Turn around again and go
to the back of the baggage car, and go through the door to the
Conductors Office. Enter the Office.
Talk to
the Conductor. When he asks you which name–type in—Matt
Collins. He won’t give you the cabin number. Exit and go back to
the baggage car. When there, click forward once, and turn 180
degrees around and click on the brown suitcase on your right. Jim
will pick it up and put it on the crate. After this wait a few
seconds and watch the suitcase vibrate off the crate. You might
have noticed that above the suitcase when it was on the crate was
an Emergency Pull Cord. Now go towards the door where you got the
blueprints and look to the shelf and get the spool of twine/cording.
Then go click that suitcase again, and right away use that twine/cording/string
you just picked up on the suitcase. The quickly return to the
Conductor’s Office. When he leaves, open the left hand drawer of
the desk and get out the listings-noting the name of Matt Collins,
He is in #283, This is Winslow, then notice on the clipboard on
the desk that # 283 has repairs listed.
Now
exit here and using the blueprints, go to the four compartment
car from the front of the train. Enter room #7. Turn to the
dresser and click on the top drawer, open it. There is a piece of
paper with a single Rune Symbols on it, click on this. As soon as
you do, Jim will get dizzy and pass out. You wake up to a Blonde
Woman in the room. After this, go back to the Conductor’s Office
and talk to him, Ask about Collins, He is gone, but luggage is
not. You go to the baggage compartment. Go to the end where you
found the blueprints, but turn right anc click on the clipboard.
In close up you notice that Matt Collins’ tag number is 0100AA.
Turn around and head to the opposite end, all the way to the door.*****SAVE
YOUR GAME ***** there has been report of a “bug” here.
Then turn back around 180 degrees, and click on the crate on your
right, this is the crate you are looking for. First remove the
small pin from the top and put it in the small hole on the left
in the front. Then remove the large pin from the top and put it
in the other hole on the front. Then flip the top hasp down, and
open the lid.–You will notice it is a couple of cases of
Champagne. Close this back up, and flip the hasp back into place.

Then
flip the bottom part of the hasp all the way up. And now remove
the large pin that you put in the front and click it in the
center hole. Then push the hoop up to the top, remove the small
pin and put it in the front center hole where the hoop was. Then
on the left side of the trunk, remove the handle and put it in
the holes on the top covering the hasp. Then remove that same
handle holder from the left side also and put it over the hoop in
the front then get the handle from the top and put it over the
handle holder on the front–This automatically opens the trunk.
Jim will then switch stamps on the crates. Now you need to go to
the dinning car, via the blueprints.
Talk to
the Blonde Woman. Apologizing. Keep talking to her and ask about
Winslow and where she is going, CD CHANGE
You
are now in Los Angeles.
In your
room, click on the telephone. Call everyone possible starting
with the Police. Then access your World Map and go to Gabe’s
Diner.
Gabe’s
Diner
Talk to
the Detective. After you bump into Alice, you end up in your
motel room again. Access your World Map and go to the Train
Station Shipping Office.
Train
Station Shipping Office
First
talk to the incoming clerk. Then talk to the outgoing clerk. Then
look to the left of the outgoing parcels and notice the Trash can.
Click on it and then click on the box inside. Ship this box with
the outgoing clerk, Using the box from inventory. Then choose
Express Delivery. Check before you leave with the incoming clerk.
Access your World Map and go to the Boarding Home.
Boarding
Home
Talk to
the landlady. The turn right and check the closet, Click on the
pocket of the jacket hanging there. Click on the mattress and Jim
will notice a shoe under the bed. Then click on the beside table
and open the top drawer and read the note. Then the third drawer,
there is a romance book, but more important a napkin with writing
underneath the book. Click on the napkin. Note the Biltmore Hotel
Bar. Access your World Map and go to the Biltmore Hotel.
Biltmore
Hotel
Talk to
the bartender. Then use Lizzie’s picture on him. Access your
World Map for a short stop back at your Hotel room, Then right
away access the World Map again and go to the Shipping Office at
the Train Station. Talk to the incoming clerk, when you get a
look at the shipping manifest, note Matt Collins is using the ABC
Moving Company. You will also get your package. Access the World
Map and go back to your hotel room.
Your
Hotel Room
Click
on the telephone and call the ABC Moving Company. Access the
World Map and go to the ABC Moving Company.
ABC
Moving Company
Shine
your flashlight around and find the memo on the wall next to the
calendar, read the memo. Turn to your left and click on the desk
and then click on the middle drawer on the left and read what is
inside. Files always start with the Drivers’ initials. From the
list you know that Steve Owen who took the package from the Union
Station and deliver it to AKP on 1/10. From the note you know
that Steve Owen always want to drive in zone I. So the package
number is : SOIAKP52
Turn to the
right and down and find the file cabinet. Click on the bottom
drawer and scan along until you come across the file you need.
Access your World Map and go to the Biltmore Hotel.
Biltmore Hotel
Talk to the
bartender. At first, play along with him. Then insult him and you
will find out Lizzie’s Room No. Then turn left and go forward
once, then turn right and go forward up the stairs. Now go to the
end of the hall where the window is and turn to your right. This
will be room 201. Knock–but there is no-one there. Turn and face
the window again and click on the bottom of it and then exit
through it. Once outside turn and find Lizzie’s window and click
on it, but it won’t open. So tilt your view up and click at top
of window and it moves enough for you to click on the stop-stick
jammed into the window. Then return to the bottom and click again
and this time it opens. Go inside. Once in the room, check the
chest of drawers, and the vanity table, but nothing is there. Now
to the right of the chest of drawers tilt your view up and notice
a key on the closet door ledge, click on this key and take it to
inventory. Access your World Map and go back to the Sunset Arms
Hotel. (Your hotel)
Sunset Arms
Hotel
The Detective
is waiting for you. Talk to him, then Alice will walk in and save
your butt. Talk to Alice. When done with Alice, Access your World
Map and go to the Train Station Lockers.
Train Station
Lockers
The key you
have from Lizzie’s has no number on it, but she wrote in her
letter that she had a full proof combination. Her initials. They
are E S. On a phone dial E S is 37, so look for locker 37. When
you find the locker, read Matt’s letter, and then in the Jewelry
box get the receipt for the Antique shop. Access your World Map
and go to the Antique Shop.
Antique Shop
Talk to the
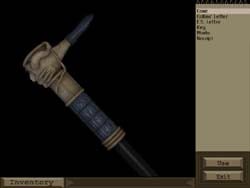
owner. Jim will then buy the cane. Examine the cane in inventory.
Note the vertical lines just under the head of the cane and the
Rune Symbols going down the handle a little ways. From the
vertical lines down, match up the Rune Symbols, just like you did
back at the underground caverns at the Monastery. When the cane
opens, you will get a Treasure Map.
Access your
World Map and go to the Sunset Arms Hotel.
At the Hotel
get the pass from the pillow on the bed, Access your World Map
and go to the Movie Studio.
Movie Studio
After the video
sequence, go talk to Alice, Now turn around 180 degrees and go
forward to the Trunk/crate that is open on the other side of the
room. Click on the delivery receipt that is inside the trunk. Now
go back and talk to Alice again. Access your World Map and go to
Al King’s House.
Al King’s House
Talk to Alice.
Turn 180 degrees around and click forward towards the desk. Now
turn left and click on the telescope. To slight left of telescope
are the inclination and declination charts. Then go back and
click on the desk. Click on the open notebook, and make a note of
the coordinates on these pages. Now go practice on the telescope.
Click on the metal box on the side of the telescope and set your
coordinates first pair is -.8 & -45, click on telescope and
slide your arrow pointers so they me in your view–both
Horizontal and Vertical arrows must meet, then you get your eyes
full~!! Now set second pair -1.0 & -25 now click on telescope
and set your arrows—Geezz another eye full. Ok now the third
pair .2 & 5 now set the arrows, Man o’ Man is this guy a
voyeur or what????
Ok enough of
that stuff, now click on the trash can that is beside the desk.
Click on the torn pieces of paper and take them to inventory,
Also click on
the newspaper article(read it), chisel, and pair of gloves. In
inventory examine the torn paper and try putting the telegram
together. There are two of them, but only one is important–Winslow’s,
it was sent from Zurich, he will arrive in January, and wants the
crated delivered to an abandoned shooting lodge. Access your
World Map and go to the Cemetery.
Cemetery
At the cemetery/crypt
make your way around the sarcophagus noting the scribbles on the
wall–and then click on the gold urn, get the piece of paper and
note the circled page number–165. And the Saturnus Logo, and
what Winslow wrote to you. Access your World Map and go back to
Big Al’s House.
Al King’s House
Turn and go
over to the desk, Click on the map above the desk. In inventory,
Use the Treasure map on this map. Superimposing it over the top
line up the “crosshairs” As you can see Al’s house is a
height of 100. And the marked position is 250. Now look at the
chart for the telescope, for a range of 16,500feet ( from urn at
cemetery) and a difference of 150 (250-100) the angle is .5—so
from the graffiti on the cemetery walls, the correct position for
Saturn is 27. So go to the telescope controls and set your pair
of numbers .5 & 27. Then line up your arrows and you will see
Dick Winslow looking back at you.
The Abandoned
Lodge
********SAVE
YOUR GAME HERE*********
Turn around and
click on the photo attached to the ladder, then click again to
get close up. After the ladder breaks and the fire starts, turn
around and face the lockers. Start clicking on them from left to
right, when you get to the 3rd one, Jim will be “branded”
electrically. Click on the key hanging inside this locker and Jim
will automatically get out–
You return to
your Hotel and read a note from Alice and wind up at Big Al’s
House again.
Al King’s House
The place has
been ransacked. It is a mess. Click forward once -turn right and
click into the center area. Turn left and click on the note on
the projector, then click on projector button to turn it on.
Watch the movie. Now turn around and go back up towards the bar
area. Turn left, click forward, turn left, click on the cuckoo
clock. In a close up click on the note. Then set the hands of the
clock to read 5 o’clock. ( hour hand on 5 and minute hand on 12)
As soon as the hula dancer comes out, move the minute hand back 5
minutes (to 11) A secret passage will now open.
As soon as you
enter this underground passage ****SAVE YOUR GAME****** now turn
to the right and lower your view, you should see a severed head,
Now turn back to the left, and see Alice hanging around in the
background. Click towards her, click on either Alice or the
dagger to her right to free her******************
long video
sequence here………………you have three (3) choices
Shoot Dick
Winslow—not a good choice
Do nothing—still
not a good choice
Shoot The Black
Dahlia out of Winslow’s hand. This is the best choice and
probably the correct choice.
Personal notes–some
of the puzzles are rather hard, a few are very time consuming,
but finishing them is great fun–but for those of you who just
simply get frustrated there are a few cheat codes for solving
these puzzles
Stained glass
puzzle : LEADHEAD
Lockbox puzzle
: LOGHOUSE
Turnkey puzzle
(Louie’s loft dresser) : TURNKEY
The seal puzzle
: RINGDING
Raven room
circular table puzzle : ARTHUR
Winslow’s safe
: MASTERLOCK
Dream – Archway
puzzle : CANCAN
Raven Room door
: TRIANGLE
Pressure gauge
puzzle : PRESSURE
Pressure-lock
puzzle : BARBELL
Candlestick
puzzle : NIMBLE
Europe’s
catacomb – Sun/Planet : SUNSPOT
Europe –
Pressure Lever puzzle : LADYBUG
Europe –
Multiple Key puzzle : KEYPUNCH
Europe – Gear
puzzle : GEAROIL
Catacomb –
Stone Pieces puzzle : ROCK33
Catacomb –
Slider puzzle : BLOCKHEAD
Catacomb –
Pillars puzzle : TEMPLE
Catacomb – Bags
of Rune puzzle : GEMSTONE
Train – Trunk
puzzle : BOXTOP
LA – Cane
Puzzle : CANDYCANE
LA – Telegram
puzzle : TELEPORT
LA – Telescope
puzzle : PEEPER
LA – Cuckoo
puzzle : BONGO
EASTER
EGGS
Here is the
list of easter eggs that can be found inside the game :
Click on Jim
while using the telephone while in Pearson’s hotel room in Los
Angeles instead of choosing one of the names to call. You’ll see
a funny clip.
Hold down and
drag your left mouse button to the edge. Jim will spin as fast as
he could.
In ABC
warehouse, start to examining the files one after another. You’ll
see funny clip after you
BUGS
& PATCHES
Here is the
list of the bugs that I found while playing the game, some has
been repaired with the patches :
Don’t pick up
the Astrology book on the table while in Cassandra house (Psychic
Parlour), it will make the screen turn to black. Instead, ask her
to look at the book.
Sometime the
clerk at the Union Station won’t give you the package.
The bag of
Runes puzzle : sometime the runes won’t move
The Cuckoo
puzzle at the final disc : sometimes you don’t have to solve that
Game crash
while clicking the broom at Louie’s loft, superimpose the
treasure map at Al King’s house, etc
Few trouble
with Sound Blaster AWE64 (Sound trouble)
All of these
bugs has been repaired by a patch from the Technical Support site
at Take 2 Interactive.
Inerplay and Take2-Official Game Website
Eileen Caraher
Visit my message board:
Message Board
My Other Pages I have created
My Homepage
My Genealogy Page
Friends and Roses
PurpleRoses Valentines
Fate of the Unicorn
St. Pat’s Day Page
Thanksgiving Recipes and Stuff
My Idea of Christmas
Shivers II–Harvest of Souls, walkthru
Titanic:Adventure Out of Time (another game walkthru)
View this guide raw, exactly as the archive holds it