The Secrets of Atlantis: The Sacred Legacy
The Secrets of Atlantis, The
Sacred Legacy
Walkthrough by Bert Jamin
© December 2006 Bert Jamin (www.gamesover.com)
This walkthrough may not be sold and may not be used for any commercial
purposes. Neither is it permitted to publish this walkthrough in any way without
the written permission of the author Bert Jamin ().
Feel free to place this walkthrough on your web site or on your home page, on
condition that no part of this walkthrough is changed and that the name of the
author (Bert Jamin), the URL of the owner of this site (www.gamesover.com)
and his E-mail address
are mentioned unchanged. For the most up to date walkthroughs always visit www.gamesover.com.
If you have any suggestions to improve this walkthrough, let me know by sending
me an email: .
The Zeppelin
Turn to the left and walk forward. Take the crab
pincer from the table. Turn around and take a coin from the table. Turn to
the right and walk forwards. Pan to the right and take the ashtray. Turn to the
right and walk towards the windows. Pan to the right and see the life hammer in
the display on the wall. Smash the glass of the display with the ashtray. Take the glass
breaker out of the display.
Turn to the right and walk to the
corridor. Go forward and walk to the stairs leading down. Turn around and go
down the stairs. Turn to the left and walk towards the closed door. Turn to the
left and open the closed door. Enter the radio room. Notice that most of the
equipment has been sabotaged. Open the drawer of the desk and take the nuts and
bolts. Pan to the right and examine the equipment. Exit the radio room.
Turn to the right and walk towards
the ladder hanging on the wall. Take the ladder. Turn to the right and walk to
the end of the corridor. Turn to the left and open the door of the engine room.
Enter the opened door. Turn to the right and talk to the man sitting down, Lou
Garetti. Ask him about everything you can. Turn around and walk towards the
red valves. Close the three steaming valves. Leave the rightmost valve alone! Use the crab pincer on the bolts
next to the left valve of the bottom valves to obtain an intact pipe.
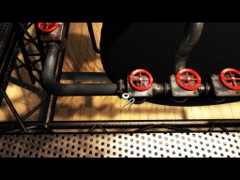
Use the crab pincer on the left bottom valve
Turn to the right and go one step
forward. Turn to the left and go another step forward. Turn to the right and
look at the top of the tank. Place the ladder against the tank. Climb up the
ladder. Flip the red lever down. Use the crab pincer on the bolts. Remove the
bolts with the glass breaker. Do the same with the pipe leading up. Place the
intact pipe on the opening. Attach the nuts and the bolts. Head back to the red
valves. Open the center and the rightmost valve.
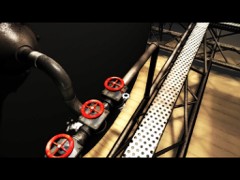
Open the center and the rightmost valve
Head back to the ladder against
the tank. Climb up the ladder. Flip the red lever up. If you have done things
correct you’ll see that the Zeppelin has enough steam again!
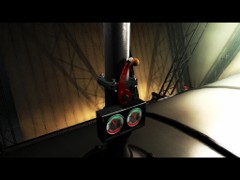
Steam enough!
Climb down the ladder. Turn to the
left. Go forward one step. Turn to the left and speak to Lou once more. Talk to
him about the Zeppelin. Turn to the left and walk between the two tanks. Go
forward three steps. Turn to the right and go forward one step. Pan to the left
and see that the pump isn’t working.
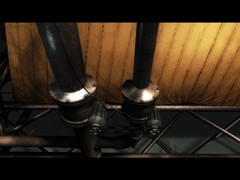
As dead as…
Look up and flip the red lever to
the upper position. The pump starts working for only a moment because the belt breaks. Flip the
red lever to the down position to stop the pump.
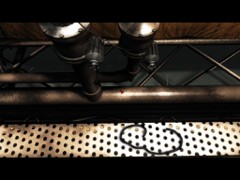
The broken belt
Head back to mister Lou. Talk
to him about the belt. He gives you his belt. Head back to the broken pump.
Attach Lou’s belt to the pump. Look up and flip the red lever to the up
position.
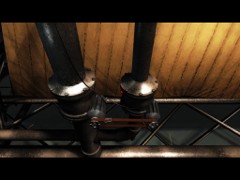
Lou’s belt on the pump
Head back to Lou once more. Speak
with him about the Zeppelin. Turn to the right and exit the engine room. Climb
up the stairs. Pan a little to the right and enter the corridor next to the
bulletin board. Turn to the right. Walk to the telephone that is hanging on the
wall a little further. Remove the phone cable with the coin. You have to do this
twice to get the phone cable!
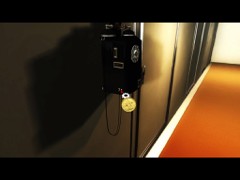
Use the coin twice to get the cable!
Head back to the radio room
downstairs. Remove both of the cables from the telex and from the brown telex
machine against the wall. You have to do this twice too!
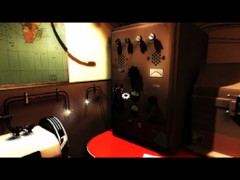
Remove BOTH of the cables!
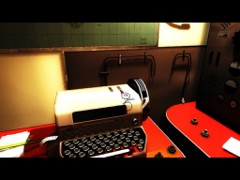
Remove BOTH of these cables too!
Attach the phone cable to the
telex. Type your message with the telex keyboard. Take the telex ribbon from the
left side of the telex.
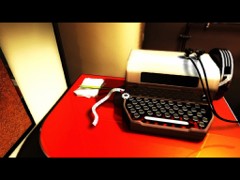
The telex ribbon
Exit the radio room. Head back to
mister Lou in the engine room. Give him the telex ribbon and off you go to…

Arriving at the New York State Building
The New York State Building
Walk to the bellhop dressed in
red. Talk to him to find out his name Elmer. Ask him about himself and about the
elevator. Turn to the right and walk towards the dressed tables in the little
foyer. Walk to the left corner at the back of the foyer. Pan to the right and
pick up the empty waste basket. Turn to the right and go one step forward. Turn
to the right one more time and go forward.
Look at the right and open the
drawer of the little table. Take the lighter from the drawer. Turn to the right
and go forward twice. Turn to the right and go forward one more time. Turn to
the right and open the letterbox of Elmer Mitchel. Take the service note out of
the letterbox. Read the service note.
Turn to the left and go one step
forward. Turn to the right and take some papers out of the waste basket. Put the
papers into the waste basket you are carrying around. Examine the note above the
waste basket. Turn to the left and go forward. Turn to the right and go forward.
Turn to the right and walk towards the bellhop. Give him the service note.
Turn to the left and go forward.
Turn to the right and go forward one step. Look around and notice the number 82
on the wall. Look down to the floor and place the full waste basket on the
floor. Light it with your lighter. Walk to the bellhop who is now extinguishing
the fire. Now you may use the fire escape and you’ll end up at ground zero.
Turn to the left and talk to the
journalist. Ask him about everything you can. Turn around and walk towards the
girl behind the desk. Talk to her and ask her about everything you can. Turn to
the left and go forward. Turn to the right and go forward.
Turn to the right and walk towards
the green dressed bellhop. Talk to him and when you get the option to choose a
bellhop of course you remember Elmer, the bellhop dressed in red! So… choose
wisely! Head back to the journalist. Ask him about the visitor’s badge. Enter the
building and head back to the elevators. Show the access badge to the bellhop.
Enter the elevator.
Turn to the left and go one step
forward. Turn to the left and go two steps forward. Turn to the left and go one
step forward. Take the inventory register from the top of the cupboard at your
left side. Read the register to learn that equipment service is at the fifth
floor. Turn to the right and go forward one step. Turn to
the left and walk to the end of the corridor. Turn to the left and go one step
forward.
Take the magnifying glass out of
the cupboard to your left. Turn around and open the door of the office. Enter
the office. Walk forwards the desk and read the nameplate on the desk. Talk to the woman
and ask her about everything you can. Exit the office.
Turn to the right and go one step
forward. Turn to the left and go three times forward. Turn to the right and open
the door of the office. Enter the office. Talk to the bitch behind the desk.
Exit the office. Turn to the left. Go forward twice. Turn to the right and enter
the fire exit.
Turn to the left and walk to the
end of the corridor. Talk to the girl behind the desk of Cineworld. Ask her
about everything you can. Turn around and grab the green Cineworld Magazine from
the desk. Exit this little Cineworld foyer. Turn to the right and talk to the
bodyguard. Ask him about everything you can. It seems that he has a crush on the
lady behind the desk on ground zero.
Turn to the left and go forward
twice. Enter the fire exit at your right side. Turn to the left and go one step
forward. Turn to the left and enter the elevator. Follow the Exit signs and head
back to the girl behind the desk. Talk to her and tell her about the cupids.
Turn to the left and go forward. Turn to the right and go forward. Turn to the
right and walk towards the elevator.
Enter the elevator. Turn to the
left and go forward. Turn to the right, go one step forward and enter the fire
exit. Turn to the left and head back to the bodyguard near the Cineworld foyer.
Talk to him about the girl behind the desk he has a crush on, called Julia. When
he wants to do you a favor in return choose… the fist!
Turn to the left and go forward
twice. Enter the fire exit at your right side. Turn to the right and go forward
one step. Turn to the right one more time and go forward
one step. Turn to the left and enter the office. Give the Cineworld Magazine to
the girl behind the desk. Take the hairpin form her desk! Talk to the girl about
the cupid. Exit the office.
Turn to the right and go forward.
Turn to the left and go forward. Turn to the
left and enter the fire exit at your left side. Turn to the
left and walk towards the elevators. Step into the left opened elevator with the
number 3 on top. Turn to the left.
Walk towards the girl sitting on
the sofa. Talk to her and ask her about everything you can. Turn to the right
and go one step forward. Turn to the right and go another step forward. Turn to
the left and try to open the door opposite the bulletin board. Locked! Pick the
lock with the hairpin. Enter Lansky’s office.
Search the coat next to the door
to find a note. Read the note. Turn to the left and walk towards the strange
looking safe at the back wall. Notice that the safe has three different colored
pointers. Around the safe are colored marks. Your goal is of course the get the
colored pointers pointed to the corresponding colored marks. Don’t touch
anything yet! You can move the pointers by clicking on the buttons at the bottom
of the safe. You can click on the right site of each and every button to move
the pointers clockwise. By clicking on the left side you move the pointers
anticlockwise.
Let’s start with the yellow
pointer. Of course you have to press the left yellow buttons. Click twice at the
right side of the upper button. Click twice at the left side of the bottom
button. Click once at the right side of the upper button. Click twice at the
left side of the bottom button. The yellow pointers should be at the correct
spot now.
Let’s do the white pointers now.
Of course you have to press the center white buttons now. Click twice at the
right side of the upper button. Click once at the left side of the bottom
button. Click once at the right side of the upper button. Click once at the left
side of the bottom button. The white pointers should be at the correct spot now.
Finally let’s do the orange
pointers. This time of course you have to press the right orange buttons. Click
at the right side of the upper button once. Click at the left side of the bottom
button once. Click at the right side of the upper button once. Click at the left
side of the bottom button once. Click at the right side of the upper button
once. Click at the left side of the bottom button once.
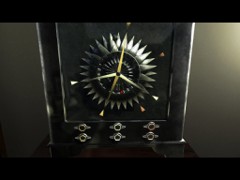
Just one click away of the opened safe
When done correctly the safe
opens. Take the heavy metal key out of the safe. Pan to the right and notice something
behind the painting on the back wall. Go forward one step and turn to the right.
Move the painting. Look through the grating. Read the scribbled note. It says
-2, 8, 13, 7 and 14. Exit the office.
Examine the planning board on the
wall and remember the time on which daily work starts, nine o’clock. Turn to the
left. Go one step forward. Turn to the left and study the photo on the wall with
your magnifying glass. Remember the inauguration date of the Empire State
Building. Turn to the right and go forward. Turn to the right and go forward one
step. Turn to the right and walk towards the elevators. Turn to the left and
enter the elevator.
Turn to the right and go forward
twice. Turn to the right and go forward. Turn to the right and enter the fire
exit. Turn to the left and go forward twice. Turn to the right and enter the
office. Examine miss Hatchet laying on the floor.
Exit the office. Turn to the left
and go forward three times. Turn to the right and go one step forward. Turn to
the left and enter the office. Talk to Ellen and tell her about poor miss Hatchet. Talk to her once more. Exit the office. Turn to the right and go
forward. Turn to the left and go three times forward. Turn to the right and
enter miss Hatchet’s office once more. Notice that there’s laying something on
the floor where miss Hatchet has been laying. Walk to that corner of the office
and pick up the note book.
Look at the metal box on the
chair. Yep… a number lock! Read the spiral-bound notepad. It says elevator
doors. Believe me there are 8 of them. It also mentions the maintenance floor.
As you have learned that is the 4th floor. It also mentions the employer arrival
time. Well, on the planning board you’ve seen that working day starts at 9. It
also mentions the day of inauguration. As you have seen on the photo of the
Empire State Building that is the 1st of May. Finally it mentions the equipment
service floor. As you have learned that is on the 5th floor. Of course it can’t
be a coincidence that these are five numbers and that the number lock has five
digits! So… could this be the code for the number lock!?!? Let’s give it a
try. Change the code into 8 – 4 – 9 – 1 – 5.
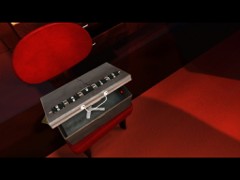
8 – 4 – 9 – 1 – 5 …Sesame open
Take the security key out of the
opened box. Exit the office. Turn to the left and go forward twice. Turn to the
right and enter the fire exit. Walk towards the elevators. Step into the right
opened elevator to end up at floor -2. Turn to the left and go forward.
Walk towards the metal door. Turn
to the left and take the fire extinguisher from the wall. Turn to the right and
go forward. Turn to the right and open the metal door with the heavy metal key. Enter
the elevator control room. Turn to the right and walk forward. Smash the pad lock with the fire
extinguisher. Take the jump leads out of the opened cabinet. Turn around and
walk towards the electrical board. Drop the jump leads on the shelve beneath the
board.
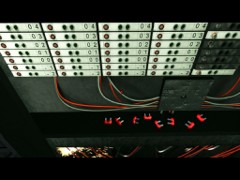
8 jump leads on the shelve
Read the scribbled note once more
if you have forgotten the numbers written on it. Right… it says -2, 8, 13, 7
and 14. Here is the way you have to place all of the jump leads:
pick up a jump lead and put in the
left row at the -2 position
pick up a jump lead and put in the left row at the 08 position
pick up a jump lead and put in the second row at the 08 position
pick up a jump lead and put in the second row at the 13 position
pick up a jump lead and put in the third row at the 13 position
pick up a jump lead and put in the third row at the 07 position
pick up a jump lead and put in the right row at the 07 position
pick up a jump lead and put in the right row at the 14 position
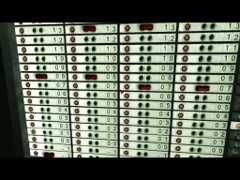
All jump leads placed correctly
Put the safety key in the keyhole
at the bottom right of the board. Turn the safety key. Examine the electrical
board and notice that all the elevators should be working fine now! Exit the
control room. Head back to the elevator. Step into the elevator to finally
arrive at floor 14 to meet Mister Foster.
Go forward twice and speak with
Miss Pennington, Mister Foster’s secretary. Ask her about everything you can.
Turn to the left and enter the opened door to Foster’s office. Walk all the way
to Mister Foster’s desk. Speak to him. He first wants to play the game called
The Jade Stones and the Scarab. This game is actually quite simple. You have to
beat the standing Jade Stones without being beaten by the scarab. Pick up the
stone and place it on the white square to the right. Than place it on the white
square to the down left square. Than head for the rightmost Jade Stone. Than
head for the leftmost Jade Stone and finally beat the last Jade Stone. If you
get beaten by the scarab, just speak to Mister Foster and try again.
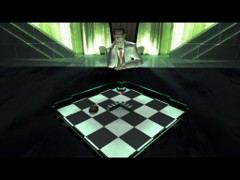
All Jade Stones beaten
After you have won the game, speak
to Mister Foster. Speak to him once more. Be sure to exhaust all dialogs, especially about the medallion!
Exit the office. Speak to Miss Pennington once more and exhaust all dialogs. Turn
to the right and walk towards the elevator. Enter the elevator to head for…

Arriving at Macao
Macao
Go forward and enter the ship.
Turn to the right and go forward. Turn around and go down the stairs. Walk to
the bar at the right back corner. Talk to the barkeeper to ask him about Miss
Sullivan. Talk to the woman sitting at the bar. Ask her about herself and about
Miss Sullivan.
Turn to the left and walk towards
the two man standing at the very long table. The table turns out to be a rat
racetrack. Talk to the man at your left side. Ask him twice about the rat race.
He will give you a gambler’s bet.
Go one step forward towards the
Chinese guy dressed in blue. Turn around and speak to him. Turn to the right and
walk towards the gambling table at the opposite side of the room. Turn to the right and walk to the betting
counter. Hmmm… nothing to bet! The guy behind the counter is vast asleep!! No
way to wake him up from this side of the counter!!!
Turn to the right and walk towards
the stairs. Turn to the
right corner. Notice the closed curtain. Open the curtain to face a nice (?)
sliding puzzle. Behind this sliding puzzle is a door to the betting room with
the sleeping man. In order to open up this door you have to solve this sliding
puzzle. While you are trying to solve the puzzle the Chinese guy dressed in blue
will spot you from time to time. When this is the case, quickly turn around and
go one step forward and return to go on with solving the puzzle. Remember that
if you aren’t quick enough when this guy spots you he resets the puzzle and you
have to start all over again! I guess you would like to know how the image of
the sliding puzzle has to look. That is the easiest part. Just look at the image
on the curtains! Believe me I’m very bad in solving these sliding puzzles. So
giving you the moves I’ve made won’t do you any good. If you can’t solve this
one yourself just send me an and
I’ll send you my saved game! After uncountable moves I finally made it…
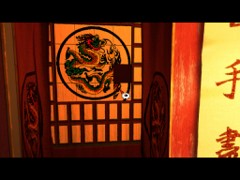
One more click to go…
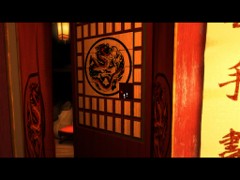
…made it!
Enter the opened door. Walk to the
sleeping man. Pan to the left and examine the calendar next to the grating to
find out the correct date. Take the note under the pillow of the sleeping man.
Read this note. You are going to need this later to answer some questions of the
Chinese guy dressed in blue. Talk to the man to wake him up. Talk to him once
more. Ask him about himself and about Miss Sullivan. Give him the gambler’s bet.
Talk to him about the rat race to get a betting slip. Exit the room.
Walk to the man at the rat
racetrack. Talk to him about the rat race. Give him the betting slip. When the
race is over talk to him again. When he has given you some money talk to him
once more. Exhaust all dialogs. Look who or what is coming down the stairs! Of
course you hurry to the gambling table to speak with the lady. Exhaust all
dialogs.
Turn to the left and walk to the
bar. Talk to the barkeeper. Exhaust all dialogs. Talk to the woman at the bar.
Exhaust all dialogs. Give the small sum of money to the barkeeper. Wait a little
until the bottle is getting emptier and emptier and the barkeeper finally falls
asleep. Talk to the woman at the bar once more. Step behind the bar and open the
brown hatch.
Enter the room behind the opened
hatch. Pull the lever of the generator. Quickly turn a little to the right and
hide in the dark corner. When the Chinese guy dressed in blue has switched on
the generator exit the dark corner. Go through the opened hatch. Walk to the
lady at the gambling table.
Talk to her about the rat race.
After that talk to her about herself. Exhaust all dialogs. Turn around and walk
to the Chinese guy dressed in blue who is standing in front of the curtain in
the left back corner of the room. Show him your large sum of money. Talk to him
about the poker game. Before you may pass you have to give the correct answers
to his questions. You know what date it is because you have seen the date on the
calendar in the room with the sleeping man and you have red the note under his
pillow. So… the correct answers are: tiger – two kings of hearts – clover ace.
After you gave the correct answers
he’ll give a winch code. Study this winch code! Head back to Miss Sullivan. Talk
to her about the poker game. Off you go to the poker room. However, before you
can enter the poker room you have to lower one of the sails. Nope… you can’t
just pull a rope to lower the sail. You have to turn three wheels the correct
way to do this.
Study the three little wheels.
Don’t touch anything yet! Notice that you can turn the little levers to the left
and to the right by clicking at the left side and at the right side of each and
every lever. With the winch code in mind you turn the left lever three times to
the right, the center lever four times to the left and the right lever twice to
the right. It must look like this:
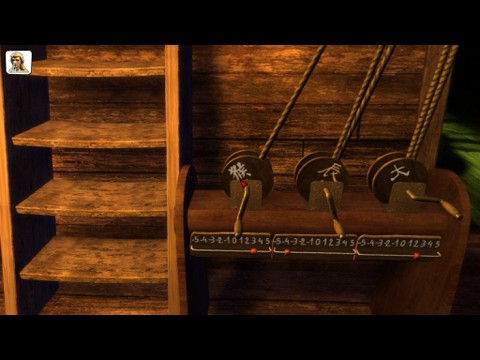
The correct winch code
When you have done this correctly
the door next to the levers will open. Enter the opened door. Pan a little to
the left and talk to Kate about the poker game. Have a seat! Talk to
the man to the left, James Elliot. Exhaust all dialogs. Talk to the Chinese guy,
Master Yu. Finally talk to the man to the right, mister rat race. Exhaust all
dialogs. Before you ask him about the poker game save your game so you won’t
have to go through all the chitchat again if something goes wrong.
Talk to mister rat race about the
poker game and… let’s play!
First hand: keep on following the bet until you win and continue.
Second hand: fold and continue.
Third hand: fold and continue.
Fourth hand: keep on following the bet until you win and continue.
Fifth hand: follow the bet twice, raise stakes, follow the bet.
Now James Elliot turns out to be a
bad loser! He not only takes the bas-relief with him but also Kate!
Talk to Master Yu about Kate. Talk to mister rat race about Kate. Exit the room. Go up the stairs and exit the ship. Go forward twice
and talk to captain Nathaniel Blackwood. Exhaust all dialogs and off you go
to…

Arriving at India
India
Turn to the right and talk to
captain Blackwood. Exhaust all dialogs. Turn to the right and go forward. Turn to the right and go forward twice.
Turn to the right and go forward three times. Go down the stairs Turn to the left,
go forward and enter
the radio room to the left. Take the pencil and the sheet of paper from the desk above the
drawer. Combine the pencil and the paper. Exit the radio room.
Turn to the right and go forward
twice. Turn to the right and go forward to the engine room. Enter the engine
room. Look to the right and pick up the Zeppelin knife that Lou must have
dropped. Turn to the right and exit the engine room. Go down the other stairs
leading outside the Zeppelin.
Go forward and talk to Kate who is
kept imprisoned in a cage. Exhaust all dialogs. Walk around the cage. Look at
the floor at the backside of the cage. You can’t do anything with it yet but
remember you can find it here. Turn around and go across the bridge. Keep all
walking all the way to the spiral stairs leading down. Go down those spiral
stairs.
Walk towards the bookcase at the
right side of the entrance of the room. Captain Blackwood appears and starts
reading a book. Ask him about Elliot and about the book he’s reading. Turn to
the right and walk towards the statue in the distance. Turn around and go up the
stairs. Go one step forward. Try to open the huge brown doors. Notice the inscription at the wall
next to the doors. Use the paper and pencil on the inscription. Examine the
scumble of inscription.
Turn to the left. Go forward and
descent the stairs. Head back to the entrance at the left side of captain
Blackwood who is still reading the book. Go up the stairs and walk all the way
back to Kate. Show her the scumble of inscription. Head all the way back into
the building.
Walk to the bookcase at the
right side of captain Blackwood. Take the book on the upper shelve. Read the
book and you see some pictures of an elephant. Of course you wonder what to do
with these elephants. Well… nothing at all. Just remember the directions they
are pointing to, one to the left, three to the right and two to the left!
Take the book on the third shelve
from top. Read this book about precious jewels. Turn to the left and walk
towards the other bookcase. On the upper shelve you’ll find the Seventh Book of
Knowledge, the book Kate told you about. Take the blue sapphire from the book.
On the third shelve from top you’ll find the book about Kama Sutra. Walk back to
captain Blackwood. Talk to him about the jewels.
Turn around and walk towards the
table at the centre of the room. Walk around the table and find the green statue
of the elephant. Cut the pearl from the trunk with your Zeppelin knife. Walk
back to captain Blackwood. Yee… the book he is reading most be much more
interesting than the Kama Sutra book! Show the pearl to him. He’ll give you a
moonstone!
Turn to the right and walk towards
the statue in the distance. Examine the base of the statue. Note that there are
15 buttons which you can press. Label the buttons from top to bottom A, B and C.
Label the buttons from the left to the right 1, 2, 3, 4 and 5.
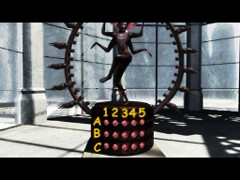
The labeled buttons
Press the buttons in this order:
C5 – C1 – A1 – B2 – A3 – C3 – B4 – B5 – B4 – C5. When you have done this
correct the top of the statue opens. Take the ruby from the head of the statue.
Make a note of the position of the arms and the hands of the statue!
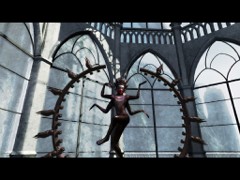
Make a note of the arms and the hands
Turn a little to the right and
walk towards the seats. Turn a little to the right again and walk towards the
next seats. Look at the floor to find a wooden chest. Notice that there is an
image on the lid that looks the same as the statue you just opened. Move the
arms and the hands to the same position as on the statue.
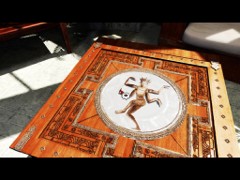
Moving the last hand into the same position
When you have done this correctly
the chest opens. Take the green emerald out of the opened chest. Walk to captain
Blackwood and show him all of your jewels. Turn to the left and walk towards the
statue that is standing in front of the leftmost bookcase. Cut the ivy with your
Zeppelin knife. Place the green emerald on the statue.
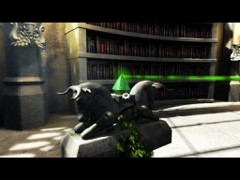
The first jewel set…
Turn to the right and walk to the
statue at the end of the green beam. Cut the ivy. Place the blue sapphire on the
statue.
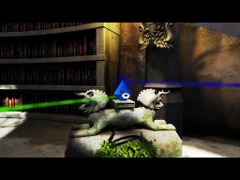
The second jewel set…
Turn around and walk to the statue
at the end of the blue beam. Cut the ivy. Place the red ruby on the statue.
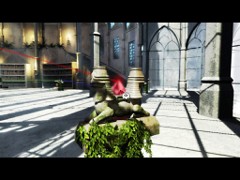
The third jewel set…
Notice that the red beam is
pointing to the door on top of the stairs. Walk to that door. Place the blue
moonstone on the doorknob.
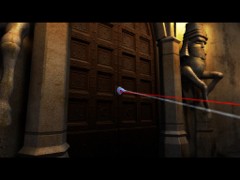
The fourth and last jewel set…
Turn to the left and go forward.
Go down the stairs. Turn to the left and notice the white beam that points to
the pillar next to you. See the square on the upper part of the pillar. Open
that square and take the bas-relief…
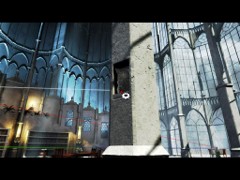
The opened square
…now captain Blackwood shows who
and what he really is. He not only steals the bas-relief but also knocks you unconscious!
And not only that!! He also puts you into a sarcophagus that cannot be opened
just like that!!!
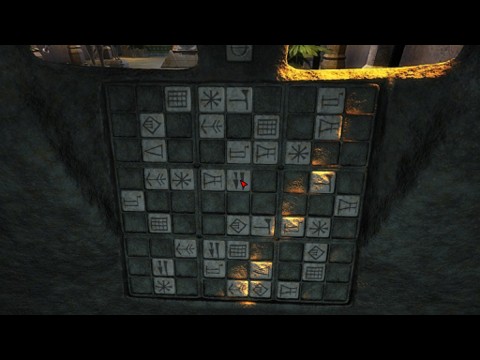
A room with a view
When you study the stone tablet
you seen discover that this actually is a pre-historic Sudoka puzzle! Just keep
on clicking on the upper left empty square. You’ll see that it has nine
different images. When you do this with another empty square you’ll see the same
nine different images in the same order. So this means that each and every image
represents a cipher. With the button on top of the puzzle you can reset the
whole puzzle. Press that button. In the next table I give you the complete
solution to this Sudoka puzzle. With the numbers I tell you how many times you
have to press an empty square on each and every row from the left to the right.
So where I say in the first row 7 – 3 – 8 – 5 – 6, it means that you have to press the first empty
square on the first row seven times, the second empty square three times, the
third empty square eight times, the fourth empty square five times and the fifth
empty square six times. Here we go!
first row: 7 – 3 – 8 – 5 – 6
second row: 4 – 1 – 6 – 9 – 8
third row: 9 – 8 – 5 – 7 – 2
fourth row: 6 – 1 – 2 – 5
fifth row: 9 – 5 – 2 – 4 – 7 – 8 – 6
sixth row: 8 – 3 – 6 – 7
seventh row: 3 – 1 – 4 – 6 – 9
eighth row: 5 – 9 – 3 – 7 – 4
ninth row: 2 – 6 – 9 – 8 – 1
And here you can see how it should
look like.
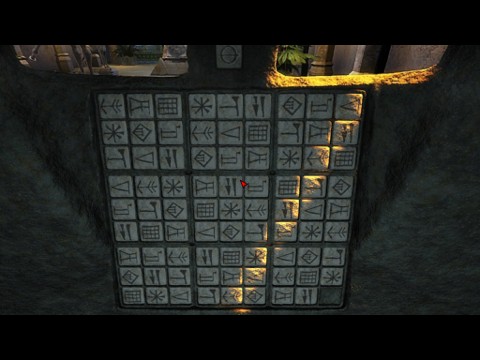
One click on the right bottom square will finish the job!
When you have done this correctly
the sarcophagus opens and you’ll pop out. Look at the statue in front of you.
Take the trident from the statue. Go forward and examine the bas-relief. Turn
around and study the tile in the floor. Walk forward and exit the room. Turn to
the right and go forward. Go down the stairs. Turn to the left and walk towards
the entrance. Go through the entrance once more and head all the way back to the
caged Kate.
Remember you saw that strange
device down the floor at the back of the cage. Place the trident into that
device to lower the cage. Walk around the opened cage and talk to Kate. Exhaust
all dialogs. Head all the way back into the building.
Go up the stairs and enter the
opened room once more. Walk one step forward. Examine the bas-relief one more
time but leave it alone after that! Turn around and see that Kate is standing on
the pressure tile. Turn around and face the bas-relief. Now remember the book
with the elephants you have red earlier. I told you to remember the directions
those elephants. So press the bas-reliefs in that order. Huhhh… you have
forgotten!? Okay… no elephants no cookies! Just kidding of course. Here is how
you have to press the bas-reliefs: press the left relief once, press the right
relief three times and finally press the left relief twice.
When you have done this correctly
you notice that the door at the back wall of the room opens. Go through that
door and go forward. Examine the fresco at the left wall. Talk to Kate and
exhaust all dialogs.
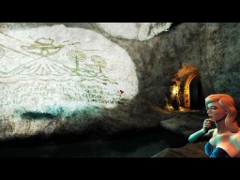
Breath taking, isn’t it?
Turn to the left and go up the
stairs. Head all the way back to the Zeppelin. You can find it at the end of the
path behind the cage where Kate was kept imprisoned. Climb up the ladder to set
course to…
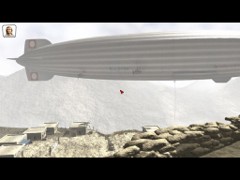
Arrival at Mesopotamia
Mesopotamia
Turn around and talk to Kate.
Exhaust all dialogs. Walk towards the little wooden gate. Talk to the herbalist.
Talk to him once more and Kate will translate what he’s saying. Exhaust all
dialogs. Give him your pearl. You’ll get a herb poultice in return.
Turn to the right and walk up the
path twice. Turn to the right and walk towards the first house. Examine the big
wooden crate in front of the house. Pan a little forwards and go forward once.
Turn to the right and take the iron bar from the wheel. Turn around and return
to the first house.
Lift the wooden crate with the
iron bar. Talk to the little girl called Jyan. Exhaust all dialogs. Take the
smoker from the ground next to the wooden crate. Return to the house with the
wheel. Turn around and pick up the wooden bucket. Turn around and walk to the
houses at the end of the street. Talk to the woman by the stove. Exhaust all
dialogs. Pick up the box of matches next to the stove.
Turn around and go forward once
towards the house whit the wheel against the wall.
Try to open the door. It’s locked! Take the grille from the wall. Turn to the
left and go one step forward. Take the wooden hoe that is standing against the
wall. Open the door and enter the house to meet poor captain Blackwood. Talk to
him. Turn around and take the sieve from the wooden pole. Take the shears from
the other pole. Exit the house.
Turn to the right and go forward
twice along the brick wall. Here you’ll face a beehive. Leave it alone for now
but believe me… you are facing a nice puzzle for later on! Turn to the right
and go further up. In front of the temple turn to the right and pick up four
(4!) stones. Turn to the left and walk to the right side of the temple.
Use the hoe on the green plant.
Pick up the red roots. Turn around and go one step forward. Turn to the right
and enter the temple. Examine everything you can. Look at the blue-yellow
painting on the wall. As Kate explains this bas-relief represents the Dragon of
Marduk. Notice that four stones of the bas-relief are missing. Also notice that the
seize of the missing stones is different. Now remember that you just picked up
four stones in front of the temple. That can’t be no coincidence! First we are
going to measure the seize of each missing stone.
Place the grille over the empty
upper square. The seize of this missing stone is 6 x 6. Take back the grille and
place it over
the empty one but upper square. The seize of this missing stone is 5 x 4. Take
back the grille and place it over the empty right square. The seize of this missing stone is 3 x
2. Take back the grille and place it over the empty left square. The seize of this missing stone
is 3 x 2 too. Take back the grille.
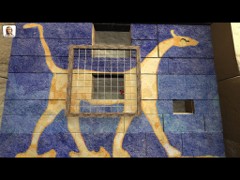
Taking measures…
Exit the temple. Turn to the right
and go down the path. You are facing the beehive again. Light the smoker with
the box of matches. Use the smoking smoker on the beehive to scare away the bees. Remove the
roof from the beehive. Look how cute… all those bees! Well… believe me…
you can’t see no bee for days when you finished this puzzle! Your goal is to
get all yellow bees from the left to the right and all the orange bees from the
right to the left by using the smoking smoker. The main thing is that you leave enough
room for the bees to jump forward. I numbered the front row of yellow bees Y1,
the second row of yellow bees Y2 and the back row of yellow bees Y3. With the
orange bees I did the same but changed the Y for an O! So I numbered them O1, O2
and O3. Here we go…
Y1 – O1 – O2 – Y1 – Y2 – Y3 – O1 –
O2 – O3 – Y1 – Y2 – Y3 -O2 – 03 – Y3
Put away the smoker and click on
the beehive. Surprise!! Get your smoker again and here we go again…
Y1 – O1 – O2 – Y1 – Y2 – Y3 – O1 –
O2 – O3 – O4 – Y1 – Y2 – Y3 – Y4 – O1 -O2 – O3 – O4 – Y2 – Y3 – Y4 – O3 – O4 –
Y4
Put away the smoker and click on
the beehive. Surprise!!! Get your smoker one more time and here we go for the
last time…
Y1 – O1 – O2 – Y1 – Y2 – Y3 – O1 –
O2 – O3 – O4 – Y1 – Y2 – Y3 – Y4 – Y5 – O1 -O2 – O3 – O4 – O5 – Y1 – Y2 – Y3 –
Y4 – Y5 – O2 – O3 – O4 – O5 – Y3 – Y4 – Y5 – O4 – 05 – Y5
Put away the smoker. Take the
center frame full of honey from the beehive. It might be wise to save your game
here! Turn around and head back to the village. Head back to the woman by the
stove. Give her the frame full of honey. Walk to the well.
Speak to little Jyan about the
locked door. Great… she won’t tell you anything about it! Wait a little and see how Omarim is
getting his honey bread from the lady by the stove. Head back to the woman. Talk
to her about Omarim. Turn to the left and talk to Omarim. Give him the bronze
medallion. Talk to Omarim once more and exhaust all dialogs.
Now little Jyan starts crying for
help because she dropped her doll into the well. Turn around and walk towards
the first house. Go forward one more step. Go down the path at the left side of the
circular brick wall. Turn to
the left and cut a piece of pivot wire with your shears. Combine the twisted
metal wire with the
bucket. Turn to the right and go down one more step.
Talk to the herbalist about the
plant and about Omarim. Turn to the right and go up the path twice. Turn around
and go up the path between the two brick walls. You are standing between the
beehives again. Turn around and take the plant.
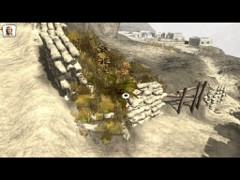
The plant and the snake
While you take the plant you will
be bitten by a snake. The venom of this snake is fatal! It’s good you traded
your pearl to the herb poultice with that
herbalist!! If not… you would be dead by now! Head back to the village and
walk to the well.
Place the bucket with handle on
the hook above the well. Pan to the right and turn the lever of the well. Take
the doll out of the bucket and give it to little Jyan. Talk to her once more
about the locked door. Pan to the left and walk to the house with the wheel
against the wall. Turn to the left and move the wooden pole laying on the
ground. Pick up the key. Put the key into the lock and turn it around. Enter the
workshop.
Take the stonecutter’s tool from
the windowpane. Leave everything else alone for now. Exit the workshop. Turn too
the left and walk to Omarim. Give him the Aloe leaf. Talk to him once more and
ask him about the first aid. He gives you a bowl of medication.
Head back to the last house at the
right side. Enter the house and give Omarim’s remedy to captain Blackwood. Talk
to him and exhaust all dialogs. Exit the house. Turn to the left and go forward
once. Pan to the left and look down the yellow floor outside the workshop. I’m sure
the pattern on the floor will ring a bell! Remember you measured the missing
stones of the painting in the temple. Also remember that you picked up four big
stones in front of the temple.
We are going to chop those four
stones one by one to the correct seize. First we are going to make the biggest
missing stone with the seize of 6 x 6. Drop one of the stones for cutting on the
floor. Use your stonecutter’s tool twice on the stone.
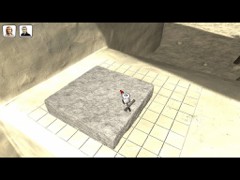
One stone 6 x 6
Pick up the cut stone. Drop the
next stone for cutting on the floor. Now we are going to cut the one but biggest
missing stone with the seize of 5 x 4. Drop one of the stones for cutting on the
floor. Use your stonecutter’s tool four times on the stone. Pick up the cut
stone.
Now we are going to make the two
smallest stone with the seize of 3 x 2 each. Drop another stone for cutting on
the floor. Use your stonecutter’s tool seven times on the stone. Pick up the cut stone. Drop the last stone for cutting on the floor. Use your
stonecutter’s tool seven times on this stone too. Pick up the cut stone. Now
you should have four cut stones in your inventory. They should look like
this:
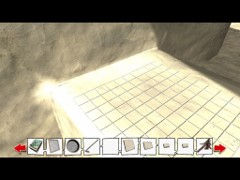
Four correctly seized stones
Turn to the left and go forward
twice. Go up the path between the two brick walls and head back to the temple.
Enter the temple. Don’t do what captain Blackwood tells you yet. But keep in
mind his words that you have to place the bronze medallion in the trident. Walk
to the bas-relief on the wall. Place the four cut stones into the appropriate
empty squares. Great… nothing happens!
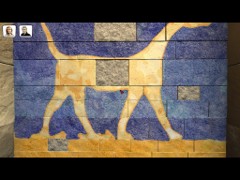
They do fit nicely but…
Well… that is because the colors
are missing! Head back to the village. Enter the workshop. Place the sieve over
the bowl next to the little burner. Take the pestle from the bowl next to it.
Put the red roots in the bowl. Use the pestle on the red roots. Take the roots
from the bowl and drop them on the sieve. Shake the sieve and take the bowl with
powder from underneath the sieve. Put the powder in the empty bowl on top of the
little burner. Light the little burner with your box of matches.
Now we are going to mix some paint
to get the correct colors to paint the blank stones of the painting in the
temple! Before you touch anything study the little burner first! Notice the two
metal pipes leading down from the top. Also notice that each of these pipes has
a metal tap. Both metal taps can be opened and closed. Finally notice that there
is a circular valve halfway the little burner.
With the painting in mind you know
that we have to make dark-blue paint, bright-blue paint, dark-yellow paint and
bright-yellow paint. On the next images pay attention to the position of the
taps! Only with the use of these taps you determine the color that you get!!!
Turn the circular valve on the
little burner to get a bowl of dark-blue paint. Take the bowl of paint.
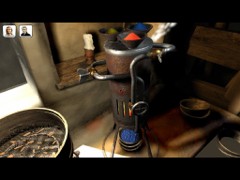
The bowl of dark-blue paint
Turn both of the taps to open
them. Turn the circular valve on the little burner to get a bowl of
bright-yellow paint. Take the bowl of paint.
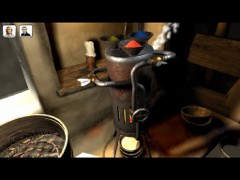
The bowl of bright-yellow paint
Turn the left tap to close it.
Turn the circular valve on the little burner to get a bowl of bright-blue paint.
Take the bowl of paint.
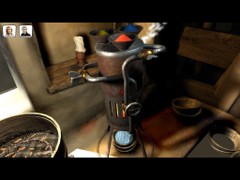
The bowl of bright-blue paint
Turn the left tap to open it and
turn the right tap to close it. Turn the circular valve on the little burner to
get a bowl of dark-yellow paint. Take the bowl of paint.
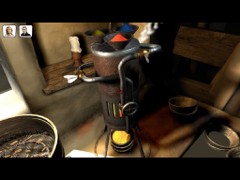
The bowl of dark-yellow paint
When finished head back to the
bas-relief in the temple. Use the bowl of dark-blue paint on the upper blank
stone. Use the bowl of yellow-orange paint on the one but upper blank stone. Use
the bowl of light-blue paint on the right blank stone. Use the bowl of orange
paint on the bottom blank stone. It should look like this now:
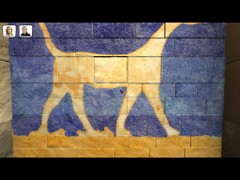
The fully painted bas-relief
Place the bronze medallion in the
eye of the Dragon. You’ll pick up a priceless blue Atlantean crystal from the
water basin beneath the painting. Don’t forget to take back the bronze medallion
from the Dragon’s eye!!! Turn around
and walk to the opposite wall. Click twice with the bronze medallion on the
trident. Turn to the right and walk towards the opened panel in the wall. Place
the Atlantean crystal at the left side of the panel to activate it. Study the
panel and I guess you know the meaning of this one. Yep… you have to move the
ship from the left side to the right side. You can move a tile to the left by
clicking on the left side and you can move it to the right by clicking on the
right side. To move a tile up click on the top part of a tile. To move it down
you have to click on the bottom part of a tile. Label the stones this way:
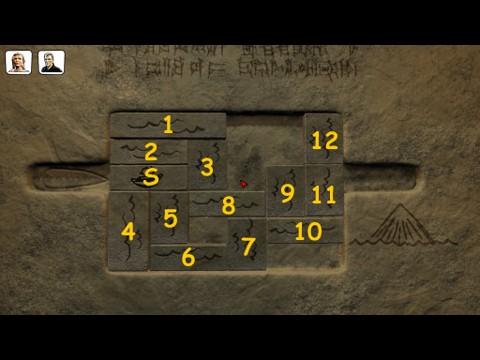
Moving the Ship (S) from the left to the right
Here we go again: 9 up – up, 8
right, 3 down – down, Ship right – right – right, 2 right – right, 1 right, 4 up
– up – up, 5 up – up, 6 left, 3 down, 8 left – left – left, 3 up, 7 up, 6 right
– right – right- right, 3 down, 7 down, 8 right – right – right, 4 down – down –
down, 3 down – down – down, Ship left – left – left, 1 left, 2 left – left, 8
left – left, 7 up – up – up – up, 6 left, 10 left, 11 down, Ship right – right –
right – right.
Enter the opened wall. Turn to the
right and take the piece of paper out of Elliot’s bag. Read the torn-out page.
It turns out to be a page written by your father. This page gives you some vital information. I’ll mention that later. Walk to
the back wall. Remove the fake bottom medallion from the socket. Place your
bronze medallion in return. Oops… Elliot pops out of one of the tombs, jumps
to the horn of a bull’s head. You will be trapped down below in a room with a large grate on top. No way to escape from
this room at the moment!
Talk to Elliot who is standing in
the room above. Exhaust all dialogs. Talk to Kate and exhaust all dialogs. Talk
to captain Blackwood and exhaust all dialogs again. Turn to the right and
examine the extinguished torch on the wall. Talk to Kate and ask for her scarf.
Put the scarf on the torch. Light the torch with your box of matches.
Remember the words on your
dad’s torn-out page "Three times she turns a serpent that adorns her
finger". Turn the ring beneath the torch three times. Turn around and
notice the raised column. Now remember your dad’s words that you have to climb
nine steps. Notice the tiles in the floor in front of this column.
In order to leave this room you have to raise nine columns by pressing the tiles
in front of this column in the correct order. Now remember the words in your
dad’s torn-out page:
"Then in her gaze appear
fantastic images" – Look around and notice 4 heads of a bull
"I see precious stones that light the way to truth" – Notice that 8
burning torches light the room
"I see a flaming tentacle" – a tentacle has 5 sides
"I see a trident of orichalcus" – a trident has 3 fingers
"and lastly I see a big ship" – that is just 1 ship
Number the tiles from the left to
the right 1 to 10. Notice that the leftmost tile is hardly visible! Also notice
that the fourth tile has a dark-brown square.
Press the dark-brown square of the fourth tile
Press the dark-brown square of the eighth tile
Press the dark-brown square of the fifth tile
Press the dark-brown square of the third tile
Press the dark-brown square of the first tile
If you have done this correct all
nine columns are up, forming a staircase leading up. Go up these stairs. Look up
to see a bull’s head above the grate. Use the iron bar on the bull’s left horn.
Walk forward. Look to the left and notice the big rock rising up in the sky
with a huge red crystal on top of it. Notice that Elliot is standing behind some
sort of panel high up that rock. Finally notice that the bridge towards that
rock has been destroyed and is hanging down the rock. So… there is no way to
reach the bastard! Walk towards the Ark. Enter the Ark. Turn to the left and examine the huge standing
green crystal. Turn to the right and go forward.
Turn to the left and place the
blue crystal on the panel. Now you have to make a blue connection from the upper
right spot to the bottom left spot. Alas this isn’t as simple as it looks.
You’ll find a fearsome opponent in Elliot! Each time you make a move in blue,
this bastard makes a contra move in red. I can’t give you the exact solution to this puzzle because
the way Elliot reacts to your moves is
different every time. Below you find an example. This is not just an example!
With me it worked 9 out of 10 times!! If you fail, just press the
red arrow to the right to give it another try. Good luck!

One more click to go…
Once you have succeeded, the road
to Atlantis gets revealed. Greedy Elliot of course wants to see the road to
Atlantis. While he’s standing on the edge of the rock he get’s struck by a
falling rock and off he goes ;o). What a shame! In the meantime Kate starts drawing a map of this
revealing road to Atlantis. But before she’s finished the whole place falls
apart and they have to run for their lives. The Ark disappears buried with tons
of rock taking it’s secrets of it’s origins with it. But the quest for Atlantis
isn’t over yet!
Back at the New York State
Building thanks to the map Kate drew they find a new lead. From the incomplete map Kate has made
mister Foster recognizes that the symbol fits clearly to an image in one of his books
in his collection. As you get ready to follow this new lead you realize… the adventure has only just begun!
The End…
View this guide raw, exactly as the archive holds it