Just Adventure original
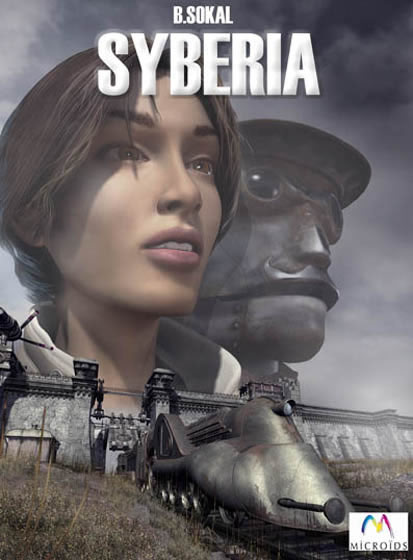
Syberia Walkthrough by Jennifer Miller
The wall
Head back to the engine via the
station, and place the mammoth toy back on its gold plate in the collection
room. Exit the car and cross over to the opposite side of the platform.
Go up to the winding machine and rewind the train’s clockworks. At
this, Dan will call. He is furious that you haven’t returned home yet.
Hanging up on him is the smart option, dear. Back in the coach car, tell
Oscar that we are all wound and ready to proceed. So the train starts,
but we only get so far before stopping again. What now?
Exit the coach car and you’ll
find Oscar waiting for you in the ticket booth. He’ll tell you that
you’ll need a ticket and a visa to pass through the protective wall.
Oh geez, not now Oscar! Why do you have to follow procedure now?! And
of course, he’s not authorized to issue visas. We’ll have to
find someone else who can do that.
Go around the booth and you’ll
see a door on the side of the great wall. Open it and climb up the stairs
to reach the top. Once you’re there, Olivia will call. She seems
to be concerned about Dan. Um okay, but he’s MY fiancé, sweetie, back
off. Be nice to her, and then continue on your way. Head along the top
and enter the guardroom.
Here you’ll meet Captain
Malatesta, sole watcher of the wall. Ask him quite politely that you need
his help to continue on your way. He responds that he refuses to give out
visas because there is a soldier sitting on the other side of the wall just
waiting for an innocent civilian to pass through. For proof, he asks you
to look through the telescope. After focusing it, all Kate will see is
a piece of wood. Perhaps Malatesta has bad eyes. Tell him that the rider
is just a dead tree. Malatesta will not believe you. Great, but I really
need that visa!
Look around and you’ll notice
on the desk that there is a pair of broken glasses and two empty wine goblets.
What was it about increasing eyesight? Oh yes! The Yanga-cola powder! Pour
two glasses of the Barrockstadt sauvignon and pour the Yanga-cola powder
into one. After a bit of convincing, Malatesta will accept your offer of
wine. The powder will do its trick and the captain’s eyes will be
stronger. Have him look at the “soldier” again. Realizing that
he has indeed been looking at a piece of wood all these years, Malatesta
will grant you a passage visa for the wall.
Return to the booth and give
Oscar your visa. He’ll present you with a ticket and orders you back
on board. Give the ticket back to Oscar, who’s waiting for you in
the coach car, and then have a seat. Time for another ride into the unknown.
Komkolzgrad
Holy cold war, Batman! Where
are we? This place is freakier than Pee-Wee’s Playhouse!
The platform
The train will wind down once
again and pull into the station of a very strange looking factory. Large
clouds of black smoke will be billowing skyward and everything is cast in
a red glow. Exit the coach car and walk towards the engine. Oscar will
call you over and let you know that you’ll need to wind up the train
before you can progress. Tell me something I don’t know Oscar! Unfortunately,
he has no idea where we are, so there’s little we can learn about this
place right up front. (Fortunate for you, player, I do. So welcome to Komkolzgrad!)
Let’s go check out that large statue towering in the distance. Perhaps
we can find some answers there.
More ladder climbing kids! Climb
all the way up to the control room in the head of the statue to get an idea
on the function of this bloody thing. Take a look around. You’ll
see by the bed that there’s a fourth Voralberg cylinder, a metal lever,
and a set of plans on how to operate the statue. Hans has been here! Seems
as if we’re on the right track after all. Turn towards the control
panel on your right. This will move the statue back and forth. Place the
lever into the panel to activate it. Move the lever up twice to move the
statue until it is straddling the train. Once you’re there, press
the red button to activate the winding mechanism. Okay, since that’s
finished, let’s move the statue all the back, so push down on the lever
twice. (Note: if you don’t want to view all the little movies for the
moving of the statue, just right-click on your mouse.)
Wow! That was too easy! No
complicated machines to figure out (climb down the ladder), no weird people
to interact with, no visas to procure . . . hey! Wait! Come back here!
Where are you going with those things from my train?!! It’s no use
following him because the door is locked. Rats. Better get onto the train
and see what’s missing.
Hurry into the coach car and
you’ll find Oscar tied up in the back. Collect all the tools left on
the floor, then undo Oscar’s bonds and he’ll tell you a scary
story. Basically, he was pulled down and delivered of his hands! Great,
just great. How am I supposed to move on if my engineer has no hands? And
it’s no use asking Oscar if you can operate the train; he’s not
allowed to tell. I suppose we’ll have to track the hand thief down.
But how to get inside the factory?
Before leaving the train, view
the final cylinder, the one you recovered from the control room. In this
letter, we learn that Hans came to this Russian city, called Komkolzgrad,
to renovate its largest factory with automatons. At its peak, Komkolzgrad
was the center of science and industry in Communist Russia. Now it seems
to be abandoned.
Leave the train and return to
the statue. Climb into the control room and move it forward one time.
Exit the control room and you’ll see that there’s a hole in the
sheet metal wall of the factory. Perhaps if I can get over there, I can
pry it open with these tools I’ve found. Jump over to the opposite
platform and use your tools to tear a larger hole, big enough for you to
walk through. Seems as if we’ve stumbled into some sort of storage
room. Could find plenty of useful things here. Go over to the shelves
and you’ll find a spark plug, which looks curiously like a small Voralberg
automaton. Rats, though. I can’t seem to get through these doors.
Go back to the statue and push
it back once. Leave it and cross all the way to the other end of the platform.
Ooo . . . a freight elevator. Pull the lever to summon it and let’s
take it down and see where it goes! To a mine a course, what else? At this,
Dan will call, but the signal will die because of where you are. It’s
pretty dark in here so let’s change that. Look at the generator on
your left. Seems that spark plug might come in handy here. Place it in
the generator and watch that bad boy start to spin. Seems we now have light!
Walk all the way to the other end of the mine and take the second elevator
up. We are now in the factory!
The factory
Go to your left and up the stairs.
My God! It looks as if the huge furnace pipes have been converted into
a giant organ. If you look closely at the player, you’ll see she now
has Oscar’s hands. If only I could use that screwdriver lying nearby
to take them off. Go ahead and take the screwdriver anyway. We might need
it. Go back down the stairs and cross in front of the two large doors.
On the other side of the room, you’ll find a ladder that has been blocked
by a large metal sign. See, I knew you’d need that screwdriver. Use
it to remove the plate. Climb on up and enter the left-hand door.
Here you’ll meet Sergeui
Borodine, the director of the Komkolzgrad factory, probably the only living
soul left in this godforsaken place. He was badly injured during an accident
in the factory, so now he wears a large mask over the upper portion of his
face. (Can we say Phantom of the Opera? I think Gaston Leroux deserves
some credit here!) Speak to him about all things. He’ll admit that
he did assault Oscar and take his hands, but it was all for a good cause.
You’ll discover that he’s a fanatical admirer of the great soprano
Helena Romanski. (Yep, we can say Phantom of the Opera.) The hands
were for his automaton organist who is to play for Helena when she makes
her triumphant return to Komkolzgrad, which he intends to orchestrate. (No
pun intended . . . well, maybe a small one.) He strikes a deal with you:
if you can convince Helena Romanski to come back to Komkolzgrad and give
a personal recital for Borodine, he will return Oscar’s hands and send
you on your way. But there’s a catch – no one knows where Helena
has retired to. Borodine opens his Romanski museum to you so you can learn
more about her.
Leave the control room and climb
down the ladder. The entrance to the museum is in the upper-right corner
of the screen. Man, this almost as bad as that Eva Gardner museum in North
Carolina. This guy is not only a fan, but he’s obsessed! He has everything
from her dresses, to her makeup table and brushes. In the back, be a good
adventurer and check out the desk. In here, you’ll find a book filled
with scraps of articles about her and photos (including one that looks like
Hans standing with Borodine and Helena) and a stack of letters from Borodine
to Helena, all returned unopened. To find out more about Helena, call your
opera-loving mother. Her and her tenor boyfriend, once linked to Helena,
will tell you that they think she’s in Aralbad, a Russian resort town
on the coast.
Head back to talk to Borodine.
Before you get there, Dan will call again. Apparently, he feels awful about
the argument, but only because he may have embarrassed himself at work.
What nerve! Afterwards, tell Borodine you think Helena is in Aralbad and
that you need to find a way to get there since your engineer is broken.
Borodine will turn on the factory monorail, which will take you to see the
drunken cosmonaut named Boris Charov that lives on the mountaintop. Exit
the control room and take the door to the right of the control room.
The Cosmodrome
As you’re exiting the monorail
station, Olivia will call. Again, she is really worried about Dan and wants
to know what’s going on. And because she’s so concerned, she’s
been spending more time with him! Sheesh, woman! Why can’t you mind
your own business? Well, that’s two friends pissed off at me – maybe
I should try for three. Anyway, keep walking up the path towards the large
Cosmodrome you see ahead. Climb the stairs and you’ll see a junked
space capsule. You’ll find Charov in there.
Yep, and he’s drunk, sloppy
drunk. Remember Randy Quaid’s character from Independence Day?
The same thing with this guy. Bottles of vodka lay everywhere. Why don’t
you pick one up for the road? Talk to him about all available subjects.
Doesn’t seem like we’ll get much useful info out of him while
he’s in this state. Let him stagger off once he’s finished and
he’ll pass out in a bin near the crane. Leave him be while we check
out the capsule. On a small shelf, you’ll find a key to operate the
crane and a letter concerning Hans Voralberg’s work for the Russian
space program. It appears as if Charov was going to fly Hans’ device,
but when the program was scrapped after Hans’ sudden disappearance,
so was he. Poor guy! It’s no wonder he’s upset!
Head out of the capsule and you’ll
see our cosmonaut friend passed out nearby. Seems we’ll need to get
him underneath that shower and wake him up since we have more questions
about Hans. See that control panel on the opposite side of the platform?
Use your newly found key to activate it. Turn the right control arm once
to the left and then push the left on down to position the tub correctly.
Once you’ve done that, head down the stairs and to the right. Turn
the large wheel to get the water flowing to the showerhead. Go back up
to the control panel and push up the lever controlling the water. Surprise!
Can you answer my questions now?
Charov will be a little out of
sorts at first, but he’ll warm up to you. Ask him all your questions,
and this time you’ll get straightforward answers. He’ll confirm
that he did indeed know Hans Voralberg and was devastated when the program
was canceled. So he’s spent the rest of his time here, drinking away
his sorrows. He also tells you a bit about the airship and his eagle, Soyouz.
Leave Charov for the time being
and continue to the right to check out the launch platform of the station.
You’ll see Hans’ flying wing in the center. Quite an impressive
device! It’s a shame it has never flown. Over to the right, you’ll
see the aging airship, surrounded by birds. Head to the left and climb
the stairs to get to the control room. On the right, there’s a control
panel that operates the launch system for the flying wing. Close up on
it and use the abandoned key to open the top of the panel. Reconnect the
two broken wires and close the top. Sure, try pressing the launch control
buttons, but you’ll need to get a blood sample for the passenger before
launch can commence. Take the blood cartridge from the panel. Hmmm, I wonder
. . .
Leave the control room and walk
to the other side of the platform. Head up the stairs to the airship to
get a better look at it. Unfortunately, the door is locked. And the birds
seem to be swarming all over it! And here I thought I was playing a good
game and not Hitchcock. Um, well maybe this is just a passing thing.
Moving on.
Go back to see Charov and ask
him about the airship again. He’ll hand you a key to get inside. Unfortunately,
once you do, nothing happens when you pull the lever. You’ll find
Charov hanging around the stairs to the control room. He’ll make a
deal with you. If you can repair the flying wing and send him to the stars,
he’ll tell you about how to get the airship running and take you to
Aralbad. Sounds easy enough. Have him give you some blood for the cartridge
so you can get the launch program running. Return to the control room.
Place the blood cartridge back
into the panel and start pressing the buttons. Unfortunately, Charov’s
blood sample fails. Rats . . . well, let’s the cheat system and use
a few drops of our own. Of course, since Kate is a light drinker, she’ll
pass with flying colors. Keep pressing the buttons for the sequence to
continue. Charov will come up on the screen and begin to tell you how to
get the airship out, but is cut off by static. Before he enters the rocket,
he tosses something toward the platform, and then disappears as the flying
wing blasts towards space. But wait! You didn’t tell me your secret!
Run down stairs and recover the
object Charov left for you. It looks like a lever. But to what? Leave
the launch pad and go past the capsule to the longer set of stairs with
a red light over the entrance. Climb up these and you’ll reach the
cage for the eagle that Charov told you about. Perhaps if I release him,
he’ll get rid of all those birds around the airship! Place the lever
in the device to your right, the one that looks kind of like a projector.
Soyouz will soar out of his cage and go after the little sparrows, scaring
them all away.
Hurry back to the airship and
climb inside. We’re in luck! Pull the lever now and the automaton
pilot will take you to Aralbad.
Aralbad
Not a bad flight. I just wish
they hadn’t shown The Brady Bunch Movie for the in-flight entertainment.
And these peanuts are supposed to keep me all day?
The Hotel
Cross the stone courtyard and
past the fountain to the hotel entrance. Marson will call you at this point,
still pissed that you haven’t found Hans yet. Patience darling! Inside
the hotel lobby, speak to the receptionist, a Mr. Felix Smetana. Once hearing
that you’re not a guest, Smetana refuses to let you meet Helena Romanski.
So she is here! But how can I get back to see her? We’re going
to need a distraction. Smetana will go back to his soccer matches on the
old TV, so we’re free to poke around the lobby a bit. Across the lobby,
there’s a locked iron door that leads to the thermal baths. Next to
it is a broom closet, full of cleaning supplies. Oooo, we could do some
damage here. One of the favorite St. Mary’s College of Maryland
pranks was to take a bottle of Mr. Bubble and dump it in the fountain in
front of the student center. Let’s have Kate do the same here. Take
the bottle of soap and empty it into the fountain, creating a mountain of
bubbles. You badass!
Go back in the lobby and open
the large curtain to the left of the main door. Now, go get Smetana’s
attention by ringing the bell on the desk. Of course once he sees the bubbles,
Smetana will go into a complete panic and leave his desk unattended. Silly
man! Hasn’t he ever played an adventure game before? Go behind the
counter and take a look at the guest check in. Yes, Helena is here. Make
note of her security code (1270) in your notebook. Also, notice that Hans
has been here as well. But how can that be? He seems to have been everywhere
I turn up! Also, make sure to pick up the pamphlet for the Kronskey Hotels.
Inside, the phone number for their Paris location, the Hotel Meizurt, is
written in red. We’ll need that later. Also, give the red button
a good smack to open the iron grate door to the baths.
Go on through the gate and take
the door on the left. This is the dining room and bar for the hotel. Sitting
near the bar is an automaton, a sort of butler with a wheelchair. Go talk
to him. He’ll introduce himself as James and that he’s Helena’s
nurse and caretaker. She’s currently sitting out on the pier that
overlooks what used to be the ocean. However, he can’t bring her in
to talk to you until she’s good and ready. Great . . . we’ll go
out there instead. Walk to the far end of the dining room and you’ll
encounter another locked door, this one controlled by a coded panel. Try
entering Helena’s code and pulling the lever, but it doesn’t seem
to work. Probably because she’s already out there. Let’s try
something else. Head back to the baths.
Oh wait! The door to the cloakroom
is open! Cross the hall to the back right door. Inside, you’ll find
a ticket on the floor with a second code: 0968. This might help us. Head
towards the back room and grab one of those snazzy crystal goblets off of
the cart. Pocket it like I did with that neat glass from the Newport Creamery
in Rhode Island. Go back to the dining room and use the new code to open
the door to the pier. Before heading outside, make sure to put on the gas
mask. The air of Aralbad is so saturated with salt that it could kill you.
Nice place for a spa, huh?
You’ll find Helena all the
way at the end of the pier, looking out across the dried sea basin. While
you’re speaking to her, Smetana will run up and inform you to leave.
Helena will defend you, saying she doesn’t get guests very often.
So there, Smetana! (blows raspberries) Once you’ve finished with your
questions, Helena will want to go inside. Grab the bell that is hanging
nearby and hang it on the closest hook to the hotel door. Ring this to
signal James. Only, you’ll have to go inside and let James know you
rung it. Then he’ll go out to get Helena.
Mom will call in the meantime
and ask you all about Helena. Give her your best short story, and then
get her off of the phone as James wheels Helena in. Talk a bit more to
Helena and she’ll tell you that her voice has completely left her and
the only thing that could cure it would be this amazing cocktail that a
bartender in Paris once made for her. In Paris you say? Call the Hotel
Meizurt (46433643) and the current bartender will give you the ingredients
for a “Blue Helena.” They are as follows:
Twist of lemon
Honey
Vodka
Blue curacao
Ice
This next puzzle was probably
the most frustrating yet interesting in the entire game. A bar completely
controlled through musical keys and symbols. What could be better for this
cocktail loving music major? Let’s get a better look at the bar/organ.
Between the bottles is a sheet
of paper, showing you what keys control which bottle of alcohol. They are
numbered 1-16 from bottom to top, 1-8 being in bass (

)
clef and 9-16 in the treble (

) clef. (You know you love my hand drawn symbols!)
Well okay, we’re on the right
track. We have the bottle of vodka, and it looks as if this machine has
its own curacao and ice. But where to get honey and lemon? Look down under
the right side of the bar into the cabinet. TA DA! Just what we needed .
. . ick, except the honey has all crystallized. Add it to your inventory
and then go back into the central room where the baths are. See those two
guys playing chess on your right? Go over there and turn the knob to heat
the water in the smaller raised tub next to them. Place the honey bottle
in the water once it’s heated enough. This will heat up your honey (why
does that sound like a line in a Mariah Carey song?) and you’ll be all set
to make a “Blue Helena.”
Back at the bar, place the vodka,
honey, and lemon in their appropriate places. Power up the machine by pushing
the knob all the way on the left. Now, position the lower lever so it’s
pointing to the bass clef. Keeping your keys numbered from left to right,
press the second key. This will give you your vodka. Next, flip the switch
over the treble clef, pressing the third key after doing so, giving you
a healthy amount of blue curacao. For the final ingredients, push the knobs for lemon (lemon slice), honey (black honeycomb) and ice (snowflake). To shake, click on the automaton symbol and the drink
will be delivered to Helena for inspection. If it’s indeed her miracle
cure, she will drink up. But Helena’s a soprano, therefore, a diva,
not unlike myself. If it’s even slightly wrong, she’ll send it
back to be remade. So be careful with this one.
After downing the concoction,
Helena will sing a few notes, only to grow frustrated with the tone. She
tells Kate that she used to be able to break glass. If she can do that,
then she will really believe that she has gotten her voice back. Place
the crystal goblet you thieved earlier on the end of the bar and tell Helena
to try. She will indeed use her powerful pipes to shatter the goblet into
many pieces. Wonderful! She’ll come to Komkolzgrad with you!
Head back to the airship and
Olivia will call. She’ll confess to you that she messed around with
your fiancé and feels terrible about. Kate will end the conversation abruptly
as Helena arrives for the trip. Poor Kate . . . I say kick both of their
asses to the curb.
Komkolzgrad
The factory
To an audience of two humans
and many automatons, Helena will sing her heart out, accompanied by the
powerful pipe organ. Upon the completion of her recital, Borodine will
drop a large cage over the helpless Helena, as he intends on keeping her
in the factory for all time. He really has gone mad! Come on, Kate; let’s
get her out of there.
Hurry to the door of the cage
and break the lock with your tools. Helena will run out. Please don’t
forget Oscar’s hands! Use the screwdriver to detach them from the
organ player. Run to the main entrance. As you and Helena try to escape,
Borodine will drop a set of bars between you and singer, trapping you inside.
Give the hands to Helena and tell her to put them back on Oscar and get
the train ready for departure while you find a way out. Go over to the
freight elevator and take it down into the mines.
Just as you exit the elevator,
a loud explosion will ring out from behind you. Borodine has destroyed
the elevator shaft! Must get to the other elevator before he takes out
that one as well. Too late, Kate darling. Get a close up of the small
bomb he has waiting for you at the other end, then run away from it before
it explodes in your face. But how am I supposed to get out? Remember those
air vents you may (or may not) have looked at earlier? Climb up that and
you’ll make it back to the platform.
The platform
Look over at the crates next
to the elevator. One of them has come open in the explosion. It’s
filled with those little bombs Borodine has been using. Snag one for safekeeping.
Never know when you’ll need an explosive device. Hurry back to the
engine and Oscar will get your attention. Apparently his hands are back
in place and things are peachy. Let’s get in the coach so we can get
the hell out of here!
Dan will call as you board.
Blow the little bugger off; goodness knows he’s done enough already.
Speak briefly to Helena as the train approaches the large statue. Blast!
Seems Borodine has been tricky and installed steel bars across the statue’s
legs so we can’t get out! No worries here kids, I have a bomb more
powerful than a Latoya Jackson infomercial. Exit the coach and place the
bomb on the leg of the statue. Tell Oscar about your plan then run back
into the train. Watch as the statue explodes, setting off a train reaction
(no pun intended, really this time) that sets the factory up in flames,
destroying Borodine and his mad empire. And of course, our heroes get out
just in the nick of time.
Aralbad
The train will come to a stop
at the Aralbad station, winding down in the perfect place. All passengers
will disembark, even Oscar. Go use the now VERY familiar winding mechanism
to tighten the springs of the train then speak to Oscar about all subjects.
Seems as if we’ve both grown up quite a bit over the last few days.
Once you’ve finished, Smetana will arrive and tell you that a package
was delivered for you at the front desk. But I’m not a guest here,
how strange.
Return to the hotel lobby and
look inside the brown box that is on the left hand side of the desk. Even
stranger – it’s an automaton of a mammoth. But wait! Only Hans
made these! Does this mean he’s here? Marson will call again at this
point, asking for another progress report. Yes, we’re close, but not
quite there yet. More later, boss. Helena will call the reception desk
and ask Smetana to have you meet her in the dining room. Do so.
Helena and James will be waiting
for you there. She will tell you all about her several year affair with
Hans Voralberg and that it nearly destroyed her when he disappeared. But
as suddenly as he disappeared, he’s reappeared . . . and is waiting
for you out on the pier!
Hurry outside (not needing the
mask this time) and sure enough, the mysterious and terribly hard to find
Hans Voralberg will be waiting on the bench to see you. While speaking
with him, Hans will sign the papers to transfer ownership of the factory
to Universal Toys. Kate will be floored with the ease he does so, believing
he does not understand what he has just done. All Hans seems to care about
is getting to Syberia and living among the Yukols and their domesticated
mammoths. He intends on taking his clockwork train the rest of the way,
directing you to a pontoon plane at the end of the pier to take you back
to New York. Marson will call after Hans has left you, congratulating you
on your success and telling you that by all means, do not lose the signed
papers. If they’re lost, the sale is void.
The final scene will then play
out for you, in all its amazing beauty. Kate of course, follows her heart,
leaving those shallow people behind in New York to have more adventures
with Hans and Oscar as they travel to Syberia.
Oh yeah, this has sequel written
all over it!
The End (at least until
Syberia 2)
Screenshots
View this guide raw, exactly as the archive holds it