Runaway 2: The Dream of the Turtle Walkthrough by MaGtRo
Runaway 2: The Dream of the Turtle
by Pendulo Studios
Walkthrough by MaGtRo December 2006
Gameplay: Read the manual. It is
very well written and is funny. This third person point and click game came on
a DVD-Rom.
Move the cursor to the top of the game screen to see
the inventory icon on the left and the options icon on the right.
The inventory icon opens and closes the inventory
screen. Left click an item and move off the inventory screen to go back to the
gameplay screen. Click the item when it gets a green halo on an active spot in
the gameplay screen. In inventory, right click an item to do further
examination.
The options icon has the gameplay menu on
the left. It consists of load, save, erase and exit. The erase deletes a
selected saved game. The save feature when clicked on shows a picture of the
saved game. Type in a title for the saved game and then press enter to save the
game.
The selections to the right show: music, subtitles, antialiasing, high quality video and
high quality audio choices. Below these are
the volume and brightness controls. Below the controls are the credits and info
on Runaway 1.
Double clicking on an exit arrow skips the walking to
the next screen. Space bar pauses the game. The ESC key hastens the intro.
Brian Basco is seen pushing her girlfriend, Gina
Timmins out of a plane. Gina opens her parachute but she was targeted from the
ground level and shot. She is last seen sinking in the lake.
Brian is on a laptop communicating through Krypto
chat with Sushi Douglas, the rich computer expert. Brian is asking Sushi for
help and is telling her the story of what happened.
That morning, Brian and Gina hired Flying Platypus Tours to go to
Mala Island to see Tiki Falls and Tiki Temple. They meet Otto, the ancient pilot
of the airplane. Otto kicked the bucket while flying the plane and that is why
Brian pushed Gina out with the only parachute available. Brian crashed landed in
the jungle of Mala Island.
1.
Trapped in the Jungle
Inside the plane:
After crash landing,
Brian wakes up at the back of the plane with no backpacks.
Look at (left click)
and pick up (right click) the shard of glass on the floor right of Brian
and the open door. Look at the boxes on the right and take a Capote puppy.
It already has batteries. In inventory, look closer (right click) Capote. Learn
that it has a cap to get liquids in the toy.
Look at the ‘keep close’
compartment left of the door. See that it is locked.
Go left of the locked
compartment and look at the items thrown onto the floor left of the chair. Take
Gina’s hair clip.
Enter the pilot’s
cockpit.
Look at the glove compartment by Brian’s left arm. Take the magnifying glass.
Look at the central glove compartment by Brian’s right hand. Take the
binoculars and bottle of whiskey. Look at Elvis.
Open the hatch of the plane:
Cockpit – Look
at lever above
Brian’s left hand. Activate the lever and see the front hatch of the plane open.
Exit the plane.Hatch – Go
outside the plane and see the jungle
surrounding the plane. Go to the hatch and it closes.Cockpit – Go back
inside the plane’s cockpit again and activate the lever again. This time use
Gina’s hair clip on the lever. That will hold the hatch open. Exit the plane.
Get Otto’s Bag:
Outside the plane
– Something dropped from
the sky. It’s Otto’s pilot license. Use the binoculars above the plane’s
tail to see the treetop. See Otto’s bag hanging from a branch.Go to the hatch and look
inside the hatch. Take a tank of water, tool and anti-slippage
spray.Quicksand – Go right 3 times and see
a lemur by the quicksand. Look at the ledge on the right. Right click to climb
the ledge and see that it is dangerous.While standing close to
the ledge, look at floating object in quicksand to see that it is Otto’s
goggles. Right click at that exact spot and automatically,
Brian gets a branch and takes Otto’s goggles.Plane – Go back to the plane.
In
inventory, look (right click) Otto’s goggles. It has a strap. Click the glass
shard on Otto’s goggles to get strap. Click the strap on the branch.
Hmm… We need to cut it. Click the glass shard on the branch. Then click the
strap on the cut branch to get a slingshot.Use slingshot with
treetop above the tail of the plane. Brian automatically takes a rock and
shoots to get Otto’s bag.In inventory, right
click and then left click Otto’s bag and get key that is broken.
Fix the broken key:
Welding –
Use a magnifying lens on a ray of light shining through the trees. Hmm… Use
the tool on magnifying glass to get lengthened magnifying glass. Use
the lengthened magnifying glass on a ray of light. Brian selects a good place
to stick the lengthened magnifying glass on. Use the broken key on the
magnifying glass stuck in the ground to get welded key.Go inside the plane and use the key on the locked compartment. The excess
metal makes the key too thick. Use the glass shard on key. Use the smooth key
on compartment. Look inside the open compartment and take the snowshoes.
Get pass the lemur:
Go back to the quicksand
area 3 screens to the right. Look at the rock. Climb the rock. It’s slippery.
Use the anti-slippage spray on rock. Climb rock and Brian will walk on the
fallen tree. Aaargh! That nasty lemur.Lemur – In
inventory, click the tank of water on Capote puppy to fill Capote’s tank with
water. Use Capote the puppy with area where the lemur was before – on the
ground in front of the rock. Watch as Capote
does his thing and the lemur drinks the er… water. There goes the Capote
puppy.
Go back to the plane
and take another Capote puppy. In inventory, click the whiskey on
Capote to fill Capote’s tank with whiskey. Use the whiskey filled
Capote the puppy with area where the lemur was. Heheheheh. The drunken
lemur and Capote puppy are placed in inventory.
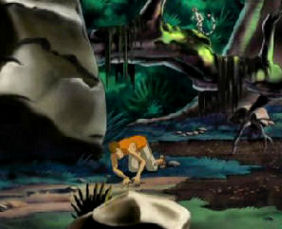
Climb the rock and get
to the top of the ledge.
Rickety bridge:
Go right to leave the
jungle. See the hanging bridge. The gorge is very deep. Read the sign. Use the
snowshoes on the bridge. Brian leaves his inventory except the lemur. Watch
Brian.
At the top of the cliff,
Brian sees the lake and a military camp at the lakeside.
Brian continues telling
Sushi his story.
2.
Surfin’ Mala
Military Camp: At the Tiki Falls turned
Military camp of 13th Infantry Regiment, Brian is brought to
Leslie (Lester) Flowerpot, the son of Colonel Kordsmeier.
When Brian is able, look
at the notebook on the desk. Realize that Leslie writes all of daddy’s order on
the notebook and that Leslie’s handwriting is similar to Brian’s.
Talk to Colonel
Nathaniel Kordsmeier. My, he loves war and is a man of action. Martial law is
imposed on the island. Brian thought she saw Gina as blonde.
The aim is to find a way
to sneak into camp since they are watching every step and find a way off the
island. Brian named the lemur, Little Devil.
Hawaiian Bar at Luana Beach: Go right to go to the
Southbound Highway. Talk to Lokelani at the bar. Learn all about her boyfriends (do
jot down who’s who) and Aolani, a cockatoo. She named Brian, Kaimi. Learn about the
remaining population of the island, the monk (maybe deaf), Kai (lost leg and
came from a long line of witchdoctors), Knife (has a motorboat and loves
surfing) and Koala. Learn about her former occupations especially makeup job and GreasePaint Pro.
Take the cigar holder
from the ashtray by Brian’s right foot. Take the chalkboard and chalk
from right end of bar.
Exit the bar and move
the cursor at center of the mountains to go to highway.
Alaula Cove:
Talk to Knife on the
surfboard. Try to borrow his motorboat and learn about Koala. Koala was at Luana Beach earlier and he has console game to keep him quiet. Take the piece of
rope left of the hut’s stairs and the talcum powder at right of
the stairs.
Talk to Kai on the
hammock. His grandpa is a witch doctor and specializes in reviving dead poultry.
Look at the sand turtle
Koala made.
Go to left screen
towards the end of the cove. Take the tool box. Look at the motorboat and
the gap in the rock. Leave the cove.
Get to borrow the
motorboat or find a way off the island:
Luana Beach:
Basement Entrance –
Go to the left of the main stairs of the Visitor Center. Open trash
container and get butter. Look at the basement doors blocked by a board.Bucking Bronco –
Go to Bucking Bronco bottom of the beach. Look at the bronco and the trap door.
Enter the trap door.Surf Shack – Go
to the Surf Shack.Cable – See a cable hanging on the right of the stairs. Get the cable
and see that the other end is hooked to something. Look at end of cable under
the hut. It is hooked to root of palm tree. Use butter from trash container
under the hut to grease end of cable to get cable.Monk – Talk to the monk. He doesn’t talk but hears since he nod or shake his
head. Give chalkboard to monk-like individual. Talk to him again until he runs
out of chalk. He has a mission to accomplish.Soldier – Go and
see the soldier that is hidden at left of the Visitor Center. A vehicle is seen
right of a palm tree.Talk to Zachariah
O’Connor. Learn that he was a former lumberjack and climbs trees fast. Only
Professor Pignon is allowed to be driven to the camp. He shows the picture of
Pignon in his book.He knows how to make a
chalk: grounded plaster and gum Arabic.Make chalk – In
inventory, use the talcum powder on the cigar holder. Go to the right of the
Hummer and look close at Palm tree. It’s full of sap. Use the cigar holder with
talcum powder on the trunk of the palm tree. Brian shakes, compacts it and
presto! a chalk.Hawaiian Bar –
Talk to Lokelani about the bucking bronco. Balance and foresight is the same
words that Knife used to describe surfing. Brian has to fix the bronco first.Fix the bronco:
Surf Shack – Go
to the Surf Shack. Give the chalk and talk to the monk like person. Ask him if
he’s a mute. Brian finally recognizes Joshua. Brian gets Joshua to remember him
from Runaway 1. The Trantorians abducted him. He came with a team of Trantor
and he is looking for a Professor Simon. As a trade off, he will fix the bronco
if Brian helps him off the island.Bucking Bronco –
Joshua needs tools and grease. Give Joshua the butter and the tool box.Power to the bronco:
Basement entrance
- Use the steel cable on the board of the basement entrance.O’Connor – Go to
the soldier by the Hummer. Talk to O’Connor and get him to climb a tree. Give
him the rope and he climbs the tree after some nudging.While he’s up there, look at
book and take photo of Pignon. Right click on hummer to borrow hummer
since you have now attached the cable on the basement board. Watch how Brian
does his driving – well done.Basement entrance
- Enter the basement and look around. Look at and enter room under stairs
that is behind the giant crab. Get a metal detector.Look at and get to work
on the circuit breaker on the left of stairs. Lower both Seafood Kahuna and
Visitor Center levers. Then raise the Bucking Bronco lever to get power to the
bronco. Leave basement.Bucking Bronco –
Joshua fixed the bronco. There’s a whole race of aliens waiting for Brian to do
his errands. Joshua will wait at the Surf Shack. Lokelani turns the switch to
the bronco on. Watch Brian.Alaula Cove – Go
to the highway and back to Knife at the Alaula Cove. Talk to Knife about ‘if I
told you how you could start surfing…’.Back at the Bucking
Bronco, the first part of the plan is completed. Knife lends his motorboat.
Find a way to sneak
into camp:
Get a photo of Brian:
Beachside Photo stand
- Go to the wooden structure right of the Surf Shack. It is a souvenir photo.
Look at and go back side of panel. It might be unplugged.Hawaiian Bar –
Talk to Lokelani about the movie magic makeover software and ‘use the
GreasePaint Pro to make me look somebody…’ and about the photo stand. The
photo stand needs token. There might be tokens under the stand.Beachside Photo stand
- Look at and go under the platform. Release Little Demon under the platform. He
got a token. He also wants a brewski as trade for the token.Hawaiian Bar –
Talk to Lokelani about a beer. Brian will be tested about Lokelani’s boy
friends.Boyfriends: Central European that looks like the Colonel – Milo; Polynesian dude – Lopati; Indian origin -Tiroo; Brian – Russell. She gives a beer.
Beachside Photo stand
- Give Little Demon a taste of his own medicine (the beer). The lemur gives the
token and then jumps back to be with Brian.Basement – Go
back to the circuit breaker at the basement. Now flip the lever of Lokelani’s
place and flip up the lever of the Surf Pix.Beachside Photo stand
- Go back side of panel and insert the token on the slot. Brian calls Lokelani to
join him. Get Hawaiian photo souvenir.Hawaiian Bar –
Talk to Lokelani about the movie magic makeover software. Give Lokelani the
photo of Pignon taken earlier from O’Connor’s book and then the Hawaiian photo
souvenir. She will go to her hut to scan the photos. Brian raises the circuit
breaker level to her hut automatically. She leaves Aolani with Brian.Brian decides to get a
beer but with the word beer, Little Demon jumps out and scares Aolani to fly to
the palm tree.Lokelani comes back and
gives Brian the doctored photo. Upon learning about Aolani, Lokelani is
distraught.Aolani the cockatoo:
Bring Aolani down
from palm tree – Hear Aolani. Go to palm tree by O’Connor. Automatically
talk to O’Connor about the bird. Brian inserts the doctored photo in the book
while O’Connor shoots Aolani.Bring Aolani back to
life – Go to Alaula Cove and talk to Kai about his grandpa being a witch
doctors. His specialty is reviving poultry and he has only one arm. Give Aolani
to Kai. The bird is not fully dead. He cannot remember where the witch
doctor hut is located – somewhere NW with some graves.Locate the hut –
Exit the cove and go to military camp. Speak with soldier at checkpoint to talk
to the colonel again.When Leslie leaves his
desk, write on his notebook – ‘Locate hut in the northwest part of the island’.Talk nonsense with the
colonel. Leave the area and visit another place. Go back and ask to talk to the
colonel again.When Leslie talks to
daddy the second time, he mentions the coordinates of the hut that Brian wrote
own. Bryan writes the coordinates down. ‘I wish had a GPS.’ Talk and
close the conversation with the colonel.Find and get a GPS
- Talk to O’Connor at the Luana beach and ask about a GPS. Learn that he lost it
chasing a rowdy kid earlier.Go to Alaula Cove and
enter the hut to see Koala playing with a video console. Look at video console
and realize that it must be the GPS. Koala would not give it. Use Little Devil
with Koala. The GPS is thrown out the window. Brian picks up the GPS.Witch Doctor’s hut
- In inventory, use coordinates on GPS. Brian follows the instruction of the GPS
and ends up at the hut.Enter hut and look
around: turtle shells, shrine, throne and ceremonial basin.Alaula Cove –
Look at and use the metal detector on the sand turtle. Get the bogus leg.Go talk to Kai about his
grandpa hut.Witch Doctor’s hut
- There’s an underwater tunnel to the lake where the turtles mate. Grimarium –
book of spells is lost. Speak with Kai again and ask about the Grimarium. It has
a metal cover and should be with the person’s body.Get a turtle shell
to be used as shovel
from the pile right of the entrance curtain. Exit hut.Use metal detector on
the graves. When Brian finds a positive result with the metal detector, use the
turtle shell on the grave.Listen to Brian. Then
listen to Kai.Get into the camp:
Make up –
Lokelani does her magic on Brian.Pierre Pignon introduces himself to Marine
O’Connor and away to the camp they go.
Brian continues to tell
Sushi what happened.
Brian and the colonel have
a talk. Professor Simon is the only one who knows how to activate the AMEBA but
he is missing. Simon is the one Joshua needs to contact.
Brian is escorted by Lt.
Col. Chapman, the next in command to the underground area to activate AMEBA.
Chapman doesn’t like his orders. The computer has all the data of Prof. Simon.
The catalyzing gloves are very expensive.
The room and Brian can
be seen by the Colonel but not heard.
The real Pignon arrives
and is detained by Lokelani.
3.
Simpler than an Ameba
Stop from being spied
at by the colonel:
Look around. Go to the
table on the right and rummage at the stuff. Get an ultra strong plastic bag.Go to the boxes by the
left wall and left of the stairs. Get a socket cam.Climb up the ladder on
the right to be at the platform. Go forward to right end of ramp, then left to the end and take the
duct tape that is atop a doormat.Look at the surveillance
camera at center of the platform. Place the socket cam onto surveillance camera.
Watch Brian do his thing.
Activate the AMEBA:
Go down to the main
floor. Go up the stairs (adjacent room) on the left and see a glass enclosed
bowling bowl with 3 holes. There’s a slot in the middle of the glass case. Go
back out of the room.Black men – Go
right to the next room with statues. Hear the black men talking in middle
doorway. Listen and then go in to check them.Open the briefcase
- Exit to the door on the right. See O’Connor talking with Caddy Cadwallader on
the walkie talkie about an audition on channel 5. Talk to O’Connor. He gives an
envelope from Lokelani. He also warns that Pignon is not to leave the
area.Go back to the room-main
chamber in the Tiki temple. Open the envelope and get Pierre’s ring and
letter. Use the ring with the briefcase. The Contactors International Agencies’
briefcase activates a card for Pignon. Automatically get the catalyzing glove,
sunglasses and the neuralizer also.Neuralizer surprise
- Go back outside to O’Connor. Talk to him completely. He says that he knows
that he is being auditioned for Intelligence Service-CIA and that he knows that
you are not Pignon. Use the neuralizer with O’Connor. It didn’t work. 3 smallmarbles falls out of the neuralizer. They look so familiar. Brian
orders O’Connor to be silent about him.
Use the AMEBA:
Go back to the Ameba
room-archaic bowling alley. Use the card in the slot at middle of the glass
case. Look at the bowling ball. It is very heavy to pick up. Use the marbles on
the bowling ball. It rises. See that the ball has now a hand imprint. You can
use your hand on the ball but best use the catalyzing glove.See 2 black holes
appear. Brian uses the one on the right and sees the other hand go out of the left
black hole. Wow!Go back to the desk at
next room. The glass case covered the ball again. Use the computer to read Professor
Simon’s files. Brian drew a chart on how the AMEBA works.Activate the AMEBA
- Go back to the Ameba room-room full of surprises. Insert the card again on the
glass case and use the catalyzing gloves on the ball. Select to go to Alaula Cove,
Mala Island and Joshua.Joshua visit 1 – See
Koala and the lemur playing ping pong. Talk to Joshua and learn about AMEBA
– a jalopy that means Anti Cellular Matter E- nuclear Bilocator Apparatus.Joshua visit 2 – Use the
gloves on ball again and select Alaula Cove again. See a dental operation being
done on Little Devil.Exit the room and go up
the ladder. Look close at the control panel of the platform at right end close
to the giant Tiki statue. It is turned off and needs a key to operate. Go back
to and activate the AMEBA.Joshua visit 3 – Use the
card on glass slot, gloves on ball again and select Alaula Cove again. Talk to
Joshua again. Ask what happened to Little Devil’s operation. Ask for the
dental instruments. The gloves fell off at the other side.
Tiki mouth:
Control panel –
Go back up to the control panel right of the Big Tiki. Use the dental probes on
the control panel to turn on the motorized platform. See that Brian hasn’t lost
his lock picking talent. The platform rises close to the mouth. Climb up to the
mouth.Indiana Jones, I
presume –
Look at the large ball of stone on the left. Look at and get the hat above the
stone ball. See a tarantula as big as a cow under it. Look at the legs under the
stone ball. Look inside the leather bag on the left of the leg and get
Stenchazol – it stinks. Take the whip left of the bag.Tiki Temple
– Go to the right and enter. Look out the opening and see the blonde Tarantula
talking with the colonel. There’s a John Doe that brought the Trantonite rocks.
Listen to Colonel’s plans and what happened to Gina.Brian mentions that
there’s an alien space ship at the bottom of the lake. He decides to help find
Simon.One of Tarantula’s
babies is missing – Adelina. Learn that tarantulas love only decomposed meat
and to them the worst it smells the better.Look at the opening
again – You can move to look up and look down. Check the statues, the coliseum,
the men in black and the terrarium. Look also at the gloves
on the floor below the terrarium. Those look like the catalyzing glove that was
lost.
Get a glove:
Adelina – Go back
to the hat above the stone ball. Use the ultra strong plastic bag on the hat to
put spider under the hat into the bag. Adelina is in the bag.Go back to the Tiki
Temple opening on the right. Hear Tarantula ordering the fresh meat to
decompose. They love the stinky smell.Click Adelina on the opening and Brian
will formulate a plan for Tarantula to follow Adelina. But the spider might go
back to the terrarium. Hmm…Men in black room
– Exit the statue. Lower platform using the control panel and go right to the
statue room.Use the Stenchazol on
the room in the middle. The old bottle cannot be opened. Use the dental probe
on the Stenchazol and then use it on the middle room-back exit. Leave bottle of
Stenchazol as close as possible to Tiki Temple. Hehehehe.Tiki Temple – Go
back up to the Tiki mouth. Go right to the Tiki Temple gap. Click-throw Adelina
through the gap (empty space). When Tarantula leaves to get Adelina, Brian automatically gets a
glove.Kordsmeier learns that
Pignon is Brian. The colonel and Tarantula leave to catch Brian.
Tarantula leaves her
walkie talkie on the table. Click on the opening and get the walkie talkie.
Escape:
Exit through the mouth
and see that Kordsmeier and Tarantula are at the bottom of the room.Use the whip on the
broken earring on the left of the giant Tiki statue.Brian needs a
distraction and he uses the walkie talkie to get O’Connor to do a screaming
distraction. ‘moron’. Hahahaha!Watch what happens. Run
Joshua! Alaska?
Brian continues telling
his adventure to Sushi.
Joshua being constantly
hungry ate the berries beside the gate to professor Simon’s home. The berries
induced loss of memory and the password to identify them to Prof. Simon is
forgotten. Brian takes Joshua to a shelter to recuperate.
4. He Who Knows
Does Not Speak
Find a cure for
Joshua’s memory loss:
Shelter – Talk
to Joshua and see if you can induce the password out of him.Go to the left
cupboard and take the knife from the middle drawer. Take the oil
dispenser from the fireplace mantle and firewood from the bin at
the foot of the bunk bed. Exit the shelter. Take the empty gas tank left of
door.Ben Wazowski –
Go down at bottom exit to the path. Go left and talk to the Ben Wazowski, a
bear researcher. Learn about the result of eating the berries and the cure –
raw salmon. He wears a bear suit (not costume) without a head. Learn about
bear claws and how to fish using it. He has collected bear essences. He tells
what he knows of Professor Simon. His backpack behind him has bear claws and
bottle of perfume.Shelter – Go
back to Joshua and talk to him again. Be sure to shake him up again about Trantor
being destroyed. Discuss eating raw fish and try to convince him to eat raw
fish. Learn that he has Japanese blood and that he likes sushi.
Find sushi:
Ben Wazowski –
Go back out to the path and talk to Ben again about making sushi. Learn about Archibald and the
instances that he appeared to Ben.Ben’s cabin –
Go left-downhill and see a tower top cabin at the center of the woods. Professor
Simon’s house is to the right. You can check it if you want. Go to the tower
top cabin and climb the stairs.Look around. Take the
chainsaw right of the bed on the left. See that it is empty. Take the hockey stick
left of door.Click on the guitar
and Brian will get an idea.Archibald –
Brian goes out to the balcony, turns on the light and sings. He gets hit by a bottle. Brian goes down and talks to
Archibald. After some discussion, Archibald agrees to make sushi. He needs
chopsticks, salmon, nori algae, bamboo mat and a thousand dollars. He gives a whistle
that can be used to call him when you have all the items.Go back up to the
cabin. Take the bamboo mat sign from the door.Go to the right and
see some bottles. Take a bottle and remembering what Ben stated about the
scents, Brian picks up a pheromones of female bear in heat bottle. If
you haven’t done it yet, take the hockey stick and chainsaw.Exit through the door.
Pick up the
bottle of bleach thrown by Archibald. Look at the barrel on the right. Take the
rubber
tube on top of the barrel. Go down.Chopsticks – Click
the firewood on the axe left of the cabin stilts. Brian chops chopsticks.Nori algae- Go back to
Ben at right screen and take the plant right of his backpack.Bamboo mat – This is the
bamboo mat sign from the door of Ben’s cabin.
Make a hole to
catch salmon:
Chainsaw – Look at
chainsaw and learn that it needs a mixture of oil and gasoline to make it
run.Go back to the
shelter. Go right and see a truck with a moose statue on it. The truck
has a winch on the front bumper. Click the gas tank on the truck and Brian
will go behind the truck to siphon gasoline to the tank using the rubber tube.In inventory, use the oil
dispenser on the gas tank. Then use the gas tank on the chainsaw.Hole – Go
back to the frozen river left of Ben. Use the chain saw on
the frozen river. Brian will walk on the log and cut a hole.A bear comes and
appropriates the hole for his own fishing.
Get rid of the bear:
Make a bear head
for Ben – Go back to the shelter and right to the truck. Use the chainsaw
on the moose to get a moose head. Brian removes the antlers.Use bleach on the
moose head to change it to white. Use the knife on the
bleached moose head to cut holes.Ben and the bear
– Go to Ben and click the moose-bear head on him. He goes to the bear by the ice hole
after using the ferocious bear essence on himself.While he’s gone,
click-trade the female bear in heat scent on the essence bottle on the side of the
backpack.Ben comes back
disappointed. Talk Ben on going back to the bear again. This time he uses the
female bear in heat scent.And they live
happily ever after.
Catch salmon:
Go back to the frozen
river and use the hockey stick to pick up the bear claw Ben left.Go to the hole and
use hand in the hole. Then use the hockey stick on the hole. That worked but
the stick is too smooth.Use the bear claw on
the hockey stick. Use bear style fishing device on the hole and get a salmon.
Get sushi:
Go to the right of the
ladder going up to Ben’s cabin. Click the whistle between the boulders on the
part of the forest Archibald came from.Automatically give him all the items needed for the Sushi. Talk
to Archibald and ask how long to prepare the sushi and to have it delivered to the shelter.
The delivery costs Brian his cell phone.
Joshua:
See the sushi in front
of Joshua disappear fast. In his joy and happiness remembering the password,
Joshua does his dance on thin ice and it breaks off the main ice floe to float to the middle of the lake.Go right and use
the cable-winch of the truck. The truck needs to be
turned on. Open the door and find out that the engine doesn’t turn.Open the hood. Use
the hockey stick on hood to make it easy for Brian to check the engine. It is missing
a sparkplug.Use the knife on the
chainsaw in inventory to get a sparkplug. Put the sparkplug in the
engine. Open the door and the engine turns. Watch the rescue of
Joshua.
Joshua gives the proper
password at Prof. Simon’s gate. Prof. Simon explains the history of the Trantors
and their effect
on earth. They collect animals for their intergalactic zoo. They put the animals
in a state of suspension they call the dream. Learn about the Contactors
International Agency’s part in the animals and technology exchange. Kordsmeier’s
interest happened during the dream of the platypus. The NG-Zero was used to save the
scientist.
Joshua remembers the
message he is to deliver. Watch Alpha ask for Prof. Simon’s help in getting
Trantonite from a downed spaceship in Palenque. During the Dream of the Turtle,
the head chef (John Doe) stole trantonite. The downed ship is kept hostage by
Kordsmeier in exchange for the NG-Zero. They rescued Gina when she was shot.
Keeping her in suspension is costing them trantonite energy.
Brian and Joshua join
Simon in helping the Trantors. Brian contacts Sushi Douglas for help.
Tarantula arrives with
some of her men and reports to Kordsmeier.
Simon mentions about an
interesting aspect of one of the
books of Brian Scullerly.
Tarantula’s man talks to
their Alaskan spy, Archibald. The sharpshooter fires at Simon. Joshua and Brian
escapes.
Sushi alerts Saturn to
go
help Brian. Rutger joins the group.
5.
Shipped to the Past
In a yacht, Brian
wakes up with missing memory. Let’s look for someone
to refresh Brian’s memory. Check the door and keypad on the right and see it
needs a pass code.
Go left pass the Neptune room and click on a cylindrical
tube left of the diving suit. Enter the elevator.
Sushi Douglas:
Talk to Sushi. Find out what happened and what
she found out.
5 centuries ago, the tomb in Palenque (astronaut
of Palenque) was robbed.
A student obsessed with the tomb named Paco told Sushi that a known cruelest pirate – Íñigo Malantuñez y
Gonion, the captain of Orion might have taken the stone. The galleon’s
figurehead has a shining charm found during Malantuñez’ youth makes him undefeatable. The youth was left by Cortez
in the jungles 30 miles of Palenque. He was reported to have stolen of the Spanish trade route
map.
His trail disappeared then.
Sushi then researched the Archives of the Indies in
Seville, Spain. A female scribe wrote down the pirate’s history. Sushi found
out that the Orion was sunk in 1564 by an English warship.
The sunken ship is within 80 square miles of where
they are now. It might take the sonar 2 weeks to finish the search. Dean
Grassick was hired to dive down to check the wreck.
Talk to Sushi completely. She gives the password for
the doors – 0512.
The search time is too long for Brian. He needs to
find a way to find the sunken galleon before its too late.
Rutger:
Go out to the deck at the bottom of the screen. Look
around and talk to Rutger. Brian lost his memory because of Rutger’s herbi-doze
berries.
Try to take the telepathic helmet beside his lounge
chair. Look at the gardening supplies left of the door. Get a bag of sand.
Look at the bong left of the lifesavers. Take the broom beside the refrigerator.
Saturn:
Go down the elevator in the bridge. Enter the Neptune room and
talk to Saturn by the bar completely. The trantonite releases neutrinos. Brian has
an idea of making a neutrino detector and Saturn works the details. The French girl
borrowed the magazine but the article is missing.
Saturn needs: a fresh water tank; the telepathic
helmet and an article about neutrino detection taken from his magazine. Saturn
is making a mini-sub.
Camille and Dean Grassick:
Go to the locked Reserve area door beside the Nautilus. Use the
keypad and Brian automatically enters the password.
Talk to Camille sitting on the steps. She is called by Dean.
At the Sea lock room, watch Dean Grassick fudge the
taping. Talk to Dean when he’s done.
Fresh Water Tank:
Go back to the left and upstairs.
Look at the glass cases on the wall: fire hydrant and the water hose
that can be used to fill the tank. It needs a key.Enter the door at the back using the keypad.
Cargo hold room – See a big tank and overhead deck
hatch. Ah – just fits the bill.Open the shut off valve left of the tank. The tank
is empty. Now we need fresh water.Go to the right and check the Cargo hold 2 door. Press
the red button right of the door. It closes immediately.Use the broom on the door to block the door using
the broom.Brian comes up with a
bag of white plastic ties.Go up the stairs and then enter password to go out the door.
Go back to
Sushi at the bridge. Ask her for the glass case key to the water hose and fire
hydrant. Joshua got the other key.Go back down to the water hose cabinet and see that
it is gone.Sea lock room – Go down the stairs to the
sea lock room. See Dean and Camille still taping a show.Go to the right, pass the sea lock capsules and
enter the storage room on the right. Take 2 diving tubes from the box.In inventory, use the ties on the 2 tubes. Get more
tubes from the box and Brian will automatically make a makeshift hose.Go back up and click the made hose on the fire
hydrant. Brian will say it will better wait when you have gathered all the
necessary things for the neutrino detection.
Article about neutrino detection taken from his
magazine:
Camille – Go to the Cargo hold room or
anywhere and look around. Go back to the room with the missing hose – Reserved
area and see Camille on the steps. Talk to her completely. She has 2 bottles
of wine that she has brought for Dean but he’s on the wagon. Talk to her about
the magazine. Dean took the pages to wrap his lunch.Dean – Go down and watch another fudged
taping. Talk to Dean or Camille when he takes a break from his taping. He said
he will eat his lunch when he’s done taping. Brian says that Dean is so used
to having a teleprompter that he doesn’t remember his lines anymore.Go back upstairs and out to the main area. See
Joshua entering the elevator.Camille – Go back to the Reserved Area and
see Camille on the steps again. Talk to her. She gives 2 bottles of Bore
d’Eau wine from Chateau de Sebi. Dean calls her again. Exit.Staterooms – Click the wine jugs in the state
room aisle. Listen to Brian and his curiosity. Deja vu time. There are now 2
empty wine jugs in inventory. Hear Joshua say it might come in handy.Saturn – Go to Neptune room and click-ask
for the sketchpad on the bar. He says it still has one page and he needs to
fill it to write new ideas. He has an idea about obesity – to eat more slowly.Obesity idea – Take the trident off Neptune’s
statue across the bar.In inventory, combine the sand with the 2 empty wine
bottles. Then combine the tie and the wine bottles with sand to get
hourglass. Use the trident with the hourglass to get watch-fork.Give Saturn the watch-fork. He leaves to write down
the idea. When he returns, ask for the new sketchpad on the bar. Take a pen-marker
from the mug on the bar.Exit and see Joshua sneak into the Reserved area. Talk
to Camille about the wine.Dean – Go back down to Sea lock room and Dean. Click the sketchpad on
him. When he takes a break, Brian talks to him about teleprompter.Watch the taping that goes well. Dean takes his lunch
break and tosses the article to Brian.
Telepathic Detection:
Neptune room – Talk to Saturn about his
message for Rutger.Saturn sends a message: He’s got so much nerve it
won’t fit inside his hat.Deck – Go up to the bridge and then deck. Talk to
Rutger. Just one thing… I bet you don’t know what Saturn just said to me.Tell Rutger a new translation of Saturn’s message: That his hat is off to you,
and not to pout.Rutger sends a message to Saturn:
His techno-art is so sadly sad that it ain’t good even to put above a toilet.Neptune room – Talk to Saturn. Just one
thing… Rutger just said something lovely about you.Tell Rutger’s message this way:
He’s sad that your techno-art doesn’t get more deserved air time on TV.Saturn sends a message to Rutger:
In order to like reggae, you have to be daffier than a duck and waddle like
one too.Deck – Talk to Rutger. Just one thing… I bet
you don’t know what Saturn just said to me.Tell Rutger a new translation of Saturn’s message:
When he listens to reggae, that he gets so happy he starts to flap his wings
like a duck.Rutger sends a message to Saturn:
I guess I’m supposed to feel sorry for sayin’ only jerks with blue hair go to
the Burning Man Festival!Neptune room – Talk to Saturn. Just one
thing… Rutger just said something lovely about you.Tell Rutger’s message this way:
He feels like a wacko for not having gone to the Burning Man Festival with you.Saturn sends a message to Rutger:
The Jamaican bobsled team won’t win the Olympics even if it secretly uses
doping!Deck – Talk to Rutger. Just one thing… I bet
you don’t know what Saturn just said to me.Tell Rutger a new translation of Saturn’s message:
The day Jamaica wins the bobsled medal, he’ll buy you an Olympic-sized bong.Rutger feels kindly towards Saturn now. Me, make
things like that! Lie! Rutger will give it the
telepathic helmet to you.
Neutrino trace:
Now that all the necessary items are taken, see Bryan and
Saturn work in Cargo hold 1. Brian dismantles the helmet and then fills the
tank. With lights off, see the neutrino fly in the direction of the trantonite. We’re right on top of it.
Galleon wreck:
Sushi says that Dean backed out of diving. He is
just an actor and expected a double. Brian has
to swim a bit to the galleon and a 3D scanner should be placed at the middle
of the galleon.Watch the dive. The new adventure is titled – Blast
to the Past. Brian places the 3D scanner.The next dive is to check the figurehead that has a
sphere. It is covered with lichen.Get a cleaner – Go down to Cargo hold 1. Look
in the toolbox and get a saw. Use the saw on the broom to cut door
blocking broom. Get a brush – piece of broom.Exit cargo hold – Go up the stairs and exit
cargo hold. The keypad password doesn’t work.Use the intercom left of Cargo hold 2 door. Talk to
Sushi and find out what Joshua did.Use the red panel left of the intercom to open the
overhead hatch. Climb the ladder. Cargo hold 2 was also opened.Hear Sushi talk about the hatches on the cargo
holds. Hehehe.Talk to Sushi again. Ask to go down to the galleon
again.Brian cleans the figurehead sphere but it is empty.
They think that the stone might be in the stateroom.Brian dives to the stateroom inside the galleon. The
door is stuck.Bryan needs an idea to get the door open.
Sushi says that Joshua got in Cargo hold 2 and started opening boxes using a
crowbar. Aha!Get the crowbar
– Go down to Cargo hold. Someone removed the brush that keeps the door to Hold
2 open.Use the red button
right of Cargo hold 2 door. Brian says that the crowbar is in there.Open the hatch by
using the red panel left of the intercom. Try to go out onto deck – no ladder.Go up to the deck
where Rutger is lounging and
hear noises. Brian talks to Joshua who is destroying the antennae.At the deck, place the
arrow at bottom right of screen. Go right to deck. See Brian look down cargo
hold 2 and can’t jump down. Brian goes back to main deck.Go to Saturn at
Neptune room. Note that the helmet of the diving suit is gone. Talk to Saturn
about what he is making. Get electro magnets on bar.Go back to Cargo hold
1. Use electro magnets on the open hatch to climb on deck using the
electromagnets.Watch Brian climb.
Brian gets the crowbar.Brian dives to the stateroom inside the galleon and
opens the door. Brian! Brian!6. The Hidden Beacon of Avernus
Brian is a prisoner at the galleon. From the
dungeon, Brian is brought up
to Captain Íñigo Malantuñez y
Gonion. The female scribe writes down the events.
Brian is now Brushian Bharscough. The British
Interfector, Brushian’s warship is chasing the Orion. A UFO is seen and Malantuñez
leaves.
Brushian’s aim is to remove his shackle, find the
hidden beacon of Avernus, get on a dinghy, return to the Interfector and
command the attack on the Orion.
Remove the shackles:
Look around. Take the dagger-letter opener and
paperweight from the map table on the left.Look at shackles. It has a bolt that holds the
clamps-crescents. Use the letter opener dagger and-or paper weight on the shackles. Then
look at the nail on the post left of Camille.Talk to Camille and learn her history and Malantuñez’.
Use the letter opener on the nail. Brushian will then describe how it can be
used on the nail. Throw the letter opener dagger to Camille. She takes the
nail.Russian Mongrel guarding the door talks to Demon Dog.
He thinks that the sounds from the room behind him are Devil Dog’s responses.You now have a nail. Use the nail with the
shackles. Russian Dog made a code to talk with Devil Dog. Free!
Dinghy: Camille will help
with the search. Brushian automatically checks outside for the dinghy.
Find the hidden Beacon of Avernus:
Get clues to the Beacon’s hiding place:
Pirates – Go back outside. Listen to the
pirates above: Mangy Pooch and Lap Dog. One has a magic jug of grog that refills itself. They eat
sunflower seeds with their grog. Someone comes and they lowered the empty grog
bottle above the right window.Look and search through the sunflower seed remains on the floor at left. Get
3 sunflower seeds.Look at the right window to see that the window sill
is about to fall off. Remove the window sill using the letter opener. Get a
nail (now 2 in inventory) and the board.Parrot – Go back inside and talk to Feathered
Fleabag, the
parrot. He might repeat words of Malantuñez. Give sunflower seeds to the parrot.
Ah: Left from Spain to the East, set sail; Empire of the Rising Sun… Those
are directions. We need more info by getting more seeds.Go to the globe and spin it. See that the starting
point has Spain. Turn the globe to see what happens. Click on the left or
right of the globe to turn it. It clicks when it is at a correct point
like Spain.Look around the room. Take the empty jug from
the map table. Check the cabinet on the right. It has certificates. Look at the Ming vase spittoon.
Spit on it if you want. Look at the glass jar above the spittoon. It has seven
tailed dragon’s tongue in the jar. Get seven tailed dragon’s tongue. In inventory, look at
the tongue to see that it is stretchy.Exit the stateroom:
Russian Mongrel is guarding the door. Go out to the
passageway
and have a talk with him. He sends you back in.Tie the seven tailed dragon’s tongue to the bars of
the door. Then launch the paperweight on the dragon’s tongue. Ouch!Passageway:
Pick up the paperweight. Check the dress on the left,
the flag, the skeleton ornamental pirate and the
cask. The cask has the pirate’s scourge – clean water.Treasure hold:
Open the door left of the skeleton. A sword
comes out of the slot.Use the board on the sword. The sword wielder is dazed.
Enter and get Demon Dog, the lemur.Look around and take a treasure – golden idol of
Dosicua. Exit the room.Husky Hound’s Office:
Go right to the passageway corner. Talk to the pirate that
brought you up from the dungeon.You can select any name you want: Barbarian
Bloodhound, Shaggy Sheepdog, Crispy Corndog or All Bark and No Bite.He gives out certificates, guards the dungeon and
gives out the daily ration of grog. You cannot get grog unless you have a
Certificate for
Pirates with Low Moral Standing.To get the certificate, you have to pass 3 tests and
the certificate.
Act of Extreme Cruelty:Go to the left of Husky Hound and rummage in the
cabinet on
the floor.Go to the barrel of clean water on the right
passageway. Click Demon Dog on cask of water.Go back to the cabinet left of Husky Hound. Get a soap bar.
Throw the soap in the clean water. Place Demon Dog in the soapy water. He comes out
shining clean.Go back to Husky Hound and show him the washed Demon
Dog.Proof of Plundering and Pillaging test:
Give Husky Hound the golden idol taken from the treasure room.
History of Classical Ruffianism Test:
Husky Hound asks questions and you select the
answers.1. Who was the ship’s cook in the famous crew of the
ill-fated Captain Flint? Long John Silver.2. What was the original trade of Cap’n Blood, which
was convenient for someone wantin’ to become a bloodthirsty pirate? Doctor.3. How did Captain Swallow escape from the island
Captain Babossa abandoned him for the first time? By inventing turtle surfing
as everyone knows.4. By means of what ingenious combination of trips
did the 4 Pirates of Lentil Cove reach the Caribbean Express’ port of call on
Chickpea Island?The 4 pirates tore the treasure map they found in 4
and each got one ensuring their cooperation. The last Caribbean Express was to
pass Chickpea Island 8 days later. They have 8.5 days to get to that port. The
problem was that during the brawl, they lost 3 of their 4 wooden legs. They
decided they would return to the port in pairs with one pirate wearing the
sole remaining peg leg and the other leaning upon him. Afterwards one of the 2
would return to Lentil Cove using the wooden leg then forming a new pair to
return to the port and so on, until all four could reach the boat’s point of
arrival. The order is of utmost importance because some are faster than
others.Henry Wobblins can reach the port in half a day.
Diego el Cojuelo can reach the port in a day.
Jean David L’Eclope can reach the port in 2.5 days.
Joao de Passoromo can reach the port in 5 days.
Questions and answers: These are just one possible solution.
1. Which 2 pirates were the first to go to the port of call? Henry Wobblins and Diego
el Cojuelo. Took them one day.2. Which of ’em returned to Lentil Cove with the wooden leg? Henry returned.
Total – a day and half.3. Who is the next pair to go to the part? Joao
de Passoromo and Jean L’Eclope.
That is a total of 6.5 days.4. Diego el Cojuelo returned. Total of 7.5 days.
Henry and Diego took 1 day to get back to port. Total is 8.5 days.
Certificate:
Go back to
Malantuñez stateroom. Open the cabinet above the
shackles. Take a certificate.Give the certificate to Husky Dog. Wait… Yer
certificate properly filled in, spitted and sealed. Now you’re a certifiable pirate with the
certificate to prove it.Grog – Click the empty jug on Husky Hound and
get a bottle of grog.Treasure hold – Now that you are a
certificated low moral pirate, take
booty. Click on the treasure and get a voucher for huge treasure
issued by the 3D art department.Go down and take the funnel that is left on
the floor. Go
back to Malantuñez state room and then outside.Get more sunflower seeds:
Look at the hanging empty jug and realize that you
cannot reach it. Use the board on the right window and automatically hammer it
on using the nails and the paperweight.Click the bottle of grog on the hanging empty jug. With
the funnel on the small mouth of the jug, Brushian automatically fills it up.Hey Abracadabra! The bottle refilled itself
magically. The pirates start snacking on sunflower seeds.Look at the pile of seeds and see if there’s any
with the meat. If none – go back inside and then out again. Search the pile and
get 5 sunflower seeds.Globe directions:
Go back inside and give the parrot the seeds.
Left from Spain to the east, set sail…
Empire of the Rising Sun…
Then traveled west to Newfoundland.
Then veered east to entry of Hell in Greek isles…
And after getting Hidden Beacon of Avernus emerged
in hindquarters of the world. The End.Go to and spin the globe. Follow the directions
above. Click on the left or right of the globe to turn it. At each correct
point, a click is heard.Starting from Spain turn the globe around back to
Spain to hear a click.Then turn right-east to Japan (click).
Turn left-west to Newfoundland (click).
Turn right-east to Greece. The bottom of the globe
opens.Brushian takes the stone – the
not hidden anymore Beacon of Avernus.It’s getting hot! Brushian tosses it in the Ming vase
spittoon.Malantuñez comes in and chops Brushian’s head off.
Brushian, Brushian, Brian!
Watch!
No party yet. This is just the beginning.
Kordsmeier, Tarantula, John Doe
You have a new ally on your team now!
Credits.
Mala Island the Morning After: Japanese Straggler,
O’Connor and Otto.
This document may not be
distributed without express written permission of the author and the content
may not be altered in any way.
For Questions or Comments
on this Walkthrough, please write to:MaGtRo
Copyright © 12/2006MaGtRo
View this guide raw, exactly as the archive holds it