Prince of Persia 3D – Introduction
Run to the end of this ledge and turn right to spot a large plateau sticking out of the rocks. Directly ahead is a column on a narrow ledge.
Jump to the right of the column and get the healing potion. Return to the previous ledge and turn left and jump
over to the ledge. Run and jump over the crumbling section to the middle then climb up to the ledge sticking out of the cliff. The camera
will pull back showing three ledges sliding out. Climb to either side ledge and then jump to the middle ledge and climb up into the hole. Jump
to the horizontal bar and swing to the rocks ahead. You will land on the far side of a slope and start sliding down. Start holding the grab
button and you will grip the bar at the bottom of this slide. Swing once more to the next bar then shimmy to the right and line-up with the
next ledge. When you are ready, swing and launch to this ledge.
Follow the curving path around to your first encounter with a Grease Monkey monster. Choose arrows or your staff and when he is dead you can
take his healing potion. Continue to the structure ahead and climb up and turn left to face the gap in the floor.
Jump the gap and move to the left and jump onto the floating rock. Ride it to the top and turn to face the opening in the wall. Jump to the
opening and enter. As you run down this next area several stone slabs will slide out and try to crush you. Swing across the horizontal bar
and get to the far end and jump across the gap to the safety of the next floating platform. Move forward and climb up to the next section on
the right and continue around this L-shaped ledge.
Jump to the top of the structure and start running down the new ledge. More slabs will slide out but you can get past them easily as long as
you don’t stop running. Jump to the next piece of floating wall and follow it around to the ledge with the hole. Jump into the hole and watch
for more crushing slabs in this room. Head to the far side and drop through the hole then turn to spot some ledges you can jump to. Make your
way across these ledges and kill another flying demon. Continue to the right and jump to the building and head down the stairs.
You are now at the beginning of a new series of platforms that lead to a large stone wall. Start jumping and you will come to a switch that
will raise a large section revealing an opening in the wall. Continue across to this opening and get the super-jump potion.
Jump across the first two platforms then turn left and jump to the large plateau. If you are in need of health at this point you can take a
side-trip to the gazebo on the left and climb the spiral steps. Jump the gaps and make your way to the roof where a healing potion
rests on a narrow ledge.
Your ultimate destination is the platforms on the right. Jump to them and continue to the next plateau and continue up to the ledge with the
demon. Kill the demon then turn right and jump out to the narrow wall and get the arrows. Return to the L-shaped section of this wall and use
the short side of the L to get a running start to jump back to the upper plateau. Start making your way up the long series of floating rocks
until you are on the final stone that takes you up between two possible destinations. One path leads to a large statue and the other path leads
to a strange device with lightning. Go towards the lightning for now.
Head up the short ramp and onto the stone bridge. The short towers on either side conceal blade traps. Drop off either side of the bridge and
shimmy past the towers then pull back up and continue to the rotating disc ahead. There are three pools around this area and each pool will
teleport you to another. This is the only way to get past the deadly lightning. Locate the pool with the stairs leading down and jump in.
Swim to the bottom to teleport to the next pool. Surface then swim down to teleport once again. You should now be in a pool just to the left
of a new path leading to a small temple-like structure with a purple gem. If not then keep using the pools to teleport until you can exit
and access this bridge without being blocked by lightning.
Jump to the rotating disc then quickly jump to the stone bridge and follow it out to the temple. Get the gem then climb up to another bridge
with blades in the towers. Hang off the side and shimmy past then pull up and jump into the pool on the right. Teleport back to the pool to
the left of the entrance bridge to this area. Jump to the disc and back to the bridge. Repeat the shimmy move to get past the blade trap
then head toward the statue of the face.
Head down the short ramp and jump to the stone that is going up and down then jump across to the opposite ledge and go up the short ramp to the
hands. As you approach, one hand will open. Climb up the right side of the statue and insert the purple gem into the empty eye socket then
drop to the ground and the other hand will open freeing Iamasu. This winged creature will fly away for now. Enter the area where he was being
held prisoner and claim the sword. You can use it right away on the winged demon who attacks.
Slide down the ramp to the next tricky area. This area is only confusing because of the misleading camera angle. If you start panning the
camera around you will see what looks like a solid floor is made up of various ledges at different heights. Plan your path then move forward
and jump to the two platforms diagonally to your left. Continue across the ledges until you reach the ledge with the Grease Monkey. You can
either fight him or just run past into the doorway – he won’t pursue you.
Ride the lift to the top then walk to the edge and jump up to the hole above and pull up. Climb the rope that you find here and jump off at the
top then pull up to the ledge the rope was attached to. Climb up the short stone wall ahead then climb the rope beyond that to the entrance
above. Jump off the rope and enter the round room. Move around to the left and find the box. Slide it against the wall with the keyhole in
it then continue around to the floor switch and step on it. A machine will lower from the ceiling and in a burst of magic you are reduced in
size to only a few inches tall.
Move around to the string to your left which now serves as a rope. Climb up and jump off to the ledge behind you then turn left and pull up to
the wooden arm. Walk out to the spinning disc and run clockwise against the spinning. Avoid the flame jets and jump to the railing along the
wall. Walk along this railing and jump to the box you previous slid against the wall. Enter the keyhole and out the other side just as you
get big again.

This next section has more ledges for you to jump to. Continue forward until you can go no further then head to the right making your way to
the Shrine on the right. Climb up to the Shrine and enchant one of your arrows. Quickly climb up to the next higher ledge and aim to your left
at the guard on the high ledge. Shoot him with the Arrow of Possession and you will become the guard. Move the stone slab on this ledge and
push it below. By now you are probably the Prince again. Jump down to this ledge and push the block over so you can use it to get up to the
narrow ledge with the green potion. Drink the endurance potion to increase your total possible health.
Now return to the ledge with the Shrine and continue up. Don’t bother enchanting another arrow – it will wear off long before you get to use it.
Keep going until you can enter the door high above. As you enter the arena through one of the archways, three doors will open and three demons
will attack. Even with your increased stamina you are no match for these odds. Just run straight ahead toward the platform where Iamasu just
landing. Mount the magical beast and he will take you away from the demons and this demonic level.
Run past Iamasu and jump across the gap to the ledge. If you miss you won’t fall far and can still pull up on the other side. Continue around
to the next ledge and keep climbing up until you reach the top then turn right to face the ledge by the waterfall which looks further than it
really is. Since you are higher you can easily make this jump. Once you land, turn to face the falls and jump through the water to the cave
inside and get the stash of five arrows. Exit the cave and start jump to the ledges on the right. Start climbing the vertical rock steps until
you reach the top.
From this plateau you should spot a rope stretched across the gap near the falls. Jump to the rope and shimmy across until you are facing the
ledge on the other side then swing and launch toward this ledge. Climb up some more ledges and head left into the area with the block of ice.
This is actually a frozen Monk and you need to thaw him out to unlock the nearby door. Continue past the monk and up the next series of steep
steps. You will reach a large stone temple entrance at the top. Continue past this door along the narrow ledge and find the cave in the cliff.
Climb into the cave and get the chunk of meat the rats are eating then return to the temple door.
Enter and head into the room with three doors and a pressure plate. Drop the meat on the pressure plate and the rats will come over to eat.
Their weight will trip the switch and you can enter either the right door or the one ahead of you. The left door is you exit out of here in a
few moments. Follow either of the passage to the corner room where a large demon will attack. Kill the demon then go step on the switch by the
skull. This will reveal a magical flame which you can use to enchant one of your arrows. This only lasts a very short time so quickly run back
to the previous room and down the other passage.
Carefully run out of the opening at a sharp angle to the right – if you have too much forward momentum you will fall to your death. Quickly run
down the steps and whip out your bow and shoot the magical arrow at the frozen Monk. If you are quick enough the arrow will still be hot and the
Monk will melt and unlock the door for you. Continue through to the next area.
Walk onto the plateau and onto the patch of snow. You will fall through to a cave below. Exit the cave and climb down the ledges until you
reach the bottom. Turn around and spot a cave with a healing potion inside. Once you get the potion exit the cave
and locate the ledge directly above the entrance. Continue climbing several ledges until you reach the top ledge with the pool of water. Look
to the right and spot a very narrow ledge. You can jump and grab onto this ledge and shimmy to the right until you can pull up on the larger
ledge.
Continue around the cliff and continue climbing up until you reach the ledge with the broken rope bridge above. Turn and run to the hanging rope
and swing to the opposite ledge then head around the narrow ledge to the left. Watch out for the collapsing sections as you make your way to
the top of the next large plateau. Grab the arrows on the final step before reaching the top then left toward the next rock formation. Avoid
the patches of snow on this plateau as they all conceal bottomless pits.
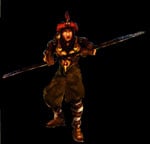
Jump the chasm and start climbing more ledges until you reach the top level with the guardhouse and a giant WereRat. These guys are so short
it is hard to hit them with the sword – I recommend the staff weapon to finish them off quickly. When the creature is dead continue to the door
and step on the pressure switch partially concealed in the snow drift to the right of the door. Enter and pass through to the other side where
another guard will attack. Kill him then continue forward and turn left to find an entrance.
Watch out for the collapsing floor in the middle of this room. A potion his behind a gate to the right but you need to drop through the hole
to the floor below. Another WereRat attacks but you know how to defeat them now. Head away from the rope down the narrow passage to find a
green endurance potion. After you drink it, return to the rope and climb up to the area above. You are now on the
other side of that previous gate so you can drink the invisibility potion then quickly climb up the raised section
and pull up to the room above. An assassin guard the hole in the floor but if you walk you can sneak by him and drop through the hole to the
other side of the gate and exit this building.
Back outside, continue forward to the long patch of unstable snow with the rope stretched across. Watch out for the sniper in the top of the
guard tower you passed through when you entered. You can kill him if you want but I recommend saving your arrows. You can cross this next
hazardous area one of two ways. You can make a mad dash across the snow-bridge; as long as you don’t stumble or stop you will make it. You
can also drop off the edge here to the ledge below and start making your way across a long series of ledges and jumps to get to the other side.
There is no reason to take this obviously harder route unless you collapsed the snow bridge and are still on this side.
When you reach the other side you will be in a tiled area and a demon will be attacking from the passage. Kill him and take his
healing potion then continue down the passage to the underground lake. Dive in and swim to the left and continue
deeper into the cavern and exit the water on the shore to the right. Walk past the ramp and over to the switch which opens the door. Enter the
room and flip another switch to shut the gate and stop the water from pouring into this cavern. Now exit and return to the ramp you just passed
and go up and turn left. Pass the first turn to the left and continue to the back wall and jump the gap where the water gate is. On the other
side, turn left and follow the path around to the right and into the next area.
Follow the tunnel into the room with the large skull and a pair of switches on opposite walls. Press both switches and the skull will rise and
release a demon which you must defeat. When he is dead you can press both of the switches again and the skull will rise again and you can enter
and get the feather-fall potion. Press the switch inside here to open the gate behind you. Return to bridge
that extends out over the water and jump off to the right and swim to the stone wall with the three openings. Climb to the top of the wall
and walk to the left end. Face the ledge beyond and jump.
Your feather fall ability will seem to make you jump in slow motion. This is great for dropping or jumping further than you normally could have
before. Start climbing the next series of ledges until you reach the top. An archer is around the corner high on a ledge. You can try to
snipe him from here but I recommend just charging down the path and jumping to his ledge. Hang from the ledge until just after he fires an
arrow then quickly pull up and charge with your sword. You should be able to kill him before he can reload his bow or switch to another weapon.
Continue up the next series of ledges to the raging underwater river. Jump in and press the grab button immediately. You will start grabbing
onto the rocks in the river which will slow your trip down the river. When you finally go flying out over the falls make sure you are grabbing
just in case you overshoot the rope bridge. You will grab the railing and can pull up. Standing on the bridge facing the falls, turn and go
right. Continue along the ledge and jump the gap to the next ledge.
A rope is stretched across the gap and you must jump to it and shimmy across. The trick is that with your new feather-fall ability you must
stand much further back than normal so your new increased arc puts you on the rope and not over it. Take about 4 steps back and jump at an
angle toward the rope and grab. Shimmy to the other side and land on the ledge then jump to the rope on the right and swing to the other side.
Jump up to the overhanging ledge on the left then jump to the ledge on the right.
Now comes a very tricky climbing and shimmy section. You need to make your way up the next series of ledges but due to the camera angle you
often cannot see these narrow ledges. Try shifting your camera view to a higher angle and you should start spotting the narrow ledges you can
use to shimmy to wider ledges you can stand on. As you near the final ledge you will come to a section where you will be going to the left
and cannot shimmy any further or pull up. At this point you need to let go of the ledge and immediately grab again to catch the ledge below.
This technique will be use several more times in the upcoming levels so I will refer to it as the drop/grab move.
After you have climbed your way to the top you can head down the passage to the other side to a ledge overlooking a massive lake. Take the
sloped ledge up to the right and climb to the plateau above with the pair of guardhouses. Head to the first door and step on the pressure plate
to open the door. Draw your sword and sidestep into the doorway and start swinging. You should get the advantage of surprise and get several
free hits on the assassin inside. When he is dead you can continue to the second guardhouse and repeat the same procedure. When he is dead
you can flip the switch on the right wall to lower the drawbridge and enter the temple.
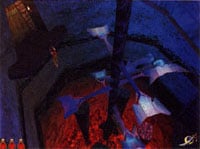
A channel of lava blocks your progress and a female assassin waits for you on the opposite side. Jump the lava and kill her quickly. Your
destination is to the right through the Jaws of Death trap but you must first head left and do a few things. Go to the end of the room and
locate the button in the floor. Stepping on the button opens the gate back through the Jaws of Death but only for a short time. You must find
something to keep the button down.
Jump to the ledge above the button and kill the guard waiting for you. Move forward and climb up through the hole in the ceiling and climb up
to the next passage. At the far end is a box you can push over the edge which will land on the button and permanently open the gate. Now you
can retrace your steps back to the floor and head to the other side of the room. Time your dash through the Jaws of Death and enter the next area.
Turn left and go through the now-open gate and cross the bridge. When you are halfway out, turn and go to the switch on the right wall and
flip it to get some ledges to start moving. Return to the bridge and turn right to continue to the other side and flip the switch on the right
side of the gate to open it. Move out onto the ledge and start jumping from platform to platform. You will want to jump quite early (almost a
full platform-width) to land on each successive platform. When you reach the opposite ledge, go through the door and enter the next hallway.
Continue down the hall through another Jaws of Death trap then turn left into the next room. The door will shut behind you and a guard will
attack. Kill the guard then exit down the passage to the right. The floor will collapse and send you falling into the next level…
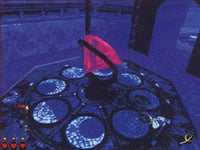
SPLASH! Exit the pool and dry yourself off then head up the stairs. Enter the room and note the chunks of ceiling on the floor. Climb up
these pieces then jump the huge hole in the floor to the right and continue through the door. Turn right and follow the passage around to the
door on the left and enter. Kill the assassin guard inside then climb onto the block then up through the ceiling. Turn left and jump across
the huge chasm to the opposite side. Hang from the edge and drop to the ledge below and pull up to the larger ledge.
Head right along the ledge and through the cave into the next area. Drink the healing potion then turn left and
walk out to the next area. Jump across this new chasm to the ledge on the other side. Now start climbing up from ledge to ledge until you
reach the top. Now jump across to the far ledge and go up through the hole into the room. Go around the right side of the raised portion and
either go around or jump over the hole. Continue around and climb up to the raised section.
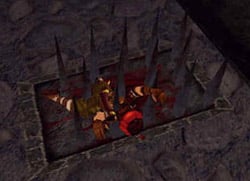
Walk around to the center of the raised section and spot the opening above. Carefully move to the edge of the spiked area and jump to pull
up to the area above. Now you are in a large cave with an exit along one of the walls. Go through this exit to enter the temple. Now take a
left and climb onto another piece of ceiling and jump over the hole in the floor. Continue down the hall until you reach the large circular
room.
Enter and kill the assassin guard then exit through the only other door in this room. There is a healing potion
here and a long pit to the right. You need to jump to the narrow ledge and shimmy across the pit while a sniper shoots arrows at you from the
opposite side. Pull up and kill him before he can switch to a close-range weapon. Continue past the dead guard into the next area and step
on the floor switch to activate a large tower in the center of this room.
Enter the door on the right side of this large room and continue to another chunk of ceiling. Climb on and jump the hole on the other side and
continue down the hall to a room with three sets of spiked floor traps. Stay to the right and continue past the traps to the next room. In
here is a gate with a potion behind it and a pit bordered on two sides with spikes. Face the pit with your back to the gate and approach the
LEFT ledge. Turn sideways and sidestep between the spikes and the pit then lower yourself down and hang from the edge. Drop and grab onto the
horizontal rope below. You should now be facing a vertical rope so swing and launch to this rope then climb to the top.
Jump off the rope so the assassin is on the other side of the pit. This gives you time to decide whether you want to fight or run. Around the
corner to the left is a healing potion which you can get before or after the battle. When you are ready, climb the
rocks to the right of the pit. Keep going up to the ledge and flip the switch to lower the giant telescope in another room.
Turn and find the hole in the floor behind you and use it to return to the ground floor (back by the pit flanked with the spikes). When you
drop you need to grab again to grip the edge and pull up then sidestep past the spikes. Exit this room through the door on the right then take
a left to enter the room with the telescope. Climb onto the telescope and run up the top and jump to the high ledge beyond the high end. Turn
right and go through the door and continue to the room with the rope hanging in the middle.
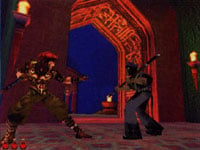
This is a very tricky section. An archer on the opposite ledge will be shooting at you as you make your way across this room. Run and jump to
the rope and at the far end of your swing release and either land on or grab the ledge above the ledge with the archer. If you miss this ledge
you will either grip the spiked ledge below or hit the floor and die – either way, you will want to restore and try the jump and swing again.
When you are on the narrow ledge move to either side and do a sideways-jump to either narrow ledge on either side of this one. Grab onto the
ledge and hang, then drop and hang onto the lower ledge (without spikes) and pull up. Get behind the column and wait for the archer to fire then
rush him while he is reloading and kill him with your sword.
Enter the door behind the archer and follow the hall to the left. Enter the room with the pair of ledges. Ignore the lower ledge as it is
trapped with a deadly slicing blade in the wall. Continue to the next room and find the box that you can push back into the previous room and
place under the higher ledge. Use the box as a step to reach this ledge and climb up. Enter the next hall and kill the assassin. Follow the
passage to the switch and flip it to open the roof above the giant lens and flood the area with moonlight.
Return to where you just killed the archer and take either side ledge to reach the floor below. Run up the far stairs being careful not to get
stuck with the spike trap in the center of this room. Up the stairs, turn right and go through the door and return to the room with the three
spike traps in the floor. Go to the end of this room and turn right and down the hall from before. Jump the hole and climb the chunk of
ceiling and you will be back in the large room with the tower that you activated earlier.
Cross this room and go up the curving stairs and flip the switch on the upper ledge to rotate the lens. The moon beam will turn and open a new
set of door. Go down the stairs and into this new passage. It makes a sharp right reversing turn at the end and you are face-to-face with a
big demon. You can kill him now or run past him into the next room – he won’t follow. Turn and climb up the ledge on the left and find the
switch that activates the lens in this room. The moonbeam will be redirected and a new passage will open.
Drop down and go through this door and get ready for a deadly trap. A large pit ahead can only be crossed by doing a running jump to the rope
and swinging across. The only problem is that a row of spikes are on this side of the pit. You have to time your run and jump so that you
clear the spikes but still grab onto the rope at the end of your arc. It may take a few tries so save your game. When you do grab onto the
rope you need to make sure to release at the end of your first swing. If you swing back to this side you will get stuck on the spikes. Release
and grab onto the ledge on the opposite side. Climb up at the far left where there are no spikes and continue.
Go through the door into the courtyard and run through the archway where you will find a switch you can flip. Return to the center of the
courtyard and grab the healing potion located to the right. Now head the other direction through the door where a
female assassin is waiting for you. Kill her and continue to the large chasm with a pair of ropes hanging over it. A row of spikes are right
in front of you. Carefully walk forward then jump up to the bar across the door. Swing out to the first rope and then swing to the second rope.
You must release and grab the second rope on your first swing or you will swing back onto the spikes in the door. Once you are on the second
rope you can swing back and forth and increase your arc until you are ready to launch to the dark rope. Climb this rope to the top and jump off.
Deal with the assassin who will try to ambush you as you arrive.
Continue through this room and around the corner where another harder assassin is waiting. Kill him then continue through the archway and get
the healing potion. Turn left and enter the next room. The ledge splits with the left leading to a closed gate.
Go right and hang off the edge and drop and grab the ledge just below. Pull up and flip the switch to open a new door. Go through this new
door and fight the assassin with the double-blades before moving to the moving ledges.
Jump to the first ledge and grab if necessary. Jump to the second ledge and turn left and jump into the doorway in the left wall. Continue
along this path until you reach the ledge that splits in two directions. Go left and flip the switch to raise a new lens tower. Now you need
to return to the very first tower room with the open ceiling. The easiest route is to return to the split in this ledge and take the other
path to the hole in the ceiling. Climb up and follow the path to the gate which will open as you approach. This is the same closed gate from
earlier where the path split.
Drop down to the room below and head through the open door and follow the moonbeam through the hall. This is the same hall with the demon from
earlier. The passage does the reverse turn to the left this time and takes you back to the main room. Head up the curving stairs and flip the
switch again to rotate the lens to its original position. Head through the door that opens after you flip the switch and follow it around to the
next trapped hall.
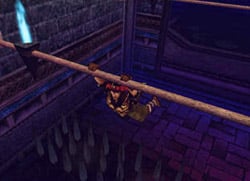
This hall has two rows of spikes so the only way to cross is to use the horizontal bar above the hall. Jump up and grab the first bar and
swing to each of the bars down the hall until you reach the other side. Launch into the room and land on the floor then turn right and find the
rope that leads up through a hole above. Climb up to this ledge and return to the door next to the switch from earlier. The door is now open
with the moon beam hitting it so turn right and enter.
Follow the passage and stairs leading to the next area. There are four square symbols (two on the floor and two on the wall) and each symbol
has a Roman numeral. You either need to memorize the symbols or make a crude sketch so you can get past the next puzzle. I did this puzzle
three times and the pattern was never the same.
When you reach the next hall there will be a large checkerboard section of floor made up of various symbols. You need to cross this floor by
jumping to each symbol in the proper order (1,2,3,4 or in this case I, II, III, IV). This means you will often have to reverse direction just
to land on a non-lethal square. If you step on the wrong symbol it is GAME OVER, so make sure you save before starting this puzzle. When you
step on the forth symbol in the sequence you will start over with the first symbol (usually the brown square). To get across this room you
will repeat the 4-square pattern three times, so you will be stepping on twelve squares to get across this area.
Head through the double doors on the other side to confront Rugnor one final time…

What treachery is this? Rugnor has tied the Princess to a giant cog on some diabolical machine. She is slowly turning toward another cog
which will certainly crush her and any chance of a future for your marriage. Not to put any pressure on you, but you have about 150 seconds
to defeat Rugnor in the final battle. To make matters worse – you can QuickSave your game but if you restore you will start at the beginning
of the level – even though everything else will be the same.
Run down the catwalk and up the stairs. Jump to the ledge and start the first battle with Rugnor. When he take enough damage he will back off
and drink a potion to heal himself and then teleport to a ledge high above. You must quickly turn to the left and jump to the chain. Climb up
and the camera will pull out for an exciting view of your climb with the helpless Princess in the background. Jump back off the rope to the ledge
and walk out onto the beam and turn left. Jump and grab the first ledge and pull up. Then pull up to the second ledge where Rugnor waits for
the final battle. A Cinematic will cut in somewhere around this point showing the Princess nearing her doom. You have about 1 minute left.
Whip out your sword one final time and defeat Rugnor once and for all. His death will ironically save the Princess and you can sit back and
enjoy the closing movie.
CONGRATULATIONS!! You have saved the Princess and won the game. Thanks for playing and for using Sinjin’s Guide to Save the Princess.
To start the game at a specific level do the following:
– Create a copy of the Desktop Icon/Shortcut you use to start the game.
– Modify the Target Properties of this shortcut and append to the C:Pop3dPOP3D.exe one of these lines:

-L “geometryroomsprisonfix”
-L “geometryroomsivorytwr”
-L “geometryroomscistern”
-L “geometryroomspalace2”
-L “geometryroomspalace3”
-L “geometryroomspalace4”
-L “geometryroomsroof1”
-L “geometryroomscityanddocks”
-L “geometryroomsdirig1a”
-L “geometryroomsdirig1b”
-L “geometryroomsdirig2”
-L “geometryroomsdirigfinale”
-L “geometryroomsruins”
-L “geometryroomscliffs”
-L “geometryroomssolar1”
-L “geometryroomsmoontemple”
-L “geometryroomsfinale”
Cut and paste these codes (or copy them) exactly as shown and make sure there is a space between the EXE and the -L.
These are more tips and strategies than cheats, but I did find these things out while playing the game:
-
– You can run past almost all enemies. They will not pursue you past their assigned area.
– Fighting in a doorway seems to give you a big advantage. Don’t know why, but it does.
– Get in their face – rush the enemy and stay right up against them while swinging.
– Snipe your enemies with arrows whenever possible. Especially other archers.
– Press the grab button when running over “uncertain terrain”, and you will grab on if it crumbles.

View this guide raw, exactly as the archive holds it