Prince of Persia 3D Walkthrough by Mark "Sinjin" Smith
- NEW Version 1.2 includes updates to Prison Level and Cheat Codes.
– Version 1.1 includes updates to the City & Docks level.
– Feel free to LINK to this page.
– Please DO NOT copy this walkthrough to any other site.
– Please do not email me for specific hints. Everything you need to know is here.
Welcome to the Prince of Persia 3D online walkthrough where I will hopefully guide you in saving the Princess once again.
It seems that the Prince (who still doesn’t have a name after 3 adventures) has lost his Princess (also nameless) and has
gotten himself thrown in the dungeon.

This guide will walk you through all the detailed levels of this amazing adventure as you escape the dungeon and pursue the
Princess and her captors across move than a dozen exciting locations in 12th Century Persia. I’ll provide you with all the
locations of weapons, potions, and other items necessary in completing your quest as well as various strategies for defeating
some of the tougher bad guys you will encounter.
Your combat techniques will be critical to your success in this adventure. You will need to master several weapons and various
styles of combat for each. Evasive tactics, counter attacks, and block and parry moves are also critical to winning many of the
battles. Practice these moves early in the game so you will be ready when you really need them.
Jumping, and grabbing onto ledges is another tactic that you need to master right away to survive even the first levels. Always
examine your surroundings for clues to deadly traps. Bloodstains are usually a sign of something sinister nearby; either a
guard or concealed trap just waiting to be sprung. Examine walls for cracks or unusually colored blocks indicating a moveable
section or block in the wall. These hidden passages often lead to weapons or potions.
Try to stay at full health at all times. This will make it easier for you to survive encounters with the guards and also the
occasional poisoned potion flask. Poison is almost never fatal unless you are already very weak. Use other potions such as
Invisibility, to sneak past guards and avoid combat situations. You aren’t being scored on how many guards you kill, so sneaking
and stealth are always preferred over reckless and unnecessary combat.
SAVE OFTEN! There is no limit to your saved games. Your game is automatically saved at the beginning of each new level, but you
will also want to save after a difficult combat encounter or after getting past a difficult trap or series of jumps. Saving your
game often will lessen your frustration of having to repeat large portions of the game and increase your enjoyment of the adventure.
This guide has been tested with the PC version of the game, but it should also work for the Playstation version as well. If you
find any discrepancies between the two versions, please email me and let me know.
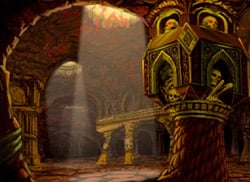
You begin your adventure locked in a dungeon cell with no weapons. Turn and locate the off-color block and push it through to
the other side. That was almost too easy! Follow the passage to the right until you reach the corridor with a gate at one end
and an opening on the left. Enter the room and talk to the prisoners for some less-than-helpful clues then pull up to the ledge
above the prisoner on the right (as you enter). Stand under the hole and jump up and pull yourself into the next room. A
cinematic shows a guard discovering that you have escaped.
Take the only exit from this room around and past the prisoner sitting on the ground. Head to the right and into the next room
with a water trough above that feeds the showers in this room. A floor switch at the back of this room opens the wooden gates
above and starts the water flowing. Move over to the trough next to the door that just opened and jump and pull up to the trough
then enter through the gate opening.
Jump in the water and start swimming. Exit to the shore on the right and climb out. Head to the left and climb up the short
ledge. Run across the bridge and jump at the last minute to make it to the other side. If you fall in you will have to swim
back and try again. This time the bridge won’t be there so you will have to run and grab and pull up on the opposite edge. Go
to the series of ledges to the left and climb up until you can enter the passage at the top.
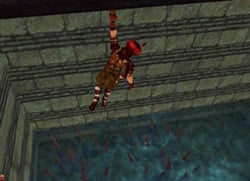
Continue down this passage until you reach the watery pit with the spikes below. Do a running jump over this pit and grab at the last
minute so you can grip the opposite edge and pull up. Keep going until you arrive at the wall then crouch down and crawl through
the opening. Talk to the prisoner in the next room who gives you some useful information on the upcoming area and the guards.
Enter the next hall and turn right and go to the corner where you can spot a guard walking back and forth. Wait until he is
walking away from you then jump to the nearest beam above and pull up. Jump to the middle beam and look right to spot an
Invisibility Potion. Drink it then quick drop to the floor and proceed to the end of the hall and
trigger the floor plate which opens the gate further ahead.
While you are still invisible, quickly run past the first guard and back down the hall and around the corner. A guard will be
coming out of the door ahead but you can run right by him. Continue down to the next T-intersection and head right jumping over
the spikes and through the door. Continue slowly through this next passage between the pair of spike traps in the first part
of the hall and to either side of the traps around the corner. In the next area, climb to the top of the wooden roof and face
the opening in the wall and jump through.
Head to the door on the right and follow the passage past the sleeping guard to the stairs leading up. At the top, continue
left then right until you reach the pair of doors on either wall. The door on the right just has a worker who tells you to get
a weapon. Ignore him and this room and enter the door on the left and. Head to the left wall and move the crate to reveal a
concealed cave with a Healing Potion. You may want to save this for your return trip or drink it now
if you need it. Crouch down to get in and drink the potion then return to the hall and continue to the left. Go up the steps
and turn the crank to activate the winch which raises a box to uncover several rats.
Drop to the floor and follow the tracks leading into the passage where you will find a lever next to the torch on the right.
Flip the lever to open the door to the left and enter. Walk out onto the wooden plank then jump and pull up to the platform above.
Do a running jump to the opposite ledge and cling to the edge and pull up. Do another running jump to the following platform.
At the end of the corridor jump diagonally to the right platform and pull up. If you fall you will take some damage but a
Healing Potion is behind one of the boxes. Climb back out by the winch and try again.
The gray room ahead has a guard on duty. Do a running leap into the doorway on the left side of this room and run to the
stairs on the left. At the top of the steps you will need to crouch under the blade trap then stand and head up the stairs
on the right. At the top, turn right and go to the wall with the shower and climb the ledge.
Head to the right over by the brick wall where you will find a box you can move so that it is lined up with the hole in the
wall. Now move to the side and push the box into the hole and watch the guard get crushed below. Drop down and retrieve the
guard’s sword. You now have a weapon and won’t have to sneak around as much. Head over to the ledge opposite of where the
crate fell and climb up. Return to the opposite ledge in the corner then return through the hallway by jumping to each of the
platforms.
Jump down in the next room and fight the guard below then exit through the open passage and follow more tracks leading to a crate
and a winch. Climb the ledge and activate the winch to raise the box and reveal a green Endurance Potion.
This is the first of several rare potions that will increase your overall stamina. Follow more tracks to the room with the rats and
jump up to the ledge above. Kill the new guard in this passage and drink the Healing Potion he leaves
behind. Grab that potion in the room to the right if you didn’t get it the first time through this area. Continue to the end of this
hall then head down the stairs to the left. Approach the sleeping guard who will wake up and engage you in combat. When he is dead
you can pull the lever on the wall to open the door in the next room past the blade trap.
Take the hall to the right that leads out and back to the beginning of this area. To the left is the hole you jumped through and
to the right is the door you just opened. Directly ahead is a guard you can either fight or run past when his back is turned.
Go into the room on the right with the red glowing floor and turn right to face the sculpture of Assan’s head. Watch the
cinematic showing the guard activating the sculpture and opening the gate. Go over to the table and grab the box then return to
the previous room and head left. Crawl under the slicing blade trap and enter the Torture Chamber.
Move toward the head-crushing device and put the box on it. Then go and flip the nearby lever to activate the device and smash
the box revealing a bracelet. Go get the bracelet then exit this room by crawling back through the blade trap passage and return
to the room with Assan’s head. Stand in front of the sculpture and activate it to open the gate. Follow the passage beyond and
fight another guard in the next room. When he is dead you can enter the door to the blue area and watch the closing movie. You
have escaped from the prison…
You begin in the blue hall you entered as you left the prison level. Turn right and head up the ramp and through the door. A
cinematic takes over and a sniper at the top of the tower will fire several arrows at you which you barely dodge. You end up flat
against the wall. Turn left and run across the bridge to get out of the sniper’s view and examine the area around the pool. To
the right is a drawbridge, but as you near it the guard raises the bridge. You need to find some way to flip that switch from
way over here – perhaps a bow and arrow…from the sniper above.
Continue around the pool until you spot the wooden bridge with a gap. Jump the gap to land on the bridge and follow it as it
ramps up and through an arch. Head to the right and follow the walkway. Climb up onto the ledge and continue around until you
reach a stone wall. This can be a very deadly trap if you aren’t fast. Stand against the wall with the blades on your right
and jump and cling to the wall (do NOT pull up or you will die in the blade trap on top of the ledge). While you are hanging,
shimmy to the right until you are clear of the blade trap above and then pull up. As soon as you are standing a block will start
moving toward you and try to push you back down onto the blades below. Quickly turn using the quick-reverse command and jump to
the ledge across from you. Grab and pull up to the safety of this ledge.
Move forward and turn left and jump over the blades in the floor. Walk out onto the wooden platform and turn to the left. Walk
to the edge and do a standing jump to the next wooden platform. The walkway T’s to the right ending at a dead end. Continue
forward and walk off the edge to the platform slight below this one. At the end of this short walkway you can jump up to the
higher ledge and continue around until you reach the hole in the left wall. Jump into the hole and continue.
Enter the open door and continue to the hall. It turns to the right and you will notice several suspicious raised stones and even
more suspicious holes in the wall. Yes, this is a dart trap and the stones will trigger the darts. You may either walk
between these stone triggers at 45-degree angles or jump over them. Once you are past this trapped hall you can enter the open
passage to the left.
This room has a pair of blue floor stones which open the next two gates to the right. These gates only stay open for a short
time and you will have to open them in the proper order. Enter the room and step on the stone to open the first gate then
quickly run to the back wall and run over that stone as you arc around and run through the gates. If you don’t make it there is
a stone in between the gates to let you back into this room to try again.
Once you are through both gates you need to get against the left wall and jump across and pull up to the narrow stone ledge.
Be careful as there are two large sections which will crumble and fall away if you touch them. The first section is immediately
to your right and the final section is at the very end. Run across the first section and it will fall out under you. You will
make it to the next stable piece as long as you don’t stop. Stand under the wooden beam and jump and pull up. Walk out to the
wooden ledge and use it to get a running start so you can jump to the window.
Follow the ledge around to the right and turn left into the guardhouse. You will surprise the archer who will stumble and fall
to his death far below. Take his bow (you will not be able to arm it until you find some arrows) and get ready to do a swan dive
into the pool below. While you are up here you may want to get the healing potion to your right
(facing the pool). It is on the narrow circular ledge. Walk out to the end of the right platform and do a standing jump to get
the potion. This is a tricky jump so only go for it if you need the healing.
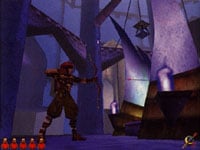
Run off the ledge and fall into the pool – do NOT jump or you will hit the floor on the far side of the pool. There isn’t
anything in the water so climb out and head to where the guard fell to his death. You should find some arrows which you can
add to your arsenal. Now go to the raised drawbridge and ready your bow. Align the targeting sight with the small square trigger
on the winch and fire. The bridge will lower and you can cross. Have your sword ready as soon as you get to the other side. A
guard will ambush you from the right.
When the guard is dead you can turn and go through the next trapped hallway. Make sure to crouch to avoid the slicing blades
that come out of the walls. Head around the corner to the guard towers and the large gate. A cinematic will show a guard
escorting a prisoner into the palace. It also shows what must be done for you to open the gate later. For now, walk across
the large area and into the passage on the far side.
Follow the hall to the small room and look at the ceiling. There are several sets of spikes in the ceiling and there are columns
directly under each of these that will rise up and crush you if you step on them. Sidestep the areas under these spikes and make
your way to the opposite door. Follow the passage until you reach the hall being guarded by the soldier with a staff weapon.
You need to defeat this guard then move on down the passage. A cinematic shows the fallen guard pressing an alarm just as he
dies which causes several pieces of floor to fall away in the next passage.
This next hall isn’t that hard, even with most of the floor missing. Below are several stone ledges which are much safer to use
when crossing this next area. First line up and do a diagonal jump into the first door on the left. Inside are more arrows you
can add to your collection. Exit the door and fall straight down onto the stone ledge. Turn and jump across the gap to the next
ledge. Climb up and into the second left door and get the healing potion in this room. Now drop
back down to the stone ledge and cross over to the opposite door and pull up to continue.
Pull the desk out away from the wall and crouch to crawl through the hole. In the next room the only way out is through the hole
in the corner of the ceiling. It is too high to reach from the floor, so slide the nearby box under the hole and climb onto the
box then jump and pull up to the area above. Go through the door onto the platform then climb to the ledge above. Line up with
the angled portion of the ledge and jump over to the wooden beam then make a running jump to the opposite ledge. Pull up and
continue.
Kill the guard in this next room and take the healing potion he leaves behind. Continue through the
next door and you will be in one of the guard towers. Stand on the pressure plate to complete half of the sequence to open the
gate. Ready your bow and aim through the bars toward the opposite tower. Target the other guard and wait for clear shot and fire.
The guard will fall onto the trigger in his tower when he dies and complete the sequence. The gate will open and you can go out
onto the ledge and start dropping down from ledge to ledge until you can turn left and jump to the bridge. You could also jump
to the floor and take the ramp back up to the bridge if you want. Run through the gate and into the next area where you can step
on the blue floor trigger to lower the drawbridge and exit this level.
As you begin this new level you will go past a well. Climb on the edge of the well and jump to the rope and slide down to the
sewer below (nice to know they drink from the sewer). Ahead of you is a gate so turn around and walk down the underground passage
through the waist-high water. A short dead end passage leads to the right. Follow it to the end and get the stash of arrows then
return to the main sewer pipe. You could go right to the large room with deeper water but nothing is in there. Return to the rope
and prepare to climb out.
After you deal with the surprise attack by the sewer monster you can climb out and jump back to dry land. Getting off the rope can
be tricky – just let go of all action keys and press DOWN twice to jump back off the rope. If you fall you will die. Now move ahead
to the stack of boxes and get the arrows lying here. An archer will shoot at you from the watchtower ahead. Hide behind the boxes
and ready your bow. You will have to step back or to the side to get a clean shot at the sniper. When he is dead you can continue.
Go to the right of the boxes and look out over the water. There is a ledge below with a box but your target is the rope. Do a
running leap to the rope and grab on. You can move with the swing of the rope to increase your arc then let go at the end of the
swing towards the stairs. You should land on the steps and can start climbing up and to the right. You will have to jump, grab,
and pull up across a pair of gaps in the steps to reach the top ledge. Head out to where you killed the archer and get more arrows
and a healing potion.
Continue across to the other side and get in the small elevator to the right and ride it down to the ledge leading out toward
the boat. Jump to the deck of the boat then head to the rear and use the oar to get the boat moving. Get ready to fight when the
assassin drops onto the deck. He is a hard opponent so make sure to block his attacks and counter with your own. When the fight
is over the boat will take you through some large wooden gates into the harbor area at the Palace docks.
Facing the rear of the boat, jump into the water on the right and locate the submerged box floating in the water. Climb onto this
box then jump to the next floating box and climb on. Jump/climb onto the wall and head right to get a healing potion
then check out your surroundings. A moveable box is nearby but it has no use to you. Return back to the wall near the floating
boxes and look out to spot a thick pole sticking out of the water. Jump out and grab and pull up onto this pole then turn and jump
and grab onto the chain. Climb up and spin around so your back is to the ledge then drop off onto the upper ledge. Head to the
other side of this catwalk and flip the switch to start the box moving back and forth across the harbor area.
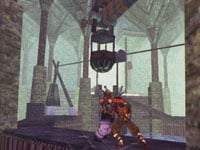
Look up to spot a hanging platform. Go to the other side of the catwalk and drag/push the box under this platform then climb onto
the box and jump onto the platform. From this ledge you can jump out to another hanging platform closer to the moving box. Turn
and face the area where the box is passing beneath you and run off the platform just as the box is going past. Do NOT jump or you
will miss the box. Ride on the box to the right and when it reaches the end jump down to the dock before the box goes back out over
the water.
Several boxes are along this next section of the dock and you can choose to go to either the left or right of them. Each presents
its own challenge. To the right are pressure plates in the floor which trigger darts traps. You can jump over them and avoid the
darts or you can take the left side which is slightly easier. There are two sections of this path that will drop out from under
you. Just start running and jump over the sections as you near them. You should also be holding your grab button just in case you
miss and fall – you will cling to the opposite edge and can still pull up and continue.
Head up the ramp and then up some stairs to right the big guy guarding the doors to the palace. Don’t waste arrows on this guy.
Rush him and attack with your sword. This guy is really tough so make sure to block his attacks and counter with your own. When
he is dead you can step on the pressure switch and open the door to enter the palace.
The palace is very large and complex level and is divided into three main sections. Below are three links to jump to any of these
sections if you need help with a specific area.
Palace Entrance
Palace Interior
Palace Escape

As you approach the series of vertical ramps you must first deal with the guard. When he is dead you can get the yellow potion
and follow the hall back to the T-intersection. Turn left and flip the wall switch to lower the ramp then turn around and head to
the other end of this hall. You can check out the small chamber to the left and view the moat and palace ahead. Enter the darker
passage and flip this switch which raises the gate at the end of the greenish hall. This gate is on a timer so you must quickly
get through the next hall but you will also have to crawl since there are deadly blade traps in the wall. Once through, turn right
and return to the area where you killed the first guard and go up the ramp.
Deal with the large guard waiting for you at the top of this ramp then flip the switch on the left to raise the ramp. Return to the
ramp and walk up the incline to another T-intersection. Both directions are dead ends so jump into the window in the back wall and
move forward. Push the box forward to raise a section of wall allowing you access to the next area.
Move quickly to avoid the deadly arrows of a pair of archers. One is across this large room to the right of the fountain. You must
run toward him and engage him in hand-to-hand combat. He will pull out a staff weapon when you get close. Kill him quickly then
seek cover from the other sniper who is already shooting at you from the upper ledge back where you entered this room. A
healing potion is over by the fountain. Grab it on your way back to the wall where you entered. You
are safe from the sniper above in this area so move the nearby box over so it is lined up with the hole in the wall then shove it
into the hole to lower the wall allowing you access to the other side.
There is a ramp above you and two raised sections to either side. The right side is blocked with a plant so climb onto the left
side and move to the end and climb onto the short box. Pull up to the next ledge and turn and jump onto the ramp. When the guard
on the other side of the bridge sees you he will close the gates and raise the bridge. Climb to the top of the ramp and look at the
windows to the left (as you go up the ramp). A guard is walking back and forth. Run and jump to the windowsill and hang on.
Shimmy to the left until you are under the far left window then pull up when the guard is walking away to the right. Ready your
sword and kill the guard when he comes back and get the healing potion he leaves behind.
You can climb into the window behind you and get a better view of what lies ahead. Your destination for now lies in the other
direction through the door and across a collapsing bridge. Run and jump across the bridge to the opposite side and move into the
next area. A gold alcove on the left had a stash of arrows on the floor. Take them then move into the window and out onto the
ledge. You are now on the ledge above the fountain room and opposite the ledge with the sniper from earlier. He is to your right
and several large tapestries are blocking most of his shots. You can still take damage so you must act quickly.
Turn right and move to the end of your ledge and jump up to the wooden beam with the hanging tapestry. Start swinging back and forth
and launch yourself toward the rope. Grab the rope and swing again until your arc is high enough to carry you to the next ledge.
Cling to the edge of this ledge and shimmy to the left until you are behind the column and out of sight of the archer. Climb onto
the ledge and run around the column and whip out your sword. You should be able to surprise the archer and get behind him for a
devastating back-attack and kill him in two slices. Go to the far end of this ledge and get some arrows before entering the
window back by the fallen archer.
Head down the short call to another window that overlooks the moat and the palace. Jump out to the rope and climb up until you are
above the wooden beam. Jump off the rope and onto the beam and follow it to the roof. Climb up and walk around to the front and
your view will change to look down on the guard on the other side of the raised drawbridge. With the bridge in the “up” position
the end is near – near enough to jump to. Jump the small gap over the moat and slide down the bridge and pull out your sword.
Do not pull out your sword while sliding or you will automatically sheath it when you hit bottom. Kill the guard and investigate
the dark passage to the right. It is a short dead end with a healing potion hidden inside.
Enter the huge circular room and watch the cinematic of the machine rising through the iris in the ceiling. There are three bookcases
in this room. Assuming you entered this room at the 6 o’clock position the bookcases at 9 and 12 o’clock are both fatal traps. You
only need to activate the bookcase on the right (at 3 o’clock) to access the next passage.
Take the short hall to the lift and tide it to the top. Exit down another short hall into a large circular room above the iris you
saw earlier. There is a closed door on the opposite side and a passage higher up and to the right. Some boxes on the left side of
the opposite passage allow you to step up to a higher ledge then jump over to a wooden platform. Back up and get a running start
and jump to the stone ledge at the base of the high passage. Pull up and follow this passage to a pressure plate that opens the
door leading to a stone spiral staircase.
Climb the stairs and kill the guard who charges down the hall. Grab the arrows lying on the floor at the top of the stairs then
head down the passage where the guard came from. Another pressure plate opens the door leading out to a ledge high above the iris
below. A sniper is across this chamber on a higher ledge. Aim up and kill him with your bow. I recommend a magic arrow for a
quick kill. Then flip the nearby switch and quickly get onto the wooden platform. Ride it around and jump off into the narrow
alcove before it reverses and takes you back to the starting ledge.
Climb up to the next higher ledge where a box blocks your path. Back off and cling to the side of this ledge and shimmy left past
the box and pull up on the other side to get the healing potion. Now push the box forward until you
can jump up and grab the top ledge and pull up to the next higher area. Look out and to the right and spot the rope and jump out
to it. Swing across to the next suspended platform and then jump to the hanging chain. Climb up and jump off to the ledge where
the fallen sniper lies.
A door flanked by two large spears is behind the body of the guard. The door won’t open and you can’t get the spears, so head back
to the left of the door and find the area where you can jump up to the next higher ledge. Continue left and climb up again into a
passage concealed behind some grates and find the super-jump potion. Head back the way you came until
you reach the edge of the ledge and jump to the next higher block. With your increased jumping ability you can easily jump
over the door below and onto the opposite ledge. Climb up and continue forward until the ledge ends. Turn and face the interior
of the room.
There are three suspended platforms you will be jumping to. The first is above the ledge with the switch. Jump to this ledge then
turn and face the next ledge leading around in a clockwise pattern. Jump to this ledge which should be directly beneath the wooden
beam attached to the machine above. At this time you can jump straight up and continue or you can choose to make another daring
leap to the next highest ledge across the room with the healing potion on it. If you make this jump
then drink the potion and return to the ledge and jump straight up to grab the beam and pull up. Another
healing potion is inside a dark alcove in the bookcases. Jump up to get that one if you need it then
head to the main deck of this machine and pull the lever.
The machine will rise up through the next iris and you will find yourself in a new chamber. A very large guard with an equally
large tattoo patrols the floor below. Jump down off the machine and fight the guard. Use all your best moves, blocks, and counter
attacks to defeat him. When he is dead you can exit through the corridor and the door at the end.
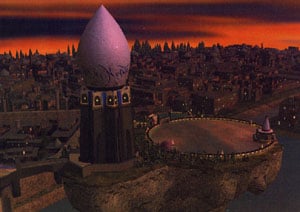
Those of you who played the Prince of Persia 3D Demo will recognize this level. You find yourself on a narrow bridge under
immediate attack from a very nasty guard. Kill him quickly and continue across the bridge into the next building. Pass through the
first small room and into the octagonal beyond. A ledge is directly ahead of you and passages lead out on either side of the ledge.
The left passage leads to a corridor that takes you to the top of a long flight of stairs leading down to a pool of water, a guard, and
a locked gate. You could go there now and kill the guard but you will have to return back to this central room and go to the right to
solve the puzzles necessary in opening that locked gate.
The right passage leads to a room with twin columns in the center. The columns are trapped with swinging blades. The exit opposite from
where you entered is also trapped with a large chopping blade which will slam down as you pass through. This room is part of a larger
puzzle which begins back out in the central room.
Now that you know what is down both of the passages, head toward the ledge in front of you and climb up. Turn right and go into the
next room and you will find a pressure plate in the floor to the left. Directly ahead is a small drop-off to a dark passage that
leads to a gate and also wraps around leading to stairs down to the trap-room from the previous paragraph. The following puzzle must be
completed quickly as the gates that will open are on a timer.
Stand with your back to the pressure plate and back up onto it. When it activates you will hear a gate opening to the left. Run forward
and drop off the ledge – you will be in the room with the twin columns and slicing blade traps. Directly behind you is another pressure
plate. Don’t waste time turning around – just back up onto it and then run forward between the two columns. Stay in the exact middle of
the columns and the blades won’t even come out. Turn left and slowly approach the door. When you get close the giant blade will slam
down. Wait for it to slowly go back up and run through the door before the trap resets. Head up the stairs and turn left to find the
dark passage and the opening in the wall. The gates you just raised were in this doorway and the one on the other side of the deep pit
and they will close in just a moment.
Quickly line-up with the rope and jump to it and swing to the other side and land on the ledge. Climb the rope that is here up to the
ledge above and jump back to this ledge and enter the room, being cautious of the spiked floor traps that spring up in various locations.
To the right is a passage with a guard. Kill him and continue around as the hall angles right leading to another rope. Swing across to
the other side and enter the next passage.
To the left in a small alcove is a healing potion. Use it if you need it or save it for later – you will be
returning this way shortly. The gate ahead of you is locked so turn and go to the left and enter the circular room on the right. The
floor opens and drops you into a pit just as a spiked ceiling slowly starts to descend. You have about ten seconds to locate the
moveable block and push it into the next room creating an escape from the crushing doom behind you.
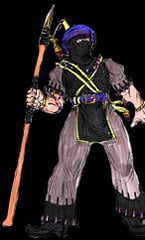
In this new room you will find the passage leading out and to the right. Jump up and grab the edge of the floor above and pull up to
the catwalk-like structure. Once again you have two possible directions to go – for now just go to the left and follow the passage
until you arrive at the ledge overlooking the courtyard. A switch here will unlock the gate I mentioned at the beginning of this section.
After you flip it you can return back to the catwalk and around to the other passage. Stairs lead up to pressure plate which opens the
other locked gate from earlier. If you didn’t drink the potion earlier then you may want to get it now – you won’t be coming back.
Walk out onto the ledge and look down. Far below is the pool of water I mentioned earlier. Run off the ledge and you will fall into the
water below. Climb out of the pool and head past the stairs and into the next room. Kill the hooded assassin guard (if you didn’t do it
earlier) then approach the now-opened gate. Pass through and watch the brief cinematic.

Head down the stairs and drop off the ledge. Another ledge hangs above you. Jump up and grab and pull up then cross to the other side
by going around the pool the belly dancer dove into. Drop off the matching ledge on the other side and head to the left. Some arrows
are stashed on the top of the wall. Grab them then return to the right corner of this large courtyard where there is a guard tower and
a sniper who is already targeting you.
There are two ways to kill this guard; the easy way and the way the designers wanted you to. The easy way is to snipe this guard yourself.
A single Swarm Arrow will usually kill him, or you can use several of your normal arrows. Of course you could always play the game as
intended and run into the door at the base of the tower. Turn right and find the section of moveable wall and push it in. This lowers
a rope in the center of the tower. Circle around until you reach the Monk – don’t kill him – then enter the door on the right and climb
the rope to the top of the tower. The archer will get a few shots at you while you climb up plus I found this rope extremely difficult
to dismount. Falling from this height is instant death. So kill the guard however you want. When he is dead you can return to the Monk.
Continue around the passage and carefully enter the next room. A healing potion baits you from across the
room but a pair of dart traps forces you to be extra cautious in getting it. Enter the door on the left and jump to the rope at a 45
degree angle so you are swinging to the corner of the opposite ledge. You can either land on the ledge or grip the side. Shimmy if
necessary to clear the spikes that fill the central portion of this ledge. Walk to the far side of this ledge and sidestep to the middle
and do a standing jump to the doorway.
Follow the passage around to the left until you reach the closed gate. A pressure plate will open the gate taking you back to the Monk
but first you will want to turn and climb up to the ledge behind you. Prepare to battle a pair of guards. When they are dead you can
continue to the back of this raised area and climb up another ledge. Get the Tri-Point Double Assassin Blades lying on the floor and flip
the lever to shutdown the machine and stop the spinning underwater blades.
As you pass by the Monk he will offer the use of his Shrine (the box-like device in the tower room with the rope). You can use this
Shrine to enchant any single normal arrow you have in your possession. Just approach the Shrine and it will open. Press action to enchant an
arrow. The magical essence of these Shrines is only temporary and varies in power and duration for each Shrine you encounter.
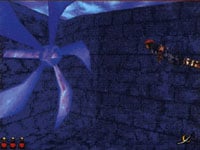
Return to the outer courtyard and climb to the central gazebo. Dive into the pool then take a deep breath and dive down and swim through
the green passage into the next room. You will see the blades you recently stopped from spinning and a pair of passages lead out on
either side of the blades. Take either passage – they both lead to the next room – and quickly surface as your air is almost gone.
This room (the pool room) has three closed gates and one that is open. Go into the next room and you will find three switches; red,
green, and blue. These switches open their matching gates in the pool room. Step on the blue switch to open the gate in the same location
back in the pool room. Return to the pool room and enter the short hall. The torch on the right is unlit and sideways. Activate this
torch to open the hidden door and enter the next area.
View this guide raw, exactly as the archive holds it