Prince of Persia 3D – Introduction
Fight the assassin guard and take his healing potion then climb up the short wall beyond and get the arrows
lying on the floor. Enter the next room with the altar and four torches. Climb onto the altar and pull up to the floor above. Be very
careful as there are pressure plates surrounding this hole that will activate the dart trap. Sidestep as necessary and exit this room.
Head around to the left until you reach a closed gate and a guard on the other side. Turn right and walk out onto the ledge. A pair of
guards are below on a ledge just outside a door. Kill them with your bow – this make take several arrows – then return to the pool room
and enter the other room to step on the red switch.
Enter the pool room to spot another gate opening. Enter the small room and jump up to the left ledge and enter the doorway. Turn the
corner and jump off the ledge to avoid the deadly spikes below. Follow the passage until you exit out onto the ledge where the two
guards you just killed are lying. If you didn’t kill them earlier then kill them now. Head to the right and step on the pressure plate
to raise the bridge and cross over to the next area.
Again, jump up to the left ledge and exit out onto the ledge. Make a tricky jump to the balcony then enter the hallway through the door.
You are now on the other side of that gate from earlier – the side with the guard. Fight him now and take his healing potion
then use the pressure plate to open the gate and return to the room with the hole. Drop down to the altar and return to the pool room.
Before you get there you will spot a new passage available to you on the right. Take this passage and ride the elevator up.
Exit the lift and head to the right where you will find a rope you can use to swing to the other side. Continue into the next room which
is above the room with the three colored switches. Cross around to the other side and push the gold urn over the edge causing it to land
on the blue switch. Now you can jump out to the chain hanging in the middle of this room and climb down to the floor below. Step on the
green switch and return to the pool room to take the final passage.
Follow the passage until you arrive at the top of a massive foyer. Twin stairs lead down on both sides and you can take either one to
lead you to the final encounter with the belly dancer. Don’t be distracted by her graceful moves – she is very deadly and has over twice
the hit points that you do. You will need to use all of your combat experience to defeat her. I recommend the sword. If you try to use
your knives she will tear you up before you can even scratch her. When she is finally dead you can claim her healing potion
then exit through the door. Follow the passage and watch out for the spinning blade trap around the final corner. Run past these blades
as they are lowering back into the floor. Enter the door to exit this level and start the very cool cinematic.
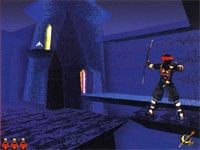
Head across the bridge. Note the green potion on the right – you will be getting it shortly but not from this area. Kill the guard at the far
end and take the healing potion he leaves behind. Ignore the switch on the wall (it closes the gate behind you)
and continue forward and to the left. You can jump over the railing at the top of the stairs or duck under the slicing blade trap on the
banister as you go down them. Run toward the opening at the far end of this passage and the guard will close the gate as you approach. Turn
left and climb out onto the window sill and drop to the outer ledge. Turn right and follow the ledge around the corner and kill the guard who
shut the gate.
Turn left and run across the crumbling ledge – grab on and pull up or jump to clear this gap. Move forward until the arches are on your right.
Go into the first arch and locate the floor plate and step on it to open the shutters in the back wall. Climb through to the ledge on the other
side. To your left is a window high in the wall and to your right is another floor plate to reopen the shutters on your return trip. For now,
move left and jump across to the ledge just below the torch-lit terrace with the assassin guard on top. Climb up to the top and kill this guard
the run and jump to the walkway on the opposite side.
The walkway continue toward a tower then splits in either direction. Head right a few steps then face away from the tower and spot the ledge
below. Jump to this ledge and enter the door. Turn right and continue up the spiral steps and into the next hall. An opening in the left wall
leads out to the deck with the green endurance potion which will increase your total health. Continue up the step
and turn right. Drop from the window back to the ledge with the floor plate and step on it to open the shutters and climb through to where you
started.
Move forward through the arch and jump across the alley to the opposite ledge and pull up. Sidestep to the right and pull up to the upper
ledge. You can go to the far right end of this ledge and drop down to get the healing potion if you need it,
otherwise just jump through the window in front of you and drop to the floor.
Kill the guard in this room and take the arrows he leaves behind. Proceed through the door and down the stairs to the open area outside and
watch the cinematic of Rugnor and your Princess. A sniper on a ledge high above to your left is already shooting at you. Take cover
behind one of the battlements (square stone columns) on the left. Jump and grip the edge of the battlement and wait for the sniper to shoot.
Then while he is reloading, pull up and jump the gap to the ledge ahead of you. If you land on the ledge, quickly run to the right. If you
come up short, then grip the edge and shimmy sideways to the right and pull up. Locate the lit window and jump to the ledge and enter.
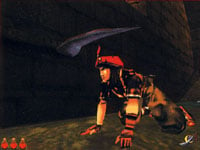
Continue to the rope and jump to it and slide down to the floor below. There are two exits from this room, Through one of the exits you can
see another door – this is the exit you need to take but don’t go through that second door. Turn right and go up the stairs and step on the
switch. Drop to the floor below and go outside. Move the box over to the high ledge and use it as a step to climb up. Follow the ledge
around to the left and enter the door. The hallway beyond is double-trapped with spikes and slicing blades. Jump the spikes then duck and
crawl under the blades.
Continue to the right and step on the switch and avoid the dart trap. Turn right and locate the narrow ledge. Jump and grab then shimmy to
the left until you are under the door then pull up and enter. Walk outside and turn and pull up to the next ledge. Ignore the Green Poison
Potion on this ledge. Turn and do a running leap to the opposite ledge then turn left and head to the rope. Jump to the rope and swing to
the other side then head right to the edge and do a standing jump to the large balcony below. Enter the door and turn left and take the
stairs leading down. Jump over the spikes at the bottom of the stairs then turn right and head out onto the bridge. When you are between
the four columns turn left and walk off the bridge to the area below.
Your now need to jump to the ledge with the guard ahead and to the left. You can either make the jump and kill the guard in hand-to-hand
combat, or snipe him with a few arrows then make the jump when it is all clear. Either way, jump to the ledge and head up the stairs. Enter
the room and step on the floor switch to lower a lantern then exit back to the stairs. Go down halfway and jump over the short wall to land
in front of a gate which will open as you approach. Go inside and fight the old man who attacks from the left. Continue down the hall from
where he attacked and enter the small room. Ride the lift to the top and exit.
Turn left and continue to the doorway on the ledge. Avoid the spikes as you enter the door and take a right. Watch out for the sniper in
this area. Run across the bridge and turn right. When you arrive at the stairs you will notice a pair of beams running above the stairs.
Jump to either of these beams and shimmy over the stairs which are trapped and will open dropping you in a deadly pit otherwise. At the
bottom of the stairs, take the door leading to the next hall with a pair of doors. Both doors lead outside so take either. Jump to the
aqueduct and follow the watery path straight ahead into the doorway. Turn left and run down the ramp and jump to the rope swinging to the
central platform. Fight and kill the assassin and take his healing potion. Jump to the opposite ledge and climb
the short wall and enter the door on the right to end this level.
As soon as this level starts quickly climb onto the box on your right and then jump to the ledge above. You could fight the guards below, but
there are no rewards for your efforts. Make your way along the ledge until you are above the stone wall with the gate in it. Drop down onto
this wall and walk across to the other side then get on the next ledge. Drop off and hang from this ledge and shimmy past the spiked area.
Pull up on the other side and turn to face the next ledge across the street. Watch out for the dark raised sections on the corners of both
of these ledges. They are triggers for deadly dart traps which launch from behind you. To avoid the traps jump across at a slight angle to
the left and the darts will miss you.
Continue forward until you reach a carpeted area with a pair of Life Stealer Arrows. Pick them up then turn and jump across to the lower
slanted roof across the street. Drop off to the street below and continue past the fountain until you spot a large guard up ahead. A small
alley on the left contains several boxes. You can pull out one of these boxes to access a shape-change potion.
When you drink it you will look like the other street guards and can simply walk by anyone you encounter. This is on a timer so get moving.
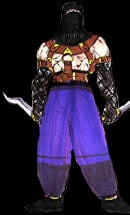
Walk toward the big guard and turn left and head down the street. A pair of guards are at the next intersection. Turn right and go a short
distance then turn right again into a dead end area. Climb the ledge leading to the door and take the ramp up to a room with a Key and a
healing potion. Get both then drop through the window to the street below. You will have changed back to the
Prince so watch out for the guard who attacks as you hit the pavement. Kill him then return to the fountain.
Locate the keyhole at the top of the two short ledges and use the key. Enter the left passage (the right goes to the same location but is
heavily trapped) and follow it around to the alley with many ledges and deadly dart traps. Stay along the wall as you approach this area
to avoid the darts shooting down the middle of the passage. Jump across to the opposite ledge then drop to the ground and kill the guard
below. Move on top of the grate in the corner and open it to access the sewers below.
Follow the watery passage down and turn left. Watch out for the spikes coming out of the walls. Time your dash through the spikes as they
are retracting and continue to the hole beyond. Back into the hole and hang onto the edge. The camera will move to an overhead view and you
will see a pattern of spikes poking into the shaft. Time your drop when the spikes are retracted and drop to the lower passage. Head up the
ramp to the open area where a Muck Monster swims around. You are safe on this ledge and can easily kill him with a few arrows. He is much
harder to kill in hand-to-hand as he has a very fast strike attack.
When he is dead you can continue up the opposite ramp. Those spikes are too difficult to jump from here. Turn and pull up to the ledge above
then face the spike alley and do a running jump out to the vine. Start swinging and release to land on the opposite ledge. Continue down
the tunnel and climb the rope at the end to arrive at the docks.
Walk out onto the dock until it collapses. Fall to the lower level and move ahead and around the corner to the left. Turn left at the next
corner and you will come to a gap in the wall with a table, pot, and some arrows. Grab the arrows then return to the far side of this building.
Find the ramp that crosses the gap between the buildings. Head up the slope and turn and pull up to the next higher ledge. You should now be on
the top section where a door enters the building behind you on the right.
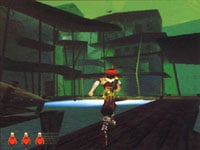
Don’t enter the door just yet. Turn left and follow the walkway until you reach a wooden ramp leading up. A stone building should be at the
top of the ramp to the left. Don’t go up the ramp; instead, drop off on the left side and continue forward until you can spot the hole in the
floor above. Pull up into the lit room and find the green endurance potion. Drink it and drop back to the deck
below. Continue between the buildings until you are overlooking the water. To your right should be the high door leading into the building.
Turn left and look down to spot a building below. Beyond this building is a shipwreck out on the horizon.
Get a running start and jump to the roof of this building. Walk to the back edge and stay to the left. Turn and lower yourself over the edge
and drop. Grab immediately just in case you miss the walkway below. You will catch yourself and can pull up to the ledge and get the
healing potion. The walkway will crumble and fall away if you go to your left, so just pull back up to the roof.
Off in the distance ahead of you, you should see the door you need to return to. But first, one more quick stop. Run and jump from the right
corner of this roof to land on the nearby walkway. You should be right outside a doorway. Enter and talk to the man and get the flute from the
table. Exit, turn right and jump to the next walkway.
Return to the sloped ledge ahead and cross to the building on the left. Climb onto this ledge and walk up the slope then pull up to the next
higher ledge. Turn once more and jump to the top ledge and move around to the right to find the door that enters this building. Most of the
floor in here is very unstable. Go just inside the door and turn and do a standing jump to the middle of the room. You will land on a stable
piece of wood. Now take a few steps back from the far edge of this platform and do a standing jump to the next lower piece of stable floor
below. (Use first person viewing to line-up these jumps before attempting them). Now back off this ledge and hang and drop to the floor below
and you won’t take any damage.
Head toward the corner room with the shovel and you will find a hole leading below. Drop through to the tunnel below and follow the passage
to the underground lake. Another Muck Monster swims around here and you can either kill him or avoid him. The far right passage is the
safest of the two for exiting. Make your way around the ledges (or wade across the water if you killed the Muck Monster) and enter this
passage. When you turn the next corner to the left there will be a bottomless pit. You cannot jump this pit but there is a very narrow
ledge along the left side you can walk across. Past this pit you will see the other tunnel from the lake room branching in from the left.
A short passage on the right has a healing potion. At the end of this passage is a coiled rope. Play the flute
and it will rise up out of the pit. You may have to try various locations to activate the flute/rope. Climb out of the tunnel to the wharf
above.
Head down the wharf until it splits off in a Y. Take the right fork to the house at the end and enter. Drink the strength potion
which will make the next boss-battle much easier. Return to the Y and take the other path. Ignore the house on the left – it is empty. Keep
heading to the right and a giant Muck Monster will attack. He smashes up a lot of the wharf and you will fight him in waist-high water. You
should easily defeat him with the added strength of the potion you just drank.
When it is dead you can move ahead to the nearest piece of the wharf. This is the ONLY time you can be in the water without automatically being
eaten by a Muck Monster. Once you are on the wood you need to stay on it for the rest of the level. Start jumping across the various broken
pieces of the wharf as you make your way toward the Dirigible in the distance. When you reach the wall, climb to the top. Ignore the guard in
the nearby boat and quickly dive into the water (this water is safe) to avoid the pair of archers on the towers. Swim to the opposite
side of the harbor and exit onto the wooden dock. Ignore the guard here and enter the door to exit the level and start another cool cinematic.

The next few levels are going to test every bit of your patience and your jumping abilities. Almost every jump is a life and death
situation and one slip or missed ledge will send you plummeting to your doom. Keep your finger over the QuickSave and use it often!
Begin the level by climbing the rope in front of you. Jump off the rope and enter the room and talk to the man then climb the boxes and exit
through the hole in the ceiling. Kill the skinny crewman then turn right and jump up to the ledge above. Head right along the ledge and cross
the plank leading right and onto the platform. Continue straight and climb up to the next ledge. There are several crates in this container.
Climb the first large crate and jump to the conveyor belt. Run to the opposite side and enter the building to get some arrow. Return to the
container and move to the boxes in the back.
Climb up these crates and pull up onto the ledge. Turn left and quickly get up the small step and draw your weapon to fight the big guard.
When he is dead you can move toward the pressure switch and step on it to open the nearby door. The guard will vanish as you enter this new
room and the man inside will tell you that each guard you kill makes all the others stronger. Turn right and get the healing potion
then climb up and through the window.
Jump from this ledge to the platform below then walk forward and turn right. Jump over to the box with the rope inside and climb the rope. Exit
to the ledge at the top and make your way to the stack of crates nearby. Climb up to the ledge and get more arrows then climb back down the
crates and walk back toward the rope. Turn left before you get there and spot the next ledge you need to jump to. Another rope is accessible
from this ledge. Climb up and jump from the rope into the room above. Walk to the other end of this box-like room and jump to the rope to
avoid the falling floor around it. Climb up and jump to the next platform.
Get a running start so you can leap to the doorway and continue up to the platform with the guard. Kill him then continue around this large
deck and jump to the wooden platform hanging from several chains. Climb to the ledge above this then jump to the door. Continue past the gears
and up the ramp to the pressure switch. Step on it to lower the drawbridge then return to the machine room. Jump over the trapped floor as you
reenter this room then turn right and head out onto the bridge. Jump from the end of the bridge to the platform beyond then climb the crate on
the left and continue up to the next ledge.
Climb up another crate then turn and jump to the next ledge and follow the walkway to the top. Kill the guard on the right and if you need it
you can carefully walk out onto the beams to get the healing potion. Watch out for the pressure plates on some of
the beams that will trigger an arrow trap. Climb up the crates near where you kill the skinny crewman and turn to jump onto the platform that
is moving back and forth. Turn right and stand on the edge of this moving section and when it reaches the far end jump up to the next walkway.
Continue forward being very cautious of the giant slicing blade trap. Wait for it to slam down then run through as it is resetting.
Continue along this path until you can jump to the right to the central platform. Turn left and follow it around until you can jump to the next
platform. Move forward and climb to the next ledge then turn left and go through the archway. Continue to the end and turn right and jump to
the hanging crate which is a counterweight to a similar crate on the other end of the beam. The cinematic shows where this crate is.
When the crate is at the bottom, turn and jump to the walkway behind you and run back to the central platform. Continue back to the left and
this time run off the end of the ledge and jump to the crate on the other end of the balance beam. Depending on how fast you are this crate may
already be lowering. Leap across to this crate and then to the ledge beyond. From this platform you can jump to the next small platform then
head to the edge and wait for the wooden lift to come up. Step on and ride to the top. Turn right and jump to the far ledge as you near the
top. If you fail to make the jump you will be crushed with a sickening crunch.
Head to the end of this walkway and face the rope. Jump to the rope and climb up then drop off into the doorway. Climb to the ledge and exit
through the window above the door you just entered. A guard is ahead and to the right. Kill him now with your bow then climb the rope and spin
around so your back is facing the sliding platform below. When the platform is beneath you (you will hear a noise) drop down and ride it to the
other side. Jump to the opposite ledge when this platform reaches the other side and head left. Run to the rope and swing across to the building
and get some arrows inside. Return to the previous walkway using the rope and walk to the end. Turn right and jump to the higher ledge. Grab
on and pull up then walk to the end of this ledge and turn right again. Pull up to the ledge with the dead guard and walk to the end.
Turn left and drop down to the doorway with the floor plate. It opens this shack and you can get the healing potion
inside. Return to the ledge with the guard and climb the ledge on the left. Another guard is off in the distance. You need to kill him with
your bow as soon as you can get a clean shot or he will cause you problems as you get closer. He guards a purple potion which you will be
getting in a few moments. Continue from this ledge into the next building then head out through the door on the right. Turn left and drop
straight down to the walkway below. Follow this catwalk through another slicing blade trap to the end of the ledge then turn left and climb up
to the next ledge. Jump to the platform outside the building and enter to get the strength potion. Exit the building
and jump down to the lower catwalk and repeat the last few climbs until you are back on the highest section. Turn and face the moving platform.
Climb onto the platform as it nears and ride it to the other side. If you need it, you can turn left now and go to the rope and climb down to
get the healing potion below. Return to the top and go to the right when you are ready. Another skinny guard is
on the upper ledge. You can kill him now with an arrow or wait and deal with him in person. Continue around and enter the door and go up the
stairs. Kill the guard (if you didn’t already) and flip the switch he was guarding. A large section of the circular walkway will lower into
place. Follow it back around to the right until you spot the healing potion. If you aren’t wounded then save the
potion until after the next combat.
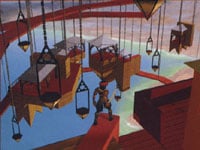
Turn right and walk up the ramp and fight the big guard. Now go get that potion if you need it before continue to the end of this walkway. At
the end turn and climb the ledge then head left to the hanging crate. Turn right and jump to the rope. Climb to the platform and jump off then
follow the series of platforms until you reach the gold roof. Now is a good time to target the guard ahead with an arrow and finish him off.
Jump to the next few platforms then line up for the jump to the big hanging box. When you land on the box run forward and jump to the central
platform quickly before the box lowers and you have to repeat all this over again.
Ignore the floor plates and the switch and turn to the vertical wood walls on the right. Jump to the wall and grab on and pull up. Do a standing
jump to the tent then run off the canvas and continue forward. A guard will be pursuing you from behind, but you can easily beat him to the
lift around the corner to the right. Ride it to the top then enter the next lift to the left and ride it to the next level. Exit the lift and
watch the guard leave this area. Walk out onto the catwalk and it will crumble taking you down with it. Now you are forced to take the very
long way to get to that exit. Head to the end of this walkway and turn left. Back off the ledge and hang until the platform slides beneath you.
Drop and ride it to the other side where you can climb up to a ledge with a conveyor belt and a blade trap. Cross the treadmill and time your
jump through this trap and cling to the opposite ledge to pull up.
Turn left and leap to the horizontal beam and swing across to the opposite ledge. Turn right and ride the lift to the upper ledge. Run, jump,
and swing across a pair of horizontal beams to the next ledge then get ready for a difficult jump. Jump out to the rope and start swinging.
As you swing watch the moving wooden platform and when it is nearing the slicing blade trap below let go at the right moment to land on this
moving platform. Jump to the next stationary platform then hang off the ledge and wait for the platform to slide below you so you can drop
down.
Ride this platform and jump to the next platform when you get close enough and ride this one to the far side where you can jump and climb to
the ledge. Turn left and jump into the doorway and flip the switch to lower the lift behind you. Climb on and ride it to the top. Turn and
jump out the window onto the ledge. Turn left and leap to the walkway and follow it around to the end. Drop to the ledge below and face the
next section where large boxes are moving in and out. Time your run past these boxes and turn right to enter the door at the far side of this
puzzle.
Drop to the platform below and walk to the ledge. Climb down to the suspended catwalk with the pair of blade traps. Time your run through
the first trap then jump and grab as the middle section of the catwalk falls away. Get past the remaining blade trap then turn left and wait
for the giant fan blades to spin around. Time your jump early so you land on the blade and quickly turn to face the outside edge of the blade.
When you spin to the far side jump to the ledge with the crate. Use the crate to climb to the upper ledge and step on the pressure plate to open
the door. Enter to fight the crew boss.
This guy is tough and with ten health points on his side you will have to use some good strategy to defeat him. Block his attacks and counter
with your own to do extra damage. When he is dead you can move forward and flip the switch on the wall. This entire section will spin so that
the walls are now floors. You will also lose all your weapons. Continue forward and start climbing the walls which now form ledges. Make your
way to the crate and use it to step up to even higher wall sections. When you reach the very top you can pull up into the elevator. Ride it
to the top and exit to the walkway. Follow it around to the left and then the right until it ends at a small gazebo.
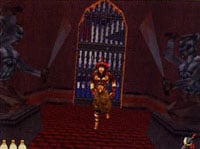
Exit the left and head up the steps to the waterfall. Jump in the pool and get the key then turn and head back to the arches on the right.
Enter and use the key on the lock to open the timed gate. Enter quickly but stop just on the other side as a pair of statues with swords will
move in to slice you. Wait for the statues to pull back before dashing between them. A guard is waiting for you in the next room but you are
still unarmed. Run across the first pressure plate to open the gate. Jump over the second floor switch and run through the gate and over the
third switch to shut the gate. You are safe for now so continue down this passage.
When you reach the bunkhouse check the left side and pick up the staff weapon. Continue up the ramp and to the left to the next door. A guard
is in this room and you can test your new weapon on him. When he is dead you need to get past another pair of slicing statues then quickly
duck down to avoid the giant ceiling fan which will take your head clean off if you get too close. Stay down until you get to the safety of the
hall on the left then you can stand and exit back outside.
Drop to the plank below and run to the other side. It will start to retract so you must be quick. Jump through the opposite door and into the
next room where a wall switch will activate a giant forklift. It will move a giant box to the opening in the floor and drop it. As soon as the
box is dropped run and leap to the forklift and grab on. Ride it to the other side and pull up to the ledge and quickly get to the left so you
don’t get crushed by the next box that drops in. Walk around to the door in the right wall behind the box and continue.
Cross the bridge and get the healing potion as you make your way down a series of ramps. The floor will open and
dump you into a lower area with a floor switch. It opens the door leading to a small room which dumps you to a ledge when you enter. Turn and
find the path of hanging platforms leading down. Kill the guard on the first platform and get his healing potion.
Now start making your way along the rest of the platforms until you reach the green stone platform with the sliding box. Get past this box and
then jump to the wooden box below with the hole in the corner. Drop into the box and get against the wall to avoid the arrows of the sniper outside.
Run across the short walkway to the next green ledge and get past the sliding box on this ledge. Jump to the platform and grab onto the rope and
climb up. Quickly get off the rope and turn to fight the archer who has been shooting at you. When he is dead you can take his bow and enter
the room ahead to get some arrows. Turn to the opening and make a daring running leap to the far platform. Turn left and spot the next group
of hanging platforms leading up. Start climbing.
When you reach the top you will be on of those green platforms from earlier. You will need to step out onto the box as it slides out and ride
it to its furthest limit then jump to the platform above. Run across the long platform and jump as the middle falls out. Grab if you come up
short and continue to the end where you can climb onto the box. Above the box is a very nasty meat grinder which spins then shuts down just long
enough for you to pull up and run to the far side and climb up through the hole in the ceiling. This takes careful time and you need to make
sure you get around the far edge of the blade.
When you are above the chopping machine turn and head through the door leading to the conveyor belt with a pair of chopping blades. Time
your run through this area carefully and drop to the floor on the other side. A door on the left leads to a ramp heading up to a grassy area.
A guard patrols this area – you may fight him or ignore him and run to the arches on the left. Head toward the pool in the center of this area
and climb up the first two ledges and find the ledge that sticks out toward another suspended ledge along the far wall. Jump to this hanging
ledge and drink the super-jump potion.
Jump straight up to the platform above and stand on the floor switch to lower the drawbridge. Jump across to the drawbridge and go to the
center and jump straight up again through the hole in the ceiling. Jump to one of the ledges along the far wall then drop to the ledge below
and stand on the floor switch to lower another bridge. Climb back to the top ledge and jump back to the center. Cross this new bridge and jump
to the ledge on the other side of the room. Climb up to the top ledge and stand on another switch to lower the elevator back in the center
structure. Return to the center and ride the elevator to the top.
When you reach the top, grab the rope and climb up to the room above and follow the hall that leads to a series of ramps. Head up the ramps
then drop into the next room and turn left to face a hallway with large wooden hammers waiting to pound you into the floor. Time your run past
the hammer and make your way into the next passage. Turn right and stay along the wall to avoid the flames shooting out of the wall. Turn left
and drop down through the hole and talk to the man. He will tell you about poisonous gas in the next room.
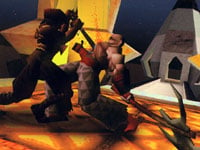
Stand on the switch to open the door and enter the room. Locate the box and the vent in the center of the room then slide the box on top of the
vent to block the deadly gas. Flip the wall switch to lower the lift and quickly climb on before it goes back up. Turn and kill the guard who
is charging at you as you exit the lift. Head out onto the catwalk and jump to the central platform. Climb onto any of the gold blocks around
the perimeter of this platform and use them to climb up to the upper deck. In the center of this deck is a large catapult and a floor switch
that will rotate the device clockwise.
Several towers surround you, but only one has a lowered drawbridge. Stand on the switch once to rotate the catapult and aim it at this tower.
Then climb up and hop onto the catapult to be launched through the air toward the tower. You will hit the safety net and bounce out onto the
ledge. Turn and jump up to the platform directly above then walk forward and turn and climb up once more to end the level.
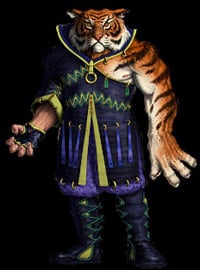
Climb the ledge and head to the right. A guard exits the first tower and you must defeat him before proceeding. Run toward the rope and jump
and grab on as the floor breaks away beneath you. Swing to the center and land on the platform which also breaks sending you to the ledge below.
Enter the central room and climb the rope to the room above. Once you are on this level you can pull up to any of the four ledges above you.
In the center is a floor switch will will drop several wall sections and reveal your arch nemesis, Rugnor. Prepare to fight.
Once again you must use all your combat skills. Watch for his attacks and block them then immediately follow-up with a counter attack. Retreat
and try to bait him into attacking then strike when he moves into range of your staff weapon. When he is dead you will see a great cinematic
and then you will be off to the next level.
Well if you thought you did a lot of jumping and ledge-hopping in that last level – you ain’t seen nuthin’ yet! This level is the mother of
all jumping levels and I highly recommend QuickSaving after every successful jump or you will go insane before the level is finished. Even worse
is that almost every missed jump is fatal and there are several long stretches where you cannot even save your game. Just keep pounding that
F6 key before and after each successful jump and you will be fine.

The previous cinematic had our hero plunging to his doom. Fortunately for our hero, there was a pool of water floating in the air that he could
splash into. Swim to the surface and climb out onto the ledge and get your bearings. Try not to get sick from the green swirling clouds or
spinning stone ruins as you make your first leap to the nearest ledge. The platform ahead has a winged demon waiting for you. These guys take
4-5 arrows to kill so you decide on how you want to kill him. Kill him from here or jump to his ledge and use your staff. Climb the next
ledge leading to a platform.
Run to the end of the platform and a new piece will fall into place. Keep on running and the path will create itself as you continue. It will
also be collapsing behind you so don’t stop running. At the end you will need to jump and grab to cover the small gap. Once you are on the
solid platform you can locate the moving boxes and get ready for more jumping. Jump to the first box then onto the second as it passes by.
A running jump from this box will get you to the ledge above then you can turn right and follow the series of ledges that lead to the rope.
Swing to the horizontal bar then swing to the ledge beyond. Turn right and jump to the rope and swing across the gap then turn right again
and climb the next two ledges.
View this guide raw, exactly as the archive holds it