Nightlong: Union City Conspiracy
Nightlong: Union City Conspiracy
A Walkthrough, by Steve Metzler
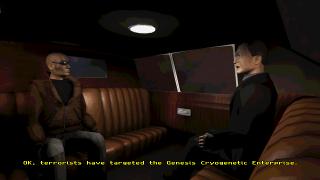
Nightlong is an inventory based adventure in the classic
vein. You must be prepared to search each screen carefully for ‘hotspots’
that you can interact with (text description pops up), and solving some
of the more obscure puzzles will come down to trying every inventory object
with every other object you see!
All you have to remember as far as the controls are concerned is:
-
Left-click to get a description of an object.
-
Right-click to use.
And … be sure to get the description of each object that comes into your
inventory. Sometimes, a hint is provided in the description as to how the
object may be used. The conventions used throughout this walkthrough are:
-
Locations and objects are all capitalised (Like This) just as they appear
in the game.
-
I’ll always provide a link back to where an object was originally found,
in case you missed it! For instance: there is a piece of Aluminium Foil
that you pick up early on in the game, but it’s called Foil
Paper in the inventory, and that’s how it will be represented when
it’s used.
Now that you’re mentally prepared for a moderately difficult game …
Ruby’s Apartment Building
Hugh Martens drops you off on the Rooftop Auto-park of Ruby’s apartment
building. You begin the game with the following objects already in your
inventory: Credit Notes, Minicom, Elevator
Key. Pick up the piece of Aluminium Foil
found between the two Aircars. Enter the Building via the Door, and press
the Button to call the Elevator. Oops! Get the Fuse from the Panel, and
combine it with the Foil Paper. Then, use this
new object on the Panel to repair it. Press the Button once again to call
the Elevator, and use the Elevator Card that
Hugh gave you in the Slot (inside the Elevator). Ask for the floor to Ruby’s
apartment. Use the Credit Notes with the Vending
Machine to buy a Can of beer. Be sure to retrieve
the Coin that comes as change.
Examine all the doors. You find that Ruby lived in Apt. 17, but you
don’t know what his hand-writing looked like so you can’t forge his sig
on the Pen Pad. Take the Elevator back to the Rooftop Auto-park. Be sure
to look at the Map next to the Letterboxes, or you
won’t be able to find the Subway later on! Use the Small
Key to open the Letterbox for Number 17 (you have to hunt carefully
through all the letterboxes to find the right one). Take the Letter,
and now you have a sample of Ruby’s hand-writing! Head back to Ruby’s apartment,
then use the Letter on his Pen Pad, and finally,
the Magnetic Pen on the Letter. We’re in!
Ruby’s Apartment
Pick up the Notepaper from the coffee table.
Get the Bottle of vodka from the Refrigerator,
and the Subway Card that’s in the Trashcan. Take the Photo
of Ruby and a “gorgeous brunette” from the frame on the kitchen table.
Go through the door on the right to enter Ruby’s Bedroom. Opening the
Wardrobe and examining the Clothes will reveal a Safe,
but you can’t open it yet. Examine the Glass on the table. It had vodka
in it, and was used recently. Press the down-arrow on the Switch near the
Window to lower the Roller Shutter. Then open the Window to reveal a piece
of Tape stuck to the inside of the Roller Shutter. Examine the Tape, and
you now have another Key. Use this Key to open the Safe.
of what turns out to be powerful acid, and a copy of an interesting Report
that Ruby sent to Hugh just a short while ago. It looks like Rotmall 17
(which you found a reference to on the Note Paper)
is the place where Ruby was supposed to meet the terrorists before he disappeared
…
Exit Ruby’s apartment, and take the Elevator to the Rooftop Auto-park.
Head out the Door, and examine the Barrier that someone has crashed through
on the left-hand side of the screen. Use the Tube of
acid on the Barrier to free a Bar, and take it.
Re-enter the building and take the Elevator down to the Subway.
Subway Entrance
Talk to the Cop, and find that you’re not allowed to take the Escalator
to the street because of a bomb alert. Look at the Map above the Ticket
Machine, and you will notice Rotmall 17, but only if you previously examined
Ruby’s Note Paper. Use the Ticket Machine to
purchase a trip to Rotmall 17. Only the 5 credit Coin
that was returned to you from the Vending Machine upstairs will work, because
the slot that takes notes is jammed. Use the Scanner on the Gate to get
to the trains.
Rotmall 17 Subway Entrance
Pick up the Plastic Plate underneath the Graffiti, and use it to repair
the ID plate of the Fax on the left. Show
the Photo to the Bum, but he won’t help you out until
you give him the Bottle of vodka. Then he remembers
that Ruby was with a woman, but not the one in the Photo. Give him the
Can of beer next, and he also remembers that the woman
Ruby was with owns a nightclub called the Free Climax. Buy the Skate
from the poor Bum, and then head up the Escalator.
Rotmall 17 Square
Talk to the Doorman outside the Free Climax. You need a membership card
to get in. Enter the Liquor Store to the right of the Free Climax and watch
the scene between the Storekeeper and his wife. Then look at the Membership
Card behind the Counter. Talk to the Storekeeper. When you befriend him,
he’ll tell you it’s illegal to sell alcohol after 8:00 PM. Then ask him
what cocktail he’s making. He’ll tell you it’s for Eva Tompson, owner of
the Free Climax. Finally, you find out that he’ll give you the Membership
Card if you manage to bring him a bottle of Chateau Lafitte ’85. Hmmm.
Exit the Liquor Store and climb over the Railings to the left to enter
the Alley.
Use the Tube of acid on the Padlock, then proceed
into the basement of the Liquor Store via the Trapdoor. You won’t be able
to get into the basement until you get the Storekeepers Wife to leave.
Go back up to the Alley, and use the Bar on the Manhole.
Pick up the dead Rat near the Grating on the right-hand side of the screen,
and return to the Liquor Store basement. Combine the Skate
with the Rat, and use the Skate to scare off the Storekeepers Wife. Take
the Bottle of Lafitte ’85 from the Case on the floor. Exit through the
alley, and present the Storekeeper with his own Bottle of Lafitte ’85 in
exchange for the club Membership Card! Use
the Membership Card with the Doorman to gain access to the Free Climax.
Free Climax Club
You talk to Eva Tompson. She knows about Ruby, but is obviously being evasive.
Nothing more to do here for the moment. Exit to The Square, and head back
down to the Subway.
Now that you finally have something to report, call High Martens using
the Minicom he gave you. He’ll send a Map of the
subway system to you via the Fax. Examine the
Map. Head back to the Alley, and go down the Manhole.
Examine the Grating, and you’re finally into the Subway Tunnel.
Subway Tunnel
Use the Pistol on the Door behind you to blow off
the Padlock. Enter the Storeroom, and get a rusty old Key
from inside the Cabinet on the far right. Take the Poster off the middle
Cabinet, then open it and get the Leads, Screwdriver,
and socket spanner Tool from the Bag. Exit the
Storeroom, and use the Screwdriver to remove
the Metal ‘S’ from the Logo on the bottom right of the large Advertisement.
Attach the Metal ‘S’ to the Chain on the floor, and use the Makeshift Grapple
on the overhead Pipe to swing across the gap (this was a very weak puzzle,
BTW. When you first try to pick up the Chain, Joshua comments that “it
weighs too much”! So … how he then manages to lift it and throw it over
the Pipe once the Metal ‘S’ is attached is beyond me).
Anyway, you’ve made it to the other side of the platform. Head for the
Passageway. Use the socket spanner Tool to open the
Panel on the wall. Then attach the Leads to the Contacts.
Pull down the Lever to apply power, then use the Leads with the Magnetic
Field in the doorway to short the whole thing out. Now you can enter the
Deserted Station which leads to the Zoo.
Deserted Station
Once through the door into the Deserted Station, note the collapsed ceiling
that has destroyed the Bridge over the tracks that leads to the Zoo Entrance.
Use the ‘Go to …’ on the left side of the screen to move down the platform.
Use the Bar to knock down the Loudspeaker hanging over
the Info Booth, and pick up the Magnet that drops
onto the floor. Take the Pliers from the Shelf
in the small room at the end of the platform. Open the Trapdoor in the
floor, and enter the Passageway. You can’t get to the other side, so head
back up. Go back to the Deserted Station, and head up the Bridge to where
the Sign is hanging from a Cable in the ceiling. Use the Pliers
to cut the Cable so that the Sign falls. Now head back down the Staircase,
and use the newly created Passage to get across the tracks to the Zoo Entrance.
Zoo Entrance
Enter the concealed doorway near the Palm tree. It’s a Bar. Open the yellow
Curtain, and take the Cylinder and Broom.
Take the Can from the Counter, and the empty
beer Can from one of the tables. Exit to the
left, and there’s an exhibit of a Goddess that you can’t do anything with
yet. Proceed onwards to the left, and you find yourself at the Bookstore.
You can look through the glass, but can’t get inside. Go all the way back
(past the Goddess and through the Bar) to the Zoo Entrance. Then, take
the path by the sign at the left to arrive at the Sphinx exhibit. Right-click
on the Sphinx to get the access code. Here it is:
“Under the supreme eye of the father of the gods … Sits the solar
protector of all men … To the right of he who delights in the eternal
coming of his being”
Hmmm. Under the Statue of the dog (actually, the Egyptian god Anubis)
there are 3 Wheels used to enter the access code.
Have a good look at them to familiarise yourself with the symbols, but
unless you happen to be an Egyptologist, you don’t know enough yet to solve
this puzzle! Exit the Zoo, and proceed all the way back to where you left
the Chain hanging from the Pipe in the middle of the subway tracks. Combine
to obtain a Magnetic Bar, and use it with
the Chain to swing back across. Enter the Storeroom again.
Storeroom
Use the Small Can (of oil!) on the Hasp of the
Door, and now you can finally open it. Proceed inside, and try to turn
on the light using the Switch, but the Bulb has gone. Remove the burnt-out
Bulb from the light fixture. Open the Trapdoor on the floor, and go through
it. Aha! We’re on the other side of that impassable fissure. Use the Key
you got earlier (from one of the Cabinets in the Storeroom) on the Door
… and you emerge through the Well into the Bookstore!
Bookstore
On the middle shelf just to the left are some books on Egyptology (how
convenient). Take the Book and examine it. You’ll
see pictures of the gods that correspond to those found on the code Wheels
near the Sphinx, along with a description of the gods. Take the Bulb
from the Reading Light on the Desk. Exit through the Well, and head back
to the …
Storeroom
Put the good Bulb into the light fixture Socket, and
use the Switch to turn on the light. Take the Three-way
Adaptor from the Shelf on the right. Now, return to the Sphinx exhibit
at the Zoo.
Sphinx
Using the Book as a reference, set the 3 code Wheels
on the Statue as follows:
Top wheel – Ra (“father of the gods” – hawk’s head with sun symbol above)
Bottom left wheel – Kheprer (“delights in the eternal coming of his
being” – scarab beetle holding sun symbol)
Bottom right wheel- Horus (“solar protector” – falcon symbol)
and press the Button. Now you can enter the Sphinx, which is actually
a …
Control Room
Pick up the microwave Gun. Set all the Buttons on
all the functioning Control Panels to green. This turns off all the magnetic
fields that are protecting the exhibits. Exit the Control Room, and head
left to the …
Fissures
Cross the Footbridge, and you are attacked by a mechanical Dinosaur. Use
the microwave Gun to zap him into oblivion. Cross the
other Footbridge, and enter the Cave. Take the Flare
from the Table, and head back to the Zoo Entrance. Back through the Bar
again, to the Goddess (the snakes should not be moving. If they are, return
to the Control Room and ensure that all of the Buttons on the functioning
Control Panels are green). Examining the Bush at the base of the statue
of Kali reveals a Faucet. If you turn it once, the Flames in the Brazier
are extinguished. Use the Faucet a second time, and you may now collect
some Fuel in the empty beer Can.
Head back to the Zoo Entrance, and this time proceed to the exit
on the right of the screen which leads to …
The Pond
Some strange things happening here! Notice the Kid (wearing a jet propulsion
pack?) who is mysteriously hovering in the distance. If you examine the
Panel on the Machinery to your left, Joshua will rip the Panel right off,
shorting out some circuits in the process. The Kid drops to the ground
across the pond. Now, use the gas Cylinder on the
Tank of the Machinery, and do the same with the beer Can
full of fuel. Then use the Flare on the Tank to ignite
the fuel mixture, blowing open the Sluice Gate and making it possible to
cross the previously submerged Bridge. Take the Remote
Control from the Kid, and head back to the Cave in the Fissures. Use the
Remote Control on the Key set into the wall
(that opens and closes the Cage), and the entrance to a secret Elevator
is revealed! Use the Elevator to enter a large Warehouse.
Warehouse
Get the telescopic Pincers and the hologram Projector
from the open Crate to the left. Head up the Elevator to the top of the
Warehouse. Use the Push-buttons in the ceiling to open the Trapdoor, and
go up the Staircase to the Roof. Oops! Locked out. Use the Magnetic
Bar to jimmy open the Door of the maintenance Building (you lose the
Magnetic Bar in the process, but you don’t need it any longer). Use the Lever
on the red Mixer Faucet to cut off the gas supply. Then, use the Pliers
to cut the flexible Pipe coming out of the Mixer Faucet. Use the cut Pipe
to bend it upwards. Go back outside and detach the Hose
from the water Faucet, then attach it to the flexible Pipe
through the Window (huh? I thought there was glass in the Window, so this
one had me stumped for a bit). Go back inside and use the Lever
to restore the gas supply, then head back outside once again and place
the damaged Minicom on the trapdoor Lock. Use the
Hose on the sparking Minicom to create a home-made
torch and Joshua uses it to cut through the Trapdoor, but sets off the
fire alarm in the process. A workman comes out of a secret entrance to
shut off the alarm, but accidentally leaves the Control
Panel open and also drops a Match on the floor.
Head back down the Stairs and the Elevator, and open the Control
Panel. Use the Screwdriver to remove the
inside Cover. Use the middle Wire to free one
end of it from the Earth contact. Then, use it again, attaching the free
end to the ground Contact (right next to the Switch). Finally, put the
Cover back on and pick up the Match
the workman dropped in the middle of the floor. Head back up the Elevator,
and combine the Match with the Broom to obtain a makeshift
Torch. Use it on the Sensor in the ceiling to set off the fire alarm again.
This time, when the workman opens the Control Panel and throws the Switch,
he gets a shock and is rendered unconscious. You can now enter the terrorist’s
Hideout via the secret door he left open on the way out!
Hideout
Use the Three-way Adaptor on the wall
Socket just inside the entrance. Insert the hologram Projector
into the Three-way Adaptor, and turn on the Projector. The remaining terrorist
comes to investigate, and Joshua knocks him out. Search the terrorist to
obtain a Laser gun and yet another Key. Take the
Elevator to a Deserted Room, and use the Key to open the desk Drawer. A
Security Card is in the Drawer. Use the
Computer on the Desk to view an important email that leads Joshua to suspect
that Hugh Martens knows a lot more about this affair than he has so far
revealed. Examining the Picture on the wall produces a hidden Piece
of Paper. Head back to the Hideout, and use the Laser
gun to blow open the blue Panel that houses the Security System. Use the
security Card to enable it. Then, hit the
Buttons according to the order of the black to white transitioning colours
on the Piece of Paper. If you number the
Buttons 1 to 7 from top to bottom, the order to press the Buttons is as
follows:
6, 4, 3, 7, 2, 1, 5
The Security System is now disabled. Go back into the Elevator, then
enter the Door on the far right of the Deserted Room. Examine the green
Panel. It’s Ruby! Open the white Panel to obtain a Stethoscope, Syringe,
and a Report on Ruby’s critical health situation. Go back to the Deserted
Room, and use the Stethoscope on the other Door
to eavesdrop on a conversation between Eva Tompson and one of the terrorists.
Then, Joshua figures he has nothing to lose and enters the room. A long
explanation of what has been happening ensues …
Cyberspace
Of course, you lose all your worldly possessions once you enter cyberspace.
You have a Positioner though. You can record
your present position by pressing the red button, and go to any previously
saved position by using one of the yellow buttons underneath the display.
Proceed straight ahead into the maze. Now, this is a very simple maze
to negotiate, so it’s not even worth bothering to map it out. Just follow
the ‘Go To …’ indicators to visit places you haven’t been yet. You must
find the following 4 locations:
After you’ve found all 4 of these places, use the first yellow button to
return to the place where you first entered cyberspace (Slot Machine).
Go to the next screen on the left-hand side, and use the Hammer
with the Drum to hit the Bell. The Hammer breaks, and you almost knocked
the Bell off. Pick up what’s left of the Hammer. Go to the right again
to return to the Slot Machine. Use the Hammer on
the Spider, and the Spider’s damaged leg will now hold one of the skulls
for you. Put the Coin in the Slot, then use
the Slot Machine. Wahey! “In cyberspace, no one can see you cheat” (sorry,
Alien joke 🙂 Collect the 6 silver half credit Coins
you just won, and go to the next screen on the left again. Enter the Hut
via the Door. Go down the stairs to the basement. Use the Cloth on the
boiler Handle. Once the spider is gone, pick up the Gunk
from the floor, and scrape the Mildew off
the wall. Exit the Hut. Go left to the Shooting Range. Use the Mud
with the Runners to slow the targets down. Put the Coins
in the slot on the pillar, and then use the Gun. Collect the Puppet
as your prize.
Return to the Hut, Open the left-hand Drawer of the Ticket Office, and
take the Packet of matches. Open the right-hand
Drawer, and place the Puppet inside. Go back outside
and get into the Cage. Use the Remote Control, and you wind up at the …
Castle
Go into the entrance to the right of the Spider. Open the Brazier, and
get the Dust. Pick up the Skull
from inside the Pentacle (I think it’s actually a Pentagram), and on the
way out, get the Torch from the right-hand side
of the steps. Exit the Church to the Courtyard, use the entrance to the
left of the Spider this time to enter the Alchemist’s Study. Get the small Bag
and the Jar from the shelves on the right. Read
both Parchments on the Table. One tells you how to make gunpowder (but
we already knew that. We’re seasoned adventurers, aren’t we?) and the other
tells us we have to fog up this mirror over the fountain. Read the Book
on the pedestal, and learn how to kill werewolves. You also learn that
their blood is able to corrode metal. Pick up the small Shaft
leaning against the wall near the fountain. Use the Skull
with the Tile under the fountain. Put the Torch in
the Skull. Light the Torch with the Match, and then
use the Torch again to kick the Skull out of the way. The Mirror
fogs up, and you can read the numbers:
7, 8, 4, 5
Exit the Alchemist’s Study, and take the entrance at the base of the
Tower to the right of the screen. Use the Shaft on
the Meridian Circle to place it in the centre hole, then right-click on
the holes near the Roman numerals to move the shaft to each one in the
order you found on the Mirror:
VII, VIII, IV, V
The housing of the Meridian Circle opens, revealing a Book. Click on
the Book to finally get the lowdown on what Hugh Martens has been up to!
You are transported to Hugh’s cyberspace office.
Hugh’s Cyberspace Office
This receptionist is one tough cookie to get past! So, use the small Bag
of sleeping drug on the Chocolates. When she conks out, press the Button
on the panel next to her. This unlocks the door to the Meeting Room. Take
Balls from the Showcase, and the Club from the
suit of Armour. Then use the first yellow button on the Positioner
to return to
the place where you first entered cyberspace. Go left to the Cablecar,
and use the Club to strike the Drum, this time knocking
the Bell clear off the Totem. Pick up the Bell,
and use the Positioner again to return to the Sculpture
with flowing lava. Put the Bell into the Lava. Place
the silver Coin into the Bell, followed by one of
the Iron Balls. Use the Cloth
with the Bell, and pick the Ball up from the ground.
Use the Positioner one more time to return to the location of the Werewolf.
Combine the Saltpetre with the Charcoal
Slack, then combine the Powder with the Jar. Finally,
use the Powder with the Pistol. Use the Pistol
to shoot the Werewolf, then collect his Blood in the empty Jar. Use the
Positioner to return to Hugh’s cyberspace office, and use the Jar to corrode
the Lock on the Door in the Meeting Room. Look at the Sheet of Paper on
Hugh’s desk. Open the desk Drawer, and get the Slide.
Go back into the Meeting Room and use the Slide in the Projector. What
you see projected is a mask that can be used with a 7-segment LCD numerical
display (such as the one hanging right above the unconscious Receptionist
in the next room)! When you apply the mask across 6 digits (red means:
leave out segment), you get the following:
| _
|
_
|
_
|
_
|
_
|
_
|
562396
Go back into Hugh’s office and key this number into the Computer on
his Desk. Now we’re really clued in as to what’s going on! Joshua exits
cyberspace and travels with Al and Eva in the Aircar to the prison island
of Rocas Perdida in an attempt to track down Hugh Martens. Al gives you
a high tech device called a Parallel
Cutter to aid in the break-in on the island.
Rocas Perdida
You’re deposited on a beach. Right-click on the portion of the turtle Tracks
nearest you to obtain an Egg. Head off to the right, and use the Egg on
the Snake. Then zap the Snake with the Laser. Pick
up part of the Snake using the Pincers.
Return to the Beach, and continue onwards past the Aircar to the Pond.
Use the Laser again to break the Padlock so that the Grating swings open
to allow access to a large Conduit. Use the Snake
on the Pond to distract the Piranhas therein, and Joshua goes up the Conduit.
Laundry Room
Close the Conduit Grating (you have to pixel hunt for this one)! Move the
Sheets on the shelves to reveal a box of Detergent. Use the Detergent on
the Bucket, then use the Bucket. Joshua empties the contents into the Conduit.
Put the empty Cans into the Washing Machine,
turn it on, and watch the show. One less guard. Be sure to take the Keys
the guard left in the Door, then head into the …
Corridor
Use the Keys to open the door to the LA-5 Detention
Area. Look in the Window of Cell 2, and talk to Dr. Moreau. Ask him how
to open his cell door. Then ask him about the governor, and where the laboratory
is. Leave him for the moment. Exit to the Corridor, and head to the right
of the screen. Take the MDVD camera from the Desk, and use it on the Keypad
next to the red Door. Return to Dr. Moreau, and Joshua gives him the camera
with all possible keystrokes recorded. The combination for the red door
is: 446677. Return to the Sentry Post, and use the Keypad. Joshua enters
the combination and we’re into …
Laboratory
Pick up the Gloves off the Chair. Take the Tester
and Tubes from the shelf. Then look at the Symbols
on the Blackboard. Rather than just giving you the solution to this puzzle
outright, I’ll attempt to show you how to actually solve it. Please bear
with me! In the place of the symbols, I’m going to substitute letters,
because they’re easier to work with, so let’s translate the symbols on
the board to:
ABC x DC = DEFC
DEFC
+CBFC
—–
AGECB
Immediately, we can deduce that ‘A’ = 1, because two numbers summed
could never produce a carry into the last column that was greater than
1.
Next thing we notice is that the last digit, ‘C’, is the same in all
3 numbers in the multiplication at the top. The only numbers this can hold
true for are: 0, 1, 5, 6 because: 0 x 0 = 0, 1 x 1 = 1, 5 x 5 = 25, 6 x
6 = 36! We can rule out ‘C’ = 1 because we already know that ‘A’ = 1.
In the sum at the bottom, ‘C’ + ‘C’ = ‘B’. Therefore, ‘C’ cannot = 0.
Here comes the slightly tricky part … that still leaves 5 and 6 as possibilities
for ‘C’. Let’s try 6. Then 6 + 6 produces a carry out of the 1st column,
but this won’t work, since ‘F’ + ‘F’ + 1 in the 2nd column must produce
an odd number, and 6 is an even number. So … ‘C’ = 5! That means that
‘B’ = 0, and ‘F’ + ‘F’ + 1 = 5. So ‘F’ = 2 as well. Now we’re really getting
somewhere. Here’s what we know so far:
105 x D5 = DE25
DE25
+5025
—–
1GE50
Some further work on the sum at the bottom eliminates 3 and 4 as possibilities
for ‘D’. Since ‘E’ + 0 cannot produce a carry out of the 3rd column, then
neither 3 + 5 or 4 + 5 is sufficient to produce the necessary carry out
of the 4th column. 6 is eliminated because 6 + 5 = 11, and ‘G’ cannot =
1 as ‘A’ = 1. Same for 7, because 7 + 5 = 12 and ‘F’ = 2, not ‘G’. ‘D’
cannot = 9 because: 105 x 95 = 9975, but the result must end in 25. So
… ‘D’ = 8! And finally: 105 x 85 = 8925, so ‘E’ = 9. Thus:
8925
+5025
—–
13950
Was that fun, or what?
Exit the Lab, and use the Screwdriver to
open the Panel under the Window. Joshua converses with Al, but we already
know how to figure out which wire carries 100,000 volts. Use the Tester
on the box, then use the Parallel Cutter
on the Box. Al and Eva get inside, but are surprised by Martens and his
men. Poor Al is killed, and Eva is locked up to be dealt with later. Exit
to the Corridor, then use the Keys again to open the Infirmary Door (underneath
the cross).
Infirmary
Look out the Window of the Infirmary, then right-click on the middle Window
in the outdoor view to talk to Eva. Afterwards, get back into the Infirmary.
Examine the Coat behind the bars to get a Thermometer and dental Floss.
Use the Gloves with the Cylinder inside the bars
to inflate them. Then use the Tubes with the Syringe,
the Floss with the Syringe, and finally the Syringe
with the Gloves. Look out the Window again, then use the Syringe on Eva’s
cell Window. After Eva uses the Syringe on the Guard,
use the Keys to re-enter the Detention Area. Joshua
searches the Guard and comes up with a Laser. Talk to Eva in Cell 1, and
she gives you the Code. Have a look. Having done our homework already in
the Lab, we know the number at the bottom is:
958320
Click on the Keypad behind you, key this number in, sit back and relax
as you watch the conclusion.
Copyright © Steve Metzler for the Games Domain,
November 1998. Not to be reproduced without the author’s permission.
View this guide raw, exactly as the archive holds it