Mysterious Journey II
To get to the top floor:
Enter and the elevator rises to the
third floor as shown by the number of bars at the center.At third floor, look carefully and
take the first left exit. Come back in. Go down to the first floor.At first floor, look carefully and
take the first right exit. Come back in. Go up to the fourth floor.At fourth floor, look carefully and
take the second left exit. Come back in. Go up to the fifth floor.At fifth floor, look carefully and
take the second right exit. Come back in. Go up to the top sixth floor.Telescope:
Every ramp has a telescope while
one ramp has two.Each telescope is focused on a
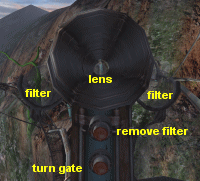
security gate on the ramp that circles the tower.Use a telescope and see that the
filters are placed on either side of the telescope.Click on one or both filters and they
will be placed over the lens.The top button removes the filter
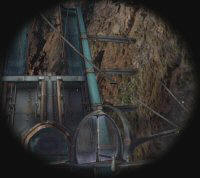
while the lower button rotates the gate seen through the telescope.Determine the correct red gate and
rotate the gate so that the correct gate is farthest from the tower or
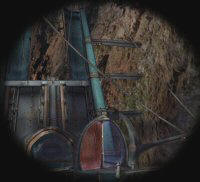
situated at the outward part of the perimeter.To know which gate is correct,
place both filters over the telescope lens. The colors seen is the reverse of
the correct one, so a blue gate is really the red gate and vice versa.Rotate all blue colored gate to the
outer side while both filters is over the telescope lens. Do this on all the
telescopes.
Telescope setup Gate seen with no filters Gate seen with both filters
When done, enter the tower and it
will automatically go to the fifth floor. Exit to a ramp that will lead to the
building seen through the telescope. The left inner side of the gates are
blocked. Since you arranged the correct ‘red’ gate to the right outer side, walk
the ramp and enter the building.
Oracle:
This Oracle is a decoy. The Oracle gives a number of power, 28.
Lyra:
Sen goes through a portal and exits out to Lyra. Go forward on the corridor and
pick up a green ball. Go forward to the rotunda and pick up the red
ball.
Take the left corridor and rise to the
second level. Pick up the red-green ball. Take the side corridor and see
a door with graphic above 3 columns of 4 rows of rectangular buttons.
Take the lift down and go to the left
hall. See another graphic with a setup similar to the one seen at level 2.
Go back to rotunda and take the left
alcove. Rise to a machine.
Ball – graphics pattern puzzle
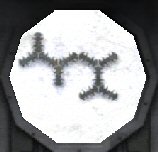
– The object of the puzzle is to make a pattern similar to the graphic on the
doors seen.Note that the top monitor has 3
columns of 4 rows like the 2 graphics setup on 2 doors seen earlier.Note that the lines goes left to
right on top row, connects to right to left on second row, connects to left to
right line at third row and right to left at bottom row.Use the 3 balls on the machine. To
change balls, click on balls. To cycle the pattern of the balls, click on the
side buttons. Note that the red-green ball does not show any lights on the
monitor.Find the pattern similar to the
graphics on the 2 doors.
Level 1 door
Use red ball and then cycle the buttons.
Use green ball and then cycle the buttons.
Note the placements of the lights on the monitors.
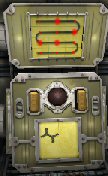
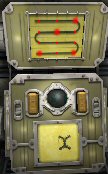
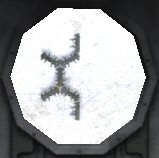
Level 2 door
Use red ball and then
cycle the buttons.
Note the placements of the lights on the monitor.
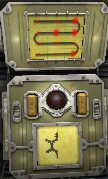
Level 2 door – Go down the lift and go to the corridor across the
rotunda. At the
second level, go right to the corridor. Click the top right, second row right,
second row middle and bottom right pads. The door opens but the path is blocked
by debris. The lock pad needs only 4 entries.
Level 1 door – Go down, turn to the left hall on the lower level. Face
the lower level door and since the lock needs only 4 entries – enter the first 2 lit
circle of the left glyph and the last 2 of the right glyph as seen on the ball
puzzle machine. Click top middle,
right on second row, right on bottom row and left on bottom row. The door opens.
Meet the real Transai Oracle. The
Transai Oracle has an airship that can take Sen to the Ansala Oracle. He gives an
ancient number of power – 12.
Transai Skyport:
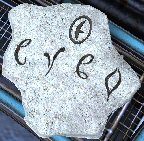
Sen finds himself at the skyport. Look at the symbols on the stone lying on the
bench.
Airboat control – Enter the
airboat and look at the control.Click-cycle any
button and see 12 different glyphs formed. This is a base 12 control.The stone has glyphs similar to the
base 4 seagate control underwater. Based on the seagate control glyphs, the
stone reads as 3120.Convert the base 4 – 3120 to base
12. I used a Base-n calculator to get 160.The control has the zero glyph as
default. Click the button once on the left,
6 times on the middle and no click on the right. Have a nice flight!
Gelleas above
Enter the hall and see a
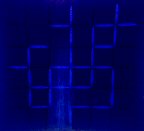
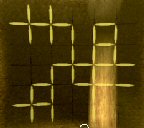
puzzle on the door. Turn right, enter room and see a blue and yellow framed cloth with
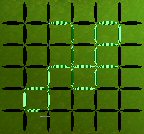
lines. Note the lines. Go out to the hall and right. See a green lined
pattern on the locked door.
To open lined doors:
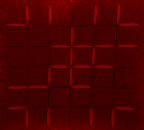
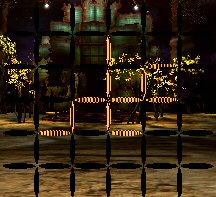
Green door – Study the pattern of
the blue and yellow lines in the other room. Note the common lines between the
2 patterns.Enter those common
lines on the green pattern on the door since blue and yellow makes green.
Enter the room and study the lines on the red cloth. Go back to the locked
lined door at the main hall.Clear door – Study green and red lined patterns and see what lines are in common. Enter
those common lines on the door.
Secret of Sarpedon:
Sen meets with the Ansala Oracle. Arko, Carluen and
Loreann arrive and tell Sen the true history of Sarpedon. Oracles are the
central coordinating units for colonization of the planet. Companions are
planetary engines for processing nitrogen, producing greenhouse gases and
changing the soil. The watch crew of the colony ship that was to colonize this
planet formed factions based on
their ideas about terraforming the planet – the beginning of the Ansala and
Transai tribe. The Ansalas took one Oracle out of the network and took it to the
valley. A fight ensued between the two factions that resulted in the destruction
of the colony ship – Lyra. The Oracles who are in communications with each other
decided to mindwipe the population and impose a memory of history of global war. Sen needs the station maps and access codes for the station. Sen and Chemay are
Ansala sleepers – double agents. Sen needs to restore the Oracle-companion
terraforming network at the Overide chamber on the station. There is a
reconnection override left by the Ansalas in case they need to use it again.
Carluen and Loreann cannot help Sen because the Oracles they tend need to be
manually adjusted. Arko will open and close the protection field overhead
manually at the precise moment of reactivation of the network.
The Ansala Oracle prepared a ship for
Sen to get to the station. She gives an ancient number of power – 52.
Sen has little over 5 hours before the space station
crashes down.
Space Station
Finding Chemay:
Go forward and note the
symbols on the crate sitting on the left side facing the right corridor.
Go to each door at the
end of the 3 hallways. Each door has a set of colored glyphs. They are door locks. Above the colored glyphs are the labels for
those doors, 2 of which are found on the crate.
Pick up the disk
on top of a box at the
corridor facing the crate with symbols.
Go back to the
intersection and see a big circular disk on the wall. Use the disk that was
picked up on the metal decoder.
Decoding the crate
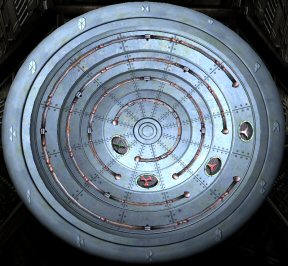
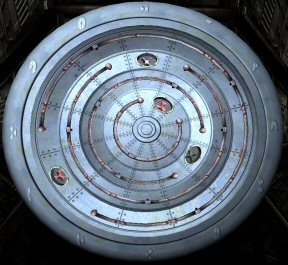
symbols – The decoder disk has 4 inner circles and 12 radial sections with
symbols similar to the crate.Using the crate symbols
as a formula: label of door = the 4 symbols to unlock the door.To convert the symbols
in the formula to the colored glyphs on each door:Select the first symbol
to be converted and then rotate the first circle until
the space shows a colored glyph under the first symbol on the outer perimeter of
the disk.Select the second symbol
to be converted and then rotate the second circle until
the space shows a colored glyph under the second symbol on the outer perimeter
of the disk.Do the same for the
third and fourth symbols. The colored glyphs are the code to enter for that particular
door.
Top set of symbols on crate for first door.
Bottom set of symbols on crate for second door.
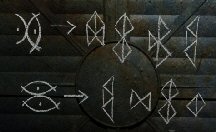
First door: Go to door across the crate with
symbols. Press: white 3-pointed star, pink 3-pointed star, pink 3-knobbed
star and green 4 pointed star. Door opens and then check the room.
Second door: Go to the door right of the white
metal disk. Press: pink 3-knobbed star, white 4 pointed star,
green 4 pointed star and pink 3-knobbed star.
Door opens, go forward and see a
crate with another set of symbols. Go to the right corridor and left at the next
corridor.
Towers:
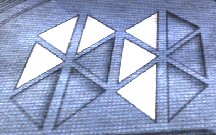
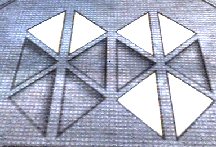
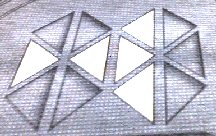
Go through the door and come out on a ramp on top of 4 towers. At the center is
a layered taller tower. The tower roofs have numbers similar to the one that is
on the airship control. Note the drawings of the numbers and we will decode it later. Look
around and note that one of the windows on the wall is open. Go back and go
through the corridor.
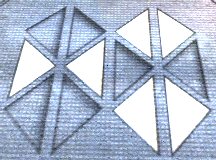
Take the corridor across the crate
with the new symbols. Enter the room at the end and see the window seen from the
tower top. Note that the 16 buttons overhead the window is similar to the ancient
symbol seen during gameplay.
Exit and go back to the metal
decoder.
Decode the tower numbers –
Across the metal decoder is a panel that has the base 12 numbers. The bottom row
shows the symbols seen on the crate and doors. Some numbers are missing. The top
left is 0 and is read across the row to 3 at top right. The panel is a
calculator with the mathematical function icons at the bottom. Select any a
number, press the bottom left icon, press another number and you will get a sum.Compare the markings on the tower
roof on the symbols on this calculator. The numbers on top of the
towers are: 28, 14, 08 and 04.Decode the new crate symbols –
Note that the code for the unopened door symbol is equals to the symbol above
the other 2 doors with a mathematical function symbol (addition) in between.
Since the metal decoder has 12 radial
segments and we have been using base 12 here, count the top of the metal decoder
as #0 and going clockwise to end at 11.As seen from decoding the door lock
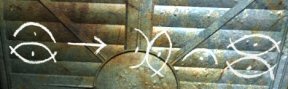
puzzle – first door has the symbols at
segments 3 for the first circle, 4 for the second circle, 6 for the third circle
and 8 on the last circle – 3468. Check the graphic above.The second door has symbols at
segments 8 for the first circle, 0 for the second circle, 4 for the third circle
and 1 on the last circle – 8041. Check the graphic above.The crate formula will then be third
door = 3468 + 8041. The math function is seen at the calculator panel across the
decoder wheel.So add the numbers , first symbol, 3
+ 8 = 11; second symbol, 4 + 0 = 4; third symbol 6 + 4 = 10 and the fourth symbol
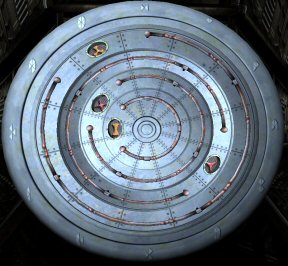
is 8 + 1 = 9.Go to the metal decoder and turn the
wheels to 11 for the first circle, 4 for the second circle , 10 for
the third circle and 9 for the fourth inner circle.
Third door – Go to the third
door and press yellow 3-knobbed star, pink 3-pointed star, pink 4 pointed star and yellow
dumbbell.
End Game:
Sen is reunited with Chemay. Chemay
will contact Arco and will work to get Talen fixed. Chemay gives Sen a prion
generator. Sen needs to find the reconnection override.
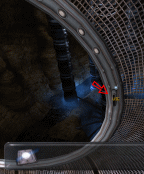
Go forward and take the left corridor
to the room with the window opened to the tower. Insert the prion generator on
the slot at the right edge of the window frame.
End Puzzle – The 16 buttons
above the window is the same as that of the ancient symbols. The 4 ancient
number of powers given to Sen are 12, 28, 36 and 52.The object of the puzzle is to make
the ancient numbers on the towers. This is done by joining numbered towers using laser beams.The 16 buttons are positions that
shoot different combinations of laser beams to the towers.The middle large button turns on and
toggles off the lasers.Check the laser combinations by
pressing the different buttons individually, then press the middle large button
and note which towers are hit by the lasers.The tower numbers using base 12 from
left to right looking out from the window is 4, 8, 14 and 28. Converting them to
base 10 make the towers from left to right 4, 8, 16 and 32.To make the numbers of power:
12 -point the laser
beams on towers 4 and 8 by pressing button 15 and then press the middle button.28 – point the laser beams on
towers 4, 8 and 16 by pressing button 8 and then press the middle button.36 – point the laser beams on
towers 4 and 32 by pressing button 3 and then press the middle button.52 – point the laser beams on
towers 4, 16 and 32 by pressing button 7 and then press the middle button.
Watch the space station shake. The
shield over the planet is removed. Carluen and Loreann manually adjust the
Oracles.
See the Oracles tell the Transais and
the Ansalas that they are now one tribe – the Transalas. Talen is grateful to
Sen.
This document may not be
distributed without express written permission of the author and the content may
not be altered in any way.
For Questions or
Comments on this Walkthrough,
Please write to: MaGtRo
Copyright © 12/2003
MaGtRo