Just Adventure original
Lands of Lore 2 Guardian of Destiny Walkthrough
THE
CITY OF ANCIENTS
Main
Goal :
Find the answer for the curse and a way to Underground Cavern
IMPORTANT
NOTES :
If you don’t bring along the 2 ivory chips from the museum, you must
follow this hints step by step because you won’t find the 5th or 6th
chip in this area. As a result, you won’t be able to open the northeast
Tower. You may encounter this problem if you open the southwest Tower
before the northeast Tower. But if you bring along the chips, you
could open the Towers in any order you wish.
Q : I have no clue
at all, what must I do here ?
A : Take the elevator to the City of Ancient below. Here,
you must solve the puzzle in the four tower in each corner. Inside
each tower there is a pyramide with a fireball inside of it. After
you solve the puzzle in each tower, the pyramide should break and
the fireball will open a secret door to a room with a teleporter.
On the other side of the teleporter you must build the real tower
that will answer your curse.
Q : What must I
do to solve the puzzle in the northwest tower ?
A : You must use your magic and skill to solve the puzzle.
To reach the tower, you should go south then west at the first intersection.
Follow the path until you reach a big gate. Behind the gate is the
northwest tower. First break the floating stone on your left with
your weapon. Then head to the floating red smoke. Use your ice weapon,
such as Axe of Blizzard or Crossbow Shard, to dispell it. You could
also use Myst of Doom level 1 spell (the Apparition spell) to dispell
it. Your next target is that floating ice fog. Use your fire weapon,
such as Crossbow Valkerie, Crossbow Milliard, or Spark spell, to dispell
it. Once you have dispell those three floating things, the pyramide
in the next room will be broken and the fireball will shoot at the
yellow door on the big black pillar to open it. Inside you’ll find
a Storm Crystal and a stone block. Push the
block through the teleporter then jump through it. Push the stone
block into the cubical pit and a yellow octahedron shape will appear
in the big plain below. Clicking on it will raise the first part of
the real tower in the middle. Note : in the south of the entrance in the
City of Ancient you’ll see a big circular area (I called it the Central
Plain). The part of the real tower will also shows up inside this
area whenever you raise one from plain behind the teleporter.
Q : What must I
do to solve the puzzle in the northeast and southeast tower, I could
do nothing there ?
A : You must flooding certain area first before you could
do something in those 2 towers. Find the broken fountain in the south
passage from the Central Plain. Use your Axe of Blizzard or Crossbow
Shard on the floating ball above the fountain twice. It will re-activate
the fountain and the water should be flooding the water tunnel that
connect the northeast and southeast tower. The water should also make
the Black Lichin trees along the water tunnel grow again. Take some
if you want. And the most important thing are : the water should keep
you alive when dealing with fireball in southeast tower and as an
important factor for destroying the pyramide at northeast tower.
Q : What must I
do to solve the northeast tower ?
A : You need a silver leaf and an Ivory chip to do that.
The chip will lead you to the silver leaf plant.
Q : Where can I
get Ivory chips ?
A : You can get 4 Ivory chips in 4 different places in this
area. Starting from the entrance :
- First
: South (reach the intersection), west, then north. Enter the northeast
entrance (at the corner). Freeze the fountain with your ice weapons
then break it. Move the crate to the platform on the ground. Do
this again in the next room. It will open the grate on the room
above. Jump to the room above and enter through the grate. Move
the crate you found there to the side of the ramp (it’s for your
quick move later). Quickly grab the chip from the statue and run
back to the ramp (the ceiling is lowering). Jump to the crate then
to the ramp. And quickly jump over and exit the area. - Second
: West from the first room where you found the chip, there is another
entrance to the south. This room contain two gargoyles that separated
with a big chasm. If you walk straight from the first gargoyle to
the second gargoyle across the chasm, you’ll walk on the invicible
bridge. Take a leap of faith and cross the bridge. Get the chip. - Third
: Back to the intersection. Then take south path. You reach the
Central Plain. To the northwest direction from the Central Plain,
you’ll see another entrance. There are 2 globes on each sides of
the room and an electric grate that protect the chip on the gargoyle.
Lit these globes will open a door to an alcove on the left and right.
Inside these alcoves there is another globe. Lit these globes will
open the electric gate that protect the chip. Now do this quickly.
Grab the chip and head south (just look at your compass). When you
reach the wall, click it. It will open the door back to the outside. - Fourth
: To the southeast direction from the Central Plain, there is another
entrance. Inside this room there is a small fountain. Freeeze the
fountain and break it. Take the final chip on the base of the fountain.
Q : Where can I
get the silver leaf ?
A : First of all, go to the room where the silver leaf plant
grows (it’s through the west passage from the Central Plain). There
are 2 entrances to this room, the east and the west. At the first
time, the west door will be closed. So open this door by clicking
the stone wall. Find a pedestal with several glowing red pillars on
it. It’s just north of the southeast tower. Circle it to find the
Ivory chip holder on the base of it. Inserting the chip in it will
raise a gun from the hole in the middle. It will shoot a lightning
bolt that will break the glass door blocking the back room at the
museum (if you had opened the door to the museum first), go through
the west door of the room with silver leaf plant and raise the floor
to the silver leaf plants. Since the bolt will raise the floor in
only for a short moment, you should take the silver leaf first before
you go to the museum. Run as quick as you can before the bolt reach
the room with the silver leaf plant. Pick as much as you can. As soon
as you heard a bell chime, run to the outside.
Q : What is the
solution of the puzzle in the northeast tower ?
A : Use the silver leaf at the base of the pyramide. Click
on the floating yellow octahedron. It will water the area. Click on
the hourglass to speed up the time. The silver leaf will grow and
break the pyramide. The fireball will open the door at the big black
pillar. Do exactly the same as the northwest tower. Note
: You can grow aloe, black lichin, and silver leaf plant here
also. Put them in the plots of land that surround the pyramide. Click
the yellow octahedron to water them and the hourglass to speed up
the time.
Q : What must I
do to solve the puzzle at the southeast tower ?
A : When you reach the southeast tower, a grate to the right
will raise open. Enter that archway and jump over the canal. There
are 4 sets of yellow door. Each row contains 3 door. Open these door
with this order : left, left, right, right, left, left, middle, and
middle. Lit the oil with Spark spell or fire weapons. The explotion
will break the pyramide outside. Take the Dark Bow. If you didn’t flooding the water tunnel
as I mention earlier, you’ll be fried to death before you can reach
back the canal. Do exactly the same as the previous towers.
Q : What must I
do to solve the puzzle at the southwest tower ?
A : Take back the ivory chips at the gun pedestal and the
door inside the museum, then go to the southwest tower. Insert all
four of the chips into the holder. It will break the pyramide. Do
exactly the same as the previous towers. Once you’ve solved all of
the puzzles, the Real Tower will completely rebuilt.
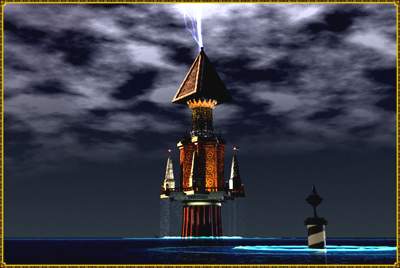
Q : What must I
do at the Real Tower ?
A : Get in there. Kill another duplication of Belial and
head through the force field. This is the Mantle of Ancients. It will
give you an access to level 5 of all spells (including your Curse
control spell).
Q : Where is the
exit from this City of Ancients ?
A : There are 2 exit way from the City of Ancients.
- First, the exit is on
the east passage from the Central Plain. Look for the north entrance.
Inside you’ll see 4 pairs of door on the left and right wall. Open
this door one by one and spark the globe inside (DON’T shoot it
with your fire weapons because the hidden chamber in the first room
on the right from the entrance won’t open if you do that). Make
sure that all of the globe doesn’t glow when you open the door.
If you shoot them, there will be 1-2 globes already glowing. Inside
the hidden chamber there is a Jewel Scarab. Now head to the north
door and open it. Move the tapestry to reveal a room with a dragon
fountain in it. Attack the red dragon with your weapon. The blood
should spill the water and open a secret door on the north wall.
Enter the door. There is a two-way teleporter into the Subterranean
Cavern behind it. Step on it and enter ….. (If you want to go
back to the City of the Ancient, just lit up four braziers in the
corner. It will activate the teleporter back to the City of Ancient). - The second exit is at
the room with silver leaf plants. If you stay for a little longer
on the moving floor. Deep below the pit, there’s an entrance to
the Subterranean Cavern. By the way, this exit way is much much
closer to the destination room in Subterranean Cavern. It is a one-way
path to the cavern so you couldn’t get back to City of Ancients
through the same path (but you could go back through the first path
: See paragraph above).
SIDEQUEST
Q : What is the
use of the big chalice inside the room near the northwest tower ?
A : If you put a mandrake root into the chalice, you will
be transported for a short while into a big room with lots of magic
scroll. You’ll be transported back automatically after a short while,
take what you wish for.
Q : How can I break
the glass door that protect the back room and opened the locked doors
inside the museum ?
A : See the note on how to get the silver leaf. The museum
is located at the west passage from the Central Plain (to the west
wall at the corner). At the first time, the entrance is closed. Open
the door and use the gun at the pedestal with several red glowing
pillars on it. The lightning bolt will destroy the glass door. Inside,
you’ll see a desk with an ink pen on it. Pull it and a secret door
will be opened. Inside you’ll get a Speaking Stone and a locked door. Unlock
the door with the Ivory Chip. Inside you’ll get the skeleton key.
Use the skeleton key to open the doors inside the museum. Behind those
doors you’ll see many chemical ingredients behind the glass cage.
Destroy the cage if you want to take them. Do it quickly because the
ceiling will be smashing down.
Q : What is the
use of the small pedestal inside the room near the southeast tower
?
A : That is a duplication machine. When you enter the room,
six alcoves open up revealing 3 pairs of items : Fire Crystal and
Ice Seed, Ancient Magic Stone and Ring of Regeneration, and Lightning
Crystal and Stone Cube. If you put one of those things on the pedestal,
its pair will shows up on the large platform. Use this machine to
duplicate Ring of Regeneration as many as you
can. It’s very useful for the final fight againts Belial.
EVIL
LUTHER
Q : Should I kill
Bacatta, he attacks me ?
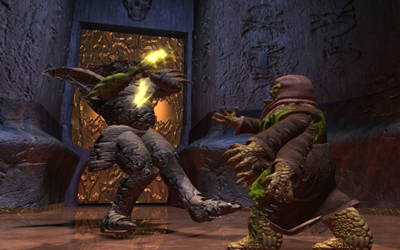
A : After you kill the Belial’s clone in the Real Tower,
you’ll facing Bacatta. He tries to stop you getting into the Mantle
of the Ancients. Kill him and take his Serpent Staff.
SUBTERRANEAN
CAVERN
Main
Goal
: Find a way to Belial’s Laboratory
Q : Where is the
entrance to Belial’s Laboratory ?
A : The entrance is in the southwest area. This room has
a weird ceiling. It looks like living pods hanging on the ceiling.
In one corner of the cave wall, you’ll see an entrance with many flesh
tube inside. Hack these tubes and go through. Click on the left passage.
Use your sword to open the closed door. Look carefully on the right
side of the screen. There should be a “thing” just like a tentacle.
Click on it and wait for a moment. DON’T touch anything until a big
spider shows up. After it “repairs” the tentacle, a path to the left
will open. Go through this path and hack your way to Belial’s laboratory.
Q : Should I kill
those green spiders, they are very annoying ?
A : DON’T kill them. Just run and avoid them. That’s the
best way. If you kill those creatures, there will be another brown
spider formed somewhere. And these brown spider is an ugly, mean,
and nasty creature. You don’t want to mess with them, believe me.
BELIAL’S
LABORATORY
Main
Goal
: Find Dawn
Q : What should
I do in this bloody chamber ?
A : After Bacatta gives you the Belial’s Horn (that’s the
only weapon that can kill Belial), you’ll arrive in a room with a
blood pool in the middle. Jump to the pool and crouch. Break that
grate with your weapon and morph into lizard form. Follow the canal
to the other side.
Q : Help, I’m can’t
pass the slime canal. It always kill me. What should I do ?
A : Raise the dam first to stop the flowing of the slime.
Morph back to human form just at the edge of the canal. Shoot the
3 levers on the wall with your range weapon. It should raise the dam
and stop the flowing of the slime. Step on it and cross to the other
side. Raise back the levers to empty the next room from the slime.
Now you’re save to continue your journey.
Q : I always died
when I tried to jump off the edge. Where should I go ?
A : Find another edge to jump off. There is only one edge
that save enough to jump. Head north from the entrance. If you arrive
at the room with deep pit, you’re on the right track. Pull down the
lever to lower the bridge. Cross the bridge and head north. Follow
the path to the east until you reach an edge. jump to the canal below.
Head downstream until you reach another chamber.
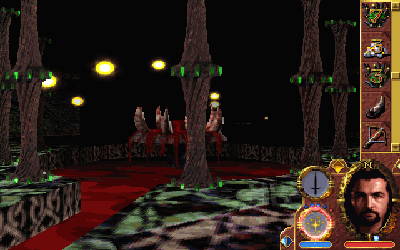
Q : What should
I do in the Summoning Room in the lower level ?
A : Summon something in that room. Use your Apparition spell
(Myst of Doom level 1 spell) on each of four skull on that room. It
will summon a little daemon. Kill it and get the Ancient Stone from its body.
Q : Where should
I go ? Seems that there isn’t any way out from this level.
A : Drag the daemon body into the other room on that level.
Put the body on the platform beneath the skull. It will open a secret
door. Enter the opening and use the elevator to move down to the lower
level, the Birth Chamber. You’ll meet Dawn here.
Special
Note : Don’t go yet when you meet Dawn. Just keep on clicking
on her, and she’ll give you the Ruby of Truth, eventually.
EVIL
LUTHER
Q : Where can I
get the Belial’s Horn ? I don’t see Bacatta around.
A : Since Bacatta is dead now (thanks to you !!!), you won’t
see the cutscene showing him killing the Belial clone. You have to
kill that clone by yourself. Get the Belial’s Horn from his body.
Q : What should
I do with Dawn ?
A : Dawn will try to seduce you in order to disarm and murder
you. Kill her now.
BIRTH
CHAMBER
Main
Goal
: Defeat Belial once and for all !!!!
Q : How can I kill
that ugly brown blob ?
A : You couldn’t kill it directly. You have to share something
with it first. Transfer your curse to the blob (use your curse level
5 spell). Belial will come out from its body and kill it. But …….
you’ll have to fight few daemons as a consequence. Kill them all and
take those Ancient Stones from their body. Break the
door with your weapon and chase Belial.
Q : How can I pass
those blue cloud thing ?
A : Shoot the 2 left most blue generators on the ceiling.
It will open a gap to pass through.
Q : What must I
do in the room with moving pillars ?
A : Jump from one top to another to the other edge. Kill
Scotia first (use the Ruby of Truth to kill her) before you jump your way
out. The safest way to jump is : north, west, north, northeast, then
jump to the edge.
Q : What must I
do in the armory ? The traps always kill me.
A : There are 3 traps to disarm here : the moving stone blocks,
the flaming spears, and the pillars of ice. To disarm the moving stone
blocks simply just by destroying the floating stone on your left with
your weapon. Then shoot the red cloud with your ice weapon to disarm
flaming spears. And for the white cloud, use your fire weapon to disarm
the pillars of ice. You may have to do this several times, because
these traps can regenerate very quickly. But once you have disarm
all 3 of the triggers, the traps won’t regenerate again. On the corners
in this room, you’ll find Dragon Scale Gauntlet, Dragon Fire Bracers, Dragonscale Armor, and Ring of Drake Fire. Note
: if you kill Scotia and get to this room quick enough, you can get
all of those things and kill Belial more easily later (because he
couldn’t use that things as a protection)
Q : What is the
best strategy to kill Draracle’s clone ?
A : Use the Ruby of Truth to kill him instantly
Q : What is the
best strategy to defeat Belial ?
A : This is a very mean and nasty fight. Prepare yourself
with adequate armors like : Dragonscale Armor, Dragon Fire Bracers,
Ring of Drake Fire, and Dragonscale Gauntlets. There are several ways
to defeat Belial. First, you must be quick. Don’t let him prepare
his spell for you. Attack as soon as you can. If you’re not quick
enough, you may want to trap him first. To do this you must have several
Stone Cube or Ice Cube with you. First, find the small pool in that
big area. This pool will regenerate the hit and mana points. Drop
the cube on the 4 entrances to this pool. The cube will form stalagmites
and prevent Belial to enter this pool. Then chase him, until you can
cornered him. Put the cubes surround him so he couldn’t move again.
Then attack him as quick as possible with Belial’s Horn. In no time
he’ll be dead !!!! Watch the ending.
EVIL
LUTHER
Q : What is the
twisted story here ?
A : Instead of fighting Scotia, you will have to fight just
3 small imps (isn’t it wonderfull). And you won’t have to face Draracle’s
clone in the Armory (yup, Scotia is here now !!!). But …. the mean
things are : You will have to fight both Belial and Draracle in the
final fight. I know, not both of them at one time. But after you kill
Belial, Draracle will shows up. Show those guys who’s the new KING
in this land. Kill them all.
EPILOGUE
GOOD
LUTHER
At last, Luther can overcome
his curse. He and Dawn will live happily ever after and the Draracle
will leave them in piece. One thing that dissapoint me a lot from
this ending though. They should make the ending more sophisticated
and interesting. The ending movie is one of the worst I’ve ever seen.
It’s too short and doesn’t worth the final fight against Belial. Sorry
Westwood. You should’ve done better for this …….
EVIL
LUTHER
At last, Luther can overcome
his curse. He is the new EVIL god of the lands. Ha … ha… I’m gonna
rip those guys off. This ending is more enjoyable. Watch how the EVIL
works.
Special
Note : By the
end of the game you should have collected 12 Speaking Stones that
tell you the whole story of the Land.
USEFUL
ITEMS
These are several useful
items that can be found lying around the land. I’ve put it in several
table. The quality is sort from the worst to the best.
| Melee weapons | Special power |
|---|---|
| Dagger of Light |
None |
| Stalagmite/Iron Rod |
None |
| Dagger of the Empty Hand |
None |
| Mace/Staff/Short sword |
None |
| Gauntlet of Striking |
Increase protection |
| Halberd/Fine Long Sword |
None |
| Axe of the Long Arm |
None |
| Long Sword Prism |
Blind |
| Thoehan Great Sword |
None |
| Serpent Staff |
Poison target |
| Dracoid Dagger |
Drain life |
| Halberd Bastion |
Increase protection and combat |
| Great Axe Blizzard |
Cold damage |
| Firestorm Sword |
Protection and release Firestorm at distance |
| Rever of the Great Orc |
Need Gauntlet of Might for use |
| War Axe Traitor |
Need Bracer of Valor for use |
| Darkstorm Sword |
Protection and Drain life |
| Enchanted Thoehan Sword |
Lightning Storm |
| Belial’s Horn |
Only weapon that hurt Belial |
| Range Weapons | Special Power |
|---|---|
| Rock/Throwing Dagger/Light Crossbow |
None |
| Crossbow Snare |
Throw web |
| Longbow Shift |
Spark and smart missile |
| Death Stroke Dagger |
Lightning Bolt |
| Dagger of the Empty Hand |
Return to hand |
| Axe of the Long Arm |
Return to hand |
| Guardian Orb |
Create sword that attck your opponent |
| Long Bow Defender |
Double Shot |
| Dagger of Light |
Shoot Crystals |
| Crossbow of Valkeri |
Release Firebolt |
| Plasma Staff |
Triple Firebolt shot |
| Crossbow of Shard |
Shoots ice crystal |
| Noble Valkyrie Crossbow |
Shoot triple Fireball bullets |
| Crossbow Milliard |
Shoot 3 smart lightning bolt that can follow enemies |
| Dark Bow |
Drains life |
| Net of Exile |
Kill opponent directly |
| Armor | Special Power |
|---|---|
| Coward’s Target Shield |
Invisibility |
| Plate |
None |
| Obsidian Chain Mail |
None |
| Reflection Armor |
Reflect magical attack |
| Fire Shield |
Fire resistant |
| Dragon Scale Gauntlet |
Protect against weapon |
| Dragon Fire Bracers |
Fire resistant |
| Dragonscale Armor |
The best armor in the game |
| Magical Items | Special Power |
|---|---|
| Ancient Stone |
Allow access to level 5 magic |
| Lightning crystal |
Cast spark |
| Coco’s cap |
Heal wounds |
| Iron Rod |
Recharge lightning crystal |
| Stone of The Cobra |
Sink slower in the water |
| Fire Crystal |
Cast firebolt |
| Ivory chips |
Increase mana |
| Dragon gem |
Increase protection |
| Speaking stone |
Recording machine, right click on portrait to use |
| Dragon’s blood |
Time bomb, right click on portrait to activate |
| Ring of Regeneration |
Resurrect character |
| Helin’s Ring |
Increase attack speed in lizard/beast form |
| Vell’s fruit |
Eat them to neutralize poison |
| Stone Bracers |
Wear it to protect character from poison |
| Bezel Ring |
Increase protection and increase attack speed in lizard form |
| Bracers of The Dead |
Wear it and you can talk to the dead |
| Gauntlet of Might |
Increase might and to use the Rever of the Great Orc |
| Stone and Ice Cube |
Throw to the ground to create stone stalagmite |
| Kenneth’s Charm |
Increase your stats |
| Ring of Cat |
Increase protection to your body and speed up your weapon use |
| Ring of Drake Fire |
Turn spark spells into Fireball |
| Ruby of Truth |
Destroy illusionary monster |
| Storm Crystal |
Release lightning storm |
| Dampen Necklace |
Access to Curse spell level 1 |
| Control Token |
Access to Curse spell level 3 (Human spell) |
| Lizard Amulet |
Access to Curse spell level 2 (Lizard spell) |
| Colon’s Amulet |
Protect against the undead |
Below is the list of the
alchemical combinations I’ve found so far ….
| Object 1 | Object 2 | Result | Use | ||
|---|---|---|---|---|---|
| Acid Sac | + | Champion Stone | = | Pod of the Changeling | Change to beast with max. strength |
| Amber | + | Ironwood Sap |
= | Champion Stone |
Increase might |
| Amber | + | Venom Sac |
= | War Cluster |
Reduce damage taken |
| Black Lichin | + | Gorgonite Nodules |
= | Stone of the Gorgon | Turn any creatures into stone |
| Tar Crystal | + | Venom Sac |
= | Death Sac | Deadly poison for weapons |
| Gorgonite Nodules | + | Rainbow Sulfites | = | Mind Cluster |
Reveal entire map of the area |
| Lamplight Eggs |
+ | Tar Crystals | = | Acid Sac | Damage opponent with acid |
| Lamplight Eggs | + | Venom Sacs | = | Poison Paint |
Apply to your weapons to poison them |
| Mandrake Roots |
+ | Tar Crystals | = | Pyro Pod |
Turn Spark group into Firebolt group |
| Poison Paint | + | War Cluster | = | Force Pod | Allow access to level 5 magic |
| Rainbow Sulfites | + | Silverleaf | = | Manafoil | Restore your mana point |
| Silverleaf | + | Wild One Serum | = | Lharkon Vapours | Put Lharkon into sleep |
Copyright
: CRASH @ 1997
All pictures are property of Westwood Studios and Connected
Media Ent.
Best viewed using IE4.0 with resolution : 800 X 600
Any comments and addition can be sent to : Crash’s
Email