Journey to the Center of the Earth
Mines
Dock –
Talk to Angus, Captain of the Eider. He will give you special pass to enter the
mines for a favor – to give Maoro Fi seeds from his country. To get to
Maoro Fi, don’t let anybody see you until the extraction zones and hide in
automated wagon programmed to take you directly there. The machete and
knife are back in inventory.
Go left
towards the green automatic mine car. Look close at lever on the side of the
car. Move the knob left and then down. Watch.
Mine –
Go to bottom screen and talk to the digging giant. He gives a message to
Angus. Read the message – Heard tell of a revolt some would
rather fight than mine. No names but keep your eyes peeled. Go
back to the Captain via the mine cart. Give him the message, get a visitor’s
pass and learn more about the resistance. Hmm. Back to the mines by clicking
on the entrance to mines.
Talk to the
head driver, Firmin. The machine needs filter, water pressure is too low and he
gives you an order slip. Orders are rubber stamped by Wallace. Read the
order note 24/EZ for part 74F1.
Platform – Go to the derrick-elevator at back wall. Press
the buttons at left of elevator. At the surface, check a news bulletin in the
computer.
Go to the
right screen. Talk to the giant Hutha Meo, supervisor of the platform standing
guard by the geyser elevator. The geyser is accessed by anyone having a
management staff card. Go back close to the derrick-elevator and go right by the
long building. You will see an aerial view of the platform: the large supplies
building, glass roofed building, waterwheel between them and to the left the
guarded geyser entry. Enter the door at the end of the large supplies
building.
Supplies
and sorting building – Talk to Amalia. Her staff mate can use the geyser.
Pick up the paper by Ariane’s feet. Read it – Let the
revolt begin. Meeting tomorrow. A.
Supplies – Go to the next aisle and take filter on the right
shelf. Turn around and take blank sheet of paper and lead pencil
by the ladder. Click pencil on blank sheet of paper and then read it in the
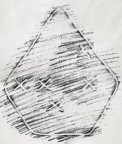
computer – it’s a diagram with Xes. Check another e-mail. Click on green metal
plate on the floor for the hotspot to the main aisle. Go to the back of the
building.
Sorting area – Click the computer on the bulletin board and read the
schedule and rules. Click to the right of end of the aisle and then climb ladder
to go the worker in yellow. Talk to Kia Tran, in charge of sorting. He lied
about access to the geyser. Leave the building and go back to the mines to
deliver the filter.
Mine –
Talk to Firmin. He wants you to recalibrate his machine based on the
calculation sheet.
Recalibrate machine –
Calculate
the sheet and look at the computer for the result.
First step
– ideal cadence 15. Second step – ideal cadence 37. Third step – ideal cadence
8.
Go to the
machineries by right wall and look close at the 3 gauges by the pipe going
up.
1. Click on
the button of the left gauge to turn it green. Click on the 15 mark to move
the slider to 15. Check gauge.
2. Click on
the button of the middle gauge to turn it green. Click on the 37 mark to move
the slider to 37. Check gauge.
3. Click on
the button of the right gauge to turn it green. Click on the 8 mark to move
the slider to 8. Check gauge.
If
correctly done all the buttons will turn green.
Go back to
Firmin and talk to him about machine. He gives you a map of the mine.
Read map. There’s an arrow behind the geyser door the giant was guarding.
Supervisor
building – Take the elevator to the surface again. Go to the right by the
long building and then to the glass roofed building at the southeast corner of
the platform.
Go inside the
glass roofed building and talk to Taal Nadi, platform supervisor and friend of
Adam. The lab is accessed through the geyser. The geyser is alarmed but there’s
a system here that blocks the mechanism.
See Bares Mohul appear outside. Ariane asks Taal to distract
Bares, who said he’s never been here before and to tell him, she’s just leaving.
Take the black sheet of iron at the right foreground behind Ariane.
Turn off
the alarm of the geyser elevator – Look close at the console that is used
to ‘unjam’ the geyser. Each set of numbers must go to the other
side.
Move 1
black number to the right.
Move 2
white numbers to the left.
Move 3
black numbers to the right.
Move 4
white numbers to the left.
Move 5
black numbers to the right.
Move 5
white numbers to the left.
Move 5
black numbers to the right.
Move 4
white numbers to the left.
Move 3
black numbers to the right.
Move 2
white numbers to the left.
Move 1
black number to the right. Green light comes on.
Now the
geyser elevator doesn’t have an alarm. Next, we should take care of the guard by
the geyser elevator door.
Waterwheel –
Distract
the guard by the geyser door – Go to the open pipe that brings water down
to the waterwheel located between supplies and the glass roofed supervisor
building. Place the sheet of iron to block the flow of water on the open pipe.
Go down the ladder to the waterwheel and use the machete on the belt on the
smaller wheel on the left.
Geyser
elevator – Talk to Hutha Meo and he will leave his post. Enter the geyser
elevator and see the lever to go back to the platform, an open pipe-tube and a
diamond with buttons that looks familiar. Look close at the buttoned diamond and
recollect the tracings on the blank paper (Schema) taken at the supplies
building. Press the buttons as shown by Xes on the schema. WOW!
Laboratory – Enter the door at bottom of screen. Ariane
hides while Armanda talks to a co-conspirator. Armanda leaves. Go to bottom
screen and take the red phial of acid (Armanda’s favorite drink) 🙂 from
the sink.
Ball
Puzzle – Go to the desk by the exit door and click the
computer on the paper under the desktop.
12 white sister. One of them has a different weight.
In three weighings you have to find out which one of them it
is.
Otherwise she’ll change her name.
Ariane says
‘One of these balls must go to the elevator tube’.
You are to
find a ‘unique’ ball’, it could be lighter or heavier.
You can
only weigh the balls 3 times.
If you
start a new game, the balls are mixed up and new balls are added.
The
following description is what works for me.
1. Start by
grouping the balls to 3 sets of 4 balls.
2. Weigh 2
sets of balls (4 balls on each pan) by flipping the lever to hold and then
release to weigh the pans.
If they
are equal, the third set has the unique ball.
If they
are uneven, the unique ball is in the 2 sets of balls weigh.
Remember
which pan is the heavier or lighter.
3. Take
off 2 balls from one pan – remember if it is from a heavier or lighter
pan.
4. Take one
ball from one pan and place it on the other pan to even the number of
balls to 3 each pan.
5. Weigh
the pans.
If they
are even, the unique ball is found on the 2 original balls taken
off.
If they
are still uneven, and the pan that was heavy stays heavy – work with balls
on the heavy pan.
If they
are still uneven and the pans changed weight – work on the balls of the
changed pan.
6. Weigh
the pan the third time with only a ball each.
From here
you can deduce which ball is unique.
Remember
the sequence choice of ball selections – ex. heavy, heavy and heavy – the
light one is the unique ball in the last weighing.
Check the
safe and Ariane says she needs more info. Go to the bookcase and open the
right door. You have to position Ariane coming from the right to get a hotspot
on the bookcase. Click the computer on the book at second from top shelf and see
a memo about Antwerp Diamond Cutters. Go out – uh oh, Armanda locked us
in. Use the phial of acid on the lock and find Ariane on the catwalk.
Go to the
geyser elevator. Place the unique ball on the open pipe-tube at bottom right of
screen.
Secret
Office:
Check the
desk at opposite wall from elevator door. Take a reel of film, fake
photo (read), disk (analyze) and the note in the book. The disk
contained 3 bank accounts – 2 personal and one official. The note in the book is
a diary. Read the diary about Alexander. Look at the map on the
wall.
SAVE GAME
here!
It’s time to
choose:
Go through
the ornate double doors and be famous. You will see what happens to this place
when surface people comes because of Ariane’s scoop. Game ends.
Go through
the small door to the elevator and help the people that has become your friends.
Game continues.
More
Proof of the Conspiracy
Go through
the small door to the elevator. Pull the lever to get to the platform. Check the
news bulletin. Talk to Taal Nadi. Bares set off an alarm when he saw Ariane.
Adam is at the supervisor platform. Ariane told Taal that she blocked the exit
to the surface. Go to the glass roofed Supervisor building.
Mines:
Supervisor
Building – Talk to Adam. The safe has the proofs of the conspiracy needed to
show the allies. The tubes on the safe must contain same quantity of
liquid – figure what is in each test tube and go from there.
Click the
computer on the chemical formula paper on the floor and read – Add the
black diamond powder to the acidic solution and the white diamond powder to the
basic solution. Take another sheet of iron by the control panel. Go to
the Supplies building.
Supplies
building – Diamond Sorting Area – Go to the main aisle to the back of the
building where you saw Kia Tran sorting the diamonds. Climb the ladder to go
where Tran stood before. Take the white and the black diamond
powder from the conveyor belt. Read a new memo on the bulletin board
about procedures to be undertaken concerning diamonds. Read the duty note
concerning contact with Ariane.
Go to the
geyser elevator and click on the diamond button to go to the laboratory.
Laboratory –
Sink – Enter and go to the sink. Take the strips for chemical
analysis. Analyze and read how to interpret the results of the strips:
neutral – strips stays the same, acid solution – color becomes deep and basic
solution – color becomes light.
Safe – Use the pH strips on the 3 tubes on the door of the
safe.
Blue tube
– strip became lighter – basic solution
Red tube
– strip became darker – acid solution
Clear
tube – strip stayed the same – neutral solution.
Based on
the chemical formula paper from the Supervisor building, diamond powder needs
to be added to neutralize the solutions. BUT do the opposite of what is
stated on the paper.
Blue tube
– basic solution – add black diamond powder
Red tube
– acidic solution – add white diamond powder
White
tube – neutral solution already.
Click the
computer on the books in the opened safe and read about the confidential
clients and the account report. Go back down to the
platform.
Platform – Talk to Taal Nadi again. He believes now and
will meet you at the village. Go to the derrick elevator. Take the ladder
by the elevator. Go down to the mines.
Mines
– Go to right screen by the machineries on the wall and see dynamite attached on
an overhanging metal. Click the ladder on the metal door. Climb up and use the
knife on dynamite.
Go to the
extreme left of the derrick-elevator and look at stack of dynamites on the mine
cart. Ariane wants it pushed to the sea.
Go through
the mine and out to the submarine. Talk to the Captain. He’s still stubborn. Go
to the end of the railway tracks close to the water’s edge – where the railcar
used to stand. Place the sheet of metal on the railway tracks and Ariane will
make a ramp to the sea.
Go back
inside the mine to the dynamite laden mine cart.
Use gloves
and then click on the lever just a little to the left of the switch stand
between the 2 rail tracks. The hotspot here is a little difficult to find. Then
click on the mine cart to give it a push. Watch what happens.
Go back and
talk to the Captain.
Village:
Arrive by the
village dock. Check the e-mail. Go talk to the balloonist and select Giants. Go
to the village.
Healer
- Talk to Jahine, the healer since nobody else is around. She wants the Ball of
Memory as proof of Bares’ part in the conspiracy. Wake the plants with the help
of the little butterfly that after being fed will fertilizer the flowers
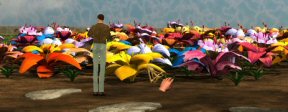
and the wall of vegetation will open up. Use the snare-flower. Look close at the
shelf behind Jahine and take the giant red trapping plant.
To get
the Ball of Memory:
Garden – Outside the arena gates, use flask full of water
on the yellow flower at the corner of the garden in the foreground. Then click
the butterfly on the same hotspot.
Watch. The
butterfly made an opening on the wall of the arena.
Arena – Enter and on the aerial view, place the
trapping flower on the sole square slab on the ground. It will trap the
ball of memory. Go back to the healer.
Healer
- Talk to the healer and give her the ball of memory. The matriarch is in
the valley of the spirits. She gives you a flute to neutralize the force
field.
Valley of
the Spirits – Use the flute on the force field. Go forward until the face on
the stone to bring the floating garden down. The tongue is gone but a
message is left there instead. Read the message of Alexander to Bares
Mohul.
Balloon – Leave the valley and go to the balloon and
Gustav. Ask Gustav to go back to the City.
City:
Market
- Balloon lands at the market. See that Armanda is blocking the entry to
the altimonorail station tower. Go to the stall with the clock. Take the blue
cloth and the telephone token.
Crossroads – Exit marketplace and be at the crossroads.
Talk to Enrique. Adam asked him to watch over Ariane. Wallace is at the
University.
Public
Phones –
Market –
Check the public phone #123-06 between the barrels close to the arched exit of
the marketplace. Not enough information to use the phone.
Crossroads –
Go to the end of the path north of the pet shop and see public phone #123-05
left of the last house.
Main road –
At main road before turning left to the market, see another public phone #123-08
at the corner. Main Gate – Go to the main exit out of the city that is now
closed and see another public phone #123-04 to the left of the gate.
Communications Building – Then, go to the Communications building.
See that Bares Mohul is guarding the entry to the other Altimonorail station
tower. Ariane has the idea of knowing the public phone number to the tower where
Bares is and trick him by pretending to be Armanda.
To get
Bares away from the Communications building altimonorail –
Go back to
Enrique and ask him for the phone number of the public phone by Bares. He
gives you the list of the phone numbers. Read the numbers in the computer. By
deduction the only phone number we have not seen is 123-09 – so that’s the
number of the phone by Bares.
Go to any
public phone. I used the one at the end of the road north of
Enrique.
Place the
blue cloth on the round dial and mouth piece.
Click the
token on the slot. Listen to Ariane talk to Bares.
Go to the
Communication center area and see that Bares is gone. Take the altimonorail to
the Academy.
Academy:
Laboratory – Go to the laboratory at left screen after
entering the building. Check an e-mail from Hector. Look close at table and take
the note concerning the power collector from the box and the conference
papers. Analyze and read them.
The Energy
Collector shows that to change the collector coordinates: emit a photoelectric
wave frequency 054, density 7 and coordinates 45W, 78N. The Conference paper
states questions about the giants and humans.
Go to bottom
of screen and close to the machine on the right. Now you will see the table.
Look close at corner table. Read the paper on the desk.
Hanoi
Tower – Move each roll of film to the third post to reconstruct the same
tower. Caution: Never put a bigger roll on a smaller one (this may bend it out
of shape).
Click on a
roll and place it on any stand as long as you don’t put a bigger one over a
smaller one. Good luck!
Take the
note and Plimantair flask from the compartment. Read the note.
Plimentaire (C2H6O): harmless for humans, harmful to giants (25% lethal).
Transmitted by contact. Takes effect in 15 minutes. Cannot be eradicated. Go to
Archive room right of main entrance door.
Archives – Lift up and down the lever of the big
typewriter like machine to the right of the desk. Take the printout and read the
RectorChoice. Hmmm!
Leave the
archives – Uh Oh! Now we’re in trouble! Talk to the Rector with Bares on
watch.
Alert the Others of the Conspiracy
Peter’s
Prison – Go to right screen and look at the
paper on top of the drawer right of fireplace. Message to Peter –
Please detain the young lady until I arrive.
Look around a
see a hanging basket suspended from a grill at the ceiling.
Go to the
arched blocked doorway. While facing the blocked doorway, click on left frame by
tree branch.
Peter’s
Laboratory – Enter the next room. Take the fuse under the right side
of the tabletop and the periscope map paper on the table top. Read the
periscope map and see it missing lens and mirror.
Go to left
screen and talk to Peter. Play with the periscope and it turns 90 deg.
Escape – Go back to the other room.
In
inventory, combine the dynamite and fuse. Place the combined dynamite
in the hanging basket.
Use lighter
on basket and watch. Pick up the iron bar.
Go to
bottom screen with the view of the fireplace to the left. See an opening at
the ceiling.
Click iron
bar on rope and then use it on the opening at the ceiling.
Old mine
by the beach – Go to opening framed by statues and then to the
Mushroom Garden. Talk to Adam. Find Gustav. To stand guard, Adam needs food,
blanket, fern mattress, box of wood and coal. Find Jahine, the healer and warn
her of the plague. Go and take the bones from pile in front of his hut. For
proof, tell others to come and see the surface. What a list to do.
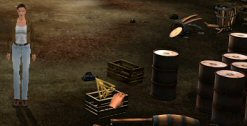
Go back
inside the mine and click on items opposite the rotating wheel to pick up
coal and empty box beside it.
Mushroom
forest – At screen after Adam, pick up ferns.
Go up the
platform station. Take the food reserves from the plate on the table and
blanket from the bed.
Go to Adam
and talk about Installation to give him all the items he needs to stand
guard.
Adam’s
hut – Go through the forest and the bridge. Check the e-mail from Gary about
turning the laptop on and off every 5 minutes. Go pass Adam’s hut and just
before the next bridge, pick up the bone (little crushed bones)
protruding in front of the rocks.
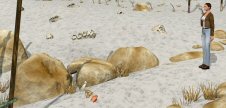
Savannah – Go forward and see Gustav flying by the Giant
fern forest. Click on the balloon. Continue forward until the dinosaur place.
Talk to Gustav. He takes you to the Giants.
Giants
Village – Read the news bulletin. In the clearing by the mammoths, pick up
the dry mastodon dung and coconuts on the ground. Proceed to the
village.
Talk to Taal
Nadi at the hut.
Fisherman – Talk to fisherman, Payan Ouva. In exchange for
a firefly, Payan Ouva wants you to put back the crawfish traps where they were.
There are 3
symbols: One male, female and one for couples. There are 3 traps: males,
females and couples. The current mixed them up. Look for lines tied to bottom
and then lure them with the bait.
Crawfish
trap puzzle: Go left of the fisherman’s hut and
look close at the 3 traps.
There are 3
traps with ropes colored red, green-blue and gray.
There are 3
stones marked green-blue male, red female and both symbols in one
stone.
Place the
bait on a stone.
When a
crawfish comes, check the color and then click on the corresponding colored
trap – either the red or the green.
Then click
another trap and it will change to the color of the trap you initially
clicked. Then clicked on the third trap to change it to that color also.
You’re done
when the bait disappears from inventory and you get out of the close-up mode.
Talk to the
fisherman and he will give you the firefly.
This is
what worked for me:
If Green
crab – sink green trap, sink gray trap that turns green, sink red trap that
turns green.
If Red
crab – sink red trap, sink green trap that turns red , sink gray trap that
turns red.
Healer
- Talk to Jahine. She needs heated coconut, crushed bones and berries
from initiation lane to make the potion to protect the village.
Potion:
Go to
initiation lane look close at last post on the left, use gloves and pick up
the berries of the 5 senses. Go back to the healer.
Place the
mammoth dung on the rock close to the healer’s leg.
Use the
lighter and then click it on the dung. It will now be on fire.
Place the
coconut on the fire.
Place the
berries on the coconut.
Place the
crushed bones on the coconut.
Tell the
healer about the preparation. She says – Pour the brew on the sponge and
squeeze it on the village square.
Use gloves
and take the floating coconut brew to get a ready sponge.
Go to the
hut, talk to Taal Nadi about the sponge.
Squeeze the
sponge on the holes on the floor right of Taal Nadi.
Talk to Taal
Nadi again. He will see you to the Valley of the Spirits.
Valley of
the Spirits – Talk to the matriarch, Aira Mnude. Watch!
Askiam:
Go back to
the balloon and Gustav. It’s time to go back to the city.
Marketplace – After landing at the marketplace, the phone
rings. Answer the public phone left of the entryway. Enrique wants you.
Ariane says
to disable the balloon. Go to the balloon, click on the control panel and take
the helium bottle.
Communications building – Go to the communications center
either by walking or the altimonorail. Talk to Enrique at the communications
control panel. He gives you the master key to block the altimonorail to
the Academy.
Use the
elevator and then look close at the control panel. Click on the button under
Academy to turn it to red. Pick up the pliers from the floor.
Wallace – Go to the Pharmacy, left path from the crossroad.
Talk to Wallace about the poison and other topics to convince him.
Now to find
the missing parts of the periscope after all the invitations given
out:
Go to the
pet store by standing at the hotspot on the road in front of the store. It’s
closed. Use the master key and enter the pet store. Go to the backroom office
and use the pliers on the magnifying lens by the half triceratops. What
else was missing on the periscope? Mirror.
Go to Ocine
outside the city gates. Talk to Ocine and he allows you to take the mirror
from his camera. Go to the tower and click on the camera to get a small
mirror.
Read the new
e-mail from Gary. Click on the dinosaur-power railcar.
Peter’s
Laboratory – Automatically arrive at Peter’s Lab.
Fix the
periscope –
Click on
the periscope. At close up, place the glowing firefly inside to see the
mechanics of the periscope.
Move back
the 3 clamps.
Place the
small mirror at the base.
Place the
lens on the 3 clamps.
Take the
bright firefly out.
Talk to
Peter. Click the computer on the coordinates paper on top of the table
by the door. The coordinates – view harbor 125 – 87.
Click on
the periscope. Watch.
This
document may not be distributed without express written permission of the
author and the content may not be altered in any way.
For
Questions or Comments on this Walkthrough,
Please write to: MaGtRo
Copyright ©
10/2003 MaGtRo