Third
Floor
 Logic Logic
Passage – The object of the puzzle is to move all the disk on
the left side to the right side. You can have the same number of
black and whites on any island but not more black (B) than whites
(W). The transfer boats has to have a disk to turn around. The
journal has the solution to the puzzle.
Left
Island |
Middle Island |
Right
Island |
4 W –
4B |
– |
– |
3W –
3B |
1W –
1B |
– |
3W –
3B |
– |
1W –
1B |
3W –
3B |
1W |
1B |
4W –
3B |
– |
1B |
3W –
2B |
1W –
1B |
1B |
3W –
2B |
1W |
2B |
4W –
2B |
– |
2B |
2W –
2B |
2W |
2B |
2W –
2B |
2W –
1B |
1B |
2W –
2B |
1W –
1B |
1W –
1B |
3W –
2B |
1B |
1W –
1B |
3W |
3B |
1W –
1B |
3W –
1B |
2B |
1W –
1B |
1W –
1B |
2W –
2B |
1W –
1B |
1W –
1B |
3W –
2B |
1B |
2W –
1B |
2W –
2B |
1B |
1B |
4W –
2B |
1B |
1B |
2W –
2B |
2W –
1B |
1B |
3W –
2B |
1W –
1B |
2B |
3W –
1B |
1W –
1B |
2B |
1W –
1B |
3W –
1B |
2B |
2W –
1B |
2W –
1B |
2B |
1B |
4W –
1B |
2B |
2B |
4W |
– |
4B |
4W |
– |
2B |
4W –
2B |
– |
3B |
4W –
1B |
– |
1B |
4W –
3B |
– |
2B |
4W –
2B |
– |
– |
4W –
4B |
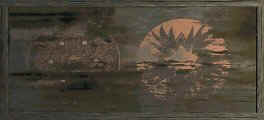
Inscribed in a chest by
one of the columns are clues for the Arithmetic puzzle on the first
floor.
 Unilateral Unilateral
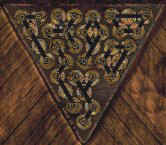
Triangular Symmetry – The object of the puzzle is to fit the
“barrels” in the triangle – pentominoe-like puzzle. Clicking turns
each part. Easter egg – under the triangle that opens the puzzle is
an animated jug.
 Complex Complex
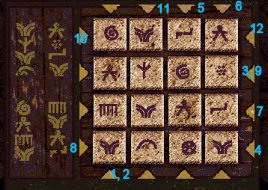
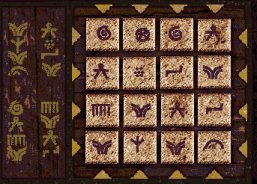
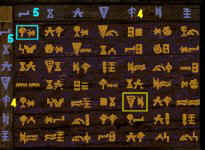
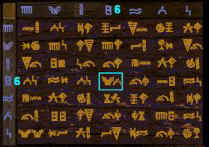
Sequential Re-ordering – The object of the puzzle is to copy
the 4 columns of symbols on the left to the right side tiles, either
horizontally or vertically. Clicking on each triangle cycles the
symbol tiles. There are several solutions to this puzzle. 2 solved
puzzles are shown below. Easter egg – the golden bird statue
for resetting puzzles spread its wings.
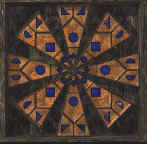
 Inductive Inductive
Reasoning – The object of the puzzle is to arrange the pieces
on the triangular plate to produce a very symmetrical pattern – a
pattern that shows the left side as mirror of the right side and the
top side mirror to bottom side. The pieces to be added are in
correct angular positions already to give a head
start.
 Logic Logic
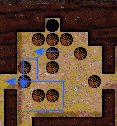
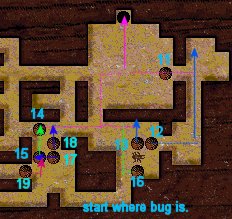
Planning – The object of the puzzle is for the bug to drop
all the brown balls into the hole at the upper right. Easter
egg – the block on the right side of the wooden door produces an
animation.
Move balls to position ON the
head of the arrow (not beyond).
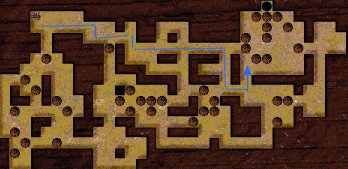
The bug’s movement is
controlled by the computer’s keyboard arrows
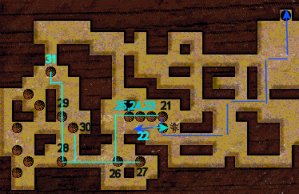
Start where the bug is. Move
ball 22 to the left 2x. Push balls 21 – 28 to hole. Push ball 29 up
2x and then push to hole. Push balls 30 and 31 to hole.
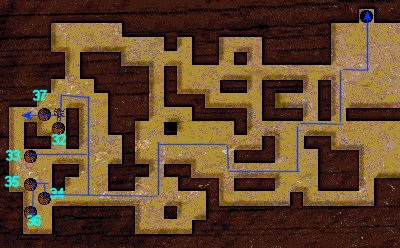
Push ball 37 1x to the left.
Push balls 32 – 33 to hole. Push ball 35 to the right. Push ball 34
-37 to hole.

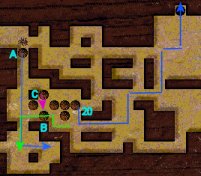
Hexagonal – The object of the puzzle is to match the
geometric shapes on the sides of the plates to the adjacent plates.
Click/hold to move the pieces. Interchange the lettered plates for
the solution.
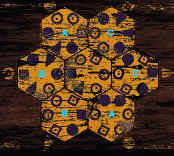
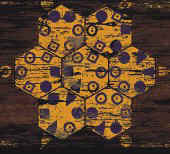

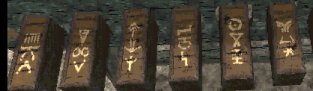
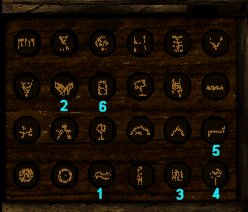
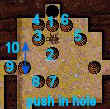
Runes – The object of the puzzle is to align vertically
the 6 triple symbols under the triangle pointer on top of the
screen, in the order seen on the clues in second floor Maze puzzle.
The first lever on the left (1) moves the outer ring clockwise and
the middle ring counterclockwise. The reverse of these movements is
done by the rightmost lever (4). The second lever from the left (2)
moves the middle ring clockwise and the inner ring counterclockwise.
The reverse of this movements is done by the second lever from the
right (3).
 Slider Slider
– The object of the puzzle is to slide the pieces to produce
a design. Use the solved picture below as reference. It is best to
do the center first, leave 2 space in between the ends of the design
and then arrange the outer edge. Easter egg – an animated
axe.
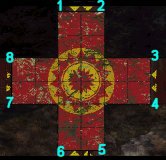
This is one solution –
3,4,2,8,6,5,4,2,3,3,4,4,1,1,2,3,6,4,4,5,7,1,5,3,6,8,6,2,2,4,1,7,7,5,4,2,7,5,5,7,7,4,4,4.
CD 1
End
Puzzle
On the right hallway by
the Professor’s desk, is the final puzzle. After collecting all the
tokens, 6 pairs of ciphers will be shown on the door before
accessing the puzzle.

The object of the puzzle is to
find a cipher that match one of the pair of clues above. The
left panel, when turned over shows the token ciphers in the same
sequence as in the token box. The right panel consists of several
panels that can be cycled clicking the top left square. There will
be several ciphers that will match the clues but only one will have
one/similar cipher in both x and y grid.
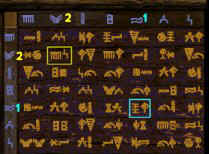
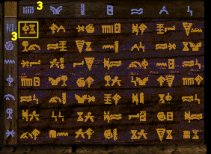
Press the ciphers on the
left panel in order as shown by the clues.
And see the
treasure of the Kavi – true Gems of Darkness.
____________________________________
This
walkthrough will be updated frequently.
This document may not be
distributed without express written permission of the author and the
content may not be altered in any
way.
Copyright ©
3/2001 MaGtRo |
 GameBoomers