Destination Treasure Island
Destination: Treasure Island
by Kheops Studios
Walkthrough by MaGtRo March 2007
GamePlay
The game comes in 2 CDs. Gameplay
needs CD2 in the CD-Rom drive. The main menu has New Game, Load, Options,
Gallery, Credits and Exit game. In New Game, select the icon you want to be
identified with. The Gallery replays cutscenes from different parts of the game.
The Options menu has choices for subtitles, camera rotation speed, object info,
light adjustment, music volume, SFX volume and voice volume. At bottom right is
the X to close, return or back to previous page.
Right click of mouse during gameplay accesses the inventory
menu and another right click goes back to gameplay. Collect items by left click of mouse on the items. They will be stored in
the transit area (right top of screen) of the inventory menu, seen by a
graphic of the item at top right of the screen and description of the item at
bottom of the screen. The items have to be transferred from the transit area to
the inventory slot (top squares) in order to be used. This can be done
individually or all items by using the ‘auto button’. Right click or click the
X-back button to go
back to gameplay screen. There are 5 inventory frames that can be opened using
the tabs on top of the frames.
Move the cursor to show description of each area in
the inventory menu. At top left is return to menu where you can save-load a
game. Overwrite on a saved game by clicking on that saved game and replace it
with a new one or make a new game. The Do-it-yourself shows the items that were
combined or disassembled by the gamer. Knots accesses the knots that have
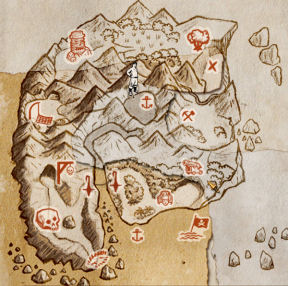
already been done during gameplay. There is a map that shows where Jim is at
present and the places that he has visited. Click on a site and Jim will
automatically walk there. Enigma is the riddle that is to be solved in the game.
The Objectives is the present mission explained by Jim.
The Combination area shown by the wrench icon is used
to assemble or disassemble items. Select an item
and click it over the combining item. It will be seen at this area. If another
item is needed, click on that item and then click it on the question mark that
is seen. To separate
a combined item, place the combined item (shown with a wrench icon) on this
dismantling area.
Left click skips the intro.
Treasure Island story is summarized by Jim Hawkins.
Long John Silver is believed to have retired and lives with his wife.
Long John Silver’s (Treasure Hunt) Enigma
Find a way out:
Jim hears a suspicious sound. Turn around and go to
the door. Jim is locked in. Morgan, Dick and Yellow Dog, the mutineers from the
Hispaniola that Long John and Jim left in a desert island locked Jim in.
Take the black spot and thick
rope from the post left of the door. Jim recalls what happened to the
Hispaniola mutineers. Right click to access the inventory screen. Click on auto
at top right to place items in the inventory frames at middle of the screen.
Click on the Black spot and see a description of the item written at the bottom
of the screen. It has the mutineers’ pronouncement ‘Depposed’ on one side and the
back has printed bible text from Revelation 22:13 and 22:15.
Pan right and take the lighter and rope
from foot of the bed. Take the sextant at right window (you can get
another one later in the game if you missed this).
Open the window and see Long John Silver’s red parrot.
Take the message from his claw. Jim reads the will that states about a
treasure at Emerald Island.
Alternative
path: Pick up the marine chronometer from the
ceiling of cabin.
The parrot sings. In inventory, combine the thick rope
with the rope. Tie the rope using the Sheet bend knot. Select bottom, top,
bottom and 4.
Get knotted ropes from inventory. Use knotted ropes on the
arm of the bench below the window. Tie the rope using Mooring with two
half-hitches. Select 1, bottom, bottom, 4 and 5. Exit through the window.
Watch Jim sail and reaches Emerald Isle and
lands at Flowery Coast. Pick up the block at the end of the jib; the long
pole at the end of the boat. Continue to the forest and go left to see a gorge.
Tyrolean Traverse: Go
back to the forest and go left towards the gorge. Click on the rope hanging over the gorge. Take the trolley handle. It
is not functional.
Trolley – In inventory, disassemble the block taken from the beach, to
get block cheek plate, wheel and axle.Combine trolley handle + axle + wheel = repaired
trolley.Use repaired trolley on rope over the gorge.
Use the trolley and be across to the other side.
Go forward until the coast of Cafe Fear.
Sixteen degree, twenty-six in
longitude,
By eighty-five and ten in latitude;
Deadly reefs ring the Emerald Isle,
Come alone if you would have fortune smile.
The Flowery Coast is your port,
Elsewhere, fear must be your consort.
The parrot sings. In inventory, combine the thick rope
with the rope. Tie the rope using the Sheet bend knot. Select bottom, top,
bottom and 4.
Get knotted ropes from inventory. Use knotted ropes on the
arm of the bench below the window. Tie the rope using Mooring with two
half-hitches. Select 1, bottom, bottom, 4 and 5. Exit through the window.
Watch Jim sail and reaches Emerald Isle and lands at Cafe Fear.
You must find where the banana tree stands,
And take the ram’s right horn in your hand;
When in the wood the song ceases,
The feathers you’ll find where the beach is.
(Continue alternative path here.)
Cafe Fear: Take the rusty
knife from the lodestone. Use the rusty knife on the block and broken mast
at right of the beach. That didn’t work. Check the lighter in inventory and see that it lost the
wick.
Skull rock: Turn around and
see a skull on the cliff wall. Go towards the skull cave and look down to see animal footprints
beside the waterfall. From here on hear a sound of a growling animal.
Enter the cave and take the knife blade,
empty helmet, string, broken statuette and figurine.
Take the fuel on the left and place it on the fire pit at the center.
Look-click on the items in inventory and see descriptions and possible usage of
some of them.
Knife – Disassemble the rusty knife to get knife hilt.
It has Long John’s initials on it. Combine knife hilt + knife blade + string. Tie the
string using Constrictor knot. Select 1, top, bottom, 4 and 5 and get a
knife.
Cape Fear – Beach: Go back to beach and use the knife on
the block attached to the broken mast to get a block.
Gallows Gate and Resin tree:
Turn around and go forward. Take the right path away from the Skull cave. See a
closed gate ahead.
Resin – Pan left and pick up a terracotta jar. Jim says that there’s
resin in the pot. Drop the jar.Note that the tree has slash marks. Use knife on tree and then
use the jar to get cold resin.Blistering barnacles! Is that a native that pushed
boulders from above?
Go forward to the gate and see a skeleton hanging on
the right. There’s grilled gate with a skull and crossbones lock and on the left
wall is a closed wood door that needs a hook to open. Go back to the end of the
path and go left.
Tyrolean Traverse: Go forward
and click on the rope hanging over the gorge. Take the trolley handle. It
is not functional. (The trolley is repaired on alternative path)
Trolley – In inventory, disassemble the block taken from the beach, to
get block cheek plate, wheel and axle./Combine trolley handle + axle + wheel = repaired
trolley.Use repaired trolley on rope over the gorge. Use the
trolley and be across to the other side.
Banana trees: Ah, here are
the banana trees. Pan left and down to pick up orange flower. Pan right
and forward towards the forest.
Take bananas from tree and the bottle
of rum below the hammock. Pan right and take the right horn of a ram.
Jim automatically blows the ram horn.
A sculpted stone idol you must look for
There to retie, gather, set and restore:
In the sky, two colors by the sea reflected.
A flower on the necklace blooms if they’re
blended.
Flowery Coast: Go forward towards the
beach. Turn around and take the package wrapped in oilcloth from the
mouth of the stone snake. Disassemble the package wrapped in cloth to get: oakum,
caulking iron and mallet. Take the fuel (wood) and place it
on the fire pit. Go left and see Jim’s boat with a hole at the hull.
Go to the left end of the beach.
Parrot – Talk to parrot sitting on top of the
idol completely and listen to and remember his
Pirate song.He wants nanasinrum. Suspend dialogue and make nanasinrum. 🙂
nanasinrum – In inventory, combine knife with bananas to get
banana slices.Disassemble bottle of rum to get open bottle of
rum and cork.Combine banana slices + open bottle of rum + helmet
= helmet filled with bananas in rum.Talk to the parrot again. In the dialogue selection,
select ‘give bananas in rum’. The parrot gives a red
feather that is now on the base of the idol.Idol – You need ‘to
retie, gather, set and restore’.Retie – Look at the loose string hanging on
the right below the yellow shell.Click on it to make a Decorative knot.
Select 1, top, 3, top, 5, 6 and 7.Gather – Pan right and go forward. Take the
red shell, yellow feather and blue feather beside the
pool. Go back to the idol.Look down at the base of the idol and
see the pink flower, white flower, red feather given by the parrot and a
blue shell on the right.Set and restore – In the sky,
two colors by the sea reflected. A flower on the necklace blooms if
they’re blended.Place red feather on the left and the yellow
feather on the right.Place red shell on the left.
Place the orange flower (blended color) taken by the trolley at
the center of the necklace.The parrot flies off after rhyming that the job is
done.
Set a flame a-dancing in the dead man’s
eyes.
Skull Rock: Go back to the
Skull Rock either walk or jump using the map.
Fix the broken statue – If you haven’t yet,
place the fuel on the fire pit.In inventory, combine the lighter with no wick
+ oakum = lighter. Use the lighter on the fuel on the fire pit.
And when shadows fall, be bold and smite;
Mallet raised, attack the pirates with
all your might.
Hook, pegleg, dagger and pistol you must
hit,
And with a fearsome blast of the left
horn, you’ll finish it.Place the cold resin on the fire to get hot resin.
Use hot resin + broken statuette = figurine.
Attack the pirates – Place the 2 pirate figurines on
the white parts right of the fire.See shadows made by the statuettes.
Use the mallet on the hook, then pegleg, then dagger
and lastly on the pistol.The skull secret compartment opens. Take the left horn of ram. Jim automatically
blows the horn.Pick up the 2 figurines.
As the prologue now has said it all,
So then life’s rotten fruit
From the gibblet must fall.
Gallows Gate: See the
skeleton falls off the gallows right of the gate.
All that falls is profit made,
For your passage surely must be paid.
One hundred nine schillings, if they’re the
right weight,
Will quickly lead to an open gate.
Go to Gallows Gate by walking or by map. The parrot is
here.
Skeleton – Look at the fallen skeleton. Pick
up the junk watch, glass eye, hook and scrap of cloth
on or around the skeleton.Pirate Song – Click on the parrot and it will
sing the start of the pirate song. Select the next verse until the song is
completed.
Fifteen men on the dead man’s chest. Yo-ho-ho
and a bottle of rum.
Drink and the devil had done for the rest.
Yo-ho-ho and a bottle of rum.
The mate was fixed by the bosun’s pike. The
bosun brained with a marlinspike.
And cookey’s throat was marked belike. It
had been gripped by fingers ten.
And there they lay, all good dead men. Like
break o’day in a boozing ken.
Yo-ho-ho and a bottle of rum. Yo-ho-ho and
a bottle of rum.The parrot drops the purse from the gallows. Pick up
the purse.Locked wood door – Use the hook to open the
wood door. Read the inscription on the plate on the raised door.
Near the scale, your purse is laid,
Choose from it the coins to be weighed:
The number you count out must equal be
To the number of seas in the world to see.Place the purse on the right side of the opened
compartment. See 2 Pistareen, 2 Piasters, 2 Guineas, 2 Louis d’or
coins and 2 Doubloons.The aim of the puzzle is to have a total of 109
schillings (from enigma) using only 7 coins (the number of seas in the world)
and placed on the scale. The amount of each coin in schillings is seen at top
right text.Place 2 Louis d’or coins, 2 Guineas, 1 Piaster and 2
Pistareen on the scale. See the gate is raised.
Let burning bones be your guide,
As on your journey you boldly stride.
Tunnel torch – Take blackened
bone from the wall. Combine blackened bone + cold resin = macabre torch.Place macabre torch back on wall. Use lighter on
macabre torch. See that all the macabre torches are lit.Enter and Jim will go forward until the other end. He
notes Long John Silver’s footprints.
Once the mountain left behind,
In the heart of a valley most unkind,
Seek the cross that to you is dear
Upon the beast which you must shear.
Snare Valley: Look to the
right and see a shear. There’s a feeder (bowl) that has salt in it.
Trap – Go forward once and look down. Jim
sees the trap.Ram – Go forward to the locked gate. Pan left
and see a ram that is not accommodating.Make Salt – Jump to the idol using the map. Go to
the pool right of the idol. Fill the empty helmet with sea saltwater.Pan right and go forward to the snake pillar. Place
the fuel on the fire pit. Light the fuel using the lighter.Place the helmet full of seawater on the fire to get
helmet full of salt.Jump back to Snare Valley.
Trap the ram – Use helmet full of salt on the
feeder bowl atop the trunk.Go back to the ram and click on it. Watch the ram
get trapped.Use the shears on the caged ram. See a tattoo on the
sheared ram. It is the second part of the enigma.Second part of Long John’s Enigma. New addition to map is seen.
Without are dogs and murderers,And whoremongers and sorcerers
and whosoever maketh a lie.
And if in this holy verse a number
you spy,The saber-ruled door you may try.
But are you lost and running blind?
Well, friend, if you’ve got a black
spotLook at it and you will find.
Gate: Go forward to the gate.
Look at the swords on the left.
Saber lock puzzle – Click-select the black spot with word ‘depposed’ in
inventory. Read the description at the bottom of the page and take note of the fragment of printed text-verse 22:15 that is similar tothe enigma.
Raise the sword from left to right to show marked
lines, 2 2 1 5.
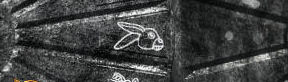
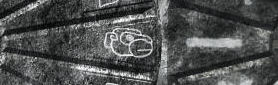
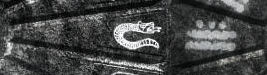
The gate rises.One rabbit, five monkeys and thirteen
snakes,A head will open, yet cause no aches.
Hollow head: Go forward right
of the stone bench. Jim hears an animal growl by the head tower, Frightened, Jim runs back to
the valley. See that the net is torn.
Go back through the gate and see that there are now 2 disks
on the bench. Take the large and small disks.
Take the left of the bench path. See 2 round holes on
the wall.
Disk puzzle – Place the large and small disks
on the hole.Turn the disks to get the rabbit on the left large
disk touching the one dot on the right small disk. See the stone gate rise a
bit.
Turn the disks to get the monkey on the left large
disk touching the single bar (5) on the right small disk. See the stone gate
rise a bit.
Turn the disks to get the snake on the left large
disk touching the 2 bars and 3 dots (13) on the right small disk. See the
stone gate rise completely.
‘Tis the pirates’ turn to wage their
attack.America’s towns suffer when they
ransack:Set a hook Between two lakes,
A slashing saber Near desert waste
A pegleg that paces O’er the isthmus’
fine spaces.To open all eyes,
On your three master set sail,
And make haste for Cuba,
In the teeth of the gale.
Inside Hollow Head: Enter
Hollow head and be greeted by the parrot. Talk to the parrot and he repeats the
enigma. Look down and see the mouth of Hollow Head.
Three-master ship – Take the package
wrapped in oilcloth and sextant (unless you already have taken the one from
the ship) from the table at left.Disassemble package wrapped in oilcloth and
get hull of miniature boat, sailmakers’ kit and masts.Combine sailmakers’ kit + scrap of cloth = sails
Combine hull of boat + masts + sails = model or
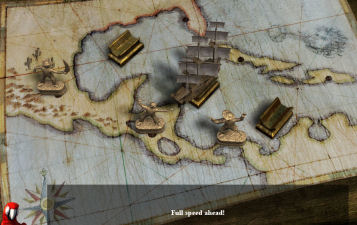
miniature vessel.Sail to Cuba – Go to the map on the other table.
Place the 2 pirate figurines from inventory and the
one pirate figurine from the table on the brown dots in Mexico.Place the one with the saber close to the desert saguaros
at left, the one with the hook at the middle between 2 lakes and the pegleg
pirate at the isthmus at right.Place the miniature ship on the middle metal holder
facing the island of Cuba.Turn the sails-masts to the left until the parrot yells
‘Full speed ahead’. The parrot opens the 2 eyes-windows.
Twixt a camel’s humps stands a fine
proud treeWhere the heart sticks to spades.
The bone gleams forth, the wood’s in
the shade.
Lone Tree: See a skull with a heart on it hanging on the window. Take the ram skull with its
horn removed. See the 2 hills (camel humps) with a lone tree in between the
hills.
Take the three-master miniature ship from the map. Exit Hollow
Head. Take the large and small disks left of the stairs to Hollow
head.
Go forward once, turn around and take the path right
of the stone bench until the swamp area.
Swamp – Pan left and take dried clay
from the ground. Cross the swamp toward the tree on the other side.Jim screams and is stuck in the quicksand. Pepita talks to Jim. She gives a hangman’s rope.
Grapnel – Disassemble the hangman’s rope to get
long rope.Combine long rope + hook. Tie the rope to the hook
using Capuchin knot. Select bottom, top, 3, 4, top and 6 to get a
grapnel.Use grapnel on tree ahead. Jim pulls himself out of
the swamp.Pick up the branches on the right. Turn around and
drop the branches on the swamp to make a safe path back towards the other
side. This is in case you need to walk back to the other side.Tree between the Camel’s hump – Continue forward to
the tree at the edge of the cliff.Combine the ram skull + right horn + left horn =
skull of ram.Place skull of ram on the tree.
Cast an eye at the skull
And where it comes to rest,
Be sure it will lead you to the buried
chest.
Ram skull eye: Place the
glass eye on the ram skull and see it drop.Disassemble the grapnel to get
hook and long rope. Use the long rope on the root of the tree. Tie a
Figure Eight knot. Select 1, top, 3, top, 5, bottom, 7, top and 9.Go down the rope. Jim caught a fever at the swamp.
Pick up the glass eye. Jim makes an X mark the spot on the location of
the buried treasure.
Your guide’s look turns fierce
If the sun’s rays begin to pierce.
Close for the taking
The metal’s awaiting
Reach out and take it, no hesitating.
Forge and mine: Go right,
right again and forward twice to the mine. Pepita rushes out and falls down the
mine shaft.
Save Pepita – Take the block at top of
the tower above the mine shaft.Pan left and Jim sees the mask, false claws
and megaphone. Take the megaphone sitting on top of a box. Open the box
and take the long rope.Pan right and take the pick. Take the
wheel, axle and short rope from the open box.Combine block cheek plate + axle + wheel = block.
Combine block + long rope + block = tackle.Use tackle on the hook on the top part of the tower
above mine shaft. Tie the rope using Clove hitch. Select: 1, bottom, 3
and 4.Use small rope at end of the block. Tie the rope
using Bowline. Select: 1, top, bottom, bottom, 5 and 6.Disassemble the pick to get handspike and
pick head. Use the handspike on the hole of the metal rim of the stand
where the end of the tackle is tied. Push the handspike. See Jim raises Pepita
from the hole. Jim faints.Spanish logbook – Jim wakes up alone. Take the tackle and
the handspike from the stand and tower.Turn around and open the metal box. Read the Spanish
logbook that explains about the Spanish mining for emeralds, casting
munitions, diving equipment and the death of many Indians. Remember these
information.Enter the forge and look around. We do not need
anything made yet.Swamp fever – Exit the forge, right and go
forward. Read a page from the journal tacked on the wall. It talks about
an herbal tea from Chinchona that cures swamp fever.Climb the rope ladder. Look at the tree on the
right. Jim sees a heart (P+J) on the tree trunk.Herbal tea – Use knife on heart and then pull to
get piece of bark shaped like a heart.Use empty helmet on water trough to get helmet
full of fresh water.Go back to the forge and the kiln. Take the fuel
(wood) from the right and place it in the kiln. Use the lighter on the fuel to
get fire.Use helmet full of water on fire to get helmet
full of boiling water.In inventory, combine helmet full of boiling water
and piece of heart shaped bark. Jim drinks the herbal tea and feels better.
Treasure: Go back to the
beach where X marks the spot.
Dig the treasure – In inventory, combine the
handspike and the pick head = pick. Use pick on X.Jim digs and finds a treasure chest. Open the chest
and see a puzzle.Parts of skull lock –
Carriage – Take the damage carriage
at end of right slot.Disassemble the sextant to get vernier,
small mirror and lens.Combine the damage carriage + small mirror =
repaired carriage.Place repaired carriage on the right slot.
Lens – Place the lens on the left small
stand.Gears – Disassemble the clock to get
watch case and gears.Place gears at bottom center of the puzzle.
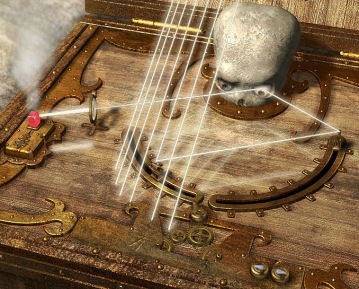
Open the skull lock – Note that there are
white flip switches at bottom right that moves the carriages.The flip switch above the gears changes which
carriage can be moved by the white flip switches.Eye – Use the glass eye on the skull.
Right carriage – Point the central flip
switch to the carriage on the right.Flip the white switches to move the carriage to
right end.Flip the mirror to vertical position.
Left carriage – Point the central flip
switch to the carriage on the left.Flip the white switch to move the carriage to
third slot from right end.Flip the mirror to diagonal position.
See a ray bounce from left mirror to
right mirror to glass eye, pass through lens and finally heats up the red
stone on the left.The lid rises. Take the bar and
treasure. Read another enigma.
New Enigma from Long John Silver
If you value nothing more that silver and
gold,Then turn back now, ‘fore you grow
old;But if you hear the voice of
friendship and your heart yearns for more,Then pursue your quest, for you a
greater treasure is in store…Turn the tiller so the water in a
rushFills the sluice to its brim flush.
Take the
sand left of the chest.
Mine:
Go back to the mine. Use the bar on the water barrel tap at end of the shed.
Turn the wheel to fill the trough with water.
Your three-master to the current you’ll
commend.
And where e’er she founders or runs
aground,
Your final chart is sure to be found.
End of Second Enigma. New addition to map is seen.
Place the three-master miniature model on the water by
the water barrel tap.
Follow it down the trough. Take the parchment on top of the mast.
The River of Blood most assuredly calls,
But avoid reefs, rapids and other pitfalls.
Pepita talks to Jim about the enigma and the true
treasure. Talk to Pepita and learn what really happened to Long John Silver.
Watch the travel of Pepita.
Fort: Go forward and right to
the end of the path. Climb the rope ladder to the top. See a pirate’s black
flag ahead. Go forward and see pirates.
Hut – Go right and enter the hut. See a
cannon setup.Turn to the back wall and take tubes, fish hook,
perforated waterskin as described in the Spanish journal and the
pole.Roof – Exit the hut and climb the tree with
the flag to get to the roof.Look down and listen to the pirates. Learn that the
pirates caught Pepita.Take care of the pirates – Click on the
pirate sitting on the cart.The table has tobacco pouch, powder horn and
bullets.Fishing pole – In inventory, disassemble the sailmakers’ kit to get
needle and thread.Combine fish hook + pole + thread. Use Uni knot
to tie the thread and hook. Select: 1, bottom, 3, top, 5, bottom, 7, 8 and 9.
Get a fishing pole.Use fishing pole on the tobacco pouch, then
disassemble it. Use the fishing pole on the powder horn and then
disassemble it.In inventory, combine powder horn and tobacco pouch
= empty powder horn + booby trapped tobacco pouch.Combine fishing pole + booby trapped tobacco pouch.
Use the booby trapped pouch on fishing pole on the table below.Watch how the pirates are taken care of by Jim.
Tie the pirates using the short rope from dismantled
tackle and use Double
loop bridle knot. Select: 1, bottom, 3, bottom and 5.Take the bullets from top of box and the
netting needle from the ground. Take the unloaded pistol in front
of the other box.Climb down the rope ladder and go right to the
beach. Jim is shot at from the ship.Climb to the roof of the hut and look at the ship.
It is Jim’s own ship.Cannon – Enter the hut. Take the swab from
the wall and use it on the cannon to get cleaned cannon.Open the barrel right of cannon and use the empty
gunpowder shovel from the wall on the gunpowder barrel.Used the filled gunpowder shovel on the cleaned
cannon.Take the rammer from the wall and use it on the
cannon with gunpowder to get the gunpowder properly tamped. Return the rammer
to the wall.Make a new tackle and then use tackle on right hook of cannon cart.
Disassemble pick to get handspike and pick
head. Use handspike on hole left of the cannon bar.Now, we need ammunition.
Forge: Go to forge using the
map.
Make a mold based on the Spanish journal.
Go outside and use empty helmet on the fresh water
in the trough. Go back to the forge.Mold with hole – In inventory, combine helmet full of fresh water +
sand + dried clay = empty helmet + mixture.Place the mixture of water, sand and clay on the bin
left of the table.Place the hemispherical mold on the middle small
post. Place the conical mold on top of the hemispherical mold.Take an empty molding box from the left and place it
over the molds.Take mixture from bin on the left and place it inside the
molding box with mold at center. Take off the conical mold.Take the filled molding box, pan right and place it on one of
the white blocks frame. This one has a hole on one side.Mold without hole – Again make another one.
Take an empty molding box from the left and place it
over the hemispherical mold only (no conical mold).Take mixture and place it inside the molding box
with mold at center.Take the filled molding box, pan right and place it on the
empty white blocks frame.Place the filled molding box with hole over the
filled molding box without hole.Bellows – Pull the handle on a chain of the bellows and
see a hole on it.Disassemble the fishing pole to get pole, fish hook
and thread. Combine needle and thread to get sailmakers’ kit. Use the
sailmakers’ kit on the bellows.Kiln – Attach the extension tube to the
bellows. Pull the handle on a chain of the bellows to raise the fire.Place the treasure on the empty crucible to get
crucible with molten metal.Use tongs to pick up the crucible with molten metal.
Pour the molten metal on the combined filled molding boxes.If the mold was made by 2 molds with holes, the
molten metal will pour out and land on Jim’s foot.Return the empty crucible in the kiln. Take the top
filled molding box and empty it on the bin left of the table.Take the cannonball.
Perforated waterskin – In inventory combine the
perforated waterskin + tubes = strange device.
View this guide raw, exactly as the archive holds it