Atlantis III: The New World Walkthrough by Bert Jamin, part 1 of 4
Atlantis 3, The New World
Written by Bert Jamin
www.gamesover.com
October 2001
©Bert Jamin (www.gamesover.com)
This walkthrough may not be sold and may not be used for any commercial purposes.
Neither is it permitted to publish this walkthrough in any way without the
written permission of the author. Feel free to place this walkthrough on your
web site or on your home page, on condition that no part of this walkthrough is
changed and that the name of the author (Bert Jamin), the URL of the
authors home page ( www.gamesover.com )
and his E-mail address
are mentioned unchanged. For the most up to date walkthroughs always visit
www.gamesover.com.
If you have any suggestions to improve this
walkthrough, let me know by sending me an email:
.
All images are property of Cryo.
Click on one of these images to go to that part of my
walkthrough
Or click on the image at the bottom of this page to go to the next part
After your Savior, the Targui has left, you decide to
take a look around a little bit. You can go only one way. So go that way. Walk
forwards and than go to the left. Go forwards two times. You are now facing a
guard. You can try to speak to him but be careful it’s a very unkind type with
very loose hands… You can go to the left. But that path leads to a dead-end
street up in the mountains.
Turn to the right and you’ll see a path
leading up with a small bush. Go into that direction. Turn to the left and go
forward one more time. Another guard is attacking you. Thank goodness you’ll be
saved once more by this unknown person. Walk towards the bent rock formation.
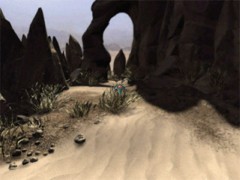
The correct way
While you are going through this rock
formation, you’ll see some kind of cables on the ground coming from the right.
Turn to the right and enter the cave. Walk towards the circular hell lightened
membrane. It leads to another part of the cave, but is still closed. Your goal
is to open this membrane. Look to your right and you’ll see all kind of
technical equipment. You can’t do anything with it, so leave it alone.
Standing in front of the membrane, look
down. On the ground you’ll see a circle and above it five different signs. Take
your disk from your inventory and place it at the center of the circle. Now take
your stick and place it on the disk. You just made yourself a gyroscope. By
placing this gyroscope in the correct on the signs you’ll open the membrane.
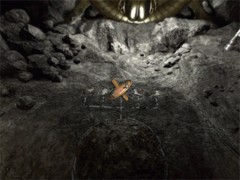
The gyroscope also called top
Number the signs from the left to the
right as number 1, 2, 3, 4 and 5. Place the gyroscope in this order on the
signs: 2, 5, 3, 1, 4. I have the idea that this combination can be different in
some games. If the last one didn’t open the membrane, just try this one: 4, 1,
3, 5 and 2. If neither one of these combinations does the trick, you’ll have to
try out another one yourself. Every time you place the gyroscope on the correct
sign, it will spin across the circle leaving behind a star at the rim of the
circle. After having done all five of them, the membrane opens, revealing the
next part of the cave, which seems to be some kind of temple. Enter the
membrane.
This time the room is filled with a big sarcophagus
at the center. Before you do anything else in this room, look to the pillar at
your right. On the floor near the right corner of the pillar you’ll find a very
well hidden wooden bird. It’s very hard to see. Pick it up…
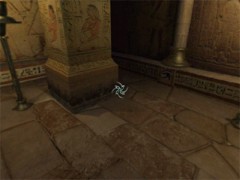
The very well hidden bird
Walk towards the wall at the
right side of the sarcophagus. You’ll see a mural of two Egyptian guys with an
image of a star and beneath that star you’ll see curved line with markings to
the left and to the right. From the top to the bottom you’ll see one marking to
the left, two markings to the right, one to the left and another one to the
right. Remember or write down this code… You are going to need it in a few
seconds.
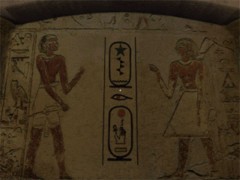
The code to open the sarcophagus
Walk towards the symbol on the wall at
the left of the sarcophagus. You can push the left and the right side of the
star. By pushing both sides in the correct order, the sarcophagus opens. The
code is the one you just saw on the mural on the other wall and is: 1 x left, 2
x right, 1 x left and 1 x right. Look what’s coming out of the sarcophagus. It’s
nothing less then a personal Psychopomp! It’s your personal help and companion
for the next part of the game. Although… helper!? He won’t be of very much of
a help to you. The most important things is that he knows how to steer the air
ship. You can ask him about anything you like.
Walk to the stairs leading up. If you
don’t know where to find these stairs, I suggest you better quit the game right
now:-) Of course you might think that you simply can climb up these stairs. Just
try and you’ll see that this isn’t the case… Take your wooden bird from your
inventory and use it on the stairs. You’ll be transported to a higher part of
the pyramid. When you’re standing outside walk to the air ship. Talk to the
Psychopomp and ask him about everything you can. Hop on board of the air ship. The
first place you’re visiting is the island with the temple of the high priest.
After you landed, turn around and enter
the temple. Walk to the priest who is waiting for you. He tells you that the Pharaoh
is dying. But before he can do so, he must be able to be reborn again. And to do
that, he needs a special kind of feather and the symbol of life. Your goal is to find this special
feather plus the symbol of life of course and deliver it to the high priest…
Walk back to your vessel and speak to the
Psychopomp. Ask him about everything you can. Now choose your map from your
inventory. On the image below you’ll find the most efficient order in which you
should pay a visit to the several locations.
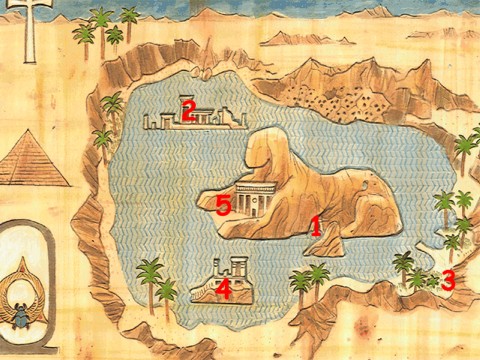
The map with the correct destinations
First of all go to 1. Walk towards the
altar. Open the small box. You’ll find an Ankh cross, the symbol of life. After that go to 2. Here
you’ll find another priest. She tells you that you have put together an old
story. This sounds pretty easy but it isn’t! Walk towards the wall at the right behind this
priest. You’ll see a wall existing of 12 different tiles and beneath very tile
you’ll see a small strip with some ancient inscription. Your goal is to make a
logical story by placing the strips into the correct sequence. After that you
have to place each and every tile into the correct position, corresponding with
the sentence of the strip. So remember… first you have to place the strips
into the correct order and after that you’ll have to do the tiles. If you are
doing this in the reverse order, it won’t work!!!
When you push on the strips you’ll hear
the sentence corresponding with that strip. The correct order of the strips with
the sentences
is:
Strip 1: Osiris son of the Earth and
Sky, is Pharaoh and Isis, his sister, is Pharaoh’s wife, she brings knowledge to
Egypt.
Strip 2: Seth, twin to Osiris, is
jealous of his brother and plans his murder.
Strip 3: During a feast, Seth offers a
splendid coffer to anyone who fits perfectly inside it.
Strip 4: All the Guests try the
coffer, but only Osiris can lie down inside it.
Strip 5: Before Osiris can leave the
coffer, it is shut fast by Seth’s servants and thrown into the Nile.
Strip 6: Isis seeks her lost husband.
At Byblos, she sees the coffer caught in the branches of a tree.
Strip 7: She hides Osiris in a swamp,
but Seth learns of her actions and determines to discover his brother’s
whereabouts.
Strip 8: He finds him and cuts him
into 14 pieces, which he hides throughout Egypt.
Strip 9: The faithful wife succeeds in
recovering 13 of the pieces.
Strip 10: She puts the body back
together and prepares it with oils and perfumes. Then she wraps it in bandages.
He appears almost reborn!
Strip 11: After that, she lies with
him and conceives their son, Horus the Falcon…
Strip 12: who one day will avenge his
father, henceforth King of Dead.
After you placed the strips in this
order, it’s really getting hard. I can’t tell you which tiles have to be
replaced or not. This differs from game to game. But… you are lucky that the
correct order of the tiles is the same in every game. On the image below you see
the correct solution. On the other hand, the images of the tiles have to
correspond with the sentence on the strip. So you could do this one by yourself
also 🙂
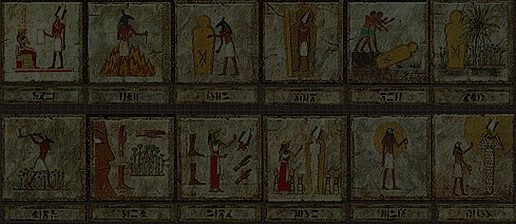
All tiles and strips on the correct places
If you did this correct, the priest will
give you a talisman. If not, you did something wrong with the tiles and/or
strips…
When you received the talisman, use your
map to go to 3, the beach. On the beach turn to the right and go forward one
time. Turn to the right and walk to the boy that’s fishing with a net at the end
of the beach. Talk to him and you’ll learn that doesn’t catch a single fish.
Offer him your talisman. After that he catches loads of fish. And not only that,
he also catches some kind of small scale. Take it from his net. When he asks
you if you want your talisman back, you refuse it of course. Why should you take
it back? You only had to solve this minor puzzle with the strips and the tiles,
right!?
In exchange he gives you a stone icon.
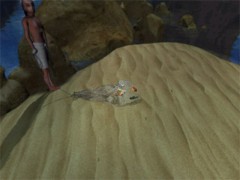
Don’t forget the scale
Use your map to go to 4. Climb up the
stairs and walk towards the sarcophagus. Use the stone icon to open it. Pick up
all the colored feathers. Turn to the left and you’ll discover some kind of pin
sticking out the pillar at the left. Place your scale on this pin. Your goal
is to find the heaviest feather. You have ten feathers and one of them is
heavier than the others. I can’t tell which one is heavier than the rest because
this differs from game to game. Simply use the scale to find out which one is
the heaviest one of all. One tip: once you found out that one of the feathers
isn’t heavier than another feather, you can count that one out. After you found
the heaviest one, put back all the other feathers into the sarcophagus. Be sure
to keep the correct feather in your inventory!
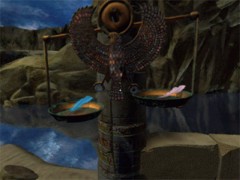
The weighing has begun
Now go back to 5, the temple with the
high priest. When you’re standing in front of him, turn to the left and place
the correct feather on the pillar. If you’ve placed the correct feather the Pharaoh
dies and goes to heaven. If you placed the wrong feather, the Pharaoh dies and
goes to hell, to be never reborned. When the Pharaoh has gone to heaven, turn to
the right and place the Ankh cross on the pillar. The Pharaoh will be reborn
now…
For the last time use your map to go back
to 1, the cave where you found the Ankh cross on the altar. Walk to the box on
the altar. When you’re standing in front of the altar, get the mysterious box
from your inventory and open it. You’ll be teleported to the cave where it all
started.
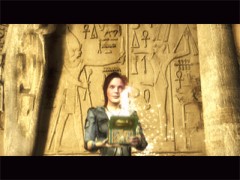
Open the mysterious box with the beetle
Click on the image below
to go to the next part, The Snowy World…
View this guide raw, exactly as the archive holds it
Parts of this guide
One guide by Bert Jamin, in 4 parts. They read in order, and the part you are on is marked.