By Cryo
Interactive
Walkthrough by
MaGtRo August, 2002
Game Play – The
game is mouse driven. After selecting a new player colored button at the
start menu, the main menu is seen – Options, Sound, Save, Load, Return to
game and Exit. Pressing ESC anytime can access the main menu. Right click
of the mouse brings the inventory bar and clicking on an inventory item
will replace the cursor arrow with that item. The inventory bar has a
scroll to show hidden items. Save frequently.
Hoggar
Peru, 2018- a man finds a skull. Hoggar, 2020
– A young archeologist travels to a rumored site of an ancient Egyptian
ruin. She meets an accident and is saved by a Targui, local tribesman. He
is there to kill bandits that have refused access to well water at the
same ruin that the young archeologist is interested in.
Camp – There is a stick and
a disk in inventory, Go forward and left and see a camp beyond. Go
forward and click to talk to the guard. Click on the top dialogue. He is
not friendly. Do not talk to him any further or the Game Ends – he means
it when he says he will shoot you! Turn left and forward 2x. Pan and look
at the encampment. There is no guard at the back and can get there from
the ledge at the other side. Go back to the guard, turn slightly right,
forward 2x and another guard appears. The Targui kills the guard. Go
forward through the stone arch on the left. Turn right and enter a cave.
There is a portal and equipments by the right wall.
Portal entry puzzle – Stand in front of the
portal, look down and see drawings on the ground – a circle and 5 icons
above it. Place the disk at the center of the circle and click the stick
on the disk to get a spinning top. The object of the puzzle is to
light all 5 stars around the circle by clicking the spinning top on each
icons above the circle. Observe the path of the top and which stars are
turned on and off when each icon is clicked. From L-R, click 4, 1, 3, 5,2.
Enter the time portal.
Egyptian Site
Sarcophagus room – The room has a sarcophagus at the center.
Go to the wall mural on the right. Take note of star hieroglyph at the
center top between 2 men and the direction the 5 arrowheads are pointed
at. Turn right, forward to the center standing torch, turn left and pick
up the wooden bird hidden in the shadow at the right side of the
pillar base. Turn right, forward to the big star on the left
wall.
Star Puzzle – Note that the right and left
points of the star are active spots. Click the star points following the
sequence shown by the hieroglyph on the opposite wall – L, R, R, L, R.
The sarcophagus opens and reveals you’re own
personal psychopomp. He gives a case with a beetle inside. Talk to
him about all the dialogues. He is your guide on your quest to prove you
are worthy. The scarab beetle means the cycle of birth and rebirth and it
is dying. Go to the passageway and will not be able to go forward. Take
the wooden bird from inventory and click it on the stairs. Fly out and see
a vast panorama from a ledge of a pyramid. Talk to your guide again about
everything. Climb aboard the airship and enjoy the ride. Throughout this
area, ask the guide about everything and he will give clues about some
items and places.
Temple of the Pharaoh #5 – Land in
front of temple between the arms of a sphinx. The high priest wants to
talk to you and will explain the situation. Enter and click on the high
priest – The Pharaoh is dying but cannot die – bring the feather so that
pharaoh may die and be judged! Bring the symbol of life so that the Bennu
bird may die and be reborn! So now we hunt for a feather and a symbol of
life. Go back and talk to the guide about everything. The Pharaoh’s soul
must be lighter than the feather of judgment. The ankh, symbol of life
calls the Bennu which kills itself and the Bennu’s soul guides the
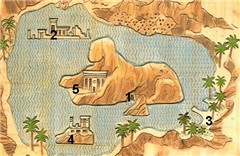
Pharaoh’s soul to the land of the living. There is a map in inventory.
Click on a destination to go there. The best arrangement to visit the
places is marked on the map. Click on destination #1.
Temple of the Ankh #1 – Turn and enter
the underground temple. Go to the altar. Open the box and take the
ankh. You don’t need to go to the airship to go to the next
destination, just click on the map. Click on destination marked
#2.
Temple of Isis #2 – Enter the temple
and talk to the priestess. She says their story has been forgotten, make
it relive so that our lives have meaning once more. Go to the 12 panels at
the back wall.
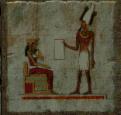
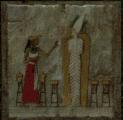
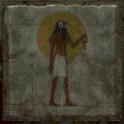
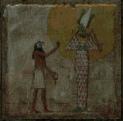
Story picture puzzle – Arrange the panels and the labels-story
lines to make a story. Click on the label below the pictures to hear a
story line. Best to arrange the story line first and then arrange the
pictures to match the storyline. Click on a label or picture and then
click on the place you want to transfer it to. The labels or pictures will
exchange places. From L – R.
 |
 |
 |
 |
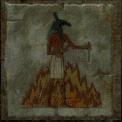
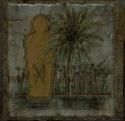
Osiris
son of the Earth and Sky, is Pharaoh and Isis, his sister, is
Pharaoh’s wife. He brings knowledge to Egypt |
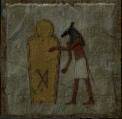
Seth,
twin to Osiris, is jealous of his brother and plans his
murder. |
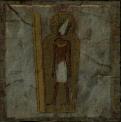
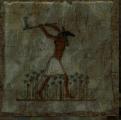
During a
feast, Seth offers a splendid coffer to anyone who fits perfectly
inside it. |
All the
Guests try the coffer, but only Osiris can lie down inside
it. |
 |
 |
 |
 |
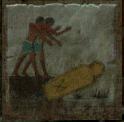
Before
Osiris can leave the coffer, it is shut fast by Seth’s servants and
thrown into the Nile |
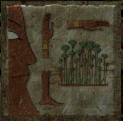
Isis
seeks her lost husband. At Byblos, she sees the coffer caught in the
branches of a tree. |
She hides
Osiris in a swamp, but Seth learns of her actions and determines to
discover his brother’s whereabouts. |
He finds
him and cuts him into 14 pieces, which he hides throughout
Egypt |
 |
 |
 |
 |
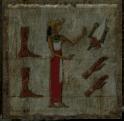
The
faithful wife succeeds in recovering 13 of the pieces. |
She puts
the body back together and prepares it with oils and perfumes. Then
she wraps it in bandages. He appears almost reborn! |
After
that, she lies with him and conceives their son, Horus the
Falcon… |
who one
day will avenge his father, henceforth King of
Dead. |
When done correctly, the priestess will give a talisman.
Select destination #3 on map. Take a look once in a while at the beetle in
the box and see that it gets livelier after a puzzle is successfully
done.
Beach #3 – Go to the boy throwing a net at the far side of
the beach. Talk to the boy and he says that he has no luck in catching
fish. Give the talisman to the boy. He throws the net. Pick up a
scale from the net. He also gives a stone icon. Click on
destination #4 in map.
Destroyed Temple #4 – Climb up and look at the box with a
winged priestess on it. The icon is similar to the stone icon given by the
boy at the beach. Click the stone icon on the box’ center edge to open it.
Take the feathers. Turn left, forward and see a peg on the left
pillar. Place the scale on the peg.
Feather puzzle – Remember what the guide said – the soul of the
pharaoh must be lighter than the feather of judgment. The object of the
puzzle is to find the heaviest feather. The left pan is lighter than the
right pan. Place a feather on each pan and keep the heavier one in the
pan. Always keep the heavier feather on the left pan. Replace the lighter
one with another feather until the heaviest feather is found. Leave the
heaviest feather on the pan and return all the other lighter feathers in
the box where you got them from – the airship has a one feather limit
only. Go back to the scale and take the heaviest feather – in my case, the
purple feather. Go back to the high priest at destination #5.
Temple of the Pharaoh #5 – Place the heavy feather on the
left pedestal. See the pharaoh dies and his soul is weighed. If the
correct feather is placed on the pedestal, his soul is found pure and it
flies to the heavens. Take a look at the beetle in the box and see that it
becomes a larva. Place the ankh on the right pedestal. Watch the Bennu
bird burn, change to an egg, hatch and flies away. Take a look at the
beetle turn larvae in the box and see that it becomes a gold beetle. Go to
destination #1.
Temple of the Ankh #1 – Since the beetle, the symbol of
birth and rebirth is now healthy and the ankh is the symbol of life. Go to
the altar and click the box with the scarab beetle on it.
Hoggar and Skull
Maze
Skull chamber – Find yourself in a chamber with a central
pedestal and a portal on the left wall. Turn around and see a man’s mural
on the pillar. Go through the portal and find yourself back at the cave in
Hoggar. Go forward towards the exit and hear automatic rifle shots fired.
Outside, see the Targui captured by a guard and a bald-headed man. Go to
the Targui and the man with the whip will talk to you. The bald-headed man
is surprised that you entered the membrane of the portal. Inside the
chamber, he places a skull on the pedestal but was unable to use it. He
wants you to pick up the skull. Talk to him about everything. Pick up the
skull.
Skull Maze – Get
sucked inside the skull. The entry point changes every time you enter the
skull.
Skull chamber –
The bald-headed man talks about his inability to find the secret of the
skull. He wants you to find the secret. He leaves the chamber. Find the
skull in inventory. Turn right and click on the figure on the
pillar. He asks a question about the corridor and if you successfully
followed the dolphin’s instruction about the corridor, he will tell the
history of the skull. He goes back to the wall. You can click on him to
ask guidance. Turn left and go to the bells-wind chimes. Click on wind
chimes and a green glass with icons on it appear – remote control. Click
on the different icons – a minaret, spear point and ice crystals. When the
ice crystals is clicked the glass breaks, right click to place the remote
control in inventory and go forward to the Ice World.
Ice World
A mammoth attacks the
archeologist, now prehistoric woman and her companion (?Targui) after a
failed thrown spear defense. They run into a cave for safety. Go forward,
fall down a hole, die and see your spirit body separate from the physical
body. There are 3 exits from here; the cave at the foot of your body on
the slab goes back up to the cave’s mouth. The guide will not see or hear
you since you are a ghost. The cave to the top of the slab or head of your
body goes into a cavern with a fire pit. The cave to the left of the
body-slab goes into a cavern of stalactites and stalagmites. There is a
stick as well as the remote control in inventory.
Shadow wolves cave – Go to the cave at the top of
the slab or head of your body. Forward to the fire pit. Use the stick on
the holed wood on the fire pit to make a fire. Look around at the shadow
wolves, there are 4 dark wolves and one white wolf. The wolves will fight
each other if you click on them. The aim of the puzzle is to remove all
dark wolves and have only the white wolf remain. Click on 2 dark wolves to
fight. Then select another dark wolf to fight the winner until only the
white wolf remains. The white wolf turns to call you and pass through the
rock wall. He wants you to follow. Click on the rock wall to see where he
went.
Balloon and islands – Find yourself in an island in the
middle of a lake surrounded by rock cliffs. There is a balloon hanging
above another island. We have to get up there. Go forward once, pick up
the tree stump on the left and forward to a dead tree. See a big
tiger on the next island. Place stump at base of the tree and climb the
tree. As soon as you drop on the next island, pick up the stone on
the left side on the ground.
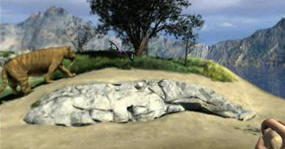
Tiger – Go forward once and see a tiger blocks the way. Throw the
stone on the tiger. Aim the cursor – as shown on the picture, under the
tree and little above the ground. Wait until the tiger is about to be in
line of fire as shown below, then click to throw the rock – by the time
the rock lands the tiger’s right shoulder will be at the cursor. Time the
tiger’s approach to the cursor depending on the speed of your
computer. If successful, the tiger will pounce and go over you to
the quicksand. If not, try again.
Pick up the tree branch on the ground on the right. Take the
path to the left of the rock. If you take the right path, you’ll end up in
the quicksand. Go forward and see a big boulder. Use the tree branch on
the boulder to move it to get to the next island. Go forward once and see
2 paths. Left path goes to the water’s edge and a black wolf. Right path
goes to a white wolf and further that right path is a cliff.
Black wolf – Go
down the left path and hear a growl behind you. See the black wolf and
immediately go back to the white wolf at the right path. Remember the
shadow wolves – the white wolf defeats the black wolf.
Go back down the left path formerly guarded by the black wolf. Pick
up the long wood stick where the black wolf was. There is a bear
that is blocking the water path to the next island. Turn right and forward
to the cliff edge. Look down and use the long wood stick on the cliff edge
to pole vault to the next island away from the bear. Go forward until the
other end of this island. Click on the log and get to the island under the
balloon.
Balloon – Go
forward once, turn left and look at the white wolf on the rock wall (if
you click on the white wolf, you’ll be back at the shadow wolf cave). Go
forward until the top, then look up and click on the balloon. Go to the
alcove on the wall and see the crystal skull and a spear thrower. Pick up
the spear thrower first and then the skull. Inside the
crystal skull – Go back to the dolphin (in my case forward and then
left). Talk to the dolphin. The spear thrower will kill the mammoth. Next
pass through the fourth door on your left and the third on your left. Turn
left and click on the globe that looks like the inside of the balloon.
Balloon – Go to the central area of the balloon to get off the
balloon. Go down the path to the white wolf on the rock cliff. Click on
the white wolf to get back to the cave.
Running animals cave – Exit the shadow wolves cave and go to
the cave that is on your right and now right of the slab with your
physical body. Go to the center of the cave with a slab of you etched on
it with the 4 elements depicted on the 4 corners. See ghost animals
running on the wall. Turn right and pick up the spear in the stalagmites.
Throw the spear to hit the animals. Place the cursor at the center of the
screen on the path of an animal and click the spear as soon as the animal
appear at the left of the screen. Each time you hit an animal
successfully, an element heart is in inventory – water, air, fire and
earth. Look at the hearts in inventory and see icons etched in it. They
are the same as the icons at the 4 corners of the slab on your feet.
Remember what the icons of each element looks like.
Go outside to your physical body and place the element hearts on
their respective corner. Looking at the slab -The fire element is at
bottom right, the earth element is bottom left, water element at top left
and the air element is on the top right. If correctly done – your spirit
combines with the physical body and is brought back alive.
Go to the exit at the foot of the slab back to the guide at the
mouth of the cave. Watch him use the spear thrower and kill the mammoth.
Baghdad
Find yourself back at the skull chamber facing a wall. Use the
remote control and click on the minaret. Enter the open wall. Find
yourself inside a jar at night. Click on the lid and watch Scheherazade
tells the story of a thief in Baghdad.
Merchant’s courtyard – Hear a cat meowing and an angry
guard. Turn right and hear the thief say rotten fish about the jar beside
you. Open the rotten fish jar, the cat jumps in and takes a fish. Go
forward, turn right, forward and hide on the other side of the fountain
from the guard standing by the gate. Take the stone from the shadow
of the plants on the right side of the fountain. Turn to the right and see
a ladder leaning on the wall. Look up to the immediate right and see a
balcony. Turn right again and see an active spot at the shadow of a fern
on the left of the guard. Throw the stone at the active spot to get the
guard out of the way. Immediately go to the ladder, pick it up and click
back to where you were before – behind the fountain. Look up and place the
ladder to lean on the balcony. Climb up and go forward. The cat comes and
tilts a jar. The jar breaks and the guard comes. Immediately enter the
door across the balcony. The merchant’s daughter hides the thief and the
thief gratefully asks her what she wants. She wants a black rose. The
thief goes to the wizard garden in search for the black rose.
Wizard garden – Turn to the right, climb the stairs, go
forward and pick up the long wood stick. Go back down to the
garden, go forward to the red house, pass the house with the red houri,
forward and down to a walkway by the wall.
Monkey – Go forward
midway the pond and see a juggling monkey across the way. Turn to the left
and see a stem of bananas on the tree. Use the stick on the bananas. Pick
the banana finger from the floor. Go to the juggling monkey at the
other side. Give the banana to the monkey and pick up the blue, red and
green sticks he left behind.
Turn around and go back up the stairs. Turn right, forward and look
at the lantern shaped stand with a hole at the center front side. Go
forward and see a gryphon with a cage hanging above it. The gryphon is
protecting a box in a niche at the corner wall. Turn left and pick up an
orb on the ground.
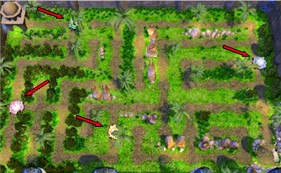
Unicorn maze puzzle – Go
back to the path by the lantern stand and up the gazebo. Look at the metal
hookah with a big opening. Place the orb in the opening. The object of the
puzzle is to get the unicorn at the bottom right to exit at the top left
corner building. To direct the unicorn, place the 4 colored crystals from
the bottom of the screen on places you want the unicorn to pass through to
get to the upper left. To get out of the puzzle and restart the puzzle,
press ESC and start over. If correctly done, you get a unicorn
horn.
Houris – Turn
right and go back to the lantern shaped stand. Insert the unicorn horn in
the hole of the front side of the lantern shaped stand. Hear a grating
sound, crash and a yell. Go to the gryphon and see him trapped by the
cage. Take the box from the niche at the corner wall. Take the
ruby, sapphire and emerald. The box automatically
goes back on the niche. Go back to the hookah gazebo and climb up the
leaning tower’s stairs. Go around and down the opposite side to the yard.
Go forward and left to the house by the wall. Try to go to the blue houri
in front of the blue curtained house. A rock guard blocks your way. Click
the blue stick on him and he runs away. Go forward inside the house and
talk to the blue houri. Give her the sapphire and she gives a key
with a decorated handle. Go to the next house by climbing the steps
across the leaning tower, left and down. Go to the green houri and a tree
guard drops down in front you. Click the green stick on the tree guard and
he runs away scared. Talk to the green houri and give her the emerald. She
gives a map to the leaning tower. Go to the house by the pond. Go
towards the red houri and a flower guard stops you. Click the red stick on
the flower guard. Talk to the red houri and give her the ruby. She gives
another key with an open handle.
Serpent Tower –
Go up the leaning tower and use the key given by the red houri to open the
gate. See a metal creature that blocks the way up. He will compete with
you as to who gets up the top of the tower first. Look at the map and see
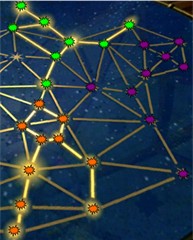
where you and the metal creature are. The map shows stars and a moon that
will automatically bring the player higher up the tower. The serpents
and a well will bring the player lower down the stairs. The number of
steps taken by either player is determined by a monkey game. The monkey
climbs a tree and when the red button is clicked will throw a coconut to
hit hippos. The higher the monkey is the less steps and the lower the
monkey is when the red button is clicked, more steps can be taken. Take a
trial run to see where the location of the monkey is in relation to how
many hippos are hit by the coconut. Look frequently at the map and try to
evade the serpent step when it is your turn. As soon as you get to the one
step before the last one up the tower, you will face a door. Use the key
given by the blue houri to open the door. A flying carpet bursts out of
the door.
Fly to a tower up in the sky and watch the wizard asks the genie
for the most precious treasure. The wizard is given the crystal skull but
failed to know its secret also. The flying carpet gives away and drops you
on the tower floor. The tower walls and fence have roses all over but no
black rose.
Constellation
Puzzle – Enter the door and pass through the magic cobras. The cobras
sent the thief somewhere up the sky and he has to chart the known
constellations to go home. Study the serpent constellation and then turn
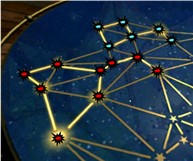
around to see 4 constellations on the windows. Look down at the star map.
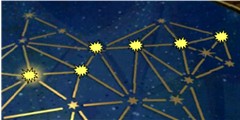
The object of the puzzle is to light up stars to make a constellation.
When a constellation is correctly made, the stars stay lit. After all the
5 constellations are lit, one star is left unlit on the star chart. Then
light up a path from the now lit lone star to the top of the serpent
constellation. If correctly done, find yourself at the bottom of the
stairs in the wizard tower.
Drawers Puzzle –
Climb up the stairs and enter the wizard’s room. Turn right and see a
cabinet with triangles with on it. The aim of this puzzle is to open only
the 4 triangles with frames on it. Click on numbered triangles in order.
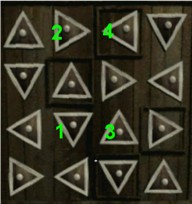
If correctly done, a click will be heard and the 4 bottom drawers
will open. Take the 4 parchments with dots on it from the bottom
drawers. The cabinet turns and a set of red drawers are seen.
Red drawers
puzzle – Look at the first parchment with 4 red squares. They are in
positions from L-R and top to bottom – 1, 3, 8 15. Now look at the last 3
parchments and mentally combine them as one parchment. The red
squares will be at 1, 3, 8, 13, 14,15. The common numbers on the 2 sets of
red squares are 1,3, 8, 15. By playing around with the sequence – press
15, 3, 8, 1 to open the cabinet on top. See the genie lamp and a
duster.
Guess what, use the duster on the genie lamp. The genie appears.
Having been given only one wish for the thief’s hearts desire – the thief
asks for a black rose. He takes the black rose and the crystal
skull appears. Take the crystal skull.
Skull maze – Enter the crystal skull again to talk to the
dolphin. In my game – go forward at bottom ramp, turn left and forward.
Turn around and talk to the dolphin. The dolphin tells the thief to sell
the skull until the one who is ready can get it. The dolphin gives the
last direction for the corridor – pass through the first door on your
right and the sixth on you left. Turn a little way to the right and click
on the globe with the wizard’s room inside.
Find yourself back at the wizards room. Go out through the door.
The rest of the thief’s story is told by Scheherazade – the thief goes
back and lays the black rose on the merchant’s daughter’s pillow. The
thief sells the skull for camels and becomes himself a successful
merchant. He ends up asking for the merchant’s daughter in
marriage.
Skull cavern – Back in the skull cavern, the baldheaded man
asks for the progress in the quest. But he cannot understand the dolphin’s
directions and ends up ordering the young archeologist to get the secret
or the Targui dies.
Corridor – Look again at the skull to go to the corridors.
Go to the corridors again by following the skull maze directions above.
Enter any of the corridor globes and follow the dolphin’s
directions.
Pass first door on the
left and third door on the right.
Pass through the fourth
door on the left and third on the left.
Pass through the first
door on the right and the sixth on the left.
Shambala
An elderly woman and an elderly man welcome
you to Shambala. Try talking to them and they will interrupt you when the
right order is not done. You have to start at the beginning if the right
order for them is not done. Here is the correct order:
Ask
the woman about the second left dialogue – picture of the man and
woman.
Go
but don’t talk to the man. He will say -The secret in the skull is
waiting.
Ask
about the first right dialogue – skull.
Ask
about the second right dialogue – young archeologist.
Ask
about the fourth left dialogue – earth.
Go
to the woman first and then ask the woman about the bottom left dialogue –
network or world with arrows.
Turn back to the woman and ask her about the first left dialogue – gift or
omega staff.
Turn left and walk forward around the pond 2x.
Turn to the left at the pond with a bush on the right side.
Go into the water. Watch as she dives in and
take the omega staff from the bottom of the pool.
Hoggar
She opens her eyes to a gun pointed at her by
the baldheaded man. The skull is gone and he wants to know the secret.
Click on the omega staff in inventory.
Skull maze – Go to the dolphin – in my
game – turn left, forward and turn around. Talk to the dolphin about
everything. Turn to the right and click on the globe with the picture of
the cave in Hoggar.
Find yourself at the back side of the camp in
Hoggar. There is a guard in front of the 2 tents. There is a truck in
front and left of the guard. Turn left and look down. Take the
flashlight-torch on top of the tent on the left. Without
moving forward, throw the torch aimed at the guard’s head. Look down at
the guard and get his knife and keys from his belt. Turn
left and see the tied Targui. Talk to the Targui and then use the knife to
untie him. Turn to the right and take another set of keys from the
pole in between the tents. Talk to the Targui. Turn right to the open
topped truck. Go forward to the truck and the click the keys taken from
the guard’s belt on the ignition. Watch them escape!
Remember what the Dolphin said – You carry the
future in you, a future you will only glimpse in your lifetime! Be careful
whom you share it with!
I have a secret I wish to share with
you!
This document may not
be distributed without express written permission of the author and the
content may not be altered in any way.
For Questions or
Comments on this Walkthrough,
Please write to: MaGtRo
Copyright ©
8/2002 MaGtRo |