Arthur’s Knights: Tales of Chivalry – Game Play

By
&Wanadoo
Walkthrough
by MaGtRo February, 2002
Game Play:
The movement in the game uses the arrow keys of the
keyboard. The menu uses the mouse pointer. Pressing the space bar is the
main Action key – speak to someone, open a door or pick up an inventory.
For the space bar action key to work, Bradwen must face with his body
slightly at an angle, the person to talk to directly or face the center of
the object to interact with. (Usually pressing the spacebar twice opens
doors). Using shift and arrow keys makes Bradwen run or the horse gallop
and climb stairs.
Clicking
the right mouse button displays or hides the interface bar at the bottom
of the screen. The circle on the left of the interface bar shows
the activity at the moment such as location of the game play, the person
to talk to or if combat is possible. Next is the inventory area that has
the choice of items,
represented by the hand icon that are picked up when Bradwen
is on foot; the subjects, represented by the
mouth icon that can be discussed when speaking to someone and the
destinations,
represented by the horse icon
while on horseback. When a
new item, subject or destination is obtained an automated transfer is seen
on the top left of the screen indicating that it is placed in the
inventory. When talking to a character, always exhaust all
dialogues by pressing the action key/space bar and then open the
subjects in
inventory and talk about all the lit icons.
To the right of the
inventory area, represented by a book is the storyline that summarizes the
progress of the game story. Hints can be picked up from the storyline. The
far right of the interface bar shows the green Menu globe that accesses
the Save, Database and Quit choices. There are 10 save game slots and can
be written over. There are 2 separate games, one Bradwen as a Paladin and
the other, Bradwen as a Celt. To play the other game after finishing the
first choice – select a new character and start a new game. Game always
starts using CD1.
Items to be
picked up. Subjects to talk about. Destinations to go to.
A young page asks Master Foulque
tales about Bradwen. Facing Master Foulque, click on the picture on left
bottom of the screen or press the Action key/space bar. Click on the
picture of Master Foulque to hear his answer. There are 2 stories about
Bradwen: as a Celt during the time of Arthur when fairies, dragons
and ogres are present and follows the old life that believe in the great
goddesses or as a Paladin, the pious knight and defender of the cross. To
choose which one, turn around and walk towards the door. There are 2 books
on either side of the door, a red book for the Celtic story and the white
book for the Christian story. Walk towards the selected story, face the
book directly, click space bar/action key and see automated action of
book going to inventory item. Walk back to
Master Foulque, face him directly, right click to bring up the interface
bar, click on book of spells, click on picture
of Foulque to start the story.
This is the legend of Bradwen, the
knight of the red dragon, warlord and bastard son of Cadfanan, the King of
the Atrebates.
Bradwen the Celt (Red
Book)
Quest 1
Check for
Survivors:
Lucius’ Villa –
Ride forward to Lucius’ villa to check for survivors after last night
attack by the Saxons. Face the Saxon warrior in front of the gate, forward
and automatically kill him. Now that you are unarmed pick up the Saxon’s
axe (press space bar). Turn to the gate, move
close to the center of the gate and press action key to open the gate.
Enter and see another Saxon under the tree. Talk to the Saxon. Fight the
Saxon by clicking on the red sword and selecting the axe from item inventory.
Time to check for survivors. Turn right,
walk forward towards the wall and pick up an iron
bar leaning on the wall. Walk to the opposite side of the villa,
turn right, forward and see a large beam in a wood shack before the steps
to the main villa. Move the blocking beam off the stairs with the iron bar. Go down the stairs and talk to Claudius.
Claudius says that Anglemar/Saxons ordered the
attack. Open the subjects in the interface bar
and choose Saxons. Exhaust all dialogues. Climb
steps using shift/arrow. Exit the villa.
Report to the
king:
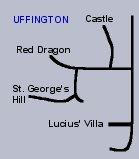
Castle – Ride/gallop the horse back to the
castle to make the report to the king. Go to the main road, turn left,
left again up the hill and turn on the first right. Talk to Urgan the
guard by the gate. Tell Urgan that the Saxons
have done these evil deeds. Enter and walk to the Council House situated
at the center of the castle compound. Enter. Report to the king, your
father about the Saxons. Corwyn, Bradwen’s squire has the message, a request for assistance that the King wants
to send to Bishop Novelius at St. George’s hill. Corwyn needs to be found.
Exit the Council house. Turn to the right
of the screen, forward and up the road to a house with a red dragon on the
door. Enter. Inform Gwenn about Nia. Ask her about Corwyn and she says that he is at the blacksmiths. At
the other end of the room is Madog, your son in a crib.
Exit your home, turn to left of screen
and circle the compound until the smithy. Jan the blacksmith automatically
fixes your sword. Corwyn must be at the stables. Go down the road and
enter the stable on the right through a wood fence opening (not the one
with the horse). See Corwyn fast asleep after ruthless combat with beer
kegs. He gives you the message for Novelius.
Exit the castle.
King’s errands:
St.
George’s Hill – Ride the horse outside the castle walls. Forward, turn
right, turn left, turn right and up the hill. Walk forward and see
Novelius. Tell him about the Saxon’s attack on
Lucius’ villa. Give him the message from
Cadfanan. He cannot help because of attacks on Magovenium and he gives an
answer for the king.
Castle – Go back to the castle and the king. Give him Novelius’ answer. He asks that you bring an offering, a chest
to the fairies of the lake, to spare the Atrebates from famine. The king
gives directions to Arden and orders to place
the chest in the island at center of the lake. Pick up the chest offering on the floor by the blue picture. Go
back to Gwenn in your home. She gives you a casket for Lebvella to be placed by the 3 raised
stones near Merlin’s tree in Arden, as an offering for protection for Nia.
Go out of the castle wall and ride the horse. Choose Arden from the destination bar.
Arden – Ride forward until Merlin’s tree. Surrounding Merlin’s tree
are crystals that block the roads, flowers and wildlife. Walk towards the
3 standing stones on the left of the screen. Place the casket for Nia’s protection at the center stone. The
crystal on the right disappears. Walk to the now open road and ride
forward until the Lake of offerings. Walk forward, right and see a bridge
under the water. Walk forward between 2 upright stone carvings and cross
to the center island. Place the chest of
offering on the green stone table. Go back to the road and choose
the kingdom of the Atrebates
destination.
Cure for the
King:
Castle – At the gate, turn to the tower on the right, forward and talk
to Morganor. The King is ill and Morganor ask that you go see Merlin for a
cure/plants. The King cannot be seen as
Morganor closed the Royal Hall. Inquire about the plants and tell him about the Saxons. Enter the castle compound and go home. Talk
to Gwenn about the plants needed for the cure.
Gwenn tells you to take a stone, stand on
carpet of flowers by the tree and call Merlin. Ride the horse and go back
to Arden.
Arden – Go to the cluster of flowers in front of Merlin’s tree. Use
the white stone of Merlin. Talk to Merlin and
then ask him about the plants for Cadfanan.
Lebvella the fairy grows them in the Other
World and only she may give them. To call her, Merlin gives you a blue
stone of Lebvella. Walk to the center great
stone on the left side of the screen. Use the blue stone of Lebvella to call the fairy. Plead for the
plants. Lebvella want you to find out the
reason for her having plants as her sisters. In Hell, your conscience
advises you to force the fairy by choosing the red heart but to be at her
mercy, pick the white lantern. Choose the white lantern. She asks a riddle
– I am the most precious of goods, yet even the beggar
possesses me. I am long in becoming, but may quickly disappear. I am in
the air, on the ground, in the water. I come in many shapes.
Look at the 3 stones (red, white and gold) that appeared in front of the
standing great stones. Pick the red stone of
life and tell the fairy the answer. The reason is that life of a
plant maybe worth as much as that of a human. But she gives you the medicinal plant since it
is for a king, a guarantor of the land of his people. Go back to the castle at Uffington.
Castle – Corwyn exclaims that Picts are at the gate of the castle. The
Pict denies entry. Do not fight him or you will die. He allows you entry
after telling him about the medicinal plants
that you carry. Enter and go see Morganor at the council house. He
is now King and the Picts are his guards. Morganor blames you for
Cadfanan’s death and as punishment banishes you. Gwenn has fled after the old king’s death. Go to your
home. Find an engraved stone on the table indicating that Gwenn and Madog
might have gone to Merlin at Arden.
Arden – Ask help from Lebvella about contacting Merlin. She will help for one condition – for you to
get the 3 pearls that are her transformed sisters. The crystal to the Lake
of Offering banishes. Go to the Lake and collect the 3
pearls from each of the tables on the 3 outer islands. Go back to
Lebvella and give her the 3 pearls (press spacebar). Look for Merlin’s stone at the place of shimmering colors. Go
to the cluster of flowers in front of Merlin’s tree. Use Merlin’s stone to call him. Inform Merlin about the
dead king and Gwenn’s disappearance. Merlin
says that Gwenn went with Novelius to go to Magovenium. Merlin bids you to hurry but added a
dreadful prophecy.
CD2
Quest 2
Find Bradwen’s wife and
son:
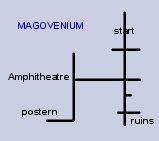
Magovenium – Ride forward pass the pillar, under the arch
and turn right. Ask the guard for entry to the Amphitheatre. Only
the Magovenians that carry the mark are allowed in. Approach Claudius
standing at the right side. He gives you the bad news that Novelius has disappeared Novelius is accused of sorcery by a hermit and only
bearers of the cross of the heresy of Pelagius
can enter the Amphitheatre. You might get one from Brother Cornelius, a
herbalist at the outskirt of town. Gwenn is
inside and wants to leave for Arden immediately after getting salt from
Cornelius. Ride the horse to the ruins to look for Cornelius. Ask him for
a cross to enable entry to the amphitheatre. He
gives you a cross since you are a good man. It
also worries Cornelius that Novelius has
disappeared. Go back to the amphitheatre and show the guard the cross. Enter.
Amphitheatre – The guard standing by the monastery door on the left
side of the
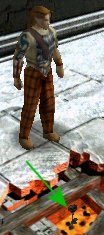
amphitheatre does not allow you entry. Get the tongs leaning by the opening of the blacksmith shop.
The man on the right side of the main platform says to listen to the holy
man. Go to the door with the cross and cup and
find it locked. Talk to the man on the ground close to the steps about
everything, Novelius and door. Climb the wooden steps to the flagellating
masked man. He would not answer your question about Novelius and the accusation but does answer about the
door – he dares you to brave the fire of hell
to find the key to the door of the devil. Talk
to the man on the ground by the green smoke about Novelius calling from the devil’s well, Gwenn and door of the
devil. Climb back to the main platform and turn left. Look down on the
broken concrete platform – devil’s well and see the green smoke emanating
from it and fire burning below. Also see a key down there. Use the tongs on the key. Use the
key on door with the cup and cross.
Enter.
Devil’s well or catacombs – Hear the cries of Novelius. Go down the
steps, forward, turn left and pick up key. Go back to hallway beside the stairs and
forward to closed door. While facing the middle of the door, use key on door. Enter and find Novelius. Novelius has
some bad news – the witch killed Gwen. Look at Gwenn behind the wood planks. The witch
with crow’s wings killed Gwenn and stole Madog. This witch took up the
appearance of the anchorite, the holy man in mask. Novelius warns not to
attack her or the inhabitants will kill you. Merlin might be able to help in countering her
sorcery. Climb steps (shift-arrow) and go out of the amphitheatre. Tell
Claudius about Gwenn and that you are going to Merlin in Arden. Claudius
warns about the Picts on the road to the Great Forest.
Arden – On the way, the Picts attacks and one Pict is killed. It
was good to heed the warning of Claudius. The other Pict says that
Morganor placed a reward of a golden torc on your head.
Continue to Merlin’s tree. Inform Merlin
of the tragedies that has happened and describe the witch. The witch is the Witch of Winter and can be
unmasked by the Cup of the Sea. The cup, a gift
from fairy Dael to the Atrebates shatters when 3 lies are spoken in its
presence and can thus reveal the witch for what she is. Galwich the giant
stole it and it can be found at the Black Rock. The crystal that blocked
the road to the Black Rock disappears. A black wolf guards this
road.
Go to Black Rock. Turn to screen right
and talk to Galwich the giant. Don’t fight him or you die. Galwich stole
the cup and has given it to fairy Nael, who desires it. Nael is one of the 3 sisters at
the Spring of Rhiannon. Go back to Merlin. Merlin can summon Nael from the Other World but needs salt for the ritual. Go to Magovenium. In Magovenium, ask Claudius for the salt. Travel back to Merlin at Arden. Give Merlin the salt.
At the Spring of Rhiannon, Merlin
performs the ritual and Nael appears. Ask Nael for the Cup of the Sea. She wants you to greet her sisters
for her and then she will give the cup to you. Go around and greet
(spacebar) the other 2 carved rocks circling the Altar of Rhiannon. Nael
gives you the cup. Turn to the right and
walk around to the shaded area on the left side of the spring to exit. Go
back to Magovenium.
Magovenium – Enter the amphitheatre. Warn the man on the ground close
to the steps about listening to the anchorite.
Talk to the anchorite/witch. She would not talk to you until you purify
yourself. The man on the ground explains what the anchorite meant about purifying. Only a man that has
flagellated himself publicly with a sacred whip
can talk to the Anchorite. The whip is with the last repentant man.
Walk forward, turn left, up the ramp, turn right and ask the repentant man
for the whip. He gives you the whip but does not want to believe what you said about
the anchorite. Go back to the anchorite
and purify yourself with the whip. Then use the
cup of the sea on the anchorite. The witch
flies away. Merlin arrives and he will watch over Gwenn and warns about
the Other World – Avalon.
Quest 3
In search of the
witch:
First island – Following Merlin’s instruction you arrive at Avalon.
After crossing the crystal bridge, pick up the blue
moon stone close to the reeds. Pray (space bar) on the carved stone
at the foreground. Walk forward and pick up another blue moon stone close to the giant guarding the
bridge. Talk to Galwich the giant and he
explains that he will not let you pass since he is the proud guardian of
the bridge to Avalon. Giants have an ancient
pact with Morgan, the great mother. Galwich saw
the Witch of Winter fly overhead and could not
do anything about it.
Pick up some white flowers to get pollen. Walk forward on the left side of the flowers
and see a crow on a stone. The crow warns you not to pick the golden apple
on the tree. Give the crow some pollen and he
flies away revealing another blue moon stone.
Pick it up. If you pick the golden apple, you turn into a pig – be
warned.
Go back and pick up some more pollen. Go forward to the right of the flowers
and see a fish in a stream. Corwyn states loudly that it is ugly. Look
(space bar) at the fish and notice that it has shiny scales but looked
starved. Give the fish some pollen. The fish
turns into a fairy bewitched by Morgan after the fairy seduced Gawain. She then turned Corwyn into a mushroom for
his reckless statement. Talk to the fairy about Gawain, Morgan and Avalon. The witch is at
the circle of stones and because of an ancient pact even Morgan cannot
touch her. She also said that Galwich has one
weakness and she will tell you that weakness for the 3 hearts stripped
from her by Morgan. Give her the 3 blue moon
stones. Drink of the Rain nectar… and of the
fruit the giant vanquished.
Go back to the entry to Avalon and on the
way pick up more pollen. Drink the rain nectar
in a blue bottle on top of the carved stone. Now that the rain nectar
protects you, pick the golden apple off the
tree where the crow was. Go back to Galwich. Do not fight him or you
die! Give him the golden apple and he changes
into a boar. Cross the bridge, ride forward to the next bridge, cross and
get to the Stone Circle.
Stone Circle Island – There are 3 stones that are covered in ice. Talk
to the Witch of winter at the center of the stone circle. Do not fight or
you die! To torment, she would not say where Madog is. Morgan is
supposedly powerless against her because of the pact. After talking to the
witch, turn left, forward to small clearing and another bridge. Talk to
the fairy about the witch. Give her pollen and she gives you a red jewel but would not say what for. Go to the fire
blocking the bridge. Use the red jewel on the
fire and the fire is extinguished. Cross the bridge and ride to the last
passable island by way of a shaded lane to the Tower of Source.
Exact revenge on the
witch:
Tower of Source – Talk to another fairy. Do not accept the wine
offered, just ignore it – remember Merlin’s warning. Ask her about Morgan and then explain about Madog, and she laughingly say that the witch violated
the pact by stealing a man’s child. Call the messenger and will find
Madog. Go to the second outer island from the entry bridge and pick up a
crystalline horn. Use the horn to call the
messenger and a crow appears. Talk to crow and tell Morgan of the
violation of the pact by the witch. Morgan says – Spring always triumph over winter. Look for the
fairies of spring and the 3 blooming stones will imprison the
witch.
Fairies of Spring – Go to the outer circle in front of the wine on the
ground. Pick up 3 engraved goblets. Go back to
the fairy at the center island. Ask her about spring. Give her an engraved
goblet to quench her thirst and pick up the spring flower. Do the same for the fairy that gave
the red jewel on the bridge at the stone circle island. Ride to the
engraved stone by the entry to Avalon at the first island. Do the same for
this fairy but do not drink the wine she offers. Now you have 3 spring flowers.
Go back to the witch at the center of the
stone circle. Use spring flower on each of the
3 stones covered in ice and in doing so hurts and finally paralyzes the
powerless witch. Talk to the witch. The witch made a pact with Morganor
who is a sorcerer to kill Cadfanan and Madog, who was given to the Picts
as human sacrifice. In rage and despair, Bradwen changes into a wolf and
kills the witch.
Transform Bradwen back to human
form:
Corwyn in Avalon – Corwyn is transformed back to human form. Ask
the fairy about Bradwen. Go to Bradwen at the Stone circle. Face the wolf and talk to him (spacebar). Go back to the fairy
that changed you to a mushroom at the first island and ask her how to
change the wolf to human form. Make Bradwen
forget his rage and he will be a man again.
Now, to find out how to do that – Ride to
the Tower of Breath (has 3 entry bridges). From first island,
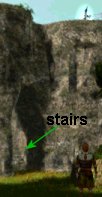
stone circle island, cross bridge where the fairy with red jewel
was to another island, turn right, cross bridge, cross island to Tower of
Breath. Climb the steps up to the main tower where you can see a fairy on
top. Talk to the Fairy of the 3 Winds about the wolf. Find what is light as the
whisper of a fairy, lives for only a brief moment and changes form in
darkness. Turn to the right side of the screen and forward to
the red circle platform to cross to the top of one of the stone tree. Here
you will pick up white stone of snow and the
blue stone of rainbow. Cross back to the main
platform and go to the red circle platform at the left of the fairy to go
to the stone tree platform. Here you will pick up the white stone of the clouds and the yellow stone of butterfly.
Go back to Bradwen the wolf. Use the
stone of butterfly on the wolf. A glowing blue
butterfly turns to Gwenn. She speaks to the wolf – forget
the rage and despair, forget me, be amongst the living and become the one
I love and avenge us. Bradwen is transformed back to human
form. With no known destination you cannot leave Avalon.
Free Gawain:
Prison
Tree – Cross the bridge where the Fairy gave the red jewel and ride to
the very end island. The bridge to the Tower of Source is now blocked. Go
to the newly opened bridge, forward and take the bridge on the left. Cross
bridge, go around the island. At the side of the island see a man inside a
cage of tree branches on the raised area at the middle of the island.
Climb up and talk to modest Gawain, about knights, Morgan, Morganor and Arthur. He
asks to be freed from the prison tree and he
will knight you thus Arthur will back your cause. Gawain explains that he was on a mission to Mark of
Cornwall but Morgan tricked him to Avalon. Go to tower of breath to
find out how to free him.
Tower of Breath – Talk to Fairy. Do not take the sacred torc unless
you want to stay in Avalon forever. Talk to her about Gawain, Morganor and Arthur. The riddle for the Prison tree command – Neither the sun nor the moon can hear my cries. The moon gives
me wings and the sun takes them away from me. At night, I am the daughter
of the sun; during the day, the daughter of the moon. Go to the
stone tree platforms and can gather the blue stone of will-o-wisp, white
stone of firefly, brown stone of bat and white stone of owl. Only the
white stone of firefly is
needed.
Go back to Gawain. Place the white stone of firefly on the outer branch of the
prison tree that looks like a hand. Gawain knights you. You swear
allegiance to Arthur and to fulfill the code of chivalry. Gawain entrusts
you with a mission to Mark of Cornwall asking
him for armies to help Arthur. Go to the Tower of breath.
Try to leave
Avalon:
Tower of Breath or Wind – Bid farewell to the fairy up the tower and
ask for directions to Cornwall. She cannot and
advises you to stay since Morgan is attracted
to heroes like yourself. You cannot leave because of the guards, 3 enchanted warriors. Mortals cannot defeat
these guards.
Guardians of Avalon – There are 3
warriors enchanted by Morgan in animal form (crow, boar and wolf). They
can all be defeated by either of 2 ways -by first removing their
invulnerability and then fighting them or selecting the red heart to
obtain the secret of power and glory and then fighting them. Defeating all
3 warriors by one way only will ensure a defeat by the last warrior, i.e.
it should be one way for 2 warriors and another way for one
warrior.
Go to the warriors – Crow, found at a side circle at the Tower of Source,
Boar, found outside the circle of standing
stones and Wolf, found by the bridge where the
giant was. Then press space bar and they change to their human form, ask
them again who they are and when they answer and their respective subjects are in the inventory box – the choice of how
to defeat them can now be made.
One way is after the subject animal is in the inventory box,
immediately leave and go back to the fairy at the Tower of Breath. She
will give a riddle for each subject animal
and you pick the correct stone from the stone tree platforms,
then go back to the warrior and use the stone on the respective warrior.
“With this stone ends your invulnerability.” Crow – What can disperse men’s
cries can harm him. What eludes even kings can harm him. What can make
peasants and warriors alike fold under before its progress can harm
him – White stone of the winds.
Boar – What wrecks the
stomachs of men and beast can harm him. What the knight, peasant and
wise men cannot long bear can harm him. What the winter gives birth to
and what gives birth to the pillagers can harm him – stone of hunger. Wolf –
What lies hidden in the darkness can harm him. What can
flow but will not quench will harm him. What burns but is not consumed
can harm him – stone of
gold.
The other way is after the subject animal is in the inventory box, talk to
them by selecting their subjects – crow,
boar or wolf –
then a choice is presented in hell. Either to choose the red heart or
white lantern. Choosing the red heart will give you the secret of power
and glory and ensure a win over the warriors.
Defeat the warriors. Leave Avalon and
proceed to Cornwall.
Quest 4
Talk to King
Mark:
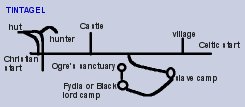
Cornwall, Roman Road – Upon arrival at
Cornwall via a Roman road, ride forward and meet Cymerill, King Mark’s warlord. He does not let you see King Mark unless you defeat him in duel. Fight him but you
cannot defeat him. You have to find his weakness. Turn around and ride
back to the village.
Village – Go forward to the path
at left of screen and look at a shield with Cymerill’s coat of arms. Enter
the open gate on the right and the dwelling with fire. Talk to the Clalia,
Cymerill’s sister and she says that Cymerill is
under the protection of fairy Celidwen but abuses his power. She will tell
you about his power but first bring wood to the
old lady at the church. Go out of the open gate, right, forward until an
opening on the wall with a birdcage across it is seen. Enter the
blacksmith’s shop. Ask Fergus the blacksmith about Cymerill and also some wood. Go out of the shop. Go forward, turn right on
the opening on the right and ask the old woman about Cymerill. Give her the wood. Go back to Clalia and she says that Cymerill is
protected from weapon forged by man. Go back
out and talk to the blacksmith about weapons.
Go out, turn to Bradwen’s right and ask the shepherd for his staff. Go back to Cymerill and fight him with the
staff. He gives you a note
of safe conduct to enter Tintagel castle.
Tintagel castle – Show the note of safe
conduct to the guard. Enter the door to King Mark’s tower. Ask King
Mark about his promise of warriors to Arthur.
Mark states he cannot do so because the kingdom is fighting an ogre. Mark gives you his seal to enter the hills where the ogre is and when
you bring back the ogre’s head, he will fulfill his promise. Go to the
hills.
Kill the ogre:
Slave camp – Ride forward to main road, turn to Bradwen’s left and
ride forward to guards on the right side of the road. Ask the guards about
the ogre, whom they say has a pact with the
Saxons roaming the forest. To enter, show
the seal to the guards. Go forward to the slave
camp and talk to Anglemar, standing at the middle of the camp. You realize
this is where your friends where taken. When he wants to fight, tell him
later after killing the ogre. Go to the left of
the screen and ride to another campsite.
Fydia’s prison – Talk to the fairy Fydia, daughter of fire. Stone
pillars, iron pillars and magic rings imprisons her. Promise to free her
after killing the ogre. She says the ogre never
lost in a game and that Anglemar sometimes
enters the gate. She gives you the fire of
Fydia to fight Anglemar. Go to the gate and find it locked. Go back
to Anglemar’s slave camp. Fight Anglemar using the fire of Fydia. Pick up the key from his body. Go back to the locked gate of the
ogre’s sanctuary.
Ogre’s Sanctuary – Unlock the gate with the key while standing at the
center of the gate and then enter. Look at the skulls set in stone pillars
and know that you are now at the ogre’s
sanctuary. Ask Fydia about the ogre’s
sanctuary. They are imprisoned souls in the skulls and can speak to
them by calling their name. The ogre will come
when his magic is used. Go back to the slave camp and look at the reindeer
totem. Find a red, blue and white stone that
has the symbols similar to that of the skull pillars. Show the stones to
Fydia. The blue stone is Erwyna, an Irish princess, white stone is Gladius, warlord of Mark’s grandfather and the red
stone is Duldanaan, sorceress from Cornwall. Go
to the skulls and talk to each of them by using their individual
stones. Ask Duldanaan about Tudglyd, the
ogre of Cornwall. Tudglyd has a gift but also a geas – when the half moon the color
of the sun, when the half moon…. The other 2 skulls would not
talk nor give information. Exit but Tudglyd appears and blocks the way
because you have invoked his magic. He gives you time to think about the
challenge. Fydia says that the song of the geas
has 3 verses and you have to find the other 2 to know Tudglyd’s weakness.
Go to the village.
Completing the song of
Tudglyd’s geas:
Village – Ask the old woman about the geas
but she is cold right now and asks for wood.
Ask the blacksmith about the geas. He gives it
to you a Saxon axe made of bronze like the
color of the sun that he found. Ask wood from
the blacksmith again. Give the wood (spacebar) to the old woman and
she recites the whole geas – When the half-moon the color
of the sun strikes on the day that fire burns, the head of Tudglyd shall
tumble. Go back to the Ogre Sanctuary. On the way, talk to
Cymerill. Ask him about the geas and about the
fires, Cymerill says that the day to challenge
the ogre is on Calen Hae the day fires are lit.
Ogre’s Challenge – Tudglyd is not at the sanctuary. The skulls are of
no help. Ask Fydia about the ogre and she says he must be hiding in his
den and that Anglemar had a map. Go to the
slave camp, look close at the reindeer totem and pick up a roman map. Go back to the
ogre’s sanctuary. Ask Gladius (s-shaped marked stone), one who guards the
way, about the map. A test must be passed
before gaining access – I am visible
all over the world, The wind pushes me and chases me away. I have many
shapes by cannot be held. 3 stones (blue of
water, light blue of dust and white of clouds) appear. Pick up the white stone of clouds and give it to Gladius. The
boulders blocking the entry to the den disappear. Enter the den and face
Tudglyd. After he tries to buy his way out, fight him with the axe. Pick up the ogre’s
head.
Go back to Fydia and she gives you a
lock of her hair. You promise to be back
to free her. Go to Tintagel castle; show the ogre’s
head to the guard and then to King Mark.
CD3
Quest 5
Find Gawain:
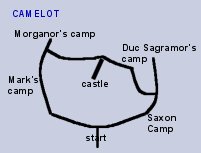
Camelot – While looking for Gawain in all the
camps surrounding the castle, the Saxon’s, Duc Sagramor’s and even the
Atrebates’ guards would not let you in. At Mark’s camp, enter, go by left
path and go to red tent at corner. Cymerill informs you that Gawain was there and also looking for you. Talk to
Cymerill about Gawain and Morganor.
Go to the castle and look at the pennants
standing on the snow and see Gawain’s coat of arms. Enter the gate, go up
the incline and turn left. Soon, Corwyn hears Baldwyn, Gawain’s squire
standing across from the guard by the main tower. Ask him where Gawain is but he promised to speak of it only to one
who knows the name of the lady. To help, he described the coat of arms of the family – unicorn and a
lion.
Talk to Cymerill at Mark’s camp about the
coat of arms and learn that it is that of Lady Yvaine’s, niece of King Mark. Go back to talk to
Baldwyn at Camelot hill and he gives you a brooch to give to Avella. At Mark’s camp, go forward
to the tent at the right corner. Avella would not let you talk to Lady Yvaine. Show her the brooch and Gawain comes
out. After the greetings, talk about Morganor
and Arthur.
Go to the castle and talk to the guard by
the main tower about Arthur. Enter. Remember –
sword cannot be drawn at the Round Table. Talk to Morganor about the Picts
and the witch. Enter the chamber of the Round Table and talk to Arthur.
Ask for justice about what Morganor did to you.
Arthur will settle it later but he wants you to find Merlin at Arden. Arthur was asked to give you grains and a message –
not to refuse to give water or food to any creation of
nature. Go to Arden.
Find Merlin:
Arden – Look around for clues to find Merlin.
All the crystals except the one for the Lake of the Offering, that block
the roads are gone. Pick up flowers from the
bed in front of Merlin’s tree.
Go to the road that has a black bird
close by and ride to the burial mounds. Before entering the mounds area,
see squirrels eating by a tree. Go around the back of the tree and pick up
some hazelnuts. Go back to Merlin’s
tree.
Go to the road that is guarded by a black
wolf and ride to Black Rock. Take the path on Bradwen’s left and forward
to the ring of skull trophies where Galwich was. Pick up a dish on the ground beside a stand close to the
forest.
Ride out of Black Rock and take the first
left, forward, left again to the Spring of Rhiannon. Use bowl on the mouth
of the spring (close to rocks) near the entrance to get water. Exit, Ride forward and keep on taking the left
path at splits of the road.
Walk forward and face a standing stone on
the left side of the road that has the sign of Merlin. Press spacebar and
hear Merlin’s voice say “I am thirsty”. Give it the bowl of water and it changes into a butterfly. Follow
it to the lane on the left. The butterfly settles into one of the 2
dolmens. Give the flowers to the butterfly and
it changes into a squirrel. Give the hazelnuts
to the squirrel and it changes into a white falcon. Give the grains/magic seeds to the white falcon and it changes
into Merlin.
Merlin explains what happened. Tell
Merlin about Cornwall events and ask help in freeing Fydia. Fydia has 3 sisters. Find them and together
they can free Fydia. Fiachra, the oldest and is
in Avalon can burn magic. Ferdia, the middle
sister and is at Black Rock can burn stone. She listens only to Fiachra.
Fhola, the youngest and who is at the Camelot forge can burn metal. Go to
Camelot.
Free Fydia:
Three Sisters – Go to Camelot castle, enter, turn right and go to
the blacksmith’s forge. Talk to the blacksmith about Fhola. The shining light outside the smithy is Fhola.
Talk to her about Fydia and prove you are her
messenger by showing Fydia’s lock of
hair. Fhola transports you to
Avalon. Turn to the left of screen and talk to the shimmering light of
Fiachra. Use Fhola to talk to Fiachra. They then transport you to Black Rock. Walk
to screen right until you hear a crackling sound and see a shimmering
light on the lava pool. Let Fiachra talk to
Ferdia. Now, the group is transported to
Fydia’s prison rings in Cornwall.
You are so happy to see Fydia. Fydia
gives instruction how to free her. Go to the sorcerer’s stone (brown rock)
and call the sister by order of their power to burn the prison rings –
Ferdia burns stone, Fhola burns metal and Fiachra burns magic. Fiachra will get the sword of 3
flames to protect Fydia and Bradwen and reseal the pact/ritual in
Arden.
Reseal the
pact:
Making of the 3-flamed sword– In Arden, greet Fydia and talk to Merlin
about the ritual. Merlin will help complete the
ritual if you find the sword. Merlin tells you where to look. Go to Black
Rock (road guarded by black wolf). Walk forward to the rock formation
facing the entrance and pick up the sword’s handle. Turn right and move forward until a big rock
before the bridge. Pick up the sword’s blade.
Go to Galwich’s ring and pick up the yellow colored sword’s hilt on a stand close to the lava pool. The sword
combines into unlit 3-flamed
sword.
Go back to Merlin and give him the sword.
Stand in the middle of the flowerbed, press space bar and automatically
hold the 3-flamed sword. Call Fhola, Ferdia and then Fiachra to
combine with the sword to form a now burning 3-flamed
sword. Merlin bides you to thank Morgan for the help of the
fairies of fire. Fydia will come back when you have gotten the justice you
ask of Arthur.
Justice:
Accused – Take the Black Rock road (black wolf) and go back to
where you transformed Merlin back to human form (Great Hunt). Take the
right path; pass the dolmen and cart to the red marked standing stones.
Stand at the middle of the ring of stones and use the 3-flamed sword to thank Morgan. A Pict sneaks behind
and gets killed by you. Search the dead Pict and get a jewel-encrusted
scabbard. Gawain arrives and accuses you of
tricking him. Excalibur has disappeared and you
are the suspect. Show him the scabbard and
Gawain recognizes one of the stones adorning Excalibur’s scabbard. You
surmised that if the Picts have the scabbard,
they might have the sword. Gawain gives you Arthur’s
ring to gain entrance in Camelot as soon as you have proof.
On the way out, talk to the fairy where
Merlin’s stone was. Excalibur would not be
allowed by the lady of the lake to be taken by the Picts. A Doppelganger takes on your appearance by the order of
a sorcerer. If you bring her flowers, the fairy will tell how to open his
hiding place at Black Rock. Get some flowers
from the bed in front of Merlin’s tree. You can use the white wolf road.
Give (spacebar) the flowers to the Fairy
of the wind. She gives you pollen from Avalon
and instructions. Go to Black Rock.
Proof – Take the screen’s left path at Black Rock and use the pollen on the large stone that block the pathway.
Cross the bridge to the entrance of the Black Rock tower. Ask Ferdia to open the entrance to the tower. Enter and
talk to the doppelganger. Morganor made him. Fight him with Fiachra and once defeated, it changes to a ball of
clay. Pick it up as proof. Turn right and pick
up Excalibur. Return to Camelot.
Camelot – Go to the castle and show Arthur’s
ring to the guards at the main gate and the tower door. Enter and
walk to Arthur. Give him Excalibur and tell him
the Doppelganger had done the stealing and
Morganor is responsible for the actions. Arthur
wants more proof. Talk to Merlin about the Doppelganger and give him the ball of clay. Merlin brings the doppelganger back.
When Morganor was sent for, the doppelganger asks him if he was going to
thank it for its service. Arthur ordered a duel to settle the matter and
Bradwen got his justice.
Bradwen became a Knight of the Round
Table and King of the Atrebates.
Bradwen the Paladin (White
Book)
Quest 1
Get Lord Elad’s oath
back:
Castle – Arriving by the castle gate very
tired, talk to Morganor standing on the tower on the right. After
informing you of Lord Elad’s rebellion, he orders you to bring back Lord Elad’s sword as proof of his submission. Ask
about the reason for Lord Elad’s broken oath to King
Cadfanan and the king’s health.
Red
Dragon Hill – Ride down the hill, turn right, forward and see an
anchorite. The hermit likens you to your Uncle Novelius that he accuses
with heresy. Talk to the hermit about everything, Lord
Elad and honor. Ride down to main road
and turn left.
Lord Elad – Try to convince Lord Elad to come back to the King. He has
made a pact with the Saxons. Do not fight him
but convince him by talking about his honor.
Automatically defeat him and he gives you his fealty and sword. Anglemar, the Saxon
promised the Crown of Atrebates for his fealty to Cedric. The Saxon
prisoners were taken to Tudglyd, a sorcerer. Go back to the
castle.
King’s mission:
Castle – Give the sword of Lord Elad to
Morganor. Enter and go to the Royal House at the center of the compound.
Enter and talk to the King. Gwen, your wife keeps a coffer for Novelius.
Report to King Cadfanan about the Saxons and he
warns you of Morganor. In speaking about honor,
the king’s despair shows. On the way out, ask Olwen who is sweeping the
floor about the King.
Exit; turn left and left again to reach
your home with the red dragon mark on the door. Gwen, upset about the
abduction of Nia expresses her opinion about the Christian God, your
constant absence and Morganor’s actions. Ask for the casket given by the king.
Turn around and pick up the bell/doll from the
table and give it to your son Madog in his crib. Outside the door, remind
Corwyn, your shield bearer of his duties.
St.
George’s Hill – Ride down the hill, right, left and right up to St.
George’s Hill. St. George’s sword is at the ground at the center of the
hill. Talk to Novelius. He turns the alliance down because he needs his
men to defend Magovenium. Ask about St. Joseph,
King Cadfanan and anchorite. Give the casket
to Novelius. Go back to the castle. Morganor asks that you get a
healer since the King has lost consciousness. Go back to Novelius at St.
George’s hill. Novelius sends you to Magovenium
to see Brother Cornelius. Ask about Cornelius
and he gives you Bishop’s seal. Once on the
horse choose Magovenium as the destination.
Cure for the
king:
Magovenium, Monastery – Ride forward pass the pillar and the arch,
turn right and go forward. Talk to the guard at the Amphitheatre. Prove
that you are not a spy by showing the seal.
Enter and walk towards the screen’s right/Bradwen’s left. On the way, pick
up an axe leaning by the wall of the
Blacksmith’s shop. The blacksmith gives you direction to the monastery. Go
forward to the door with the cross. Enter. Talk with Armenius, the drunken
Brother. He will tell you where Cornelius is after you give him a jug of
wine. Exit the monastery, forward, go down the main steps off the platform
of the amphitheatre and go to the left side of the broken pillar. Get
the jug of wine by the wall of the house. Go
back to the monastery and give the jug of wine to Armenius. He says that
Cornelius went to pick herbs but not know where. Turn to left, forward and
get a ham from the wall. Exit.
Amphitheatre – Go again to the ground off the main platform; go
around the broken pillars, up the ramp, right and forward. Talk to Nai.
Give him the ham. Ask about Brother Cornelius. Cornelius went down the catacombs, through the door
marked by a cup. Climb back up the main step to the platform; turn left
and approach the door with the cup. The door is locked. Go back to
Armenius and get the key to the catacombs. Open the catacomb door with the key. Enter.
Catacombs – Corwyn feels the heat and you hear somebody pray. Go down
the steps and immediately turn to the hallway beside the steps. Forward to
the locked door, use axe on door while standing in front of the center of
the door. Enter and find Cornelius, who thinks you are a demon. Give him
the seal of Novelius. Ask help for the King. He gives you medicinal herbs. Exit the amphitheatre and see the anchorite
outside. Talk to him. Go back to Uffington
castle at the kingdom of the
Atrebates.
Uffington Castle – Corwyn screams about the Pict at the tower. Turn
right and talk to the Pict. Enter and go to the Royal House. Enter and
find Morganor on the throne. Morganor brags, blames you for the death of
the king and banishes you. Gwen and Madog are
driven out of the castle and are on the road. Olwen would not speak to
you. Go to your home and find letter from Gwen. Read the parchment from inventory. Gwen left for Magovenium.
CD2
Quest 2
Find Bradwen’s wife and
son:
Magovenium – How do you find Gwen when the Saxons have
attacked the city? Go to the amphitheatre. Talk to Anglemar but do not
fight him. Turn to left, forward, right at end of street and go to the
postern of the monastery. Get the torn letter
from the door and read it in inventory. Novelius wrote that Gwen is here
and safe and can enter through the postern….
Ride to the ruins, forward, right and
left on second road on the left. Go through the arch and look at the tree.
Forward to shack opposite the arch, go to the back room and find Armenius
still drunk. Ask about Gwen and Novelius. Give him the seal and he gives you a key. Go back to the postern of the
monastery.
Monastery – Use key on postern of the monastery, enter, forward and
talk to guard. The inhabitants are rioting and want to destroy the
monastery. Climb the steps and enter. There are side altars on Bradwen’s
right. Enter each of them to read (spacebar) about the life of St Joseph
of Arimathea, how he defeated the devil and sealed him here at the
monastery and about St. George at the very last
side altar. Turn to the hallway opposite the first side altar,
forward and enter the door. Talk to Novelius about the guilt laid on you
by Morganor. Ask about Gwen, Anglemar and Morganor. Also ask about St.
George’s gift from God that made him defeat the dragon – Faith.
Exit. Note several mirrors on the wall all around the
monastery.
Go forward, left and enter first door on
Bradwen’s left to enter the chapel. See the relic of St. Joseph of
Arimathea beside the door. Go to the altar and pray (spacebar). Pick up
St. George’s shield that appeared on the
altar.
Go out to Anglemar in front of the
Amphitheatre door. Fight Anglemar using the St.
George’s shield. After killing Anglemar, the bells stops (Thank you!) and the Saxons departs. The population is still
rioting so cannot enter the main gate. Go to Novelius via the postern.
Talk to Novelius and then the guard downstairs. Exit through the door to
the Amphitheatre.
Amphitheatre – Hear somebody say, ” Our blessed tree will save us”. Talk to the man at the
platform and then the man on the ground. Ask about the tree of St. Joseph. Talk to the anchorite on top of the broken pillar. Talk to the
woman on her knees and she also said that the anchorite accuses the monks
of being with the devil. She saw the devil
carried inhabitants to the catacombs. Ask about Gwen. Go to the door with the cup at the other
end of the platform to that of the monastery door.
Catacombs – Enter, down, left, forward and pick up Madog’s toy/bell on the floor. Turn to look at the fresco – St
Joseph slew the devil. Go back to Novelius.
Talk about Gwen, tree, toy, devil (fresco locked the devil in the catacomb) and
then the anchorite. On the way out from
Novelius’ room pick up the cross on the left
side of the door.
Go to the ruins and the tree. Look close
(spacebar, body facing the branch) at the tree and realize it is the tree
of knowledge. Then use the cross and pick the
fruit of knowledge. Go back to the catacombs.
The amphitheatre door can be used now.
Face the fresco of St. Joseph and then
use the fruit of knowledge. The devil speaks
with your voice. Enter and see Gwen. With her dying breath she said that
the anchorite is the sorceress of winter and
carried Madog off. Make a promise to Gwen. Look
at the fresco at the left side – Truth will be the reward
of the chosen one. Go back to Novelius.
Unmasking the
anchorite:
Monastery – Tell Novelius about Gwen, Madog and anchorite. Exit,
forward, left, left at the hallway after the chapel and check the door at
the end. Talk to Dionicus and then ask about the anchorite. Search for innocence and
accept its gift. It will take you to the cross of renewal. The cross will
strip the Witch of winter of her powers. Go out of the
monastery using the postern.
Talk to the boy. Give him Madog’s toy and he gives you his knife in return. Go to the tree in the ruins. Look
close at the branch, use the child’s knife on the branch and then pick up
the branch in blossom. Go back to the
amphitheatre.
Amphitheatre – Go back to the anchorite. Talk to the anchorite. DO
NOT ask about Madog or you die. Use the branch in
blossom on the sorceress. She went to the other world – Avalon.
Go back to Novelius. Talk to him about
Madog and Avalon. He
gives you a map to Avalon and some warnings.
Away from Novelius, look at the map in inventory. Go to Avalon.
Quest 3
In search of the witch, first
time:
First island – At the first island in Avalon,
see a giant sitting by the bridge. Talk to him about the witch. Walk to the left path of the clumps of white
flowers and see Dap, squire of Knight Lancelot
imprisoned. Talk to him about the witch, Lancelot and find about the sword Chastiefol thrown
into the waters at the tip of the island. Walk out of the glade and
forward to the stream. Corwyn sees something shining in the water. Stand
opposite Chastiefol, the sword and pick it up.
Go back to Galwich and fight him with Chastiefol. Pick up the key from the giant’s body. Free Dap from his prison
with the key and give him
Chastiefol. Cross the bridge and ride until the Stone circle
island.
Stone circle island – See Lancelot’s horse, the witch at the center of
the stone circle and petrified Lancelot. Talk to the witch. DO NOT press
spacebar at Lancelot or you will fall into the witch’s trap. Walk forward
behind Lancelot. See a fairy and she offers mead but while thinking about
it, Corwyn drinks it and changes into a mushroom. Ask her about the witch. Find Kael at the Tower of
Source.
Tower of Source – Go to the opposite end of the island and ride to the
very end through a shaded lane. At the center of the Tower of Source is a
warrior and the fairy Kael is inaccessible behind a wall of fire in one of
the outer circles. Talk to Kael’s champion about Lancelot and about the witch. Take the test. First test – lives between the water and land. Go to an outer
circle, pick up stone of the toad and give it
to the warrior. Father of bread – wheat. Finery of the
ground – brown. After completing the
3 tests, the fire blocking the bridge to the fairy is gone. Talk to Kael
about the witch. She gives you powder/gold dust to cancel the witch’s power. Go back
to the witch at the stone circle and use the gold
dust. She escapes.
Search for the witch, second
time:
Prison Tree island – Ride to the very end of the islands. Take the
left bridge to get to the Prison tree island. Walk around the island,
climb the ramp to the center where a tree cage is situated. Hear the witch
cackle but the tree slaps you down. Go to the other side and see the
witch’s wings. Go back to the shimmering light by the bridge. The light is
now a fairy. Do not lie down and rest as she requests. Ask her about the
witch. Yrshgul, the prison
tree caught the witch. Her sisters might help. Ride out.
Tower of breath – Ride to the first open bridge on Bradwen’s left
passing through an island to the Tower of Breath. Talk to
the fairy near the bridge about the witch and
the prison tree. Turn around and walk forward
to an arch on the left. The steps up the tower are hidden by it. Climb and
talk to Dwella about the prison tree. In hell,
choose the white lantern/heart. Dwella’s clue to Yrsgul’s weakness is
You meet me each day, but you cannot see me. The older you
get, the more I bring you vigor, I am therefore the theatre of an
impossible life. Turn to left of screen and walk to red circle
on the edge of the tower. At the outer platform of a stone tree pick up
yellow stone of sleep (press spacebar when the
name of the stones are shown on the screen). Choosing the wrong answer
will result in Bradwen staying in the other world forever. Go back to the
prison tree.
Prison
tree – Use the yellow stone of sleep on the
slapping hand of Yrshgul. Talk to the witch about the witch’s reason for what she did and about Madog. Morganor is behind
all of this!!! When you kill the witch, she disappears but leaves behind a
torc in the cage. Bradwen is now in a fit of despair.
Bring Bradwen back from
despair:
Corwyn in Avalon: Corwyn is returned to human form by the fairy. Talk
to the fairy. Go look at Bradwen at the Prison
tree island. Then go back to the fairy that turned you to a mushroom by
the stone circle. Talk about Bradwen. Find the
butterfly/Gwen to talk to her
husband.
Butterflies – There are 4 glowing butterflies that can be found; a
red butterfly by the bridge at the stone circle island going to the others
islands, a green butterfly in a glade at the Tower of Breath close to the
left bridge, a blue butterfly by the entrance to Avalon and a red-gold
butterfly by the stream where Lancelot’s sword was found. Talk to all
butterflies and be sure to ask the green butterfly about Gwen. The Gwen/red-gold butterfly will not appear
until the others have been spoken to. Talk to Gwen/red-gold butterfly about Bradwen.
Go back to Bradwen and use the butterfly on
him. Gwen implores with Bradwen and asks him to stop Morganor.
Free Lancelot:
Back as Bradwen, pick up the gold torc left by the
witch in the Prison tree. Go back to Dap, Lancelot’s squire at the cage at
the first island. Ask Dap about Morganor and
the torc. The torc is Lancelot’s and the knight
can help you gain justice.
Tower of breath – Go to the Tower of Breath and talk to Dwella
about Lancelot and the torc. Give the torc to
Dwella and she explains the torc by another riddle – It
can be won or it can be lost. It can last a moment or an eternity; It can
cause happiness but also bring suffering! Go to a stone tree
via red circle on the ground. Pick up the red image of love. Tell the fairy the answer and she gives another
riddle to understand the recipient of the love – She is
unique in her country. She is no goddess, but revered. She commands men
but has neither magic nor strength. Get yellow image of Queen and tell Dwella the answer. She explains the
secret love between the Queen and Lancelot.
Stone circle island – Go to Lancelot at the stone circle. Use the
stone of Queen and then the torc on Lancelot’s statue. After talking to him, ask
about justice for Morganor. Lancelot knights you so that Arthur can hear your request.
Lancelot gives you a mission to Cornwall – to
stop Tudgyld, who fights Arthur.
Quest 4
Find Tudglyd:
Cornwall – Meet Cymerill, champion of King Mark. Talk to him about Tudglyd and Mark. To let
you pass either fight him or kill the little ogre, child of Tudglyd. Go to
the road at screen’s right. Turn to the road that goes up (a tree
separates the 2 roads) upon reaching the second curve. Find a dead hunter
in a clearing and pick up his horn. Go back to
the road and ride forward until the coal burner’s hut. Blow the horn in front of the hut door and out comes a “baby”
ogre. Talk to Alglyd and then fight him. Pick up the collar/trinket as proof of victory. Go back to Cymerill and
show him the trinket. He allows you to pass but
the castle is still closed to you.
Village – Go to the village. Talk to the man close to the gate and
ask about Tudglyd and learn that the ogre’s
children guard the hills. Enter the church/cemetery enclosure and talk to
Father Johan. Give him Niul’s horn and ask about Tudglyd. – He who finds the remains
of the Saint woman will rid us of him. Go to the shrine at rear
of the enclosure and read the inscription – Saint
Ophelia. Talk to Father Johan about St.
Ophelia. Go out of the cemetery and circle the
village. Talk to the man by the dove cage about Saint
Ophelia and the doves that are her
children. The cooing of the doves frightens the ogre. Go back to the
priest and ask for the doves. He gives the
dove to you. Leave the village.
Hills – Ride down the road until you see a black wolf on the screen
right, turn into the snowy ground. Remember what the man in the village
said – the ogre’s children lay in ambush. Walk only by the grassy area
under the trees, off the path close to the embankment by the main road. If
you walk at the center of the path – 2 ogres will ambush you. Enter the
slave camp. Talk to Nia, Gwen’s sister about what has happened and ask
about Tudglyd. Walk around and take the path to
the north (left side of screen).
Black Lord’s camp – Go forward and talk to the Lutisse, niece of King Mark and prisoner of Lord
Melatus. Ask her about St. Ophelia and Tudglyd. Talk to the Black
lord about Lutisse. You cannot win the
fight with Melatus. Go back to Lady Lutisse and ask her about the black lord. Only a valiant man armed with truth can
beat the Black lord. The gate to the ogre’s sanctuary is
locked.
Go back to the slave camp and get a key from the reindeer totem. Tudglyd appears. Talk to
him about Tudglyd (hunger never satisfied),
Mark and St. Ophelia
(remains in his sanctuary). Leave him and go back to the Black lord
camp. Talk to Melatus about Tudglyd and St. Ophelia again. Go to the gate at the rear of the
camp and use the key to open
it.
How to defeat
Tudglyd:
Ogre’s sanctuary – Talk to the 3 skulls on pillars and ask them about
St. Ophelia. They all say they are St. Ophelia.
Go back to Lutisse and ask her about St.
Ophelia. Only the cup of the sea can
truth be known and Cymerill has it now.
Cup
of the sea – Go back to Cymerill on the road but remember the ogre’s
ambush and walk under the trees off the path. Ask him about the cup of the sea. Fight Cymerill but you cannot win. Go back to Lutisse and
ask about Cymerill. Cymerill draws his strength
from trees. Go back to Cymerill and ask to
fight him by the coal shed. After his defeat, Cymerill hands over the
cup of the sea. Go back to the Ogre’s
Sanctuary.
St.
Ophelia – Use the cup of the sea on each of the skull to find the real St. Ophelia.
When you find her, she gives you remains of St.
Ophelia. Go to St. Ophelia’s shrine at the cemetery in the village.
In front of the shrine, bury the remains of St.
Ophelia. Only the Blood of Christ can quench the
ogre’s thirst and only the Body of Christ can soothe his
hunger. Pick up the host and wine that appeared at the foot of the shrine. Go back
to the Ogre Sanctuary (Arthur is in
inventory).
Ogre Sanctuary – Stand at the center of the stones and press
action/spacebar. Tuglyd is nowhere to be found. Exit but Tudglyd appears
to block your way. Tudglyd is hungry – give him the Host and then Wine. Talk
to him about Arthur. He will be in peace with
Arthur, Cornwall, free the slaves and isolate himself. He returns a brooch for Lutisse. Give Lutisse the brooch. Search for the truth to free Lutisse and give
your promise to be back. Talk to the Black Knight. Go to Camelot.
CD3
Quest 5
Lesson in
humility:
Camelot – Go to the castle hill at the center of the area.
Walk to the pennants on the snowy area by the top of the screen. Look at
the pennants and see that Lancelot is here.
Talk to the guard about Arthur and then Lancelot. Go to each of the camps around the castle
hill to look for Lancelot. Morganor’s Pict guard would not talk to you. At
the other camps, ask the guard about Arthur and
then Lancelot. You will find Lancelot at Dux
Sagramor’s camp. Enter and talk to Lancelot, standing at the center of
camp. Ask about Lutisse and then Arthur. He gives you a midnight
colored shield/coin to allow you to enter the castle
grounds.
Show the coin/shield to the guard at Camelot hill. Enter and talk
to Novelius standing by the left path. Inform him of all that has happened
including Lutisse. Truth is in God’s
hand. Walk pass Novelius to the Church’s ground seen in the background.
Stand and pray in front of the cross by the castle wall. Turn around and
approach the man by the church. He said that the cross is new – only the
humble will be saved. Walk pass the man to the very end of the path and
see an old broken cross. Pray in front of it. Only the
love of a mother can soothe the tears and suffering of her
children. Pick the crown that
appeared at the foot of the cross. Ask Novelius about the royal crown. He tells you to go see Dionicus at Magovenium.
Magovenium, Monastery – Enter the monastery and talk to Armenius. Go
up the stairs and see Dionicus. Talk to Dionicus about the crown of King Saul, Saul’s pride, Lutisse and sword of truth (gift of the Lord to St. George when
he defeated the devil in Magovenium). Exit.
Go to the grounds of the amphitheatre and
talk to the “King of Magovenium”. Give him the royal
crown in exchange for the crown of
thorns. Go to the catacombs.
Test in Hell:
Catacombs – Look at the fresco close to where Gwen was. Use the
crown of thorns on the fresco. Time for your test. Enter and realize that you cannot go
back out. Hear the souls ask for help. Look at St. Epona’s statue with
tears coming down her face. Turn right, enter the alcove and see a
gravestone with a blasphemous “You will know no
rest” inscription. The adjacent alcove has a tower of brambles.
Pick a black thorn. Go back out and turn left.
Walk to the opposite side of the room from the entrance and face a black
mirror with a flame stand beside it. Burn the black
thorn on the flame stand.
Hell – Confront the devil. He tries to convince you to join him and
become the greatest of his Black knights. Ask the Prince of Darkness about
Lutisse and pride.
He gives you an ebony colored cup, a means to
vanquish him. Ask about the sword of truth,
Morganor and the Tower of
Brambles. The brambles guards the souls of knights who try to win
the sword of truth. Pick up the white lantern on the left and find
yourself outside the black mirror. Go back to St. Epona’s statue. Collect
her tears using the ebony colored cup and it
transforms into a crystal goblet with tears. Go
to the tower of brambles at the second alcove and use the crystal goblet on the brambles. The brambles
disappear leaving a black rose. Go to the
gravestone at the adjacent alcove and place the black
rose on it. The devil cursed you for freeing his prisoners. Read
the inscription – Rest in peace. You cannot get
out of here. Pray to St. Epona in front of her statue.
You find yourself at St. George’s hill in
Uffington. Pray before the cross by St. George’s marker. Pull out
St. George’s sword of truth at the center of
the area. Go to your horse and ride to Cornwall.
Free Lady
Lutisse:
Cornwall – Ride to the Black knight’s camp. Talk to Lady Lutisse and
ask about the sword of truth. No lie can resist
it and you are now God’s champion in Britain. Go to Melatus and fight him
with the sword of truth. Melatus comes back and
thanks you for freeing him from the devil and gives you a horn to be blown on his gravestone in case you need
his help. Talk to Lady Lutisse and she bids you to get justice in Camelot.
Lancelot
accused:
Camelot – Ride to the castle. The guard says that you are not welcome
here. Look at the pennants on the right and see that Lancelot’s standard is not there anymore. Go to
Mark’s camp and talk to Cymerill. Ask about Lancelot. He is accused of carrying off Queen Guinevere. Sagramor
and his soldiers witnessed the act .
Go to Sagramor’s camp and ask
the guard where he is. Go to the Saxon’s camp. Ask the guard for Sagramor and you can enter. Talk to Sagramor,
standing on the left side of the camp about Lancelot. He saw Lancelot take Queen Guinevere in
Arden Forest. Verify this by using the sword of truth on Sagramor. Go to Arden.
Arden – Ride to Merlin’s tree. Crystals block 4 of the
roads going out and 2 of them are black. Go to the one on the right of the
3 standing great stones and ride to the Lake of offering. Walk around the
lake and see Lancelot. Talk to him and then use the sword of truth on him. Continue talking to him and
then ask about Sagramor, Queen Guinevere and then Morganor. Morganor together with Mark and Cedric
plots against Arthur. Pick up the glowing tablet behind Lancelot and close to the forest. Use
the tablet on Lancelot. Leave the lake and ride
back to Merlin’s tree.
Check the 2 black stones and see that it
bears the mark of sorcery. Go to the black stone with a white wolf nearby
and use the tablet on it. The black crystal
disappears. Ride forward, right and then left. Walk forward and then to
the path on the right. Look at the cart by the dolmen. Pick up the black shield.
Go back to Merlin’s tree and then to
Lancelot at the Lake of Offering. Show Lancelot the black shield. A knight in Morganor’s camp carried the
shield but it bears the marking of Melatus. Go to Magovenium.
Magovenium – Go to the catacombs and Melatus’ gravestone. Use the
horn Melatus gave to call him. Talk to Melatus
and then show him the shield. It is the shield
of Melatus’ brother who is under the devil’s power and is now a doppelganger. Show him the tablet and he says it is part of the enchantment of a
doppelganger by a sorcerer. Pray to St. Epona to leave this place. Find
yourself in the chapel at the monastery. Go to Dionicus and show him the
tablet and he says it is the work of Morganor.
As long as you carry the tablet it will protect you from the sorcery of
the creator. Ask him about the doppelganger. 3
tablets are needed to make one and need all 3 to defeat it. Now, to find
the 2 other tablets with Morganor back at Camelot.
Camelot – Go to the Atrebates’ camp. Talk to the Pict
guard and then show him the tablet. Enter and
talk to Morganor about Lancelot, Arthur and doppelganger.
Ask him also about the word of power. Use the sword of truth on Morganor. Go to Saxon’s camp.
Talk to the guard and then show the tablet to
gain entry. Talk to Cedric, show the tablet and
then ask about word of power and doppelganger. After some fast-talking, he says that
Mark knows the word of power and gives you the second tablet. Go to Mark’s
camp. Again show the tablet to the guard to
gain entry. Talk to Mark and show the tablet.
He gives the third tablet gladly. Ask about the
magic word. He recites the word – The Word created all things,
in the name of the Word, open. Leave for Arden.
Arden – At Merlin’s Tree, use the tablet on
the Black stone beside the black wolf. Ride forward to Black Rock. Walk
forward and cross the bridge to the Black rock tower. Use the magic word on the rock door of the tower. Enter and
talk to the doppelganger. He reveals the main plot of Morganor on Arthur.
Talk about Melatus (doppelganger), Queen Guinevere and Morganor. Use the tablet
and then the sword of truth on the
doppleganger. We come from the land of the dead. 6 we are,
3 to carry Bradwen off to the land of the dead and 3 to carry off his
shadow. Get out of the hexagram, stand behind one of the brown
sorcerer rock and use the sword of truth on it. Repeat this on the other
brown rocks. 3 of the rocks disappear. Use the 3 tablets on the remaining rocks. The doppelganger
disappears. Turn to Bradwen’s left and go forward and try to pick up the
rose, formerly encased in black crystal by the brown rock. As proof of
your love, show the brooch of Lady Lutisse and
the crystal rose can now be picked up. Go to
Camelot.
Camelot – Go to the castle. Talk to the guard about Lancelot. On the way to the main tower, hear a beggar
at the foreground. Talk to him and then give the coin/midnight colored shield. Talk to the guard at
the main tower. Enter and talk to Arthur about Morganor and Lancelot.
Give Arthur the crystal rose. Arthur orders the
Ordeal of the Duel.
Bradwen became a Knight of the Round
Table and King of the Atrebates.
This document may not be distributed
without express written permission of the author and the content may not
be altered in any way.
For Questions or Comments on this
Walkthrough,
Please write to: MaGtRo
Copyright © 2/2002 MaGtRo