Art of Murder: FBI Confidential Walkthrough by MaGtRo
Day 6
Cusco, Peru
It is morning already when Nicole exits the house.
Go back to the hotel by going to the left.
Talk to Don Diego standing outside the hotel. He gives
a sandwich.Go back to the right and back to Alvarado’s house.
Nicole comments about the absence of the Indian. Go to
the door and find out that it is opened. Uh Oh!Alvarado’s house: Enter the
house. Nicole locks the door.Jose’s room: Enter Jose’s
room. Find Alvarado dead.Hear the police arrive with the Inca and they are trying to get in
the door.Go to the fireplace and take the knife.
Use the knife on the slit in the circle right of where
the knife was displayed.Take the 4 crystals: dodecahedral
crystal, cubic crystal, spherical crystal and tetrahedral
crystal. Taken also is the map to Akakor.Exit the room and enter the door to the courtyard.
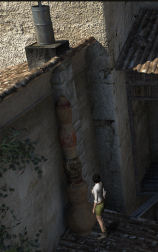
Balcony: Look around and see
that there is a way out on top of the chimney on the other side of the balcony.Click on the board at left and it will form a bridge
to get to the wall and escape.Ladder: Now let’s make a
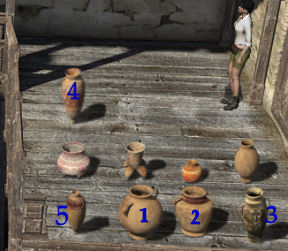
ladder with what we have.The aim of the puzzle is to stack amphorae on the wall
to make a ladder.Use amphora that have a wide mouth and also have a
base-bottom that has a rim. Also use ones with handles.Place the biggest, tallest and most stable at the
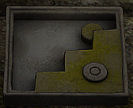
bottom and gradually stack the smaller ones on top.See picture below:
Move the amphora blocking #1 and place it on an empty
space.Place #1 by the wall beside the chimney at left.
Take #2 and stack it over #1. Continue until 5
amphorae are stacked up.If a wrong amphora is taken, Nicole will say that she
is too tired to climb.
Click on the exit on top of wall and see Nicole climb
up.Car workshop: Nicole is at
the scrap yard.Talk to Jose several times and learn that the jeep is
ready.He will give a can of gasoline since there are no gas
stations.Go to the ATM machine at the hotel wall. Insert the
card and push any button. The card was rejected.Go back to Jose and talk to him again. After some
dialogues, he agrees to take the camera as payment.Hotel: Go back to the hotel
and enter.Take the camera: See the
policeman is there with Diego.Go back outside and enter the kitchen left of the
hotel.Pick up the matches on the table at the
foreground.Go to the fireplace at top. Take the jug over
the metal sheet. Take strawberry and honey from the hutch at left.Use the jug on the big jug that contains chicha left
of the fireplace.Place the jug with dough over the metal plate on the
fireplace. Add strawberry and honey to the jug.Use matches on the fireplace below to get fire.
Turn on the switch below the window to get the
delicious smell outside.Automatically, Nicole is outside the hotel. Enter and take the camera from the hutch
cabinet.Car workshop: Go back to the
scrap yard.Give the camera to Jose. He gives the gas can.
Use the gas can on the fuel tank right of the front
door of the jeep.Watch Nicole drive through the Andes and later have an
accident.
Day 8
Somewhere in the Andes
A day is lost after the accident.
Rope
bridge: Cross the bridge to the other side.Jungle: Take the tube-crowbar
from the ground.See that there’s a tunnel just above it but covered by
vines-liana. Use knife to cut the liana.Use the tube-crowbar on the tunnel door. It still
doesn’t open.Jeep: Go back to the left and
over the bridge.Go left at other end of bridge and be at a wrecked
jeep.Take the chair. Open the crate at the back of
the jeep with the tube-crowbar.Take pulley and jack from the
opened crate.Rope
bridge: Go right and try to cross the bridge to the other
side. Eek!Pick up the cable from the ground. Combine the
cable and the pulley. Use the pulley with cable on the chair.Use the chair and pulley on the cable stretched
over the stone archway.Have a ride across the chasm.
Akakor:
Use the jack on the tunnel entrance. Enter and be in Akakor.
Entrance: Look up and check the sign-symbols on the rock
above the entrance.See a blue disk on the left on the sign.
Check the 2 figures on the ground.
Go right to the main square.
Sun Pyramid: Go to bottom path from the main square.
Look at the symbols over the entrance. This one is a red bar.
Go inside the pyramid and see plants growing. Water is
collected on the plant’s leaf.Go back to the main square.
Small Pyramid: Go to the small pyramid ahead.
Check the sign above the entryway. This is a yellow
circle.Enter the pyramid and see a tomb.
Look close at Raches’ grave. Take the disk-cap on the floor.
The tomb cover is skewed but needs a lever to open.
Go back outside to the main square.
Main pyramid: Enter the pyramid at right.
Nicole says that this is the gate that guards the vault.
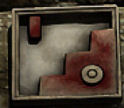
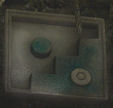
Open the gate: Look at hole
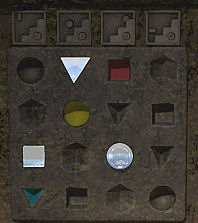
in the wall the left of the gate and see a puzzle.This is made up of geometric shaped holes, 3 of which are colored.
Above are the signs seen on top of the archways of the entrance and
the 2 other pyramids.The object of the puzzle is to place the appropriate crystals at the correct
place.The columns are identified by the sign on the top. So they are from left to right:
sun pyramid, entrance and small pyramid signs. The last must be this pyramid’s
sign.The colors of those signs as seen outside are: sun pyramid
is red; entrance is blue and the small pyramid is yellow.The shapes for each column are identified based on the colors seen on the panel:
sun pyramid which is red is a square (cubic); the entrance which is blue is an
inverted pyramid (tetrahedral) and the small pyramid which is yellow is a circle
(spherical).Place the appropriate crystal of that shape in the column under the correct
sign.Place the cubic crystal on the square hole on the
first column.Place the tetrahedral crystal on the inverted pyramid
on the second column.Place the spherical crystal on the circular hole on
the third column.The last column must be for this main pyramid.
A panel opens on the dagger of the guard on the door.
Place the dodecahedral crystal on the appropriate hole
(left).
The door opens.
Vault: Go inside and look around.
Pick up the not completely rusty sword on the
floor at right.Go back inside the main pyramid and the vault.
See flies buzzing on the right.
Go to left wall where the headless skeletons are
located. Look close on the left wall and see a funnel guarded by a big
spider.Click on the fresco right of the passageway on left
wall. Here the memory of the discussion between Professor Dickinson and William
(Bill) Warren. (Thanks, SirGraham!)Exit to the passageway on the left wall.
Airplane: See an old airplane.
Pick up the empty jar with no lid from the ground at bottom left of the screen.
Look at right side of the plane.
Get rid of the snake: Go to
the metal cover at right side of plane.See a snake lying on top of the battery.
Go back inside the vault area via the road to town. Use the sandwich on the flies.
Place the fly covered sandwich inside the empty jar.Go to the left wall. Place the jar of flies on the spider in the hole. The spider enters the jar.
Automatically, the jar with spider is covered with the cap.Take the funnel from the hole. Click on the
funnel in inventory and get notes. Right click to read the notes. Learn
that whoever wrote this borrowed the watch from Noel.Go outside to the snake in the plane. Click the jar
with spider on the
snake’s head. The snake skedaddles.The empty jar is in inventory.
Battery: Check the battery and Nicole says it dries up
in this weather.Go back to the sun pyramid and see the water accumulated on the frond.
Use the empty jar on the water and get a jar of water.
Small pyramid: Go back out and go to the small pyramid.
Look close at the tomb and use the sword to pry the cover of the tomb. The sword
breaks.Look at the skeleton. Take the jaw of the skeleton that still has teeth. Take
the watch that is the trademark of Noel Raches. So it is possible that the one in the tomb isSamuel Dickinson.
Go back to the battery of the plane and use the jar of water on it.
Plane hood: Go to the hood at front part of the plane.
See and take the air filter. In inventory click the dirty
air filter. The air filter is cleaned.Place the clean air filter back on the hose.
Click on the propeller of the plane. Away we go back
to New York.
Day 10
FBI
New York branch, Downtown
The flight from South America took 2 days.
Office: Talk to Ruth.
Chaser: Enter his office and
report. Nicole ended up being suspended and Chaser takes over the case. He
inquired about Nick’s progress in the case and wants a report.
Nicole wants the suspension in writing.
NYU
Library:
Go down to the car and go to the library.
Enter the library and talk to the librarian at the
Reading room.Learn that the page tearer might be from Nicole’s
side. FBI? The widow of Dickinson gave the papers to Warren.Exit the building. Get an SMS from Nick:
He wants Nicole to check the stockbroker’s place.
Stockbroker’s House:
Go to the car and go to the stockbroker’s house.
Enter and go left to the hallway. Look close at the
pictures on the wall.Click on the graduation picture. See a picture of
hairy Raches holding a guitar. Click Raches’ picture in inventory and see Raches’ handwriting.
Museum
of Pre Columbian Art
Go to the car and go to the museum. Talk to the
porter.Enter the Exhibition Hall. Go to the
Archives. Look at bottom metal shelving.Pick up Dickinson’s dental records. In inventory,
click the dental records on the jaw taken from the tomb. It is verified that it
is Professor Dickinson.Exit the museum and see Warren. Talk to Warren
completely.Go to the car and go to the subway.
Subway
Get a call at 181 St. subway from Chaser. Nicole
states she followed Warren. Chaser wants the report now.
FBI
New York branch, Downtown
Automatically be at Nicole’s desk.
Right click the suspension letter-ruling. Nicole
noticed the signature.Click the signature of Raches’ photo on the
signature on the ruling. Leon Chaser – Noel Raches.Talk to Ruth completely. Then she leaves.
Chaser’s office: Enter the office
and look around.Look close behind the desk. Check the center drawer
and then open the bottom left cabinet of the desk.Safe: To open the safe, enter RACHES to replace CHASER.
The numbers on the dial are the positions of the
letters: 1-6 left to right. Click on a number, the dial points to it and
that number can be worked on.The letters can be cycled up or down by clicking
on the left-right arrows or dots on the outer circle of the dial.Pull the lever to open the safe.
Check the plane ticket to Cusco, the torn page of the
yearbook, car accident photo, another lanky guy picture and a picture of
Alice Dickinson. There are 20 years old newspapers on top shelf.Go downstairs, try to exit and Nicole calls Nick.
She warns him of Chaser and Warren.
Subway
Go to the car and go to the subway.
Subway station: Enter the
subway station building at right.Go to bottom screen to the scaffolding and take
pliers. Exit the station.Tenement: Go left from the subway
building. Enter the door of the tenement.Check the elevator doors. Click twice on the grilled
door to the basement at left and see that there’s a light down the basement.Go one floor up. Read the electrician notes on the
elevator cage. The schematics states to bypass switch 20/07 WB for the elevator
to work. Take the uninsulated wires hanging right of the
elevator cage.Go up to the elevator engine room.
Power box of the elevator:
Open the green box.In inventory combine the pliers and wire to get the
pliers to grip the wires.Click it on bottom left blue metal box labeled 20/7
WB.Go down until the lowest level.
Basement: Use the elevator to
be at the basement.Take the skewer from top of the crate at bottom left.
Go to the other room. Check the abandoned platform hole at top of the wall.
It’s too high.Use the pliers on the boiler knob at left and to take the
knob-wheel.Use the skewer on the barrel full of water to drain
the barrel.Nicole automatically places it under the hole. Click
on abandoned platform hole.Subway rail: Exit out
to the subway railway.Enter the subway train thro ugh the door. Use the wheel
on the brake post at left. Release the brake rod holding the wheel post.Watch Nicole drive the subway train and the final
meeting.
This document may not be
distributed without express written permission of the author and the content
may not be altered in any way.
For Questions or Comments
on this Walkthrough,
Please write to:
MaGtRo
Copyright © 5/2008MaGtRo
View this guide raw, exactly as the archive holds it