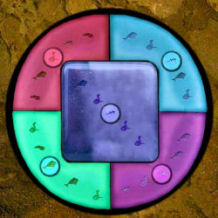
Anacapri: The Dream
eat, but soup you cannot sip.
Count them up, how many are they?
Keep in mind and then proceed.
A. Go back to the hallway with marble statues and
count the number of round mosaic plates on the marble table – 9 plates.
They are blue, they are mute,
headed for the Faraglioni.
On the rocks they like to stay,
don’t be afraid, they won’t fall down.
They
don’t swim, they don’t know laugh,
they
don’t smile, they don’t cry.
They are few, just make your guess,
add it to the former number.
B. Go to the Olivetum – nature display building at
other end of the villa. Enter the building and look at the display behind the
post at the center – 2 blue lizards. 2 + 9 = 11
They are useful, aren’t they?
As you can’t be on your feet.
Count the ones inside the room
where sometimes Axel eats,
where the
old pendulum clock
beats out
time while it goes by.
Look and count, how many are they?
Add them up to what you have.
C. Go to Dr. Munthe’s
office inside the house – 6 chairs.
6 + 11 = 17.
Go now where the sweet delights
of the palate are prepared,
where aroma blends with wine
celebrating cooking art.
You can find them on a shelf
Count them carefully and then
multiply
their number by
that last
figure in your mind.D. Go to the kitchen – 7 mugs on the shelf. 7 x 17 =
119
They are involved in lunch or dinner.
If they fall dawn they don’t break
as their fragile brothers do.
Count them up, but only those
standing upright on the shelves
on the
hutch and dresser too.
Times the number found before
a new figure now you get.
E. Go next door to the pewter room – 35 upright pewter
plates. 35 x 119 = 4165
In the air, no more they wander,
nor the birds may fly with them.
since they are fastened with pins
in a show case. What bad luck!
What a shame! They rest in peace.
Count the ones behind the glass,
get a number, subtract it
from the old result you’ve got
F. Go back to the Olivetum and check the 2 butterfly
cases, one on each side of the room – 55 butterflies. 4165 – 55 = 4110
They are light or they are dark,
They are all around a well,
Looking up toward the sky
they can’t see, they have no eyes.
None of them have seven sides
but they share the ones they have.
Final code is former count
minus sides you figured out.
G. Go to the well at the inner courtyard just after
the kitchen and before Dr. Munthe’s bedroom – hexagon (6 sides) tiles. 4110 – 6 =
4104.
If the calculation is right,
that’s the code, so push the buttons.
So that little door will open
with a nice surprise for you.
Go back to the sphinx, press red button and enter
4104. Take Barbarossa gate key from the compartment.
Barbarossa Castle: Go to the
gate beside the Olivetum. Use the key on the lock of the gate. Go forward, open another gate
and continue forward. Take a left on the stone path.
Green door – Forward until the green door with
a map with a square hole blocking the entryway. That map looks familiar.Use the parchment taken from the chest on the map.
Continue up the steps to the top of the castle.
Seagull – At the balcony, see a familiar
scene. It is the painting in the kitchen in Reality. The door is locked.
Use the Obsidian stone 4 (seagull) on the frame-scene
of the table with the door ahead. Listen to Barbarossa.The door is opened. Enter and take the Turkish coin from the
counter. Turn around and take the red wedge.Listen to the turtle. Look at red wedge in inventory.
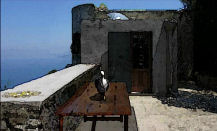
Exit the castle and go down the stone steps. Midway
down, take a left to the Barbarossa castle poster. Then forward to a picnic
table. Take crumpled paper 4. Read it in inventory. There are now jump points for Villa San Michele and Barbarossa’s castle.
Reality 5:
Right click to see the icons at bottom of screen.
Ring the bell at bottom left to go back to Reality.
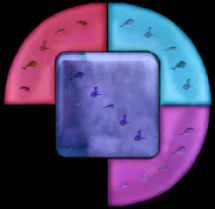
Locked kitchen door – Enter the animal code
seen in the red wedge.Top to bottom: seagull, gecko,
snake, dolphin, seagull.Sitting room – Go to the desk and read the
letters from Mirta, Adriano, Falchetti the security person and Dr. Greenturtle.Look at the 2 framed tiles on the walls; they are
clues.In the
dream, you heard two phone rings: in De Angelis’ shop and in Villa San Michele.
Listen to the two
new messages in the answering machine.Check the gear and the clock on the table close to the
door.Exit sitting room and check the bathroom and green
locked door handle.
Time to go back and dream. Right click to see the
icons at bottom of screen. Click on the syrup bottle at bottom of the screen.
Last Wedge
Faro: Jump to Caprile.
Hadrawa – Go forward until Hadrawa’s office.
Climb up and give him the Turkish coin. Take envelope and open it in inventory.
The 10 caprini and a receipt for the previous coins is now in inventory.Check the handwriting of the receipt. It is the same
seen in
the crumpled papers! So it is Hadrawa who is following you
and
looking for the disk.
A phone call is heard. Exit the office.
Buy ticket – Jump to Piazza Vittoria and go forward until the green
vending machine (1). Press the button and use the 10 caprini on the machine.
Take the green season bus pass for Faro.
Bus – Jump to Caprile. Press the button on the yellow bus caller. Select
Faro and then insert the green bus pass.Turn around, forward and pan left. Enter bus. Listen carefully to the bus driver
about the French and English battle that happened in Faro and that there’s a ghost
that wanders around there. Exit the bus. Take note of
the pink-red bus caller.
Lighthouse – Go right and down the stairs. Go forward and take the path
at diagonal left towards the lighthouse. Pick up the red stone from the
right side of the path. Turn around and go back to the split in the path.
Round structure – Take the left path. On the way in an enclosure on the
left, take the gray stone. Go forward until the round structure. At right
side of the round building is a slot machine. Play with it. The clue will be
seen later. Go back to the path and go forward until the fork in the path.
Beach area – Take the left path to go to the beach area. Go right to the boat
shelter area. Go forward and look through the ring and take the yellow stone.Continue down the steps to the water’s edge. Take the blue stone from the
rocks at left.Go back up and up the red brick steps. Faro has a jump point now. Go left and
walk to Tombosiello.
Tombosiello:
Lt. Nelson – Meet the ghost of Lt. Nelson. Carry on. Go forward until
the dead end. Take crumpled paper 5 from the left. Ack,
Hadrawa is just waiting for you to find the last
wedge…Turn around and take a right at the split in the path. Go forward and then left on a gravel
path to get to Tombosiello.Go forward and listen to Lt. Nelson again. Learn that Capt. Church found the
disk. Nelson drew something on the ground, we’ll check it later. Now, go towards where
he pointed.Listen to Nelson again about the French strategy, what Cmdr.
Hudson Lowe ordered and
dismissal of Capt. Church. Nelson hid the disk.Take the key to Fort Pino. Each of the forts has a machine that
he and Capt. Church
made. Each
machine activates the next. Fort Orrico has an object that he hid that will lead
to the disk.He gave some advice – Place the horse in the pot and the teeth under the mouth.
If you are in need of kindling, look under the green roses, on the way to the
Fornace, the lime kiln.
Drawing – Go back and look at Nelson’s drawing on the ground. It shows a
square, X, O X and a structure that looks like the one below the lighthouse.
Slot machine – Jump to Faro and let’s see. Go forward until the
structure.Look at the map on the slot machine. Press the red button and then pull the
lever. Ah, Nelson’s drawing (after the second pull of the lever) is seen on the
slot machine. The machine made a sound.Look at the map again and see that Fort Pino is now activated. Ah – this is the
first of Nelson’s machine.
Fort Pino: Jump back to Tombosiello. Continue on the
road, check the tiles by the road and forward until Fort Pino.
Bunker – Go down inside the fort and look around. Use the key given by
Nelson on the green door.Pan left and look at the desk. Take Cmdr. Lowe’s diary and read it in
inventory. Learn what his reasoning is, plan S392 and about the 5 wedges. When
the 5 wedges are joined, they must be set into a round hollow during the full
moonto
get
the disk.Go to the other room and look at the desk. Take red die on the table.
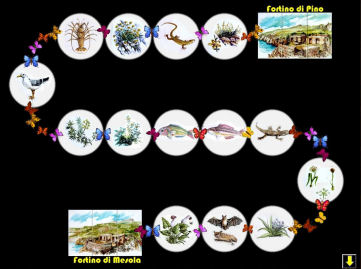
Puzzle – Look inside the box and see a tile puzzle. It shows 14 tiles
depicting plants and animals. The setup is the one shown in the wall at
Reality’s sitting room. They are tiles seen on the road from here, Fort Pino to
Fort Mesola.Time for the nature hike then. Exit the fort and start taking notes of tiles on
the way. Jump point is now made for Fort Pino.Go left and see the first tile – verbasco. Continue the hike. Next tile is a
lizard at bottom left of screen. Be sure to make a drawing of the
tiles and that you have seen all 14 of them.Close to Fornace, see sedum growing in a big rock right of the path – it
looks like green roses. Remember what Nelson said about kindling. We’ll look here
later when we need it.
Fornace: After the first part of the trek, see a clearing
below.
Water’s edge – At the clearing, go left and down on a cement path to the
water’s edge. Take the bronze statue.
Furnace – There are 2 fish tiles and a gecko in this clearing; pan to
the side to check them.Go forward and see a tube sticking out to the stone furnace on the left.
Remember what Nelson said – place the teeth under the mouth. Place the die on
the shelf.Go forward and left to the cauldron. Nelson said to place the horse in the pot.
Look close at and place the horse bronze statue in the
cauldron.Now the kindling, backtrack to the sedum (green roses) at the path and take the
wood close by. The wood appears only after the horse and mouth clues of
Nelson have been completed.Go back to cauldron-pot. Use the wood on the cauldron. The bronze is melted. Go
to the die and take the gear.
Way to Fort Mesola: Continue the trek until an
inactive bridge.
Bridge – Press the button on the right frame and see that it is not
working. The right circle is not green.Turn around and see a blue machine. Look close and see that the bottom gear
setup is missing a small gear. Well, you made one. Use the gear on the machine.Go back to the bridge and push the button.
Fort Mesola:
Carry on and remember to look at the tiles beside the path. After seeing the
first tile on this side of the bridge, take the left path at the fork.
Go forward and enter Fort Mesola. Now that we have a jump point here, jump back
to Fort Pino to finish the tile puzzle that will activate Fort Mesola.
Fort Pino tile puzzle – Go to the bunker and the room on the right. Open
the box.Arrange the tiles in an S curve as seen in Reality’s framed tiles.
Select a tile and use the directional arrow to place it at the correct position.
Once it is at the right spot, a sound is heard. Applause! Close the lid of the
box when done.By the way – there’s a bypass here. It can be found at the Instructions at main
menu.
Turn around and look at the map right of the entryway. See that Fort Mesola is
now activated.Jump to Fortino di Mesola.
Now that the Fort is activated, look around the area.
Bunker – Go down the steps and go right to the room. Open the drawer and
take pages of Cmdr. Lowe’s diary. Read the red book. There’s the map on
the left wall. We need to activate Fort Orrico.Go the other room.
Colored rocks – Place the colored rocks collected in the lighthouse area
at Faro on the pans in order 1-4 and by the color of the pan: red, blue, yellow
and gray. After the laser fire, press the button to open the drawer.
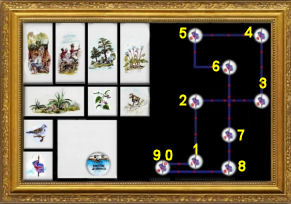
Tile puzzle – See another tile puzzle.
The object of the puzzle is to move the British flag from 0 circle, to 1 and so
on until it comes back to the original bottom left position and then move it to
a final configuration seen in the clue in Reality.The path of the British flag tile
as
well as
the final configuration is seen above the sofa in Reality’s sitting
room.
The tiles can be moved only to an empty area. Good luck.
|
1.
2.
3.
4.
5.
6.
7.
8.
9.
10.
11.
12.
13.
14.
15. |
16.
17.
18.
19.
20.
21.
22. bilberry – down once, right
23.
24.
25.
26.
27.
28. |
29.
30.
31.
32.
33.
34.
35.
36.
37.
38.
39.
40.
41.
42. |
|
43.
44.
45.
46 –
47.
48.
49.
50.
51.
52.
53.
54.
55.
56.
57.
58.
59. |
60.
61.
62.
63.
64.
65.
66.
67.
68. bilberry
69.
70.
71.
72.
73.
74. |
75.
76.
77.
78.
79.
80.
81.
|
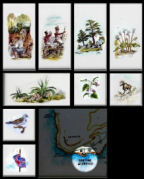
The bypass for this puzzle is also found in the Instructions at main menu.
Go to the other room and look at the map. Fort Orrico is now activated.
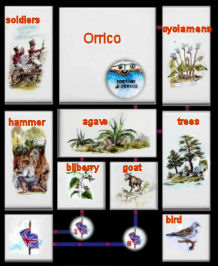
Fort Orrico: Exit Fort Mesola and go forward
until the first fork in the path. Take the left path.
Phone call – Go forward to the next fork. Take the right path and forward
until you reach a British red phone booth. Answer the phone and Nelson will warn you
that someone (guess who?) is following you.
Way to Fort Orrico – Go back through the path and when you reach the next
fork, take the one on the right.At the next fork, take the right one again. Check the globe icon to see where
you are.
At the bottom of the stone steps, turn left and go until the end where there is
a big rock on the left. Take Richard Church’s diary. Read it in inventory.
He is the R.C. that left the marble tablet that brought Nico here.Turn around and continue to go forward.
Meet Nelson again. He again warns about the one following you.
Fort Orrico – Enter the fort and look around. Go to the other side of the
tree at the center of the fort.Go and look at the grate on the ground at right side of the passage to go to the
bunker.Go back and face the steps down to the locked door. Press the button on the
right to open the door.Should we or shouldn’t we, that is the question?
Go down and enter the bunker. I knew it! We are locked in!
Take another set of pages of Cmdr. Lowe’s diary from the bed. Read it in
inventory.Take the green wedge from the corner. Look at it in inventory.
Go to the door and see if it can be opened.
Go back to the corner where the wedge was, then turn around from the corner and
look up at the ceiling there’s a hole up there.
Move
around in the room.Ah – a rope with a letter on the hook is dropped down. Take message and
read it. You know the
handwriting. It is from Hadrawa.Do we have a choice? Use the joined 5 wedges on the hook. Pull back. Hear that
malevolent laugh.Check the door again – Hadrawa left you.
Go back to the corner again and hear music. Look up to the hole at the ceiling.
Nelson reprimands you.Pull back and the door is opened by Nelson. Exit the bunker and the fort.
Walk the path and listen to Nelson again. ‘Run, there might still be a chance to
recover the 5 wedges.’
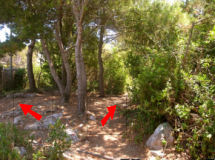
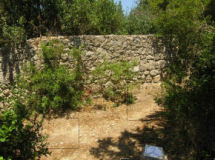
The
Obsidian Disk
Five Wedges: Go forward a few steps and jump to Caprile.
Hadrawa’s Office – Walk forward until Hadrawa’s office. Enter and go up.
Go forward until the book case and turn around. Look close at the desk drawer.
Take the 5 wedges and close the drawer.
Exit the office.
Reality 6:
Right click to see the icons at bottom of screen.
Ring the bell at bottom left to go back to Reality.
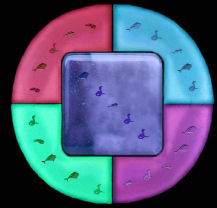
You heard two new
phone rings in Dream:
in Hadrawa’s office and at the English red booth. Listen to two new messages at
the answering machine.Locked door – Enter the animal codes seen on
the green wedge on the locked door.Top to bottom: snake, seagull,
dolphin, dolphin, snake. Open door.Room – Look around the room. Read the Science
outlook magazine at the table left of the entertainment center
and at
the magazine on the
left side of theentertainment center. Looking around, you will find objects and statues
seen
in Dream.Look at the picture
of Mirta under a full moon – ‘where we met the first time, where everything
began!’ Ah… We know that place.Click on the latch left of the frame and see the
security box that Falchetti installed. It needs a familiar code too.Go to the hallway and read Falchetti’s letter.
Time to go back and dream. Right click to see the
icons at bottom of screen. Click on the syrup bottle at bottom of the screen.
Marina Piccola: Massimo wants you
to go to him after you get the 5 wedges. Jump to Marina Piccola.
Massimo – Go down and listen to Massimo. Take
the clock remote control 2. The clock depicted on the remote control is
very familiar. Massimo wants you to see him tonight.Clock – Go to the stairs leading up and out of
the beach area.Use the clock remote control 2 on the clock on the
green door. Push the button below the clock to turn it to midnight.
Marina Piccola July 7th 12 PM
Close the clock door and go back to Massimo. Such
wonderful view and lights. Listen to Massimo.Turn right and then right again. Look up at the
constellation of Scorpio.Go to the boat dock by going forward towards the
stairs and turn right to go to the beach. Go forward and climb the boat dock
stairs. Go forward until the end. Turn left to face the full moon and the round
hollow on the wall.5 wedges – Use the 5 wedges on the round hollow
on the wall. Press the button on the left.Surprise! No obsidian disk is inside! See the new animal code.
Reality 7:
Right click to see the icons at bottom of screen.
Ring the bell at bottom left to go back to Reality.
Security box – safe: Enter: top left –
snake, top right – gecko, bottom right – seagull, bottom left – dolphin and
center – gecko.
Explanation of the story by Gey SavareseRead the letter from Dr. Greenturtle about
making your decision and the medical use of the Syrup of Dreams.
This letter is the last
piece of information you needed to fully recover your memory and understand why
you locked yourself in the house. Adriano wants your discovery of the molecule
NH160. He financed your research and threatens you to stop the funding if you
don’t hand over the CD-ROM (which holds your research on the synthesis of the
NH160 molecule). On the other hand, you are aware that the molecule is very
powerful and dangerous. Mirta doesn’t want you to give your discovery to
Adriano, who could misuse it. She suggests that she may even leave you forever
if you hand over the CD-ROM
to Adriano. Tormented by this dilemma, you decided to take the Syrup of Dream,
with the purpose to know better yourself, and find the solution of the dilemma
through the dream. A collateral effect of the treatment is the temporary loss of
memory, that can be rebuilt bit by bit during the waking-up periods between the
chapters of the dream. To avoid interference with the treatment, you locked
yourself in the house, scattered over the house documents to help the memory
recover and gave the key of your house to Falchetti, in case of any
unforeseen
problem.Take the CD-ROM that
holds your research on the synthesis of the NH160 molecule. The CD-ROM was
transposed into the obsidian disk in the dream. Your quest for the obsidian disk
in Anacapri was actually the quest of understanding what to do with the CD-ROM
in the Reality. The journey in the dream should give you wisdom for the next
choice!
Save Game here to see 2 endings:
Take the Obsidian disk – the CD that holds Nico’s
research on the synthesis of the NH160 molecule.Close the door and turn around. See Adriano come in the house,
using a key stolen to Mirta. Listen to Adriano,
save the game
and then make your choice…
Explanation of the
two endings by Gey SavareseEnding1:
You
decided to give the CD-ROM to Adriano, despite Mirta’s advice. After all, you
need to be financed for your further research activity, and Adriano paid your
research activity. But Adriano also wants you to hand over the full rights to
exploit the NH-160 molecule. You refuse, so he threatens you with a gun.
Falchetti (Lt. Nelson in the Dream) and Mirta enter the house using Falchetti’s
keys and arrest Adriano. Mirta is disappointed by your decision and leaves you,
Nico Fredi, for the second time, maybe forever.
Ending
2:
You
break the CD-ROM. Adriano gets mad and threatens you with a gun. He wants a copy
of the CD-ROM immediately. Falchetti and Mirta enter the house using Falchetti’s
keys and arrest Adriano. Mirta and Nico restart their tormented love story and
Mirta decides to write a novel inspired by Nico’s dream, named “The Legend of
the Obsidian Disk”. In the novel, Nico N finds the obsidian disk in the hollow
in Marina Piccola behind the 5 wedges. He destroys it and the spirits of the 4
animals (the gecko, the dolphin, the snake and the seagull) are finally set free.
Fine
This document may not be
distributed without express written permission of the author and the content
may not be altered in any way.
For Questions or Comments
on this Walkthrough, please write to:MaGtRo
Copyright © 7/2007MaGtRo