A Quiet Weekend in Capri
Charterhouse and Royal Library
Click on Services, then click Start, jumping to and select piazzeta. Go to
the Quisisana Hotel and take the road right of the Quisisana Hotel. Go forward
and turn left at the end. Go forward until the covered area to the Certosa di S.
Giacomo compound (large brown area bottom of the city map).
Library : Go forward under the green arch and
turn right to the library (Biblioteca). This is the library opened by Count
Fourhearts.
Electroluminescent Librarian:
1. Turn on the librarian. Press the
ON button on the left of the librarian.2. Type the name of the book to
search. Type Coup de Grace on your own computer.3. Click on the circular button.
The book glows if it is there. Turn
around, forward once, turn around and take the book at right third from top
shelf.Go forward, look close and take the
Coup De Grace book on table.Read the book in the bag and see a
translation of the synopsis. A blue arrow bookmark is taken also.Go to the
second room of the Royal library (the one close to the room where the
Yourcenar’s book is delivered by the Ectroluminescent Librarian machine)
as soon as the book is picked up. The librarian (the man) gives important hints,
particularly how to escape from the inner area of Villa Jovis. He says there is
a second arrow there, suggests to listen to the chirp of the turtle, and advices
to run away from Jovis without "false steps".
Exit the library and enter the church
or the side buildings.
Charterhouse of St. Giacomo: Look around the
church. Note a map of the charterhouse on the table by the church exit. Take the right hall by the entrance, go to the room with paintings. Go
to the table in front of the painting at end of the room. Take the letter
for Rafele Nannini from Professor Gravitiello. Read it in the bag.
Gennaro Gravitiello explains about the war between Capri and Anacapri. His
counterpart here in the parallel Capri is Costanzo Gravitiello. Gennaro wants you
to call him at phone number 45 of your original parallel Capri, dialing both the
time prefix and the dimensional prefix. He will give additional information.
Tobacconist (36): Click on Services,
then click Start, jumping to and select piazzeta. Go to the right open archway
across the piazzetta. Turn left to tobacco shop.
Skiaccia & Vinci Puzzle:
Based on the markings found on the door frame of the destroyed lab of
Gravitiello. Enter h g h h f i on the Skiaccia & Vinci. You win! – a card for
interdimensional cell phones.After successfully solving the Skiaccia & Vinci puzzle, give the Skiaccia & Vinci to the tobacconist to get a
card for interdimensional cell phones.
Porto di Tragara (34): Go back to the
shoreline facing the 3 monoliths. As seen in the newspaper, this is the area
with available interdimensional connection.
Gravitiello’s phone number puzzle: Based on the formula seen at the
Ufficio Intercom:
Interdimensional prefix = Number of
the Dimension you wish to call divided by 2 + 77.The
interdimensional prefix is deduced using the Gravitiello’s notebook and its attached document. Parallel Universes are grouped in clusters. Interdimensional calls are possible only among Parallel Universes in the same
Cluster.
The cluster we all belong to is named Base Cluster, as assigned by the
Melito Convention, in which the 5 Universes of the Base Cluster are named MA1, MA2, MA3, MA4, MA5. Costanzo Gravitiello tried to communicate with Universe #2 (that is our Universe!) of the Base Cluster. The 2nd Universe of the base cluster is named obviously MA2. The Codes associated to MA2 by the Melito Convention is 1604. 1604 divided by 2 + 77 = 879
Temporal prefix = Number of days
between present date and destination date.Present day is based on today’s birthday
of Mr. Lembo, one of the guardians at the Gardens. His card that was returned to
his sister states that his birthday is June 29, 1973. So today is June
29. The year is taken from the postcard sent to Rafele by Carmelina. The
postcard is stamped 13-6-2012. So the year is 2012. Therefore, today is June 29,
2012.The destination date that
should be from your original time-dimension is taken from the ticket you
got when you took the ferry ride. It is dated 4-03-2011. Since this is European
way of dating, it translate to March 4, 2011So the number of days between March
4, 2011 to June 29, 2012 is 483.The local number 45 is from Gravitiello’s letter left at
the Charterhouse.The phone number to call Gravitiello is 48387945.
To call Gravitiello:
In bag, look at
Interdimensional card. Turn it over and click on blue chip. The blue chip
separates.Click on cell phone and
then click on the blue chip to insert it to cell phone.Look close at cell
phone. Calls enabled should be seen.Dial the number –
48387945. Click send.Gravitiello answers and
says Costanzo left an envelope at the usual place at the charter house.
Charterhouse of St.
James: Go to the room with the paintings. Take the second
letter from the local Gravitiello.
Costanzo G. states the
need to break the loop by avoiding Gennaro G’s unlucky experiment. Gennaro was
walking from Piazetta to the lab that was trashed. You have to intercept him
prior to that event. There is a time machine already set that needs a code
derived from the studies of yellow synthetic light. He spread the ITIUG-(
Invariant Temporal and Inter-Universal Glue) in 2 places in the island. Any
glued object using this Gravitiello’s invention goes unchanged through time and
universe. There is a Villa
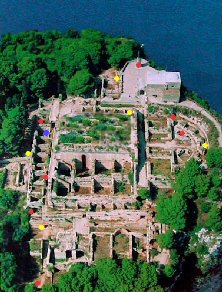
Jovis postcard with red, yellow and blue dots around the area and a key.
Villa Jovis
Use the key from Costanzo G. on the
keyhole of the gate of Villa Jovis. Look at the postcard and position your self
hidden at the right woody area.
Postcard-Villa puzzle: The object of the Postcard-Villa
puzzle is to turn on the buttons found in various places at Villa Jovis to the
colors seen on the postcard. The blue dot seen at the postcard is a blue
barrier to the cistern.
|
Climb the steps. See a blue |
|||
|
|
|||
|
1. Press the button to |
2. Continue going forward 4xs. |
3. Turn right, left and turn right. Press button |
|
|
Turn around. Left, Right 3xs. Forward until the |
|||
|
4. Go to the statue. Press button red.
Turn around and take the right direction, down |
5. Take the NW direction. Turn |
6. Turn around, forward and |
|
|
Let’s take the long way around and backtrack
Turn around. Go right, right, forward once and then left, forward once,
Go down the steps and turn right just before the main stone clearing at |
|||
|
7. Go forward until the |
8. Turn around from pillar, go |
9. Turn left in opening, go up |
|
|
10. Back up and turn right. |
11. Forward, right, forward, |
||
|
Turn left to climb steps to the very top
Forward until bench, Turn around, left, forward until you see the bench again. Turn right, |
|||
|
12. Retracing our steps again. |
13. Turn right, right down the |
||
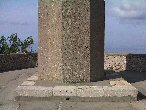
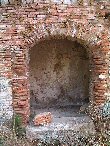
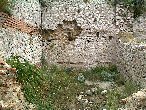
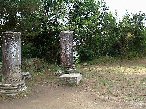
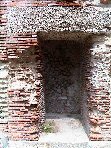
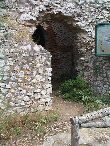

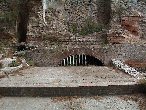
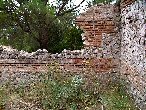
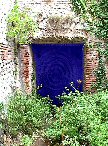
Cistern:
Right, Forward pass some yellow line
barrier. Passing through this line barrier brings up the blue whirlpool
barrier we just passed through – Trapped!Forward and turn left at metal rails. Forward, right, NE direction,
down the metal stairs.Turn left at bottom of stairs and take blue arrow from wall.
Climb back up.Turn right at split in direction.
Forward, left before blue barrier.Go forward to bright light. Use the sunglasses from bag. Look close at
brick on right wall and take box. Open box in bag and remove a
blue prism.
To get out of the cistern:
From the blue prism, turn
around, forward and right. Forward, right and then left.Forward until right to steps.
Go up and then right, forward 2xs. Take the forward arrow at right side.Face a small arched opening with vines on the left. Move vines.
Press the button and the blue light shines. It means that it broke the
blue barrier that we came through the first time.This is a timed sequence.
To get out from here we must rush to
the main blue entrance we came through at minimal steps.From the ivy, back up – turn around – forward –
forward – forward – left – down 3xs – left -forward – right – left – forward –
right – right – forward – right – left – forward – right – forward 6xs – left.
Whew!
Building at entrance: Go back to the building by the
entrance to the villa. Forward up the steps, left, forward to end of passage,
left, forward and down the brick steps. Forward until split of path, left, up
the step and right. Forward, right, down the steps on the left. Forward pass the
pillar until the steps going down.
Go in the building. If you haven’t
push the button yet do so to get a light beam. Use the prism on the beam of
light. See from top to bottom – green, red, yellow,
white, blue. Take the coin below the red button. Leave
the building.
Time Machine
Piazzetta – Go to the large terrace
overlooking the water facing south.
Colored light beams – Look close at
the telescopic Viewfinder. Insert the coin in the slot. Push button. Look at
eyepiece. See colors beamed on a satellite dish atop Soft Images. The
colors are Green, Blue, White, Yellow, Red, Red, Blue, White, Red, White, White,
Blue, White, Green, Red, Green. Note that there are 3 Green, 3 Blue, 5 White, 4
Red, 1 Yellow beams.
To delay Genaro Gravitiello’s
arrival to his lab:Remember that you will try to come
back in time prior to the time change as well as delay Prof. Gravitiello but you
will not remember anything that has happened. You have to trick your other self.
Prof. Gravitiello takes the via Botteghe from Piazetta to go to his lab. Now to
find the 2 places that Gravitiello spread the ITIUG-glue on. This will stick any
object on that can be unchanged through universe and time.Save game
here. Go to the signpost on the way to
Hotel Quisisana, look close at signpost and use the left arrow from the bag on
the Hotel Quisasana. This changes the directional arrow the opposite way.Back
up and turn left 2xs. Forward once. Look close at sign at left, change the arrow
on the sign to Hotel Quisisana to right pointing arrow.
Charterhouse:
The first entrance to to the church shows a woman inside. Remember the warning
that you are being watched.
Hide the Time Machine – In
bag, click on the transformer, then click on the time machine and it will be
transformed into a bust of Gravitiello.
Enter the church through the last
door. Turn left and see Mata Haprik. Try to pass her three times. You will be knocked down
after the third try. If you didn’t transform the time machine, it
will be stolen.
Side Altar: Proceed to the side chapel at left.
Transform the bust to the Time Machine using the transformer. Place the time
machine on the altar. Save your game here.
Time Machine Code – Based on
the colored beams seen using the telescopic view finder at the lookout area and the
sequence seen from top to bottom when the prism was placed on the yellow light
at the building at Villa Jovis; the code to be pressed is: 3 Green, 4 Red, 1
Yellow, 5 White, 3 Blue. Press GO.
If correctly done, you are brought
back during your own time just about to embark to Capri. Proceed until you get
to Capri. Take taxi. Pay taxi driver. Proceed to Newsagent. Take map from
Tourist Office. Proceed NE to Hotel Quisisana signpost that you changed. Then
turn left to the other sign that was changed. Turn the corner and oops! You
bumped into Professor Gravitiello and spilled his documents. Talk for a while. Go pass by him. Go
back to the newsagent and she will tell you the correct way.
Proceed to Hotel Quisisana. Talk to
the Concierge. Take the key.
Note:
Just for fun, the game may be resumed from the saved location before activating
the Time Machine at the Charterhouse, in the case only one arrow (the first one,
pointing to the left) is glued to its sign. Coming back to Naples, a new
sequence of images is generated after asking for directions to the Quisisana
Hotel.
Enjoy your vacation in
a beautiful country and lovely people!

Silvio sitting on the
sand greets you while his father Gey relaxes.
This
document may not be distributed without express written permission of the author
and the content may not be altered in any way.
For
Questions or Comments on this Walkthrough,
Please write to:
MaGtRo
Copyright © 9/2003
MaGtRo