Sherlock Holmes: Mystery of the Mummy
Trying to unravel the mystery but getting stuck? This walkthrough will guide you through!
Level One
The Entrance Hall
Here, you need to find a way to exit the Hall.
First, to unlock the exit from the entrance Hall, touch the Sphinx to the left of the door.
Place the correct dates in the puzzle.
It wants the ending date of each age.
OK = 2200; MK = 1650; NK = 1069; LD = 0332
Solving this puzzle opens a panel on the near side of the stairs. Take the key
Go around the other side of the stairs, and find the Seal in the potted plant.
The Center Display Room
Now you need to collect objects and unlock the Sealed Door
Unlock the door, and enter the Center Display Room
Go forward, inspect the Mummy.
Look directly down and open the chest
Take three items from the chest: Oil Flask, Hammer, Screwdriver.
Turn right, go toward the door to the Right Display Room
Turn right toward the footstool, and take the Tie Pin.
Go to the other end of the room, toward the exit to the Left Display Room.
Look on the floor and pick up the Seal.
Exit this room into the Left Display Room.
The Left Display Room and the Storeroom
Go along the right side of the room, where there are four mummies.
Push the second mummy aside, revealing a locked compartment.
Use the screwdriver to break the lock, and take the Key
Go to the end of the room. Find the Seal on the floor.
Turn right to the exit to the Storeroom. The lock is rusty.
Use the Oil Flask, then the Key to enter this room.
Go straight ahead to the mirror. Watch a short cutscene.
Turn right, go to the middle of the room. Look directly down.
There is a box. You can “open” it with the Hammer.
Take FIVE ITEMS from the box: Another Seal, Three Gears, and the Wood pieces.
Finally, go to the wardrobe in the end of the room.
Use the Tie Pin to pick the lock. Take the Whiskey.
Return to the Left Display Room.
Go across the room to inspect the Display Cabinet.
Study the Egyptian Gods and their symbols.
Go through the Center Display Room and into the Right Display Room.
The Right display Room
There is a fifth seal on the floor near the Jackal. It is an extra; you don’t need it.
There is also a piece of bandage caught under the far door. It is only a clue,
not a necessary piece of inventory. You can take it if you want, but you will be carrying it around forever.
Notice the Ceremonial Knife in a lower cabinet. Also inspect the various statues.
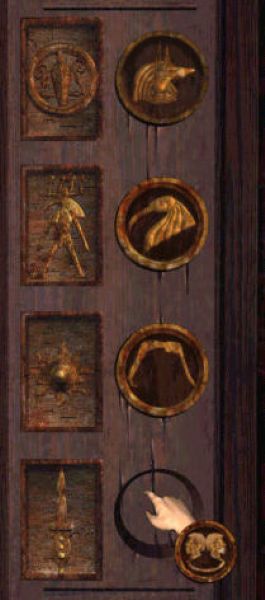
The exit from this room into the Study is “Sealed” with a puzzle.
You must associate your four seals with the symbols on the door.
If you happened to pick up the Scorpion Seal, ignore it.
The solution from the top down, is: Jackal, Ibis, Arched figure, Children.
The Downstairs Study
Now you need to unlock the exit from this room.
Read the newspaper, found on the tabletop.
Also take the extra paper. (It’s kindling for a fire.)
Go to the Desk. Take the Matches, and light the Candle.
Examine the Strange System attached to the door.
You must install the three gears and start the fire.
Open the Stove Door and use your items in this sequence:
Paper, Wood, Whiskey, Matches. The steam operates the mechanism and opens the door.
Level Two
You are in the Library. Locked in, that is.
There are several Books misfiled. You have to find them and move them to the correct shelves.
Begin with the Blue History Book. It is found by looking to the right, just as you enter the room.
It goes with the other Blue Books, which are upstairs.
Each time you correctly shelf a book, it is replaced with another.
Finally, the second time you get a Philosophy book, it will contain a Key that lets you exit (upstairs.)
Upstairs Hallway
Look at the statue. It’s not ancient, suggesting it may have some purpose other than display.
Go halfway down the hall, and (small hotspot) find the Fork on the floor.
After picking up the Fork, turn around and enter the Study.
The Upstairs Study
Entering the Study, turn left toward the clock, and look on the floor.
Near the bottom of the corner cupboard, find the (fake) Register.
Look at the painting over the fireplace.
Look closely bottom center, and find the Crack
Use the Fork on the Crack
Take the (real) Register and the Cane.
Go behind the desk and look out the Bay Window. Somebody’s up to no good.
Exit the Study, turn right, and enter the next room on the right, the Bathroom.
Look at the Vanity and take the Soap
Look at the Bathtub.
Empty the water. Someone had a bath recently and left some Sand behind.
The Living Room
Exit the bathroom, and go left. Enter the Living Room opposite the Library
Gathering clues, go right and examine the Gun
Examine Memphis XI, and notice the same sand.
Part the curtains, and observe that the key is in the door, but on the other side.
Go to the fireplace.
Use the Cane to open the Lion’s head.
Take the Package.
Go left again. The cabinet is locked, and Sherlock won’t force it.
Go left again, observe the Pipe Collection and the photographs.
Take the Pipe Cleaner (down low.)
Now you can get that key.
Use the Fake Register under the door.
Use the Soap on the lock to loosen things up
Use the Pipe Cleaner to dislodge the Key.
Unlock the bedroom door.
The Bedroom
Examine the wardrobe. It seems someone is able to use disguises.
See the large artwork above the bamboo dressing table.
There are five hotspots on the artwork, but nothing happens.
They are Woman, Jackal, Cat, Man, and Eye of Horus
Look at the nightstand next to the bed. It’s a puzzle with some pieces missing.
Go to inventory and open that Package. There’s your pieces.
Place the pieces on the nightstand. Use them in the proper sequence.
Open the drawer and read the letter from Dr. Bigoudin and examine the clue
The clue shows what to do at the Artwork.
Press four hotspots in order: Eye, Woman, Cat, Man.
The panel opens and you can take the Scepter.
Turn around and look up at the ceiling fan.
There is something on one of the blades.
Use the Scepter to switch on the fan.
The object flies to the corner and smashes an object.
Take the Golden Scarab.
Return to the Study and go to the desk.
The Study
On the end of the desk near the fireplace, is a panel that can be opened.
The mechanism is missing a part.
Place the Golden Scarab in the mechanism
Turn the handle to open the device
Read the letter.
Go to the doorway, and examine the box on the wall, just left of the clock.
Oh No, a Slider Puzzle!!
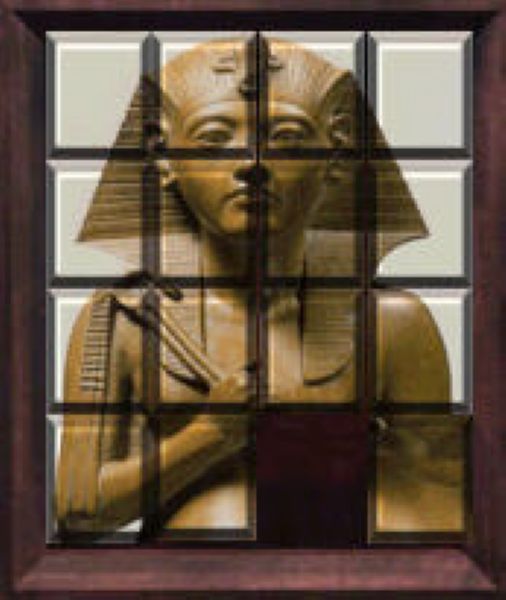
Solving the slider yields a Key.
Take the Key and use it on the cabinet that Sherlock wouldn’t force.
(It’s in the Living Room)
Take the Scepter
Go to the statue in the Hallway
Use both scepters on the statue, to open the way to the Wine Cellar.
Level Three
Before moving, look directly down and pick up the Rag from underneath the turning rack.
Turn left, and go to the table.
From the table-top, take two items – the matches (left-rear) and the Water Flask (right of plate.)
Then look down and to the right – find the stick on the floor, invisible in the shadows:
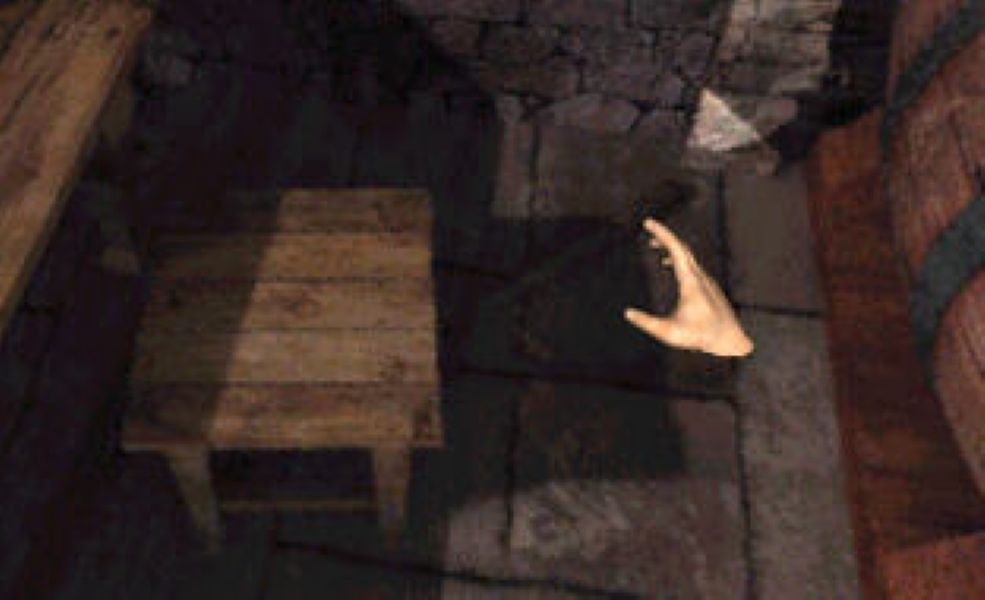
Turning further right, go to the end of the barrels. Find the hammer, also invisible in the shadows, under the end barrels:
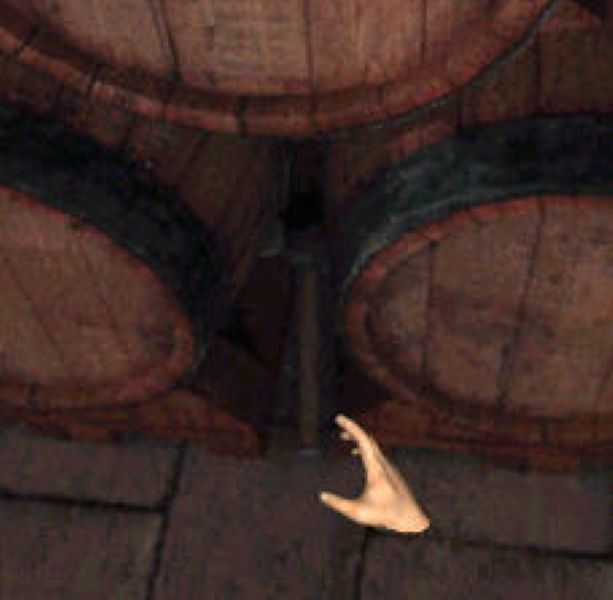
With the Hammer in inventory, return to the table, look down at the Green Mattress and lift it.
Use the Hammer to open the compartment in the floor.
Take the Statuette of Anubis
Go to the opposite wall. About eye level, is a shelf of bottles you can clear.
When you do, you have the Gin Bottle and the “Bootle of Liqueur” (their spelling.)
There appears to be a rack where you could place five bottles.
Turn around and look down. Take the second Rag from under the Turning Rack
You must search the shelves completely. The following items need to be found.
Bottle of Bordeaux
Bottle of Bourgogne
Bottle of Touraine
Bottle of Spain Vine (sic)
Another Stick
Empty Bottle (found on turning rack)
When you have all those items, go back to the rack you revealed and place the bottles.
They go in the order listed above, starting with the Liqueur.
Another slider puzzle is encountered:
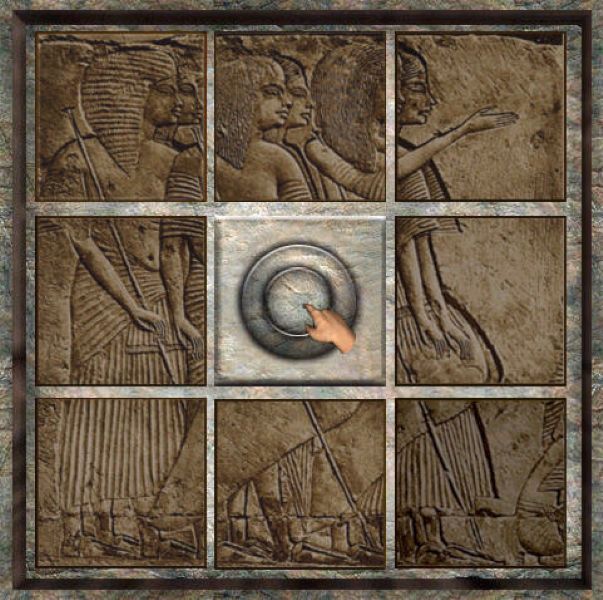
The Laboratory
Press the button revealed in the slider to unlock the entrance to the Lab.
It’s a great idea to create a saved game here.
Create a torch by combining Rag and Stick and Gin.
(you can make two, but only light one at a time.)
When you light a torch, the timer appears.
When I deliberately let the timer run out, it lasted 21 minutes.
So both torches add up to 42 minutes.
As the timer runs out, you will get a two-minute warning. You could light the second torch to continue
You could also return to a saved game, and efficiently repeat what you have learned.
As soon as you enter, look at the floor next to the door.
Find the “tool” hotspot. Use the Hammer to smash the small amphora. Take the Key.
This key will unlock the exit to the Urns room, but not until you lubricate the lock.
Look in the open box on the right end of the long Lab Bench – take the Key
Go to the middle of the bench and read the document
Read the book describing the Caste system.
Turn around and see the document on Reincarnation
Go to the opposite side of the table.
With the bookcase at your back, look down to find your way under the table.
Take the Oil Flask
Stand up again by going toward the bookcase.
Look at the note on the table that says “S = CW; D = ACW at the same time or die”
Observe the book on Mysticism in the bookcase.
Go to the desk. Pick up the Chair.
Place the chair under the broken spot high-up on the wall.
Stand on the chair to reach the Key.
Now you have both keys to the desk.
Look at the drawer and insert both keys.
Remember the note S=CW etc. Careful.
Save your game if you are unsure what to do. You might just set off a bomb.
For Both Keys, choose the outer arrow.
(That’s left key=left arrow, right key=right arrow.
Then select the Turn button.
Take the Statuette and the Parchment of Anubis.
Look on the desktop and read the documents (Casting spells, Laudanum, Parkey, and Nightmares.
Pay close attention to the description of Elements and their symbols.
Go to the door to the right of the desk, look at the floor, and find the Sand.
Go to the door to the left of the desk, and use the Oil on the lock.
Use your remaining key on the lock.
The Urns and Elements Room
Go diagonally across the room. You should look for a very small bright spot near the floor
That’s an oil lamp. Take it.
Turn left and go to the side of the room. Find a full bottle of Oil on the bottom shelf.
Fill the Oil Lamp, and the torches and timer disappear.
(You could have done this very early, as soon as you find the first key and the Oil under the table.)
Now, if you examine each of the corner urns, not the center one, you see an elemental symbol.
Look in your inventory to see what qualifies as an element.
Sand could be earth, and surely water could be water.
Matches could be fire, what about air?
That “empty” bottle is not really empty, is it? It contains air!
Drop each element in its corresponding urn.
You hear something open when you deposit the final element.
Next to the exit, you have revealed a puzzle.
The letters appear to be the initials of the Castes in India
“The last shall be the first.”
So, using the initials of the castes, insert the four letters in this sequence:
S, V, K, and B.
Solving this puzzle places the Brahman Seal in your inventory.
It also rotates the “fire” urn, revealing a hole in the floor where another statuette is concealed. Take it.
It also unlocks the door where you found the sand on the floor.
Go there and enter the Rotating Room. (Prepare to be frustrated!!)
The Rotating Room
Your goal in this room is to touch all four statues, opening a secret panel.
In addition, you must get to the door opposite the entrance and read the inscription.
Getting to the statues is relatively easy.
Getting across the room to that other door requires exactly the correct sequence of steps.
It’s hard to tell what is going on, but each time you move, the floor rotates, confusing your next move.
First, go toward the center once. From there you can reach the two nearby statues.
Touch them both.
It takes two steps to get to the other two.
Go toward them once, then go toward the center.
Now you can touch the remaining statues.
The panel opens. It is near the entrance.
To go there, click between the first two statues, then directly to the entrance.
Take the statuette.
You are back where you started.
1. Go toward the center.
2. Turn slightly right and go toward the statues
3. Turn right and go toward the center of the room.
4. Turn right and click between the first two statues.
5. Turn right and click toward the wall with the Chain.
6. Finally, turn left and click between the first two statues again.
This takes you to the desired spot, though you are facing the wrong way.
Turn around and examine the plaque on the door. It is a riddle.
Nothing seems to be the correct answer.
This door is still locked. Go straight ahead and exit the room.
Enter the Urns room. Go to the center urn and put the Brahman Seal in the urn.
(You can’t cheat and do this earlier; you must examine the riddle first.)
Return to the Rotating Room.
You will have to repeat the same steps as above, to get to that other door.
It is now unlocked.
The Rites Room
The right-hand end of the room contains a water vat, two buckets and a balance-rock.
Apparently, you need to place the proper weight on the balance.
There are only so many possibilities, 1, 2, 3, 4, or 5.
You can eliminate 3 and 5 because they are too easy – the small bucket is 3 liters and the large one 5.
You can eliminate 2 because it’s also too easy (by filling the big one and pouring it into the small one.)
One would also be unlikely, so let’s try to come up with a bucket containing 4.
Do this: Fill the small bucket and pour it into the large one.
Fill the small one again, and pour it into the large one again.
Now, the large bucket contains 5, and the small bucket has the remaining one liter.
Set the small bucket down (by clicking on the measured flasks)
Pick up the large bucket, and pour it down the drain between the vat and the balance.
Set the large bucket down.
Pick up the small bucket and pour the one liter of water into the large one.
Fill the small bucket, and pour it into the large one, adding three to one. That’s Four!
Place the four-liter container on the Balance.
A checkerboard is revealed.
Trust me, please create a saved game right here.
Approach the checkerboard and place the four statuettes on the corners.
Parkey comes in. threatens you, then gets shot.
Level Four
The timer is running as the level begins, and it’s only good for a few seconds.
This scenario is not hard to do, providing you know what to do and what not to do.
Don’t do any extra exploring.
Turn toward the buckets. Pick up the Large Bucket. (It’s the one on the left.)
Look down at your feet. Use the bucket on the Scorpion to trap it. The timer momentarily stops.
Before you do anything else pick up the other bucket.
Turn right and go once toward the door.
Look down and take Parkey’s Bag.
Before you move, get the small bucket out of inventory.
Step behind the right side of the checkerboard
Use the bucket to trap the other scorpion.
Before you move, look down and pick up the wooden board.
Turn toward the door and exit the room.
Whew!! That wasn’t so bad now, was it?
You are in the Rotating Room, which seems to have been pretty much destroyed.
Turn right, and use the board to cross the gap toward the statue.
Look at the statue’s feet, and take the Gear Wheel.
Go to the chain, and pick it up.
Return to where you came in, and step to the center of the Rotation Mechanism.
Attach the chain to the Ring in the ceiling.
Use the chain to swing through the hold in the wall.
The Wine Cellar
Turn around and look at the Barrel. Pull out the Bung.
Oh! That’s not wine, it’s gunpowder.
Use Parkey’s Bag to gather some gunpowder.
(Notice, when you got the bag from inventory, a note appeared. Read it.)
Go to the table and pick up the Lantern.
Turn left. Inspect the Barrel “Too Heavy.”
Look below the barrel find the Broken Bottle
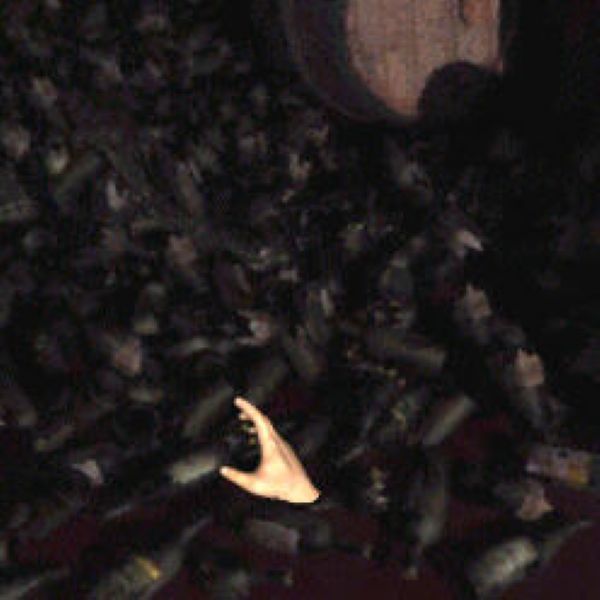
Next to the arched doorway is a stack of barrels. Look for the paintbrush (Hard to see.)
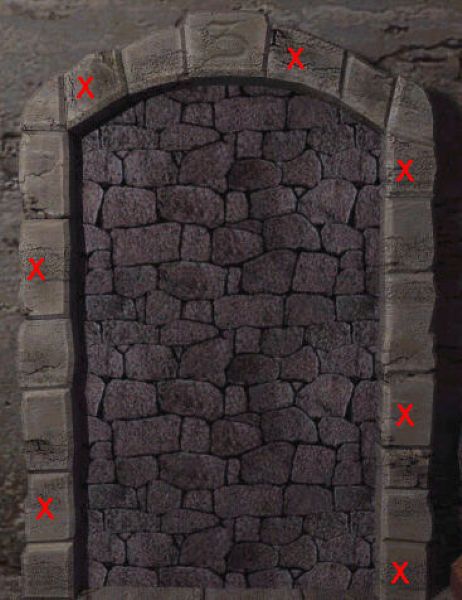
Approach the doorway. Look at the Keystone at the top to see the “tool” cursor. Use the paintbrush three times to reveal the figure 3. This means you must press every third stone. (They don’t have to be done in order, but it’s easier to keep track.
Start at the bottom right, and press the stones.
Stone, skip, skip, Stone, skip, skip, etc.
When you get done, the way to the Entrance Hall is unlocked.
More devastation. Try climbing the stairs. At the first landing, turn toward the steps going up, and examine the very first step, near the middle. Hard to see: There is a Hairpin there. Take it.
Turn left, toward the painting on the wall. See the light-sconce to the right?
Twist it, to open the painting and reveal three levers. Need to find a clue.
If you wish, go upstairs and explore.
The only thing you will find is a locked panel directly above the levers.
Downstairs, examine the mirror right of the door.
It needs something thin.
Use the hairpin to pull out the “dreadful document.”
It appears blank.
Go to the coffee table and the overturned chair.
Read the paper on the floor.
Look twice at the table.
Go to the fallen Chandelier.
Use the document on the candle to reveal the clue to the levers.
Use the lantern on the candle to light the lantern.
You might just be going someplace where the sun don’t shine!
Go to the levers. The clue says to start by pulling all three levers down.
Then, raise the middle lever twice.
Then raise the right and left levers once.
The panel upstairs is unlocked.
Upstairs again
The bathroom door is locked, and you certainly don’t want to go into the burning bedroom
However, before moving, look behind you at the painting.
You receive some kind of a clue. The ankh symbols suggest it’s an anagram.
At the same time, you automatically collect the picture-hook.
Turn some more and find another clue in a painting. “Egypt will Help”
Look at the wall above the “Egypt” picture to find a scrap of cloth, a clue.
Go to the far end of the hall. See the scratches on the wall.
Find another clue in a painting.
The smoky Living Room
The timer indicates you don’t want to breathe this atmosphere very long.
Each time you exit, the timer resets.
First thing to do is go to the curtains. Examine the bottom of the right curtain
Use the Broken Bottle to create a rag to filter the smoke.
The timer now runs at a much slower rate. Just keep an eye on it and reset when low.
Look at the Shield over the sofa (left of the curtain-door)
This must be where the solved anagrams go.
I’m pretty good at anagrams, and these took me about two days to figure out.
Be sure to refresh your breath before starting the puzzle.
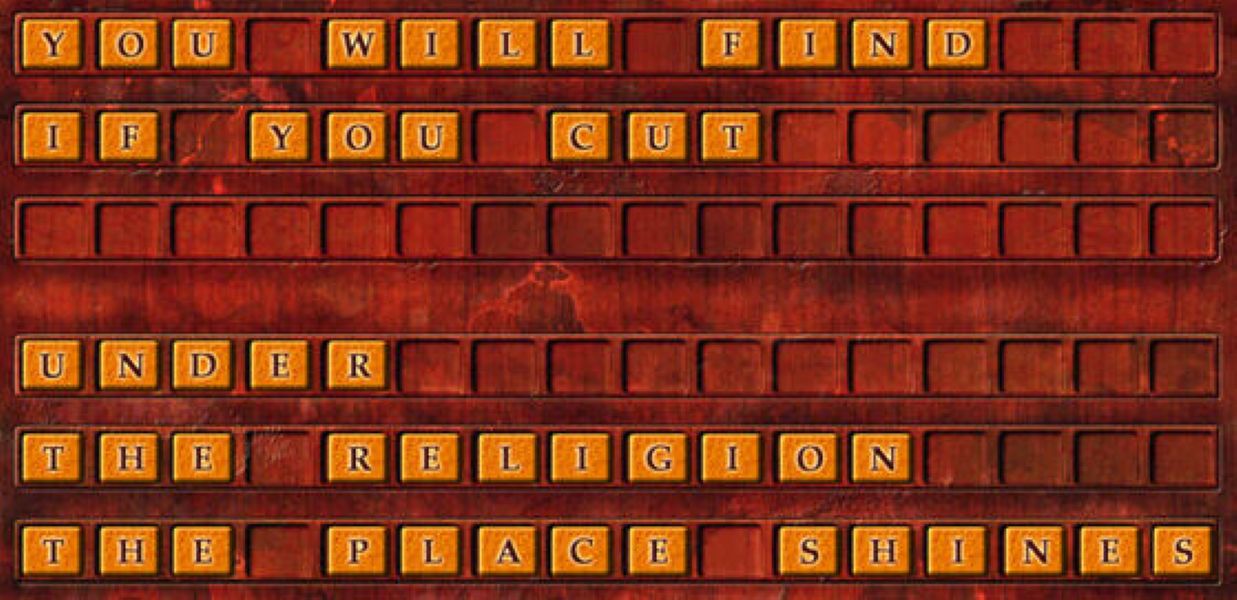
Strangely, there is no signal that you solved it. What you must do, when you feel it is complete and correct, is back away and hope. If you did it right, you will be looking in a mirror, and see the “X” on the opposite wall next to the large painting.
Again, you cannot cheat to get to the X, you must solve the word puzzle.
(You might want another breath of fresh air.)
Just left of the fireplace, find the Spear-Head on the floor.
Go to the X spot, and use the spear head.
Take FIVE objects: Three weights, a Key and a Note.
Go across the hall to the Study.
The Upstairs Study
You need to get the clock going, then get through the small door into the Library.
Put the Gear Wheel into the Clock
Attach the Hooks to the three Chains
Attach the weights to the chains in such a way that they all become equal length.
Gold on the left, Blue in the middle, Silver on the right.
Suddenly, the clock starts, and someone shouts; trapped in the Library.
You can’t get into the Library, you must force your way in.
Place the bag of gunpowder on the miniature door.
Place the lighted lantern under the bag.
You will encounter Lord Montcalfe.
Wonder how he knows so much about the bomb?
Level Five
The entire level is under the watchful eye of the timer – it runs very slowly.
But it would be prudent to save early into the level, in case you are doing your own exploring.
Don’t try to go down the spiral stairs – the steps and railings are electrified.
Go around the balcony and find the Blue Book sticking out.
Push the book to reveal the hidden room.
The steam generator (Faraday’s invention) must be shut down.
Pick up the Shovel
Use the shovel to take the burning coal out of the stove.
Press the lever on the boiler to relieve the steam pressure.
Now it’s safe to go down the stairs.
At the foot of the stairs, pick up the Ladder.
Go to the opposite corner of the Library to use the ladder.
Climb up, and clear away the books.
In the niche, see the receipt and dynamite book
Find the Pipette to the right of the niche.
Climb down and exit the Library.
Preparing for The Nonogram
You are in the Downstairs Study
Pick up the Candle from the desktop.
Notice the large puzzle on the wall, just left of the exit.
You need to gather black and white squares to do the puzzle.
Exit into the Right Display Room.
Turn right, toward the other end of the room, and go forward once.
Turn right, facing the wall. You see a tall grey Urn.
Push the urn aside to reveal a hole in the pedestal.
Take the Batcher (Balance-Scale.)
Cross the room to the Mummy.
Pick up the carpet. A trapdoor is revealed.
Open it, and a mechanism is seen. Some kind of tool is needed to make it work.
You will get the tool by solving the Nonogram.
Cross the room again, to the tall display case.
The bottom section of the case has been broken. Take the Ceremonial Knife.
Look at the low, two-drawer cabinet to the left of the knife-case
Open the drawer by using the Knife. The hotspot is VERY small, at the right end of the drawers.
Take the White Squares.
Exit into the Center Display Room.
Go forward once, turn right and look down at the cabinet.
Use the Knife again. The hotspot is small, and at the left end of the drawers.
Take the Black and White Squares.
Go further into the room, and observe that the Mummy is missing.
Turn around to face the door, and find the Oil Flask on the floor, right of the door.
Go further into the room and find the Axe on the floor.
(There are two more cabinets in this room; don’t bother. They are empty.)
Exit into the Left Display Room
Go along the left side of this room, and open the cabinets.
The first cabinet contains some Black Squares and a Bowl.
The next cabinet contains two containers.
Go to the end of the room, find the Lamp on the floor under the Seals Display.
The Nonogram
Now it’s time to face that gigantic puzzle. Would you believe there are 899 pieces in it?!
Go back through all the Display Rooms and into the study. Look at the Puzzle
Sherlock should say “Let’s Do It!”
Assuming you have studied the tutorials suggested by the main walkthrough page, you have learned how to solve this type of puzzle. Or perhaps you are one of the lucky individuals who already understands them.
Anyhow, you either can or cannot solve the puzzle.
Remember you can click and drag to fill multiple squares. You must fill all the black and white squares.
Right-click to remove unwanted squares.
Having finished the puzzle, turn around and take the Lever.
Return to the Right Display Room (the next room.)
Go to the mummy case, where you picked up the carpet.
Use the lever on the mechanism. Pull the lever.
A cutscene reveals the Sarcophagus in the Left Display Room moving aside.
Combine the Oil with the Lamp.
Look above the mummy and use the lamp on the wall-lamp to light it.
Go all the way across to the Left D. R.
Go down the ladder into the Urns Room
Go to the corner of the room and take the Rope.
Exit into the Laboratory
Go to the far corner and take the Box.
Enter the Alcove where the Bomb mechanism is working.
Prudent gamers will save their game. Just in case.
Examine the various spots; the dynamite, the boiler, the machinery, etc.
Put the Box on the other box.
Put the Batcher on the box.
(The two containers automatically go on the batcher).
Put the Bowl on the left side of the batcher
Put the Pipette on top-center of the batcher.
Put the Candle on the right side.
Combine the Rope and Axe
Hang the Rope-Axe on the Hook, which is on the wall, up and to the right.
Use the lighted Lamp to start the candle.
Don’t dawdle, get out of the room.
Your reward is a marvelous End-Scene, explaining everything. Congratulations, Sherlock.
On to the next confounding case.
Remember, Sherlock: “Pluralitas non est ponenda, sine necessitate.”
(William of Ockham, ca. 1300 a.d.)
Leave a Reply