Just Adventure original
Xiama Walkthrough
(Note: Letters in parentheses
refer to areas on the accompanying map.)
(Note 2: Puzzles are completed
when a triumphant horn piece plays. You can further confirm success by opening
your book (with TAB) and reading the note next to the puzzle name.)
(Note
3: This is a game where most puzzles can be solved in any order. I would recommend
only using this walkthrough when you are stuck on a particular puzzle. It is a
much more enjoyable process if you do what you can and then concentrate on the
more challenging puzzles later. I only created this walkthrough in this linear
pattern to match my map!)
(Final
Note: Make sure you read your book after solving each puzzle to gain some insight
into the creative process that created Xiama.)
Starting Point
("A Brief Note")
You start in a clearing with a sign marked
"Alligator Falls." There is a note on the ground from Peter. On reading
it, you will be allowed to venture right to (B) or straight twice to (C).
Camera
Puzzle ("Getting Nature in Focus")
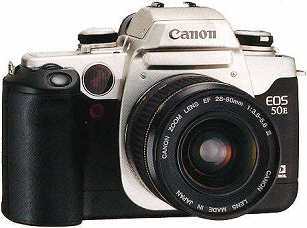
You hear a crash and find
your trusty camera smashed. A little tricky this puzzle, but when done, it should
look like this:
(C,
D, E, F) Notes by a River ("… Not a Billabong")
At this
screen and the next three right screens, you will notice fragments of stanzas
from "Waltzing Matilda." Collect them all. When you have collected them
all, walk back left until you find the campfire. Click on the campfire to compose
the poem. It should look like this:
Once a jolly swagman
camped by a billabong,
Under the shade of a coolibah tree,
And he sang
as he watched and waited ’til his billy boiled,
You’ll come a waltzing Matilda
with me.
Go back to (F) and head straight to arrive at (G).
Kaleidoscope
("Give Piece a Chance")
At the bank of the river, notice
a shining star (get used to these: there are several in this game). Click on it
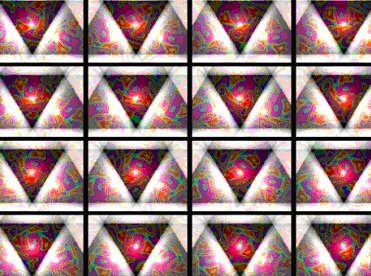
to try the kaleidoscope puzzle. The goal is to sequence the 16 middle pictures
from the top left to the bottom right. Click on the top right picture to observe
the changing pattern you need to copy. Click on one picture and then another to
exchange their places.
The easiest way is to watch the movement of the
tongue shape around the center of the figure.
When complete, it should look
like this:
Proceed
straight to (H).
Jigsaw Puzzle ("Getting it Together")
You’ll
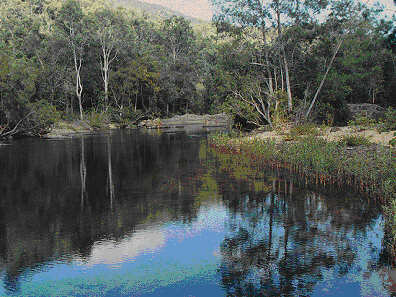
see another shining star in the water. Clicking on it causes the landscape to
become segmented and distorted. The goal here is to swap pieces of the puzzle
to form the complete picture. The twist is that the pieces are different sizes
and resize when you exchange them. When a piece looks fuzzy, it’s not in the right
spot-move it until it looks clear. Incidentally, like most puzzles in Xiama, this
is randomized every time.
The target picture looks like this:
When
done go straight to (I).
Turtle Machine I ("Shapes of Things to
Come")
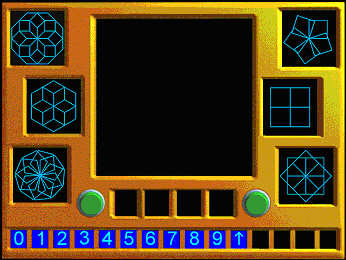
Clicking
on the "Turtle" takes you to a drawing board with three shapes down
each side. These are the target shapes. Below the display screen are two green
buttons. The left button resets your current drawing while the right button draws
the figure to your specifications entered in the boxes. At the bottom are the
numbers 0 through 9 and some spaces for certain shapes you have to make and then
use to make the target shapes. The goal is to draw the pictures on the sides.
A little experimentation reveals that the format for drawing is:
"X"
arrow "Y" right button
where "X" represents the number
of times the movement is to be performed, "Y" represents what angle
the turtle turns after each line, and right button is "enter" or "perform
action." When you have made a shape that is used to make the target shapes,
it will show up in one of the bottom squares. Then you can apply the above method
substituting the shape for "arrow."
Take some time to get used
to the turtle because there are two harder turtles still to come. Your attempts
here are the foundations for much harder problems.
Specific answers:
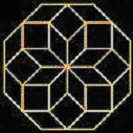
8 octagon 45
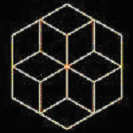
6 hexagon 60
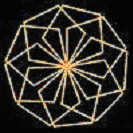
9 pentagon 40
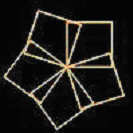
5 square 72
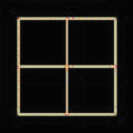
4 square 90
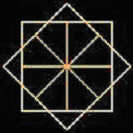
8 square 45
Turn right, then straight to reach a crossroads. You may turn
right to go to (J), straight to another crossroads, or left and then straight
to go to (N). The straight path (up a cliff face) has turns to the left for some
more nice photography. Keep heading straight up until you can go no further. Turn
left to arrive at (K).
Rock Scramble ("Getting the Picture")
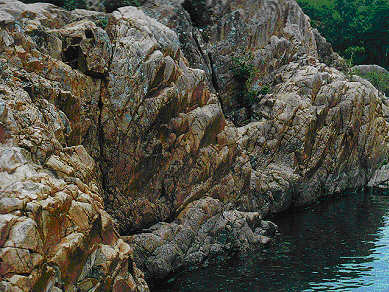
On
entry to this screen, the screen fragments into blocks that need to be oriented
with the left and right mouse buttons. This makes four configuration for each
block. The target picture looks like this:
Head
back to the crossroads (I).
Bird Call Puzzle ("The Bird That You
Heard")
Pick up the note on the ground. There is a list of ten
bird names with a description of their call. This is a straightforward puzzle.
When you hear the call corresponding to the bird, click on the bird name. It will
highlight if correct. If wrong, you start from scratch.
Be careful!
Even after you have heard any particular bird call, you may still hear it
again. Reclick the name or ignore the call. Don’t click on the wrong bird name!
Head
back to the crossroads.
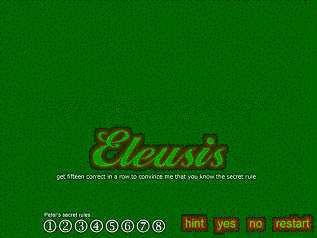
Eleusis ("See it in the Cards")
Unusually,
though not unusually for this game, you stumble upon a card table set near the
water. Click on it to play a game of cards with Peter. The goal is to guess the
rule involved in a sequence of cards. You will need to run through each of the
eight sequences a number of times to work out the rules. With each card, you need
only guess "yes" or "no" as to whether it should follow the
card at top left. When you have 15 successes in a row, you win.
The required
rules are:
Alternate colors
Same suit or value
Alternate
odd and even
Suits in alphabetic order restarting with spade
Odd followed
by red, even by black
Black followed by higher value until king, red followed
by lower value until ace
Club followed by two hearts, diamond followed by
two spades
Increase until king, then decrease until ace
Proceed
straight once. To the right is another pretty photograph. Continue forward three
to arrive at another crossroads. Go right to area (M), straight to a waterfall
(no puzzle), or left to area (N).
Green Stones Puzzle ("And Then
There Was One")
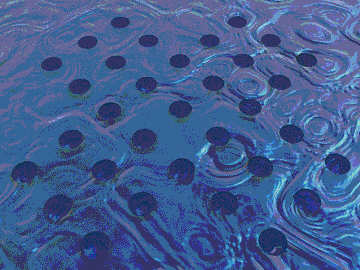
In the water at the lower left is an unusual pattern.
Clicking on it reveals a grid with green stones on it. This is your traditional
solitaire game-when you jump one stone over another you remove the one that was
jumped over. The goal is to have one stone left. The first two are quite easy.
The third is quite hard!
Label
the columns by letters A through G (from left to right at a diagonal slant) and
the rows by number 1 through 7. Disregard that some have fewer holes than others
(i.e., A, B, F, G only have three holes whereas the others have seven). A solution
for each of the three solitaire puzzles follow. Please note there are several
other solutions for each puzzle. The coordinates indicate starting and ending
points for each stone.
Arrow Solitaire (Puzzle 1):
D5-B5
D3-D5
E5-C5
B5-D5
D6-D5
Cross Solitaire (Puzzle
2):
C4-A4
E4-C4
D2-D4
D4-B4
A4-C4
D6-D4
C4-E4
F4-D4
Fireplace Solitaire (Puzzle 3):
D3-F3
E1-E3
E4-E2
C1-E1
E1-E3
F3-D3
D2-D4
D4-B4
C2-C4
B4-D4
There
is another triangle solitaire but this is not required to complete this puzzle.
Head
back to the crossroads when complete.
Turtle Machine II ("Things
Are Shaping up Nicely")
More turtle madness! Here are the solutions:
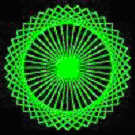
40 square 9
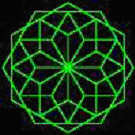
hexagon 30
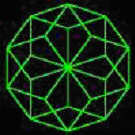
10 pentagon 36
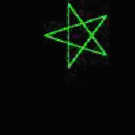
5 arrow 144
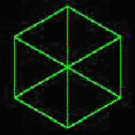
6 triangle 60
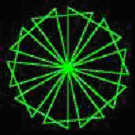
10 triangle 36
Proceed straight to a crossroads when complete. From here,
you can go right three screens to area (T) or left one screen to another crossroads.
At this crossroads, go left to area (O) or straight to area (Q).
Eight
of Four Puzzle ("Blocked Out")
Click on the shining star in
the water. Keep clicking until you reach a 4-by-2 grid of squares. The goal is
to click patterns of 4 linked blocks. The trick is: different colors indicate
different dimensions. There are blocks behind these blocks! Green indicates no
block, purple one block, and blue two blocks. Ensure after you have chosen the
blocks to highlight (i.e., not green), click on the lower right green square.
Each correct sequence (there are eight) will display itself on the screen.
Here
are the solutions:
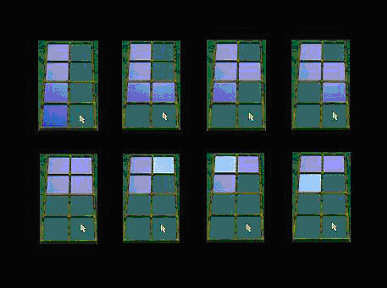
When
complete, move straight to area (P).
Gold Cup Pokerette ("Flush
with Success")
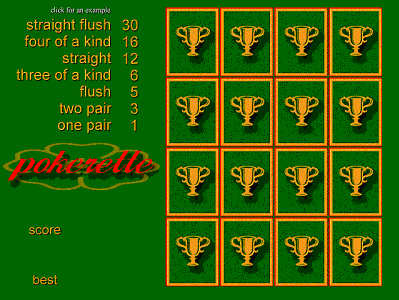
Another card table in the middle of the bush. This
time you have to play poker solitaire but instead of the usual 5×5 configuration,
it is only 4×4. Click on the examples to familiarize yourself with poker
hands.
When dealt a card, put it in the grid. As you turn more cards up,
you will have to try to fit them in to score points according to the target hands.
You must score over 35 to win the gold cup. Note that hands count across and down.
Continue
to proceed straight when complete. This will take you to (P).
Nine Stars
Puzzle ("Oh My Stars, the Mouse Doesn’t Work")
You find yourself
looking up a cliff face to another shining star. Click on it and night descends.
The stars come out and the mouse disappears. This puzzle requires the use of the
letters of the keyboard.
The correct letters must be pressed consecutively
to win. Any failure and the puzzle resets. However, this puzzle always has the
same solution:
O for one followed by
T’ for two and
T for three;
F for four and
F for five
S for six and
S for seven
E for eight and
N for nine
So simple, yet so hard to figure out!
When
complete, backtrack to the last crossroads with three directional choices.
Postcards
("Do You Have a Photographic Memory?")
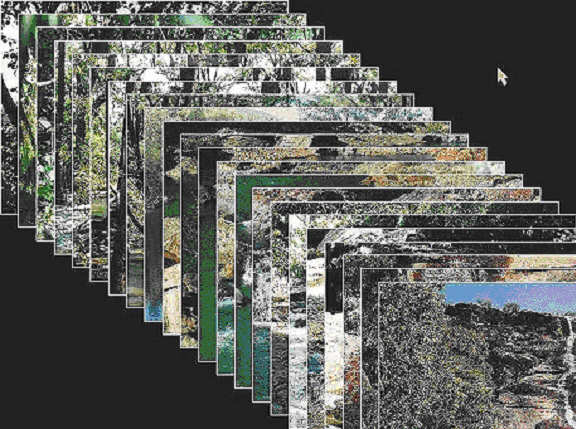
This puzzle is probably
the hardest in the game because it requires that you remember the order of the
screens through which you’ve passed and only the top postcard is most visible.
Unless you are a glutton for punishment or out-of-this-world lucky (there
are 1,124,000,727,777,607,680,000 possible configurations of the 22 postcards
(actually marginally less because the postcard with "Xiama" on it is
a given)), I recommend using this picture as a guide:
When
complete (aren’t you glad you cheated?), proceed forward 2 screens to (S).
Turtle
Machine III ("I’m Bent out of Shape")
Easily the most complicated
of the turtle puzzles. This time, each design is a two- or three-step process
using the blue and gold smileys (activated by pushing the blue button at the right
and bottom of the screen). You will need to create the derivative pattern through
the usual method, save it as a smiley, and then use the smiley in another method.
Here
are the answers for the final (Phew!) turtle machine (the parentheses mean save
as a smiley of that color; B means "blue smiley;" G means "gold
smiley").
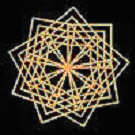
4 arrow 90 (B)
B B B B (G)
9 G 40
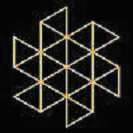
arrow 120 (B)
3 B arrow B (G)
6 G 60
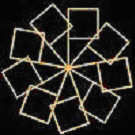
4 arrow 90 (B)
arrow B home (G)
9 G 40
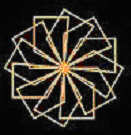
arrow 60 arrow (B)
B 90 arrow (G)
12 G home
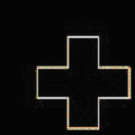
3 arrow 90 (B)
180 (G)
4 B G
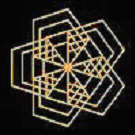
5 arrow 72 (B)
B B B B (G)
5 G 72
When done, treat yourself to a
waterfall. Go forward two. When rested, return to the crossroads.
Animal
Matching ("The Game of the Name")
On arrival, you see an upright
board. Click on it to play concentration. This is concentration with a twist:
instead of just matching picture pairs, you are required to match the animal picture
to its name. Furthering the challenge, you have a limited number of turns to match
them all. This is gauged by the rising bar at left.
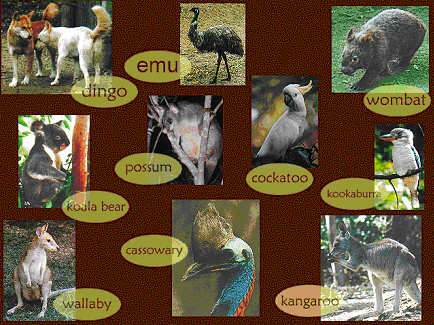
For those uncertain
of native Australian fauna, here is a picture of the animals matched to their
names:
When
finished the matching game, go back one for a refreshing dip in the waterfall.
Then, return to the last crossroads. This time, go forward three times to another
crossroads (feel free to look at the screens to the right as you proceed for more
nice photography but no puzzles).
At the crossroads, go straight ahead to
area (U) or right to area (V).
Ulysses Puzzle ("Butterflies Can
Be Caught Without a Net")
As you enter this area, you notice an
entrancing view of the canopy of the trees. As you look, a lone butterfly flies
past. Click on it to "catch" it–on film, of course. However, if
you haven’t repaired the camera, you’ll have to go back and fix it at area (B).
When
you’ve caught the butterfly, go back to the crossroads and go right to (V).
Cave
("Still in the Dark")
Botticelli ("Tugging the Art
Strings")
At the entrance to a very dark cave, you’ll see a shining
star. Click on it to descend a twisting tunnel. Click again and you are at the
bottom. Luckily, you have a torch or flashlight. Shine the torch around (it only
has a small beam) to find another shining star. Click on the star and the cave
is illuminated.
Notice the top of a sign sticking out of the water. Click
on it and it will rise up. The sign rises up: it has a screen area and nine buttons
underneath it. Pressing any button reveals part of "The Birth of Venus"
by Botticelli. Only if the buttons are pressed in the correct order will the picture
turn out correctly.
The buttons need to be pushed in this order:
5,
1, 7, 8, 4, 3, 2, 9, 6
When this is complete you may proceed left to (W)
or right three times to (X).
Nine Colors ("Waltzing Magenta")
If
you are unfamiliar with the tune of "Waltzing Matilda" before now, that
situation is about to be rectified. When you move into this screen, you can see
a number of colors near the top of the cave. Click on them and you will be transported
(with the colors) to a river scene with a row of squares.
The goal is to
put the colors in the correct order to produce the tune "Waltzing Matilda."
Each color square is awarded a part of the tune. As each color is placed in sequence,
the computer plays all parts of the tune placed in the sequence. Hence, you begin
to dread the very name of the song!
The order of the colors is:
Orange;
Red; Yellow; Green; Dark Blue; Purple; Light Blue; White; Pink
(There is
another way to solve this: simply find which square can move under all the others.
That one is the first square. Perform the same action to find the next square
and so on.)
Note: Make sure you let the song play all the way through. Otherwise,
the game does not recognize you have produced the correct order.
From here
the only way is back.
(X) Pentominoes ("One Sighs Fits All")
This
part of the cave has the pentominoes puzzle. When you click on it, you have an
arcade-like puzzle to try to catch it while your cursor gives off bright sparks.
When you finally catch it, you are required to fit pieces at top left (inconveniently
stacked one on the other) into the outline suggested by the blue squares. Peter
says there are two solutions. Here’s one. Fit the following pieces across the
top:



Then, these two directly under them:


Next, it’s these four:




The
last row:


Continue along once more to the right to (Y).
Word Square Puzzle
("A Consonant Problem with My Vowels")
In this screen, you
will see a wooden sign with a crisscrossed pattern on it. You are presented with
a 5×5 grid of letters and blanks.
The task is to fill in the blanks
with consonants to make words that read the same across and downward. You will
need to use the keyboard for this task. There are a number of solutions but one
of the two correct ones is:
SALAD
AROMA LOCAL
AMAZE DALES
On completion, proceed right to (Z).
Astronomical
Puzzle ("Starsearch on a Universal Scale")
Click on the star
in the top corner and you will again be transported, this time to an image of
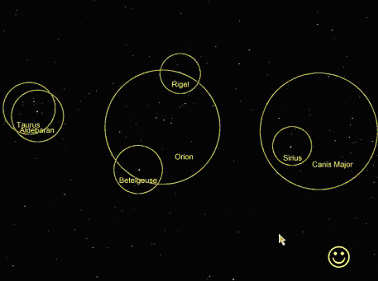
numerous stars. At the top are seven rings with names of star systems.
The
goal of this task is to ensure the star lies within the bounds of the circle with
its corresponding name. This can be checked by clicking on the "smiley"
at the bottom right of the screen. It will chime when any of the stars lies within
its circle.
The correct positioning is:
The
only way out of the cave is one screen to the right at ($).
($) Spiral
Staircase Puzzle ("A Light the Stairs")
When you arrive at
this screen, you will see a set of 5 lights light up in a pattern as a staircase
rises from the water. After it has run through once, you are required to assist
repeating the puzzle by manually switching on and off the third light when needed.
The
best way, I found, was to count as lights went on "one, two, one, three"
click the third light on "three" until the staircase completed.
To
the right is an empty part of the cave. The stairs will take you up to area (K).
Unfortunately, if you leave in error, there is no way back down the stairs. You
must find your way back to the cave.
Conclusion
When all puzzles
are complete, there is one final puzzle to complete the game. You must go back
up to area (K), however now you find you can climb higher up. Keep going straight,
but do pause to look either side for some breathtaking photography. You climb
up and then over the other side of the cliff. Then a video of you falling starts.
You hear a nasty thud.
You wake up to the sight of heavenly clouds. No,
Peter hasn’t put a nasty twist in this, although you may not be able to get up.
To your right, you find a note with the single word, "Xiama."
Turn
left and find a mobile phone. Switch it on (button at lower left) and press 9 4 2 6 2
(these are the corresponding numbers for the letters X I A M A).
You get a message indicating you have pressed the right number of digits but wrong
numbers.
Hmm. What does Xiama stand for? Think back to the title screen:
"Xiama is a Mulawa adventure." Count the letters in each word: 5 2 1 6 9.
Switch phone on and dial. After a number of rings, a man at the State Emergency
Services picks up. He cannot hear your replies to his questioning, so he asks
you to press 1 if you hear. Press 1 and he tells you they will track your position
and rescue you.
The final screen tells you you have a bonus feature next
time you start Xiama. When you restart at point (A), you can now go left
to a screen where you can transport to individual areas automatically or reset
your scores and start again.
Map