Traitors Gate 2
traitors gate 2
by
258 Productions
Walkthrough by
MaGtRo November 2003
Gameplay:
This is a keyboard controlled game that has a lot of precise movement puzzles.
The game needs an ID code for installation. It is found in a white paper with
the rest of the inserts in the box. To access the main menu, press ESC. The main
menu has new game, load, save, Laynard’s notebook, inventory, mission brief,
intro, options, credits and quit.
Laynard’s notebook contains a lot of
clues for the ruin site part of the game. Preferences have the adjustment
for sound effects and music, gamma levels and mouse sensitivity. Press the left
and right arrow keys to do adjustments.
The arrow keys move Raven through out
the game. Right click of mouse changes the camera viewpoint. Toggle or right
click again to activate-deactivate. Shift key makes Raven walk. The default is
Raven in running mode. Enter is the action key.
I key accesses the inventory and can
be cycled using the right and left arrow keys. To use the inventory, select the
item in inventory and when facing the gameplay location or item to use the
inventory on, press enter.
In save game options, use the up down
arrow keys to cycle the save games slots. Press enter on an empty or to
overwrite – on a previous saved game. Backspace a slot label will erase it to
enable other descriptive labels to be typed in. Press enter again to validate
the saved game and will then go back to the game screen automatically. OR press
ESC to cancel the saving process. Save game often – dying is very
frequent in this game.
There are rooms in this walkthrough
that are not necessary to the completion of the mission. The route taken in this
walkthrough is thought to be the direct path to the end.
A hostile computer virus with stealth
like capabilities has been released on business and telecommunications around
the world. It uses a highly secured satellite and communication systems to
attack selected targets. A US high ranking officer has defected to the extremist
group taking with him a ComSat unit, codes and link-up information. The
Pentagon has traced the ComSat unit to an underground complex in the Middle
Eastern deserts.
Agent Raven is sent in to: 1. Get in the complex. 2. Get a copy of the virus. 3. Switch the motherboard with one
that has a homing beacon.
Should you get
caught, we never heard
of you!
Ancient Ruins
Main
objective: Locate the entry to the underground military complex
Inventory – Diskbucker unit,
endoscope cam, flashlight, Gas canister, Gas grenade, i-Moc, Motherboard
replacement unit and Re-breather Unit.
Save Often!
Ziggy Room: See 3 sets of
pictures on each wall. Read Laynard’s notebook, page 14 for a description of
this room.
Go to the Dragon depiction at the
rear of the room. Position Raven exactly facing the head of the dragon. Press (enter) the head of the dragon.Move closer to the central platform
to allow the secret floor door to open. Go down.
Oil Room: See 2 levels in the dark room. The top level has 2 levers on each side. The
central area has a circular trough around a big crystal. There are windows
around the walls. Read page 18 of Laynard’s notebook .
Go left and pull lever to open the windows. Go to the opposite side and pull
lever to pour oil.Go down the lower level and turn the
gold wheel (5-6xs) until the light from the window hits the crystal and burns the oil to light
all the lamps in the complex.
Exit the room on the newly open
gate. DO NOT step on the grate on the step landing or you die!
Sun Room: See a giant sun at far wall that can be accessed by a blocked stairs to the
left. Locate the entry stated on Laynard’s
notebook page 20-21.
Climb the stairs on the left. See a
broken pillar blocking the way.Stand facing the stairs and push the
pillar 3xs to make a bridge.Climb up and push the Sun Disk. This
act opens a secret door at the lower level.Go down to stuck door and push it open.
Continue on.
Records Room: See a round
stone on the wall on the left and walls of scroll pigeon holes. Exit the room and move the dog on the brick
mural. Go back to the records room and turn
the wheel 3xs. A wall goes up revealing passage to inner chambers.
Enter the new passage. At the bridge,
look down (right click and scroll down) at a slatted bridge below. Continue
forward, pass the bridge and the path goes forward and
right. If you continue forward you will reach a rocking bridge (see frame below) and cannot go
further. Take the right fork.
Pump room: See a 3 level
balcony and a waterwheel on one side.
Top level – There are 6 murals with
lines on them. Note the bold long lines on each of the murals – horizontal,
vertical or diagonal.Middle level – Use the ramp by the
dragon mural to go to middle level.Lower level – Go down to the lower
level by jumping off an arch or using the slab that lays on the middle balcony
and lower floor found to the right side facing the waterwheel. There are 6 alcoves at bottom level
with a statue with raised hands and a lever in front.Objective
- To get the waterwheel going to provide power to the rest of the complex and
find entry to other areas of the complex.Go to each bottom level alcove. Pull the lever and see the depiction of one of
the animals seen at top level. Pull lever again to raise the statue slab. Turn the wheel to get the ring hand
to correspond to the bold long line of the top level mural of that animal. Pull
lever again to lower the statue slab to show the mural.Donkey – horizontal, Lion – diagonal,
Horse – diagonal.Dragon – vertical (unchanged),
Scorpion – horizontal, Eagle – vertical (unchanged).When all the 6 wheels of the statues
are turned to the corresponding lines and the slabs are pulled down to show the
murals – the water wheel turns and a door at middle level opens.
The water wheel has now made the
rocking bridge at top level accessible. This bridge will lead to a room with
revolving knives and another statue. This is another path but is not necessary
to the completion of the game.
Exit through the top level entryway
you came in on at the pump room and out to the fork at
the hallway and turn right.
Rocking Corridor – Go pass the
rocking corridor. Go forward to the revolving knife room.
Revolving Knife room:
Enter and when Raven steps on the entryway pressure pad the revolving knives
stand rotates. DO NOT pull the lever by the revolving knives yet or you will
drop to the Trapdoor room.
Trapdoor room: If you pulled
the lever before turning off the revolving knives, you will go down to the
trapdoor room. Enter the room through a giant skull’s mouth. At the center of
the room is a scorpion with 4 levers. To one wall is the exit door.
Objective
- To open the exit door.The scorpion faces the skull door. Go
to the back of the scorpion’s tail and pull lever twice.Go again to the back of the
scorpion’s tail at skull side of the room. Pull lever once.Go again to the back of the
scorpion’s tail at exit door side. Pull lever once.Go opposite the exit door and at side
of the scorpion. Pull lever once.Exit and go through the passage. The
wall behind you closes. Turn left if you want to go back to the revolving knife
room or right to the pump room.
Stop the revolving
knives: At the revolving knife
room, turn right and go forward to the
fenced walkway. Look down on the floor below the fenced walkway and see iconed
slabs on both sides. Lion, bull, wheat and snake on one side and crab, scale,
pyramid and snake on the other side. The hands of the lying statue are
used as pointers.
Look at the statue on the wall.
Overhead are 1- 8 numbered tiles.
Objective
- Stop the revolving knives to gain access to other rooms.When the lever is pulled in front of
the statue, the center gear moves to either left or right. This adjusts
which pointer hand at lower level is active.The wheel at the middle of the fenced
walkway moves the pointer to selected iconed tiles.Turn wheel to have pointer on both
sides to snake.Pull the lever by the revolving
knives. This stops the revolving knives and allows passage to the place that is
best accessed through the pump room later – Bull room, boat room and eventually the turntable
room.
Back at the pump room – Take the
newly opened middle level door
passing through the water wheel.
Tumbler room
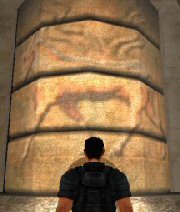
: Note the mural on the right. At far wall is a tumbler that has the mural on
the right side wall in 3 parts. There are 3 wheels in front of the tumbler.
Adjust the tumbler to show the mural on right side wall.
Turn the 3 wheels at far end of the room to show the picture on the giant
tumbler on that wall. After correctly making the picture, go down the newly
opened stairs going down.
Go forward and see a split forward or
right. Let us go right. Go forward down the stairs, pass the left stairs to the
Snake room and forward to the left entrance to the Sin room.
Sin room (slice and dice room): The hallway to get to the Sin room has spiked walls and axes. The main Sin room
has a podium at the center that has a bull-headed rod. Laynard’s notebook page 32
states – this staff
will be the guide and key on the journey. Also check page 44, tablet 15 of the notebook.
Go to the podium, take the bull-headed staff and be prepared to be
sliced and diced. Save Game here! Turn around. Wait
until the walls recycle and start to move to get pass the swinging axe by the
door.Then time the run forward through the
hallway. Midway you have to stop to wait for
one wall to open. Immediately, go forward, time yourself, go left, forward and
then right to safety. Good luck!Thanks, manxman!
Go back up the stairs and take the
stairs to the right.
Snake room: See two stands with Snake depicted at
hallway. One stand has gold skull and another has a black skull. Enter the snake
room and see 3 cobras on each side of the giant snake. Sir Hiss I presume.
Objective
- Check Laynard’s notebook
page 38, tablet 10. To open the closed door on the snake’s body by turning the
small snakes using the
levers to positions similar to the depiction on the stand with the gold
skull. If the black skull stand at the hallway is followed – green fumes will be
released by the giant snake and you die!While facing the giant snake, the right side snakes are all in position
already.The single triangle on the stand
depiction means snake facing the entrance and 2 triangles mean facing the water
source or the back.Turn the first snakes flanking the
giant snake head facing the entrance.Turn the middle snakes to face the
water source.Turn the 2 outside last snakes to
face the entrance.Turn the last middle snake to face
the water source.Go to the front stand, face the giant
snake and insert then pull the
bull-headed staff from Sin room.The snake moves forward
and the door opens. Take the cross ended key. Raven automatically takes
the bull-headed staff back.
Go back to the main hall with the
skeleton and go right.
Water elevator room: See a
large wheel with a pointer depicted on the far wall. Under it are 2 knobs. A ladder is
hanging above under an entryway. On the sides flanking the stairs are spears and
on each wall is a cross shaped slot. At the middle of the room are depictions of
chariots with real wheels behind grilled cage. A stand with a lever is in front
of the far wall depiction on the wheel.
Objective
- To open the grilled doors and to gain access to the entryway above the floor.Go down the steps and turn right.
Insert the cross-ended key from snake room on slot by platform wall. Pull middle spear and the
grill door on the right wall opens. Take the front wheel.Go to other side of the stairs.
Insert cross-headed key on wall slot. Pull left spear and the other grilled door
opens. Take the front wheel.Insert wheels on the 2 knobs under
the giant wheel on far wall.Position Raven facing the giant wheel
and his back to the lever on the stand.Right click and move the screen view
to look under the white stone that is on the stand. This shows the position
needed for the giant wheel to be turned.
Move the left wheel to get the inner
wheel on wall to a position so that the right circle with a dot is right under the triangle outside.Move the right wheel so the outer
wheel’s on wall rectangle matches the triangle outside. Save Game right before the
getting the rectangle in place. Water flows from the lion’s heads and
an elevator rises.Immediately, turn and jumped
on the elevator OR turn and pull the lever to stop the rise of the elevator
halfway and jump up. The lever does not function trying to get up in most games
and is a possible glitch. Once you reach the top and decide to go back down the
lever will work flawlessly.Thanks, Kay!
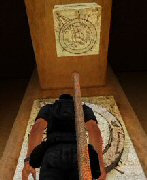
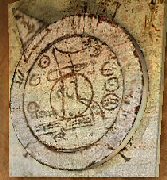
Go forward and turn right. Go
forward and turn right to a room with 2 statues part man part hoofed animal.
Pre-Chime room: A podium with a lever is at the center of the room. There are 2 statues on far
wall.
To open a secret room, pull the lever on the podium. Stairs comes down on opposite wall.
Before climbing the stair, take all 4 of the statuettes
on the posts about the stairs. Look at the statuettes and note that the knob at
the bottom are different shapes.Climb up, a pressure pad closes the
opening and opens the room across the hall.
Chimes room: Enter
and see an elaborate domed roof room with murals of musicians. There are 8
chimes attached around the back wall and 4 sets of chimes hanging at the center. There are 4 panels
on the base of the set of chimes that
produces sounds when pressed.
Objective
- To reproduce the sounds made by the panels and sets of chimes by pulling the
chimes on perimeter of the room.Press the panel and reproduce the
sounds by ringing the chimes at the perimeter of the room. Each of the panels
rings 4 chimes except one that has one chime broken.Number the panel going clockwise from
the one facing the door as #1.Number the chimes around the back
wall from left to right #1 – 8.Press panel #1 (facing the door) – Pull
the lever of chimes 3 3 6 6.Press panel #2 (left of #1) – Pull
the lever of chimes 7 2 6 5.Press panel #3 (back)- Pull the lever of
chimes 1 1 4 8. The last chime was found by trial and error.Press panel #4 (right) – Pull the lever of
chimes 1 2 3 4.The door that was closed in the other
room pulls back.
Go back and this time continue up the
stairs passing the water elevator room. Turn right at next hallway. The forward
way is a dead end.
Turntable room: See stairs
going up to a revolving bridge to 3 openings at upper level. The lower level has
3 other doors that are closed. Each door has a small closed panel on the right
side.
Go up the stairs and walk the bridge
going to the left while facing the door. Walk down up to the end to a slab door.
Push the door and immediately turn to the side panel that opened and insert statuette with
cross shaped knob.Go up the stairs and turn the snake
wheel facing the entrance to move the bridge to the middle position. Go through
the hallway. DO NOT STEP on the ornate slab on the floor on the way to the
next slab door or you will get shot at by darts. Push the door and immediately turn
to the side panel and insert statuette with triangle knob.Go up the stairs and turn the wheel
facing the entrance to move the bridge to the right while facing the door. Walk
down up to the end to a slab door. Push the door and immediately turn to the
side panel and insert statuette with square knob.Three doors on upper level open up. Go up the stairs and turn the other
(away from entrance) wheel to raise
the bridge. Climb up.
Go forward on first split of hall and
enter the room across the 2 urns.
Boat room: See a water maze with a sailboat at the center of the room. On the walls around
the maze are 4 fans. To the right up a stairs is a wheel and a lever. The steps
to go down to the water maze is beside the entry stairs close to the wall.
Objective
- The clue to this room is found in Laynard’s notebook page 36, tablet 6. Move the boat to a position that it abuts one of the 3 locks and get a treasure.Go to the podium on the right. Turn
the wheel to power the fans.Go to the lever that controls the 4
fans at each wall surrounding the water maze.Pull the lever to rotate
the fans in order to move the boat to one of 3 locks of the water maze. Click
twice on enter to get the rotation to the next fan immediately.Once the
boat abuts a lock to take a ‘treasure’, move the boat to the area where there is
a missing spike – at bottom right.Then go down to the lower level. Go around
to the area where the boat is docked by the area with a missing spike and take
the key. Do this to all 3 locks to get a key with Z end and 2 plain keys
(not used in the game).Exit the room and once you step on
the square by the entrance the fan stops.
Go left on the hallway by the 2 urns.
If you turn left, you will go to the revolving knife room (see insert above). If
you turn right on the fork of the hallway you will reach another fork. Take the
forward path to go to the Bull room.
Bull room: See a room with a
giant bull at central platform. A stand with a key slot is in
front of the platform. Around the base of the platform are 8 colored plates.
While standing to the right of the green plate, Raven looks at the things under
the bull and says – salt and what looks like charcoal.
Objective
- To follow Laynard’s notebook page 34 – Salt will he rub
into the wound and glowing coals will heap upon the sores. But the divine Sin
holds hope, and smiles down with her divine countenance, proclaiming the grass
that feeds the sacred bull will appease him. The frozen waters of the high
mountains will quench his thirst… will he reveal the place of concealment.Based on Laynard’s words above –
insert the bull-headed staff on the green square by the bull’s head to feed
grass and on the white plate on the other side to quench his thirst.The bull’s
head lowers. Take the key that comes up from the stand.
The back entrance leads to the
turntable room. Since the bridge is not moved here – be careful not to fall off.
Go back to the turntable room.
Turntable room:
Check the other 2 opening on top level. Turn the wheel
and see that one opening goes to the back of the Bull room. Move to ramp to the
other opening at top level. Go forward at the other opening, pass
the first right split and take the second right split.
Maze room: Look around and
notice that there are 4 doors above staircases on each wall. There is a door
at the maze level across this door. The door above the opposite staircase is
blocked.
Objective
- To get to the bridge at center of the maze.Once
you get in the maze, note that there are gates that can block the path. The
gates have a panel on top. To open or close these gates, step on the closest
similar floor slab. You might need to look for several of these similar slabs to
open -close the gates.There is a key at the
bridge at center of the maze.Enter the maze and go to right side of the bridge. The gate
is closed. Look at the top panel of the gate, note the pink panel and step on the similar pink slab
to the right. The gate opens. Go up and take the winged ended key.
Exit the Maze room through the
staircase you came in on. Go forward and
take the right on the main hallway.
Tomb Room: See a large
chamber with a throne at the back. There are 4 helmets and 5 swords on right and
by throne. To the left
is a tomb with a skull on the edge and up the stairs is a stone body.
Objective
- To find the correct sword and head for the stone body and find a secret
entryway.Take the skull from the tomb
and the sword that is screen right of the throne.Go up the stairs and place the skull
and the sword on the stone body.The platform rotates and the tomb
opens to staircase.
5 Keys room: Pass through a small hallway with key slots on the wall. Enter the main 5 keys
room and see wall key slots
around the perimeter of the room. Each central corner has depiction of the end of the key needed
to be placed on a wall slot at that area.
Objective
- To find the 5th key and to insert the keys on the wall slots to gain entry to
another secret room.Go to the far corner of the chamber
opposite the entryway and insert the bull headed staff. The elevator rises. Walk
the ramp to the top and take the 3 pronged key.Look down and see the triangles on
top of the columns. They are wall slots to insert the keys on: 3 blacks – 9, 4
and 16. and Red – 3, 5 and 25.Go down the elevator and place the
keys on the slots of the triangle numbered panels seen.Insert the winged key on wall key
slots (lowest) with 16 (large triangle=10 +6 small triangles).Insert the bull room key on wall key
slots (middle) at other end of the wall with 9 triangles.Insert the cross ended key on the 5
triangle wall slot.Insert the key taken from this
chamber on the 4 triangles wall slot.Insert the Z key from the boat room
on slot with 25 (2 large triangles=20 and 5 small triangles).When all 5 keys are inserted, a
secret chamber opens up by wall slot 25.
Last Tomb Room: Go down the
stairs into a chamber with a tomb at the very back of the King. In front is a
stand with a gold mask. Around the chamber walls are pictured panels.
Objective
-To get the cogwheel that is behind the gold mask and to get out of here safely. Read Lanyard’s notes – page 45, table
17 on the sequence of the calendar.Pull down the gold mask and take the
cogwheel. Green toxic fumes begin to enter the room.Press the panel in order corresponding to
Lanyard’s notes about thesigns of the calendar: Laborer, Bull,
Twins, Crab, Lion, Ear of Corn, Scales, Scorpion, Archer, Fish-Goat, Water jug
and Water Channel.I did not use the gas mask but you
can try to see if that will help.
|
|
2 Bull |
10 Fish-Goat |
|
9 Archer |
3 Twins |
|
|
5 Lion |
|
tomb |
|
11 Water Jug |
||
|
12 Water Channel |
|
|
|
6 Ear of Corn |
||
|
4 Crab |
|
gold mask |
|
7 Scales |
||
|
1 Laborer |
|
|
|
8 Scorpion |
||
Out of lost tomb room – The
back wall opens. Run out and go back to the Maze. On the way be careful of the
skull dart hallway. Run on the broken floor and NOT on the still intact
flooring. Go out the 5 keys room, tomb room and left on the first fork.
Maze’s first door by wall:
Objective –
To get to the staircase left of the maze based on the main entrance.As soon as you enter the maze, see a closed door with a crocodile panel
on top. Go right and step on the crocodile slab in the corner. This opens the
crocodile door.Enter the open crocodile entryway,
left, forward and left at first left. Go forward and up the stairs.
The Way
- Climb the stairs and the path splits. The right path goes to the lower opening at the opposite wall in the
maze. The forward path has pictures on the walk. Take note of the sequence of
the pictures on the wall. In a grilled area is a wheel. Go forward to the end
opening to enter the way.
The Walk: The room has a path to the opposite that has slabs with pictures similar to the
ones in the previous hallway. The walls have also similar pictures.
Objective
- To reach the door at opposite end and to get back to this door again
safely .Note that when Raven steps on the pressure pad by the entryway, the
panels on the floor flips. Walk the path following the sequence of the pictures
outside. Look for the correct tiles to move towards the door at the other end.
If you don’t see the next picture needed, turn around and step on the correct
one. Note the colors of the slabs’ column framing the pictures. Note also the
pictures on the walls.Walk Sequence:
Jug – Scorpion – Bull – Jug – (turn) Scorpion – (turn 2 forward) Scale
– Snake – (turn) Crab – (turn) Snake – Bull – Scorpion – Lion – Crab – (turn)
Blue Horse – (turn) Crab – Jug – Scorpion – Snake – Lion – Lion – Snake.
The grill over the wheel at the
hallway is removed. The Walk room is flooded and the door to another room is
opened. You have to pick the wheel in that
opened grill wall. Turn around and walk back using the colors of the picture
slabs side columns you just stepped on.
Walk back sequence – yellow –
3 blues – (turn) yellow – (turn 2 forward) green – blue – (turn) blue –
(turn) blue – 6 greens – (turn) green – (turn) blue – blue – (turn) blue –
(turn) yellow – blue – 2 greens.Go forward and take the wheel
from the end of the hall.
Turn around and go back through the
Walk again following the same pattern as above pictures.
Pre-Cylinder
staircase chamber: See a long chamber with pairs of pictures on right wall. There’s a closed door
at one end.
Objective
- To select the correct pairs of pictures to open the other door.Based on the pictures on the walls at The Walk, arranged the pictures
by pairs from table: lion – scorpion, bull – lion, scale – lion, blue
horse – lion, lion – blue jug, crab – lion, man – lion, lion – snake.The door to the cylinder staircase
opens.
Cylinder staircase: See a
circular platform that has gears and a partial staircase on the left perimeter
of the room.
The dark rectangular stone by the stairs right of the platform has a knob. The lever on the
wall, if pulled floods the room and game ends.
Objective
- To get the hidden perimeter stairway to come out and to align the trough high
above the chamber to a position that will safely flow the water from one side to
the other. The flow occurs when the lever is pulled.Climb up to the stairs by the lever and place the wheel on the knob.
Panels come up around the central pedestal. The panels on either side of a
central snake pointer are snake, stepped
pyramid, scales and lion.Go to the central pedestal and place
the cogwheel from lost tomb room on the knob at the side of the dark stone – you
might need to position Raven to be facing the knob directly before the cogwheel
goes in.Turn the wheel to align the trough
high above by positioning the pointer to a particular set of panels and then
pull the lever.If the wrong panels are chosen the
water pours in and the room floods. A clue is seen when you die and the view is
seen looking down. There is an opening to the right and the wood trough is seen
at the wrong position.
Turn the wheel 11 times to position the snake pointers to the stepped pyramids.
Pull the lever.
See water pours from one opening to another opening and the perimeter circular
staircase comes up to the top.
Statue room: The chamber has a giant head that pours water into a giant kettle when the
earring is pulled. The kettle lowers because of the water and it pulls the
pulley forward opening an ornate double doors in the back wall. The kettle
rises when the water leaks out and the double door closes. On the other side
of the head is a spear walled ramp that has swinging doors at the end. It is
the only way to the double doors.
Objective
– To get to the double doors by properly timing the water flow,
lowering of the kettle, gears forward and the opening of the swinging doors.Climb up and forward to a giant statue with a kettle attached by
pulley.
This is what worked for me after a lot of tries:
Pull gold earring – this will open the statue’s mouth and pour water in to the
kettle. It will then lower the kettle.
When the first small knob of the pulley stand in the background appears
completely, pull gold earring again to stop the water flow to the kettle while
the kettle is going down.
Run down with no unnecessary movements and hopefully the small doors and the
double doors are still open. Then run to the double doors and enter to the
next room. Good luck! One mission accomplished!
Underground Military Complex
Main
Objective – Find the virus and the motherboard.
Replace
the motherboard with the motherboard
with a homing device
Save Often!
Pre-Lab 1: After the statue room, see a storage area of dried foods and barrels of oil.
At far end is the metal doors to enter the military complex. The metal hallway
has the air vents that leads to the next room.
Go forward and stand right in front of the joining of the metal doors.
Use the endoscope on the metal door and see 3 techs and a guard. If you step
on the footprints on the right side of the door, the door opens and the guard
will shoot you – game ends.
Stand Raven left of the metal door and look up at the 2 pipes overhead. See
which air vent goes in or out and which box it leads to.
Go to the left metal box that houses the control to get air flow into the lab.Stand with Raven facing the door
handle. Wear the re-breather unit (can be before or after gas grenade) and use
the gas grenade on the left box. Open the metal doors by standing on the
footprint on the floor.
Laboratory 1: See all the people knocked out in an area with computers. There are 2 exits
here: the one at end of the hall and one to go to the next row of rooms.
Use the i-Moc on the technician close to the guard on the floor. The
i-Moc can only be used on a single individual at a time.Go through the metal door at end of
hall. The retinal scan from the tech works only on the
exit at end of the hall.Use the endoscope on the metal door
and see an empty room.Step on footprints. Select the
i-Moc with the technician’s retinal scan in inventory.The scanner goes down and the
picture of the tech is seen. The door opens.
Sleeping
Quarters: See a room full of bunk beds. There are 2 exits here: the one at end of
the hall and one to go to the next row of rooms. The one at end of the hall
works with the technician’s retinal scan.
Go through the metal door at end of hall. Use the Endoscope on the metal door
and see toilet stalls.Step on footprints. Select the
i-Moc with the tech’s retinal scan in inventory. The scanner goes down and the
picture of the tech is seen. The door opens.
Toilets: See a room of toilet stalls. There’s a man in one of the stalls. There’s a
passage to the other side of the room from here. Go to the right, pass the
stall where the man is and behind the sinks. The other part of the room has
tables. There are 2 exits here. One to the right is not accessible with the
technician’s retinal scan and the one above that goes to the next row of
rooms. same row and one to up to next row.
Go to the other side of the room from the toilet stalls through a
passage at right behind the sinks. Go around and see tables. Go to top of the
room exit.Use the Endoscope on the metal door
and see a glassed enclosed office.Step on footprints. Select the
i-Moc with the technician’s retinal scan in inventory. The scanner goes down and the
picture of the tech is seen. The door opens.
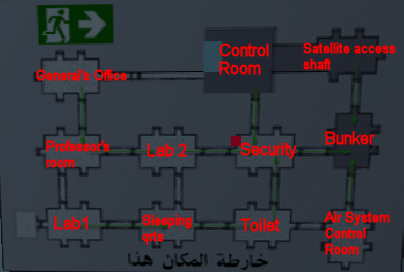
Security room: Find an enclosed office with security monitors of the complex and a map of
the access ways. There are 2 exits: One to go to the gray area of the map that
is accessible with the technician’s retinal scan and the other on the left that is not
accessible.
Take the right exit from the map.
Use the endoscope on the metal door and see a guard and technicians in the
room.Look up at the 2 pipes overhead.
See which air vent goes in or out and which box it leads to. Use the gas grenade on the left
box. Use re-breather unit.Step on footprints. Select the
i-Moc with the technician’s retinal scan in inventory. The scanner goes down and the
picture of the tech is seen. The door opens.
Control Room:
The room has a big tracking map of the satellite. At the back of the room is a
glass enclosed area. In front of this is a podium with the main scientist-professor on the
floor.
Go to the podium just in front of
the glass enclosure. Use the retinal scan of the scientist on
the floor to gain access to some room. Press the triangular remote control on the table to raise the satellite
tracking map from the stage.Go to secret room behind the giant
map.
Satellite dish
access shaft: See a hologram of earth with a satellite above it. There are computer setups
at end of the room. There is an exit to the side.
Go to far end of the room to a table with a flat drive and
lit green bar. Use the motherboard on it to get a
used motherboard. One mission accomplished!The other exit is to the side of
the room.Check with endoscope but see
nothing – you will find later that there is a guard here.Check the air vent flow on pipes
above. Use gas grenade on right box. Use re-breather unit.Use the scientist’s retinal scan to
open the door.
Bunker: See a room of boxes,
other items and a knocked out guard. There are 2 exits – one to next
row of rooms and one to the other end of the room. Exit through the one at other end of the room.
Air system
Control Room: See a glass enclosed room to the
left.
Enter the glass enclosed room by
pressing on the panel right of door. Go to the far right and behind the metal
tank. Use the gas canister on the stand left of the tank.Turn to the stand on the other side
and right of the tank. Turn the wheel 3xs to get a half bar of colored line on
the monitor.Go outside. Use re-breather unit.
Turn the wheel on the stand once to get a full colored bar on the monitor.
This will knock out all the people in the complex. Do not take off the
re-breather unit anymore.
Lab 2:
To get to lab 2, exit through either the bunker or the table side of the
toilet to the security area. From the security area, take the exit left of the
map on wall. Enter and see the scientists and a guard knocked out. There are
computers here also. Exit to the door at other end of the room.
Professor’s lab:
The scientists and a guard are knocked out. This room has a lot of computers.
Go to the back end of the room and step on the footprint
by the wall. Use the scientist retinal scan and the board will move aside to
show a screen. The general’s retinal scan does not work on this scanner.Go to the table just across the
screen. Use the Diskbucker unit on the tower while facing the screen. The
screen will show the scanning process and a paragraph will be highlighted –
Yes, I have the virus at last! Mission accomplished!
Mission : To get out of the underground military complex safely.
Control Room:
Go back to control room by way of Lab 2 and Security using the
scientist’s retinal scan.
Go to the glass
enclosed room at the back of the center.Use the i-Moc on the
general on the floor.Exit the room, left to
main hall and right to the exit.Enter the metal door
and see a guard passed out.Use the general’s
retinal scan to open the door.
General’s Office: See a central table, 4 ancient
warrior statues and a table with a bust behind it at the end of the room. The
other exit here goes to the professor’s lab.
Go to the ancient
warrior closest to the desk and is screen right while facing the desk. Pull
the spear.Go to the bust behind
the desk and turn the head. The wall turns and an exit is seen.
The
Well: Do not take off the
re-Breather. Go through the passage until the bottom of the well. See the
bottom of the dry well and metal ramp going up.
Climb the metal ramp
to the top and realize you can not open the lid of the well.Go back down the ramp.
Halfway see 2 buckets that acts as pulley weights.Go to the ledge close
to the bucket, stand by a short rock column and push rocks on to the buckets.
One rock falls in the bucket and the other rises to unlock the well lid.Go up the ramp, climb
stairs and watch the stealth fighters!The tiger’s mouth
is open.. The eagle is answering.
Congratulations! Mission accomplished.
This document may not
be distributed without express written permission of the author and the
content may not be altered in any way.For Questions or
Comments on this Walkthrough,
Please write to: MaGtRoCopyright © 11/2003
MaGtRo