The Crystal Key
THE CRYSTAL
KEY
Walkthrough by WITCHEN =O)Revision
1.2 – October 2000
_______________________________________________
Prologue
“Somewhere out there among the stars, lives
another race of people. We know this because, just weeks ago, our radio
telescopes accidentally intercepted one of their interplanetary
communications. When we were able to decode it, this is what we
read:
“Danger: Ozgar has been defeated but not
destroyed. Suralon is sinking. Return to Arkonia. Abandon all
colonies at once.”
Who were the Arkonians? And who or what
is Ozgar? “
Only days later, a gigantic alien spaceship
deploys powerful satellites around the earth. All kinds of upheavals occur
in the next two days: devastating earthquakes, critical weather shifts, and
drastic gravitational changes. Ozgar is coming after us.
You, a hypership test pilot, are
relatively safe in the polar research station, where the world’s first hypership
is being constructed. After scientists successfully pinpoint the
origin of the Arkonian signal, you are chosen as the last hope; savior of the
planet. Your mission? Find the Arkonians and defeat the evil
Ozgar.
Now on with the game!
_______________________________________________________________
Part 1. THE GATEHOUSE
WORLD
When you land in the hypership, pan around and
check out the control panels. (Critical: write those numbers down
immediately and any other numbers, symbols or light patterns you find during the
game.) Turn around and exit through the air lock behind you. Turn left in
the antichamber and walk outside into the sunshine. Go straight ahead
between the rocks, up the vague path to a grayish flat building you can just see
up in the trees.
Walk up to the door of what appears to be some
kind of gatehouse. Enter by using the hand icon on the door handle.
Once inside, go to your right and check out the dilapidated tapestry hanging on
the wall. It appears to have one point of interest, besides all the holes,
an image of an open book at the bottom left edge of the tapestry.
Turn around and walk back to the center of the
room. Turn slightly to the right and use the cursor hot spot to enter the
room to the left of the main chamber. Once inside the room, turn left and
click on the base of the torch on the wall. Click on the base again to
open a secret panel in the rock wall. Turn right. Pick up the four
books in the panel that has slid out from the wall.
Turn right and go to the standing reddish urn
in the corner of the room. Click on the scrolls. Pick up the only
one you are able to and look at it. Click on it to roll it up. The
scroll will be transferred to your back pack in the left corner of your
screen.
Exit the urn, turn right and reenter the main
chamber. Turn around and go forward to the table between the two torches
at the end of the chamber. Tip your back pack inventory over and click on
the scroll at the right side. It will begin to pulse. (When an
inventory item is pulsing, you need only click on the area of the screen where
you want to use it. You don’t need to pick it up.) Click on the
table. The scroll will unroll and you will see new markings not earlier
visible. Note the symbols on the right margin. Write them
down. Do they look familiar? And, doesn’t this chart look like a
floor plan of the Gatehouse? Looks like there might be two floors, each
with a gray circular object at the lower right side. That just might be a
staircase. Let’s find it.
Back out of the scroll, turn right, and go
forward to the room on the opposite side of the chamber. Turn right and
click on the torch on the far wall. Turn to your left and notice the new
doorway and staircase. Go down the staircase. At the bottom of the
stairway, turn right, go forward, and pan left to see an indentation, or niche,
in the wall. It looks like there might be a concealed doorway.
Turn around and go forward to return up the
staircase. In the small room, turn right, go forward two steps and turn
toward the small shelf mounted on the rock wall, to the lower left of the
window.
Spill your back pack and place the correct
books, in order, on the book shelf. The first, second, third and fifth
books shown in your inventory. (To remove a misplaced book, just click on the
shelf with no book pulsing in your inventory.)
When all four of the books have been
correctly placed, you will hear a low rumbling sound. Back out of the
bookshelf scene. Turn right, forward and left to go back down the
staircase. Turn right and descend the second staircase that has opened
behind the concealed door. Once in the lower room, turn right and approach
the table or console device against the wall. Look down to see another
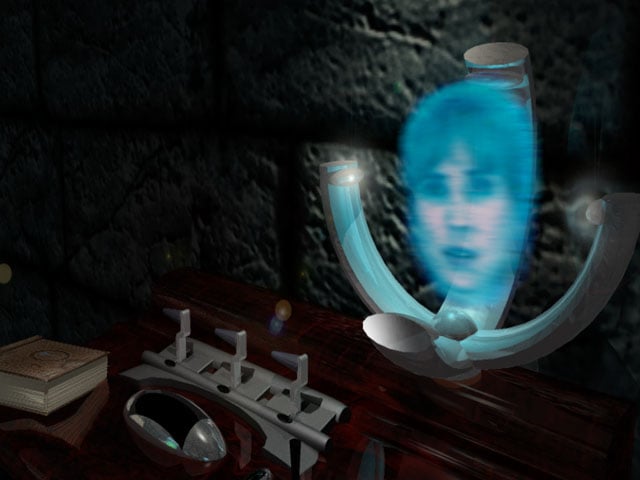
book sitting to the left, and a joystick device to the right. Click on the
joystick to see the very last hologram entered to Arla’s diary. Arla is
the daughter of the Arkonian gatekeeper, who lived at the Gatehouse. She
is a custodian of the crystal key.
When you have completed viewing Arla’s message,
click on the book laying on the console. Then click on the right edge of
the cover to open the book. You will see a graphic of a compartment with a
box inside. On top of the box are five buttons. There are five lines
of indecipherable code appearing under the graphic. The lines are
meaningful to you only because of their length; long, short, short, long and
medium.
Turn away from the console and go up one flight
of stairs to the room where the spiral staircase ends. You will come to a
stop directly under and a little to the left of the spiral staircase. Look
for a hot spot on the wall under the protruding underside of the
staircase. Click on the hotspot and you will get a close up of a door with
a ring latch. Click on the ring. The door will open to reveal a safe
compartment. This is the real version of the graphic you saw in the book
at the console downstairs. Push and drag the square buttons to coincide
with the length of the coded lines in the book, high , low, low, high,
middle. The box will open to reveal a mirrored, red velvet
compartment. And, inside it, the blue and gold crystal key. Click on
the key to move it into your back pack.
Turn around. Go back down the stairway to
the room with the console and the lighted globes. Go straight
forward to the circular archway on the opposite wall. Turn slightly left
to see a panel mounted on the stone wall. Click on the panel to access it.
See that interestingly shaped hole in the base of the panel? Looks like a
good fit for your newly acquired crystal key. Use the crystal key on the
panel. The screen will display a set of six cylinders and two small blue
lights at the bottom. This is the control panel for the transporter
portal. The display represents the Gatehouse World, where you are
now. So, clicking on the cylinders on the screen, will not be
effective. Instead, click on the lower right blue light. the
cylinder image will be replaced by a gold volcano or bowl-like image.
Click on the gold image to activate the
portal. The crystal key will return to your back pack and the portal will
open to show a bright, desert and mountain scene. Click on the portal to
be transported to the Desert World.
Part 2. THE DESERT
WORLD
You’re positioned to be looking between two
sheer, black granite cliffs. Turn right to see what appears to be some
sort of antenna device. Turn right again to see two tall black, engraved
columns to your rear. Looks like an entrance way. Turn right again
to see a metallic building, apparently damaged extensively by laser fire
sometime in the past. Ozgar’s work, no doubt. Turn back to your
left, toward the tall black columns, and exit out between the columns. You
will see a vast desert plain, blazing in the heat.
Turn right and pan down to see a stairway, of
sorts, cut into the rock. Descend the stairway and go right forward where
you see a cave in a black rock, with some kind of grayish looking all terrain
vehicle parked inside. Go forward to the cave. Look around at the
barrels, red tool box accessories, and take the battery cables off the center
gray rack.
Get into the vehicle and click to go
forward. The control panel will immerge and establish itself for
operation. And, you will be propelled automatically to the right, across
the desert. You arrive at what looks like an abandoned Arkonian power
station. Exit your vehicle by clicking on the windshield.
Turn to your left. Go forward, right ,
into the power station. Climb the stairway to examine the control room and
various control panels. There is a panel with three large levers to the
far right. Try the levers to find them inoperable. You need
something else first, before you can operate these levers to turn on the
power. Leave the control platform. Go down the stairs and out into
the desert. Turn left and go forward, two times. You are now
standing on the right side of the power station. Turn left to see two
pipelines entering the power station structure. Click on the large pipe
for a close up of the area where the pipelines enter the building. Just to
the left, below the smaller pipeline, there’s a metal shelf with something
laying on top of it. Find it with the hot spot and pick it up. It
looks like some sort of electronic tool. The tool will automatically go
into your back pack.
Turn around and take one step forward toward
the desert. Turn to your left and go forward once more, along the large
pipeline. Turn left. you will see a black metal bar resting against
the pipeline. Take the metal bar.
Turn around and go back into the front of the
power station and up the stairway to the control room. Walk over to the
far right control panel with the three levers. Click on the switches for
the correct view. Notice the bright metal holes in each of the three lever
handles. Select the black metal bar from your back pack. When it is
pulsing, click on the hole in the first lever to your left. The bar will
position itself and lower the three levers to turn on the power.
Turn around and leave the power station.
Get back into your vehicle. Lower your cursor and click on the dashboard
(not the windshield). The vehicle will take you back to its original
position in the desert cave. You will see and hear a brief sand storm,
caused by a landing space ship; followed by a surprise laser attack by one
Ozgar’s guards. Apparently, your actions at the power station have alerted
Ozgar. The laser will stun you temporarily, and you will be taken hostage
and whisked away to Ozgar’s mothership.
THE
MOTHERSHIP:
Look around to view your meager, dirty
accommodations. Try the hot spot on the door. No luck. Click
on the triangular shaped metal panel to the upper left of the cell door for a
close up. Boy, good thing the guard threw you in here with your back pack,
huh? Click on the electronic tool you got at the power station. Click on
the panel. The tool will position itself at the panel. Click on the
front of the switch device on the top of the tool. A lighted torch will
appear. Click on any one of the three rivets on the panel. The torch
will immediately remove all three rivets to display the locking mechanism for
the cell door. Click on the upper circuit board to get a close up.
The tool will position itself to the right of your screen. You will see a
circular lever to your left and a vertical sliding bar to the upper left. By
placing your cursor at the vertical slot, so that it changes to an open hand,
drag down and to the right. Try dragging the lower lever over to the right you
will discover the locking pin at the base of the panel, just above the circular
lever. However, if you can see the circular dial and the locking pin jutting out
from the center of it,below the circuit board, you don’t need to drag the lever
at this point. Click on your tool in back of the top switch, this time, to
use the tool’s metal cutters. Click on the locking pin to sheer it
off.
Click to get a close up again. Click and
slowly drag on the lower left lever, over to your right. The cell
door will open automatically.
You are looking out into the the mothership’s
passageway. Go forward into the passageway. Turn to your left to see
another long passageway. Go forward. At the junction, you are given
the choice to go right or left. Go left. You will come to another
junction. Go right. Click on the ladder to go up. At the
yellow lit grill, turn left and go forward down the passageway. Go forward
up the ramp to the door of the the mothership’s control room. Click on the
window. You will see a side view of Ozgar abusing one of his
guards.
Turn around from the window and quickly go down
the ramp, turn left and go into the little alcove ahead of you. Ozgar will
come levitating down the ramp and will turn left in the passageway beyond your
position. Whew! That was close.
Go forward to follow Ozgar’s path down the
passageway. When you stop, the yellow lit grill is on your left. Go
forward again. you will go around a curve to the left and stop near
another door. Go forward once more to stop in front of the door.
Click on the window to get a quick peek at Ozgar’s private domain.
Time to get off this mothership. You’ve
escaped and have done enough sleuthing for the time being.
Turn around and click forward twice, where you
see the red lights on the floor of the passageway. You will go back around
the curve to the right. When you stop, the yellow lit grill should be to
your immediate right. Turn left. Go forward to descend the ladder to
the level where your cell is located. Turn around and look at the
ladder. Click down at the bottom of the ladder view to go down another
level. You will see a door directly in front of you.
Turn slightly to the right and click
forward. You should see a large blue pipe in front of you and to the
right. Turn slightly left and go forward to a junction. Turn right
to descend another ramp. You will enter the ship’s air lock and open a
second spiral door to the mothership’s docking bay. Turn slightly right
and go forward toward the ship. You will find yourself on an elevator
platform. Look down right to see the handle that operates the
platform. Click on the button you see at the top. Turn around at the
top and enter the ship. Ahead of you is the bow of the ship, where the
green and orange lights are.
Go forward twice to enter the ship’s cockpit
area. Turn around and click on one of the crew chairs to be seated at the
ship’s controls. The control panel will appear in front of you. The
coordinates you will key into the yellow keypad are the same ones displayed on
the control panel of your hypership when you landed at the gatehouse 285
016 909. (The keypad is numbered left to right 1-9, with the zero
appearing at the bottom.) Write down the numeric equivalent of the orange
numbers appearing on the control panel, the mothership’s location code: 327 845
483. You will need the code later. Now, key in the 285 016 909
numeric code for the gatehouse location and you are on your way back to the
Gatehouse World.
Part 3. THE GATEHOUSE
WORLD
Back in the Gatehouse World, click on the down
arrow at the lower edge of the control panel to stow it away. Turn
slightly right and go forward up the ramp. Go forward down the passageway
to the exit off to your right. (Don’t go through any of the red neon doorways,
unless you want to take a tour.)
Use the lever on the platform to lower yourself
to the ground. Turn slightly right and click on the green hills. You
will be transported back to the spot where you originally landed, just below the
gatehouse. Turn left.
Now, if all has gone well, you can proceed up
to the gatehouse. Go back through the gatehouse, down both the spiral and
lower staircases, to the transporter portal room. Go to the control panel
and use the blue crystal key from your back pack to activate the panel.
Click on the right lower blue light to bring up the gold volcano image.
Click on the image. Pass through the portal and back into the
desert.
Part 4. THE DESERT
WORLD
Go forward and then right to the cave under the
right black cliff. Pan down and around until you see a lighted
tunnel. Go forward once. When you come to a stop at the bottom, turn
left and go forward. You will be standing in front of a battered blue hatch.
Press the lighted button on the left hatch frame to open the door. Go down
the stairway to the platform you can see off to your right. Just click on
the platform. Pan down and pull the lever on the control panel in front of
you. You will see that the control panel operates a switching device that
closes a suspended track in front of you. The light on the control panel
turns green.
Click just to the left of the panel to go down
the stairway. Go forward again, down a second set of stairs to arrive
inside a huge open freight car. Turn left and click on the lever to the
right of the freight car’s control panel. The light turns green and off
you go. At the end of your ride, turn right and click to enjoy a
dizzyingly quick trip down the stairway.
Turn right and click on the ladder to climb
atop a huge generator. You will see two switches in front of you.
Drag each switch, one at a time, slowly to the top and let go. You should
hear the sound of a starting engine. If you hear buzzing, try
again.
Back down off the generator. Go left
forward to what looks like a submersible vehicle. Go forward up the ladder
to get inside. Click on the circular control switch in front of you.
the glass hatch will close and you will be submerged to pick up several rock
samples. The rocks will be stowed in your back pack. You
automatically leave the submersible. Turn around and go back up the
stairway to the freight car. Turn left to use the control lever and you
will return up the tram way. Turn right to exit the freight car and go up
the stairway. When you stop, turn right and go forward twice, out through
the blue hatchway. Go forward up the lighted tunnel stairway and back out
into the desert sun.
When you come to a stop, go slightly right and
forward. Turn around, past the cave with the desert vehicle you borrowed
earlier, to the stone stairs directly behind you. Climb the stairs. Turn
left and go forward to the aluminum looking building damaged by laser
fire.
Turn left and enter the building. Go into
the room off to the right of your screen. Go left and forward to the
control panel. Up and slightly to the left, you will see a round
basin-like appliance. Click on it to see that is some kind of loading
receptacle. Get the rock samples out of your back pack and place them in
the receptacle.
Look down at the control panel and click on it
for a close up. Click on the vertical gray strip in the circular dial to
start the machinery. At the end of the noisy refining process, you will be
rewarded with a gold coin or disc.
Leave the building. Walk forward
twice. Turn left and go forward between the two black cliffs, three times,
to the area where you see a crater with a suspension bridge leading to it.
Cross the bridge. Pan down to look at the standing potholes of water in
the crater’s center.
Find the pothole that doesn’t make a splash
when you throw rocks in the water from your back pack. (Don’t worry, you
have plenty of rocks.) To find the pothole that doesn’t splash when you
throw a rock in it, go left from the end of the bridge. Then go left
forward to the sandy spot. Turn immediately (not far) left and go forward
to the right of the brown mound. Pan down. You will see a pond with
the tip of a mountain reflected in it. Go forward and throw a rock in the
pond. The rock disappears and makes no splash. Throw you gold coin
from the refining process into the pond. The metallic qualities of the
coin will short out the deliberately placed hologram. Hmmm. There’s
a stone stairway under there. Go down the stairway and turn around to view
a huge metal door. Try the lever on the door. No luck. Turn
around so your are facing the white rock under the staircase. Pan down to
see a hologram imager instrument attached to the white rock. Click on it
for a close up. Back out and turn around to the door again.
Pan down to see the electrical cord for this
imager plugged into an outlet at the base of the rock wall. Click on the
plug at the end of the cord. Click and drag the plug out of the
socket. Click on the socket for a close up. Plug the battery cables
from your back pack into the socket. Click on the other end of the battery
cables. Click and drag this end of the battery cables to the door
handle. The door will be blown open immediately. Turn around and
pick up the battery cables.
Go through the doorway into a dimly lit
cave. Go straight ahead toward the light on the opposite wall. Click on
the wall and another door will open. Go forward to the platform.
Looks like another portal installation.. Go forward once. Turn left
and click on the hologram instrument on the table. The speaker is a scientist;
an Arkonian geological researcher forced into hiding by Ozgar’s men. He
tells you of the Arkonians desperate plight where their only means to preserve
the secrecy of their location was to “throw away the last location
crystal.” Turn left and go back down the stairway. Look ahead of you
into the rocks to see a small v-shaped formation. Click to move forward to
the rock formation. Take your battery cables and throw them through the
center of the v-shape. Go forward to climb down into the water.
Go across the water and pickup the piece of the
crystal key. Turn around. Go back across the water and climb up the
battery cables. Go back to the portal platform. Click on the control
panel for the portal just to the right. Insert the key from your back
pack. Press the right button two times until you see a green leaf.
Click on the leaf image. The portal will activate, displaying a jungle
scene. Go forward into the Jungle World.
Part 5. THE JUNGLE
WORLD
Turn slightly to the left to find the hot
spot. Click on it . When you come to a stop, turn slightly right and
you will see a stand of trees with very dark areas on either side. Go to
the dark area on the right side. Go toward what looks like a small green
meadow ahead of you. Turn slightly right to go forward again. Click
up and left to go to the edge of a cliff. Click down between the rocks to
go down the embankment. Wow, another crashed ship! It probably is
Arkonian, as opposed to one of Ozgar’s. Go forward to walk around the
ship. Go forward again and look at the three dark spots on the side of the
ship. Go forward against the ship’s hull and pan up left to gain a view of
the three dark spots. Click on either of the lower two to open the hatch
and enter down the stairway. Pan right to see a shuttle vehicle on a
track. Click on the switch on the floor to the right of the
shuttle. Click on the switch again to release the lines securing the
shuttle. Click on the shuttle to release the rear hatch and enter the
shuttle.
Once inside, pan down right and open the
storage locker to remove a red screwdriver. Go forward twice to sit in the
pilot’s chair. Press the two blue circular buttons on the lower right of
the console to fire the shuttle’s engines. The shuttle will automatically
reposition and take off to fly you on a scenic journey out of the jungle.
You will arrive at a sunken city complex, Suralon, part of which still protrudes
from the water.
Part 6. THE SUNKEN
CITY
Once the shuttle comes to rest, exit via the
rear hatch. You will see the shuttle automatically restart, hover briefly,
and fly off into the distance. Pan around until you see the green dome of
a building in the distance. Go forward across the bridge. Turn left
and go around the building until you come to the door of the dome. Turn
right and enter. Go forward to see a desk. Play the hologram on the
machine to the left of the desk as you are standing behind it. The governor,
leader of all Arkonian colonies and chairman of the Counsel of Suralon, delivers
his last message before the remaining colonies flee Ozgar for their home
planet.
Go back to the governor’s desk and click on the
colored triangular object on his desk. You must match the patterns
displayed to those shown on the middle (green, orange and violet) painting
behind you. Match the three middle, intersecting, triangles with the
painting; green, orange and violet. (To quickly solve this puzzle, just press
the lower left colored panel five times in succession.) Back out of the
close up. The desk will open to display a CD. Pick it
up. A handy portable portal is also your reward for solving this
color puzzle.
Leave the governor’s office. Walk around
the dome by going left and forward once. Turn right and go forward over
the sky bridge to the opposite roof top, where you landed in the shuttle.
On your right is a dark glass tower. On your left are three huge solar
panels. Find the hot spot to the left and go to the platform beneath the
solar panels. Pan down and click on the joy stick. Whoops! Must have
been extremely rusty. The stress of your pulling on it has broken it
off. Let’s see. What have you got in your back pack the would work
here?
Get out your screwdriver and use it as a
makeshift joy stick. Move the screwdriver handle to your right to see a
circle of reflected light appear on the dark tower ahead of you. Move the
light circle up to the circular window at the top of the dark tower. Push
the screwdriver forward to do this. Leave the light on the circular window
until you hear a power burst. Go forward to the dark tower. Press
the button to the left of the door and enter the tower. Turn left and look
down to see a shiny object beside the elevator door. Pick it up. Its
a radio.
Click the blue button on the left to open the
elevator doors and enter. Click the only activated button on the control
panel, the fifth one down on the left side. Once the elevator stops, you
will hear a tone. Open the door. Wow! Looks like a monorail
station. Go forward, look down and jump onto the monorail tracks. Go
forward twice down the empty track toward the blue glass tube. At the next
station, turn left, jump up over the wall and onto the platform. Go up the
stairway ahead of you and out through the revolving glass door.
Go straight across the plaza to the double
metal doors across the way. Click on them to enter. Go down the
stairway. Once inside, turn left and go up the stairway. Look down
at the control panel. Turn around and look at the four storage units
behind you. Click on the second one from the right. That object
looks like another fin for the crystal key. You can’t take it, though,
because there is a thick glass face on the storage unit.
Get your radio out of your back pack.
Press the only visible button on the radio until the dial begins moving.
The dial will show red each time it reaches one of the five frequencies that
once were active Arkonian radio stations. Let the radio remain on the
station you find just parallel to the radio dial (which has the most irritating
sound) until the vibrations it causes become intense enough to break the glass
in the key storage unit. The key fin will assemble itself with the crystal
key and reposition in your back pack. You now have all the fins for the
crystal key and four options for travel; the gatehouse, the desert, the jungle
and the sun.”(The sun is where the Arkonians disposed of their garbage collected
from the colonies.)
Place the crystal key in the lock on the
control panel behind you. You will see the image for the gatehouse,
desert, jungle and sun. Use the white button on the right side to select
the green leaf to return to the Jungle World. Click on the green leaf
image. You will immediately be transported down to the monorail
tracks. The portal will appear in the tunnel straight ahead of you.
Click on the portal to arrive back in the jungle.
Part 7. THE JUNGLE
WORLD
Now to find the enemy ship from where you are
standing when you arrive back in The Jungle World.
Turn left.
Go
forward.
Turn slightly
right.
Go forward.
Turn slightly left.
Go forward toward the bright green spot.
Turn right.
Go forward between two big rocks.
Go forward to the extreme right.
Go left of the big rock, slightly off to your
left.
Go extreme right.
Click on the dim circle you see behind the
rock ahead of you.
Turn
right.
Go forward to the hull of
the enemy ship.
Click on the little
circle left screen.
Solve the
puzzle.
This is a light coded
combination lock. There is no sound to this puzzle. But, you must
match the light pattern with the one you first saw when you entered Ozgar’s
mothership. Don’t remember? Just light the two larger blue outer
half-rings and step back. When you are transported inside, turn and go
left. Click on the light lock to the left of the spiral door. When
you have a close up, choose the small yellow half-ring on the left side, and the
large blue half-ring on the right. (This combination is the same as the enemy
ship in the hangar.)
Step back and the spiral door will be
opened. Go forward. You are in the communications office of the
enemy ship. Put your CD in the communications console in front of
you. The CD you found in the governor’s office is secret decoder disc and
it will translate the alien symbols for you. Carefully, draw these symbols
on your notes! Click the lower button to hear the alien translation of the
symbols, “Abandon Ship!”.
Immediately turn and use the portable portal
from your back pack. Use the button at the left to display the correct
image (gold volcano) to go back to the desert.
Part 8. THE DESERT
WORLD
When you arrive in the desert, go forward to
the potholes area and go across the bridge to the crater. Go left.
Go forward to the sandy area. Turn immediately left before the big brown
mound and go forward. Look down. Go down the stairway. Look
down. Click on the imager (not the extreme close up). Use your
screwdriver to unscrew the imager from its base. Use the screwdriver on
the right side. The imager will dismount and position itself in your back
pack. Get out your portable portal, set it up and key in the coordinates
for Ozgar’s mothership 327 845 483.
THE MOTHERSHIP:
From the elevator, find the ladder and go right
again at the yellow lit grill. You will find yourself outside the door to
Ozgar’s private domain. Don’t go clear up to the door. Instead, turn right
and look at the communication units (yellow lights) in the alcove off to your
right. See the rod the communications unit is mounted on? Follow it
down to the floor to see a plug in at the base. Plug your imager into the
socket. The imager will position itself in the passageway.
(NOTE: If you haven’t gone back up the
corridor, the ramp, and to Ozgar’s control room door, to peek in an see him
abusing his guard…you will not be able to plug in the imager.)
Place your portable portal directly behind the
imager in the passageway. Click on the imager for a close up. Press the
down button to take a picture of the empty passageway. Press the up button to
project the image of the empty passageway toward Ozgar’s door. You must see the
image displayed to be certain it is working properly.
Click on the portable portal and select the
“sun” image. Don’t forget to press the sun image on the screen!
Quickly, turn around and go forward to the
communications unit and key in the four symbols from the enemy ship in the
jungle; the code for “Abandon Ship!”. They are the first four symbols,
left to right, on the bottom row.
You will hear the alarms go off to alert the
crew to abandon the mother ship, Ozgar leaves his domain to find out what is
going on. He quickly meets his well deserved doom, as he rushes into the
portal and is whisked off to the blazing Arkonian garbage dump! Ozgar the
invincible telepathic is now nothing but a charred
cinder………hurray!
END GAME !
Congratulations! You are a hero for freeing your people!
_______________________________________________________________
This document may be freely distributed only
with permission of the author, Witchen =O), email , or the
Use of this document on any web site must
include a link to http://www.gameboomers.com/

View this guide raw, exactly as the archive holds it