|
Ring 2: Twilight of The Gods
Short Review
Following the success of Ring: The Legend of The Niebelungen in 1998,
Arxel Tribe releases Ring 2: Twilight of The Gods. The game changes from 1st
person perspective adventure game into a 3rd person perspective adventure
game. The game still maintain the pure adventure style from the first game.
I do not experience any unnecessary fighting or jumping (not excessively
like Tomb Raider kind of game). In fact there is no fighting sequence
anywhere in the game.
The graphics are one of the best in the past 2 years. In fact, Ring II
has better graphics than Microid’s Syberia. All images within this
walkthrough are examples of what kind of images you could expect inside the
game. The sound and voice acting are superbly done, just like its
predecessor. I give both graphics and sounds quality an A+.
The puzzles are range from easy to very difficult, especially on chapter
2 where you need to pay attention to your surrounding (yup.. it’s the
infamous Pixel Hunting kind of puzzle) and inside the dragon lair where you
have to use your skill to navigate the character in a timely sequence
action. These two are the toughest puzzles inside the game.
The control is a mix between keyboard and mouse control. You will have to
use the mouse on the close up view of an item or location. As for movement,
you will use your keyboard to navigate the main character. The downside of
the game is its inventory system. You could only hold 1 item in your
inventory. This could be very tedious in some of the puzzles that requires
multiple items to solve it. I’m not sure what kind of thought inside the
designer to design this kind of inventory system.
If you are looking for a good solid adventure game with great story and
do not bothered with keyboard navigational system and the inventory system
that could only hold 1 item, this is a perfect new year’s treat for you.
Introduction:
The game is created based on the story of Siegfried. Experience his
adventure as he slays dragon, giants, wins the love of Brunhilde, the
Valkyrie, and his ultimate death in the Twilight of the Gods. He accepts the
challenge of the Gods to prove that he is a worth successor of the Walsungs,
the hero clan in Scandinavian folk lore.
K E Y M A P P I N G
| Function |
Primary Key |
Secondary Key |
| MENU |
F1 |
|
| FORWARD |
UP |
W |
| BACKWARD |
DOWN |
S |
| TURN LEFT |
LEFT |
A |
| TURN RIGHT |
RIGHT |
D |
| STRAFE LEFT |
K |
Z |
| STRAFE RIGHT |
L |
X |
| RUN |
LEFT SHIFT |
RIGHT SHIFT |
| JUMP |
LEFT CTRL |
RIGHT CTRL |
| ACTION |
SPACE |
ENTER |
| SWORD |
BACKSPACE |
E |
Chapter Two: Pay attention to the glittering
objects on the ground. These are the objects that he could get. Too bad, our
character could only pick up one object at a time.
Bugs:
Walkthrough
Chapter 1: The Slave in The Forge
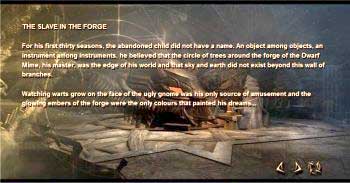
Q: What should I do to start the fire?
A: Go straight to the bellow. Move the
bellow up and down by holding the mouse. Walk to the wooden handle in front
of the bellow. Swing it back and forth from left to right to operate the
hammer. Unfortunately, you started the fire while doing that.
Q: How could I put out the fires?
A: Go to the crevice on the wall (the spot
looks like an arch with a head statue on the top, close to the bellow). Pick
up the water tank. First, put out the fire on a pile of log just beside the
crevice. Fill up the water tank again on the crevice. Move as quickly as
possible to the wall across the crevice. You might have to go back and forth
between the fire and the crevice. Run as fast as possible and try to put out
that fire. When the second fire out, the dwarf will ask you to fix the
furnace.
Q: Where should I go to fix that furnace?
A: Go right from the forge toward a group
of furnaces. Two black crows will show up and lift you up to the sky. They
will drop you near a very big tree to begin the story of ……
Chapter 2: The Crows of The Grey God
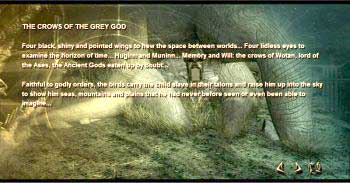
Q: Where does that strange woman go? What should
I do in this strange place?
A: Follow the woman to the top of the root.
At this time, you will not be able to do anything. To the right of the
landing spot, there is a big bull trapped in a bush. There is a warrior’s
skeleton holding a dagger trapped in a bush to the left of the landing spot.
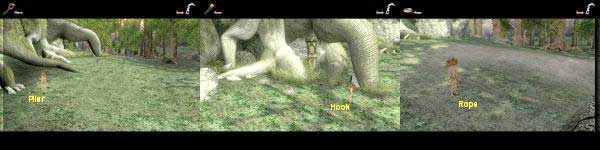
Q: How could I help the bull?
A: Pick up the pliers on the grass to the
far left end of the tree. Use the pliers to cut the branches to free the
bull. Pick up the rose beside it. Give the rose to the bull.
Q: How could I get the knife from the warrior’s
skeleton?
A: Stand in front of the bull. Start
walking away from the bull toward the other end of the field. You will see
the rope on the grass. Pick it up. Now walk back toward the bull. Stand in
front of the warrior’s skeleton and then go down. Combine the rope with the
hook on the ground to make a grappling hook. Attach this hook to the
branches where the skeleton is. Go back to the bull and pick up the leather
on the grass in front of the branches where the bull used to be. Put the
leather on the bull’s neck. Pick up another red rose and place it near the
end of rope of the grappling hook. Walk toward the skeleton and the bull
will come and try to eat the red rose. Attach the hook to the bull. The bull
will pull away the branches. Grab the dagger from the skeleton.
Q: How could I find the strange woman?
A: Climb to the top of the root where you
saw the woman disappeared earlier. Use the knife to climb the cliff to
unfold …..
Chapter 3: The Ghosts
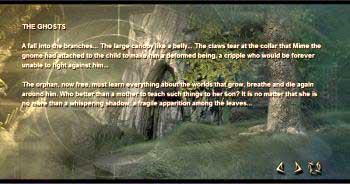
Q: Where should I go now?
A: The woman will show you the way to freedom. Jump over the small river and walk
away from her toward the dirt path. You will see a large spider web at the
end of the path.
Q: The spider always caught me. What should I
do?
A: Use your patience. Walk slowly toward
the other end of the chasm. Stop walking whenever the web started to shake.
Q: What should I do with this pedestal?
A: Notice there is a triangle mark on the
top of it. You need to create the other two triangles to summon the black
crows. Go toward the big log. You’ll arrive at an intersection. You will see
a long tunnel to your right and graveyards to the left.
Q: What should I do with this long fireball
tunnel?
A: Listen carefully to the sound of the
crows. Run underneath the fireball as soon as you hear the crow produce a
single call. Repeat this action until you reach the end of the tunnel. Hold
your weapon and pick up the bowl from the statue. Go back to the pedestal
and put the bowl on it.
Q: Where could I find the other triangle?
A: Go toward the left path toward the
graveyards. Get the Mjolnir hammer from the statue. On the way back to the
log, you will face couple of fire-spitting monsters. Throw it toward them
before they’re able to
 spit fireballs toward you. Place the hammer on the spit fireballs toward you. Place the hammer on the
pedestal. The crows will pull you up to the sky again. This time they will
drop you in front of a big locked door.
Q: How could I open the locked door?
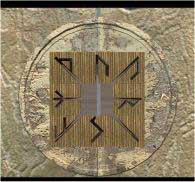
A: Notice the two items on the door: the
sliding puzzle lock and a tool to form a key piece for the sliding puzzle
lock. Use the image below to help you solving the sliding puzzle lock. Then
use the image from the lock to form the final key piece on the tool to the
right of the lock. Use the key piece on the lock to open the door. Enter
…..
Chapter 4: The First Ordeals
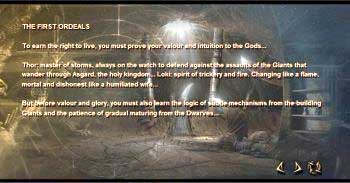
Q: What should I do now?
A: There is a plan on the altar. Read that
plan carefully. This plan will show you how to unlock the triangle
mechanism on the cave wall.
Q: Where is the mechanism?
A: Pick up the fire flower on the ground to
the left of the altar. Walk toward the far end wall of the cave (the one
with the hour glass device). Put the plant on the floor. This will
illuminate the mechanism to the right of the hour glass.
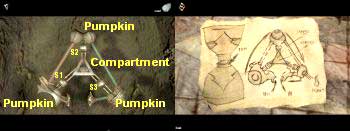
Q: How could I unlock this mechanism?
A: Based on the drawing on the plan, you
will need several items: pumpkins, fire flower with copper lid, coal, lead,
ice flower, and golden gem. Pick up the pumpkin on the cave floor just in
front of the mechanism. Put them one by one on every corner of the triangle
mechanism. Pick up the coal from the shelf next to the altar. It’s hidden
inside the jar on the left. Open the center triangle compartment of the
mechanism and put the coal inside. Close the compartment. Pick up the lead
from the other jar on the shelf. Insert it into the left tube. Now look at
the hour glass. Pull the handle out. You will be grown into an adult.
Quickly push the handle of the hour glass in before you run out of time.
This act will stop your growth. Look at the mechanism again. Turn S1 twice to send the lead to the top part of
the triangle. Pick up the ice flower on the floor cave (the bluish color
flower). Insert the flower on the top of the triangle. Turn S2 twice to transfer the lead to the lower right of the triangle. Pick up
the fire flower and put it in front of the lower right of the triangle
mechanism. Pick up the copper lid on the floor close to the spot where you
pick up the ice flower earlier. Put it on the fire flower. Turn S3 twice. The mechanism will spit out a
golden gem. Open the compartment and put the golden gem inside. This action
will open a hidden passage. Enter the passage.
Q: How could I cross this deep chasm?
A: You can’t. Pick up the stones on the
cave floor just before you reach the end of the passage. Now look down to
the deep chasm. Siegmund, the man with the red cloth, will appear again.
Throw the stones into the chasm every time Siegmund try to build the fire
balls. After doing this for five or six times, Siegmund will disappear.
Throw a stone into the chasm and then jump into it and enter …
Chapter 5: The End of The Trials
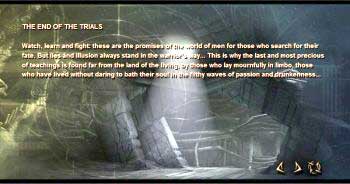
Q: How can I get out from this dead end?
A: Talk with all of those four heads inside
this room (you will see the last one across the bridge). Walk toward the pit
at the end. Use the dagger on the sprite. The sprite will open the path
underneath the lake for you. Dive down into ….
Chapter 6: The Metamorphosis
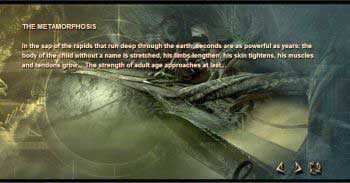
Q: How could I help the bear?
A: Pick up the stick and slide it under the
boulder. Move it to the left and lift it up so that the boulder will hit the
four skeletons. Now the bear needs only to fight the last skeleton warrior.
Run down to the bear through the path on the left. Unfortunately at the end
of the path, your dagger will be stuck on the magnetized wall.
Q: How could I defeat the skeleton without my
dagger?
A: Get the amulet on the middle of the cave
floor. Quickly, run back toward the magnetized wall. The wall will attract
the skeleton warrior’s sword along with him. Give the amulet to the bear.
The female ghost and Siegmund will appear. They told you to find Nothung’s
sword. this sword will reveal who you really are. You will be transferred
back to the forge of Mime, the Dwarf to enter …
Q: How could I enter the forge?
A: Try to knock on the door twice. Mime
will not let you in. Use the bear (click on it) to break the door.
Q: Where is Mime?
A: Notice those two trunks on the corner.
Mime hides inside one of those trunks. Open both trunks to find Mime. Talk
with Mime. He still refuse to tell you any story.
Q: How could I force Mime to talk?
A: Use the bear again (click on it). Stand
close to Mime and the bear will jump into him. He will tell you about the
story of your mother, Sieglinde. When he walked away to the furnace,
approached him. Try to make him talking again. Use the bear one more time to
force him talking. He will take you to the hidden valley with some big
carnivore plants to learn ……
Chapter 7: The Revelation of the
Origins
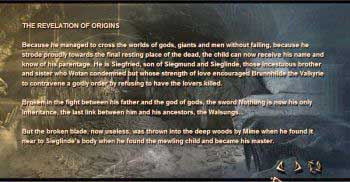
Q: How could I go pass these plants?
A: Notice that one of the tree is dead. You
need to use this tree as your tool to avoid the other carnivore plants. Look
closely at the dead giant spider. Pick up the stick beside the spider. Use
the stick to pick up the acid pouch from its death body. Use the pouch on
the dead tree. Push the tree until it falls down to the ground. Crawl into
it to the other side.
Q: How could I avoid this giant spider? It
always caught me.
A: This spider is really fast. Wait
patiently until the spider walking toward you. Run like hell to the left
side, avoid the spider and go straight to the bridge. If you fast enough,
you will be able to reach the bridge before the spider gets you. Walk across
the bridge to reach the castle of the giant Kuperan.
Q: How could I enter the castle?
A: Approach the castle and hide behind the
left pillar (not the one that close to the main door). Wait until a giant
spider come out from the door. Keep on waiting until it pass your hiding
place. Run as fast as you can to reach the main gate. Enter the castle and
continue your mission on ….
Chapter 8: Finding Nothung
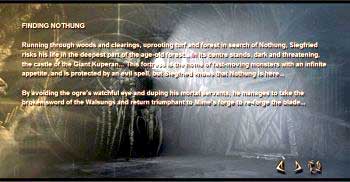
Q: What should I do now?
A: Walk carefully toward the top of the
fireplace. Alberich, the king of the dwarf, will ask you to help him. He
wants you to pick up the key on the cape to unlock his cage.
Q: Where is the key?
A: First of all, try to find salt to
protect you from all the spiders that lurking around this room. Continue
walking on the top of the fireplace to the other side. Jump to the top of
the cabinet. Walk toward the other end. Jump down to the ground. Walk to the
open chest. Sprinkle the salt onto your body. Now walk out of the chest
toward the kitchen door. Climb the cutlery shelf beside the door. Use the
iron staplers on the side of the shelf for climbing. Jump to the top of the
stool on the left end of this shelf. Get the key on the stool. Jump down to
the kitchen floor. Climb on the top of the other cabinet to the right of the
cutlery shelf. Jump to the ledge on the right end of this cabinet. Give the
key to Alberich after he tells you about the broken sword of Nothung.
Q: Where is the chest that kept Nothung?
A: The chest is located in between the
cutlery shelf and the cabinet. Unfortunately it is locked tight.
Q: How could I open the locked chest?
A: You need to utilize the giant spider to
open it. Remember that the spider carry a pouch of acid inside its body. Go
to the mouse trap in front of the salt chest. Pick up a garbage from the
pile nearby. Put the garbage on the mouse trap and hide. The spider will be
killed by this trap. Get its broken leg and use it to pick up the pouch of
acid. Use the acid to unlock the locked chest. Get the sword parts from the
chest. Siegfried will ride one of the spider back to the forge.
Q: How could I fix this broken sword?
A: Walk to the anvil. Pull the lever on the
side of the furnace. A bucket will show up. Put the sword parts in it. Pull
the lever again to push back the bucket into the furnace. Walk to the bellow
and use it to heat up the bucket. Go back to the furnace and pull the lever
again to retrieve the bucket. Pull the lever on the bucket cart to pour down
the melted iron to the mould. Bring the mould to the water fountain near
the two trunks where you found Mime earlier. Bring the
rough form of Nothung to the anvil. Use the hammer’s handle to form Nothung.
You’ll automatically see the cut scene where you lift up Nothung after you
move the handle 6-7 times. Nothung will give you a blood rush. Mime will
tell you about the Dragon Fafner, the fiercest creatures in the land. You
need to beat it to display your courage. Mime will take you to the lair of
Fafner. Step into the lair and face ……..
Chapter 9: The Dragon Fafner and The
Rhinegold
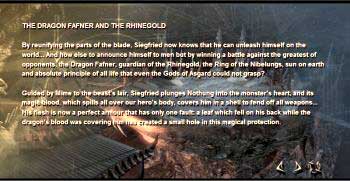
Q: What is the solution of this tile puzzle?
A: This is one of the toughest puzzle in
the game. It is dealing with timely and navigational puzzle. You need to
step on the dragon mosaic and jump over the gap to reach the other side. As
soon as you reach the other side, the spiked wall will start moving toward
you. You need to back track your step again to reach the starting point. You
need to do this quick enough before the spiked wall reaches you. Once the
spiked wall hit the cave wall at the starting point, you will be able to
step on the dragon mosaic again to reach the other end of the cave. Follow
the path to reach the inner chamber where the dragon sleep. On the way there notice the rock with a sunbeam on it.
Q: How could I wake the dragon up?
A: Pick up the shield on the bridge. Go
back toward the path and insert the shield on the rock
with the sunbeam. The shield will reflect the sunbeam to the dragon and
wake him up. Now you will have to spend hours and hours to fight this though
enemy …….. just kidding. You just need to grab a cup of coffee and watch
one of the coolest cut scene in the game. Siegfried will defeat the Dragon
Fafner. The dragon will mention about the real treasure in this cave: The
Rhinegold – the golden ring of the Gods.
Q: Where could I find the Ring?
A: Use the dragon’s body to cross the gap
to the main column. Use the wooden hanging bridges to reach the column that
has a lot of gold chest on it. The ring is on the pedestal in front of the
gold chests. Now you just have to go back to the cave entrance through the
dragon mosaic puzzle again. You will see a black crow on the top of one of
the pillar that will sing you ….
Chapter 10: The Song of The World and
The Death of The Mime
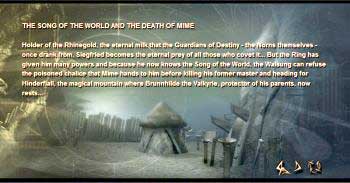
Q: What should I do with the crow?
A: The crow will start singing the Song of
The World and tell you the story of the Mime when you approach it. As soon
as the story finish, Mime will show up. He brings you the cup with wine in
it.
Q: Should I drink the potion that Mime’s offer?
A: DO NOT ACCEPT the offer or you will be
die instantly. Instead, draw your sword and kill the dwarf. Watch the cut
scene as Siegfried walk toward Hinderfiall where Brunnhilde the Valkyrie,
protector of his parents, now rests.
Q: How could I avoid the guards?
A: Walk quickly and hide behind the boulder
to the left. When the guard walks away, start running. Follow the dirt path
passing the log pile and hide behind the bushes. Wait until the two guards
out of the screen. Run quickly to the building on the left.
Q: How could I enter the building?
A: Use your sword to cut open the door’s
chain. Open the door and enter the building.
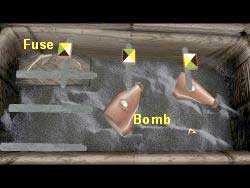
Q: What is the solution of the locking mechanism
of the gun powder chest?
A: Look at the picture above to help you. Once
you solve the puzzle, click on the fuse on the left to make a bomb. Grab the
bomb.
Q: What should I do with the bomb?
A: This bomb will be your tool to get the
attention of all the guards that lurking outside the village. Put the bomb
on the log pile. Use your sword to lit it up. Run as quickly as possible
from the bomb. The blast will create a big hole on the fence. Enter the hole
on the fence and run into the entrance on the ground to your left to find
……..
Chapter 11: The Valkyrie
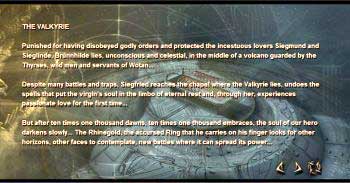
Q: Where is Brunhilde?
A: Wait until the block to the right of the
spiked wheel move. Run through the right path, avoiding the fireball, step
onto the moving platform, and finally jump to the other side. Enter the
crypt. You will see Brunhilde lying inside a coffin.
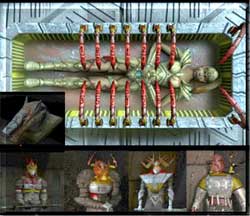
Q: How could I release Brunhilde?
A: The clues are on the statues around her
coffin. Lift the numbered claw in this order: 08, 13, 21, 34, 55. You know
that you’re on the right direction if the claw above her head does not start
moving (stay still).
Chapter 12: Tasting The World
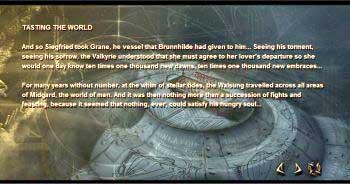
This is a self-explanatory chapter. Watch how Siegfried and Brunhilde
walk toward the ogre soldiers. They both are the king and the queen of the
world at this moment. Brunhilde will lend Grane, the great vessel, to
Siegfried so that he could take a journey to meet King Gunther ……
Chapter 13: At The Court of The
Gibichungen
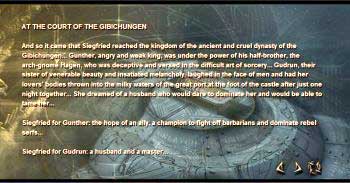
Another self-explanatory chapter. You just have to be
relax and watch Siegfried talk with King Gunther, Princess Gudrun, and
Hagen, the advisor, at The Court of The Gibichungen. Siegfried needs to find an
answer from Erda, the Clairvoyant. Hagen told Siegfried to find the Three
Objects of Evil: the tears of the loss and the Norns thread, that will conjure the meeting with Erda.
Siegfried will set a trip to find ….
Chapter 14: The Three Objects of Evil Magic
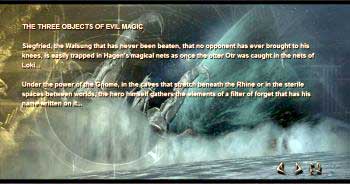
Q: Where could I find these tears of the loss?
A: Talk to the two maidens on the water. If
you keep on talking with the maiden on the right, she will eventually give
you her tears. The maiden on the left wants you to kill Alberich in return
of her tears.
Q: How could I captured Alberich?
A: Run to the left bridge. Keep on running
until you reach the main platform. Turn around cut the bridge rope so that
the bridge will collapse. Go back to your starting point through the other
bridge on this main platform. You will be able to corner Alberich on the
collapsed bridge. Bring back Alberich body to the maiden and you will get
your second tears.
Meanwhile, Hagen, Gunther, and Gudrun lie to Siegfried and tell him that
the Norns have abducted Brunhilde. Driving by the love to Brunhilde,
Siegried loss his common sense and head straight to the Norns. Now Siegfried
is nothing than a toy for the Gibichungen. Siegfried go straight to confront
the Norns to ask them about ……
Chapter 15: The Abduction of Brunhilde
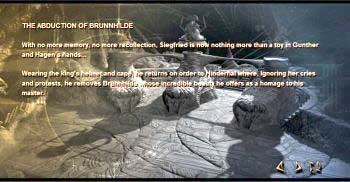
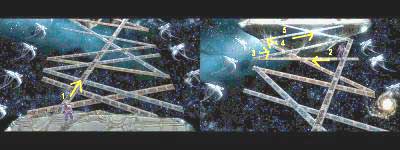
Q: How could I cross this bridge to reach the
Norns?
A: Use this image to help you crossing the
bridge. Talk with the Norns as soon as you reach the other end.
Unfortunately none of the Norns will help you. Notice that little spider
that keep on moving from one Norns to the others.
Q: How could I make the Norns to help me?
A: Pick up the sands on the left of the
Norns. Use this sand to shot down the little spider. This spider is their
eyes. Stand in between the left and the center Norns. As soon as the spider
start crawling from the middle to the left Norns (or vice versa), throw the
sand to it. Kill it with your sword. Pick the spider up and watch the last 2
chapters of the story ……
Chapter 16:
Marriage and Revenge
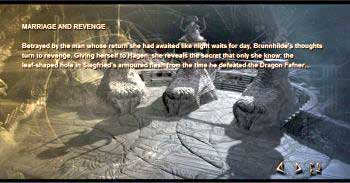
Feel betrayed by Siegfried that never return to her,
Brunhilde agrees to marry King Gunther. Siegfried has fallen into Hagen’s
trap and feel betrayed also with Brunhilde’s act. Siegfried agrees to marry
Princess Gudrun. During the celebration, Siegfried has found the truth
through ….
Chapter 17: The Meeting
with Erda and
The Twilight of The Gods
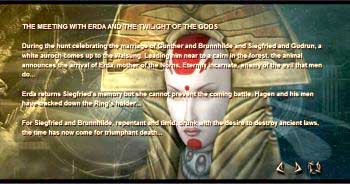
Both Siegfried and Brunhilde finally find out about the truth and face
the ultimate truth of all ….. their tragic death. Another great story from
the Opera of Wagner.
Copyright:
Crash Production@2003
All images on this walkthrough are the property of Arxel
Tribe
Any comment or question could be sent to
Crash Email
|