Nancy Drew: The Secret of Shadow Ranch
Dry Creek:
Cappy’s – Go to
Cappy’s, look at table that had the books and see that the mystery person has taken all his things away. Check the
box left at the corner. There’s a key on top of the box. Pick up the key.
Ouch!
Jail –
I’m in
the jail cell. That’s what we wanted but not this way.
Dirk’s message – Look close at the lines
right of the sink.Count the lines and it
will correspond to a letter in the alphabet.Use your computer’s
keyboard, type in the letters and then press return key. Ex: A – 1 line, B – 2
lines, Z -26 lines – under bank lamp.
Turn left and see the key hanging on the wall outside.
Jailbreak – Look
close at the key and see an overturned chair.Use the lariat on the
chair to turn it up under the key. Time the click on the chair when the lariat
makes a perfect circle.Pick up bricks from
the floor by next cell and look close at key. Click brick on the key. You will see angle arrows and strength bar for
the brick throw. Use the second arrow from the left as the angle of the throw.
Move the strength slider to the middle. Click on throw. The key is one on the
chair.Use the lariat again to
pull the chair to the cell.Click the key on the
middle of right cell door frame and out you go.
Pick up the paper off
the floor. It is Dirk’s code for his secret messages. Read the blue inked
note. The culprits use the same code.
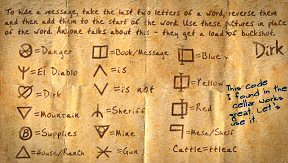
Decode the message found
in the fire pit. Will need more supplies. If ranch is not
soon check message mesa again. Dirk might have hidden it
right under sheriff nose. So the saboteur is from the ranch.
Bank – Go to the bank
(building across the hangman’s platform) and look under the lamp on the right side of the building.
Check the loose brick on
the side. Read the note – Did you know you can play some
games more than one way? You can and I’ll tell you how. Use the ring that/s the
twin of Ellie’s, your cousin in Cappy’s fun machine now. We need
to get that ring.
Ranch – Take the
saddle off Bob and place it in tack room. Talk to Dave by the chicken coop about
Mary and borrowing his aunt’s ring. Step one way away from Dave and call the
sheriff. Saddle Bob and go to Dry Creek.
Dry Creek – Cappy’s Arcade Game:
Check the old arcade game by the exit.
Mean Gang –
Insert the token won
from Mary’s Gifts. If you run out of tokens, go to Mary’s Gifts and play the
‘Run for Cover Game’ again.Pull the lever and try
to get 4 mean guys to make the meanest, roughest and toughest gang in the West.Click on the buttons
under the ones you want to keep. There is only one chance given to remove
the good guys.Pull the lever again and
see if you get 4 mean ones. If you win, you get 2 more tokens.Nice Gang – It is time
to check Dirk’s note under the bank lamp. Save Game.Use Dave’s aunt’s ring on the red
button above the slot.The sign changes to ‘make the nicest, sweetest and most
pleasant friends.Insert token on the slot. Pull lever.
Click on the buttons
under the ones you want to keep.Pull the lever again and see if you get 4 nice
ones. Take the key.
Check
Dirk’s Zebra rock message from the tuning fork puzzle.
Trail Stop:
Time to check the ‘zebra rock’ mentioned by Dirk. Remember the striped rock
close to Charlie’s grave with the rattle snake – that’s the one. Go forward from
Bob 3 times and pan left. Go to the striped rock free from rattle snake. Push off
the rock and open the door to reveal another puzzle.
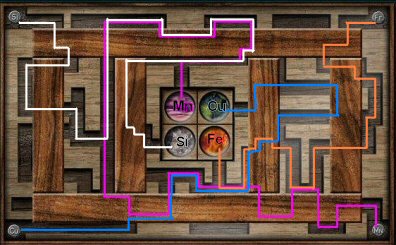
Zebra rock puzzle
– The object of the puzzle is to place the element symbol on all 4 corners to
the appropriate colored circles at the center.Use the apple magnet to
move the symbols. Click- on symbol and move it on the gray area to get to the
appropriate circle at the center. Some areas are covered by the brown strips of
wood and the metal’s path cannot be seen. The hidden paths can zigzag, so try moving it around to
see where the metal piece is free to move. Note the message at bottom left and
the sound of progress.The pink circle is Mn
-manganese. The blue circle is Cu – copper. The silver circle is Si – silicon.
The orange-red is Fe – Iron.
A music box with another
puzzle is revealed. We need more information on this one. Take the music box
with flowers.
Favorite Flowers, flowers on your favorites again:
Mary’s Gifts:
Time to check e-mail messages.
Crackers: The e-mail about the Cracker name from Charleena
Purcell states to check out Kelleher on the web. Check web, search and
Kelleher. Aha! The name is Sunflower Crackers!
Beaded bag:
Check the e-mail about beads. The bead pattern mail states that it is called
Spiral Flower. Note the pattern.
Enter the store and talk
to Mary about beads. Mary will get the
beads if Nancy finishes the display.
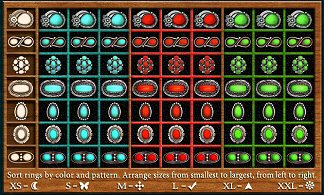
Ring Display –
From left to right: Sort rings by color and pattern. Arrange sizes from
smallest to largest.1. Arrange the similar
designs in its row based on the white design on the left column.2. Sort the colors based
on the color of the frames around the rings3. Sort each color by
the size: smallest on the left and largest on the right. The size can be seen
when the rings are picked up and the icon under the cursor shows the size. The
chart for the icons is seen at the bottom of the frame. ex. half moon is XS.Nancy will say if it
looks right.
Talk to Mary and she’ll
give the beads.
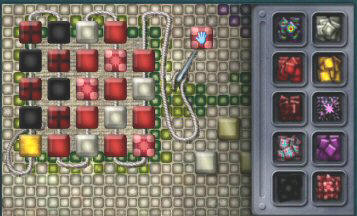
Bead Bag – Click on the purse in
tool box to see a big view and then click on the square that needs beads. A new frame is seen. The
pattern as researched by George is:Yellow – 1; Black, Black
with red corners – 4 times; Red, white, red, red with pink corners – 4 times.Sew in spiral.
Click the beads on the
needle in the order shown above. When correctly done, the beads will be sewn and
Nancy will say- Perfect! That flower looks kinda like a poppy.
Music Box Puzzle:
We know from her
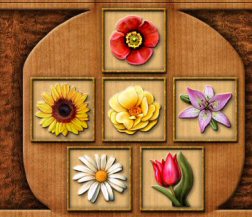
father’s letter Frances’ favorite flowers is Harrison yellow rose.The flowers on Frances’
favorite things are: lily from the letter to her cousin, sunflower from the
cracker tin can, tulip from the birthday cake, daisy from the knitting stitch of
the shawl and poppy from the beaded purse.Look close at the flower
music box taken from under the zebra rock.Dirk’s clue was favorite
flower with flowers on your favorites. So arrange the otherflowers found on Frances’ favorites around Frances’ favorite flower.
At the center, select
the Harrison yellow rose. Select Poppy on top,
sunflower on the middle left and lily on middle right. Select daisy on bottom
left and tulip on bottom right.
The box opens to show a
note and a slot. Read the note. Insert the key taken from Cappy’s arcade game on
the slot. Another puzzle and code is seen.Map Puzzle:
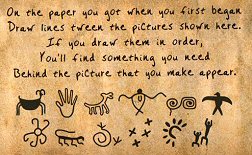
Based on Dirk’s note –
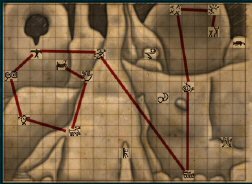
draw a line connecting the petroglyphs he shows on his note.Click on the first
glyph, then the second, then the third, etc… A white line will form to
connect them.
A V. Hmmm.
Closing in on the treasure.
Cougar Bend:
Ride Bob and let’s check the source. Look at the connected lines in the map.
Note the top middle petroglyph that is not connected by any lines. Looks
familiar! It’s the drawn V. Go forward and lasso that log above on the shelf.
Climb the rope and look for the V petroglyph. Pan left to the flat rock
and click on it to reveal a rock and a note. Read the note.
On Charlie’s
grave, hold this up, look around and you’ll see the trail to a gift to you from
me. Take the scuffed rock. Let’s ride.
Mary’s Gift:
Talk to Mary about the scuffed rock. After Mary worked on the rock, a picture agate
is revealed. Exit and get a phone
call from Bess and George.
Trail Stop:
Go forward 3 times, turn right and click on Charlie’s Grave. The picture agate comes up.
Move the cursor to find a match of the picture. Turn around and see the matching
tree just behind zebra rock. Click to go there.
? area:
Nancy rode Bob towards ‘that’ direction. Turn right and go forward until up the
cliff. Use the lariat on the protruding log ‘up there’.
Ancient Cliff Dwellings:
Enter the dwellings. See an etched coded message.
Based on the decoder
note found on the jail floor, the message is decoded as:brown . lime .
yellow . red . blue . orange . lime . yellow . brown . blue .
lime . orange . blue . brown . lime . orange . red . blue . yellow . lime . blue
. lime . brown . yellow -VMaze: Here is the start of the
maze. SAVE GAME or do second chance when you need to start over. Just follow the
code colors on top of the door and check every pot.Note: I was informed that the keys are randomly placed in different pots in
different locations. So just use the maze directions and look for ALL the pots
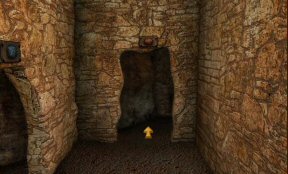
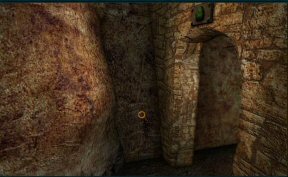
in side chambers and in the main path.Turn right to enter
room. Turn right to brown.Turn left, check pot by
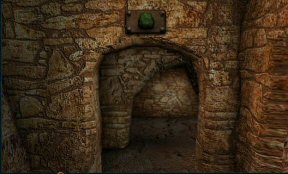
lime opening and enter lime.Right, forward and check
pot. Take L shapedkey.
Turn left, forward and
before you enter yellow at right – go forward to orange and check pot. Take =
shaped
key.
Turn around, forward out
of orange and left to yellow.Turn right, climb ladder
by red.Right, right, forward, check
pot, take wedge shaped key and right to blue.
Go down ladder at blue
and forward to orange.Right and forward to
lime.Right to climb ladder by
yellow.Left and enter brown at
right.Right to blue.
Right, then left to
lime.Left to orange.
Right to blue.
Left to brown. Enter
brown, turn
right to face lime, turn around and look at pot. Take I shapedkey.
Enter brown opening See lime opening
Face lime opening Turn around and see pot Turn around. Enter lime.
Forward to orange. Check
pot.Right, forward and right again to
red.Left, forward and left to
blue.Forward to yellow.
Left to lime.
Forward to blue. Check
the pot under red and take U shaped key. Click on mat and see a hole on the
floor.
Turn left and enter lime.
Left and climb ladder of brown.
Forward to yellow.
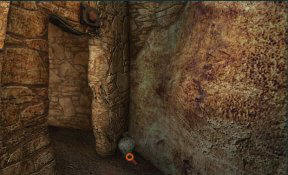
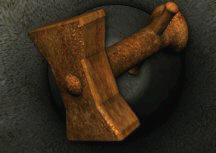
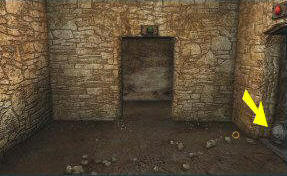
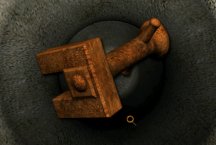
Maze keys:
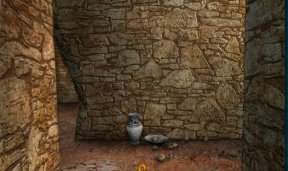
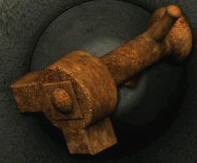
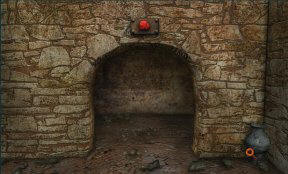
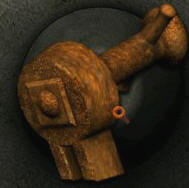
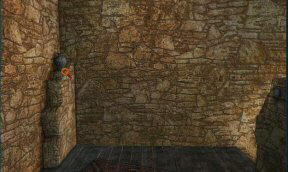
Click on metal plate. Place the keys on the
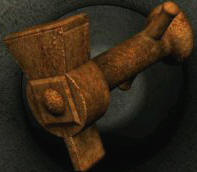
keyhole with the same shape as its end. Click on bolt at right.
Dirk’s loot: See a big heart on the
wall. Turn right and see the loot. Open the chest and see solid gold hearts.
Exit the room.
Meet the saboteur.
After the saboteur stops talking turn left, run down the ladder, turn around and turn right
to lime.
Take the red stone on the left and
lime stone on the right from the top of the opening and
exchange them to confuse you-know-who. Second chance works well here! Watch,
listen.
Sassy Detective,
Hawkeye! Yahoo!
This
document may not be distributed without express written permission of the author
and the content may not be altered in any way.
For
Questions or Comments on this Walkthrough,
Please write to:
MaGtRo
Copyright © 7/2004
MaGtRo