Just Adventure original
Inherent Evil – The Haunted Hotel Walkthrough by Linda Shaw
The unaltered guide: no contents list, no checkboxes, no page breaks. This is what the archive holds. Back to the reading view
Warning: This
walkthrough will take you step by step through the entire game … leading you
from the very beginning all the way to the very end of the game!
Table
of Contents
Part 1: The Diary
Part 2: Room 211
Part
3: The Dark
Part 4: The Beast
Part 5: The Severed
Part
6: The Maze
Part 7: Gerald
Part
8: Closure
Part 1: The Diary
Upon receiving
a frantic phone call from your brother, the opening leads you to the hotel, where
you find yourself just inside the entrance. I trust you enjoyed the opening and
the "safety" of being inside. It’ll be quite a while before you can
"escape" outside again!
Move toward the counter in the main lobby.
Get the flashlight from the bottom drawer next to the safe. Note the painting
in the cabinet to the left of the drawers. Dial 911 on the telephone that rests
on the counter top, and choose "report the murder." Listen to the 911
operator!
Go to the elevator and press level 1. Turn right upon exiting
the elevator, move forward and note the missing painting and blood on the wall
between the rooms. Turn left, move forward to the door with the police tape on
it. Turn and return to the elevator (see the doors open and close, and listen).
In the lobby, grab the painting now that is inside the cabinet behind the
counter. Then head back up to the first floor and replace the painting. Watch
the short video. Now return to the lobby and go up the steps on either side. Find
the painting next to the hutch that has hinges. Lower the chandelier after discovering
that the painting hides the controls to the chandelier. You will see a key fall
to the floor in the lobby. Return to the lobby floor via the stairs. Turn and
face the elevator, then turn around. Look at the left front leg of the sofa and
get the key. Try the dining room doors!
Make your way up to the first floor
once again, with the key in your inventory. Open room 105 and enter. In the room,
see the blood on the wall. Click on the bed and get the diary. Read it! Pick up
the phone receiver. Read the notices on the bulletin board. Turn and look in the
bathroom, then turn to see the kids area of the room. Play (or try to play!) the
chess game puzzle! Turn toward the TV and then find the desk, open the top drawer,
and push the red button. Take the key. Go down to the basement and move R, F,
F, L and see your father!
At this point, you have just completed Part 1,
and will be automatically "kicked out" to Windows. You can find the
game in Program FilesHeadgamesInherent Evil and will be able to click on LOAD,
then on Part 2–Room 211.
Enter the following access code to begin Chapter
2: GILWIEMINECKKINPECFAU8
Part 2: Room 211
Ask
questions of your father and then explore the basement. There are several boxes
containing items you will either pick up and add to your inventory or see and
observe. Being by finding the box containing a book titled "Acting for the
Brain Dead," a newspaper clipping, and blocks that spell out D-O-R-K! Find
another box containing a coffee mug that reads "BEST DAD EVER," a wire
cage of some sort (more on that much later; just be sure to take that with you),
and another news clip. There is another box that contains insulated gloves, fake
fruit, and assorted candles and the like. You cannot take the gloves at this point,
but we’ll come back to that briefly.
Find the cabinet underneath the steps
that lead down into the basement and get the fishing pole. Find the circuit breaker
switches, and you will see that you can now pick up the insulated gloves, so get
those. Use the insulated gloves on the circuit breaker wire for the elevators.
From this location, turn left, left/forward toward the air shaft. Do not enter
the air shaft. Also find a box close to the stairs with a plaque and two different
newspaper clippings. Exit and go up the stairs. Go to the elevator (that is now
repaired!) and exit on level 3. When you exit the elevator, use the exit door
in front of you; go down the steps to second floor. Turn left and look around
and explore the room with the door torn off the hinges. Move to the other side
of the elevator and to room 211. Touch the door! Then use the stairs via the exit
door, return to level 3 and use the elevator to return to the lobby.
Find
the diary page in the sofa as you exit the elevator. Return to the basement, move
to the rear by the red pipes. Using the fishing pole you will retrieve the fire
extinguisher. Now return to room 211 and use the fire extinguisher on the lava-like
substance. Enter room 211. Note the Paranormal Investigator’s ID card (leave the
money alone!). Check out the suitcase on the bed and pick up the symbol that lays
inside. Note the diary of events (spiral) on the small coffee table. Exit the
room.
At this point, you have just completed Part 2, and will be automatically
"kicked out" to Windows. You can find the game in Program FilesHeadgamesInherent
Evil and will be able to click on LOAD, then on Part 3–The Dark.
Part
3: The Dark
On the third level of the hotel, turn toward rooms 304
and 305 at the end of the hallway (left if you exited from the stairs) and see
the floating table move toward you. Note the balloon and the message attached
to it. Click on it. Now re-enter the elevator and take yourself back to the lobby.
Enter the dining room, move toward the reservation podium, and take the diary
page. Read it. Move forward toward the bar. Look at but don’t drink from the bottle,
or do it and see what happens! Move toward the dining area. Move toward the rear
wall with the paintings. Find the table in the right rear corner. It is most easily
done by moving directly toward the rear of the room (by the paintings), turning
left so that you are facing the direction in which you just came, and you will
automatically be "drawn" down to the table to read a message: "ARE
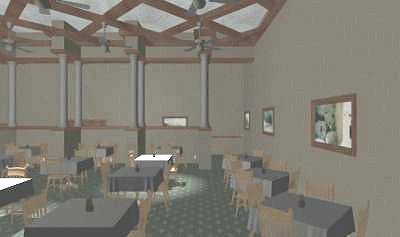
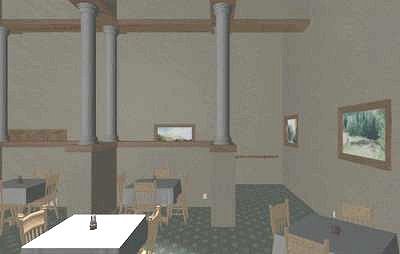
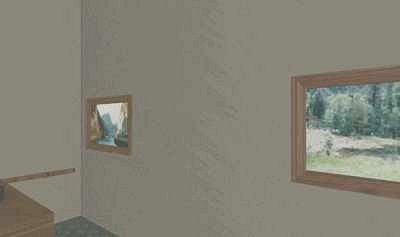
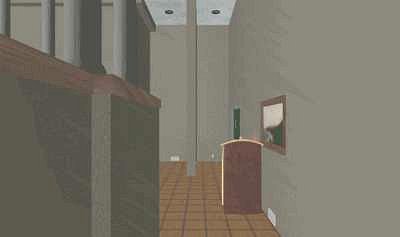
YOU AFRAID OF THE DARK?" From the beginning of this "puzzle," make
the following moves in order to safely exit the dining room. Move right, then
forward one time. See the graphic steps below.
Step 1
Step 2
Step 3
Step 4
Step 5
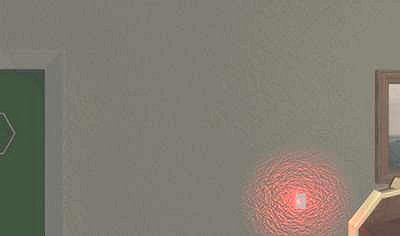
Move your cursor to the right so that you get a right/forward
angle arrow. Put your cursor on the painting in the far corner and click there.
Next, place your cursor on the podium and move forward. Then click on the light
switch. Get the balloon and the key to room 302.
Exit the dining room and
head for the elevator. Go to the third floor once again. Use the key on room 302.
When you first enter the doorway, turn R to face the door you just entered. Then
turn R again, so that you are once again facing the long, dark hallway. Now
move forward, and you will see another door. Enter that door. Move forward,
left toward the end table on the left side of the bed. Get the key from the bottom
drawer and exit to the lobby once again.
Go out the back door by the basement.
Walk around to the far left corner of the garden area (there will be what looks
like a small garden bed off by itself). Move closer to that area. Use the key
on the hatch. Pull on the handle. You will need something heavy to hold it up.
Enter the hotel again and look just to the left of the basement door. Get the
board and place it on the handle part of the trap door that leads down into the
pump room in the garden. Turn the wheel lever clockwise, and move the switch to
HIGH.
At this point, you have just completed Part 3 and will be automatically
"kicked out" to Windows. You can find the game in Program FilesHeadgamesInherent
Evil and will be able to click on LOAD, then on Part 4: The Beast.
Part
4: The Beast
Turn around quickly from the trap door and get the steel
rod. Use the steel rod on the door and exit. Check out the empty pool and get
the small piece/symbol in the corner of the bottom. Go to the second floor and
to room 211. Look on the top shelf of the closet and get the crowbar. Exit the
room, exit the floor up to 3, and go to Level 4. Use the crowbar on the elevator
shaft. Then use the fire hose behind the big plant. Enter the shaft. Find and
pick up the screwdriver behind the metal bar. Exit the elevator shaft, and go
down to the third floor and room 302. Get the boot disk off the floor sticking
out beneath the nightstand on the right side of the bed. Return to the lobby.
In the lobby, use the boot disk on the computer on the counter. Look at the 3D
Draft and place your mouse cursor on the ventilation shafts until you hear him
say something about the vent on the first floor. Place your mouse cursor where
the white dot is located on this graphic illustration.
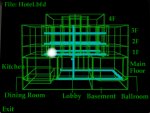
Go to the first floor, turn left, and head toward the end of the hallway. Turn
right and note the air vent. Zoom in using the eye on the air vent. Using
your screwdriver, open the air vent and enter. You will be in the kitchen. Quickly,
and without wasting any time, grab the cutting board off the counter on the right
side. Use the cutting board with each knife that the beast throws at you. Now
turn and look under the sink. In the drawers there is a diary page. Get that and
read it. Get the key in the other drawers. Exit the kitchen and go to the ballroom
… be ready!
At this point, you have just completed Part 4, and will be
automatically "kicked out" to Windows. You can find the game in Program
FilesHeadgamesInherent Evil and will be able to click on LOAD, then on Part
5: The Severed.
Part 5: The Severed
Turn
L and go behind the stage curtains. Move forward toward the trap door on the floor.
Enter the trap door and find and get the key in the dresser drawer and the comb.
(The key is to room 308). Look in the top left shelf of the closet area before
going back up. Get the alarm clock.
Exit the trap door, turn around and
zoom in on the lower left side of the black curtains. Set the alarm clock there.
Turn around and run out (automatic sequence follows that takes you up to the balcony
area). Click on the chandelier base. Get the symbol piece when the beast dies.
Exit the doors on the top and go to the elevator, to the third floor.
Use
the key to room 308. Enter and move forward toward the bathroom. Turn left and
zoom in on the note (seen Frank lately?). Zoom in on the end table, open the drawer
(diary page), and get the key to room 310 under the end table. Leave room 308,
and unlock room 310. Enter 310. Zoom in on the hutch. The radio is set at 104
FM and 100 AM. Look in the bathroom and on the mirror. You will see arrows pointing
in the following directions: R, L, L, R, L, R, L (see graphics below).
Actual
image you see in the mirror reversed, or mirrored image you will
use:
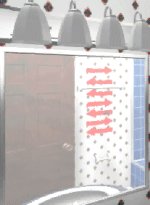
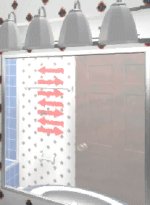
However, this is a mirror image, so the directions
are actually: L, R, R, L, R, L, R. As you exit into the hallway and face down
the main hall, you will see another automatic sequence of a ghost woman pointing
to room 301. For now, leave this area and return to the ballroom trap door. Enter
this room and click on the mirror. Note the dagger on the stand. Get that. Now
note the keyhole-looking device on the other stand. Make sure you notice the colored
lights above. There are three sets of lights: red, blue, red, and red,
red, blue, and blue, red, red. Use the dagger in the keyhole for each
of those colors, in the order above. In other words … insert the dagger
in the keyhole that has the red, blue, red lights above it. Then insert
the dagger in the keyhole that has the red, red, blue lights above it,
and finally, insert the dagger in the keyhole with the blue, red, red lights
above it. Get the symbol piece for the device, and leave to room 301. Inside this
room, things will quickly turn dark, and green! Following the mirror image
clues: L, R, R, L, R, L, R, make your way through the room without getting
killed. Exit the room and enter Part 6, The Maze!
At this point, you have
just completed Part 5, and will be automatically "kicked out" to Windows.
You can find the game in Program FilesHeadgamesInherent Evil and will be able
to click on LOAD, then on Part 6: The Maze.
Part
6: The Maze
Go through the middle purple door and you will see the
floating TVs. They will help you by giving you four colors representing the doors
that you need to go through. Click ok.
Go F, R, F, L, then enter the first
red door. Go R, F, R, F, F, F, R, F, F, R, F, F, R, F, L and enter the
white door. Turn R to enter the brown door. Go L, F, L to enter
the purple door; you will see the flying TV sets again.
"YOUR
MOTHER IS WAITING FOR YOU"
Click ok. Go R, F, L, F, L, F through a
yellow door, then F, F, F, L, F, R, F through another yellow door.
To the brown door, go L, F, F, F, R, F, F, R, F, L, F; go through the brown
door and turn around to go through the purple door. Go F, R, F, L,
F, F, F, through the blue door. Turn around and go through the white
door. Talk with mother, ask a few questions, and get the bait for the golden
dragonfly. Turn L and enter the red door. You will see more floating TVs.
Go F, L, F, F, L, F, F, L, F, F, F, L, F to the orange door. Go
R, R, F, F, F, F, L, F, R, F, F through the red door. Go F, R, F, F, L,
F, F to the yellow door. Go L, F, F, F, L, F, F, L, F, L, F to the white
door. Go F, F, R, F, L to the blue door. Turn R to the green door.
Go F, F, F, F, F, L to the pink door.
If you don’t see a TV with
a picture of a red door with horns on each side, then turn around and go through
the orange door again. Turn R, F, F, F, L, F, R, F, F to go through the
red door. Repeat the steps as listed above, which are: After entering the
red door, go F, R, F, F, L, F, F to the yellow door. Go L, F, F,
F, L, F, F, L, F, L, F to the white door. Go F, F, R, F, L to the blue
door. Turn R and enter the green door. Go F, F, F, F, F, L to the pink
door. You will see the floating TV with the horns on both sides of the red
door. For some reason, we have had to repeat this part twice. Sometimes it
works the first time, but not always. After you see the TV showing the red door
with the horns, go F, F, R, F, L, F, F, R, F, F, to the red door with horns.
The game will take you back to the hotel, and you will be outside. Go in the
door that says ENTER.
At this point, you have just completed Part 6, and
will be automatically "kicked out" to Windows. You can find the game
in Program FilesHeadgamesInherent Evil and will be able to click on LOAD, then
on Part 7: Gerald.
Part 7: Gerald
Frank
was calling from a window on the second floor. Check it out!
When you get
to the second floor, turn left and go into the open room. There is no one at the
window, but when you turn around you will notice blood on the floor. Click on
the bloody spot on the floor.
Trapping the dragonfly and getting the piece
to the seal: Go out to the garden and place the trap on the right side of the
fountain. You will see the eyeball and then the dragonfly. Place the bait in the
trap and lower the top when the dragonfly goes inside. Go to the fourth floor.
Door 401 will be open now, and you can go through. It takes you to the roof. Follow
the eyeballs in the center of the furnace, and you will find the place to put
the dragonfly. After placing the dragonfly in the center, click back and look
at each of the side panels to the furnace. You will find a piece to the seal on
the right side. When that has been added to your seal, you will again see the
dragonfly. Follow the dragonfly back to the fourth floor, in the elevator. Watch
the floor indicator as it moves to the lobby. Go to the lobby, then see the dragonfly
enter the dining room. Follow it into the dining room and watch it enter the kitchen.
Follow it again. It will drop the key into the sink. Look under the sink. You
cannot get the key yet.
Go to the third floor and check out room 310 again.
There is a red box in that cabinet with a combination lock. Look at the radio
for a hint (4420). Take the tool from the red box. Looks like it might be useful
in the basement.
Go to the basement and to the furnace/air vent in the
rear of the basement. Click on the left side of the furnace and zoom in on the
shutoff valve. Use the tool to shut off the furnace. Go inside the furnace and
pick up the wrench.
Go to the kitchen and use the wrench on the pipes under
the sink. You will get a key to room 209.
Back to the second floor. Use
that key to enter the room and then click on that blue box. Read the sign and
hold on tight!
After everything calms down, you can look in the box
and get the diary page and another part to the seal. Leave the room and you will
walk into Frank’s ghost.
At this point, you have just completed Part 7,
and will be automatically "kicked out" to Windows. You can find the
game in Program FilesHeadgamesInherent Evil and will be able to click on LOAD,
then on Part 8: Closure.
Part 8: Closure
Enter
the Access Code (GILWIEMINECKKINPECFAU8) to begin the final part of the game.
Ask the following questions of Frank’s Ghost: How? and Where is the hidden
place? You can restart this part in order to ask the other questions, if you wish.
Go up to the fourth floor. Turn and face room 400. Click on the end table to the
left of the door to room 400. Get the TV remote control. Go to the first floor.
First floor: Turn R and go to the end of the hallway. Go into room 105.
Move toward the TV, zoom in on it, and use the remote control on the TV. Put the
remote control back into your inventory. Now go to the lobby. Find the roll of
blue film behind the counter on the floor and click on it. Since the remote control
remains in your inventory, return to Room 105 and use the remote control once
again on the TV. Return to the elevator, and go to the third floor.
Third
floor: Go to Room 302. Move F, R to the TV. Use the remote and return it once
again to your inventory. Use the stairs to reach the second floor. Go down the
hallway all the way to the room on the left that has no door. Touch the blue film
roll. Make your way to the third floor. Use the remote once again on the TV in
room 302, then on the TV in room 310. Go to the lobby and make your way up the
stairs and exit the doors that lead to the balcony area. Touch the blue film roll
again.
From the balcony on the main lobby floor, make your way to the elevator
and room 308 (L of the elevator). Move F, L, L, and click on the TV. Use the remote
one last time (thank goodness, huh?).
Hop in the elevator and make your
way to the lobby and then the basement. Once in the basement, go F, FL, F to get
the film from the sink. Exit the basement and head for the ballroom.
Ballroom:
With the roll of film in your inventory, move up the stairs and all the way to
the doors that lead to the balcony area. Turn around and you will mysteriously
see the film projector appear before you. Be careful not to move forward, but
instead; click on the eye of the projector where the roll of film will be placed.
Zoom in on the projector and put the film roll in the projector. Watch the video.
Lobby: On the wall to the right of the dining room doors is a painting
just above a chair. Click on that painting and get the diary page and read
it. When you’ve read this new addition to the diary, click on the date: 12-9-23.
This is a combination to one of the two safes in the hotel. Now move down to the
basement.
Basement: move F, L, F, F, L, F, L, RF to the closet. Turn around
and zoom in on the safe. Click on the dial. Get the final piece of the seal. Move
back from the safe, turn around and move toward the closet where you got the fishing
pole much earlier in the game. Open the cabinet and click on the rear wall.
Hidden
room: Move RF, and zoom in on the top center of the well. Listen. The game ends
in about 10 seconds after the video sequence from Gerald and Sarah. You can close
the well and seal it with the sealing device, or you can leave it open with the
souls remaining. To close the well and seal it, do the following:
When Gerald and Sarah have finished talking, click your cursor on the outside
edge of the well lid. It will close and you will see a close up of the well lid.
Use your seal from your inventory on the center of the lid. The end credits will
roll.
The original of this walkthrough is located here.
To visit Linda Shaw’s home page, click here.