Dreamfall: The Longest Journey

by MaGtRo about 59 minutes to read


Dreamfall

The Longest Journey


by Aspyr and FunCom

Walkthrough by MaGtRo    May 2006
Version 1.01


Gameplay:   
This is a keyboard (or gamepad) – mouse driven
third person game. It is highly recommended that you read the manual that is
included in the game or the .pdf manual that is installed with the game. The
manual gives the background and descriptions of the characters in the game. The
game comes in 6 CD-Roms and needs CD1 to in the drive to play.

The main
menu has New Game, Load Game, Options, Credits, Exit and later Continue Game.
Pressing the ESC key during gameplay accesses the main menu. There are unlimited
saves slots.

The Options
Menu has sound, game, video, keyboard, mouse, pad and exit selections. It is
also highly recommended to play with the adjustments under Options to
personalize the gameplay to your needs. Other problems can be solved using the
variations under the option menu.

Becky
recommends and I used:

Game
Settings:

Camera
Behavior (mouse) – Normal

Camera
Horizontal Axis – Inverted

Camera
Vertical Axis – Inverted

Mouse
Settings:

Mouse Mode – Camera

Mouse Overall Sensitivity – 1/3 on the line or default

Character Movement Sensitivity – 3/4 on the line or default

Camera Sensitivity – 3/4 on the line or default

To move,
use the directional arrows or the WASD keys. Press-hold the shift key to walk.
Press-hold ctrl key to sneak. Inventory is accessed by the tab key. Press the m
key for the mobile that has the e-mail, the dialogues and notes to self. For the
focus band, the q key is for the next focus and e key is the previous focus. The
pause key pauses the game. l key is for light attack, k key is for heavy attack
and the space bar is for blocking.

If you wait
a while on the main menu, a trailer of the game with great music is seen. Pressing the space bar
once to skip the intro and dialogues and press the space bar twice to skip cutscenes.

Right click
to open the game focus band to check out things in a location. The character
cannot move during this time. Right click again to toggle it off.


Tainted


Monastery
: Play as Brian Westhouse.

See Brian
Westhouse in a Buddhist monastery cell. He is embarking on a journey and is
writing a journal as a map for anybody that will follow him. A monk calls to
him. See a square with an eye icon on the bed. Click to hear a
description of the bed. Right click to see an eye icon on top of the screen.
Move the game focus band around to check all the items in the room. Move the
game focus band on the journal and click. Brian had asks the monks to take care
of his journal. Right click again to toggle off the game focus band.

Exit the
cell and follow the Buddhist monk. Using the WASD keys or directional arrow on
your computer, exit the cell. Check the Mani wheels on the wall. Follow the monk
to a room with a circular podium. Enter and look around. Right click to focus
beam
the room. They are whispering something. Step on the dais, traveller. Go
up and enter the circle.

Brian
arrives in a desolate ice covered place. Talk to a tattooed man. The Undreaming
has found Brian. What have you done?


Chapter 1: One

Casablanca: Play as Zoë.

In
a hospital, see Zoë Castillo in a coma. Her father Gabriel watches.

Home:   
Two weeks ago, Zoë watches news. The Static is causing problems on this computer
driven land.  A vision interrupts the broadcast. See the young April Ryan
in one of her trial dreams in The Longest Journey 1. Find her. Save her.

Wonkers,
Zoë’s mechanical friend tells her that her mobile is ringing. Check the
bathroom, the balcony and the bedroom if you want. Check the bed and turn off
the in-window system. Talk to Wonkers. Take the mobile from the chair and
learn about the gym schedule. Open the closet and wear the only clean clothes.
There’s a backpack in the closet.

Exit the room and go down the stairs. Talk to
Zoë’s father Gabriel. You can check the kitchen, other rooms or
suitcase if you want. Click on door handle to exit the apartment.

Exit the
courtyard, balcony and go left down to the road. See the world of Zoë.
Press & hold the shift key to walk. The road sign is Jardin de Roses. You
can check the yellow mailboxes on each house entrance.

Olivia:   
Go forward and talk to Olivia at her Alien the Cat store. Since Zoë is
already late, so say not busy. Enter the store and look around. Check Liv’s
workstation and learn that Liv can work the wire. The overhead screen shows the
young girl. Find April. Save April. Zoë talks to Liv about it and Zoë’s
life. She has a hack that can keep the mobile invisible from the ‘eye’. You can
get it installed later.

Gym:   
Exit the store. The journal icon is seen on top of the screen.
This means that an addition is added to the journal. The journal can be accessed
using the m key. You can check the messages (envelope), dialogues (exclamation
point) and notes-journal (paper-pen) on this frame.
Use the scroll key to check other entries. To exit the mobile screen, click on
the X icon at top right. Go left down the path to get to the main
courtyard and fountain. Follow the girl that is going to the gym. Learn again
about the focus field in gameplay. Take the path right of Sushi-Ya,
forward, through the right entryway to La Place de Sucre. See chess players and
a cleaner robot. Go forward; pass by a taxi stand and benches and up the stairs.
Enter the door to the gym.

Fight
with Jama:
    Talk to Jama who is doing her Tai Chi. This
fight is a tutorial. You can practice as many times as you want or quit
immediately after the first fight. I used the keyboards on this fight sequence.
Use the arrows or And D keys to move left or right to evade her kicks. Once Jama
is clear – move forward (W key) and center on her, then use either l key (light)
as rapid as you can or k key (heavy) to administer your kicks. The left and
right mouse keys do the same actions. You can also block using the space bar.

Practice
several times to familiarize yourself with the keys and to watch the opponent
move. Learn also the timing of the kicks and where the best position to be when
applying the kicks. There is a bar on top left for your character and one at top
right for the opponent that shows the success of the fight. The first complete
red bar loses.

You can
talk to Nia and Aaralyn if you want. Go towards the stairs and see the now
familiar video on the screen. Find April Ryan. Save her.

Reza:   
Go down the stairs. Outside, Zoë gets a call from Reza, Zoë’s
ex-boyfriend. He wants to meet you at Moca Loco at the center of the town where
the fountain is located. Go forward, up the stairs, forward on the path and to
the courtyard. Go to Moca Loco opposite Sushi-Ya. Talk to Reza sitting on the left
and is on his mobile. You can invite or not, he will be busy with work. He wants
a favor. You can refuse or help; it will be the same end. Reza wants a package
picked up at in a company named Jiva at Seshadri Building and to talk to Helena
Chang.

Go back to
the taxi stand by the benches at La Place the Sucre. Enter the free taxicab.

Jiva:   
Go forward to elevator and use the button to call an elevator pod.

Talk to the
suspicious high strung ?receptionist. See a Chinese woman on the screen that
needs help.

There are
several ways to interact with the receptionist:

1. Best to
distract the fake receptionist and then plead or barter. When she enters the
side room, go to the door pad and close the door to lock her in.

2. If you
tell her about the screen. She will call out to Kano. You have to fight her. The
fight with her was fairly easy. Move to face her and do rapid l (light) or k
(heavy) kicks. She will be knocked out cold.

3. If you
select get out, the result will be the same as #2 – she will see the screen and
fight.

4. If you
distract, plead or barter, then go to the glass door and do the console to open
the door, she will see you and the fight starts.

Try to open
the glass door at the other end of the room to get to the corridor. Go to and
face the computer console and unlock the door. Enter and see a man doing
something to the glass chamber where the woman – Helena Chang is kept. The man
runs away.

Helena
Chang
:    Click on the door to see if you can open the glass
door. There is gas released to kill Helena. Helena points
above. Go to the stand on the left, climb up to get to the roof of the glass
chamber and open the lid of the control box at center. Click to turn the lever.
Go down and pull open the glass door.

Run back to
the reception room and see that Helena states that access to this floor has been
tampered with. After Helena uses the computer for a workaround, press the
elevator button to call a pod. Enter the elevator.

Talk to
Helena about Castillo and learn that she knows a Castillo. She gives the
package
for Jericho-Reza. You can open or not open the package. The package
contains a datacube. Call for a taxi using the yellow call stand.

Reza’s
apartment
:     Go to the path left of Sushi-Ya, left, go
forward up the stairs and enter the building on the left. Check the mailboxes on
the wall by the stairs. Reza’s apartment is #8. Climb the stairs and go right.
See a cat that leaped out the window and his opened door. Enter and see a dead
woman. The screen shows the young girl scene again. Then see that the Eye
commandos are downstairs and will be up soon. The cops took Zoë.


Interrogation
:    Whatever answer you give will result in Zoë
telling them everything.


Chapter 2: Lost

Zoë’s
Home:   
Zoë tries to get hold of Reza and her dad on the
mobile. Enter the bedroom. Wonkers will give a prerecorded message from Reza.
Zoë is to get the hidden updated copy of his notepad in his apartment. Lucia, Reza’s Watilla
can find the notepad for her. Reza also mentioned to go to ‘you know who’. You can talk to Wonkers again if you want. Exit the house and get a mobile message from Dad. Go
to Olivia at her shop.

Olivia’s
shop:
    Zoë will tell Liv everything. The apartment is sealed
by now. To work the seal hack, match the symbols at the bottom of the screen
with the exact same symbols in the matrix – one by one. Once the match is done,
the code breaker does the rest. Exit the shop and go back to Reza’s apartment
via path left of Sushi-Ya.

Reza’s
apartment:

Clamp on
Reza’s door
:    Go close
to the clamp. Open the inventory using the tab key and click on the mobile to
select it. Use the gear icon on the top of the selected mobile and Zoë will
use it on the clamp.

A
matching game frame appears. This is a random timed puzzle.

There are
3 symbols at bottom of the frame. One will be highlighted.

Find and
click on the match of that highlighted symbol on the smaller symbols on the top squares.

Do the
same for the second and then the third symbol.

Not
bad for a first attempt.

Enter the
apartment. See that the place is ransacked. Lucia is so excited to see Zoë but
she was fried by the surveillance spider bot. The bot needs to be disabled.

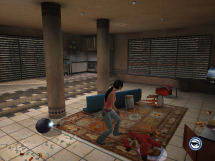
Spider
bot
:    Move forward and see that the spider bot will
activate.

Save game
here. Press-hold the ctrl key to sneak. Sneak around the
apartment to find a way to disable the spider bot. The spider bot hears very
well, so be careful about moving around broken glass and debris on the floor.

Move
around Lucia, towards the wall and then to the window. From here the floor is
clear. Sneak to enter the bathroom.

Look at the shower. Look at
the panel right of the shower. Use the panel to play music.

Click on
the shower door and the shower deactivates the spider bot. Zoë
one, spider zero.
Lucia:   
It’s time to fix Lucia. Take Lucia’s brain and power source – Watilla parts
and see that her battery and processing unit have been fried.

Go to Olivia’s
shop. Give her the Watilla parts by using the tab key, select parts and then the
gear icon. Both parts are not usable. Liv gives a battery but you need a
working Watilla to access the back up crystal.

Go back
home by going forward from the shop and enter the last house on the right. Go to Wonkers and ask him to sleep. Promise!
Zoë takes Wonkers’ brain.

Go back to
Reza’s apartment and place the battery and power source on Lucia. Talk to Lucia
and Zoë will give the password. Follow Lucia and she will open the safe on the
floor. Pick up the notepad.

Two women
(twins) suddenly appear. They didn’t say a word and after listening to an
unheard message, Zoë is released. Take the encrypted notepad from the
floor. Talk to Lucia and take Wonkers’ brain. Exit the building to go to
Olivia. See the same cat that run out of Reza’s apartment.


Encrypted notepad:
    On the way to Olivia, a message came
through the mobile. Check the message and read that Jana has cancelled future
appointments. Give the notepad to Olivia at her shop. The last entry was easily
decoded – Venice, Newport, The Fringe, Charlie.

Go to your
home and up to the bedroom. Place Wonkers’ brain back on him. Take the
backpack
from the closet.


Northland:

April Ryan:   
Play as April.

It’s
snowing. The enemy is near. April and her band are waiting for the enemy.

The game
can not be saved on this part. A fight ensues. As April, you need to fight 2
consecutive guards.

My tactic
is to move forward to get close and face the opponent. Then use the k key
continuously. Fight the guard that is standing alone.

After the
first guard is taken care of, look for the next guard with no opponent.

They will
be going to Marcuria.


Chapter 3: 201


Venice, Newport:

The
Fringe:
    Zoë is in Newport and is facing
an alley. Go forward to the alley. The sign says Venice Crossroads. See a
familiar area, turn left and forward to the Chinese man at the corner tent. He
gives direction about where the Fringe is located. Check the mail from Carlita.

If you
want, go to the tent at the other corner on the right and talk to young girl.

Turn to the
right to go the other side of the Crossroads. Cross the planks and
go left to see The Fringe ahead. Go forward and check the completely, irrelevant
door on the left of The Fringe.

Use the
buzzer and Zoë will ask for Charlie. Inside, the receptionist tells where
Charlie is. Go right of bar and talk to Charlie sitting alone. Plead to get him
to help you. Learn about Reza, The Victory Hotel, formerly the Border House.
Learn about Fiona, the canal under the hotel and backyard. Talk to him again and
learn about the changes in The Fringe, Venice, VAVA. It nice to reminisce about
what happened to the places seen at TLJ1. Learn where the Victory Hotel is located.

The
Victory Hotel
:    Exit The Fringe. Go forward and right to
get back to the Crossroads. Go to the other side of Crossroads and climb the stairs right of the Chinaman. Go forward
across the bridge, turn right, forward, left to alley with a Bar Open neon sign. Go forward and right to the
2 side paths. Climb the
short stairs, go left, forward and right to the brown door (#4 above it) with
a buzzer. No one answers the buzzer. Ah… that bench – so many memories.
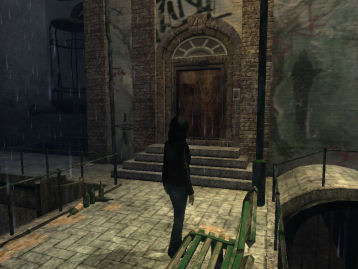
Backdoor
of Victory Hotel
:    Go left of hotel and down to the scaffolding at
end of the railing. Go down again to the water in the canal. Enter the tunnel
with broken bars right of the scaffoldings. Go forward and climb the metal ladder.
The gate has a modern padlock. The view pans to the back door with a bloody
handprint on it. Now, who knows all about modern gadgets? Call Olivia to help
with the padlock. To use the phone, open inventory and use the gear action. Liv
says to get a lockpick.

Get a
lockpick
:   
Guess who sells anything and everything. Go back to the Chinaman at the
Crossroads. Talk to the Chinaman. He will eventually trade for a cloaking
software for mobiles. Use the mobile again to call Olivia. Talk to the Chinaman
again and trade to get a lockpick. Go back to the padlock on the Victory
Hotel back gate.


Padlock on the gate:
    Use the
lockpick on the padlock.

See 4
circles that have 4 symbols each. Above and below each circle is a symbol.

The
object of the puzzle is to place a matching symbol under
the symbol above the circle and a matching symbol above the symbol below the
circle.

This is a
random puzzle and no save is possible during the puzzle solving.

Each
circle can transfer one symbol from one circle to the next circle via a side
hole.

One
tactic is to start at a circle on the end. Then check if there is a matching
symbol on that circle to the symbol above or below the circle.

Turn that
matching symbol to the side that does not have the side hole.

Then turn
the adjacent circle(s) to place the matching symbol to the one that doesn’t
have a match on the side hole.

Then turn
that circle to match the top and bottom symbol.

Work the
next circle the same way until all 4 circles are matched.

Do one
circle at a time. You can plan ahead and see what symbols are needed in other
circles and while doing the puzzle move those symbols closer to where they are
needed.

Guard
dog
:    Enter the gate and see a sleeping dog. Zoë
notes that the dog is not wakened up by the train noise.

The
object of this sneak puzzle is to not awaken the dog. If the dog awakens, go
back to the gate and down the metal ladder.

Save game
here. Press-hold the ctrl key to sneak. Sneak forward to
the door whenever the train passes by and rattles the game screen.

Check the
door and Zoë will see the bloody handprint.

Sneak
forward to
the shed right of the dog whenever the game screen shakes and the train
passes by.

Open the
shed door and get the axe.

Sneak to
exit through the gate.

Victory
Hotel:

Enter
Victory Hotel
:    Climb down the metal ladder and go right of
the ladder. Zoë will see a light through the boarded up window.

 See a
metal bar at bottom of the trash container. Use metal bar.

Go to the
other end of the container and get close to the container. Click on the
container to push it 4 times to get it under the lit window.

Climb up
the container and use the axe on the boards on the window. The axe dropped
inside.

Climb in
through the window. Go through the open doorway and see that it is dark in the
hallway. Go back to the lit workshop.

Torch:    
Pick up
the axe handle from the floor. Take some
filthy rags from the table.

In inventory, select the axe handle and
click on the wrench icon. See a + sign. Using the left or right arrows on the
computer, scroll to place the rag at center of the inventory selection. Click
on the rag to combine it with the axe handle to make a torch.

Look and
smell the cans on the table. The red can has petrol. Use the torch on the red
can with petrol to get soaked in petrol torch.

Go to the
furnace by the doorway. Use the switch on the side to get a flame inside the
furnace. Use the soaked in petrol torch on the flame to get a burning torch.

Basement:   
Enter the dark hallway and open the door. Go forward until the lit basement. See
blood trails on the floor. Follow the blood trail and the door opens. Zoë picks
up Reza’s lighter from the floor. Look at the security monitors and see
the young girl. She is pointing at the wardrobe. Save April Ryan. She wants
you to go to room 201 and that wardrobe.

Security
system of the building cameras:   

Use the
mobile on the monitors of the security system.

This is
puzzle is similar to the clamp on Reza’s apartment door. A matching game frame
appears. This is a random timed puzzle.

There are
4 symbols at bottom of the frame. One will be highlighted.

Find and
click on the match of that symbol on the smaller symbols on the top squares.

Do the
same for the other symbols.

Vinnie,
the man in
bright shirt
:    Exit the security room and climb up the
stairs to the first level of the building. Go forward a bit and the screen will
pan to show that there is a man wearing a bright shirt sitting
on a couch in the next room, pizza boxes and a pizza cooking machine. You can go to the pizza
machine and program it to go off faster. Eventually, the man will come to the
room and see Zoë. Talk to him.

These
are some variations that I found:

1. You
can mix and match the dialogue and eventually fight him. I did a similar
fighting tactic done with April and the blond baddie at Jiva. Move forward
using the W key to face and get close to the opponent. Use the k key continuously until he is
knocked out cold. This way gives you ample time to check the second floor.

2. Select
the dialogues: Vacancies, lie, calm and manager. He will allow you to look
around. This way gives less time to check out the second floor and you ‘might’
eventually have to
fight him later if you take time on the second floor.

3. Time
the pizza to finish. Quickly hide at the entrance to the basement. Sneak
behind him while he’s eating pizza and go to the stairs past the TV.

Second
floor
:    Go upstairs and see a girl on a mattress attached
to a machine in room 202. There’s medical equipment on the wall. This is not a
hotel, it is a laboratory. Go next door and see that April’s room 201 is locked.
Ignore the girl that came out of room 202. She is lost in her own world.

Go to the
other end of the hallway and into the bathroom. Take the handle off the
window. Climb the stairs to the third floor and see that the door is locked. Go
down and enter the room left of the stairs on the second floor. Use the handle
on the window. Climb out to the broken fire escape. See a red covered bed in
room 201 at the next window.

If you took
too much time checking things out and used the dialogue way to get to the second
floor, Vinnie might  come up and say you tricked him. You need to fight him.
Similar frontal assault won the fight for me. Face him, move forward and use the
k key continuously. The man will fall down and settle under the stairs. If you
use the fight way earlier, you will have ample time to find room 201 and do the
rest that follows. Or if you hear Vinnie come up, you can hide or sneak and he
will go away.

Third
floor
:    Climb the ladder left of the window to get to the
third floor fire escape. The rusty ladder falls off. Open window and
enter. See medical equipment on the wall. Exit the room and check the
other door on the left. A man in his shorts walks by, Zoë automatically hides. Go forward
and right to the bathroom. Take the filthy towel from the rack. If the
man arrives at the bathroom, go to the end of the bathroom by the shower and he
will not see you.

Exit the
bathroom and go forward to the hallway. Look inside the open room on the left
and see the man in shorts sleeping on dirty sheets.

These are
some ways to do this part that I found:

1. Take
the sheets and it will waken the man. This is an easy fight since he’s might
be drugged or still sleepy. Take the dirty sheets.

2. Wait
at the other hallway or check the other doors and the man will eventually leave the room. Take the
dirty sheets
then.

Exit the
room, left and go forward to the next hallway. See a window with a radiator
underneath. Look through the window and see room 201 with the red sheet on the
bed. In inventory combine the towel and dirty sheet to get a makeshift rope.
Use the makeshift rope on the radiator control. Open the window and climb down
to the second floor fire escape.

Room 201:   
Walk the fire escape ledge to look through room 201. Open the window and climb
in. Open the closet. Look at the picture of Charlie and 2 girls (April and
Emma). Take the videograph. Marcus enters and catches Zoë in his room. He
agrees to get info about Reza and they will meet at The Fringe.

The
Fringe
:     Go to The Fringe. Use the intercom and talk
to Charlie. Use the picture-videograph on Charlie. Learn about April, 201 and
Emma. Push on to get more information. Charlie will call Emma to talk to Zoë
and he will place Marcus on the guest list. Listen to what Emma and Charlie say about
April.

Zoë wants
to
call Reza on her mobile privately. Charlie says there’s an empty room upstairs. Climb
the stairs by the reception desk. Enter the last room and use the mobile. Marcus
arrives… with the twins. They attached Zoë to one of those machines.


Chapter 4: Winter

Dream
world
:    Zoë wakes up in her underwear in the place of the
young girl vision. Go forward to the house. The young girl is there. She drops
Zoë to the other world.


Subterranean City
:   

Trolls:   
Zoë wakes up in cave in another outfit. Look around and see buildings on the
other side of the water. There are 2 trolls in the cave.

There
are several ways to get around these 2 trolls:
1. Sneak around when the first troll is busy far from the pedestal and climb the
pedestal. Go down the steps when the other troll is in the water. Take the
glowing egg
from the stick and sneak towards the ledge.

2. Fight
with the 2 trolls using the frontal assault and the k key. Take the glowing egg
and go forward to the ledge.

3. Pick up
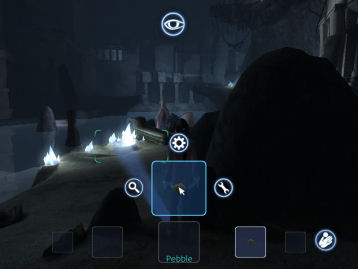
2 pebbles from the ground close to where you woke up. While the troll is
by the water far from the pedestal. Right click to use the focus mode, press tab to
get pebble and throw it in the water. Run towards and climb the platform. On the
pedestal, go to the edge, right click to focus and throw the pebble in the
water. Climb down the steps, take the glowing egg and go forward to the
ledge.
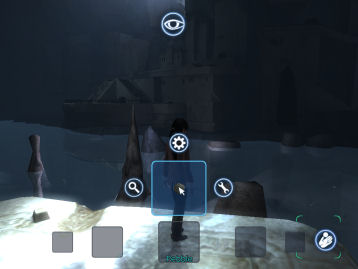
Waterwheel
:    Go forward to the end of the ledge and see a
giant waterwheel. Climb down the steps and look at the waterwheel. There’s a
platform up there. Climb the steps close to the waterwheel. Go forward and see a
broken ladder.

See a
machine on the right platform. Turn the wheel and see sparks come out from top.
Saved game here. Open inventory and place the glowing egg on top of the machine. 
Now, turn the wheel again and hear musical sound. Remember this sound. See that
the powered machine opens up the water flow. The water wheel turns. Stand to
left side of the machine and look up at the egg. Take the
glowing egg
off the machine.

Go down the
steps and use the water wheel. See Zoë hold on to one of the waterwheel board to
reach the top platform. Go forward and jump across the broken walkway. Go
forward and climb the ladder.

Glyphs
on the wall
:    At the top of the cliff by the waterwheel, go
forward to the very end of the cave.

See 3
glowing glyphs on the wall. Press each one to hear the sound it makes.

Remember
the tone heard when the waterwheel was activated. Reproduce that sound by
pressing the glyphs in correct order.

Press left,
middle, left and then right glyphs. A ring of fire opens up a door on the wall.


Marcuria:

 Cellar:   
Zoë comes out into an underground room. The door is locked from the outside.
Look at it and see that the door is not very solid. Kick it twice to open. Enter the
food and wine storeroom. Look around and note that the machine looks brand new.
Exit the storeroom and be at an Inn.

The
Journeyman Inn
:    Go to the main room and Zoë will have a
long talk with Benrime, the innkeeper. She wants you to talk to Minstrum Magda.
Blind Bob will help you outside. Brynn who is part of April’s band is eating at
the table. He overheard everything including the mention of April Ryan’s name
and left while talking to Benrime.

Tit for
Tat:
    Exit the Inn and have a good look at Marcuria. Talk
to Blind Bob begging across the steps. He is theoretically blind only. He wants
trade for his favor. He wants a boiling bottled of mulled wine and be sure that
it is made with Mrs. Mullins Mixed Spices.

Mulled
Wine:
    Go back to the Inn and talk to
Benrime. She will boil some red wine but you have to get the Mixed Spices from
the market. The spice merchant is on the first stall on the left at Ayrede
Avenue. To get to the market: go east towards the tower, once at the tower go
south and Ayrede Avenue leads all the way down to South Gate.

            Spice Merchant:   
Exit the Inn, go pass Blind Bob and be at the tower. The area looks very
familiar but without the stalls from TLJ1. Go forward, right on the road across
the tower entrance and forward to the South Gate. Note the Ayrede guards. You
can talk to them if you want.

Go
forward and look at the machine on the left similar to the one at the Inn’s
cellar. Go forward towards the gate and talk to the merchant at the first stall
(empty) on the left. He does not have any spices. The supplier is stuck on the
other side of the Ghetto, up Burrow Creek and below the Journeyman Inn. You have
to talk to AryKinryn, bearded fellow and ask him for the spices.

           
Get spice:
    Go back to the Inn. Go left on road
and then left of tower. See a man taken by the guards for selling medicines to
the magicals at the Ghetto. Go pass Blind Bob, pass the gate with the guard
(other entrance to ghetto) and
see the carts on the road. Talk to the bearded man. Hear about the
rebels-freedom fighters. He is not cooperative. He gives the spices.

           
Make mulled wine
:    Go back to the Journeyman Inn and
talk to Benrime. She tells you to go to the kitchen to mix the spices with the
heated red wine. Go to the kitchen and add spices to the cauldron on the
counter. Turn around and take the empty wine bottle from the table. Use
the empty wine bottle on the cauldron to get mulled wine.

Go outside and give the mulled wine
to Blind Bob. Talk to Blind Bob again and ask about Magda. He doesn’t know but
Crazy Clara would. Crazy Clara is at
Hangman’s Span in Crab Bend which is east of the South Gate towards Friar’s
Keep, the prison.

Crazy Clara and her baby:   
Go find Crazy Clara who might know where Magda is located. Go pass Blind Bob,
right from tower, forward to the South Gate, pass the spice merchant and left to
pass through the arch. Clara is at the bridge. Talk to Clara and find about her
baby taken by the westerling, the guards.

         
  Look for Clara’s baby – Go back to the Merchants Square by South Gate. See a beast turning a wheel at the center of the square. There is an
alley on the right between the 2 buildings. The guard stops you from entering
the alley. Enter the alley by walking behind the big beast. He can serve
as a cover so that the guard will not see you enter the alley.
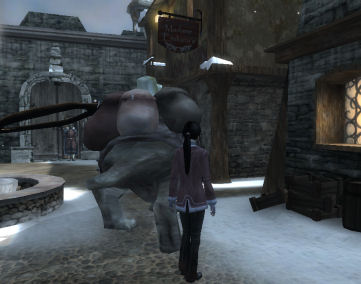
           
Get Clara’s baby – At the alley, look and release Clara’s baby from the
cage. It will
run out and scare the beast. The beast runs and the guard chases after it. Go back to
Clara. Clara and her baby are reunited. Talk to her about Magda.

Minstrum Magda:    
Magda is the Soup Lady at the Soup Kitchen for the homeless. Go back to the
Merchants Square and talk to the lady at the stall next to the spice merchant.
She says there are no Minstrum anymore in the city. Answer her with: Innkeeper
and Benrime Salmin. Talk to her about everything. Learn about the Azadi. You
need to go to Oldtown, the magic ghetto and find a practioner of magic craft to
open a gate.

Brynn-Worm:   
After talking to Magda, Brynn psssst at Zoë. He will take Zoë to Oldtown. He
promised no basement. Follow Brynn and get kidnapped.

April Ryan:   
Talk to April. See that Zoë disappears.


Sadir:

Kian:    Play
as Kian. Do the trial fights with the trainees. Talk to the trainees. After the
training fights, talk to red haired Garmon, Kian’s mentor. Child Ena tells Kian that the Six
asks an audience.

Follow Child Ena. Enter the door that
is guarded. Talk to the Six and learn about the mission. Kian is to convert by
shedding blood the leader of the freedom fighters – a Daemon named Scorpion.
When Kian leaves the chamber, the Six reveals that this is the last event that
is needed to gain the world to the Goddess.

Go back outside and talk to Garmon.

Chapter 5:
Alchera

The Fringe:   
Talk to Charlie and remember Marcus and the twins. Outside the club, walk
forward and get a call from Olivia about Reza concerning WATIcorp in Japan.

Marcuria in Arcadia: Play as
April.

Azadi Tower:    Chawan and April talk about the tower being built by the Azadis.
Scaffolding is erected close to the tower. After the talk, check the swords by
the door and the backpack on the bed. Exit the room and be intercepted by Brynn.
Talk to Brynn and he runs away upset. Talk to Na’ane standing by the room at end
of the corridor. Go down and exit the Inn.

Go left to the Tower and see the scaffoldings right of
the tower. Go forward to the area right of the round pillar which is right of
the scaffolding. Sneak around the pillar and go behind the scaffolding. See a
guard at the other end. Sneak behind the guard and be in a position close to his
back. Use the punch icon to get him out of the way or you can fight him. Climb the scaffolding and automatically be on a balcony.

Move to the glass door
that is ajar. Position April to be at the opening and then right click to use
the focus mode on the 2 people inside the room. Listen to the conversation
between Sister Sahya and the hooded man she calls Prophet. The Prophet gives
whispered orders.

At the bottom of the
scaffolding, go back to the front of the temple and see the Prophet. Follow him
and see that he enters the Journeyman Inn. Talk to Benrime at the kitchen. Go
down to the cellar and open the door. See the Prophet enter the gate to the
Subterranean City. Aprils dives through the fiery gate to follow the Prophet.

Wati City: Play
as Zoë.

Cable car:    After exiting the
Yamashiro Station, Olivia calls. The connection is bad. Zoë needs to get to the
WATIcorp headquarters at the other side of the canyon to meet Reza’s contact.

Go down and see that the bridge to cross the canyon is
not available – for employees only. Go back up, forward and check the Museum
booth that runs the cable car to the other side of the canyon. It is closed.

Go up the stairs and
look at the trash bin. The trash bin incinerates things dropped on it every 10
minutes. Talk to the man that is edgy. He is waiting for his fiancée.

Variations on the
talk to get Museum ticket:

1. Dialogue used with Kenji, the edgy man: museum,
girlfriend, work communication, talk, museum? – exactly. Yuriko arrives. He gives 2
tickets
to the museum.

Talk to the Riko, the little girl in pink about ‘sad’.
Ren and older brother left her and Hiro, a younger brother and grandma are in
the museum. Give her the other museum ticket. Riko is now in the cable car.
(Thanks, Mordack.)

2. Dialogue used with Kenji, edgy man: Someone,
reassure or ticket. Kenji tears the Museum ticket and throws it in the trash. Pick up the ticket
piece
twice to get torn ticket.

Go back down to the
bottom level and go to the vending machine left of the museum booth. Use the
mobile to get gum. In inventory, use the gum and get a sticker.
Combine the sticker with the torn ticket to get Museum ticket.

Here you can either go to the cable car with one
ticket or after waiting a while, go down and talk to the Yuriko, woman in brown
by the Museum booth.


Talk with Yuriko:

a. His fault, delayed, explain. Yuriko will give her
ticket and leave. You can either give Riko the other ticket or go alone.

b. His fault, tried or c. His fault, delayed,
guilt. Yuriko leaves without giving anything.

Go back up to the cable car. Use the museum ticket on
the ticket reader.

Enter the cable car to
ride across the canyon to the WATI Museum. Learn about the upcoming Project
Alchera. After exiting the cable car, get another call from Olivia. Learn that
the contact is Damien Cavanaugh. His associate is Rio Kuroki, a system analyst
and is the girl that is found dead in Reza’s apartment.

Museum:   
Enter the museum and note that the guard roams around. Hiro, the little boy
standing by the First BunnyBot display is reprimanded for touching the exhibit.
Look at all the exhibits.  The door at the back with a red hand scanner is
for staff only. Zoë wants to enter that door.

Enter the Staff door:   

Use the red hand scanner right of the staff door. The
guard comes over. Zoë would need Olivia’s help. Zoë mails Olivia. Check the mail
and see Olivia’s response. The contact is at 4th floor, section 2. Olivia
updated the mobile to open this staff door.


If only one ticket is taken:

Go to the First BunnyBot
display where Hiro the boy is looking at. Stand behind the boy to talk to Hiro. Give Hiro the
gum and then try to talk to him again.

Touch the BunnyBot exhibit. Again be reprimanded by
the guard. 

Talk to Hiro again. He agrees to distract the guard. Hiro enters the
exhibit and BunnyBot hops down and out of the exhibit.

While the guard is
distracted, use the mobile on the red hand scanner of the staff door.

If Riko has a ticket and you don’t have the gum:

Riko talks to Hiro and they argue. To prove that Hiro
is not a crybaby nor afraid. He enters the display.

Timed symbol matching puzzle:    This is the same random
timed matching puzzle as the other previous puzzle. Find the match of the lit
symbol at bottom to one of the symbols on the top. Do this to all symbols. Go
through the now open Staff door.

WATIcorp:

Staff entrance:   
See a robot scoot away. Check the mobile to recall where you need to go – 4th
floor, section 2.

Locker room:   
Go forward and see that someone forgot to close their locker. Take the
uniform
. Automatically change clothes.

Ventilation ducts:   
Exit and look at the ventilation duct used by the bots to go to different parts
of the building. Wait for the cleaning bot to come out. Then enter the duct and
come out to an overhead walkway.

Elevator:    Go across the walkway
and talk to the woman. Tell her you’re new. You don’t need to talk to anyone.
Enter the elevator to 4th floor. That was a funny elevator episode. Dry air
indeed!

4th floor:   
Be met by a flying bot. You need to be escorted, guest. You can hide using the
hide button on the side of the vending machine or corners whenever the flying
security bot arrives. Take a right, left, left and forward to the end.

One way to do this part is:    
Follow the bot from the elevator. Immediately hide (use hide icon) behind the
vending machine. Wait until the bot passes by. Exit the hiding place and
continue to go left. Go left at corridor. Go halfway (trigger for bot) and see
the bot come out of the double doors at the end of the corridor. Immediately,
turn around and go to the first vending machine you hid on. Hide again. Use the
mouse to change the point of view to check on the bot that is now at the end of
this corridor. As soon as it turns around, exit the hiding place and go to that
left corridor. Enter section 2.

Section 2:   
The sliding door opens. There are several cubicles. Go to the middle and see the
only man working there. Talk to Damien. Learn about The Dreamer, Dreamcore,
Static (the effect), Rio and Project Alchera (spy-control people). They need
evidence and you have to go to the WATI caves.

WATI caves:   
Damien states that you have 30 minutes to get to level -58 . He opens the door.
Damien’s instruction:
Go to sublevel 58, Damien will disengage alarm and you open the door. The
security bots will be alerted by the opening of the door. The rest of what is to
be done, Zoë knows.

Sublevel 58:   
Go down the stairs to 58. If you are early, wait. When the red light
turns green, open the door. Enter. Zoë sees a spider bot.

Search for PS-A1
panel:
    Listen to Damien’s instruction. Zoë needs to go
to the other side of the entrance where she is now. Look for PS-A1 panel to
upload the software Damien gave.

Note that the spider
went left to right. It is best to go the same route and not chance meeting the
spider headlong.

Go right, forward,
left corner (1), forward, left corner (2), forward, left corner (3), forward,
left corner (4) and see the panel on the right wall at middle of hallway.

Upload software:
   Open the panel; use the mobile on panel and the office doors
will be unlocked. Hear a sound. Listen to some more instructions from Damien.

Blue atom
door-laboratory
:    Now, to find the door with the blue
atoms:

1. Shortest way is
to turn to the right from panel and the blue atom door is at right at middle
of hallway. The spider bot might come soon so immediately open the door and
enter.

2. The long way is
to go around continue to the left of the panel and take 6 left corners and
the blue atom door will be on your left at the middle of the hallway. Open
the door.

Worm – blue capsule:    Now to get the
capsule. After the cutscene, turn right and take a blue capsule. In inventory, combine
blue capsule and worm to get encapsulated worm.

Go to medlab to be
scanned
:    Exit the laboratory. Go left 6 times or twice
on the right and enter the door with the green M sign.

Place the encapsulated
worm on the scanner on the top of a table on the left. Enter the big scanner
on the right and be scanned.

Search for core room
at Security Office:
     Go left through 3 left corners and enter the door with
orange sign with cross swords. See that the grid is on and there’s a woman at
the center of the building. The door is left opened.

Get a spider bot
of lower clearance from Cybernetics office:
     Go to cybernetic office by
going left through 2 left corners. The Cybernetic office has a red hexagonal
sign. Go close to the 3 spider bots on the left. Use the mobile on the
spider bots.

Now you are playing
as the spider bot. LOL! Exit the room and hunt for the security bot
patrolling the hallways. Once you find the security spider, press space bar
and the security bot is fried. Click again to get the higher clearance.

Get the spider bot
to enter the security office with the lit grid. Move the bot on the square on
the right. Click left mouse or space bar to deactivate the grid.

Ahhh, back to being
Zoë, go right 2 corners and enter the security office. That woman is still
there at the center. Go to the white coat on the chair. Use the coat to get an
orange datacube key.

Core room:   
Exit the room and go right through 2 right corners. Place the data cube on the
center of the red circle.

Decontaminate:   
The decontamination airlock is closed. Use the panel on the right. Enter the
airlock. Go forward and a cutscene is seen. It shows where the 2 scientists
are located. Save game here.

Sneak to go to core stand:    You
need to go to the stairs on the opposite side of the airlock, go down and go
to the core stand close to the stairs.

Wait and watch for the pattern of movement of the
scientists. The female scientist goes clockwise and stops in front of
airlock. She goes to right frame and back to left frame. The male scientist
also goes clockwise.

One way to get by is to wait for the female
scientist to be on the left side in front of the airlock, sneak towards the
core, sneak to the right and then run to the stairs.

Go down and go clockwise behind the stairs on this
level so as not to meet the male scientist.

Go around to the stand close to the stairs and
insert the encapsulated worm on the core stand. Watch the cutscene.


Subterranean City:
Play as April.

April used the rope to
go down to the lower level by the waterwheel. Go forward and down the stairs. Go
forward and see the Prophet rowing to the city on the other side of the water.
Find another way to that side of the city.

Platform door:    Go forward
towards the platform. See trolls climb the platform; sing to the door and the
door opens. If you are near the platform, they run away. If you hide beside
the platform, they can smell you. Stand on the path far enough not to be seen
but with a view of
the platform. Wait until a troll climbs the platform and then run to the door. By the
time the troll has entered, you can run in the still open doorway.

First chamber-altar:    
See the troll go to far left door. Look at door and see 3 symbols on the door.

Go behind the altar and use-hide

the altar to crouch down.

Right click to use the focus beam on door. Press space bar to get a
close up of the door. While still on focus mode close-up, wait until another
troll opens the door and April will note the combination of the door (R, L, M).

Runes and Statues chambers:   

Go down the stairs and see a statue with runes on a
wheel.

Go down the next stairs, forward and see a chamber
with 4 side passages. On the floor are runes that identify that side passage.
Similar runes are seen on the central post.

It is best to explore the area first to know what to
do.

Warning: There are several shy trolls that go
around. There are several stones or boulders that you can use to hide behind on
using the hide icon. If these shy trolls see or smell you, they call the
biggest, meanest beast you’ll ever see. These stones or boulders will not help
with the big troll and any fight with it is a lost cause. You will not win.

Places to hide from the big bad beastie:

Run back up the stairs you used to enter this level.

Hug the wall of the room with coffins right of the
statue at passage at right of the chamber.

If you hear him coming, run as far as possible to
another side passage. If he sees you, you’re a goner.

After it is made accessible, hide in the secret tunnel
on the passage right of statue on the left of the main chamber.


Explore the top & lower level:

The bottom passage has statue (#1) up the stairs you
used to enter the chamber. The passage seen across from here has a locked gate.

Go to the passage at right and see another statue #2
that has a circle with runes. Turn right from statue and see a room with
coffins. Here you can hide from the big beast if you stay by the wall. Exit and
go straight pass statue #2 and see a cracked wall. Use the wall 3 times. The
wall breaks and April falls down to a lower level.

From arrival place to this lower level, go left to
enter another chamber.

Go to the passage at right and see a gate that has an
oval shape empty slot at the center (maybe for some type of key). Exit this
passage to go back to the chamber.

Step up to the passage on the right (be at top level)
and across the passage you arrive on. Go left a bit and then go right to see
another statue (#3).

Turn around, forward and right. Go forward to see a
locked gate, the one across from the entry passage of the top level chamber.

Go right, forward, step down (lower level) and see a
gate that has 4 circles of 2 runes each. The top rune of each circle is the rune
found on the floor on the chamber above. The bottom rune is the rune for the
statues. The gate must be protecting something very valuable.

Turn around and take the earthen tunnel on the right.
Open the door at the end and go forward to see statue (#4) that is on the left
passage of the top level. Since you opened this passage from the tunnel side, it
can now be accessed from the other side (top level). You can hide here when the
big beastie chases you.

Open the gate with runes:

As seen from the runes on the gate, the top rune is
the location of a specific statue and the bottom rune is the rune that should be
turned to top position of that statue’s circle. Go around the area again and
turn the circle of those statues.

Start by turning the circle of  #4 statue left at
top level chamber to show the bottom rune seen at the picture above.

Then the circle of #1 statue on the stairs going back up to
the altar chamber  to show the bottom rune seen at the picture above.

Then turn the circle of #2 statue on right passage
from the top chamber to show the bottom rune seen at the picture above.

Go through the hole in the wall to get to lower level.
Go to stairs across the lower level chamber and turn right and turn the circle
of #3 statue to show the bottom rune seen at the picture above.

Once all the statues’ circles are turned to position
the correct runes on the top, a cutscene of the gate with runes rising up is
seen.

Exit from this place:

Go back to the gate with runes by turning
around from statue #3, forward and then right.

Enter the chamber of the gate with runes. Go forward to the sarcophagus. Use the
sarcophagus to see inside. Take the glowing egg. Look again and April
notes that the creature looks familiar, as with the statues and the body in the
coffin.

Turn around, forward, go down to the left, forward, veer right and right to the
chamber.

Go left to the gate with the oval shaped empty slot at the center.

Place the glowing egg on the empty slot of the gate. The gate rises.

Underground passage to other side of the Subterranean City:

Go forward as far as you can and then turn right. Climb the stairs to get to
topmost level. The door opens at the top.

Other side of Subterranean City:    Exit the room to the balcony. See the
Prophet seemingly talking to 2 of those big beasties. One of the beasties stays
up on the main stairs across from this building. The other is on the ground.
There are 2 staircases, one on each side of the balcony. You cannot outrun these
beasties and cannot win any fight with them.

Save Game here. Stand at top of the left stairs. Wait until you hear or
see the beastie come up the stairs to chase you. Run across the balcony to the
right stairs. Down the right stairs, forward and up the crumbling stairs across
the way. The stairs crumbles and the beastie will not catch you.

Continue up the stairs into the balcony. Go to the right crack on the wall of
the balcony. Jump down to the top of a column.

Jump right down to the floor behind the other beastie. Sneak to go to the back
of the hall. Turn right or left and forward to the mist.

April is transported to a place of thousand voices or dreams… April touched
the swirl and… What’s happening? What did I do?


WATIcorp:
Play as Zoë.

Core lab:   
Hear that the place is to be locked down. As soon as the cutscene stops, run up
the stairs and go around the ramp to the airlock. Wait for the airlock to close and
then open on the other side. Run to go outside to the hallway. Run until you get
near the elevator. When the cutscene of the soldiers coming out of the elevator
is seen, hide (use hide icon) in one of the ventilation alcove on outside wall.
Wait until the soldiers pass by and then run to the elevators.

While in the elevator, the elevators open to show the
guards. See the young girl again on the elevator screen.
Save me.

Chapter 6: Morpheus


Greenhouse
: Play as Zoë.

The elevator opens to a
large greenhouse. Go forward to the other end of the greenhouse. Save game
here.
Talk to the tremendously big person. Learn about him being the one
responsible for the dreams, taking dreams, about Reza and that Zoë is special.

Chase in greenhouse:
   Zoë is facing left. As soon as game control is available, move
the point of view to look left where she is facing. Run the
ramp left of the big person, left at the end of ramp (by wall) and forward to
the house on the right. Enter the house, forward to the door and open the door
to outside. Save game here.

Chase
outside:    Optional: Immediately turn to left, take the broom and
automatically use it on door. Go left, forward to
end (if the broom is used, you get additional bit of time to get here; if no
broom is used – just be fast) and climb the metal bin by the wall. Climb the broken wall and use-jump to the air robot
above the wall.

Zoë lands on a trash
bin. She calls Damien.


Marcuria
: Play as April.

Journeyman Inn:

April talks to Na’ane. Go to the other end of the hall and go down the
stairs. Talk to Benrime and she advises to speak to the Guardian of the Balance.
April can’t-won’t shift anymore. The White Dragon – White of the Draic kin can
help you get there.

Enter Brian Westhouse. Select any dialogue and learn
about his friend, a Dolmari that stated that he was at the Dark People Library.
While he was there he met a white haired woman that introduced herself as the
White of the Draic Kin.

Talk to Benrime again about everything. Learn about
the ‘news’ that the Six – Empresses are coming for the inauguration of the
tower, the Rose Court, Na’ane, Chawan and Brynn. Revenge is what April lives
for.

Ghetto – Oldtown:

Exit the Inn, go right and forward until the ghetto.
Talk to the merchants to learn some background. Go to the robed white-haired
merchant behind the blue flame and meet April’s old enemy – Roper Klacks. Talk
to him completely and learn about WWWA, EDWD syndrome and especially about his
book. Ask about ‘help’ – Dark People and Roper will say there’s a Shadowship
docked at the harbor at Shady Quay.

Shady Quay harbor:

Turn around and forward until the harbor. Talk to the
scarred, hooked Captain that helps the rebels right of the dock.

Walk the dock and talk to the Shadowship captain. He
is just a robe. Dialogues can be redone. Ask about wave and about ‘pay’. Then go back to Roper Klacks. He gives his book: My
Wizardin Days are Over. Go back to the Shadowship captain and give him Klack’s
book. Step aboard.

WATI city: Play as Zoë.

Damien’s apartment:    Zoë and
Damien talk. Alvin Peats, the founder of WATIcorp is the tremendously fat man at
the greenhouse.

Marcuria: Play as Kian.

Tower:     Kian is greeted.
Go up the tower. Kian talks to the Emissary about his mission and Scorpion.
Commander Vanon arrives. He does not like Kian Alvane, who is an orphan and rose
in rank fast at Sadir’s court. Kian will be followed during his mission at
Marcuria.


Chapter 7: Destiny

Dark People’s City: Play
as April.

April is greeted on her arrival at the city. The Dark
Person doesn’t know why the captain didn’t recognize April as a wave. The White
of the Draic Kin is at the library. Follow the Dark Person through this
interesting City.

Library:    The Dark Person left
April by the desk. It will call the White of the Draic Kin. Meet April’s companion at TLJ1. Talk with Crow.

Wow! She has changed! The White Dragon arrives. She is
the only one left. She cannot hear the other dragons, the Blue Dragon. Talk
about sister, Hunted and Enemy. Answers will be given before asked. Shifting
might be forgotten but not lost. Crow is needed to go with April to the
Guardian. The White Dragon will open a gate. April closed her eyes and with the
help of the White Dragon, opens a portal. She still cannot shift. The portal will stay open but
will exit to Marcuria.

WATI city: Play as Zoë.

Damien’s apartment:    Zoë wants
to be attached to the dreamer and be given Morpheus. She wants to contact April
again.

Guardian’s Realm: Play
as April.

Tower:    Go forward and climb the
tower. Talk to Gordon, the present Guardian. The Balance is undisturbed but
dreams passes through to Arcadia and Stark. Dreams make up the fabric of the
Cosmos. Everything begins in Dreaming.

WATI city: Play as Zoë.

Damien’s apartment:    Zoë is
given the drug and is attached to the dreamer.


Dream
world:    Zoë wakes up in her
underwear again in the place of the young girl vision. Go forward to the house.
The young girl says You must save April Ryan. Again, Zoë falls through the ice.


Chapter 8: Convergence

Marcuria:

Shady Quay harbor:    Kian is attacked by 2
men. Fight them with frontal assault (w key) and a mix of rapid k and l
keys. Kian interrogates the OldTowner catlike businessman. Ask about Scorpion
and learn also something about the rebels. A soldier arrives to tell about a
witch that is caught and should be questioned at the Friar’s Keep, East side of the city.

Exit the alley and turn left to get to Oldtown market.
A running Brynn bumps Kian on the way.

Journeyman Inn:    Play as
April. April is in discussion with Chawan. Brynn runs in and says that Zoë was
taken prisoner to Friar’s Keep.

Friar’s Keep:     Play as Kian.
Kian asks to interrogate Zoë. She is questioned by Kian and he believes her
innocent. He will try to get her released. The ‘independent body’ or warden of
Friar’s Keep wants her transported to Sadir. Zoë goes back to prison. Exit the
prison and follow the snowy path down, pass Crazy Clara’s abode and see April
coming.

        Kian stops
to talk to April. He thinks he knows April. A heated discussion of the state of
affairs in Marcuria ensues.


Get Zoë out of prison:

Play as April.     Walk up to the
entrance of the prison. Enter the break in the fence on the right. Talk to Crow.
Crow flies to look for Zoë.

Play as Zoë:     Talk to Crow.
Later use the door and talk to the prison guard. He will leave the door’s hatch
open and expects to get a song later. Check the door and see that it is locked
and bolted from the outside. Talk to Crow.

Play as April:     Talk to Crow
and decided to talk to Roper Klacks about potions. Go to Oldtown and talk to
Roper Klacks about 2 potions: knock someone out from a distance and something to
melt metal. He gives smoke bomb and acid. Go back to Crow at
Friar’s Keep and give him the 2 potions.

Play as Zoë:     Take the 2
potions from Crow: smoke bomb and acid. Only the strongest
myrsnick survives
.

Use the acid on the door. Exit the cell.


Take care of the jailer:

1. Walk out once and see a cutscene of the jailer.
Sneak to the left and approach the jailer. When you’re a bit close enough to the
jailer, right click to be in focus mode. Then use the bomb while still in focus
mode. Variable: If you do not use the focus mod, sneak clockwise (long
way around) and get close behind his back. He will not see you and throw the
bomb.

2. Or you can fight with him but you have to have lots
of energy and never get hit twice. It will take a while to lower his energy,
lots of dancing around and a lot of defeats. This fight is next to impossible to
win.

Take the prison keys from the jailer that is
out cold. Use the prison keys to open the grilled door at right. Go forward and
climb down. See a cutscene of the jailer at the next lower level asking for
food. Run back to your cell and tell crow. Crow flies out to tell April.

Play as April:    Go to
Journeyman Inn. Talk with Benrime and she will give a sandwich.
Optional
: Go to Roper Klacks in Oldtown and ask for a sleeping potion. He
gives Bed-D-Bye, a sleeping potion. In inventory, combine sandwich and
sleeping potion to get poisoned sandwich.

Go back to Friar’s Keep. Use the speaking tube right
of the door. After the talk with the warden, climb up to first level. Go around
to the other side and open the gate. Enter the boiler room. Go to the right and
use the lever to open the food elevator. Use the (poisoned) sandwich on elevator
and use lever again. The second level jailer starts to eat the sandwich.

Play as Zoë:    Go to the gate
and down to the second level. Use the prison keys on the gate. Variable:
If you did not add the sleeping potion on the sandwich – sneak around the jailer
here. If you added the potion on the sandwich, you can stump all over and he
will not wake up.

Go down to first level and again use the prison keys
on the gate. Go down once more and meet with April.

Play as April:    Go and enter
the door left of the main entrance to this level. Be at the kitchen. Enter the
door on the left and see a big crate. April needs help to push it. Use the crate
and April will ask Zoë to help push the crate.

Play as Zoë:    Climb the crate
and see a metal hook on the wall. Go down and take the rope on top of box
right of the open door. Climb crate and use rope on metal hook. Use the rope to
climb out. Follow April.

Zoë and April have a heated discussion. Crow decides
to follow and help Zoë. Zoë talks with Crow. As Zoë’s sidekick: I provide the
banter and commentary and you do the stuff. Ask about sidekick – hairy
man-child! Hahahah! You can look around before using the dialogue – suggestion,
Westhouse and go. You can look at all the different people at Oldtown and get
funny quips. You can take 2 routes to get to Market Square and South Gate. The
path on the right of Roper Klacks will lead to the gate at Market Square or the
other path leads to the Journeyman Inn. On the way, Zoë sees a guard at
Journeyman Inn. If you take the direct path to the Market Square – South Gate,
the Kian-Journeyman Inn sequence will be after the Airship event below.

Journeyman Inn: Play as Kian.

Kian enters and will search the second floor for
rebels. Enter the door to the right and fight 2 rebels. Use the frontal attack
(w key) with rapid k and l keys. After the fight climb stairs. Go to the room on
the right at end of hallway. Kian talks to Na’ane about Scorpion. Oh My!

Play as Zoë.

South Gate: Go to South Gate or the merchant’s
square and go behind the stall at right close to the city walls. See Brian and
Crow. They decided to go to the White Dragon at the Dark People Library. Brian
takes them aboard an airship.

Airship:    Have a talk with
Brian about everything. Learn some back-story. Enter the hold.


Chapter 9: All That We See or Seem…

Dark People City:
Play as Zoë.

Library:    Follow the Dark
Person to the Library. Talk to the White Dragon. The White Dragon is affected by
Brian. Zoë is here and not here. Faith will bring you there. This isn’t a
dream but you are dreaming. You have a strong connection with the world of
dreams. Zoë disappears.


Chapter 10: Crossroads

Swampland:

Play as Zoe:    Run the
boardwalk and before the shipwreck, firework is shot to the air. Run the board
again as far as you can go and go left at the platform. See and call out to
April on the other boardwalk.

Play as April:    April talks to
the Captain. They were attacked and got hit badly. After the talk, go forward,
right, left and climb up the tree. Take a left, forward, down and see Kara
talking at the platform below. Talk to Kara, the head of the Council here at
Swampland. April was told a lot of hard truths.

Go up the ramp behind Kara, forward and left down
another ramp. Go right, forward and meet Na’ane. Talk with Na’ane. A man, a
messenger is at the West Pier to talk to April. Oh My! Guess who that messenger
is.

Go forward (back of Na’ane) until the firework is
fired into the air. See someone…

Play as Kian:   No one will attack
Kian. Go forward, right to small hut and down the stairs on the right of hut. Go
right, forward and left down the steps to the platform. Forward to another
clearing, left down another ramp (fireworks) and right to meet with Na’Ane.
For what I have done, I am already dead
. Go forward as far as to the end of
the pier and meet April.

——–Watch the scenes…. April, Kian, the Azadis,
Zoe, Chawan, Brynn and now the White Dragon.


Chapter 11: Faith

WATI city: Play as Zoë.

Damien’s apartment:   Go to the
computer console and use it. The interference is in Russia, outside St.
Petersburg. Get a voice mail from Dad and Zoë answers. Go to the bathroom, door
left of fridge to change clothes. Leave the apartment.

Outside St. Petersburg, Russia:
Play as Zoë.

Factory:    Zoë stands outside
the factory. Go forward and check the gate control. It can not be hacked by the
mobile. There’s a car wreck and an ancient phone booth in the area. Go to the
right, enter the fenced in area. Climb the crates close to the fence on the left
and realize that the fence is electrified. Check the metal ladder- fire escape
that goes way up to the roof at corner of the factory next door.

Get inside the factory:

Outside:    Check the car close
to the left wall and see it still has some power.

Lockpick circle match puzzle:   
Go to the right tire area and see a panel Use the lockpick on the panel. Do the
matching puzzle of the top and bottom symbols on each square.

Mobile match symbol puzzle:   
Once the panel is opened. Use the mobile to get the car going. This is the same
puzzle as before – look for the matching symbol on the squares above to the
highlighted symbols at bottom row. Then click on the match. There are 7 symbols
to do.

The car backs up and stops under the ladder of the
factory next door. Climb the crates by the wall and then up the front part of
the car. Move to middle of car roof. It is easier to see the fire escape in
focus mode but can also be seen on regular mode.

Roof:    Climb the fire escape,
turn the corner and climb the metal ladder to the roof. See a flying security
bot. Let the bot pass by and follow behind it. At the next corner is another
ladder.

Climb the ladder and be on a ledge. Go to the last
letter that is about to fall at the end of the ledge. Push the letter and it
breaks the skylight below.

Go down and make your way to the broken skylight. Be
careful of the robot. It patrols counterclockwise. Wait until it just passed by
and run to the skylight. You can stay midway the ladder or hug the big air duct
at the corner until the robot passes by. Run to the skylight and climb down.

Inside factory:

Catwalk:    Get a message. Read
the mail from Olivia. She is in hiding. Go to the extreme right catwalk and go
down the ladder until the production floor.

Production floor:    Look around
and see old-fashioned production line. The room on the left has panels that
controls the production line. The door on the corner wall is not active.

Remove the grate:    Go down and
around the other side of the production line. At the middle of the wall, turn
left and see a panel under a green light. Open the panel and switch the power on
from red to green. Now the production line has power.

Go further to the right and Zoë will say that she is
standing exactly where the source of the virus is located. It must be below.

Look at the grate close to the wall. It must be an
access to go below this floor.

Go back to the control room. The right panel controls
the movement of the winch in 4 directions. Use the arrows to move the winch
directly over the grate. Then use the down arrow of your keyboard to exit the
winch control.

Go to the next console, it controls the up-down of the
winch. Bring the winch down as seen in the cutscene.

Go to the winch and arrange the hook on the grate. Go
back to the control room and move the winch up and see that the grate is pulled
up.

Go down through the opening on the floor.

Source of virus room:   There’s a
door on the left, lockers on left wall and a desk with console at the center.
There is a glass enclosed bedroom on the right. Look inside the open drawer of
the desk. Take the small key. Use the key on the first locker on the left
wall. Take the access card.

           
Bedroom
:    Use the access card on the reader left of the
door right of the enclosed bedroom. Use the reader to enter the bedroom. The
small dollhouse looks familiar. Take the datacube from inside the
familiar dollhouse. Look around at the child’s drawing and bed. They kept a
child here on a bedroom with one way glass walls. Exit the room and use reader
left of the sliding doors.

           
Datacube
:    Go to the far console and use the datacube.
Watch Dr. Parks’ report on Faith. JIVA created Faith and WATI HQ used her for
experimental purposes. Go back inside the bedroom and look around. The dollhouse
is the one Faith recreated in her dreams. Exit the bedroom.

Exit the factory:     Use
the access card on the reader left of the glass door at the corner of the room.
Climb upstairs, use access card and run to the door right of the control room.
Use access card on reader and exit through metal door to outside. Go to the main
gate and use the access card on reader. Enter the taxicab.

Chapter 12: Reversal

Casablanca: Play as Zoë.

Moca Loco:    Talk to Karen and
find out that syndicate people – EYEs are looking for you. Reza’s apartment and
Liv’s store are closed.

Zoë’s home:    Go home and get a
phone from Dad as soon as Zoë enters the house. Watch the cutscene. Well,
connect me to the Dreamer
.

Chapter 13: The Longest Journey

Dreamworld:   
Zoë is back in Faith’s dream. Go to the house. Faith and Zoë…

After the Credits, there is a short clip.

So many Goodbyes…

It simply is.

The Undreaming is Unchained!

The future awaits us.


This document may
not be distributed without express written permission of the author and the
content may not be altered in any way.

For Questions or
Comments on this Walkthrough,
Please write to:
MaGtRo

Copyright © 5/06
MaGtRo

Other guides for Dreamfall: The Longest Journey