Dead Reefs
Go and enter through
the door. See Clarissa say Edward and she entered the opened door.See tracks on the
ground. Enter and see poor Clarissa. The necklace is broken.Exit and go back to
the main path. Go to the bottom path and climb the well at the end.At the cemetery, use
the map to go to the pier.
Lighthouse:
Time to search for Edward.
Inn – Go to the
Inn and talk to the innkeeper about Edward. He says go to the lighthouse and
look for Edwards in the mountain.Lighthouse –
Take the path behind the Inn or use the map.Enter the lighthouse.
Go right and talk to Neal. He dropped his spyglass somewhere.Exit the room and
climb the stairs to the top of the lighthouse.We need a spyglass. Go
down and talk to Neal again. He says the innkeeper has one. He saw Patrick and
Mr. Hooke; then Edward.Inn – Jump to
pier. Talk to Innkeeper. The spyglass is in the chest but the lock is broken.
He gives a set of keys to the cellar.Go to right side of
the inn. Use the set of keys on the door.Wine cellar –
Go down to the wine cellar. Go forward, left and then forward to the far end
where the desk is located.Take the key right of
the table. Use the key on the chest left of the table. That didn’t work.Use Shedwick’s
keys on the chest. Get the spyglass.Exit the Inn and go to
the lighthouse.Search for Edward
– Climb the stairs and automatically be at top.Use A and D keys
to move the view through the spyglass.Move to the right and
focus downward to the cave on the cliff side. Zoom in using the W key and see
the cave and the rope.
Signaling Cliff:
Go down the path. See the rope hanging down the cliff side.
Murderer – SAVE GAME here for to
replay other endings. Go down the rope.Listen to Edward and
Mr. Hooke.Select who the
murderer is: Edward or Mr. Hooke. Use the saved game to see what happens to
the choices.If Edward, watch what
happens. The cannons are fired from the ship as mentioned by Baron Kasbert’s
diary.If Mr. Hooke, he
wrestles the pistol from Edward and points it to Finvinero.Select the dialogue,
‘the gun is empty’. Then when possible, immediately use the hand icon.Watch what happens.
At the edge of the
cliff, immediately use the hand icon to save Finvinero.Relic – Back inside the cave with Edward, take the pistol.
Go deeper in the cave behind Edward.
See the Necromancer ritual circle drawn on the
floor.Enter the circle and take the relic.
Finvinero takes a dose of the memory potion. See the
monk that once guarded the relic.Use hand icon again and get a page torn off the
Necromancer book. It describes the ritual.Go back to Edward and talk to him.
He says to
destroy the relic. The way to destroy it must be in Hooke’s house. He gives the
amulet key that was once Clarissa’s necklace.Exit the cave and climb the rope.
Mr. Hooke’s house:
Go to the house with 2 stags on the entryway.
Enter the house – Go forward and walk to the door. See a loose step on
the landing. Use the crowbar to get broken step.The door is locked and the key is at the bottom of
the sea.Go to the ladder leaning besides the landing. Look
and see that it is broken. Use the broken step on the broken ladder.Climb up.
Bedroom – Check the wardrobe left of the
opened window. The cape with missing button is found. Go forward, look again and see something inside
the pocket. Get a written clue. It is added to the documents.Dressing table – Go to the dressing table.
Check the handkerchief on the table. It proved that Hooke is the observer and
Patrick’s murderer.Go down the stairs.
Clock – Look at the clock and see that it does not
work.Look at the floor marks on the floor left of the
clock. Looks like the clock has been pushed before.SAVE GAME here since the puzzle does not reset. Push-use the clock and it barely moved.
Time – Read the Summoning Demons in Documents. The time
quarter to one is underlined.Look close at the clock face. It must be set to a
specific time – but what time?Enter quarter to one on the clock. Then press ESC to
get out of puzzle.Move (hand icon) the clock. A secret entrance is
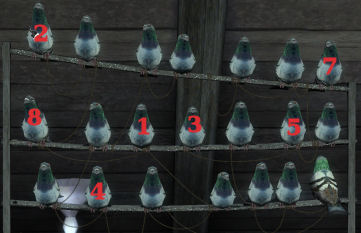
seen.Pigeons – Climb up the ladder and see pigeons and
cages.Look around. Look at the pigeons and see that they
are mannequins.SAVE GAME here! If you click on any bird that is in
the wrong sequence, you die!Review the paper taken from the pocket of the cape
in the wardrobe in documents.Move the cursor using the WASD keys. Then press the
space bar to select.First – was the twenty third, but not in order.
It is the bird at second row, third from left – 23rd.Second – flew higher than anyone else. The first one
at top row and is the highest of all.Third – was the center of attraction. The one at
second row, fourth from left – the centermost one.Fourth – moved as a "knight" and became second but
was not first. The knight chess move is L shaped. The pigeon at bottom row
second from left (not first row).Fifth – was the most unlucky one. The one at second
row 6th from left – the 13th pigeon.Sixth – was offended. The last one at third row with
his back turned.Seventh – was himself. The seventh pigeon, last one
at top row.Eight – was blind. Tell him where the others sit and
in return receive a prize. The black eyed pigeon, first one second row.
Once successfully done, get a page from the
Summoning Demon book. It is added to documents.It states that the place to destroy the demon is at
Thunder Island. It also showed when to do it and how to arrange the runes. Before the runes are set, the chain must be
disabled.Exit the house through the window in the bedroom.
Ship:
Find a boat – Go to pier and talk to the innkeeper about a boat.
Go to the right entrance to the dock close to the
houses.Talk to the fisherman. Ugh. He’s unfriendly.
Go back to the innkeeper and talk to him about Peet.
Shedwick will forgive Peet’s debt if he helps you.
Go back to Peet, the fisherman and talk to him. The
deal is half of what you get on the ship at Thunder Island is his.Upper deck – Check the 2 doors and the barrel.
Climb up and take the hook from the railing
on the right.Climb up to the wheel and take the rope on
the right side.In inventory, combine the hook and rope to get a
grappling hook.Go to the other end of the ship. Look at the left
side railing.See a crack in the hull of the ship. Use the
grappling hook.Lower Deck – Go to right room. Go through the
open doorway. Go to the door at top end of hallway.See 2 stairs going up. Climb up.
Steering wheel – See a steering wheel at center of
room.Use the walking stick on the rolled up map behind
the wheel to pull it down.Stand on the front of the steering wheel where there
is a letter B on the stand.Place the amulet on the wheel.
Look and see that the amulet is on the top of the
wheel with the map as backdrop.Turn the wheel while in front of it to have the
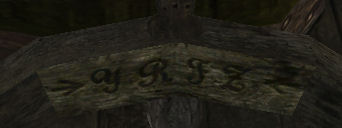
amulet at the bottom – B.Go to the other side and look to see 4 letters
inscribed on the wheel – Y R F Z.
Go back to the front and use the wheel.
In close up, turn the wheel clockwise or counter
clockwise (like a safe) to have the amulet point to Y R F Z.Counterclockwise or hand icon on the left; use space
bar to point to Y.Clockwise or hand icon on the right; use space bar
to point to R.Counterclockwise or hand icon on the left; use space
bar to point to F.Clockwise or hand icon on the right; use space bar
to point to Z.The secret compartment opens.
Go to the back of the wheel and take the runes (Inus, Zeph, Urak, Acra and Culu) from the base of the wheel.
Exit the room – Go down to the door and try to exit.
See that it is blocked.Go back upstairs and go to the right where a cannon
is sitting on a hanging platform.Look and he says the ceiling boards are rotten and
have to make the table ‘heavier’.Collect a cannon ball from around the area
and place it on the platform.Do this to the 3 cannon balls – One near the cannon
at upper right, by the chest at left of room and downstairs, right of the
stairs going up.Go to the barrel left of room and see that there’s
seaweeds inside the barrel.Use the walking stick on seaweed in barrel. See that
there’s shrapnel inside. Take buck shots-shrapnel and place it on the
platform together with the cannon balls.Watch the ceiling drop.
Flying machine: Peet the
fisherman says that it takes till tomorrow night to get to Thunder Island.
Use the map to go to Inventor Tirell. Go inside and
see that Tirell is asleep by the blackboard.Go to the flying machine and look at it.
Go to and look at the closed gate-barrier. It needs to be
removed. A comment about powder from the ship is said.Formula – Go back to the blackboard.
Read the formula on the
board: 1 F oz reactant + 4 F oz of liquid; right proportion the process is
unstable. It explodes! Aha!Take the 1 oz of blue reactant beside Tirell.
Collect empty jars. Take the empty jar right
of the entry to the stairs.Go to the top of the tower and take the empty jar
from the table.Go back down and go to the full jar on the table
across the blackboard.Use the 2 empty jars on the full jar and they will
be placed on the table.
Get 4 oz of clear liquid:Look close and see that there’s 8 oz liquid on the
left, 5 oz jar at the middle and 3 oz empty jar at right.Use the space bar to pick up the jar. Use the A and
D arrow to select where to pour the liquid to. Use the space bar to pour the
liquid.Pick up 8 oz and pour to 5 oz (3 – 5 – 0).
Pick up 5 oz and pour to 3 oz (3 – 2 – 3).
Pick up 3 oz and pour to 8 oz (6 – 2 – 0).
Pick up 5 oz and pour to 3 oz (6 – 0 – 2).
Pick up 8 oz and pour to 5 oz (1 – 5 – 2).
Pick up 5 oz and pour to 3 oz (1 – 4 – 3).
Automatically pick up the jar with 4 oz clear
liquid.Take off – Go to the barrier gate in front of the
flying machine.Place the 4 oz clear liquid in front of the barrier
gate.Place the 1 oz reactant on the clear liquid.
Go to the flying machine and use the pistol on the
flying machine.See Finvinero adjust the flying machine and fires at
the jars by the barrier gate.And away we go!
Thunder Island: Look around.
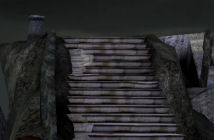
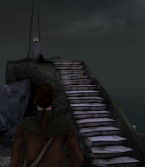
Go to the stairs and try to climb to find out it is
electrified. Go to the left and see the mine entrance is blocked.Mine Shaft – Walk to the right side of the island and get in the
mine shaft.Use the elevator to go down.
At the second level, the elevator broke.
Fix the elevator – See that the gears fly out and
get stuck on the wall. One fell in a crack on the floor.Take the gears from the wall and use it on the side
of the elevator machine panel.Look in the crack at center of the floor and see
that it is too narrow.Go to the table at other side of the cave.
Take the pick ax, tool kit and the
mining shoes (one with no soles) from the table.Go back to the wall where the gears where picked up
(left side of the elevator).Use the pick ax and get a magnetic ore.
Use the magnetic ore on the crack on the floor to
get the nut.Use the nut on the side of the elevator. It worked.
Use elevator to go back up.
Climb the electrified stairs – Go to the crashed flying machine.
Use the tool kit on flying machine and automatically
fix the miner’s shoe.Also automatically wear miner’s shoe. Climb the electrified stairs.
Destruction of the Demon:
Learn the ritual – Look around to know what
for and where things are.Go to the center of the clearing.
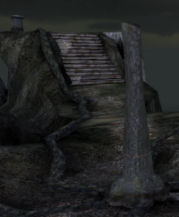
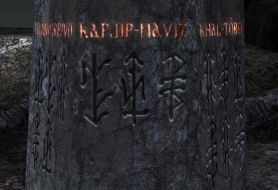
Demon rune pillar – A small pillar at the edge of the clearing has runes
inscribed on the base. Stand to the left or back to see the runes. It has the
names of the demons and runes associated with that demon below it. Kapjip-Naviz
has Acra, Urak and Culu runes under the etched name. (These runes is
changed in later game release to Acra, Zeph and Inus). The small pillar is also
the focal point of the stone veins coming from 5 stone spikes.
Relic pedestal – Behind the pillar are rising
steps that goes up to a pedestal. Go up to the pedestal and see that it is the
perfect place to put the relic. On the ground at left of path is the stone
vein that brings electricity to the pedestal and comes from the rune pillar.
Glass globe – To the right of the ritual pedestal is another rising
steps. It has a glass globe on the top.
Stone Spikes – There are 5 stone spikes around the area that have
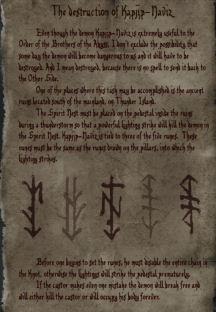
cavity on the base where the 5 runes are inserted.Prepare for the ritual – Read the Destruction
of Kapjip-Naviz page in documents. The runes Acra, Urak and Culu are in
boldface. (These boldfaced runes is changed in later game release to Acra, Zeph and Inus).
First, disable the entire chain of the knot,
otherwise the lightning will strike the pedestal prematurely.Use the pick axe to move the light colored stone
vein segment going to the pedestal.
Secondly, find out which stone spikes are for
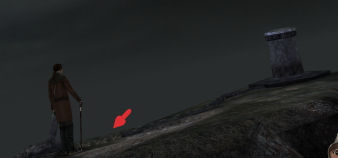
which runes.Go to the glass globe right of the ritual pedestal.
Use the glass globe and see a stone spike with a
rune on it. Study the surrounding area so that you can identify it later.Use the D key to scroll to all 5 stone spikes with
their runes and learn their surroundings.Then place the correct runes on the correct stone
spikes.If the correct rune is placed in its proper stone
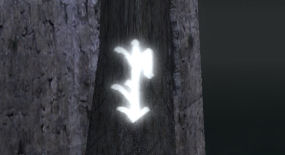
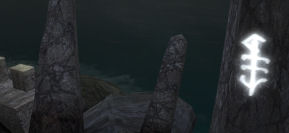
spikes, the rune will light up above the pillar at the edge of the clearing.This verifies then that that is the stone spike for
that rune. All 5 runes will light up when the rune tablets are in their own spike.
Ritual:1. Verify that the light colored stone vein going to
the relic pedestal is removed.2. Place 3 selected runes on their proper stone
spikes. (Note: The runes (Acra, Urak and Culu) given as clues above did not
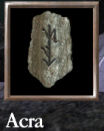
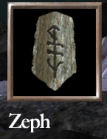
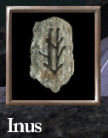
produce the solution needed for the correct ending).Place the Acra, Zeph and Inus runes in their proper
stone spikes. Thanks, Mordack!Acra spike is situated at bottom right step from the
glass globe. The backdrop is a cliff.Zeph spike is situated across the glass globe
stairs. The stairs go down and is beside the bridge on the right.Inus spike is situated left of the arch and right of
the pedestal close to the clearing.
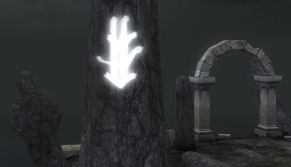
See the runes above the pillar at the clearing. 2
different endings can be seen depending on the runes entered.3. Place the relic on the pedestal. Aahhhhhhhh!
5. Immediately turn left, forward and use the hand icon on
the moved stone vein.
This
document may not be distributed without express written permission of the author
and the content may not be altered in any way.For
Questions or Comments on this Walkthrough,
Please write to:
MaGtRo
Copyright © 7/2007
MaGtRo