Just Adventure original
Art of Murder: Hunt for the Puppeteer Walkthrough
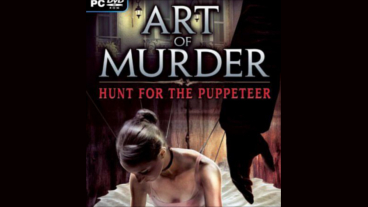
Get to the ending of this mystery adventure with this helpful walkthrough!
When in doubt, improvise. Keys do unlock doors and start cars and motorcycles and a cigar is just a cigar. But items in Puppeteer are often used for other than their obvious purposes. At various points, channeling McGyver, you’ll cobble together in a fingerprint kit, an adaptor, a glass cutter and a sparking and smoking distraction.
Left clicks pay off. Items sometimes conceal other items. You can liberate these by left-clicking on the containing object in inventory. A few items can also have their states modified to a useful one in the same way a mop reduced to a mop handle, a hairpin broken in two, a monkey wrench tightened and so on.
Time for your close-up. If it should work and it doesn’t, maybe you’re too far away. You’ll often need to zoom in on a location to interact with it properly.
Cul-de-sac. The game forces you into the straight and narrow most of the way, but you’re allowed to try out an unworkable alternate solution in one spot and minor variants (one workable, one not) in two others.
Journal-ism. The story isn’t unfolded entirely in dialogue. Some of the narrative wont make sense unless you refer to Nicole’s journal. (And sometimes not even then.) Make a point of reading it after each move to a new area, as you’ll sometimes find useful details and even character names that pertain to the location you’ve just left.
Sell phone. You cant, but wouldn’t miss it if you could. Its just a storytelling device. Nicole automatically receives four calls and places one call on her cell in the games early stages, but never has to use it on her own initiative, though she can at several points to no useful effect. (Though Inspector Pety and Carnot are added to the log of ring-able phone numbers when Nicole receives their business cards, their phone are busy or ring unanswered.)
The plot chickens. Its pretty thin in places. Its not always clear why Nicole is headed to a particular location or even how she finds it. And having introduced certain concepts, the designers sometimes seem reluctant to stick with them (the list of ancestors you’ll find in Azarra) or expand upon their meaning (the dolls deposited at most crime scenes). I’ll try to clear up such issues en route.
Contact: I’d love to know what you think of this walkthrough. Feel free to write to me at [email protected].
Copyright: This document is copyright 2009 by Peter Olafson. You may not sell it, distribute it, edit it, excerpt it (except for “fair use” purposes in news coverage) or publish it in any fashion without my prior written consent.
The scenery is like in a Degas picture, says FBI agent Nicole Bonnet. Remember that. Deep in the game, you’ll come across a copy of the original and can make a comparison.
You cant do much here initially, you’re limited to snapping photos of the body until you talk to Inspector Pety and your superior at the FBI (who is never dignified with a name), so get these little chats out of the way. Talk to the inspector. You’ll surrender your business card, setting up a call in the next chapter, and hell make himself scarce. Then try to examine the body, the central window or the table at the left side of the screen and the boss calls on Nicole’s cell.
The thrust of these two exchanges: You’re pretty much on your own here. But now at least you have the run of the place.
You task here is basic police work. Its the only crime scene in the game where you are permitted to pursue it in a semi-dedicated fashion. But its pretty tricky for a starting room and its very easy to miss some small step.
Now you can look around to your hearts content, but cant accomplish without some makeshift gear. Conveniently, this place is flush with the raw materials for makeshift gear. Check out the table on the left side of the screen. From the middle drawer, take the tape, plastic sleeves, stapler and paper and push the blue button on the right side. This unlocks the right-hand drawer, which is otherwise blocked. From this drawer, take the matches, pipe cleaner, cotton wool and rental list. (Note the last name on the list: Its not the victim, Elizabeth Soupault, but someone named Marc Taine. This will surface again soon.)
You can perform the following tasks in any order.
– Approach the body. You’ll be prompted to take a photo (unless you’ve already done so). If you do, Nicole snaps off two shots these cover the body itself and the macabre doll between its feet and you’ll see a 2 beside the camera in inventory.
That’s important. Your photos of evidence are a significant component of the tasks you must complete here (somewhat less so elsewhere) and they’ll pop up here and there until you lose your camera in the escape from Marseilles. (They’re listed below. You’ll have taken six photos by the time were done here.)
Use the plastic sleeves from the desk on the doll and you’ll be treated to a short animation of a hooded man staging the scene and, once it ends, find the doll in an evidence bag in your inventory. Nicole wont offer an opinion on this first of the three dolls you’ll find, but close-up inspection suggests its a dancer. The significance (if any) of these roles (only one of which is formally revealed) is never stated.
Zoom on the body itself. Note the crystals encrusted on the left side of the girls mouth. You’ll want a sample for analysis and you’ll need a cotton swab to collect it. Its a simple matter to combine the cotton with the matches, use the makeshift swab on the crystals and the sleeves on the swab. (Presumably the victim was poisoned, but you never learn the poison.)
– Approach the central window and zoom in on the lower portion and your attention will be called to a fingerprint. You can photograph it (and you should) but you cant preserve a copy for later analysis without a bit of help.
Help from where? The inspector is gone and he didn’t seem the helpful type anyway. But didn’t he allude to another officer? Hes out in the hallway. Talk to him, ask for a pencil and its yours.
The pencil contains lead and lead dust might be used to make a copy of the fingerprint. You’ll need to crush it and that requires something heavy. If you examined the stapler in inventory, you learned its heavy enough to serve as a hammer. Use it on the pencil, then use the paper on the crushed pencil to collect the powdered lead, then the paper on the prints to distribute the dust, then the tape on the prints and finally an easy step to miss the tape on the paper. Copy complete.
– Note that the wing window above and the left of the prints is open and that a crude cross has been drawn on the glass.
Close the window using the mop to the left of the doors hallway side. (When you click on the mop in inventory, the mop end vanishes and you’re left with the pole.) Then back out of the scene to the full-room view and zoom in on the cross’s shadow on the central portion of the studio floor. You’ll find a loose plank. Use the pipe-cleaning tool to pry it up and you’ll find 1793 inscribed on the other side. Photograph it and bag it
1793? No speculation on its meaning appears in the game but soon enough you’ll connect the murders to the French Revolution and that brings the date into better focus. The Reign of Terror began that year. (http://en.wikipedia.org/wiki/Reign_of_Terror) And check Nicole’s journal after this chapter is complete to learn the year was written in blood.
– Those are the three main tasks. But unless you’ve been snapping your camera at everything, if you try to leave now (via the door at the end of the hallway), you’ll probably learn Nicole still needs to make copies of the evidence shes collected.
Copies means more photos. We’ve already mentioned photographing the body (which includes the doll and the crystals beside the dancers mouth) and the fingerprints. What remains?
– the board with 1793 inscribed on it either on the studio floor or in the evidence bag
– the rental list from the desk
– the cross on the wing glass in the upper part of the central window (but only after this has been closed with the mop handle)
Now you just need to have a last chat with the officer in the hallway to turn over the evidence Nicole’s collected and then use the door to the street. The scene changes and you’ll find yourself outside your hotel.
Odds & ends: You can also examine the piano (in either the window or door-side view), the steel hook driven into the victims flesh near the left armpit (in the closeup view of the victim), the knocked-over chair to the right of the body and the shattered mirrors above it (both only in the view of the rooms right side), the pipe and tobacco (in the right-hand drawer of the table), the non-functioning light switch (in the hallway view of the door to the rehearsal room) and the fuse box to the right of the police officer.
This last can provide a conversation topic about the absence of light in the rehearsal room. It seems to have been designed as a kind of prompt for the wing glass puzzle above. (i.e. The darkness in the rehearsal room makes the cross on the window and floor stand out.) However, examining the box and talking to the officer about it arent required to solve the puzzle.
Enter the hotel, stop at reception for an obligatory chat with the desk man Pierre and then use the stairs to to the left to reach your room.
Nicole told Pierre she was going to make a phone call and that’s true, but she has to transmit some data first. Go over to the desk, use your camera on the laptop on the left side to connect it to that computer and then click on the laptop twice to try to send your photos to the FBI. Youll see activity on the screen and learn there’s no connection to the antenna.
This is another tricky sequence and you’ll need to perform three steps to trigger the necessary topic in a conversation with Pierre.
The antenna is the gadget that looks like a closed laptop on the right side of the desk. You can zoom in on it and click on the green button at its center to learn it isn’t plugged in. In fact, it cant be plugged in right now.
1) Why? Zoom in on the electric outlet. Nicole notes that the US-style antenna plug doesn’t fit and that she needs an adaptor.
Dont run off in search of one just yet. Pierre, now sitting at a table outside the café to the right of the hotel, will tell you hes all out and that there’s currently no place where you can buy one. And that’s the end of it. In short, its a similar situation to the one in the rehearsal room. you’re on your own and will have to cobble together a solution.
2) When you looked at the electric socket , you saw a cord already plugged in. This supplies power to the desk lamp. Hence, if you could somehow rig the antenna to run off the current going to the lamp, you wouldn’t need a compatible plug.
And note that the cord from the antenna doesn’t actually go to the wall. It goes to an adaptor that oblong gadget between the antenna and the plug. (This is a different kind of adaptor than the plug kind to which Nicole and Pierre refer and you’re not going to use it for this purpose.)
So lets take that ugly American plug out of the equation right now. Just disconnect the antenna cord from the right end of adaptor. You’re left with a little two-prong plug.
This adaptor does serve an informational purpose: As you can read on the device, it steps down the current to the 12 volts required by the antenna. (If you like, click anywhere on the antenna aside from the green button to flip it over and you can read the specs on the back.)
Hence, you need to find a 12-volt connection in the lamp.
3) Return to the lamp view. Hit the switch to turn it off and click the lamps base to turn it on its side.
This seems at first to be bad news: The sticker on the bottom indicates that the lamp requires an input of 230 volts. All these different numbers are confusing!
Yeah, thats the idea. But the true purpose of turning the lamp thusly is to permit you to remove the halogen bulb. Do so to reveal a two-prong socket like the one in the wall. (You can also examine the bulb in inventory to see it requires a 12-volt current.) Nicole here offers that she could use this to connect the antenna but would need a short wire.
That’s the key line (though you can elicit it before its time if you do these things out of order). Now go see Pierre at the café. Use the Request for help and Piece of wire topics and Pierre’s companion offers a hairpin.
Left-click on the hairpin to break it in two. Back upstairs, use the pieces either on the end of the antenna cord or the socket in the lamp and finally click on the loose antenna cord to connect it to the socket. Set the lamp upright again, throw the switch on it’s base don’t be dismayed by the little green light vanishing and back out to the desk view.
You’ll find the green button atop the antenna blinking. Press it to extend the antenna and then click twice on the laptop to send your photos. Nicole then automatically places a phone call to a co-worker named Ruth at the FBIs New York office. You’ll learn that fellow agent Nick (who made a token appearance in the first Art of Murder game) isn’t available to analyze the fruits of your labors. This foreshadows Nicks cameo in Marseilles later in the game.
Take your camera and head out. At the base of the hotel stairs, you’ll receive a call from Inspector Pety. There’s been another murder and you’re off to the scene … after one more little puzzle: The hotels front door is locked.
You can unlock it by simply ringing the bell at reception, but that just gets you outside. To reach the murder scene in Montmartre, you’ll have to arrange transportation. To do that, take the car rental brochure off the front counter and talk to Pierre. You cant rent a car tonight, but the conversation then turns to taxis and Pierre arranges one for you pronto. Leave the hotel now and you’ll find yourself exiting a cab at the crime scene.
Odds & ends: You can also examine the laptop case on the bench on the foot of your bed, the end table between the bed and the desk, the coffee cup to the right of the lamp (in the lamp closeup), the bamboo stick in the plant to the left of the stairs, the rack to the right on the stairs, the tableware cabinet to the right of the rack, a key locker and bonsai tree at the right side of reception, the flowers and the three suitcases (in the full view of the lobby) and the café door (in the exterior café view).
You can try to swap out the cord in the electric socket behind the desk and try to plug in the one for the antenna, use the bell at the front desk at earlier points (or repeatedly) and pull back from the hotel entrance to a full street scene complete with passers-by. This may seem without a concrete purpose at the moment, but you’ll find your rental car here in a later chapter. (In Nicole’s room, you’ll occasionally see the headlights of passing cars play across the ceiling.)
Note that the young woman sitting at the café table with Pierre (Sylvie Leroux) is the principal actor in another City Interactive game: The Chronicles of Mystery: The Scorpio Ritual. In fact, if you ask Pierre about Request for help and then Charger, shell reveal that she left her own adaptor in Malta (where Chronicles begins). I guess shes taking a vacation! You’ll find the game for sale in a shop when you get to Spain.
And speaking of cross-promotions, did you notice the City Interactive sign in the upper-right corner in the close-up of the café?
Upon her arrival, Nicole sees a man watching her from the buildings left corner. I think shed follow up and see what he wants this is a murder scene, after all but that’s not an option.
So enter the building, climb the stairs to the top and talk to the officer. Evidently the same fellow from the first crime scene. Hell share a fair amount of information with you before Pety summons Nicole inside. The MO is that of the Puppeteer. The apartment is that of an American named Jack Dupree. The victim was a regular here shell turn out to be Dupree’s girlfriend and a neighbor heard a quarrel in the apartment earlier in the day.
Enter the apartment, talk to the inspector and run his topics. He supplies his business card and adds a few details to what you’ve learned from the officer outside notably, that Dupree is a suspect, that the victim is Jacqueline Lorrain, a dancer from the Moulin Rouge and that there’s a witness.
During this exchange, Nicole seems to be wondering whether this killing is in fact the work of the Puppeteer. No dark-eyed doll at this scene. And the blood to which Pety refers is inconsistent with the killers meticulousness in staging the other scenes (though the body in the intro was certainly streaked in blood). The inspector speculates the killer may have lost control of the situation possibly because he was startled.
Well raise this point again more than once later in the story.
Despite Pety’s suggestion that Nicole get lost, you should snap off a couple of photos: the desk beneath the window and the ropes and hooks hanging off to the left. But you cant investigate as you could at the first scene. Approach the desk in front of the window or the bicycle wheel in the right corner and Pety’ll warn you off.
Perhaps the officer on the landing can help. Ask him about Witness and hell point you to Agnes Grouchet in Apt. 12 one floor down. Shes not helpful until you use Pety’s card on the door and then shell spill what she knows including the suspect Dupree dropping something on the sidewalk outside as he made his exit. (Note that there’s something in her mailbox. You cant examine it in detail right now, but will have a chance soon enough.)
Leave the building. You cant inspect the sidewalk, blocked as it is in this view by police cars, but at the bottom of the screen, just left of the center, is a sewer grate. Zoom in to see a gold bracelet beneath and learn that you cant lift the grate without tools.
Now, the designers have been a bit sneaky here. You’ll recall a tool box in plain sight up at the murder scene. If you looked at it, Nicole said it might contain something useful.
But no, that’s not happening. When you return to the apartment, you still cant do any more than look at the box and you cant get the inspector to look the other way.
It may not be immediately apparent, but a second toolbox can be found here. Initially, this one is almost invisible behind the officer on the landing, but after you talk to the inspector, it’s clearly visible. Ask the officer about it. (It belongs to a technician named Michel and you apparently wouldn’t like Michel when hes angry.)
Then drop down one flight and take the old newspaper from Agnes Grouchet’s mailbox. Take it upstairs and talk to the officer again. Nicole pretends the papers current and includes an account of the police investigation, the officer steps forward into the light to get a better look at it and, behind his back, you can clean out the toolbox, taking proper evidence bags, a screwdriver and fingerprint foil. Hustle back to the grate, use the screwdriver to pry it up, look at the bracelet to find a name (Lukas) on the clasp and, finally, use the evidence bag on the bracelet.
You’ll get a call from Pierre that an American man has left a letter for you at the hotel.
Odds & ends: On the lower landing, you can examine the window, the stroller (here apparently typo-ed as trolley) and mailbox. On the top floor landing, you can look at the shelves. At the murder scene, you can examine the TV set in front of the chimney, the African mask and poster hanging above it and the window above the desk.
On arrival outside the apartment house, Nicole can place calls to Ruth to learn that analysis of the pictures you sent earlier shows the rehearsal-room killing to be the work of the Puppeteer and to Boss to learn shes now the only person from the original FBI team still on the case. (Nick is working on clearing his backlog.)
The old newspaper Nicole gives the officer has nothing to do with the murders, but it’s a real article from the December 10, 2004 edition of the French newspaper Le Quotidien (The Daily). (You can find it on the net at http://www.madagascar-library.com/images/700×700/quotidien-domoina-fady-famadihana-article.jpg)
it’s apparently a philsophical view of certain aspects of Malagasy culture. (Madagascar was a French colony from 1896 to 1960.) Fady is a Malagasy word for taboo or forbidden while famadihana refers to a practice of periodically exhuming ones ancestors and rewrapping the remains. (Source: http://www.cactus-madagascar.com/culture.php#famadihana.) In some regions of Madagscar, this practice is regarded as taboo. (http://whitneyinmadagascar.blogspot.com/2008/12/famadihana-dancing-with-dead.html)
Finally, a seeming glitch: Duplicate descriptions appear for the window on the first landing and the one at the murder scene. Right-click on either window and Nicole offers that, The window is already half-open, so it’ll be easy. The one at the murder scene is indeed half-open, but the one on the lower landing is closed.
And what exactly will be easy? Presumably to get back into the apartment this way. But that’s a bit down the road and, by then, the window at the murder scene will be closed.
Housekeeping tasks.
Stop off at the desk and collect your mail. The letters from Dupree evidently the fellow who watched you from the corner as you arrived in Montmartre. (I’m a little unsure how he found your hotel to drop off the letter, since this is the first time you’ve been here since he spotted you.)
In it, he asserts his innocence and asks that you meet him on the Pont des Invalides at 11 p.m. Talk to Pierre to have him locate it for you and summon a cab.
But you have three tasks to perform in your room before you travel: transmit the two new photos from the Montmartre scene to the FBI, pick up your laptop (ostensibly with a view to taking notes) and change clothes.
For the first, just do what you did before no need to call in this time and don’t forget to grab up your camera from the desk when you’re done. For the second, grab the laptop case from the bench at the foot of the bed and then use it on the laptop in the desk view. And for the third, try to leave the room. Nicole automatically ducks out of sight to he left of the bed and reemerges in less dressy duds.
Odds & Ends: Nicole can ask Pierre about old Montmatre and learn about a café called Lapin Agile. it’s a real place and translates as The Nimble Rabbit. However, it’s not in the game.
And you can call Boss again. Assuming you called him back in Montmartre, hell just blow you off this time. (If not, youll have the Nicoles-working-alone chat reported under Montmartre above.)
The bridge scene is an animation with no player interaction. Dupree (who looks a little like a young George W. Bush) says hes being framed, asks for your help and mentions letters he received in New Orleans letters now hidden in his room. A motorcyclist appears and fires on Dupree. Dupree appears to have been struck and falls into the Seine. Nicole disarms the assailant by throwing her laptop at him needless to say, that’s all she wrote for the laptop and then picks up the gun and fires a shot after him. Next thing you know, shes being taken to task by Pety and told to get out of town and the same officer who guarded the doors at the two murder scenes is escorting Nicole back to the hotel to collect her belongings.
You don’t actually have collect your belongings. The idea here is to lose your escort.
There’s a side exit from the hotel the double doors (labeled The back) to the left of the stairs. But they’re locked and, if you try to use them, Pierre offers up an unctious Yes? May I help you?
You’ll need a key. This key resides in the previously-empty key locker behind the reception desk visible from the front but identifiable (and, eventually, reachable) only from its right side.
You’ll need a tool to lift the key. The bamboo stick in the plant at the base of the stairs would seem like the ideal tool. But if you try to take it, Pierre does his Yes? May I help you? thing again.
To the lose the police officer, you’re going to have to lose Pierre first. And just as Pierre innocently helps you dump the officer, the officer innocently helps you dupe Pierre.
This involves some to-and-fro. Start by checking in with Pierre. Topic: Car. You’ll collect the keys for your rental car and learn that someone named Louis Carnot is looking for you. (This baddie will turn up at the hotel in due course.)
Then head outside again and talk to the gendarme about Departure to work out that you’ll be traveling in separate cars Nicole having to return her rental at the airport.
Then return to Pierre and ask about Second exit and the plot is hatched. Visit the officer again to offer coffee and a pastry and Pierre again to arrange its preparation. He vanishes and you can start borrowing stuff from the lobby: the bamboo stick from the plant, the cork and hankerchief from the top shelf of the tableware cabinet on the right side of the stairs and the hook and thread from the upper left corner of the inside of the cabinet door. Put the hook together with the stick, use the hooked stick to snag the key and use the key on the side door.
You’ll find yourself in front of the building to the left of the hotel, with a partition protecting you from the waiting officers view. You couldn’t advance from this position without him seeing you, so you’ll automatically return inside. Pierre’s not back from the kitchen yet and you need him back, so prompt his return by using the front door no, the bell on the desk wont work and then returning to the hotel. Pick up the coffee and croissant in dialogue Pierre then vanishes again to answer an oh-so-convenient telephone call and bring them out to the officer. When you return inside, Pierre’s still away from the desk and you can safely use the side exit again.
This time, you’ll arrive outside to find the police officers guard down and his back turned. On automatic, Nicole uses the hankerchief and cork to plug the police cars exhaust and returns inside. Use the front door to exit, tell the officer you’re all packed he fails to note that Nicole’s not actually carrying a bag and Nicole automatically crosses the street to her rental car as the police car stalls out. Poor fellow! Click on the global positioning system on the dashboard and then on the green-flagged region to head back to the crime scene in Montmartre.
Odds & ends: You can also examine a second hook in the upper right-hand corner of the inside of the tableware cabinet door. In your room, you can now left-click on the closet to the left of the bed. (Nicole refuses to put on a fashion show for you.)
You can ask Pierre about Guests and learn why the hotel seems empty.
And you can call Ruth again just to exchange pleasantries. That’s the end of the story for the cell phone. You’ll eventually lose it entirely.
Enter the apartment building and climb to the top floor to find the door to the crime scene sealed with police tape. Zoom in and then either try the door or the tape.
Uh-uh. Nicole has boundary issues.
Finding an alternative should not prove a challenge. Drop down to the next landing, open the window and then step onto the ledge.
This sequence starts out as a non-interactive animation the ledge collapsing beneath Nicole’s weight. Once she recovers, edge left to the lighted window and grab four pieces of ironwork one loose on the window sill and three still in place (but detachable) on the grills right side two on the lower edge and one on the top.
At the left end of the ledge, use the wire (not the strongest climbing support Ive ever seen) to climb to the top floor and head right. The second window is the one you want to enter, but you’ll find it latched. (Click on the latch a bit hard to see in the upper left corner of the right pane and Nicole says the window is blocked.) However, you’ll see in the closeup view that there’s a gap in the middle. You need to slip something into the crack to lift the latch .
You dont have anything like that in inventory but, with a little prep work, you can retrieve such an item. You already have four of the six parts required. And here are the other tw Just to the right of the third window, you’ll find a broken flower box. Take the two planks and continue right to the chimney at the right end of the ledge.
Rungs are embedded in the upper portion of the chimney but the two lowest ones are missing. You can now replace them. Insert the four metals bar from the window grillwork in the four holes and then place the two planks from the flowerbox across these two sets of supports. (Each plank can go in either of the positions.) Then back out of the scene and click on the antenna atop the chimney. Nicole climbs to the top and breaks off a piece off the antenna. (That distant scream is the hundred Frenchmen who just lost their lifeline to Who Wants to be a Millionaire?)
Return left to the locked window and try to raise the latch with the antenna piece. It wont work, and Nicole suggests bending it. Just left-click on the piece in inventory to do so, then use the bent piece on the latch and you’re in.
Dupree’s stash is in a secret compartment on the outer wall between the desk and the radiator. There are four hooks here, numbered I to IV from left to right, and a hole (V) at the right end of the row where a fifth hook would go. Finding a surrogate for that missing hook is your first task.
Not that hard. Remember the two areas Pety wouldn’t let you explore on the earlier visit? The desk and the bike wheel. The latter yields a tool that helps permit you explore the former.
Zoom in on the wheel. You’ll see a loose spoke at the bottom. Grab it, get over to the desk and take the keys from the top.
The middle drawer on the right side is open. In the close-up view, click on the handle to open it a bit more. You can see some odds and ends within, but when you try to examine them, Nicole indicates she needs a light. Use the keys on the drawer they come with a mini-flashlight and you’ll now find the odds and ends meaningless … but discover that there’s a hole in the bottom on the drawers right side. Use the bicycle spoke on the hole to raise a board at the bottom and, beneath, find an Allen wrench and a slip of paper with the numbers 52314 each digit written in a different color. These are automatically added to your inventory.
Interesting. Five numbers all between 1 and 5. These must correspond to the five hooks. (Yes, five hooks. Insert the Allen wrench in the rightmost hook hole and it’ll serve as the fifth.)
But what do the colors mean? Well, note that each hook is interactive and can be turned clockwise to the eight positions of the compass. The colors must indicate the position of each hook and there must be a key to the colors somewhere.
it’s hidden in plain sight. Look at the old map of Europe, Asia and Africa on the right side of the desktop. Directions are noted on each of the eight points of the wind rose in eight different colors.
The 5 appears in red ink on the slip of paper. The SW on the map is also in red.
The 2 appears in blue ink on the slip of paper. The NW on the map is also in blue.
The 3 appears in green ink on the slip of paper. The SE on the map is also in green.
The 1 appears in black ink on the slip of paper. The W on the map is also in black.
The 4 appears in lavender ink on the slip of paper. The NE on the map is also in lavender.
And that cracks the code. You have to arrange the hooks in the order on the paper so that V points southwest (five left-clicks), II points northwest (seven clicks), III southeast (three clicks), I west (six clicks) and IV northeast (one click). Once all five are in the right positions, the compartment should open below.
Within, three items: letters to Dupree from Marc Taine (that name fromt he rental list at the rehearsal room) and a box and notebook that have been tied together. Once you have both, your game is saved automatically a sign something nasty is approaching.
(Nicole’s journal may confuse you here. She mentions finding pieces of an old map and a key and, so far, youve found neither. This may be an artifact from an early stage of design. The map pieces don’t turn up after your visit to the Moulin Rouge, where you recover the key to the box, and the key not until just before the endgame.)
Just left-click on the notebook/box combo in inventory to separate them and then left-click on the notebook to read it.Youll learn that the box requires a key; that is originally contained damaged documents in French and an odd metal object of obscure use (presumably the key Nicole mentions in her journal); that Dupree’s family name is de Bougainville (his French ancestor changed it on arriving in New Orleans c. 1793 a date youll recall from the loose plank at the first crime scene); and that Dupree didn’t have an easy time of it when he visited France to explore his roots. Someone broke into his apartment.
And that’s happening again right now. Once you’re done with the notebook, Nicole hears someone coming. A clock appears in the upper left corner and you have a few seconds to hide in the wardrobe to the right of the desk. From within, youll watch a big man with a pistol and flashlight enter the apartment. Hes about to spot Nicole when (on automatic again) she bursts out of hiding, knocks him down and heads for the door. Close call. (Maybe too close. If Nicole doesn’t hide in time, the man will shoot her dead upon his arrival and youll have to restore a saved game.)
In the car, click on the GPS again and then on the green-flagged hotel.
Odds & ends: In addition to most of the items noted on the first visit, you can also examine the police tape on the apartment door, the desktop, the dress on the closet door, the fruit bowl in the near right corner, the three pictures (located between the mask and poster) on the chimney and the blue bicycle to the left of the radiator.
When you enter, you’ll automatically walk to reception and find Louis Carnot waiting on the sofa across from the front desk. A rather terse conversation proceeds and afterward Nicole says she doesn’t trust Carnot. Why isn’t he speaking to the French police instead of a visiting investigator? While he says he wants to help Dupree, Carnot seems rather too interested in the documents you’ve retrieved from Dupree’s place. And how did Carnot and Dupree come to meet in New Orleans?
In any case, you’ll collect Carnot’s business card, This contains a cell number but no address and begs a question: How will you find him again? (Carnot never answers his phone.)
Otherwise, this is just a housekeeping visit. Talk to Pierre about Safe and hell store the box in the hotel safe for you and offer that, if you’re interested in antiques Nicole’s cover story for the box is that it’s a family heirloom he has a friend with expertise in that field. (This is just a red herring and wont surface again.)
Back in the car, click on the GPS and then the green-flagged Moulin Rouge. (You’ll recall that Jacqueline Lorrain was a dancer at that club and that her keys had a Moulin Rouge tag.) You’ll see a cut-scene of the killer preparing another doll.
Odds & ends: Once you’ve stowed the box , you can talk to Pierre again about Family and learn Nicole has distant relatives in the south near Bordeaux.